Maggie
@magonomics
Active 8 years agoForum Replies Created
-
9 years ago LINK
Maggie @Magonomics
i’m ironing mine within an inch of it’s life and sewing it by hand. so far so good!
10 years ago LINKI’m thinking about halloween costumes! Last year we did Paddington Bear and the year before was a peacock.
This year 3 year old wants to be the lorax. I’m thinking this means orange leggings, orange hoodie with eyes and mustache attached, and truffula shaped bag for candy.
Her sister is going to reuse a hand me down elephant costume and be Horton from ‘Horton Hears a Who’. I just need to make her a felt flower to carry around.
-
This reply was modified 10 years ago by
Maggie.
10 years ago LINK@dubhels2003 I agree with @nzsewist that the roller skate is good for showing off prints. I’ve also done it so the back is a single piece. A sleeveless fairy tail (sans collar) would probably work as well.
10 years ago LINKI’ve always skipped the darts when making this dress and it’s always turned out fine (and been extra comfortable). Maybe she could send you something that fits well?
10 years ago LINKI’m working on back to school outfits for my 5 & 7 year old nieces. (Can someone tell me how this happened? I could have sworn it was last week I was watching a 2 & 4 year old).
In the past I’ve done matching dresses but this year both requested skirts and tops. So I’m doing hopscotch in a navy lawn and some of the fabric I was sent by Oliver + S a few months ago!
10 years ago LINK10 years ago LINKRobbers Took My Oliver + S Sewing!
Last week I came home to find we had been burglarized. Luckily no one was hurt, the cat didn’t get out, and we have insurance.
However just about all our electronics were gone, along with some of my jewelry (luckily nothing of sentimental value like my grandmothers pearls), and they had totally destroyed the house (books pulled off shelves, clothing yanked out of drawers, filing cabinet contents everywhere, etc.).
They didn’t take my sewing machine (thank goodness!) but they did get away with the darling ‘lil man flannel I had hanging up ready to mail to a friend. Something about that was the worst part of the whole thing to me.
So public service announcement: everyone please take a few minutes to double check your insurance policy and make sure all your photos are synced to whatever backup system you use. Also wouldn’t be a bad idea to snap photos of the serial numbers of all your nice electronics.
10 years ago LINKI know the feeling! I started making my own with scrap muslin, stamps, and fabric ink. Here is a good example what they look like.
My process is this:
1. Pour myself a drink and clear off the coffee table.
2. Interface whatever muslin I have around.
3. Use a pencil and clear ruler to draw grid lines on the muslin. (I’ve found the right size is for me is 1.5 inches by 2.5 inches)
4. Stamp assembly line style. (each one gets an “l”, each one gets an “o”, etc.)
5. Cut out along the grid lines (either with rotary cutter or pinking sheers).
6. When ready to use add size (I just use a fine tip sharpie, but one day I’ll get around to ordering some number stamps), use iron on tape to affix it temporarily, then stitch in place.
Obviously they are all a little different, but personally I like that. If you want you could just get a stamp that has the whole thing.
I got my Logo Stamp for $10 from Simon’s Stamps.
10 years ago LINKSorry I wasn’t more clear!
This started a few years back when I took my five year old niece to the store to pick out fabric to make her and her sister Tinkerbell and Periwinkle dresses. (Periwinkle is Tinkerbell’s long lost twin sister for those of you who haven’t watched Secret of the Wings) We were all set to check out with materials for two Fairy Tale Dresses and Nora saw a button that she just had to have.
Obviously the Fairy Tale Dress doesn’t require a button but she had been so good the whole time (and I wanted to avoid a meltdown in the store) so I figured why not just buy the $2 buttons and sew them on the inside of the dress. The girls LOVED it so now I sew a button on the inside of all their dresses.
It’s a fun way to use up random/extra buttons you have around or if you see something cute but doesn’t really go with the style of the dress.
I don’t add them on stuff for babies, feels like an unnecessary risk to add a potential choking hazard. (Not to mention what if they rolled over on it and it caused them to wake up from an otherwise very long nap?!)
10 years ago LINKThe croquet dress sleeves fit perfectly but it wasn’t the look I was quite going for, so I am going back to the original ones!
10 years ago LINKI was going to attempt to make a less poofy sleeve by using the pattern from the croquet dress sleeve of the same size. (When the Garden Party dress was introduced Lisel said she started with the Croquet dress pattern.) Only attempting this because A) I’m working with a little extra fabric B) I can always make it sleeveless.
Will let you know how it turns out!
10 years ago LINK10 years ago LINKThanks for all the advice everyone! The kits were a hit, and my stash got some much needed cleaning for the New Year! (I have hopes that by clearing out things I realistically won’t use it will allow me to focus on and use the rest of my stash!)
I packed it all up in boxes (9 inch wide by 9 inch long by 6 inch height) which I got in the paper-mache section of the art store. I lined it in some fancy pink/purple/teal polka dot wrapping paper and used the same paper to put their initials on the top.
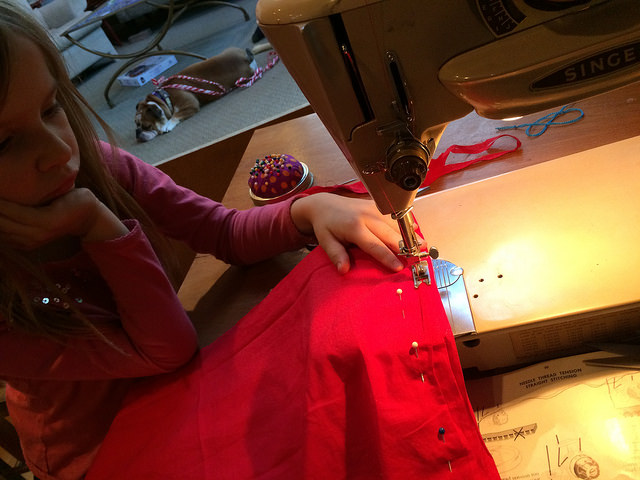
We spent Christmas afternoon/evening making Dolly Skirts. Nora (the 6.5 year old) and I got out my mom’s old Singer Slant-O-Matic from the 60s and made a Lazy Days Skirt that she wore to school today.
Here is how I ended up dealing with the sharp things:
Pins: I got ones with large colorful heads so there is less of a chance of them getting lost in carpet someone stepping in them.Needles: I found Chenille Needles had the right balance between sharpness, size (not so small they could get lost and stepped on), and big openings for little hands to thread.
Scissors: I got real but small scissors. Did you TSA lets you take on anything with less than a 4 inch blade?
Kid Sewing Kit:
– 18 Big Cuts of Fabric (Fat Quarter to 1 Yard)
– 15 Smaller Cuts (Under Fat Quarter)
– Mason Jar Pin Cushion & Pins
– Needles
– Measuring Tape
– Thimble
– A Dozen Assorted Buttons
– Elastic
– Precut Velcro Squares
– Fabric Marker
– Scissors
– 12 Kinds of Ribbon
– 3 Yards of Homemade Bias Tape in Three Colors
– 10 Colors of Embroidery Floss
– 20 “Made By Nora” or “Made By Etta” Labels
– Pattern for Dolly Skirt-
This reply was modified 10 years ago by
Attachments:
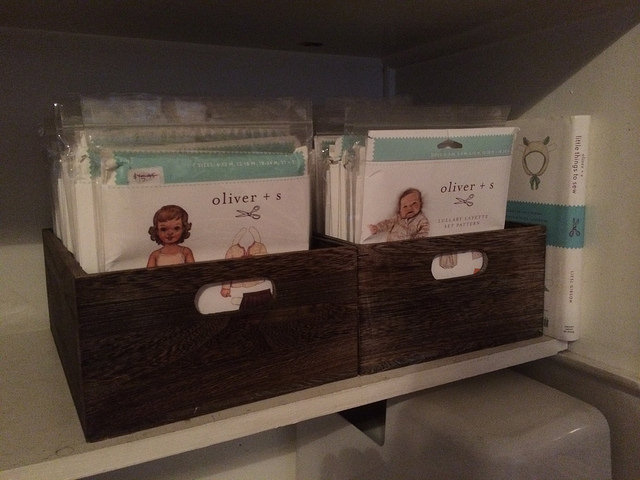
10 years ago LINKFor Original Patterns: I keep mine stored alphabetically by pattern company, then name of pattern (or what I call it), and finally by size in these boxes from the Container Store. I have two boxes just for oliver + s patterns and one for other pattern designers.
For My Tracings: I have similar sized envelopes and each pattern/size combo has it’s own envelope (library dress size 4 is separate envelop but next to library dress size 4). Each gets a label via my label maker (name of pattern | size | pattern company) and they are stored by name of pattern then size in a forth box.
Attachments:
11 years ago LINKIn terms of Quickness:
I usually do the the bodice from the Bubble Dress or Music Box Dress with a gathered or pleated skirt. (I usually just hand stitch the lining in the bodice to avoid edge stitching.) Both styles can work with long sleeves underneath in cold weather and alone when it’s warmer.In terms of favorites:
The Roller Skate is fun because with only three main pieces it allows for a fabric with a larger design/repeat than most kids stuff. Also if you add a little longer piece of elastic it can become more of a tunic as they get taller. (Plus living in Michigan and Oregon my nieces spent a good portion of the year in leggings/tights when hem length is less of an issue.) I don’t find it that fast because I like to a straight stitch finish the seams of both the lining and main fabric.The Library Dress is probably my favorite in terms of the lines. I usually omit the facing and just line the bodice and for the bigger girls I do an invisible zipper.
The Playtime Dress is probably the most practical in terms of style (and who doesn’t love pockets!). As with the Library I find it’s only a tiny bit more work to just line the whole bodice, so I usually just do that. Since it has long sleeves and is a roomy fit I’m using this pattern to make all the nieces holiday PJs this weekend with some flannel I bought in Jackson Hole over the summer. I’ve had glow in the dark thread in my stash for almost a year that I’m going to use for some decorative top stitching.
-
This reply was modified 10 years ago by
copyright
Unless otherwise credited, all work on this blog is © Liesl + Co., Inc, 2008-2025. You are welcome to link to this blog, but please ask permission before using any text or images.