Hello and welcome! We hope you’re ready to start making your Liesl + Co. Gelato Blouse or Gelato Dress. We’re glad you’re joining us for the sew-along. If you aren’t ready to get started yet, rest assured the sew-along will still be here for you when you’re ready to get going!
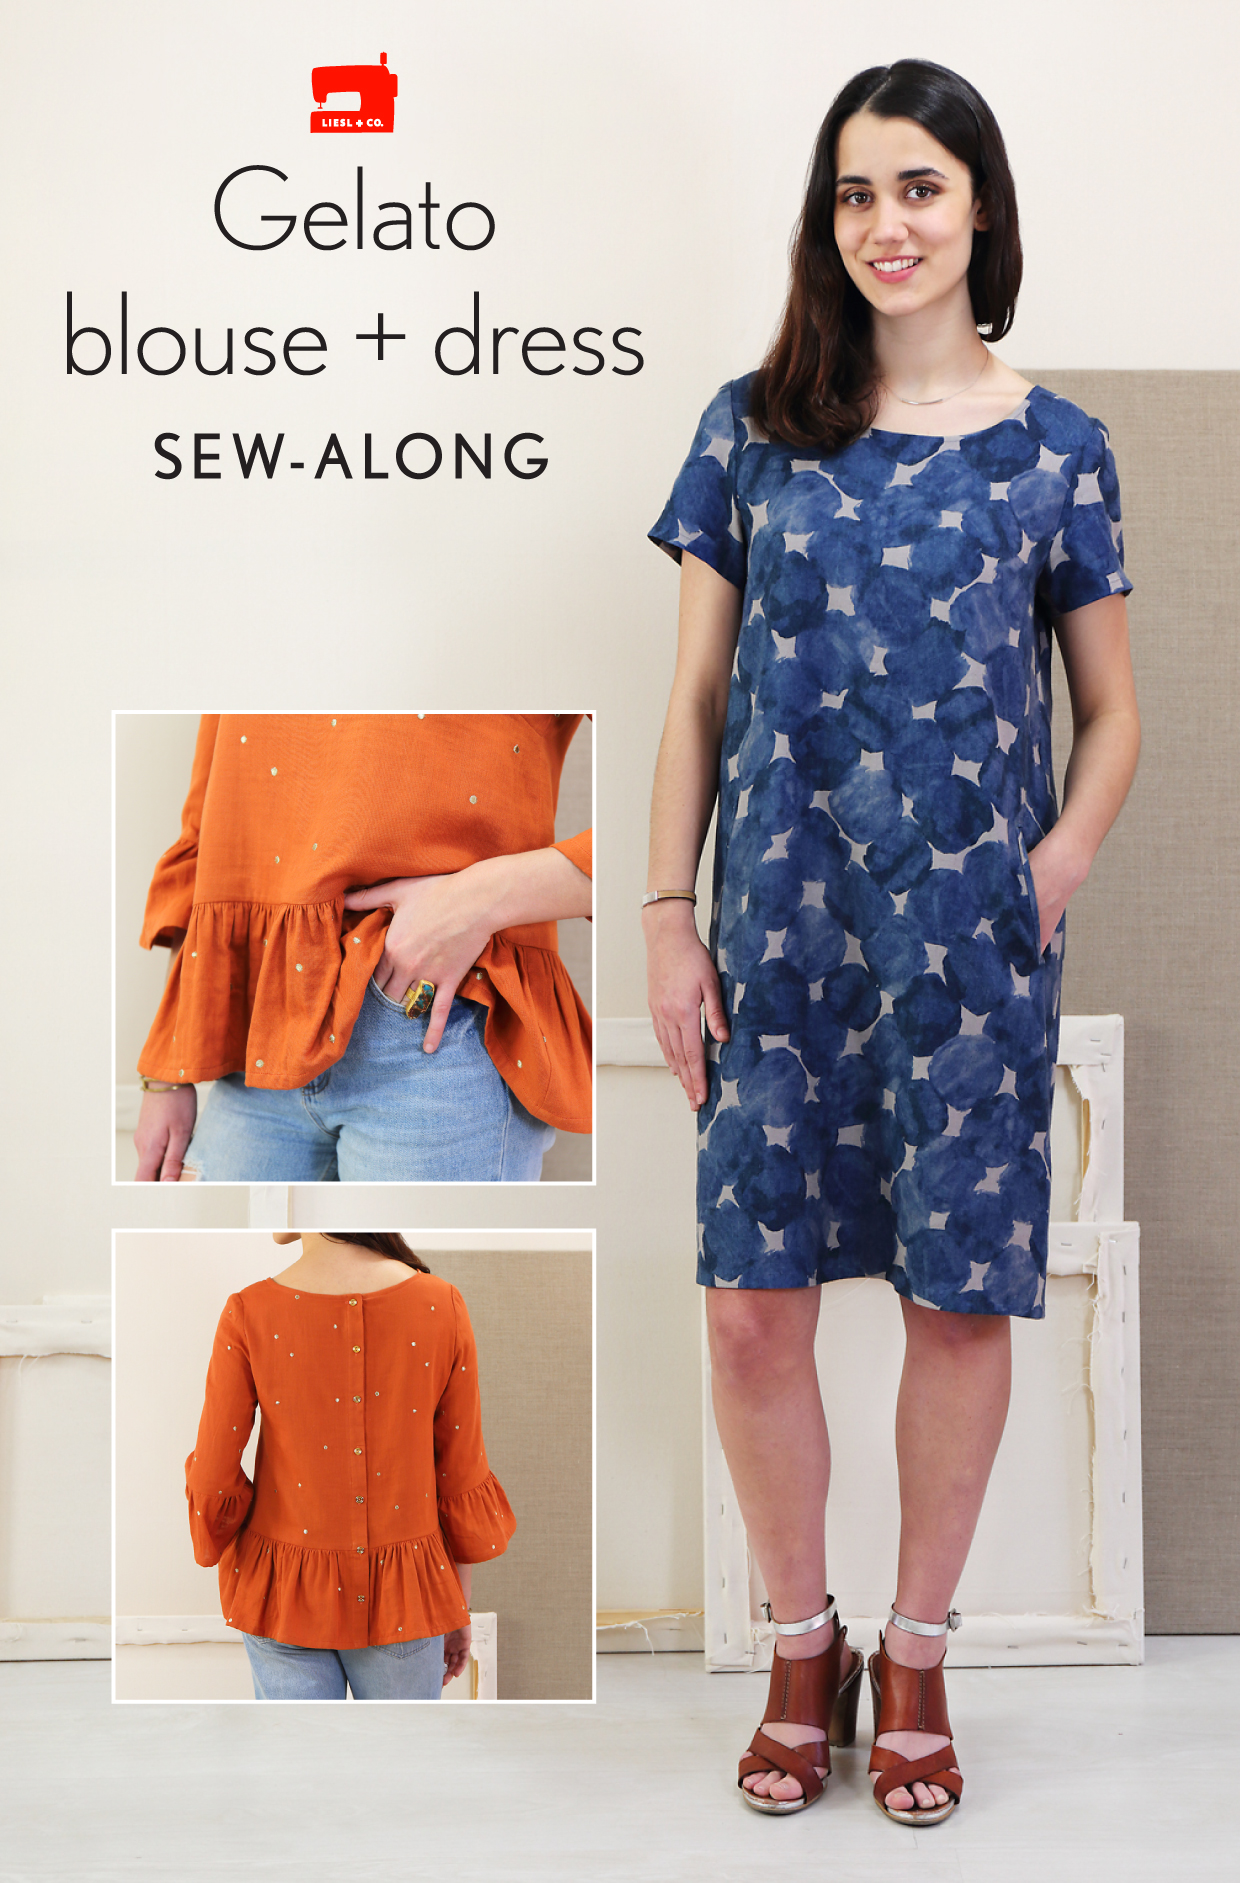
Gelato Blouse + Dress Pattern Details
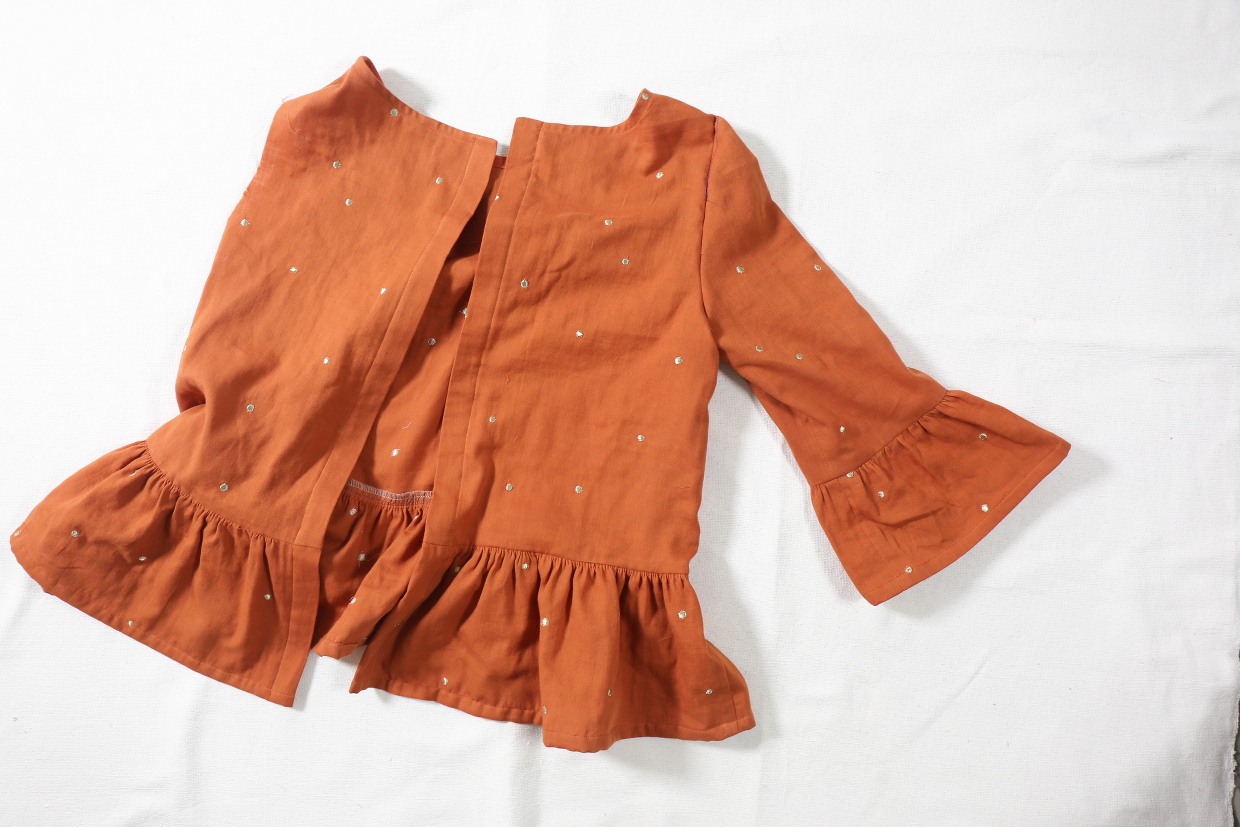
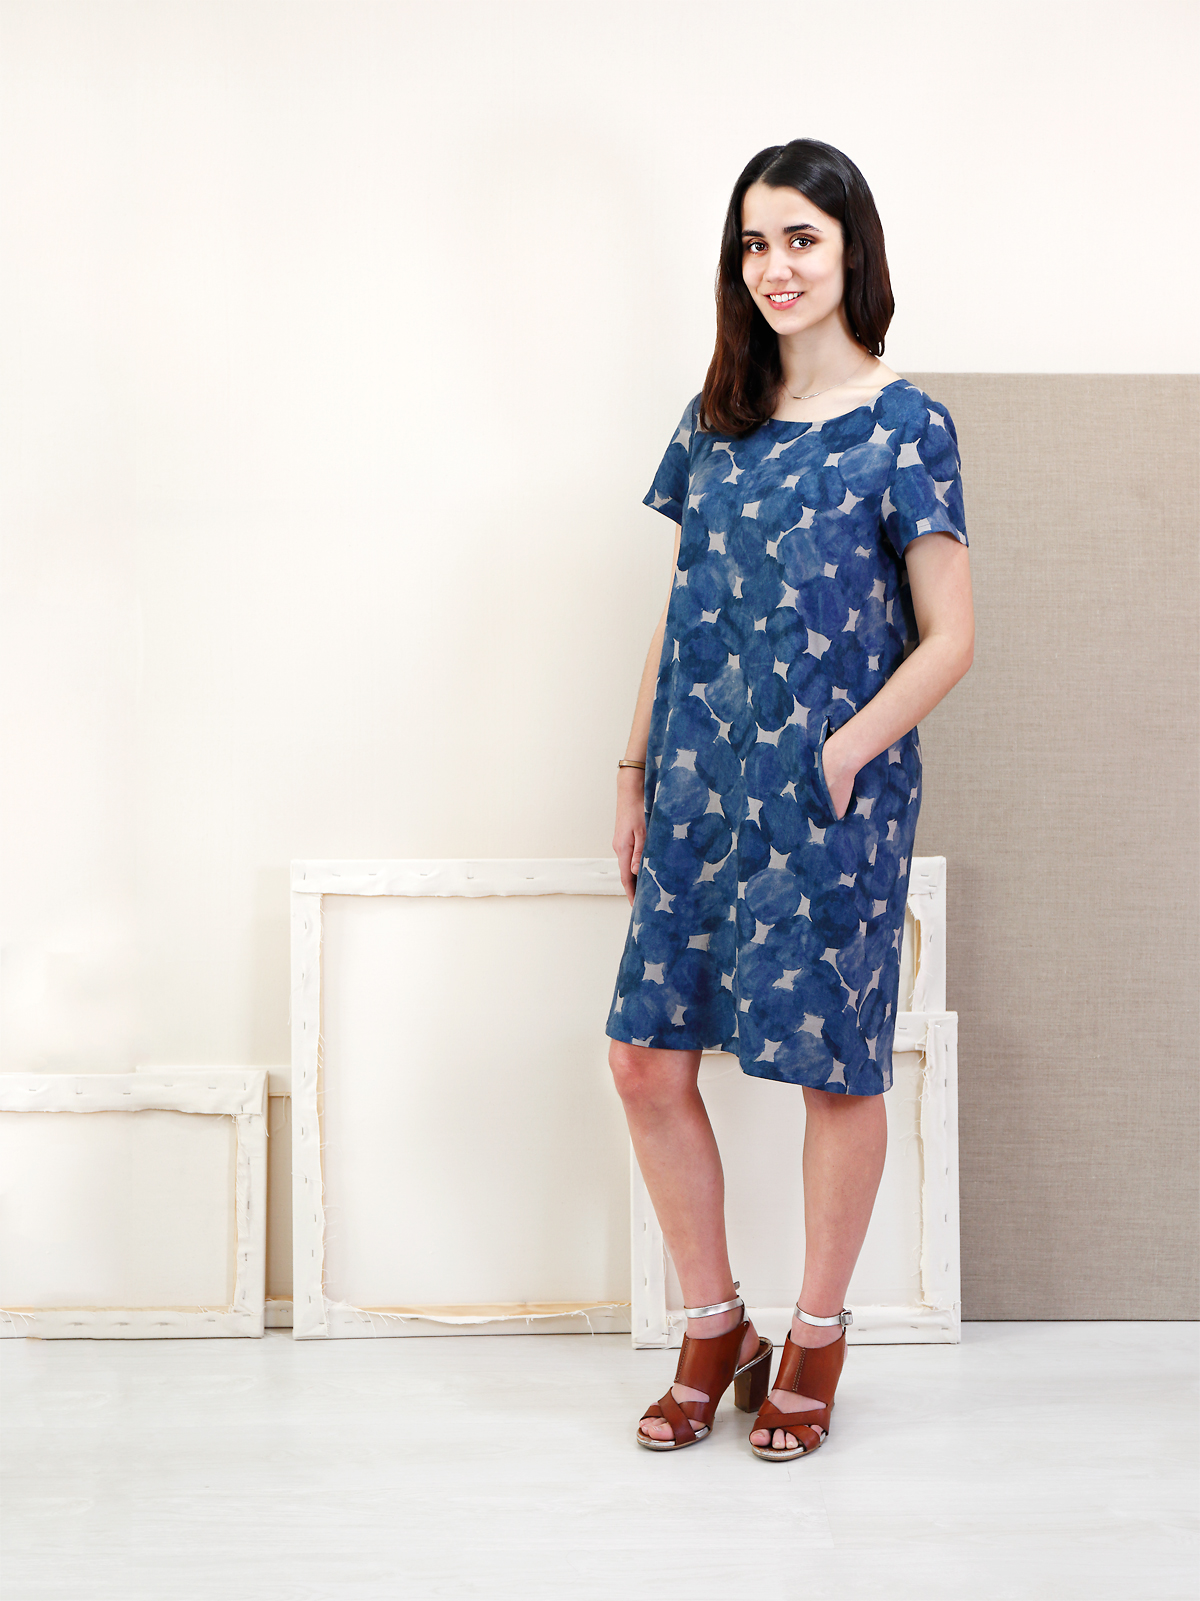
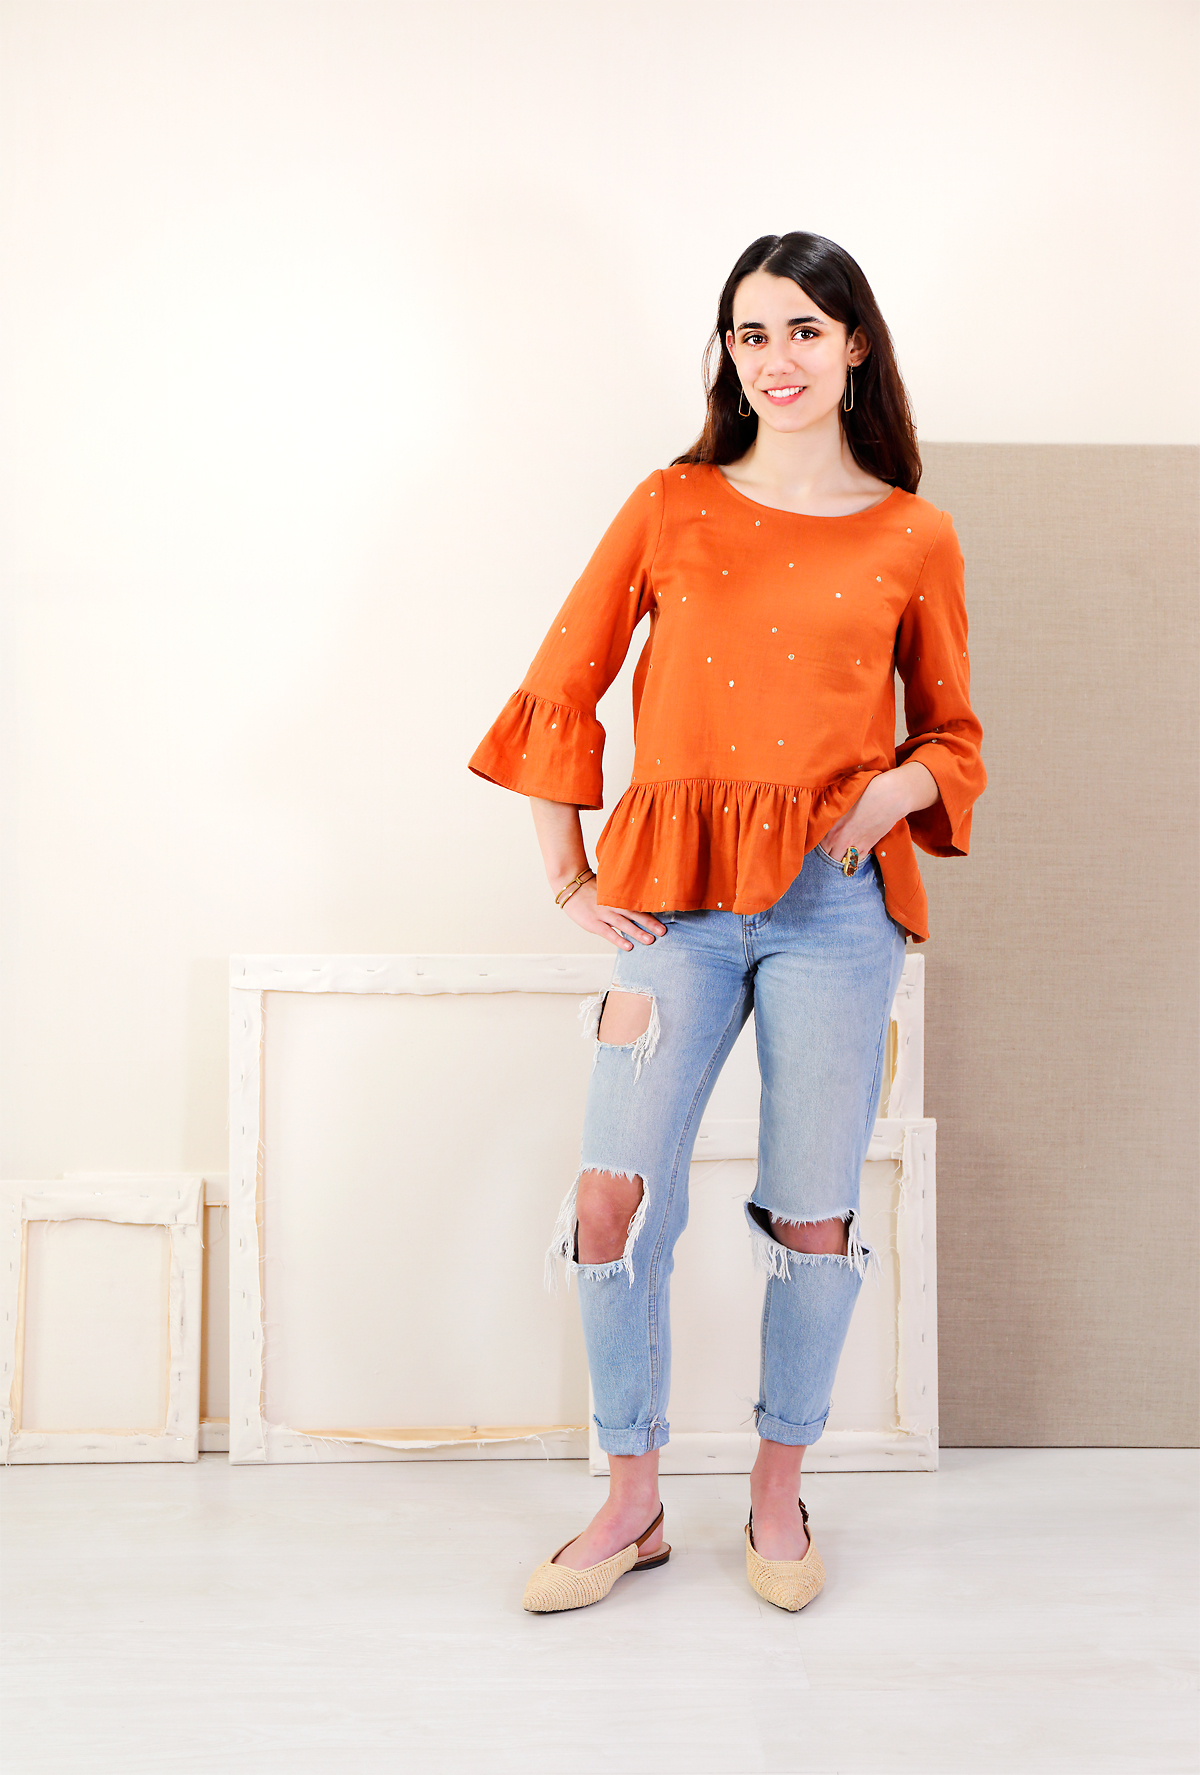
Description: Relaxed pull-on peplum blouse and A-line dress feature a scooped neck and bust darts. The blouse, View A, includes ruffled peplum and sleeve as well as a button-placket back detail. The A-line dress, View B, includes short sleeves, double-welt angled front pockets and a center-back seam. You’ll find so many ways to sew this versatile pattern, which also includes detailed instructions for doing a full bust adjustment.
Sewing level: Advanced beginner: this pattern is suitable for someone who has sewn from a pattern before or has taken a few classes and completed several projects.
Suggested fabrics: Suitable for a wide range of light- to medium-weight woven fabrics with medium drape like quilting cotton, chambray, voile, lawn, shirting, poplin, broadcloth, linen, rayon, silk shantung or dupioni, wool suiting, and lightweight jacquard.
Notions: Coordinating thread, lightweight fusible interfacing. View A: seven 1/2″ buttons.
Get the pattern: It’s available in both paper and digital formats. (Digital only for sizes 16-30.)
Sew-Along Schedule
We’ve broken down the planning and sewing process into a few easy steps. Here’s how we’ll be working through the process of creating your new blouse or dress together.
| Preparation Steps | Sewing Steps | ||
 |
1. Gather Your Materials Choosing fabric, gathering notions, deciding on customizations, and purchasing your pattern. |
 |
1. Prepare the Back Placket (view A), Assemble the Back (view B), Close the Darts, and Sew the Pockets (view B). We begin by assembling the back of the garment, closing the darts, and sewing the welt pockets for the dress version. |
 |
2. Select Your Size Deciding on the size you will sew. |
 |
2. Finish the Shoulders, the Neckline, and the Side Seams. We work on completing the top portion and the side seams of the garment. |
 |
3. Pattern Adjustments Deciding if there are any adjustments you need to make to the pattern. |
 |
3. Stitch the Ruffle (view A), Attach the Sleeves, and Finish the Garment. Just one day’s sewing is left to finish off the blouse or dress. |
Gather Your Materials
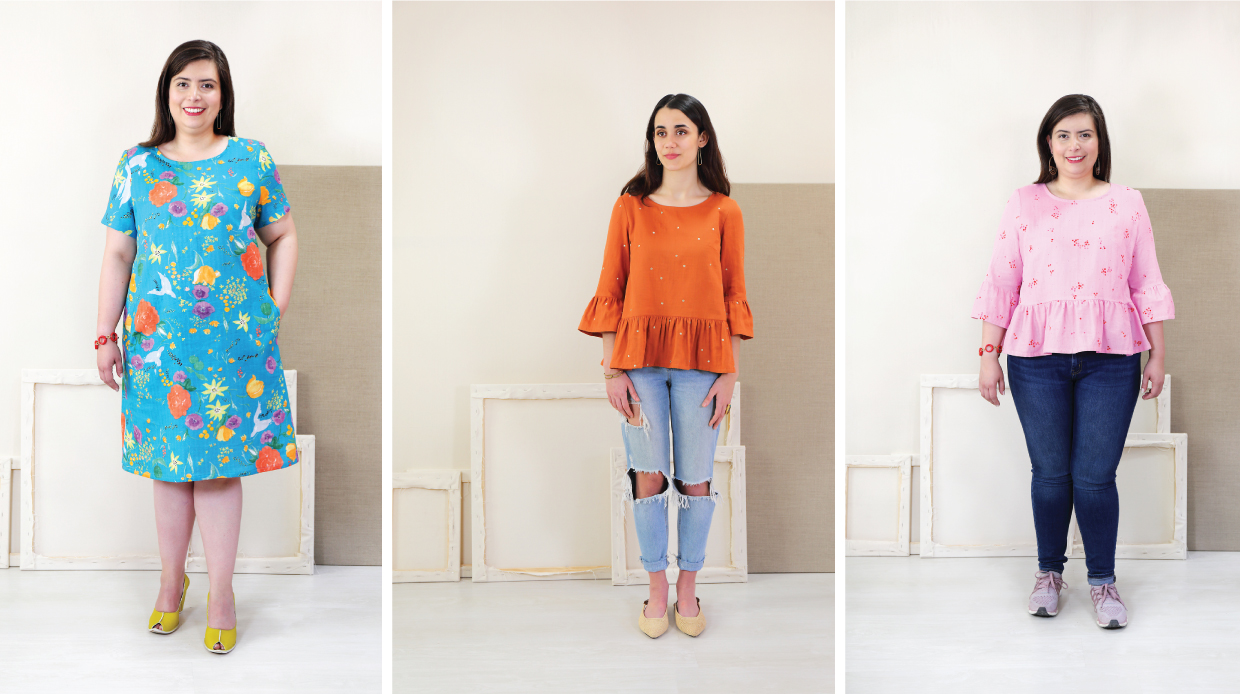
Are you excited to get started? I am! After all, this is such a classic silhouette, and there are a million things you can do with it–so many ways to customize it, alter it, make it your own. I showed a few ideas in this post, and there are lots more ideas in the Liesl + Co Gelato Blouse + Dress Pinterest board if you need some inspiration.
Choosing your fabric
Let’s talk about fabric. You have lots of options for this style. As you can see, I used a lot of double gauze for the samples we showed, mostly because it’s summer and double gauze comes in such pretty colors and prints.
But don’t limit yourself! I also used wool suiting for this blouse and a linen/rayon for the dress.
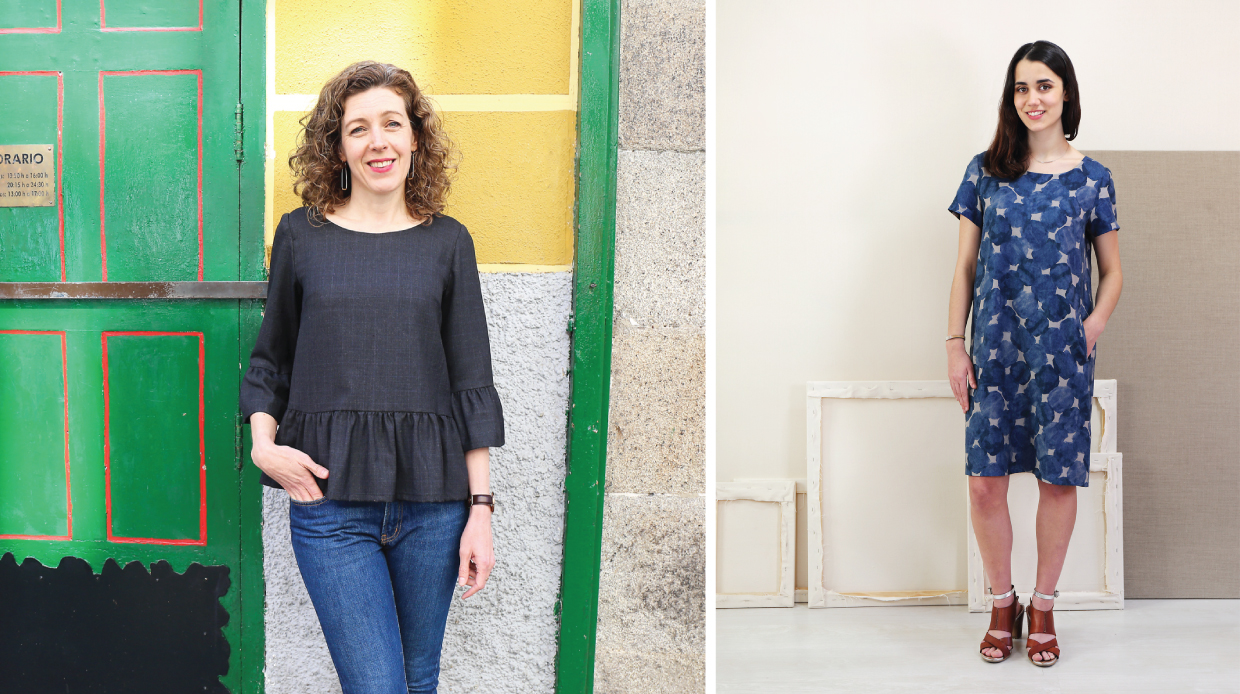
Linen, double gauze, rayon, silk, lawn, voile, or anything else that is drapey works well for this pattern. If you prefer something more crisp like quilting cotton or poplin, that’s fine too. Just know that a stiffer/crisper fabric will stand away from the body more, which I think would be fine for a summery dress. Stiffer fabrics would be great if you want to do something like pleats or tucks or add some structure to the pattern, especially.
I’ll show you my plan: I found this soft peach (or millenium pink, if you prefer) Essex linen/cotton in my stash, which I plan to use, along with a little bit of this unbleached metallic linen from Gray Line in New York for an accent fabric I’m planning a few customizations along the lines of this photo. I may lengthen the dress by a couple of inches in case the drawstring shortens it when it’s cinched. I’ll use the metallic linen as trim along the short sleeves and for the drawstring itself, like the photo. Not sure about the pockets yet. I may just skip them and leave it simple. Or move them down a bit so they don’t interfere with the drawstring.

What about you? What fabric is grabbing you these days? Which style are you planning? Are you planning the dress, the blouse, or a customization?
Choose your notions
Regarding notions, you don’t need much for this pattern. If you’re sewing the button back, you’ll need buttons, of course, and you’ll need a little bit of fusible interfacing for either view.
Here’s what else you’ll need to assemble:
- Thread. All-purpose thread works great for most fabrics, but choose your thread according to your fabric.
- Any special sewing needle, depending on your fabric choices.
Other tools you’ll need:
- Sewing sheers or a rotary cutter and self-healing cutting mat.
- Thread snips or a small scissors, which are nice to keep by your sewing machine so you can keep your sewing cleaned up while you’re progressing.
- I like to have a good straight-edge handy. My preference is a 6″ x 24″ quilting straight edge, which is also really convenient when cutting out.
- A small ruler. I like the 1″ x 6″ rulers we carry in our shop and keep at least half a dozen around at all times since I’m forever misplacing them under a pattern piece or something.
- Tailor’s chalk or a water-soluble fabric marking pen.
- A seam ripper (always important to have on hand).
- A measuring tape to determine your size and to help if you want to make any alterations.
- Pins (or pattern weights and fabric clips if you prefer).
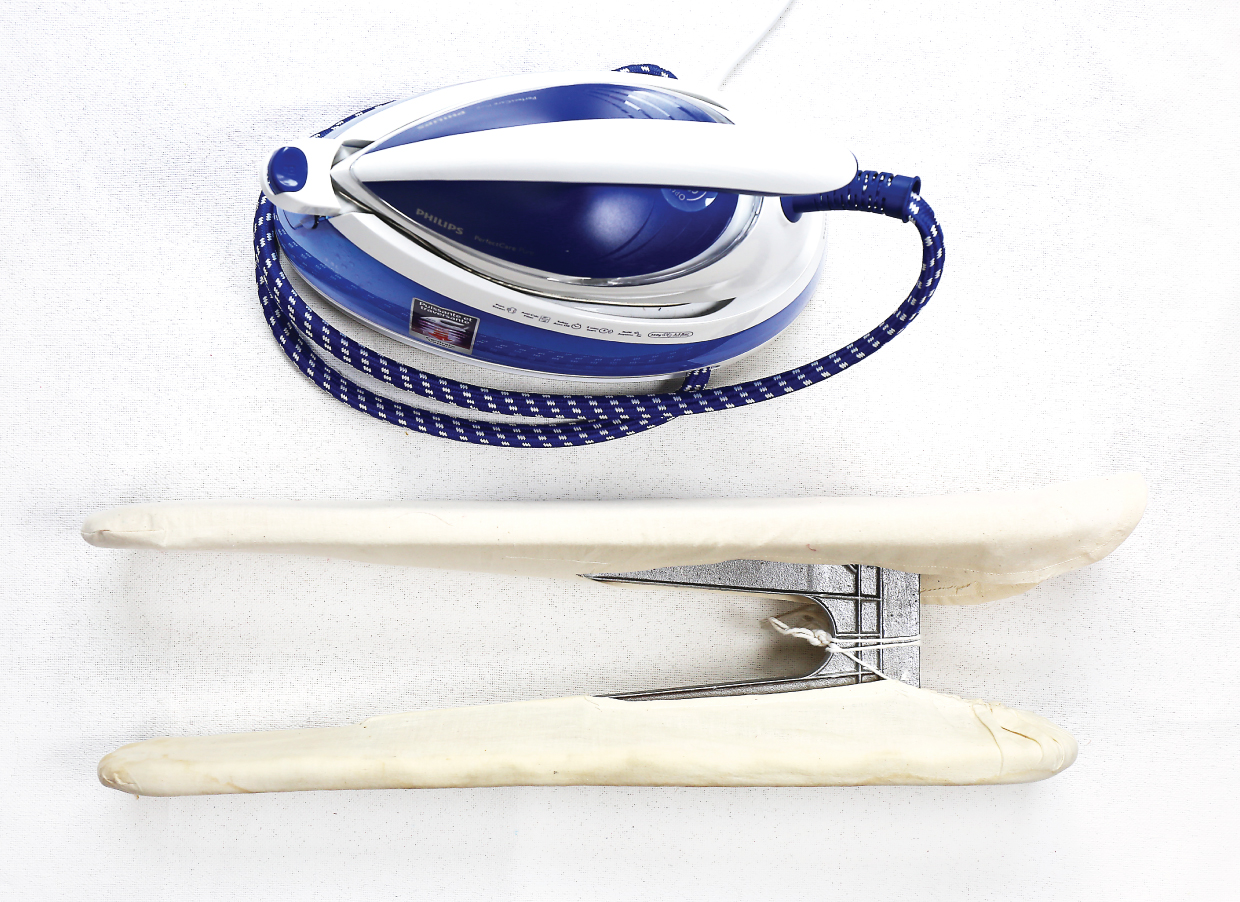
Obviously you’ll want access to a good iron (your second-most important tool after your sewing machine) and an ironing board. I make use of my sleeve board a lot, too.
Deciding on customizations
As I mentioned above, I’ve already decided how I want to customize the pattern this time. Of course, it’s perfectly fine to sew it as written, but if you want to make any modifications now is the time to decide.
Need a little inspiration? We’ve already written quite a few blog posts and tutorials for this style. You can see them all on this page. And here’s the original blog post where I introduced the pattern and offered some sewing and styling inspiration. You might find some ideas there as well.
Purchasing your pattern
And of course you’ll need a copy of the pattern, which you can purchase in paper format in sizes 0-20 or as a digital PDF in either sizes 0-20 or 16-30.
Select Your Size
Next let’s talk about selecting your size. For this style (and most styles, for that matter) focus on fitting your shoulders. You can use the measurement chart as a guideline, but obviously everyone is different and you’ll need to find the size that works best for you. Here’s a good place to star.
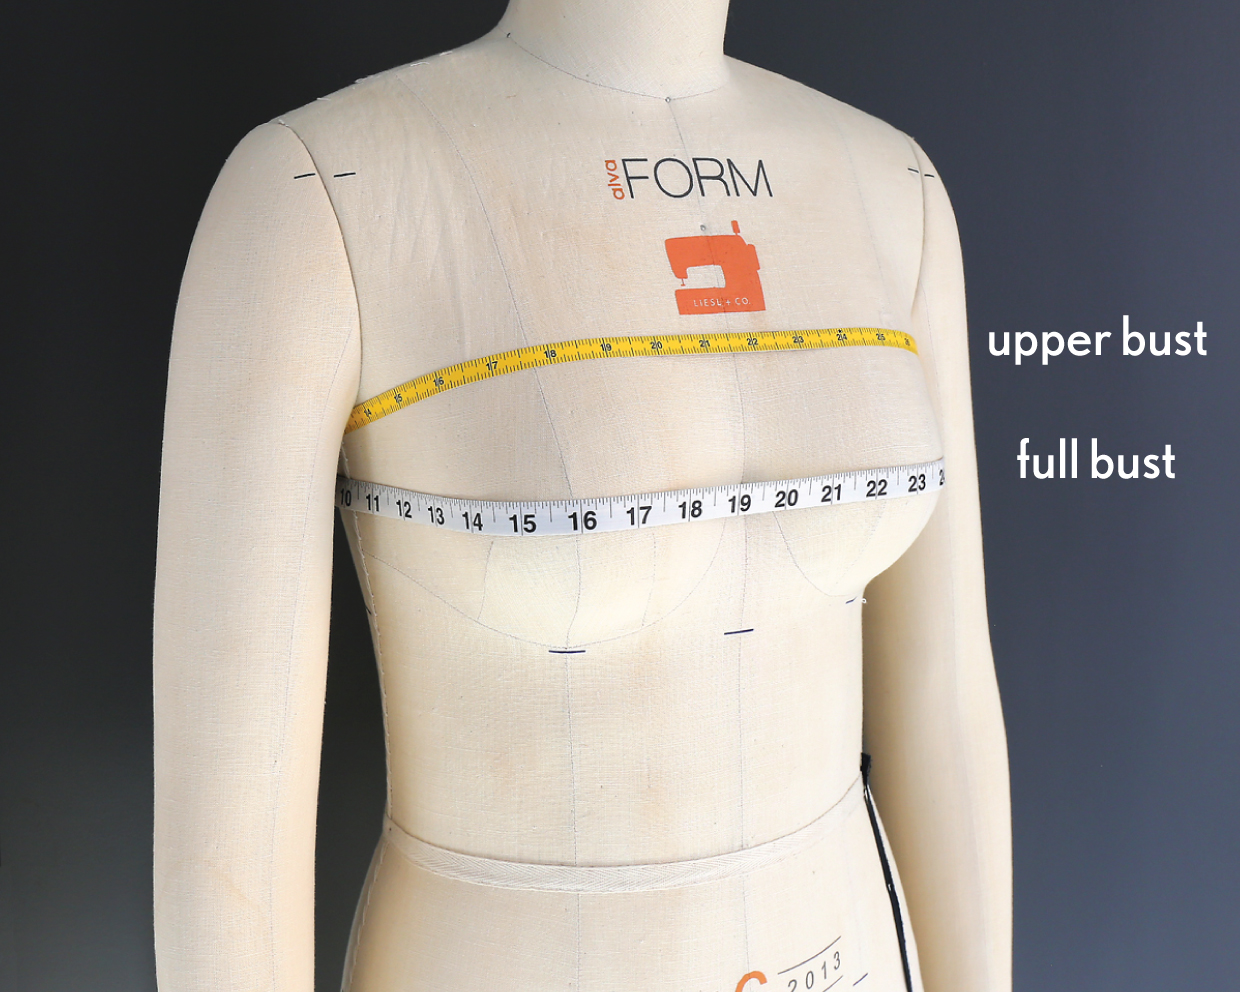
First take your full bust measurement. This measurement will be taken across the fullest part of your bust. Then take your upper bust measurement. This measurement is taken just under your arms, across the upper part of your chest, like in this photo.
OK, now some quick and easy math:
full bust measurement – upper bust measurement = x
If x is more than 2 1/2″, use your upper bust measurement instead of your full bust measurement when looking at the measurement chart. If x is less than or equal to 2 1/2″, use your full bust measurement. I’ll tell you why in a minute. Now, choose your size by looking at the bust measurements on the size chart and using either your upper bust measurement or your full bust measurement, depending on your results from the math problem above. (You will also use the results of this exercise to determine whether to do a fully bust adjustment for this pattern.)
| Sizes 0-20 | |||
| Pattern Size |
Bust (in.) |
Waist (in.) |
Hips (in.) |
| 0 | 32 1/2″ | 25″ | 35″ |
| 2 | 33 1/2″ | 26″ | 36″ |
| 4 | 34 1/2″ | 27″ | 37″ |
| 6 | 35 1/2″ | 28″ | 38″ |
| 8 | 36 1/2″ | 29″ | 39″ |
| 10 | 37 1/2″ | 30″ | 40″ |
| 12 | 39″ | 31 1/2″ | 41 1/2″ |
| 14 | 40 1/2″ | 33″ | 43″ |
| 16 | 42″ | 34 1/2″ | 44 1/2″ |
| 18 | 44″ | 36 1/2″ | 46 1/2″ |
| 20 | 46″ | 38 1/2″ | 48 1/2″ |
| Sizes 16-30 | |||
| Pattern Size |
Bust (in.) |
Waist (in.) |
Hips (in.) |
| 16 | 42″ | 37″ | 45 1/2″ |
| 18 | 44″ | 39″ | 47 1/2″ |
| 20 | 46″ | 41″ | 49 1/2″ |
| 22 | 48″ | 43″ | 51 1/2″ |
| 24 | 50″ | 45″ | 53 1/2″ |
| 26 | 52″ | 47″ | 55 1/2″ |
| 28 | 54″ | 49″ | 57 1/2″ |
| 30 | 56″ | 51″ | 59 1/2″ |
I wrote a lengthy blog post about finding your correct pattern size a few years ago. You might also want to refer to that.
To summarize, basically we want to get a good fit through the upper chest and shoulders, so if your bust differential is more than 2 1/2″ you’ll probably get a better fit through the shoulders by using your upper bust measurement instead of your full bust measurement when you look at the measurement chart. If you chose your size based on your full bust measurement, you would end up with a fit that’s very oversized and too big through the neck and shoulders, which generally looks sloppy and not nice at all. (And when you shop in stores you often have to purchase this way because you can’t do a full bust adjustment, so there’s of of the many advantages of sewing for yourself!)
And keep in mind that this math is only intended to give you a size approximation. Your shoulders might be broader or narrower than average, in which case you may find that you need a larger or smaller size. That’s why it’s always a good idea to make a muslin first. Also, under the arm you’ll want several inches of ease through the bust, so keep that in mind as you evaluate your muslin.
OK? Next we’ll be talking about any adjustments you might want to make to your pattern.
Pattern Adjustments
The pattern includes instructions for a full bust adjustment, and don’t be scared if you haven’t done this yourself yet. It’s not that difficult. And once you’ve done it the first time it just gets easier in the future. If you want me to do it with you, I have a class for that! My Creativebug Bust Adjustment Class will walk you through the whys and hows of dart manipulation.
Once you’ve done the full bust adjustment, the rest of the pattern is relatively loose fitting, so you probably won’t need to make a lot of changes aside from possibly lengthening or shortening, which can be done just as well from the hem of the dress as anywhere else on this pattern. From there it’s pretty easy. Raise or lower the dart as needed, blend to a larger size if you want extra room through the hips or more volume in the dress itself, and decide on any other customizations you may prefer.
And with that I think we’re ready! Go ahead and start cutting your fabric, or make a muslin if you haven’t already, and I’ll see you back here when you’re ready to begin sewing.
Day 1
From Liesl: OK friends, here we go! Let’s get to the sewing! Liesl here, and I’ll be chiming in occasionally with little tips and tricks not included in the sewing instructions themselves to help you along. (My tips will be indented in italics like this.)
Prepare the back placket (view A)
1) To form the back button place for View A sew a row of basting stitches 1/2” from the center-back edge of each blouse-back and ruffle-back piece. Follow the manufacturer’s instructions to fuse a 1 1/4”-wide strip of interfacing to the wrong side of each fabric piece, aligning the edge of the interfacing with the basting stitches and trimming any extra interfacing that extends beyond the edges.
2) Fold and press the center-back seam allowances of the blouse-back and the ruffle-back pieces to the wrong side of the fabric using the basting stitches as a folding guide. Fold and press a second time, using the opposite edge of the interfacing as a folding guide to form the 1 1/4” button placket on the wrong side of the fabric. Don’t stitch the placket yet.
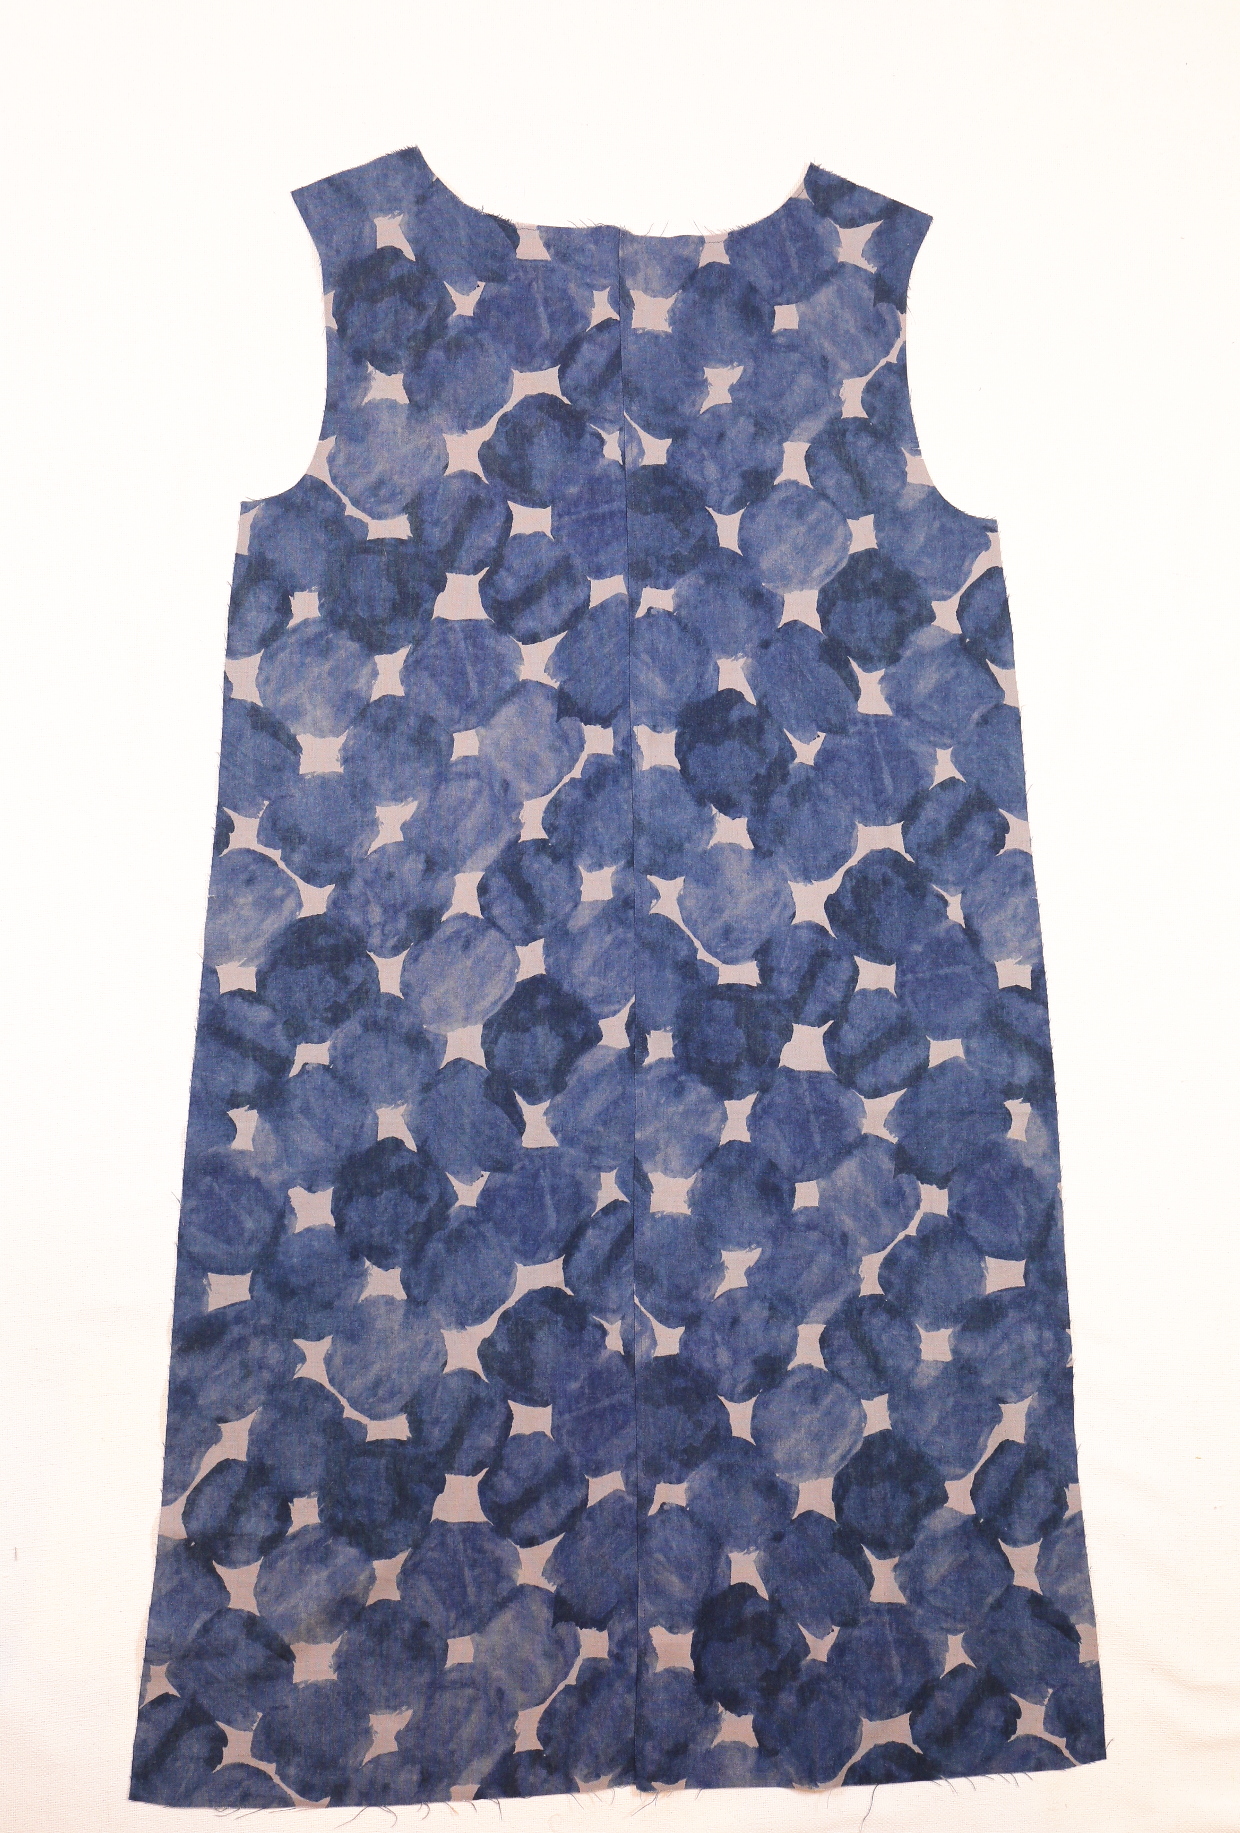
Assemble the back (view B)
1) For View B, align and pin the dress back pieces along the center-back edge with right sides together and matching the edges and notches. Stitch the center back with a 1/2” seam, backstitching or lockstitching at both ends. Finish the seam allowances together and press them to one side or finish them separately and press them open. If you’re sewing with linen or a fabric that’s somewhat loosely woven you might want to topstitch or edgestitch the seam allowances to prevent seam slippage. (Seam slippage happens when the threads in a fabric spread and distort near a seam.)
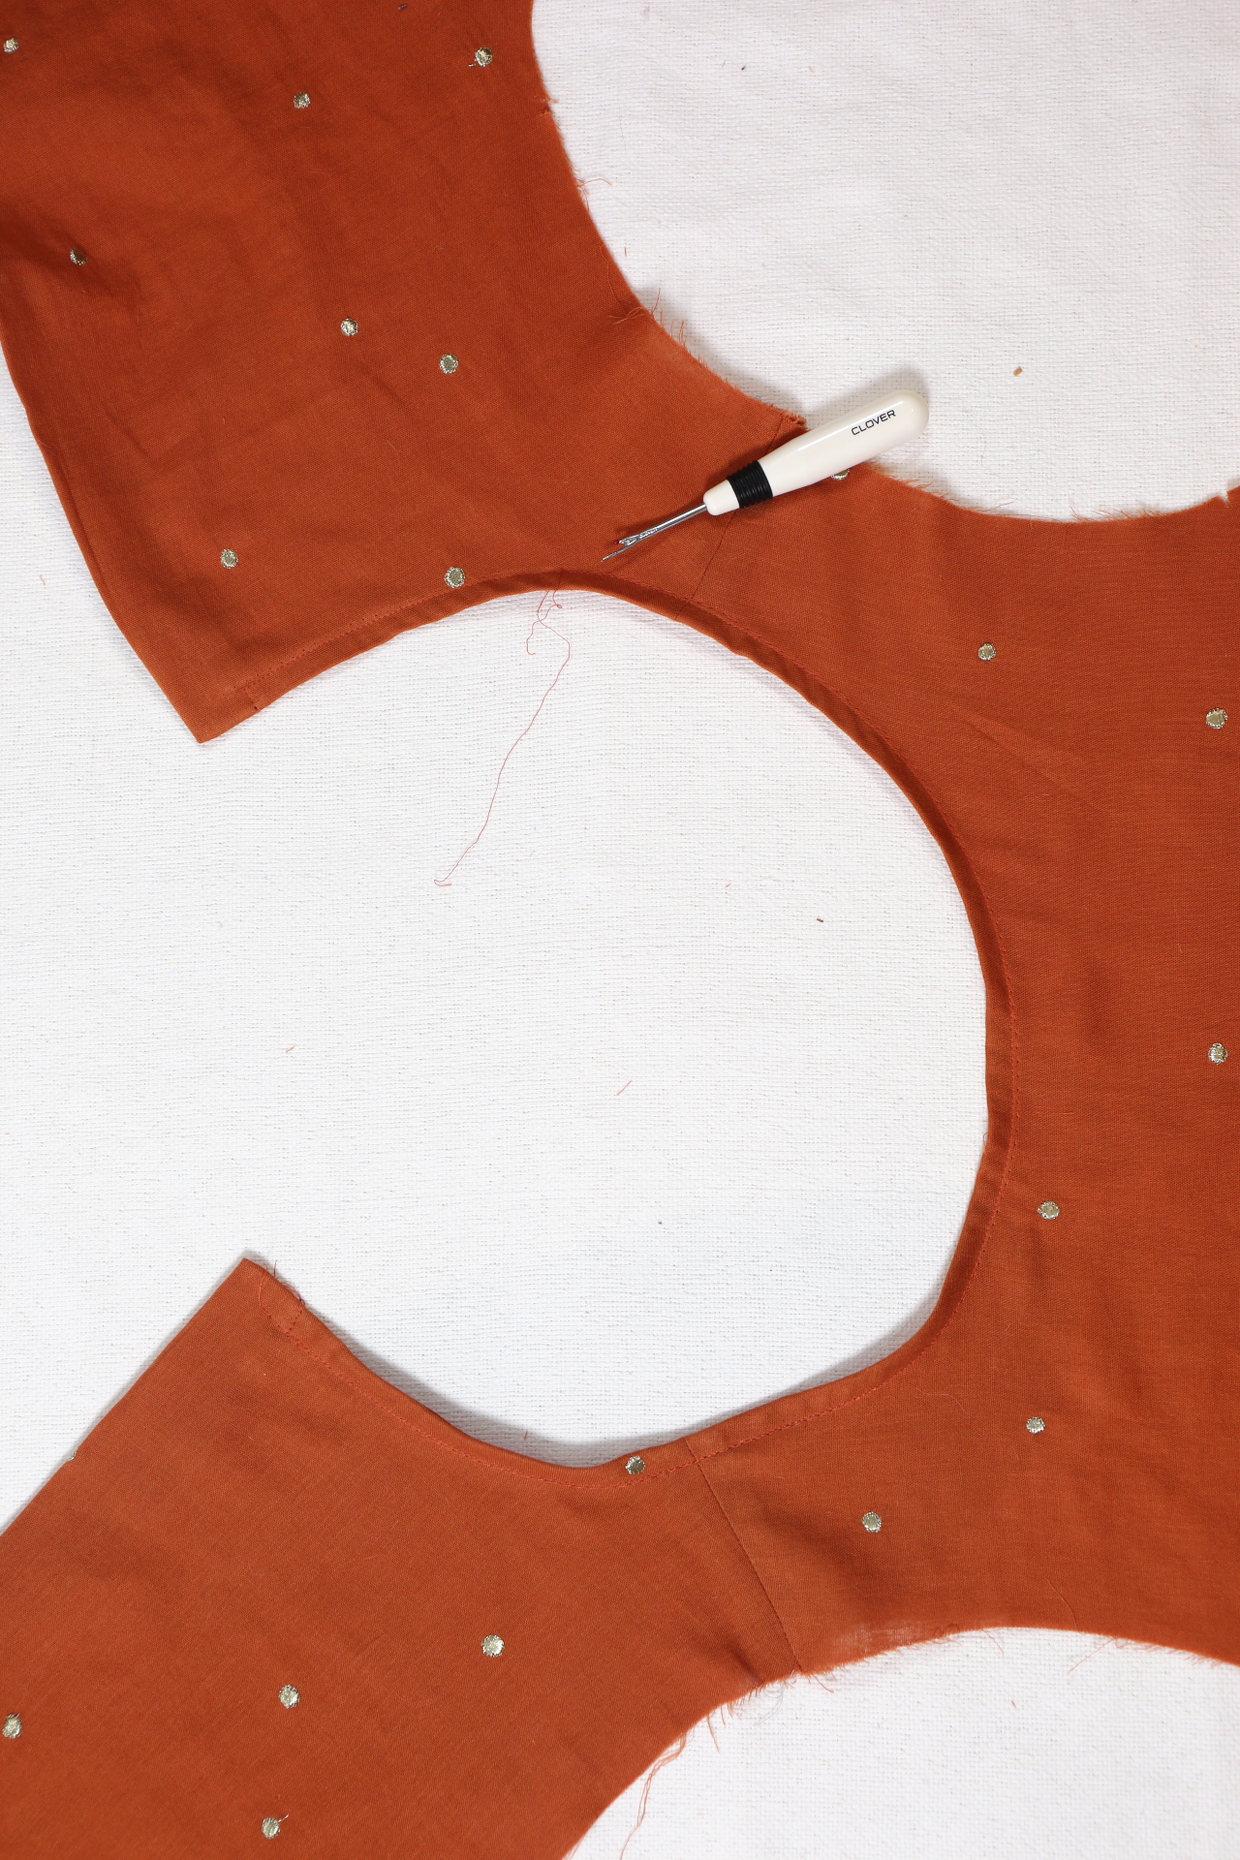
Close the darts
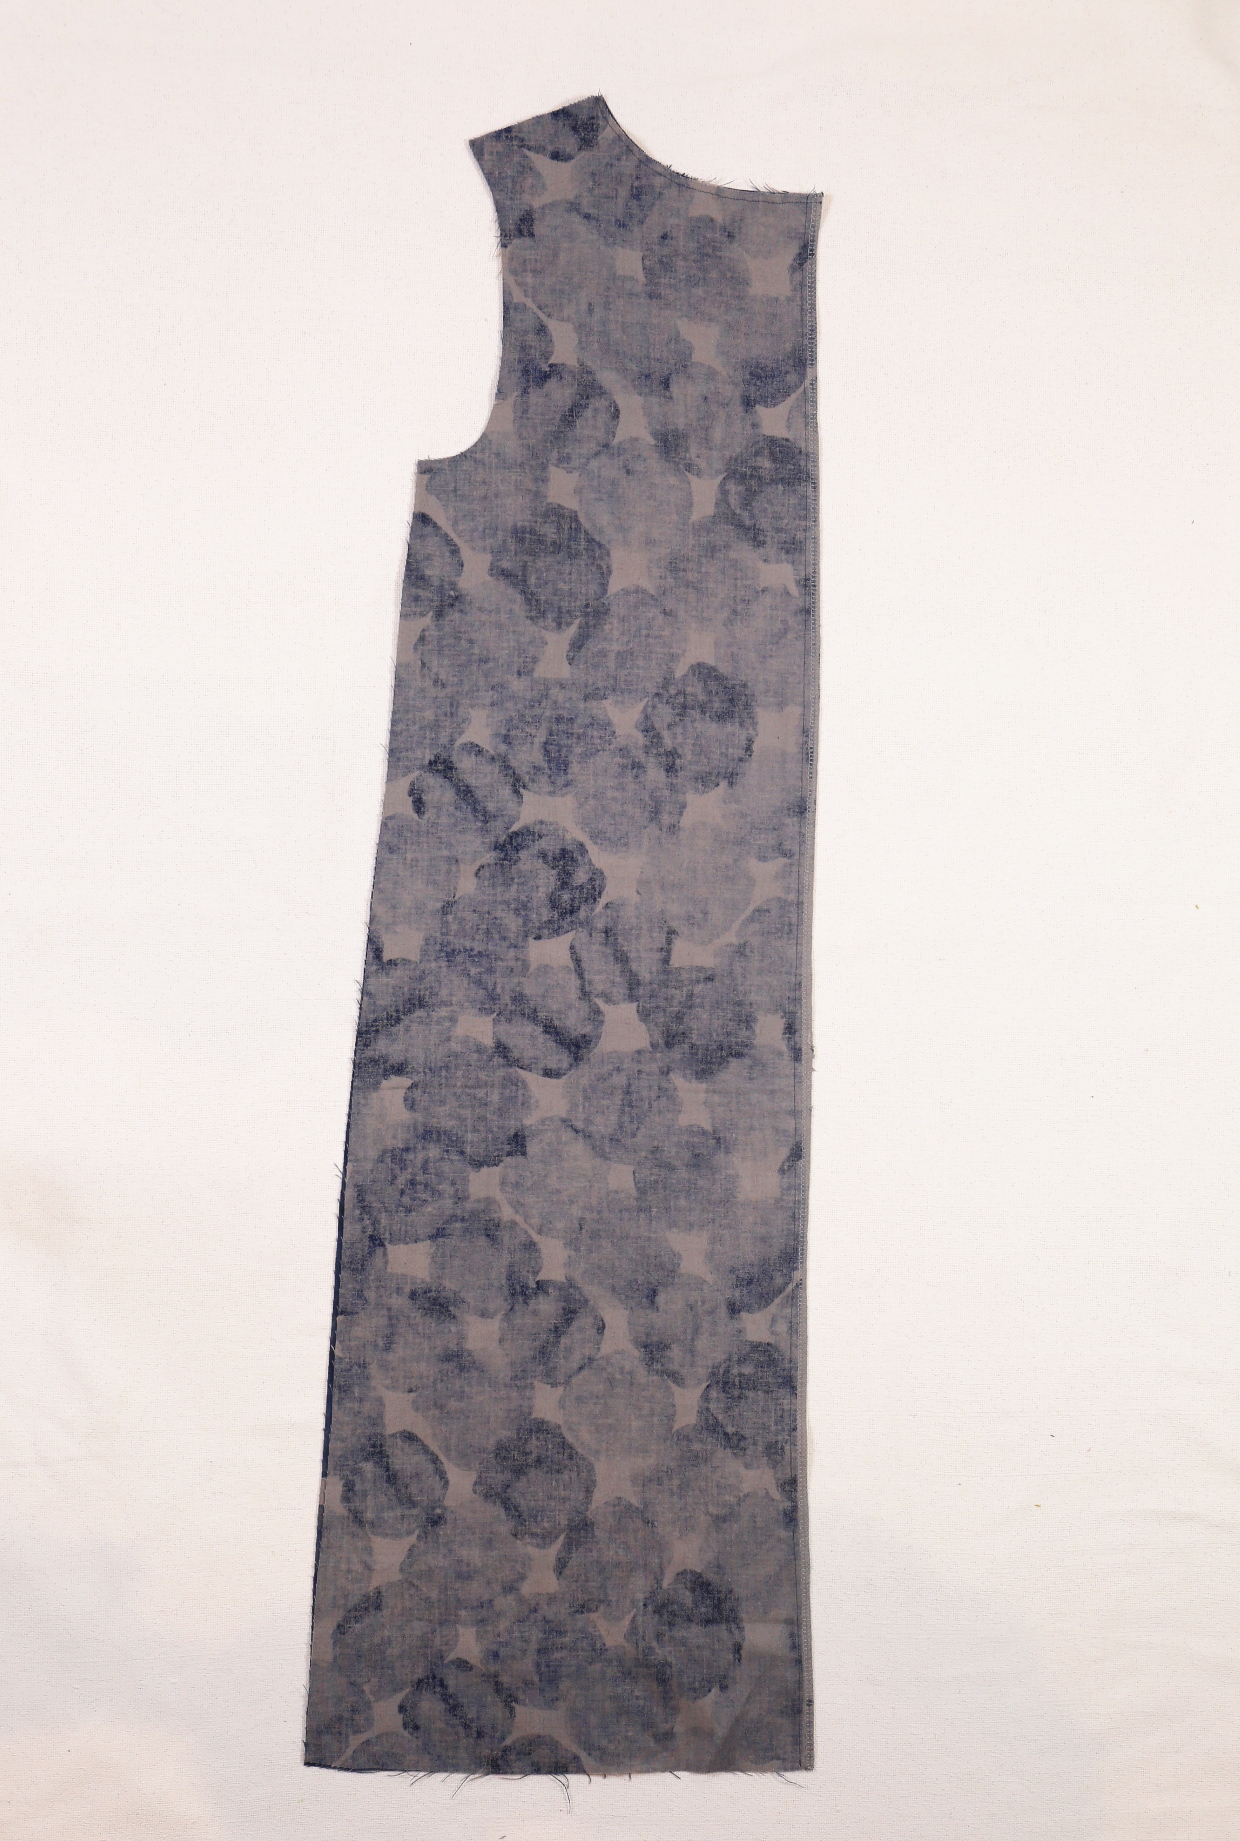
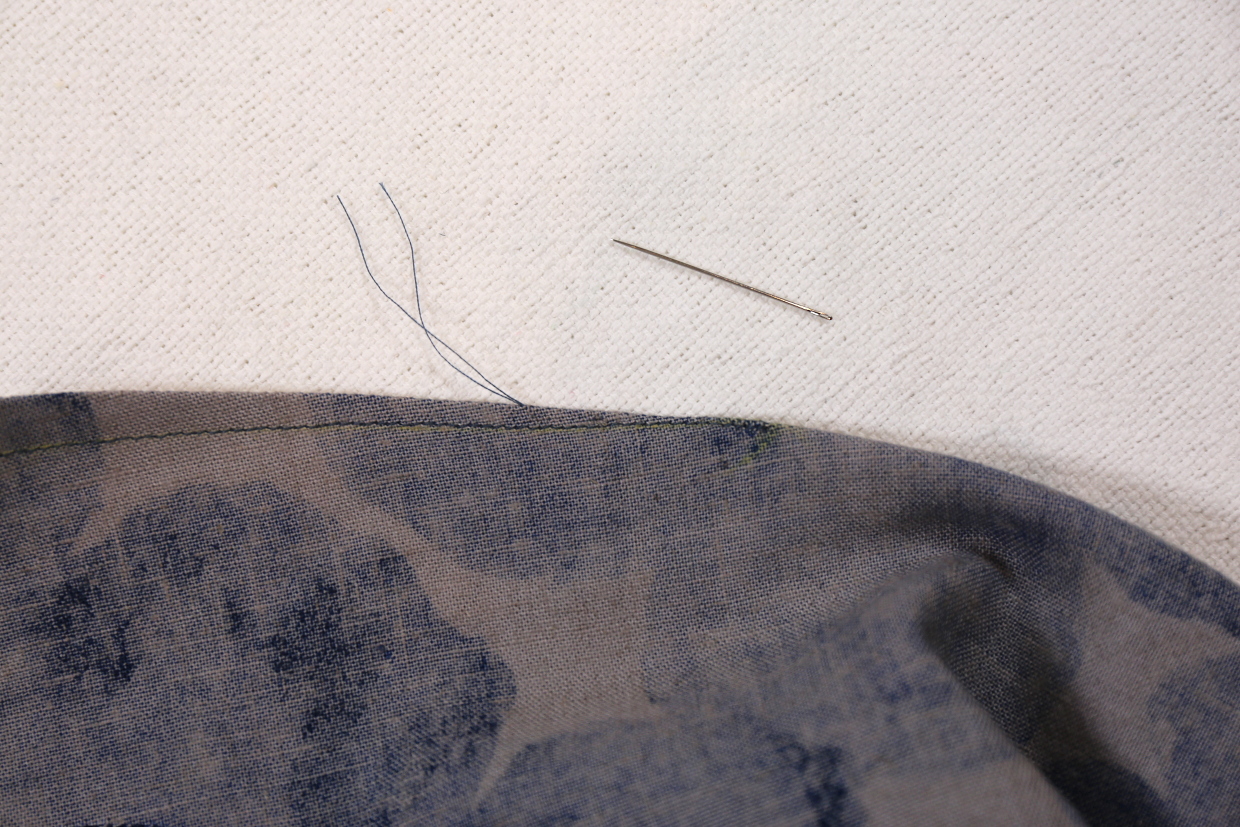
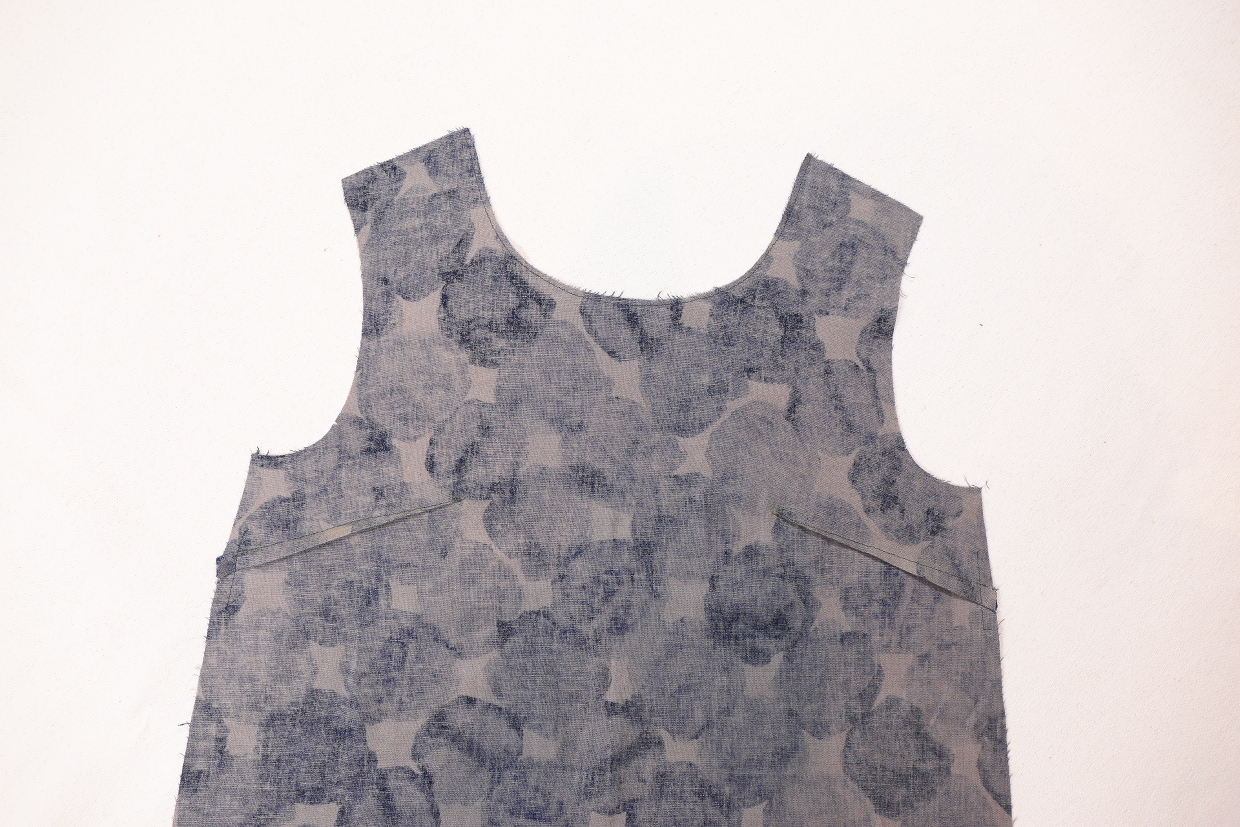
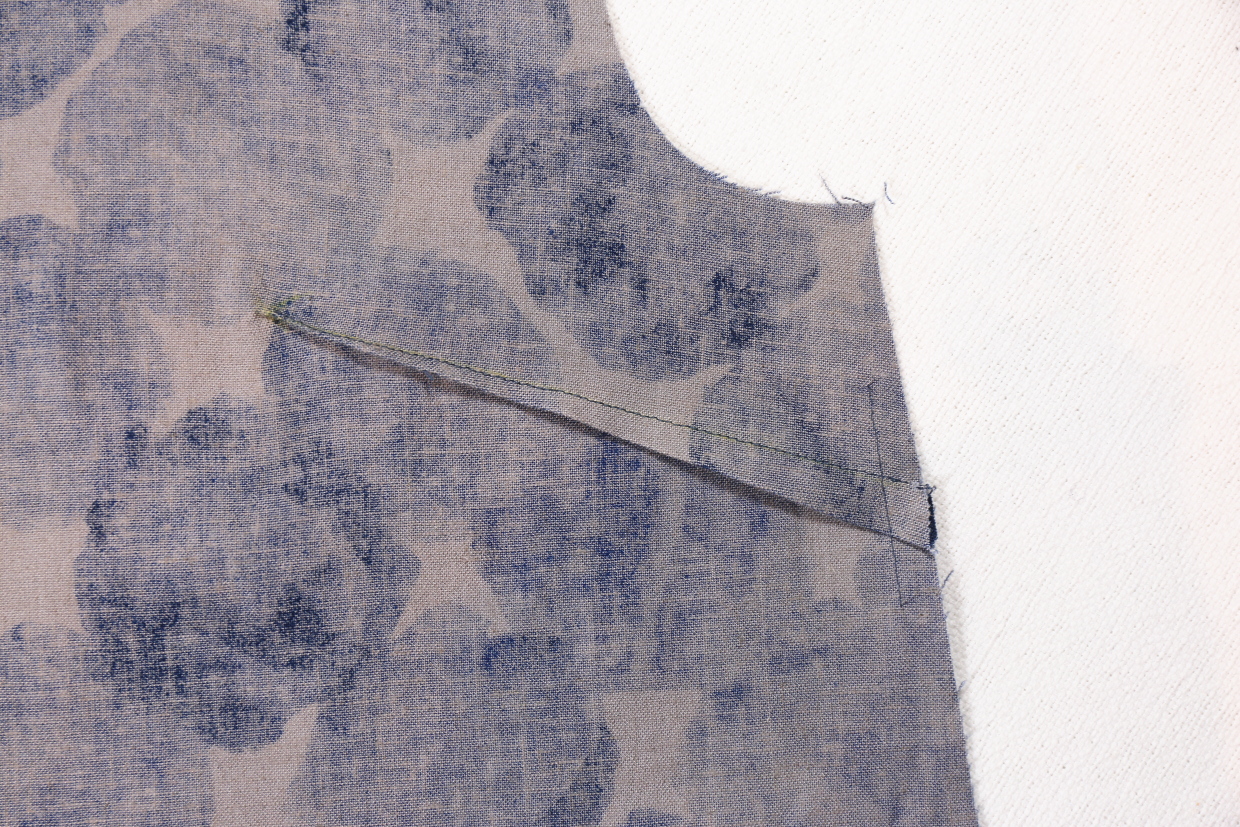
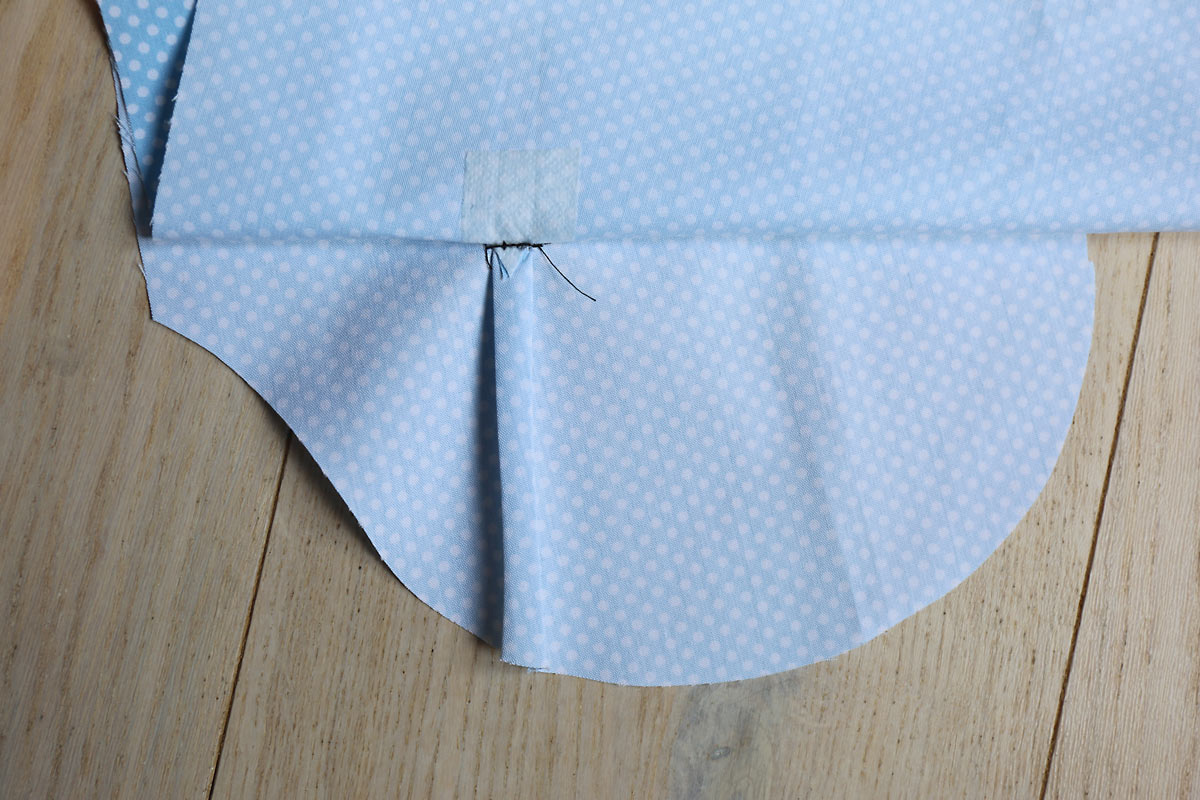
1) To close the darts on the blouse/dress-front piece, fold one dart along the dart’s center, with the fabric’s right sides together and the marked dart legs aligned. Pin and stitch along the aligned dart markings, backstitching at the widest part of the dart but not at its tip. Instead, at the dart’s point leave thread tails several inches long and knot the thread tails together a couple of times to secure the thread. This will reduce bulk at the tip of the dart and prevent the dart from puckering.
From Liesl: I like to knot the threads at the end of the dart and then thread a needle with them so I can hide the ends of the thread inside the dart.

2) Press the dart flat to set the stitches, then press the excess fabric from the dart (the dart “take-up”) toward the blouse/dress hem. Repeat with the second dart on the blouse/dress-front piece. Baste each dart take-up to the blouse/dress at the side seam with a 3/8” seam.
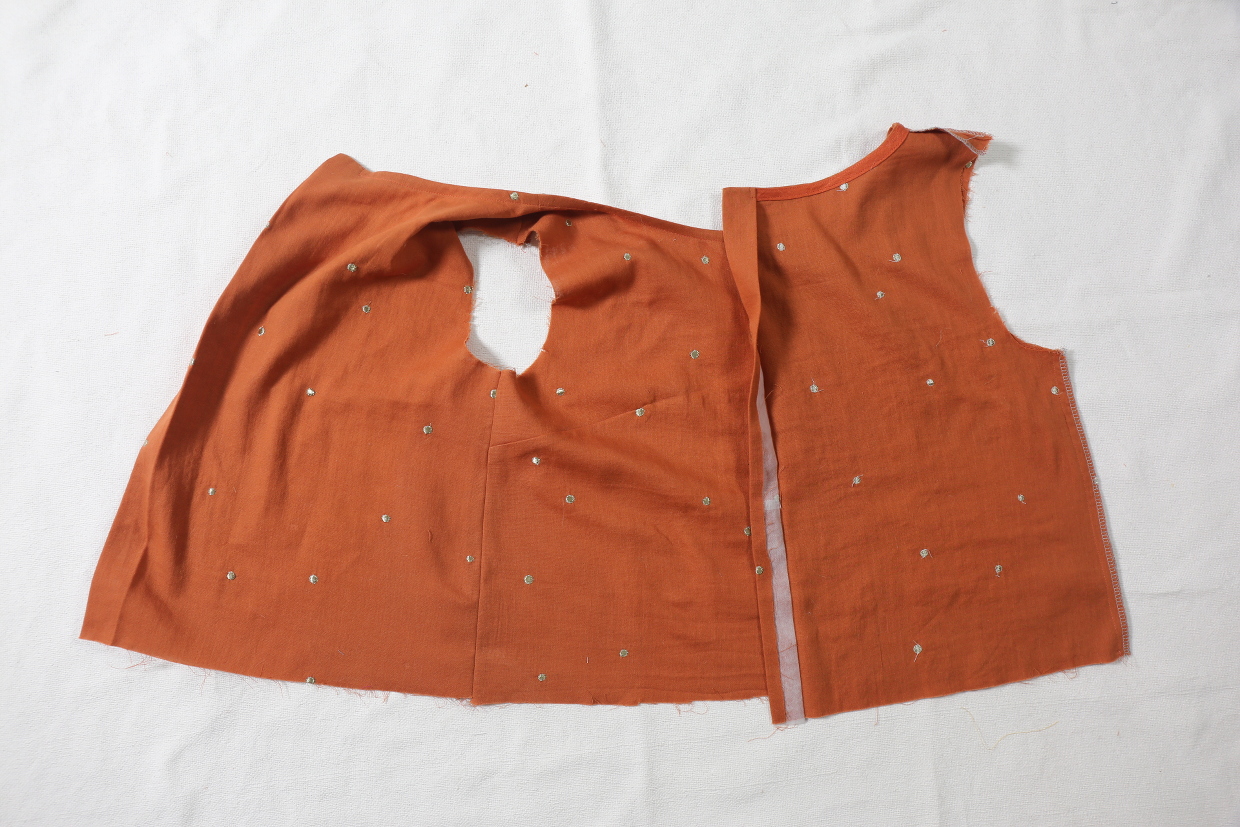
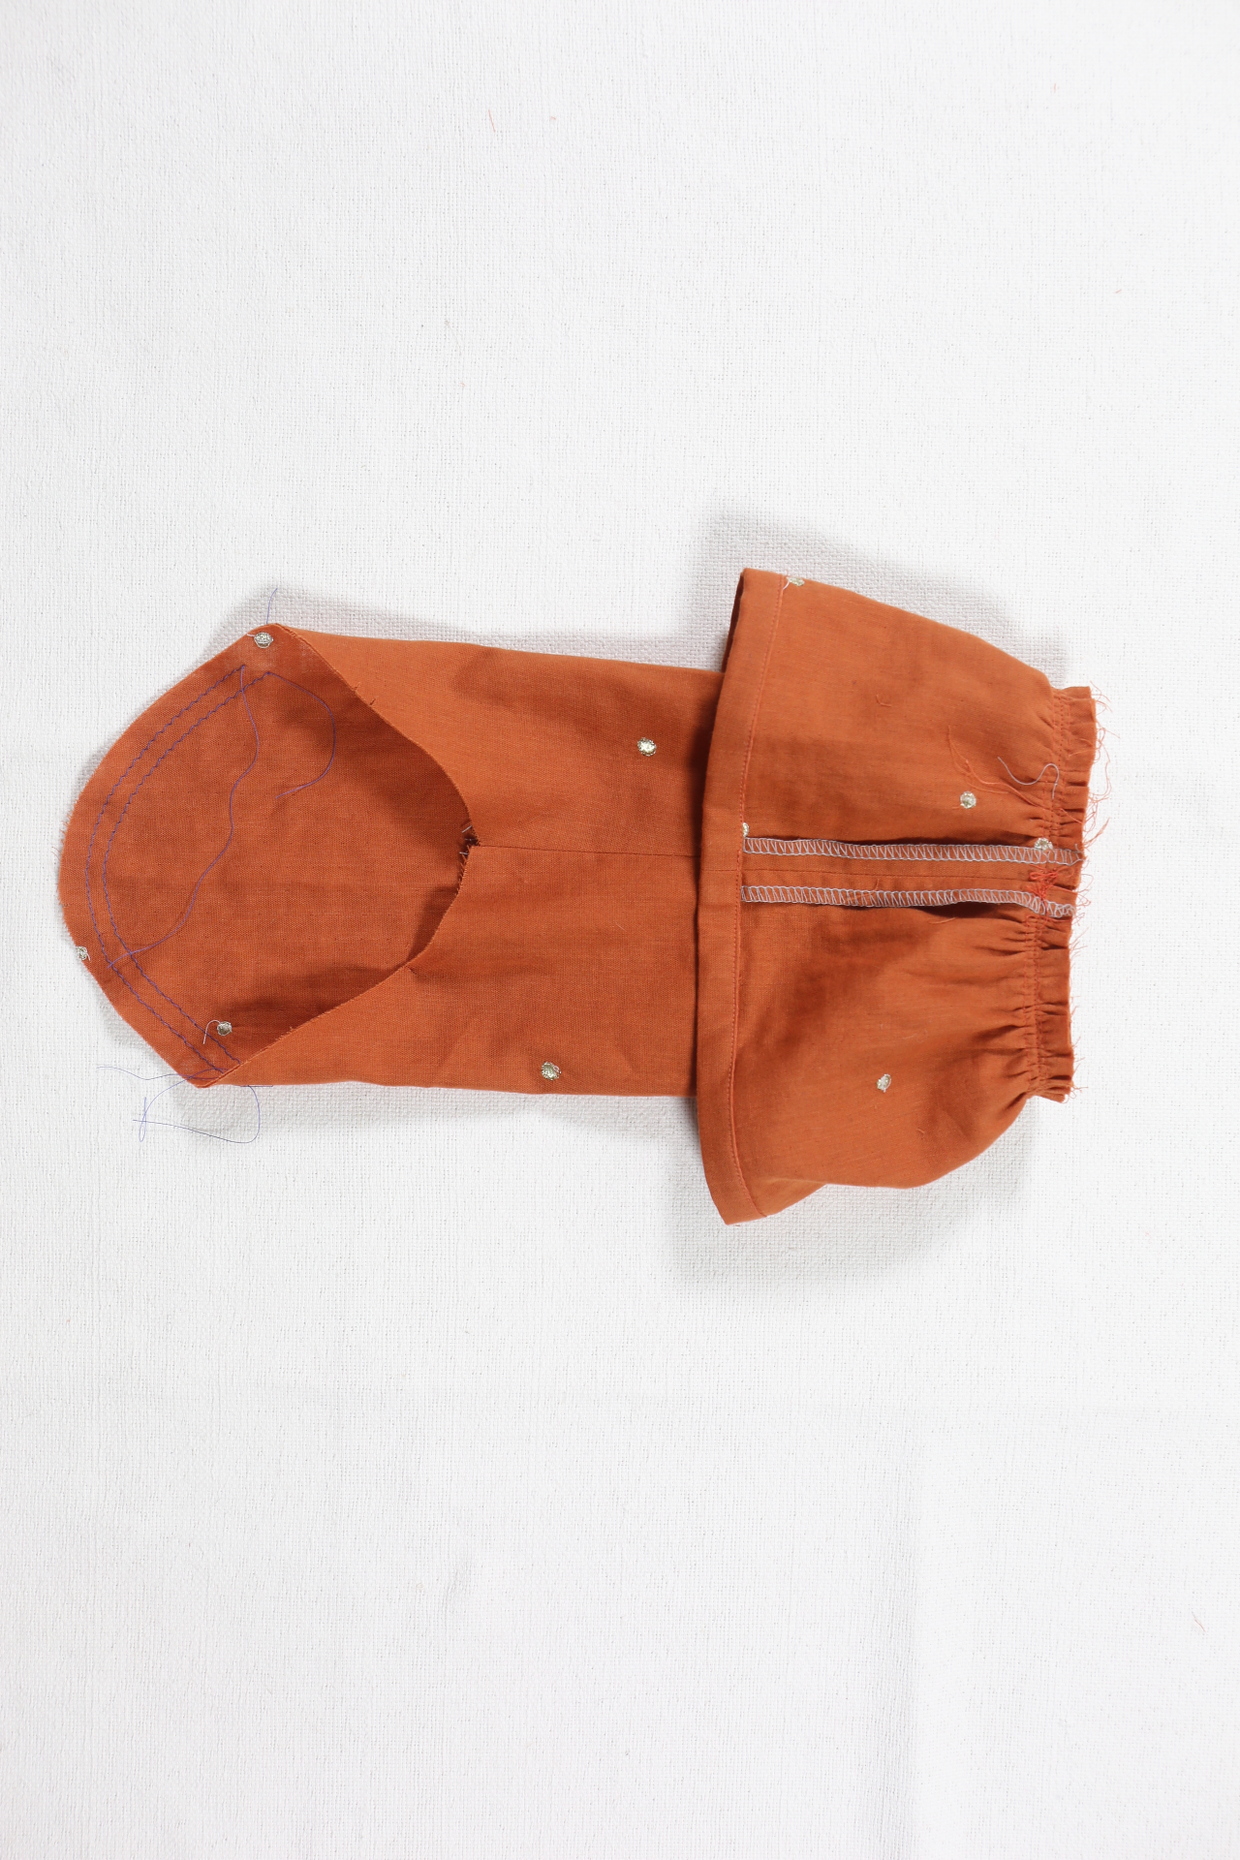
Sew the double welt pockets (view B)
From Liesl: Don’t be scared! I designed these welts to be incorporated with the pocket itself to keep things simple. Take it one step at a time and you’ll be surprised and how nicely they turn out.
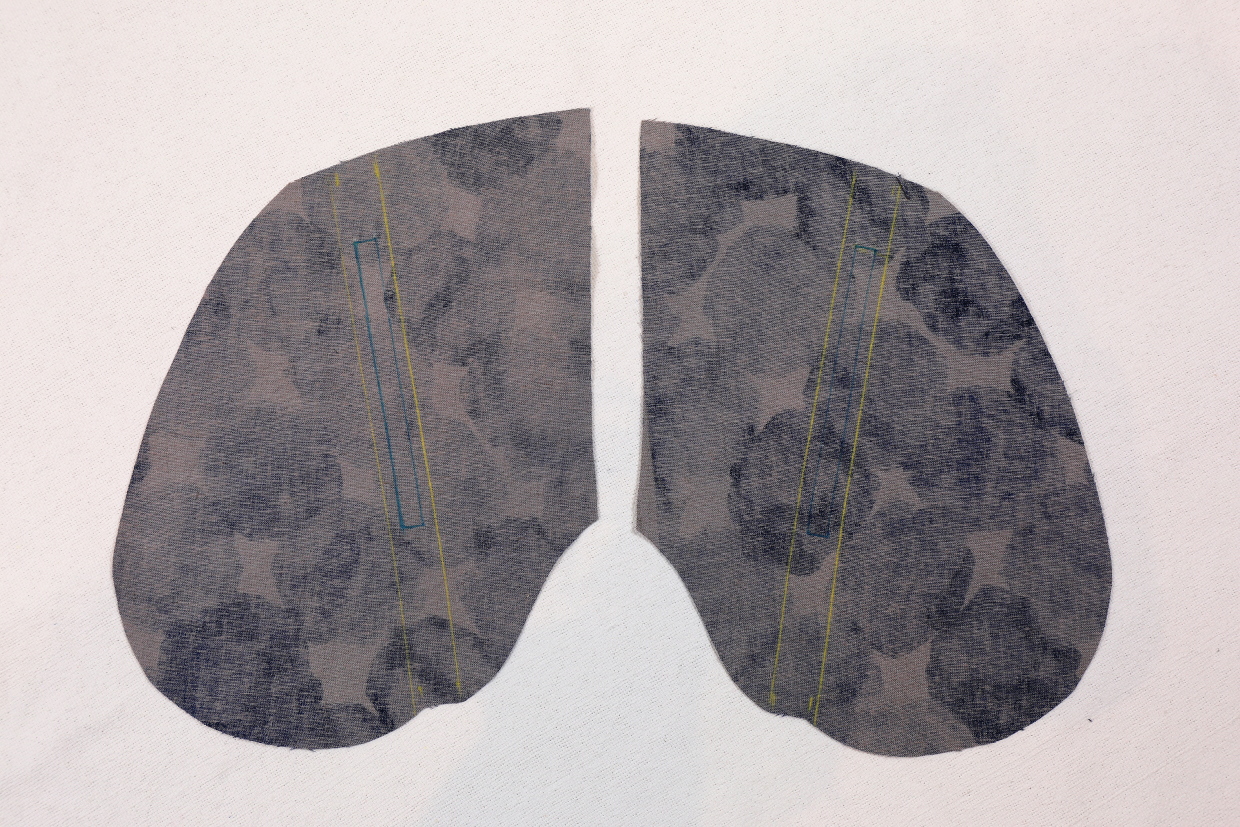
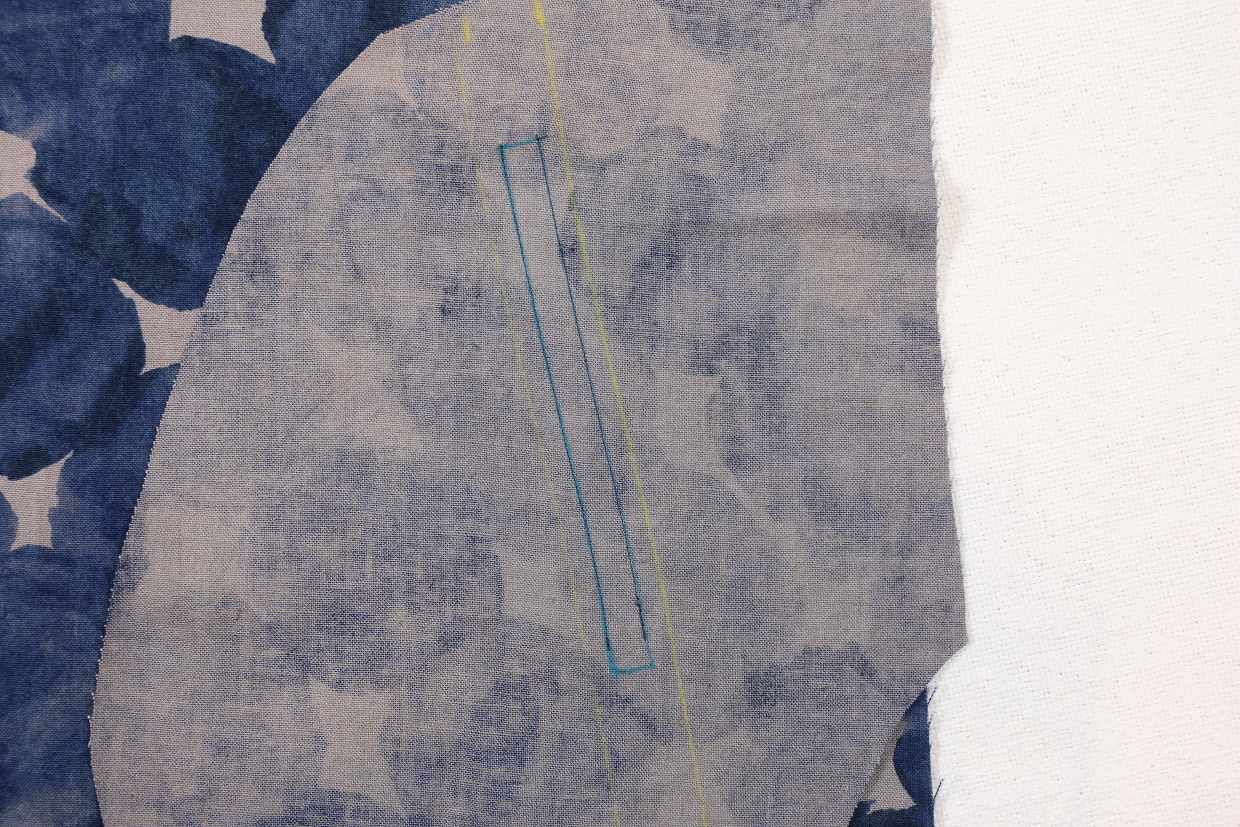
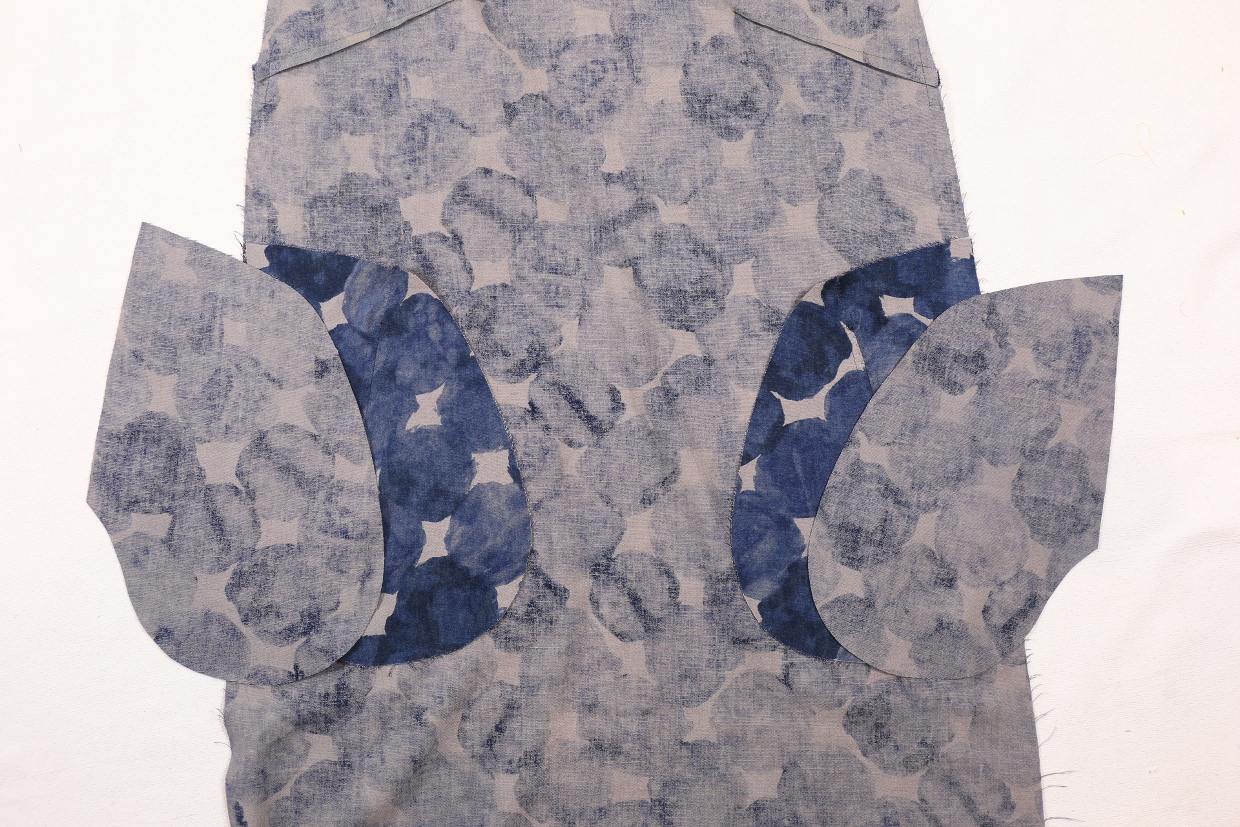
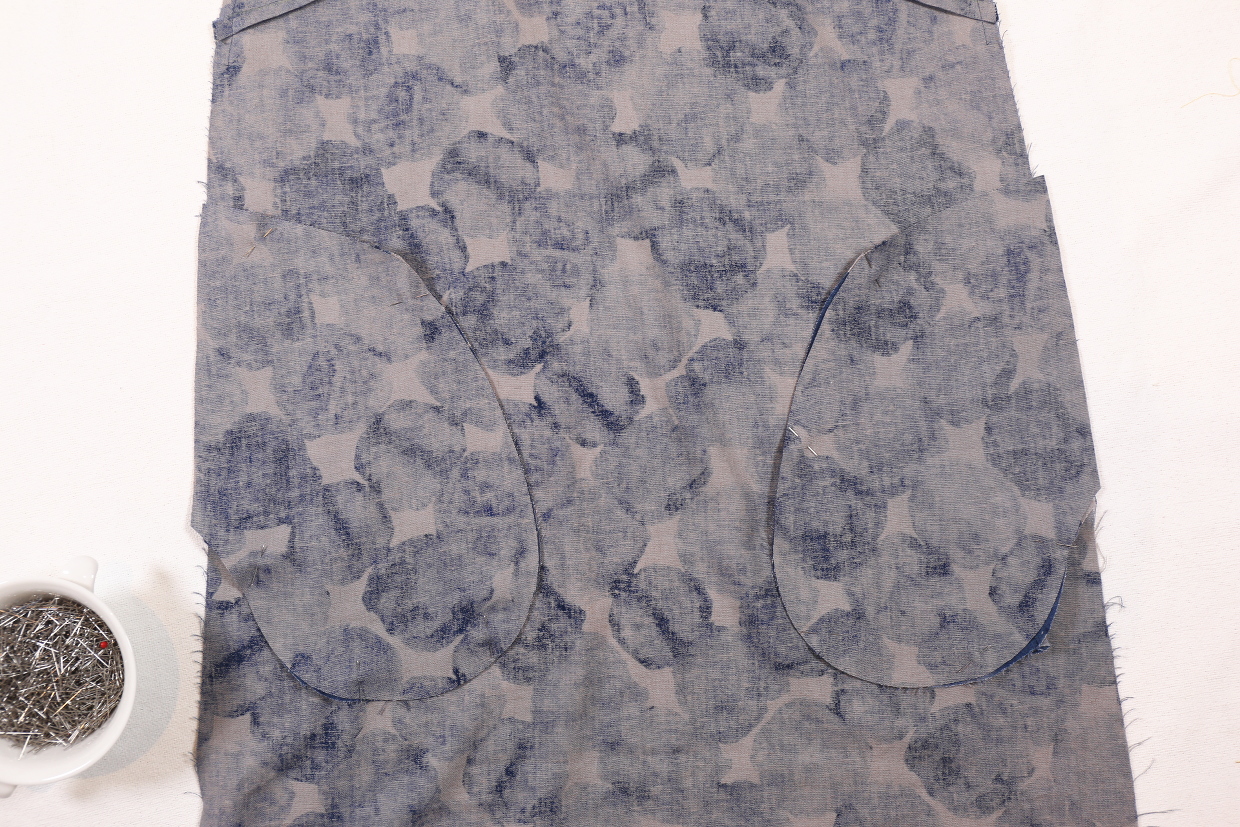
1) Fuse a 1” by 6 1/2” strip of interfacing to the wrong side of the dress front so it covers the welt pocket placement markings you transferred from the pattern piece. Using tailor’s chalk, a water-soluble fabric-marking pen, or a light pencil line, redraw the dots onto the interfacing, making a rectangle precisely 3/8” wide and 5 1/2” long. These lines will help you stitch the welt pocket, so make the rectangle as even and squared as possible. If you haven’t done so already, transfer the rectangle markings on the pocket-facing pattern piece to the wrong side of the pocket-facing piece as well.

2) With right sides together and matching the placement dots, pin the pocket facing to the dress from at the pocket marking. (HINT: To align each dot precisely, gently separate the layers of fabric and push a pin through a dot on the top layer of fabric and then guide it through the matching dot on the bottom layer of fabric before bringing the pin up through the top layer of fabric again.) Stitch only the long sides of the rectangle, stopping and backstitching or lockstitching precisely at the corners of the rectangle (that is, the dots) and backstitching or lockstitching at both ends.
From Liesl: Remember, you’re only stitching the long straight sides of the welts, not the ends. Be sure you backstitch or lockstitch precisely at the corners so your welts will be even at the ends.

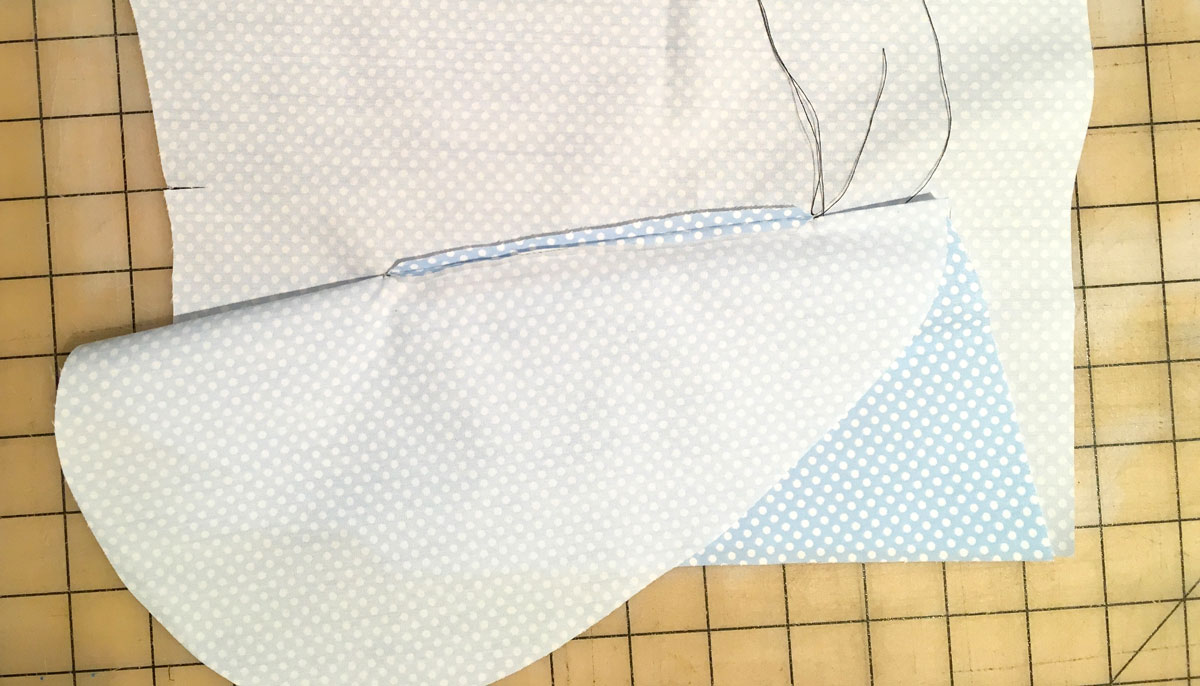
3) Cut a slit through both layers of fabric between the two stitching lines, cutting as precisely through the center as possible and stopping about 1/2” from the rectangle’s short ends. At the ends of the cut slit, clip through both layers to make a Y shape ending the clips as close as possible to the ends of the stitching lines without actually cutting into or beyond the stitching.


4) Reach in through the back of the opening you just cut and pull the pocket-facing piece to the wrong side of the dress. Once the pocket-facing piece is pulled to the wrong side you’ll have a rectangular-shaped opening in the dress front. Lift one side of the pocket-facing piece and press the stitched and cut seam allowances open, repeating with the other side in the same manner. As you press the seam allowances, press a crease into the rest of the pocket above and below the pocket opening as well.
From Liesl: There isn’t really much to see here, but the idea is that the pressed-open seam allowances will give a crisp edge to your welts. You’ll see in the next steps.
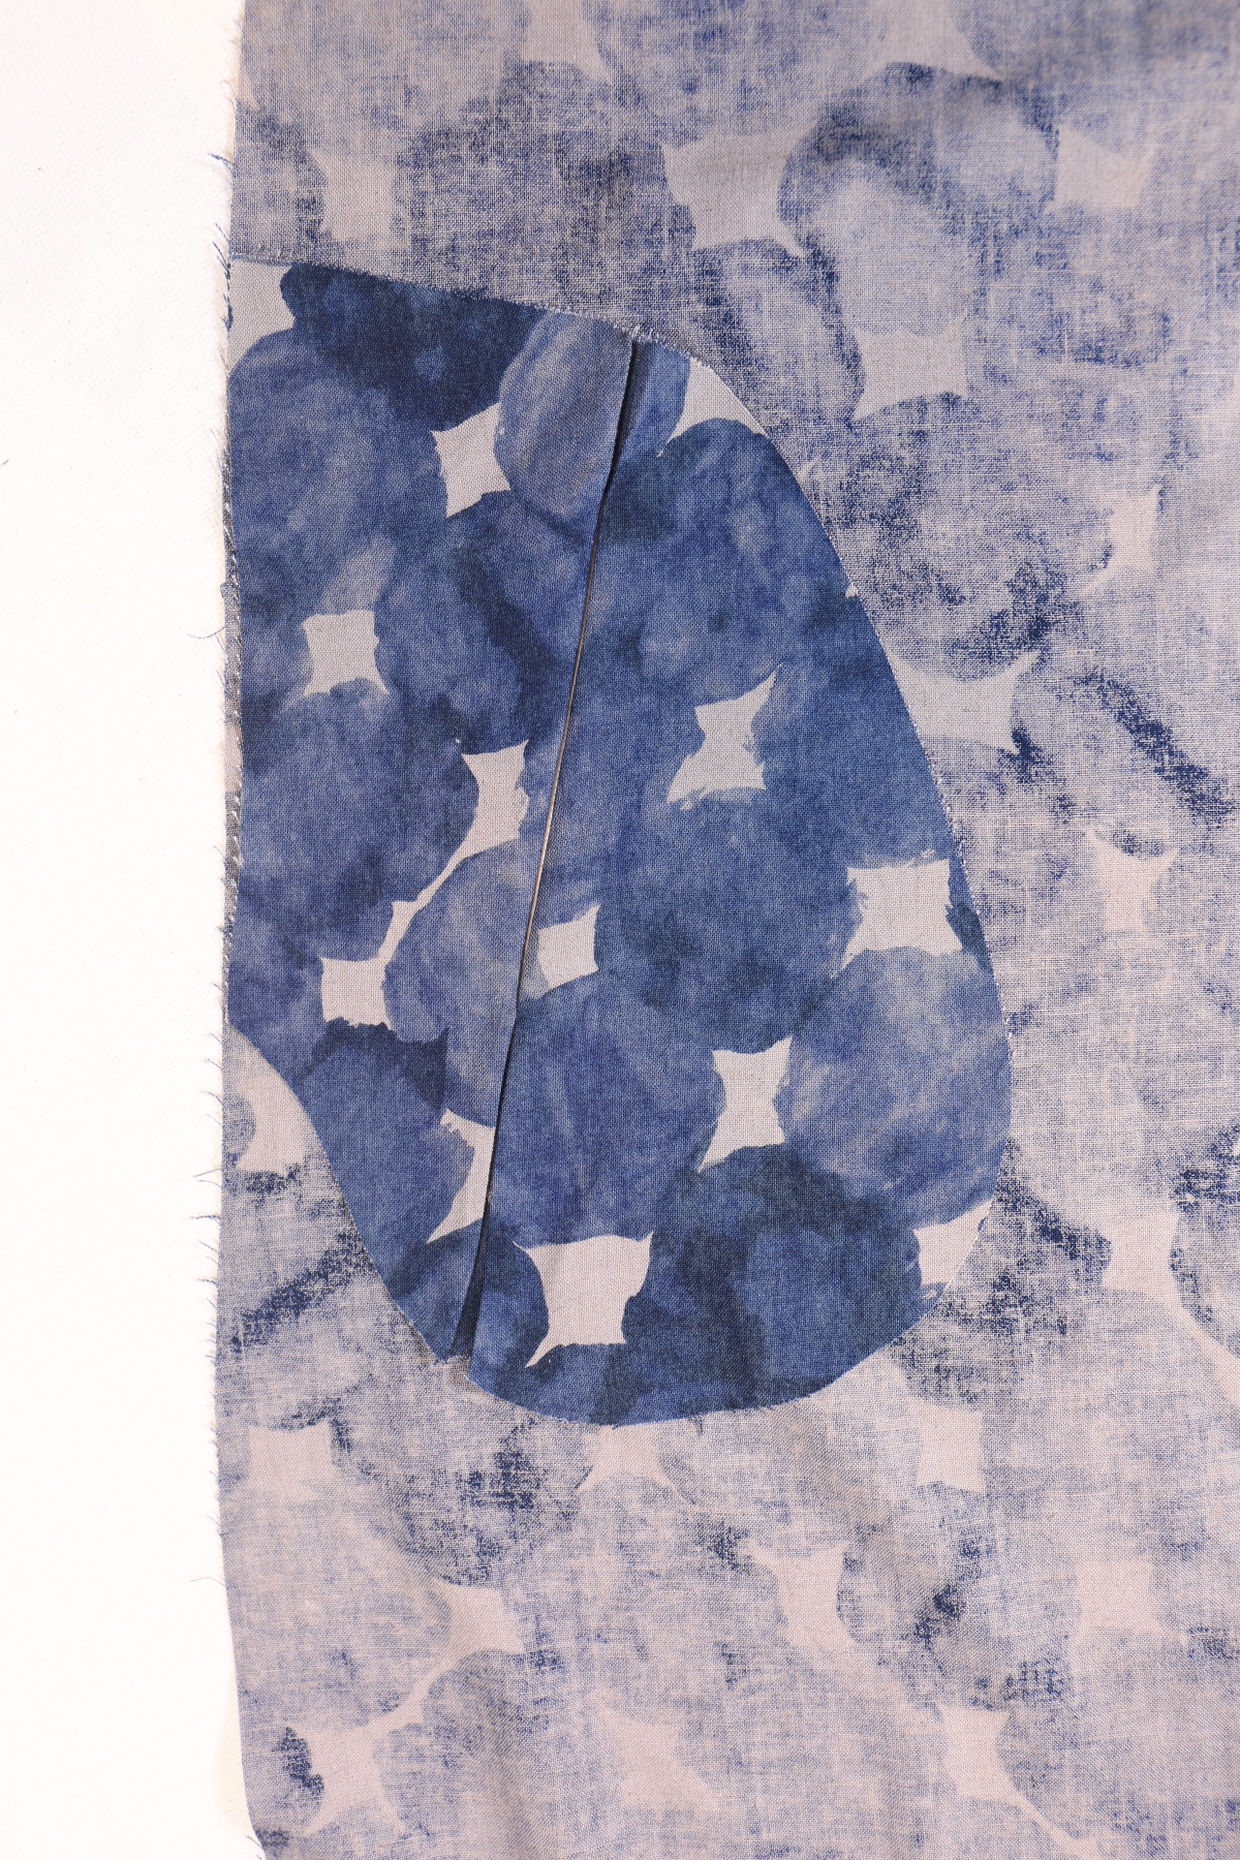
5) To create the pocket welts, fold each side of the pocket-facing back on itself to form a fold down the center of the opening you’ve made, making a crease at the center of the cut-out rectangle. The lines you transferred from the pattern piece can act as folding aids, but adjust the creases as needed. Take your time with this step, making sure that both folds meet in the center as precisely as you can. From the right side it will look rather impressive already at this point. Once you’re happy with your welts, pin or baste them in place temporarily. (I like to zigzag-baste them.) You’ll notice that a pleat has formed in your pocket fabric above and below the pocket openings, more or less along the lines you transferred. Press these folds an edgestitch or zigzag stitch them if you like, keeping them free from the dress fabric itself. (This stitching will keep the pleats flat and stitch folds won’t be noticeable in the finished pockets.)
From Liesl: Take your time here. It can be a bit fiddly, but the seam allowances you pressed open after you cut the opening can help you to get your welts just the right width since now you’re pressing the pocket fabric around them.
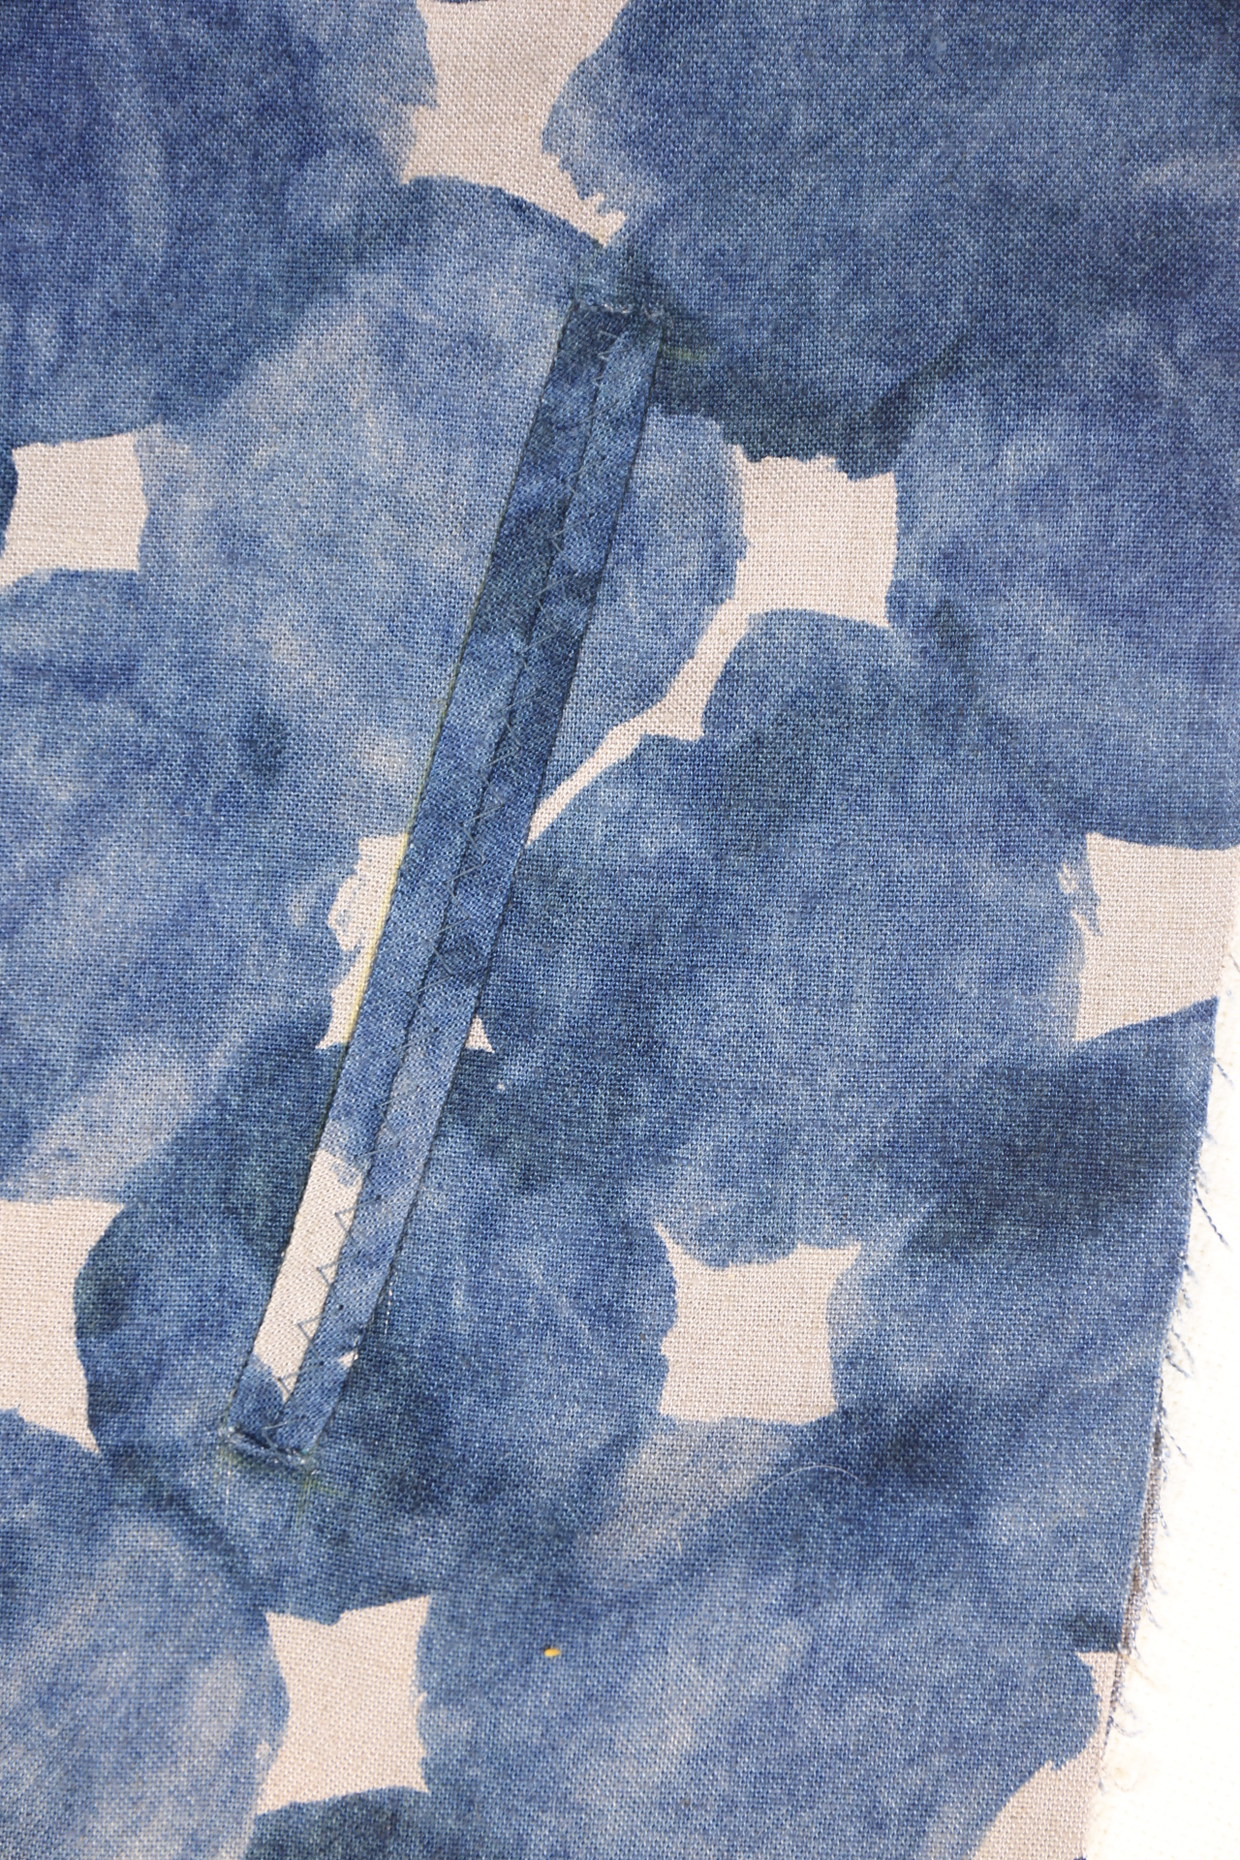
6) From the right side of the dress, fold the dress fabric away from one end of the welt as far as possible, exposing the little cut triangle at one end of the welt. Stitch the triangle to the pleated pocket facing piece as close to the welt opening as you can, backstitching or lockstitching at both ends. (You can even sew the triangle to the pocket facing with a little bit of a curve. The curve will help to give a perfect finish to the welt pocket edges.) Check the welt from the right side of the dress and stitch the triangle a little closer to the dress front if necessary. Repeat this step on the other end of the welt pocket to finish both ends. The more precise you can be, the better your finished pocket will look.

From Liesl: Here is another example of the corner stitching. This sample is from when I was developing the pattern, and the stitching is in contrast so you can see it better.
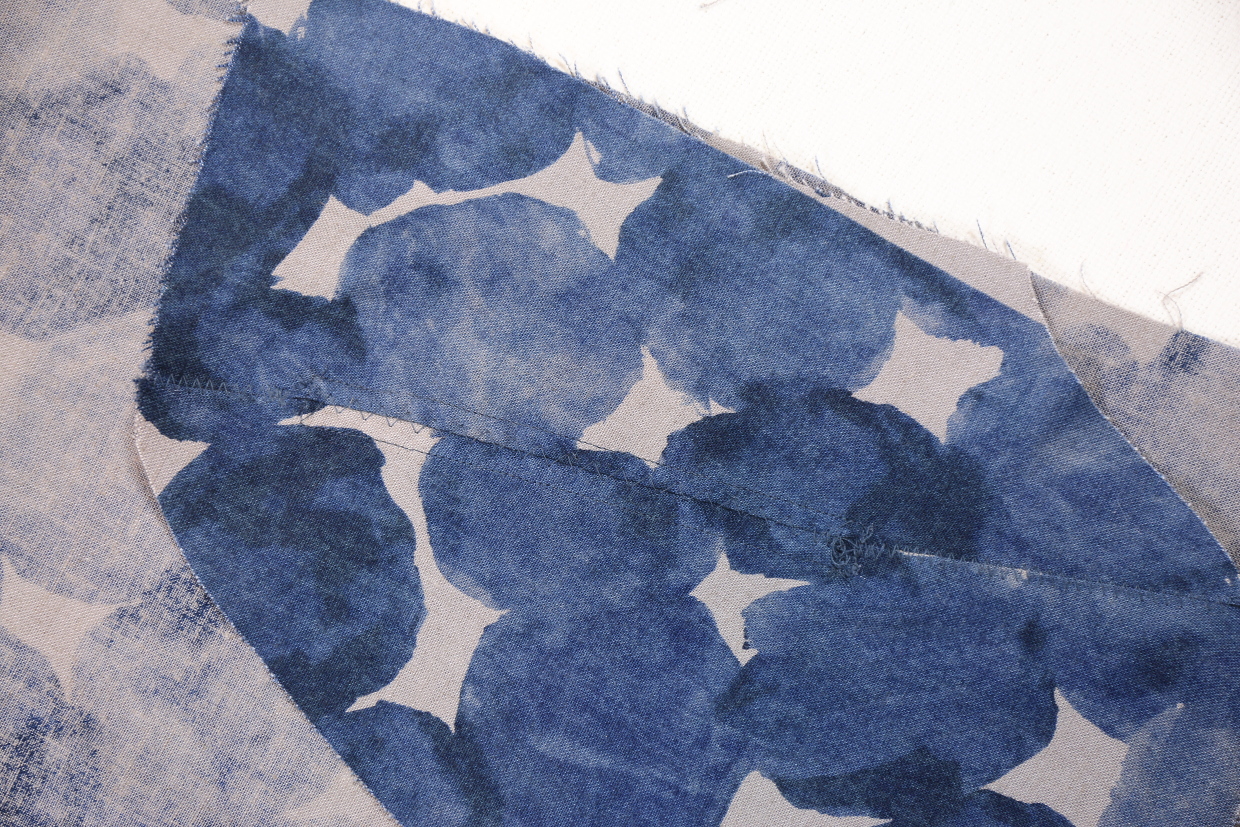
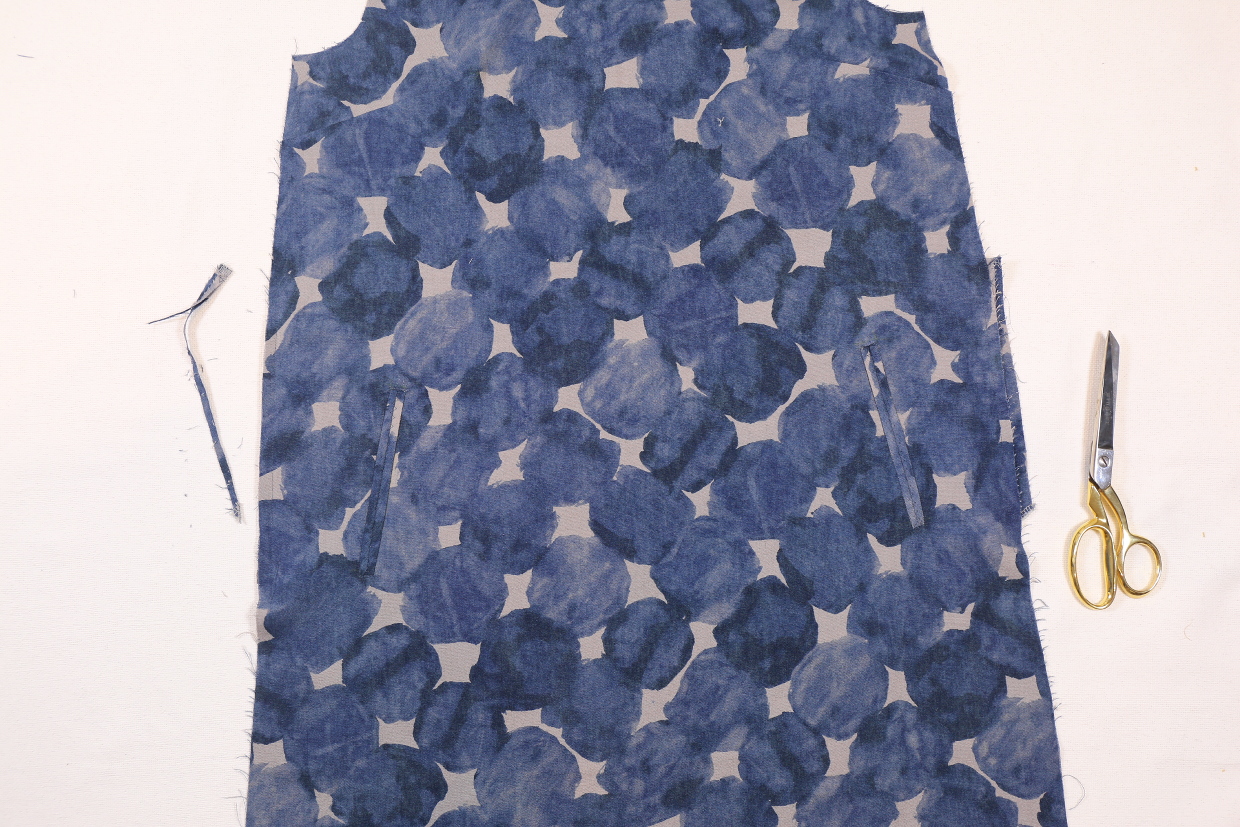
7) To finish the welt, edgestitch or stitch in the ditch (meaning stitch in the seamlines) along all four sides of the rectangular pocket opening to secure the welts and to stabilize the pocket.
From Liesl: In order for you to see what I mean, here’s a stitched sample with the stitching in contrast color so you can see it better. (And if you stitch more slowly that I did your stitching will be much neater!)

8) Turn the dress to the wrong side and pin the pocket bag to the pocket facing, with right sides of the pocket pieces together. (Remember that the pocket bag will show through the welt pocket opening, which is why the right sides of the two pockets need to be together here.) Stitch the pocket bag to the pocket facing with a 1/2” seam. If the edges of the two pockets pieces don’t match exactly here or if the pocket extends beyond the side edge a bit, don’t worry. Just trim them to be even.
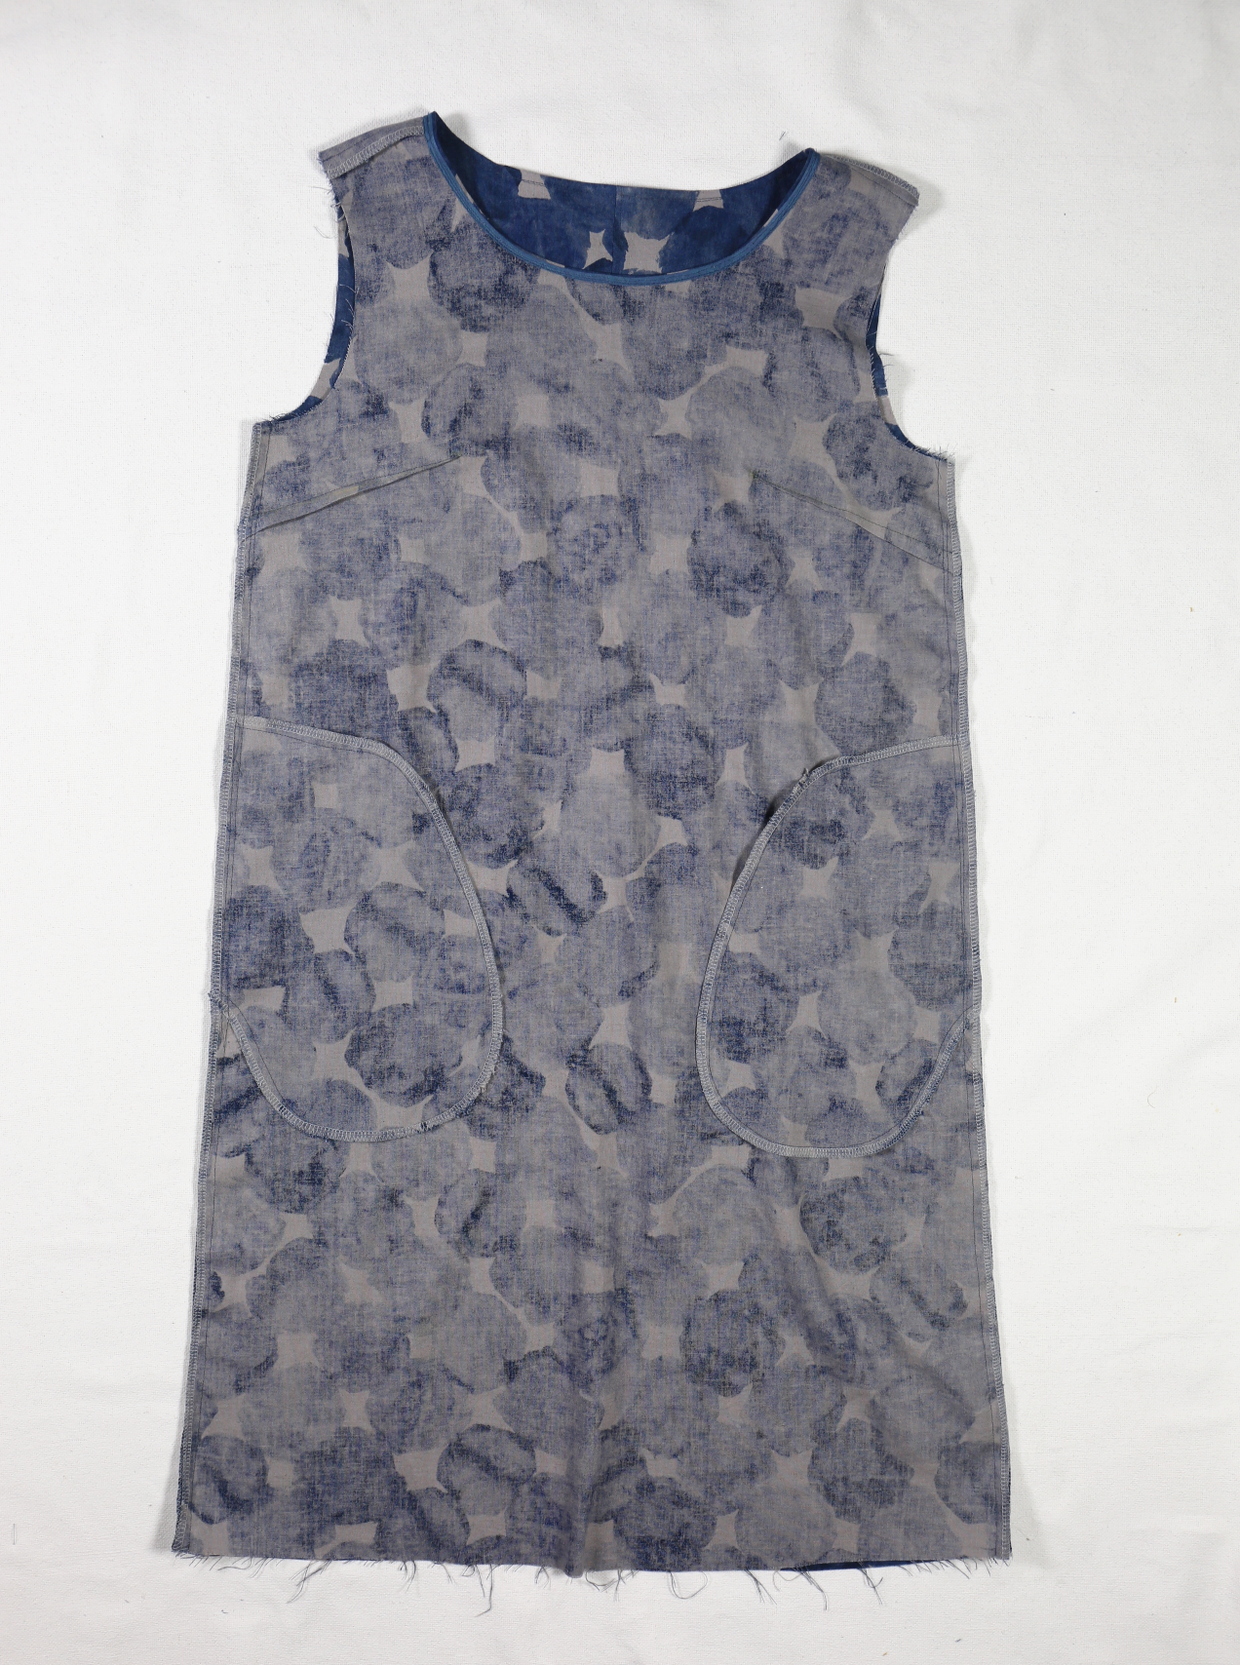
9) Finish the curved seam allowances of the pocket using your preferred method. Baste the unstitched outer edge of the finished pocket to the side edge of the dress with a 3/8” seam.

10) Repeat steps 1-9 to stitch the second pocket on the other side of the dress front.
From Liesl: And that’s it! A day full of stitching adventure, especially if you’ve never sewn a double-welt pocket. And it’s not so difficult, is it? Let’s move on to the next set of steps.
Day 2
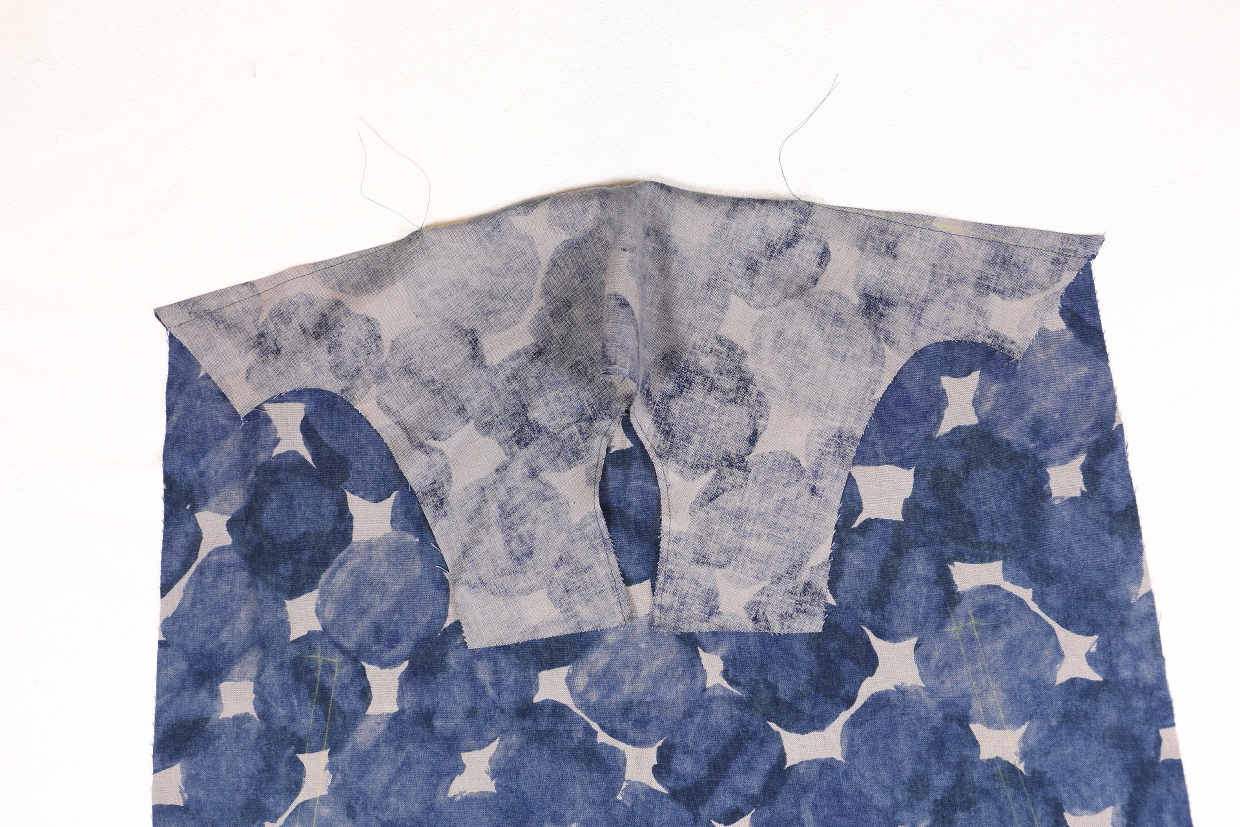
Finish the shoulders, the neckline, and the side seams
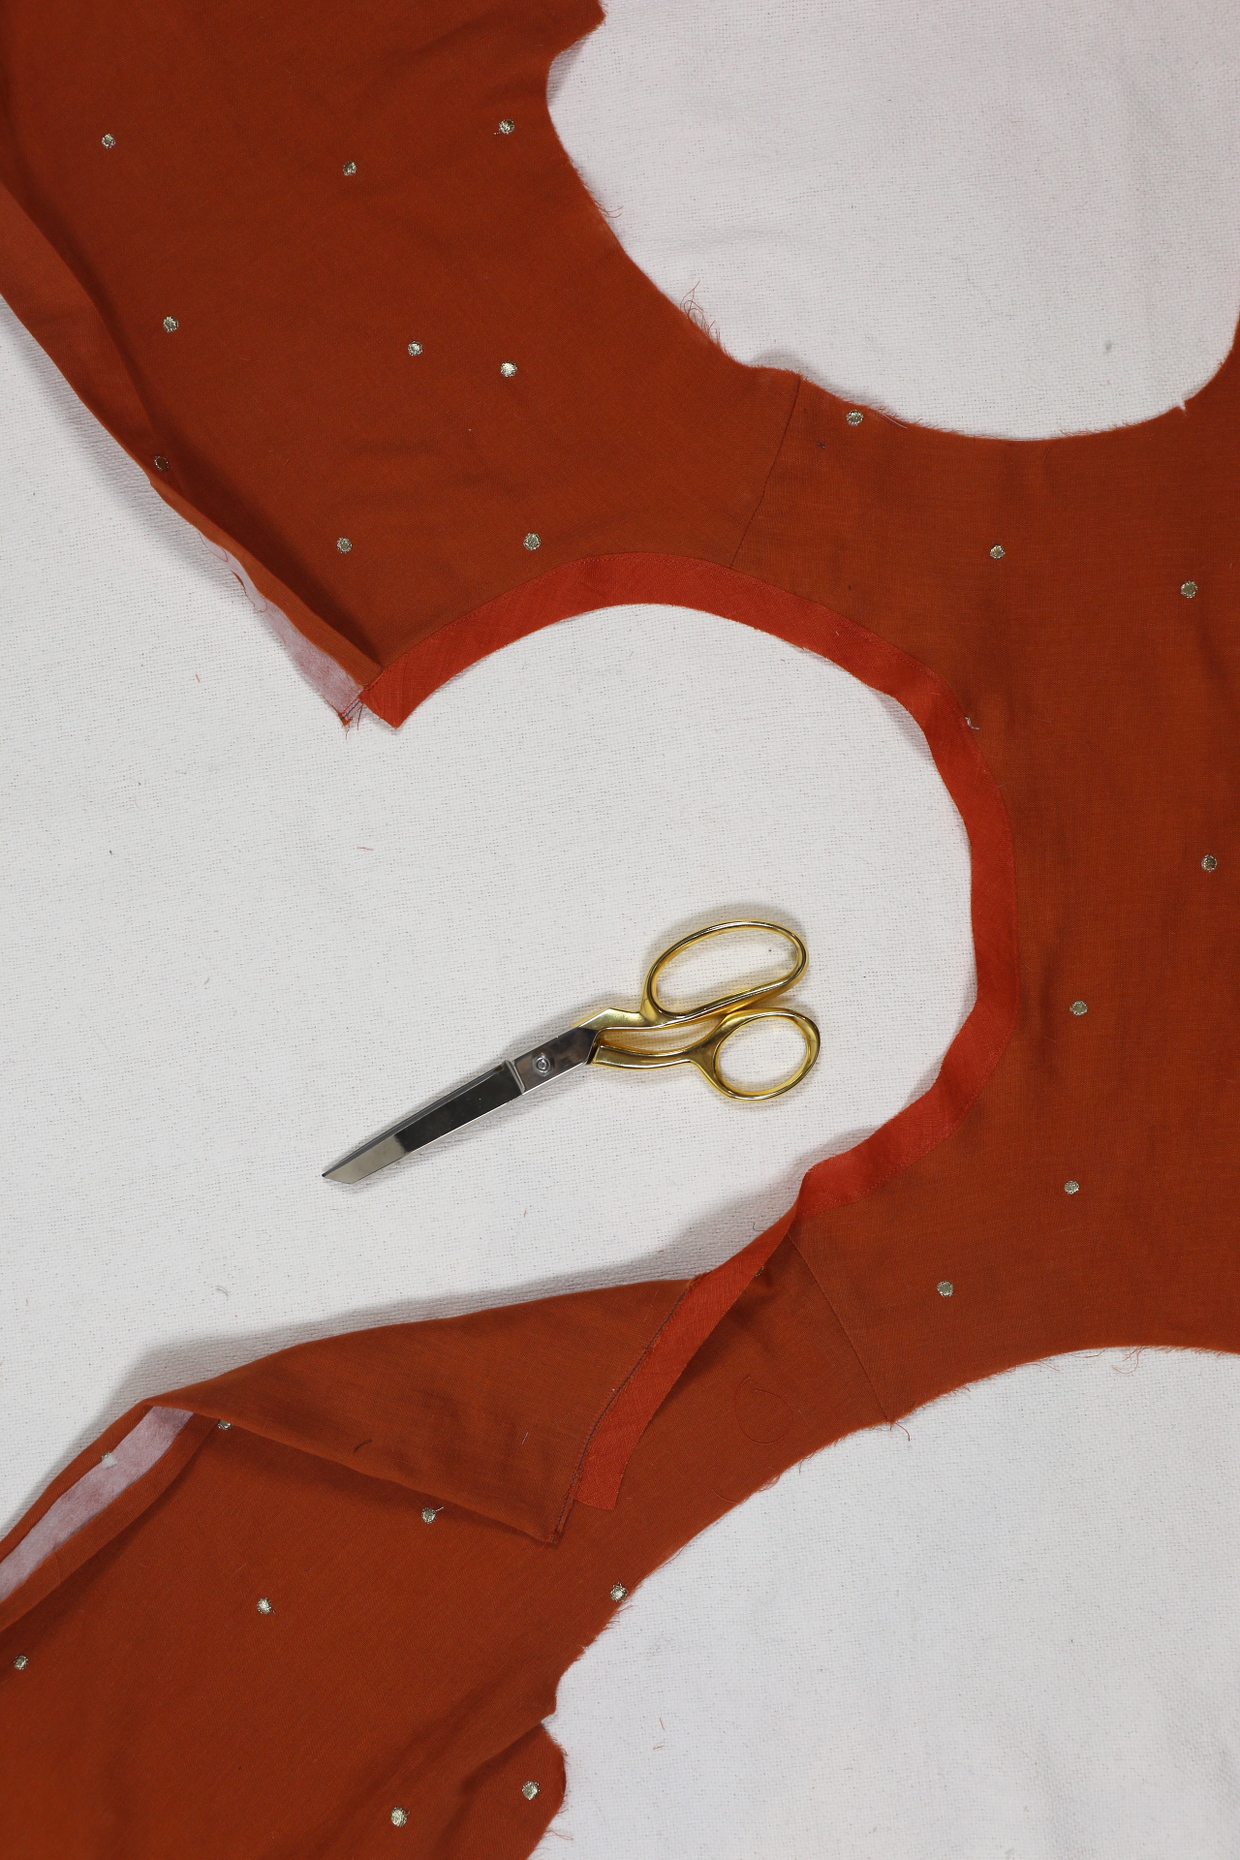
1) Pin the blouse/dress front and back together at the shoulders with right sides together, matching the edges and the notches. Stitch the shoulders with a 1/2” seam, backstitching or lockstitching at both ends. Note that because the pattern has a slightly forward shoulder seam, the back armhole will be longer than the front armhole. Press the seam allowances open and finish them using your preferred method.

2) For View A, refold the back seam allowance of one blouse-back piece to the wrong side by 1/2” along the previously creased fold. (You creased this line in Step 2 of the “Prepare the Back Placket” section.) Next fold the button placket by 1 1/4”, but this time fold it so the right side of the placket faces the right side of the blouse. Pin the button placket to the blouse so it will be held in place when you attach the bias facing to finish the neckline. Repeat this step to fold and pin the button placket on the opposite back edge as well.

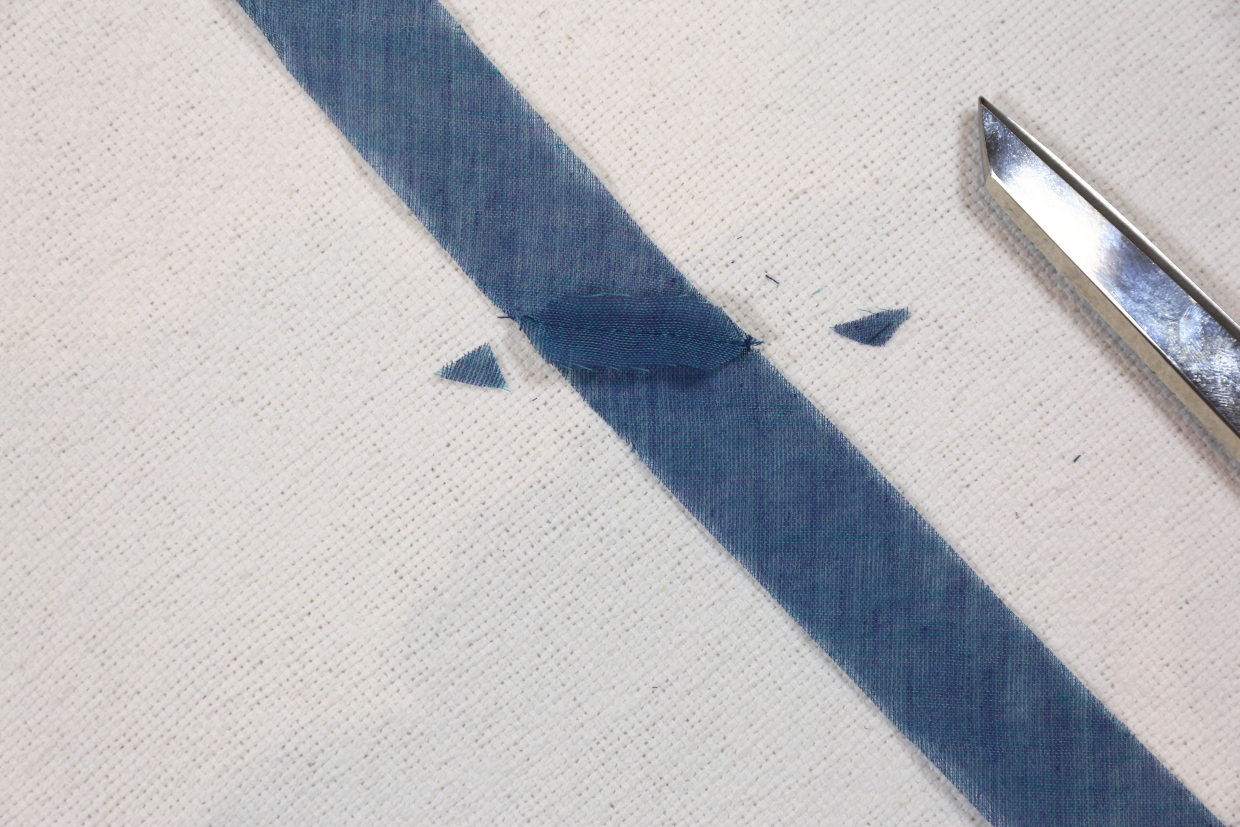
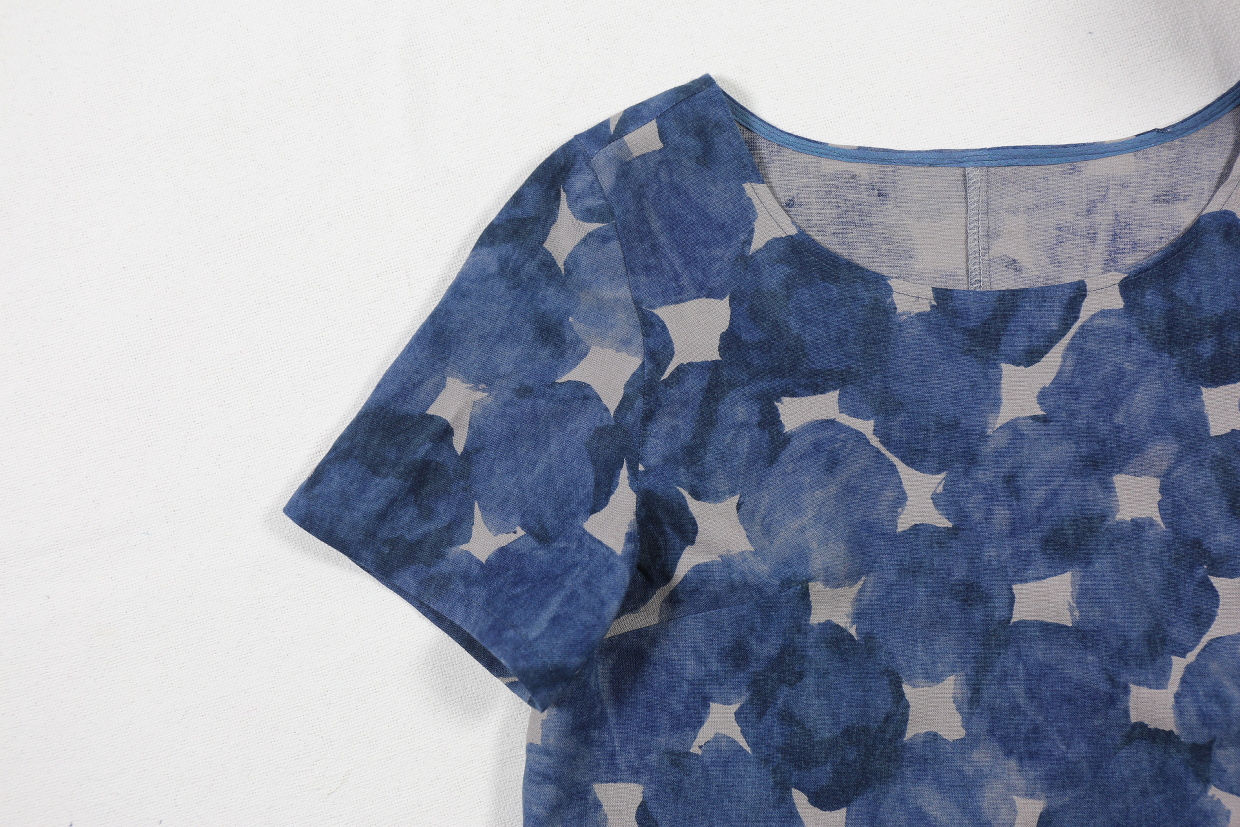
3) For View B, pin the two ends of the bias neck facing with right sides together, matching the dots and pinning at an angle to make one long bias loop. Stitch the ends with a 1/4” seam, backstitching or lockstitching at each end. Press the seam allowances open and trim off the excess fabric triangles.

4) Pin the neck facing to the right side of the neckline with raw edges aligned.
For View A, begin by pinning the center notch of the neck facing to the center notch of the neckline. Continue to pin as you work your way around the neckline, pinning the edge of the neck facing to the neckline without stretching it. When you reach the button placket, pin one end of the neck facing to cover the pinned-back seam allowances on the button placket (3/4” inside the folded edge of the button placket) and trim any extra that extends beyond the folded seam allowance. Pin the opposite edge of the neck facing all the way around the other side of the neckline in the same way, so the bias strip covers the pinned-back seam allowances of the opposite button placket (again 3/4” in from the folded center-back edge). You should be trimming about 3/4” from each end. Once you’ve pinned the bias facing, stitch it to the neckline with a 1/4” seam, stitching directly across the entire folded placket to finish the top edges of the button placket in the process and backstitching or lockstitching at both ends.
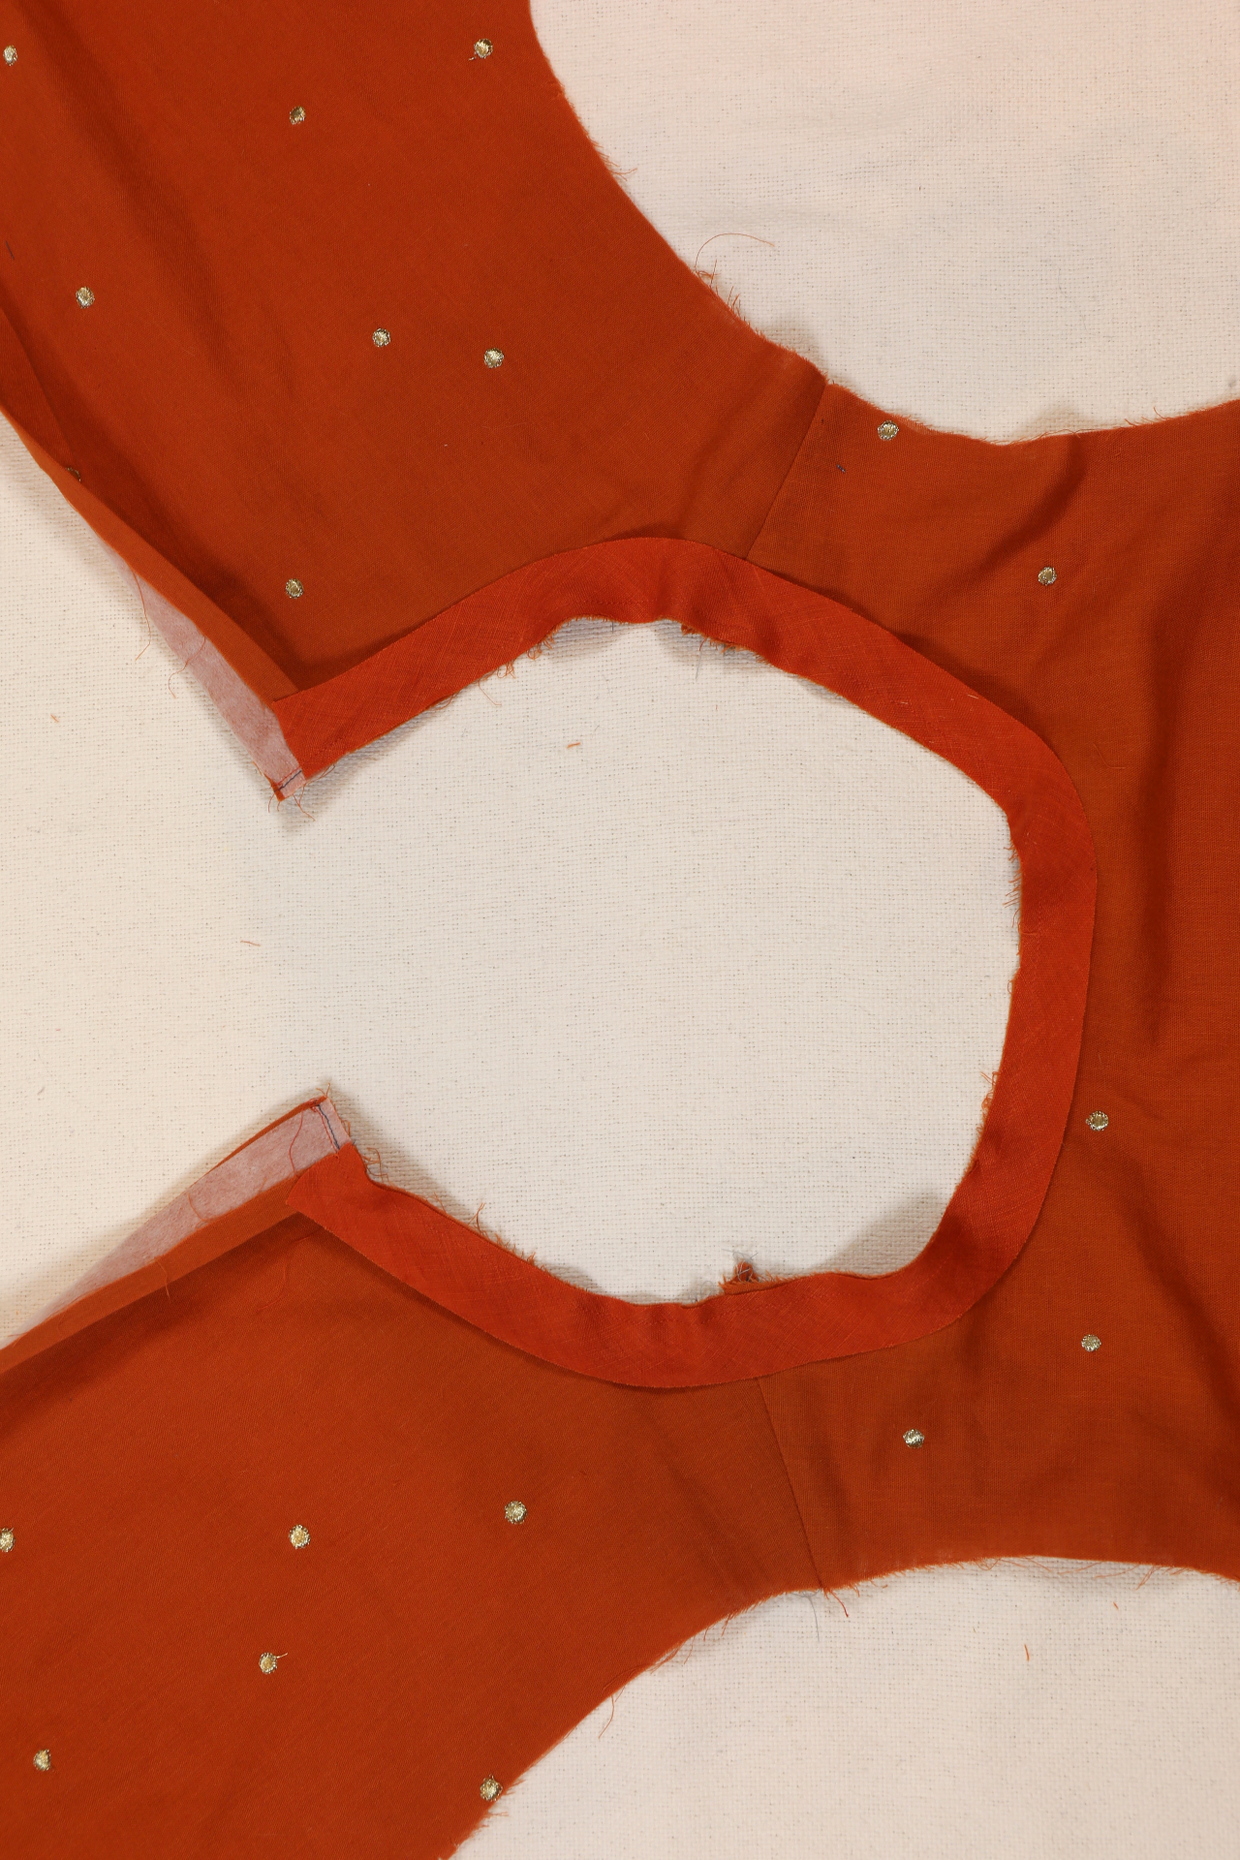
For View B, pin the right side of the bias neck facing to the right side of the neckline, matching the seam to the center back and the notch to the center front. Then pin the facing evenly around the neckline, taking care not to stretch the neck facing. Once you’ve pinned the bias facing stitch it to the neckline with a 1/4” seam, backstitching or lockstitching at both ends.
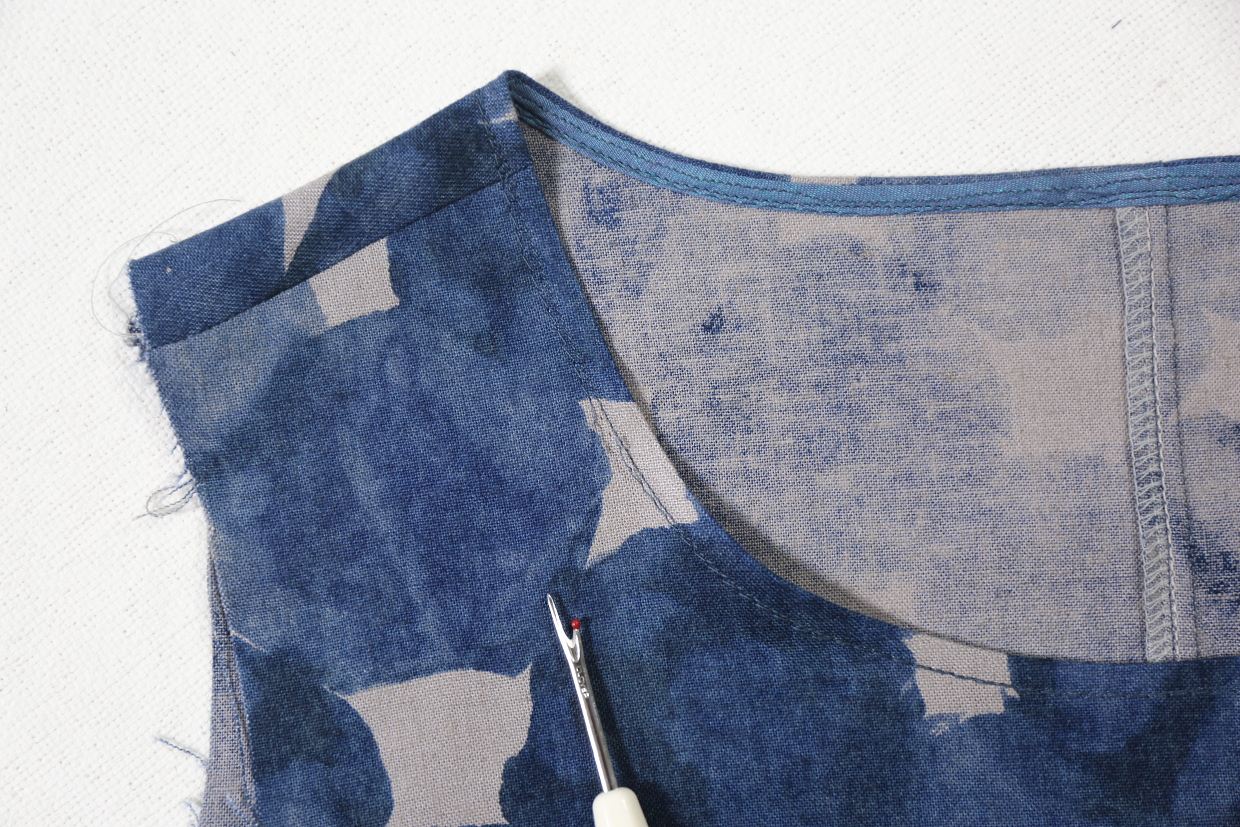
5) Trim the stitched neckline seam allowances to 1/8” and press the facing toward the seam allowances, away from the neckline. Understitch (or edgestitch) the bias neck facing as close as you can manage (1/16” is ideal, but a narrow 1/8” is OK too, as long as you catch the seam allowances in your stitches). Try to sew as evenly as possible so the inside of the neckline will look neat.
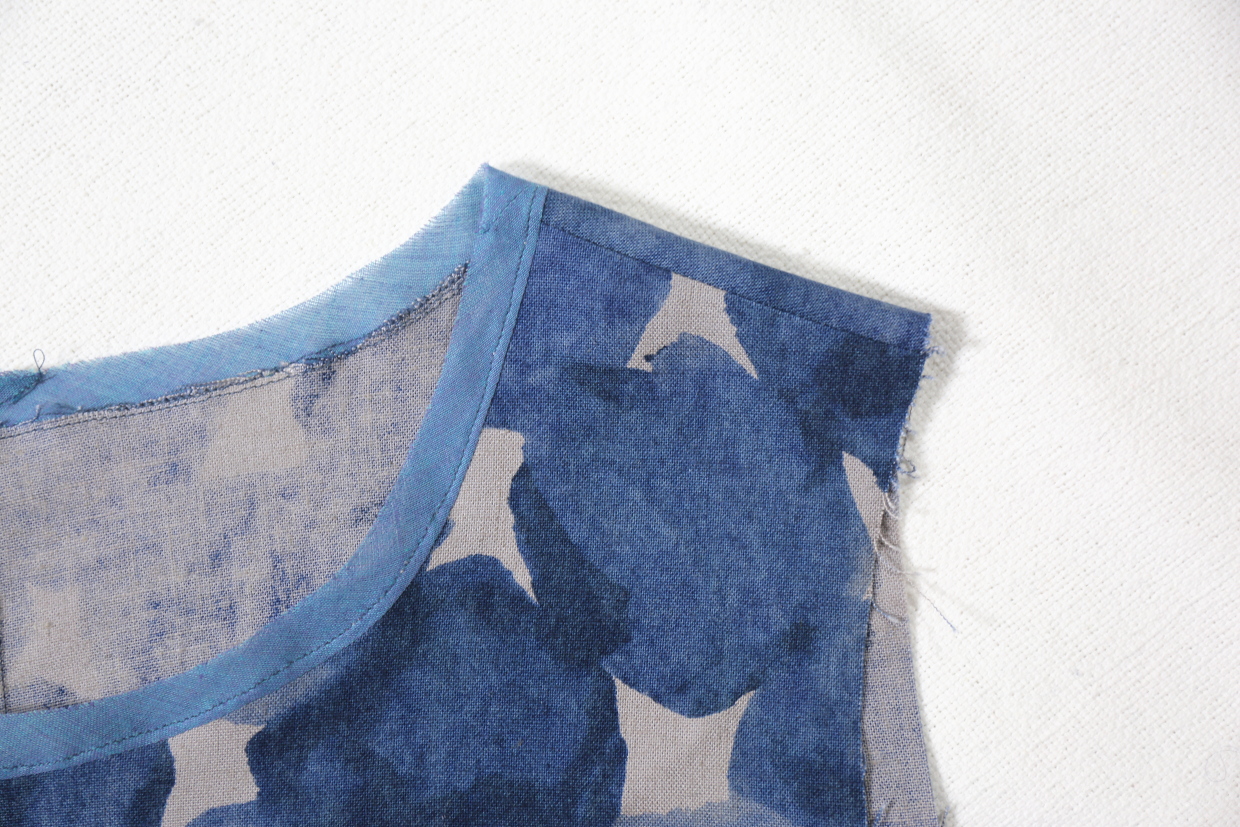
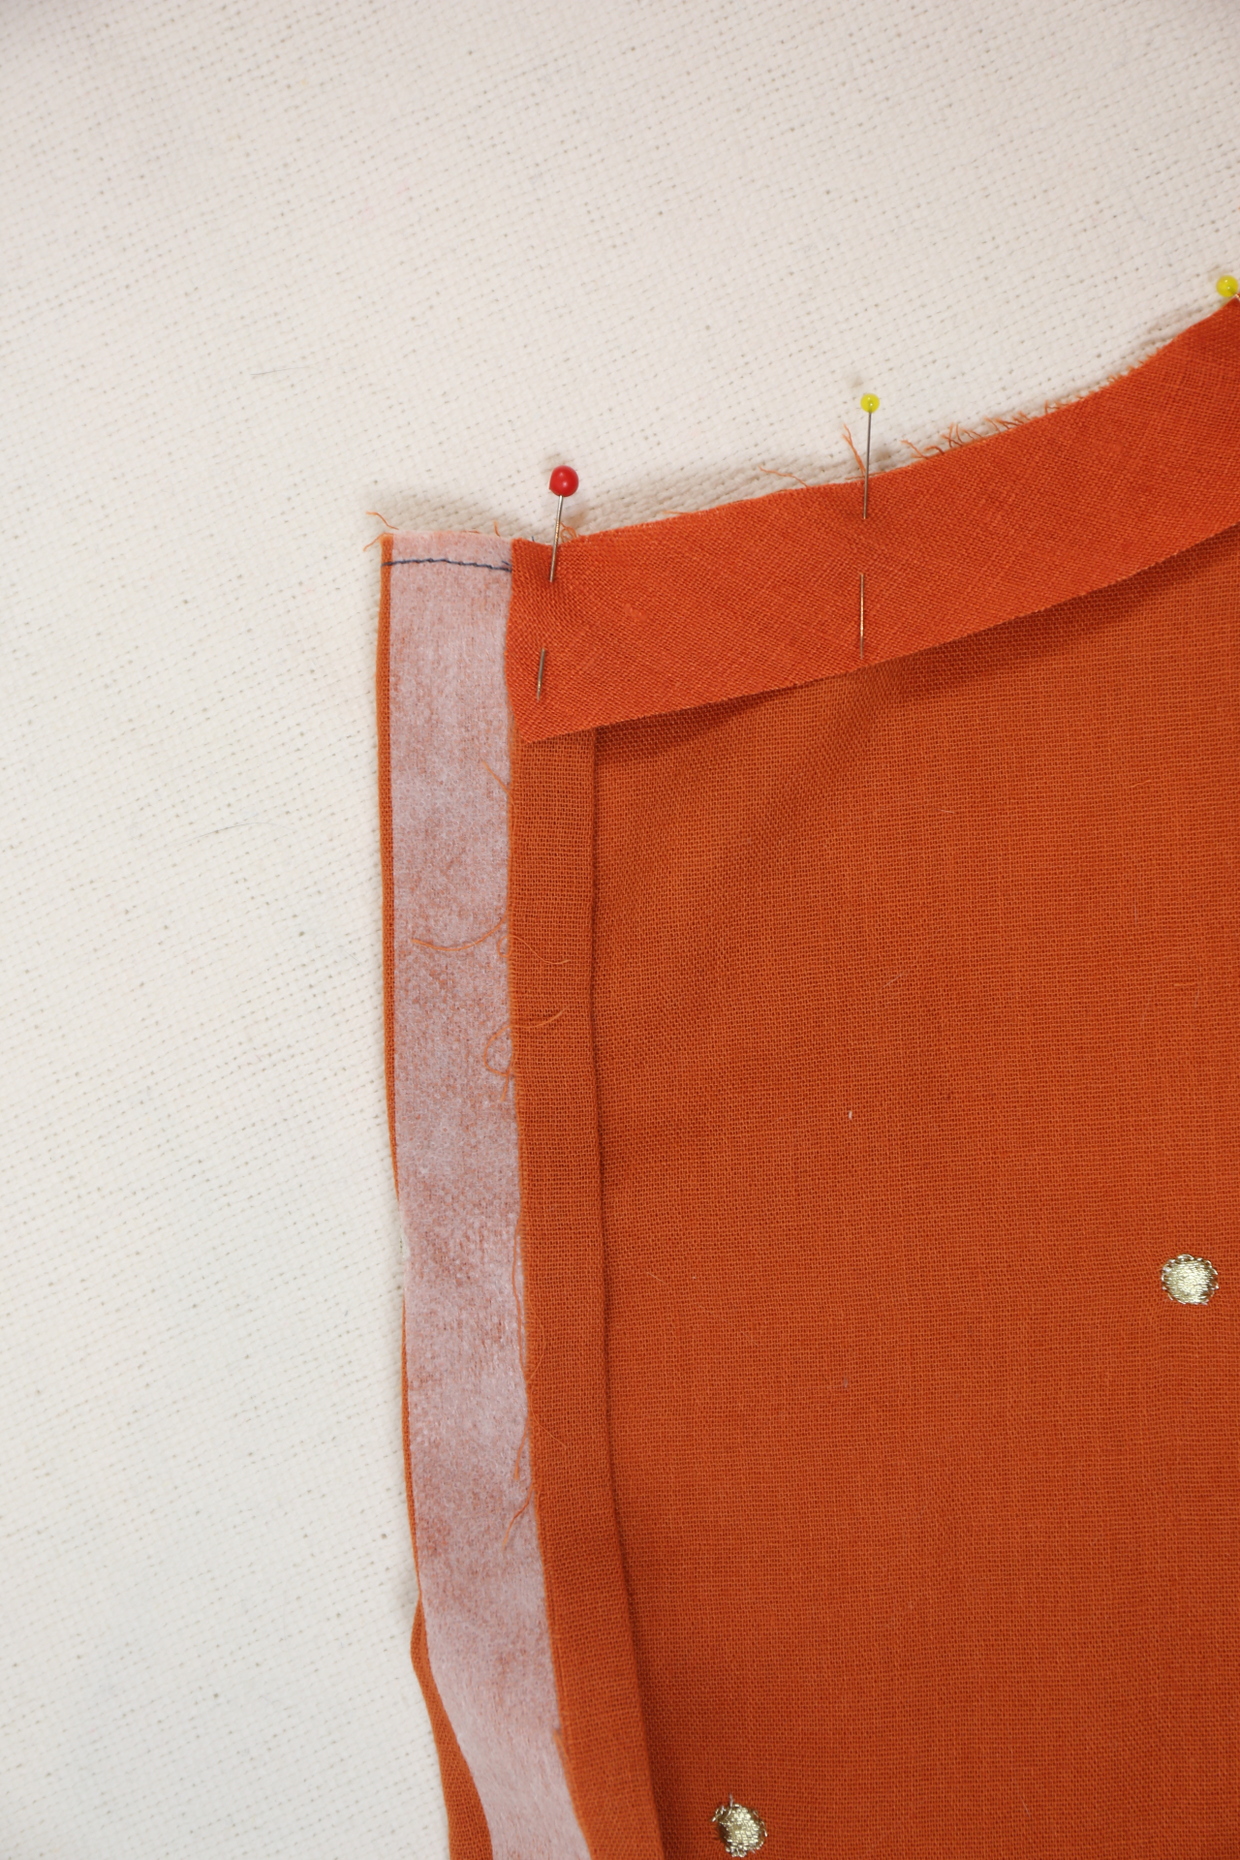
6) Working from the wrong side of the neckline, fold and press the long unsewn cut edge of the bias facing to meet either the neckline seam or the under stitching if you prefer the bias facing to be a bit wider.
From Liesl: Different fabrics can respond differently here. Some fabrics will get very narrow when you fold them, in which case don’t fold all the way to the neckline stitching so you have a wider facing to work with. Sometimes I fold only to the trimmed seam allowances if the fabric is being all tricky and finicky.

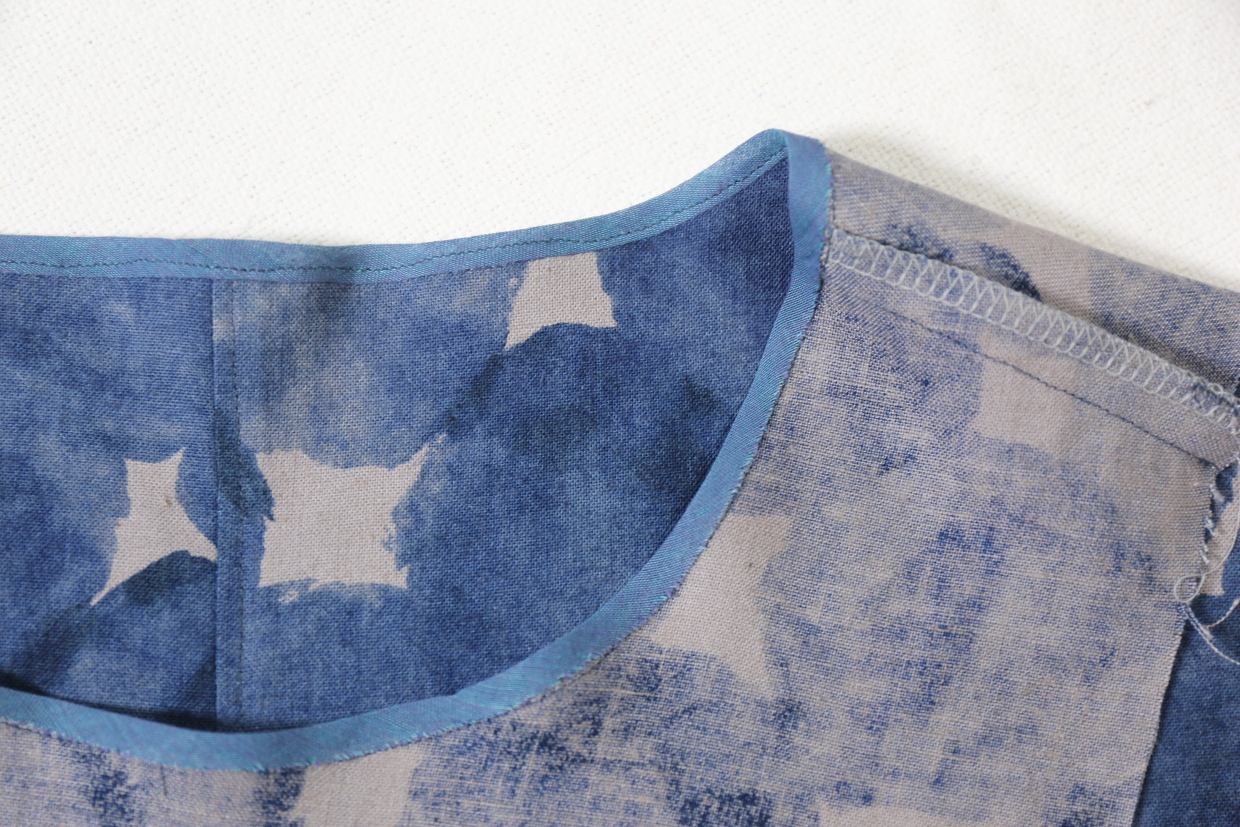
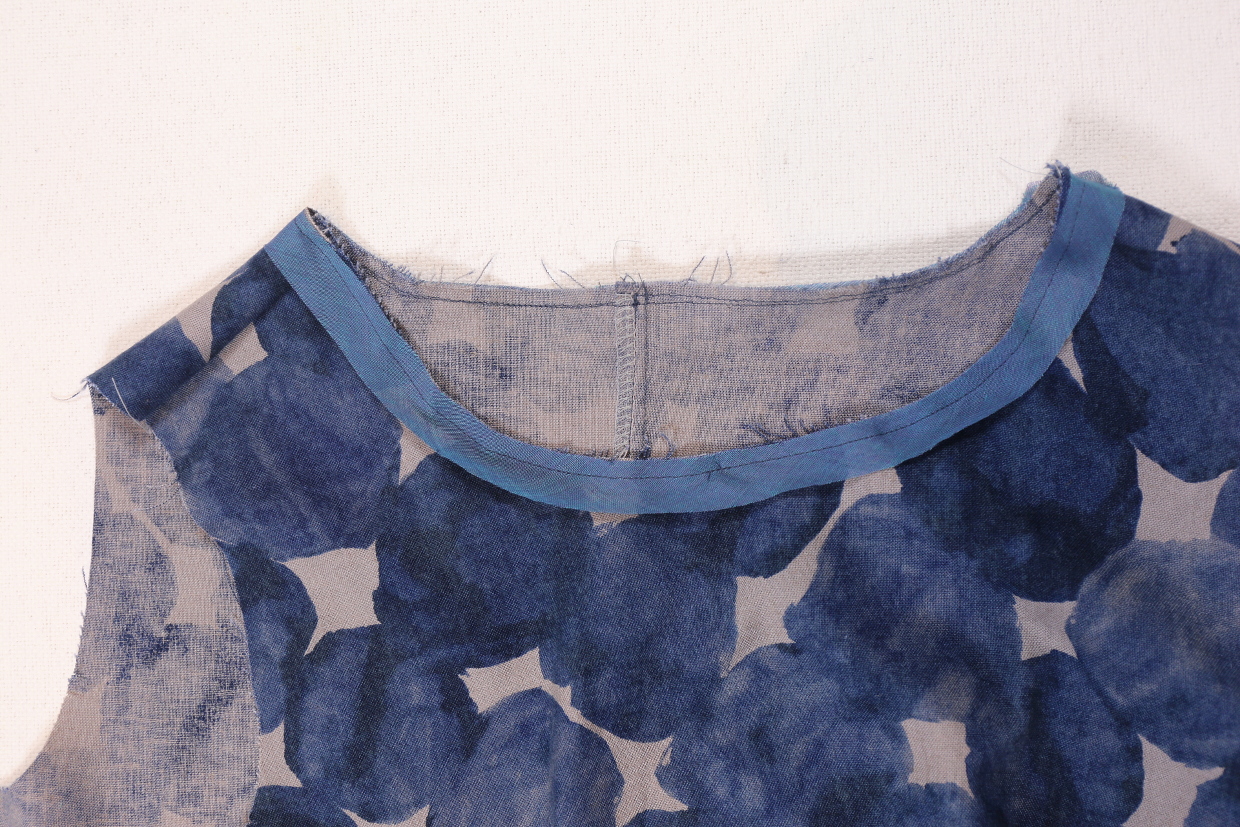
7) Fold and press the bias facing again, this time turning the entire facing to the inside of the blouse/dress, rolling the seam slightly to the inside of the neckline so it won’t show when the garment is worn. For View A, turn the button plackets right-side out and press the top of the placket at the neckline. The button plackets will cover the ends of the bias facing. For both views, baste the innermost folded edge of the facing to the blouse/dress from the inside so you can stitch as close as possible to the fold. Once you’ve basted, turn the neckline to the right side and topstitch the neckline to finish it, using the basting stitches as a stitching guide. You’ll be stitching approximately 1/4-3/8” from the neckline edge, depending on how much you rolled the neck seam to the inside. Once you’ve topstitched you can remove the basting stitches.
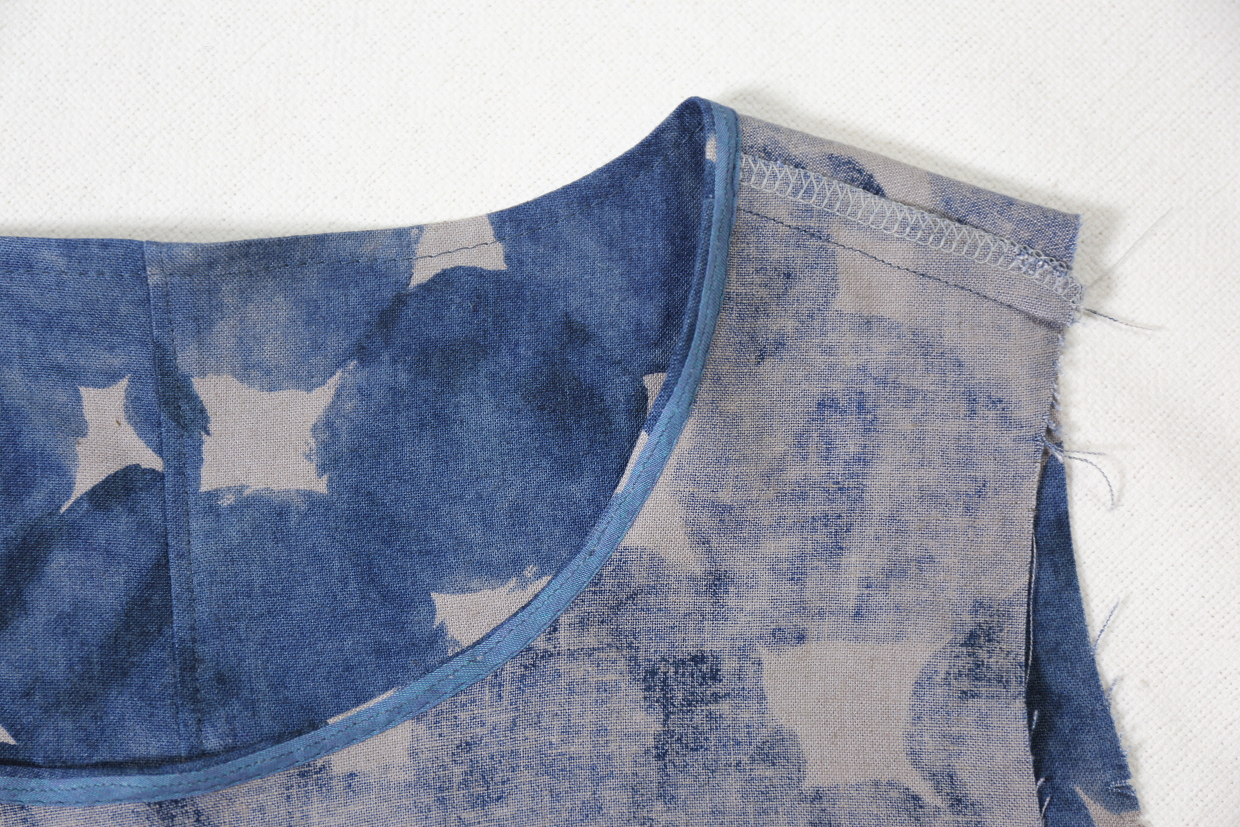
From Liesl: Can you see my basting and topstitching here? You might want to use a contrast color for your basting so it’s easy to identify and remove later.
8) Pin the bodice-front and bodice-back pieces together with right sides facing and side edges aligned. Stitch the side seams with a 1/2” seam, backstitching or lockstitching at both ends. Press the seam allowances open and finish them separately using your preferred method.
From Liesl: We’re almost done! How are you doing so far? Let’s finish these up, shall we?
Day 3
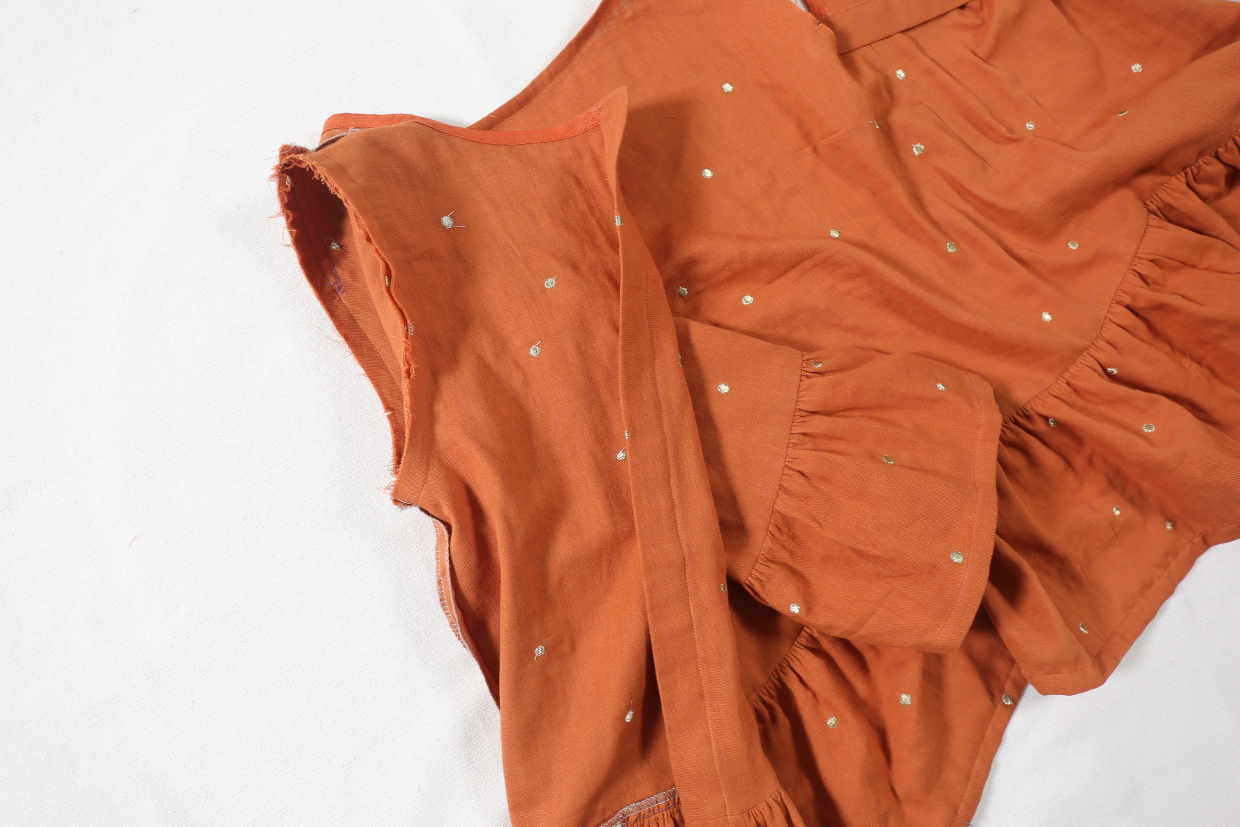
Stitch the ruffle (view A)
1) Pin the short sides of the two ruffle backs to the ruffle front with right sides together and raw edges aligned. Stitch the sides with a 1/2” seam, backstitching or lockstitching at both ends. Press the seam allowances open and finish the seam allowances using your preferred method. Going forward we’ll refer to this pieces as the peplum.

2) Unfold the center-back edges of the peplum and sew a row of gathering stitches 3/8” from the top edge of the peplum, starting and stopping at the dot you transferred from the pattern piece from the innermost button placket fold and leaving thread tails several inches long on both ends of the gathering stitches. Then sew a second row of gathering stitches 1/4” below the first row (5/8” from the top edge). If desired you can also sew a row of basting stitches 1/2” from the bottom edge to help with hemming.

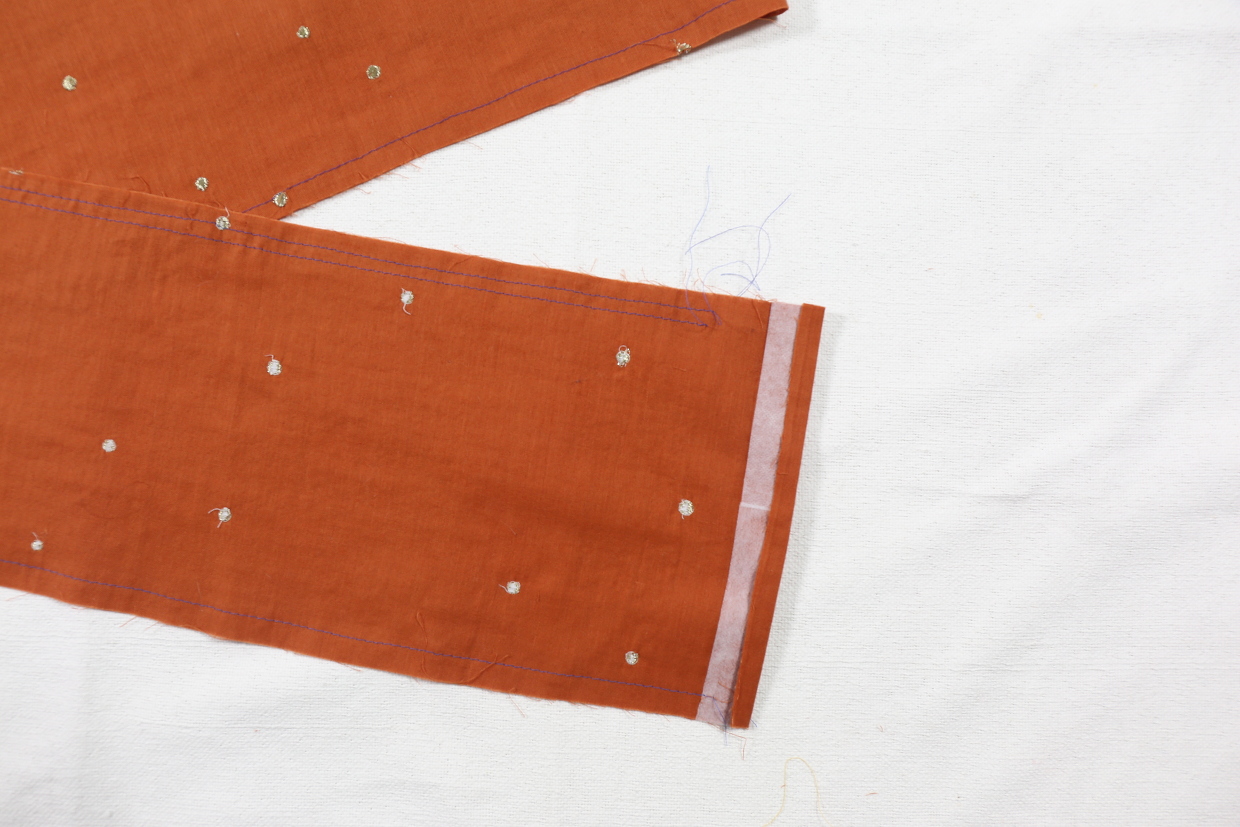
From Liesl: Leaving the placket portion ungathered will enable it to stay flat when it’s finished.
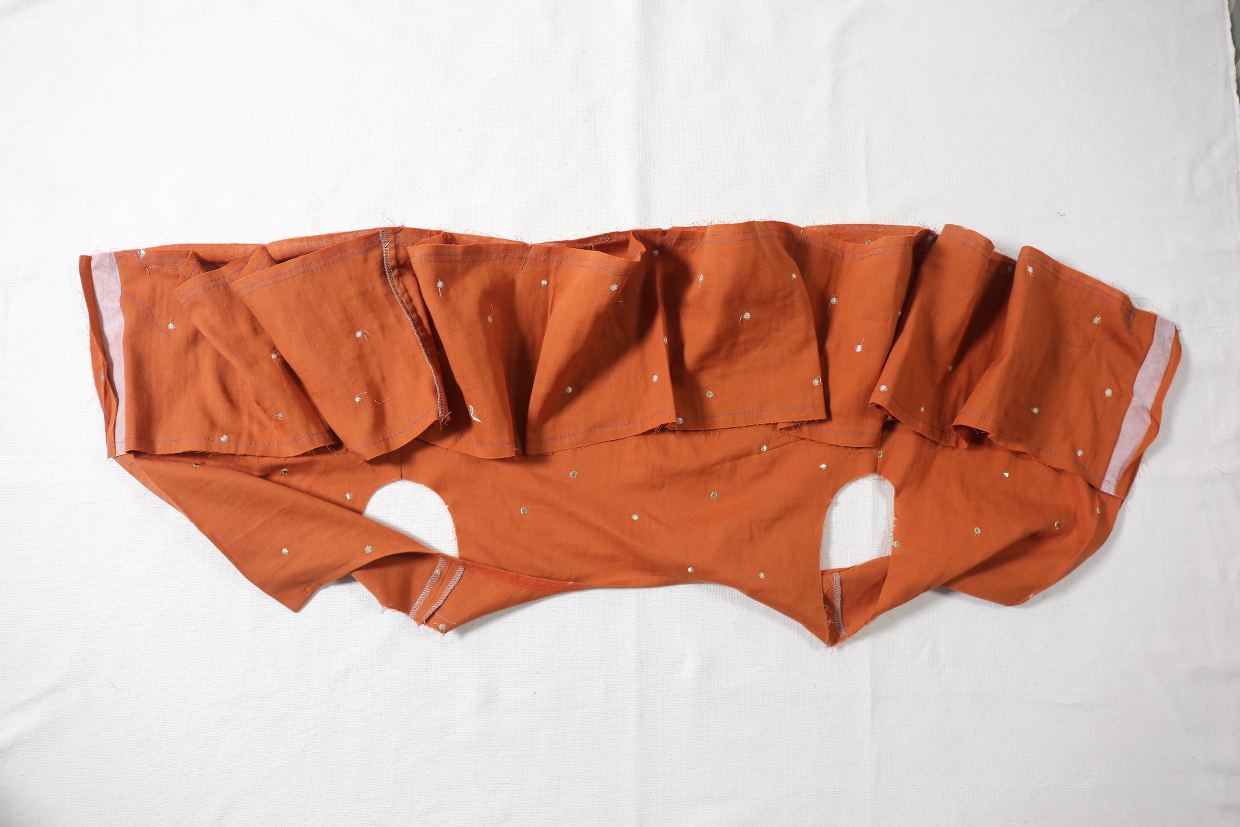
3) Pin the peplum to the bodice, with right sides together and matching the side seams, back edges (unfolded) and center-front notches. Then pull up on the gathering stitches to make the peplum fit the width of the blouse, distributing the gathers evenly before pinning them in place. Stitch the peplum to the blouse with a 1/2” seam, backstitching or lockstitching at both ends. Finish the seam allowances together using your preferred method and press them toward the bodice.
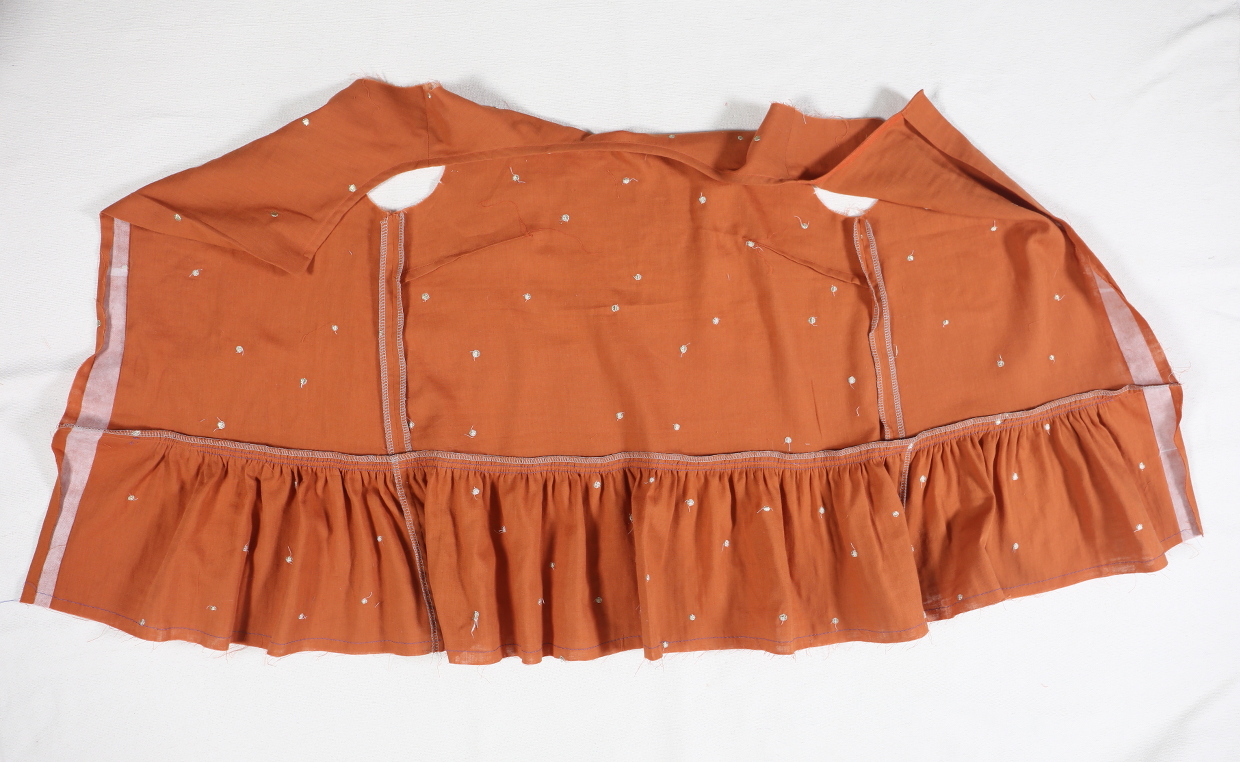
4) To hem the peplum and finish the button placket, first fold and press the bottom edge of the peplum to the wrong side by 1/2” (you might want to begin by stitching a row of basting stitches 1/2” from the edge in you haven’t already, then use the basting stitches as a folding guide). Fold and press this edge again to the wrong side again by 1/2”. Edgestitch the innermost fold to finish the hem. Once the hem is finished you can refold the button plackets and edgestitch along the innermost fold, a little less than 1 1/4” from the back edge of the blouse to finish both button plackets.
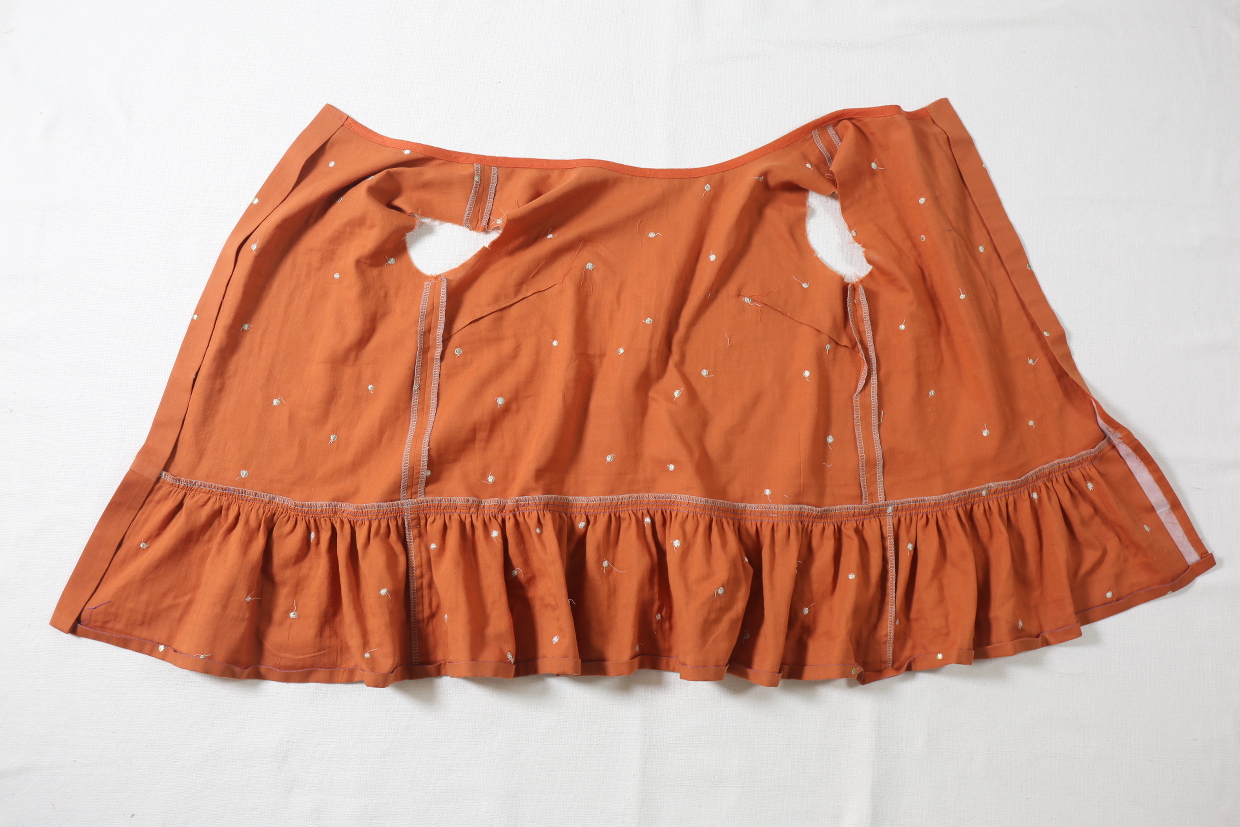
From Liesl: You can get all fancy finishing that back placket, but sometimes it’s easiest to keep it simple. And it looks good once it’s sewn, doesn’t it?
Attach the sleeves
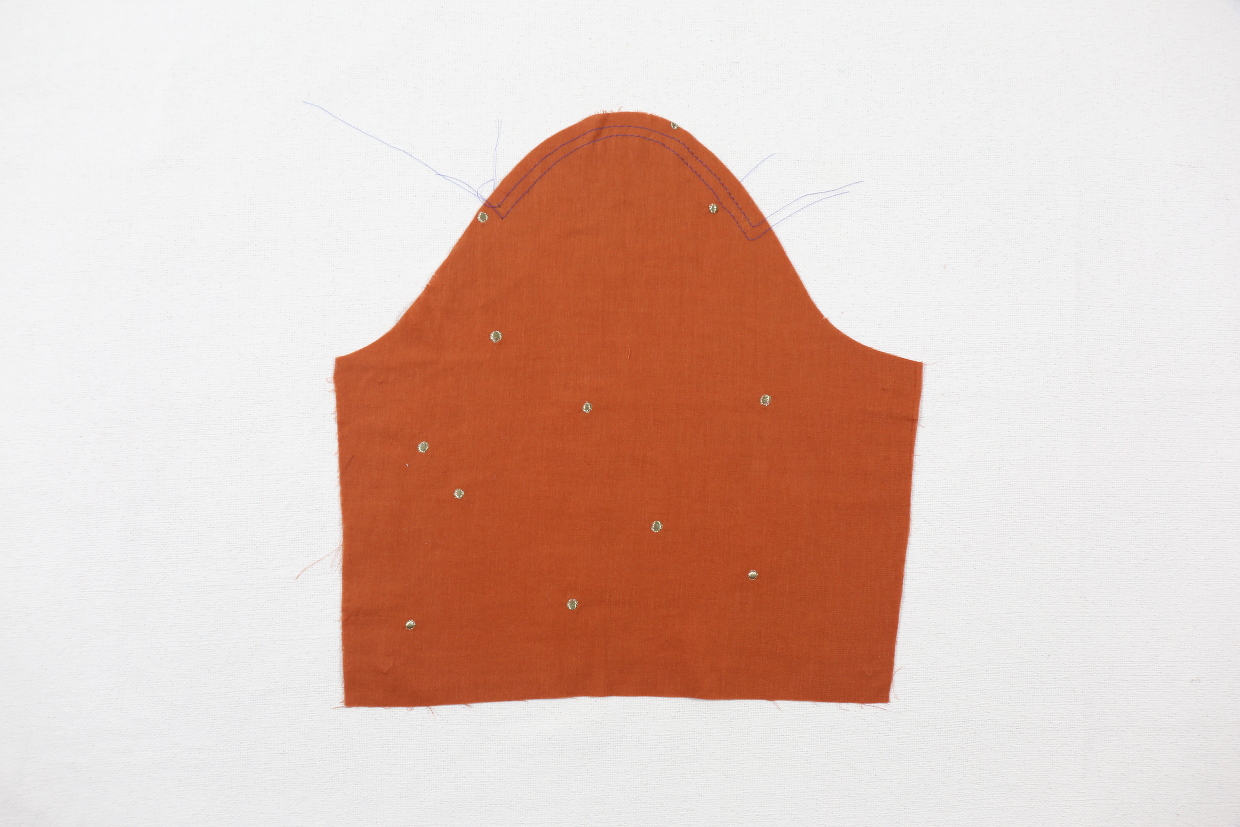
1) Sew a row of gathering stitches 3/8” from the raw edge of the cap of one sleeve, starting and stopping at the dots and leaving thread tails several inches long on both ends of the gathering stitches. Then sew a second row of gathering stitches in the same way, this time 5/8” from the raw edge. (Note that the sleeve cap also has an upper notch, which you’ll use later to help align the sleeve to the shoulder seam when you pin the sleeve and armhole together.)
From Liesl: This sleeve doesn’t have a lot of ease, but it still helps to get a smooth cap if you use the gathering/ease stitches.
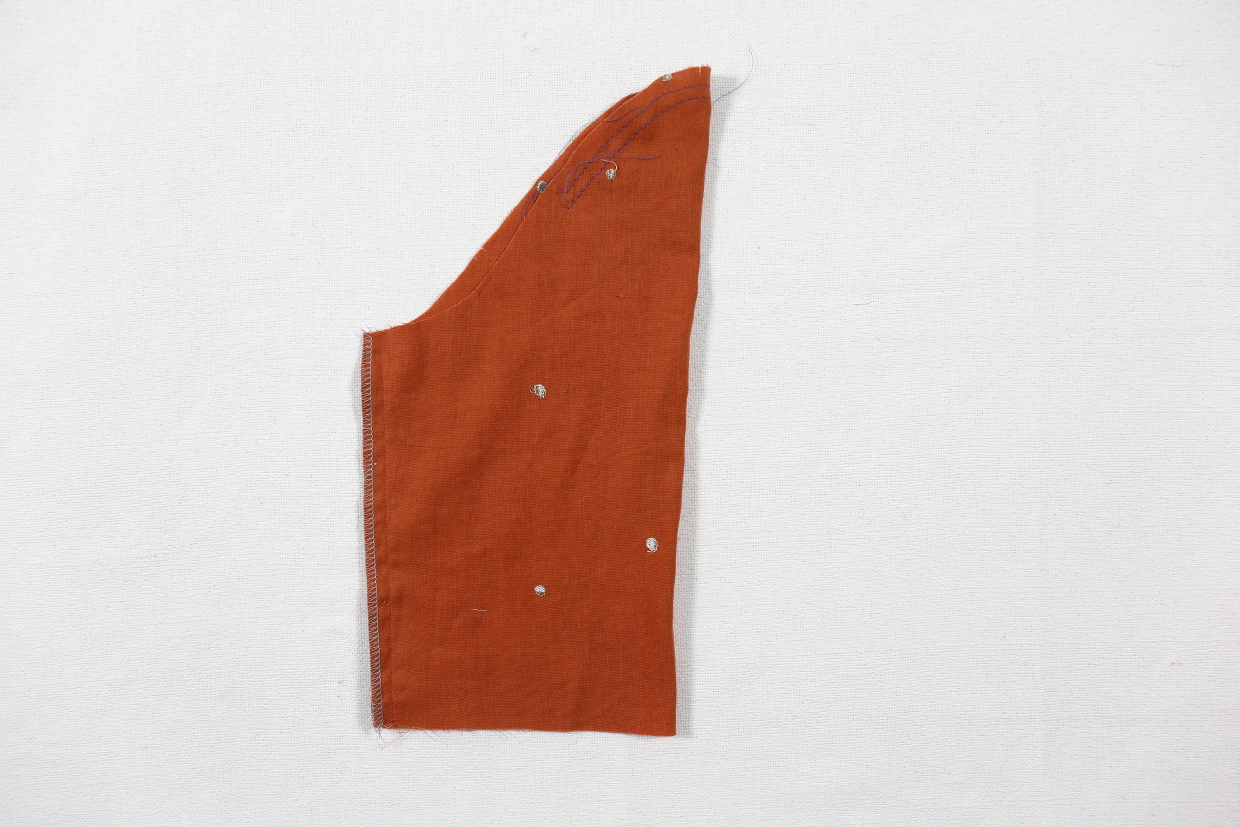
2) Fold the sleeve in half, with right sides together, and pin the side edges of the sleeve together. Stitch the sleeve with a 1/2” seam and press the seam allowances open. Finish the seam allowances using your preferred method.

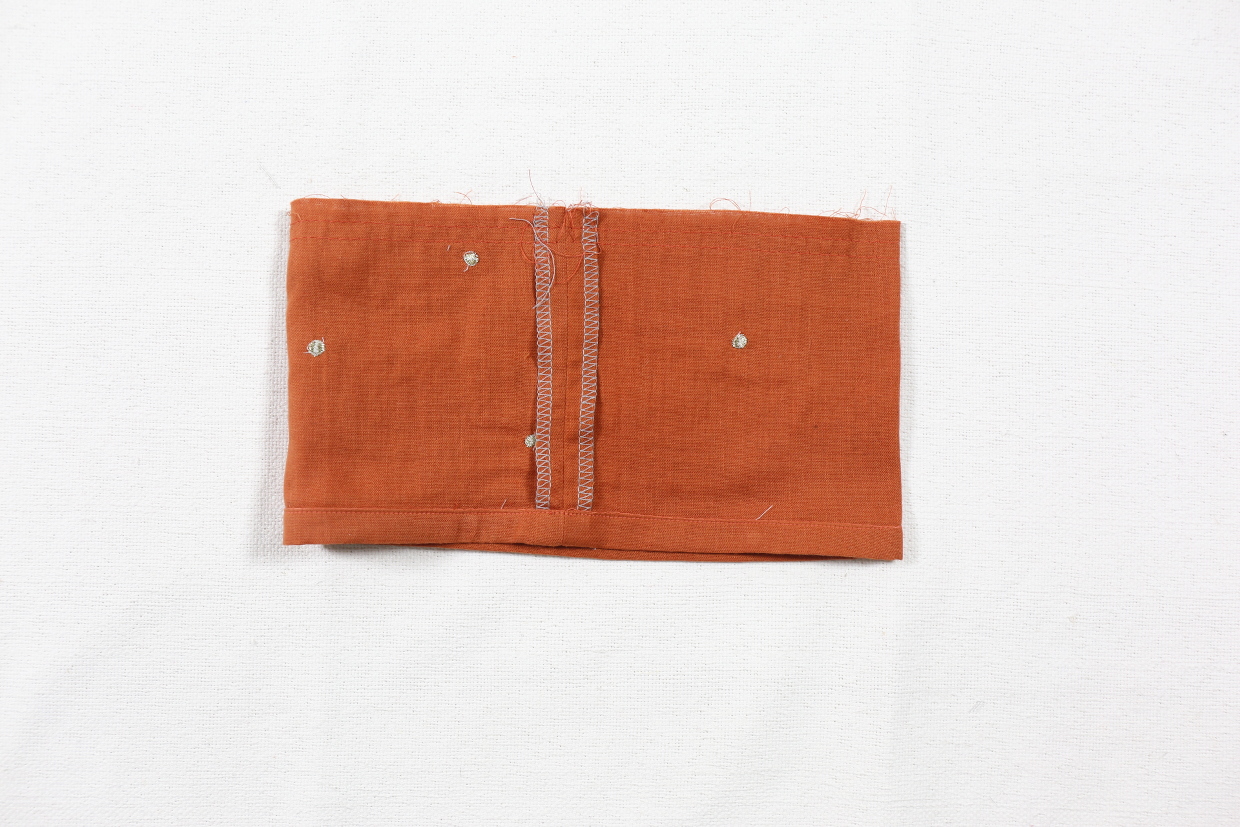
3) For View A, pin the ends of one sleeve ruffle in half lengthwise, with right sides together, and stitch the short ends together with a 1/2” seam, backstitching or lockstitching at both ends. Press the seam allowances open and finish them using your preferred method. To help with gathering the sleeve ruffle, sew a line of basting stitches 3/8” from one long, notched edge, leaving thread tails for gathering. Stitch a second row of basting stitches in the same way, this time 5/8” from the edge.


4) To hem the sleeve ruffle (View A) or the short sleeve (View B), sew a line of basting stitches 1/2” from the bottom edge of the ruffle or the short sleeve. Use the basting stitches as a folding guide: First press the raw edge of the fabric to crease along the basting stitches, then fold and press by 1/2” again so the raw edges are enclosed. Edgestitch the second, innermost fold to finish the hem.
5) For View A, pin the sleeve ruffle to the sleeve, with right sides together and matching the side seams and notches. Then pull up on the thread tails of the gathering stitches to make the ruffle fit the width of the sleeve, distributing the gathers evenly before pinning them in place. Stitch the ruffle to the sleeve with a 1/2” seam, backstitching or lockstitching at both ends. Finish the seam allowances together using your preferred method and press them toward the sleeve.
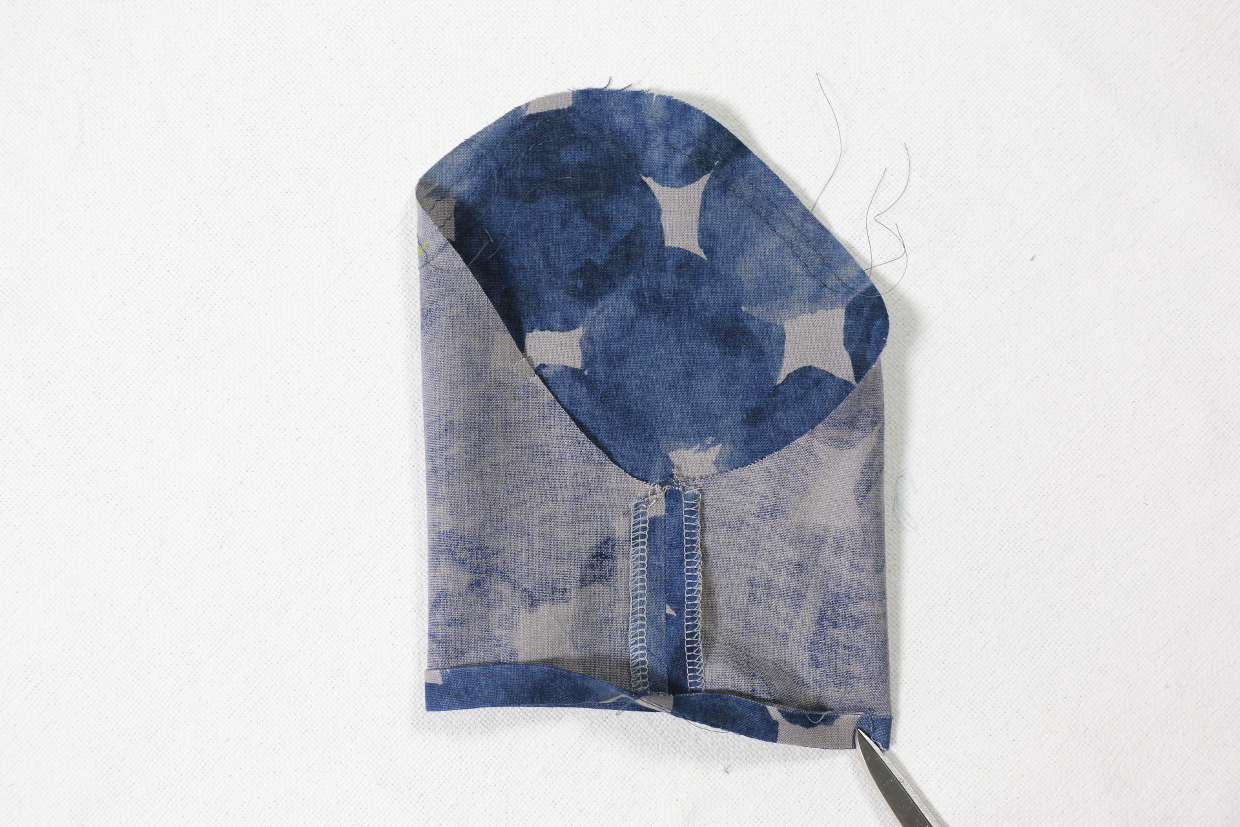
6) With the blouse/dress turned wrong-side out, pin one right-side-out sleeve into the corresponding armhole. Match the notches and seam of the sleeve with the notches and seam of the armhole. Pull up on the gathering thread tails to ease the small amount of excess fabric at the top (cap) of the sleeve until it matches the armhole. Smooth the fabric to eliminate any puckers and pin the sleeve into place. Stitch the sleeve to the armhole with a 1/2” seam. backstitching or lockstitching at each end. Finish the seam allowances together using your preferred method and press them toward the sleeve. Attach and finish the second sleeve the same way. Once the sleeves are sewn, you can remove any visible basting stitches from the sleeve cap.
Finish the blouse/dress
1) For View A, transfer the button and buttonhole markings from the template to the fabric. Stitch the buttonholes on the wearer’s left placket, as marked, and sew the buttons to the marking you transferred from the template on the wearer’s right placket.

2) For View B, to hem the dress, sew a line of basting stitches 1/2” from the dress’s raw bottom edge. Press the fabric to a crease with wrong sides together along the basting stitches, then fold and press by 1/2” again so the raw edges are enclosed. Edgestitch the second, innermost fold to finish the hem.
3) Remove any visible basting stitches from the ruffles (View A), the pocket (View B), the sleeves, and the hem. Your Gelato is ready. Time to celebrate with a scoop!
I hope you had fun with this sew-along! If you joined us, please leave a comment so we know you made use of it, will you? And we’d love to see how it turns out! Tag us #lieslandco and #gelatoblousedress on social media, or post a photo to our Liesl + Co. Friends Facebook group!
I couldn’t wait for the sew along, so I’ve already made a wearable muslin of the blouse — I love it. I used cotton lawn for the blouse, and now I plan to make the dress for my granddaughter. I know I’ll have to make some pattern adjustments, so the sew along will be helpful. What do you think about a jersey knit for the dress?
Jersey would probably work although you might want to size down a bit. I haven’t tried it so can’t say for sure, but let us know if you do!