Visiting us today from our Advisors Circle is Lisa who has stopped by with her Weekend Getaway Blouse with Hemstitching, Chai Tee Dress and Tunic, and Heirloom Afternoon Tea Blouse Tutorial. She is back to share her latest make. Thanks for stopping by to share your tutorial Lisa!
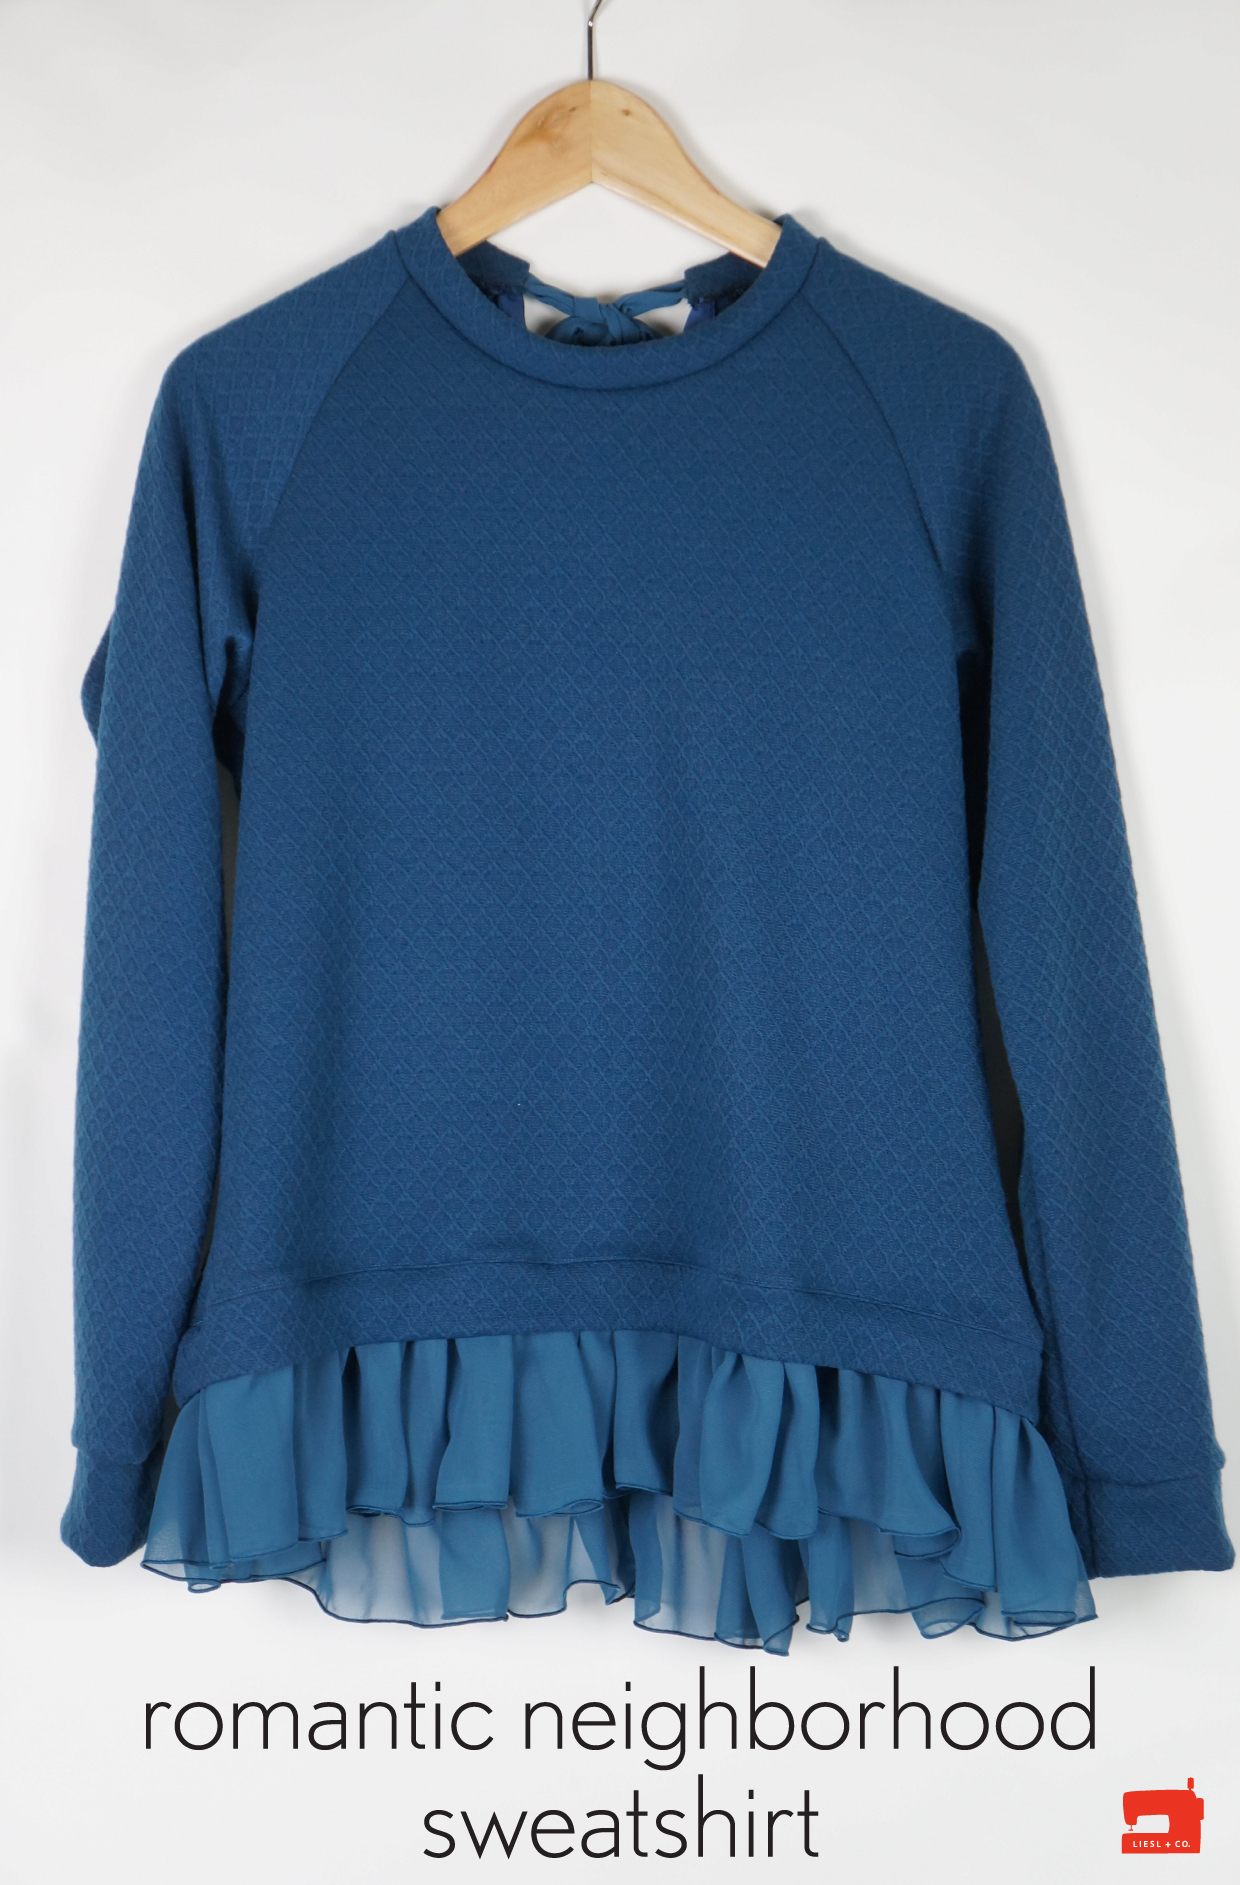
Some patterns can be described as Great Wardrobe Builders and I believe that the Neighborhood Sweatshirt is just such a pattern. The different style lines and options create so many possibilities. So far we have seen contrasting fabrics, lace sleeves, and faux suede! For my version, I went romantic for my daughter with a chiffon ruffle and a back bow.

I used the View B body with the View A sleeve. The fabric is a lightweight sweatshirt knit. The ribbon and bow require 1/2 yard of 45″-wide chiffon. I shorted the pattern body by 1″ at the lengthen/shorten line, and also shortened the waistband width by 1″ to account for the ruffle. At the center back of the pattern, I cut a “V” shape that is 4″ deep and 1″ wide.
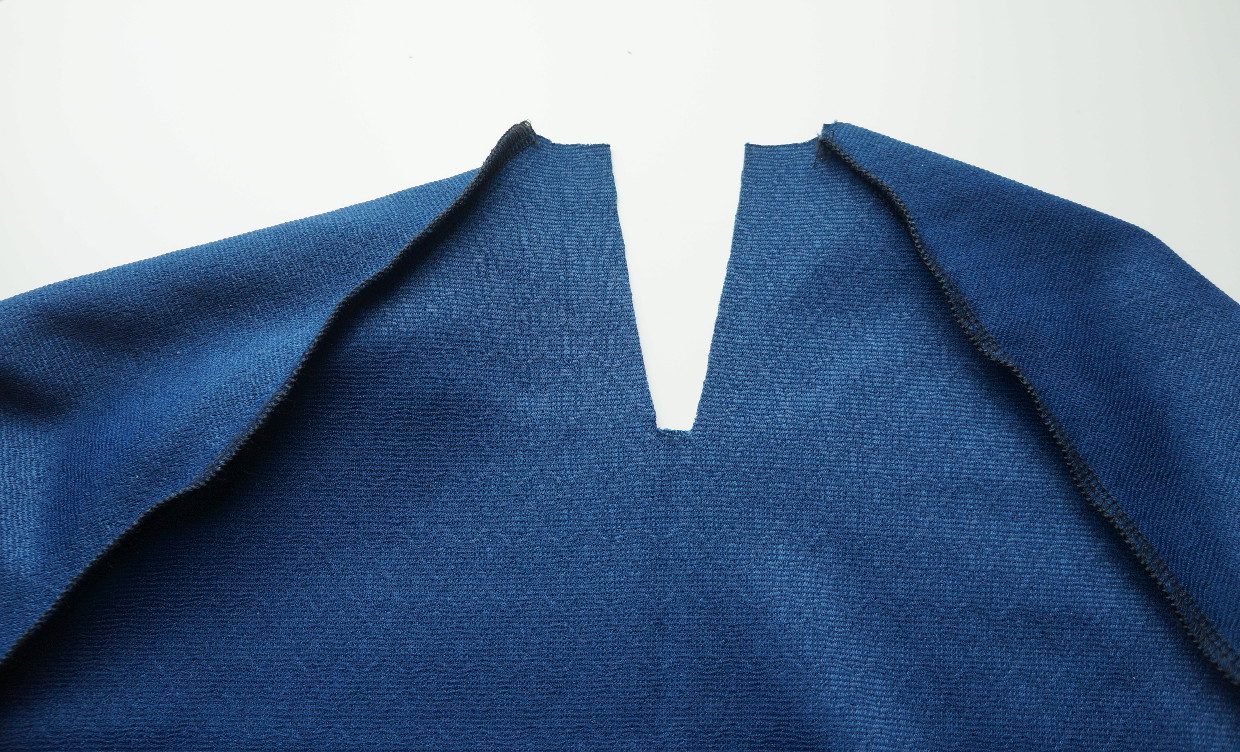
I rounded the bottom of the “V” slightly. This opening leaves room for the knot of the bow. I also shortened the length of the neck band by 1″. To finish the opening of the “V” use bias binding or a strip of lightweight jersey fabric. Press open one side of the bias binding and pin to the right side of the back with raw edges even, opening out the “V” and extending the binding on each end.

Stitch together using the pressed out line as a guide. Turn the bias to the wrong side and pin in place.
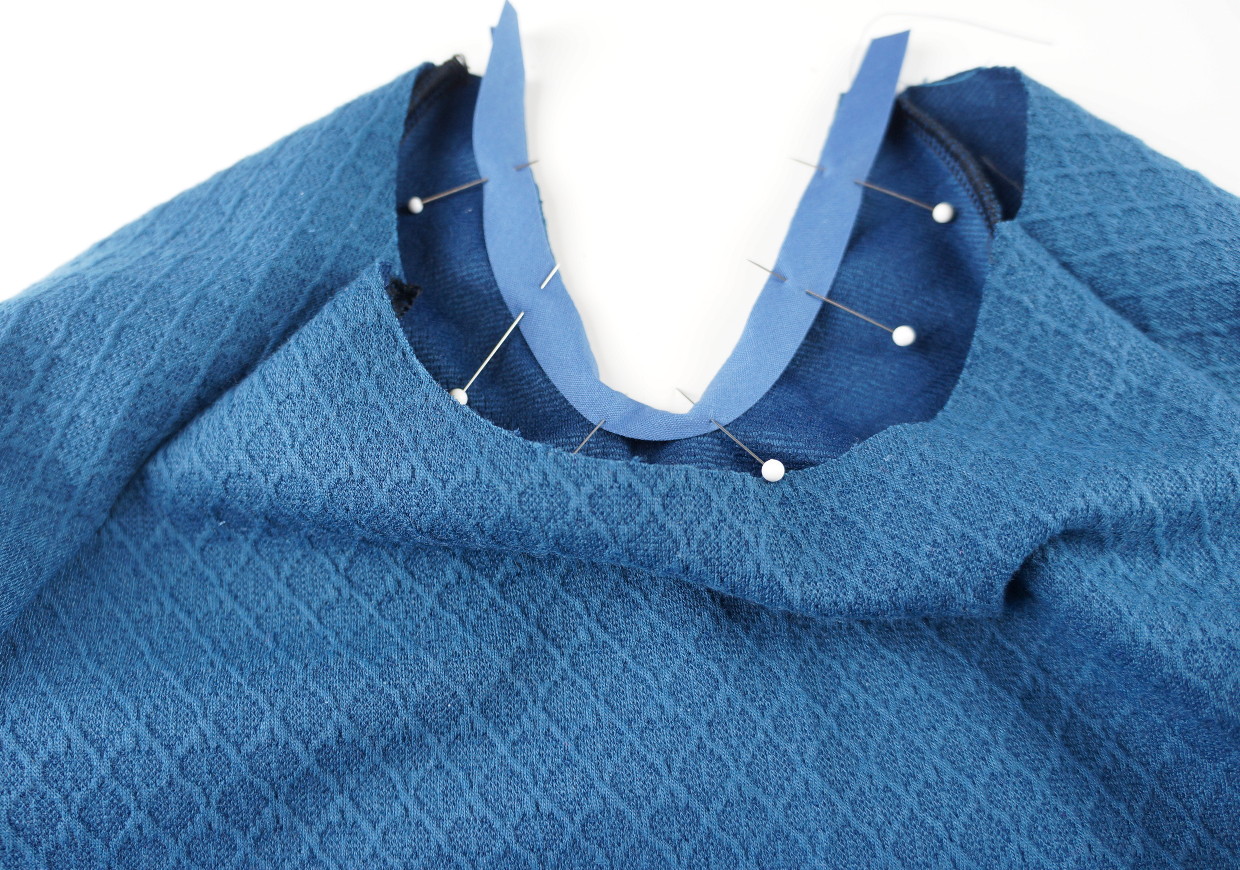
Stitch in place right along the edge of the bias. Trim the bias edges that extend even with the top of the sweatshirt.
To make the bow, cut two strips of chiffon 3″ wide and the width of the fabric (45″). This post gives some helpful tips for working with chiffon. Sew one short end with right sides together and then sew the long sides with right sides together. Turn right side out. Do this with both strips. I did this on my serger which handled the chiffon with no problem. You could also use French seams. Pin the short raw edge of each tie to the bottom half of the neckband but keep it out of the bottom seam allowance.

Pleat the tie so it fits in the bottom half. Baste in place. Fold the neckband in half with long sides together and sew the two short ends of the band. Turn right side out. Attach the neckband to the neckline of the sweatshirt with raw edges even, beginning and ending at the “V” and making sure not to catch the bow ties. Press to the wrong side as the pattern directs and topstitch the seam in place if you desire.
For the ruffle, cut three strips of chiffon 6″ wide and the width of the fabric. With right sides together, sew the three strips together at the short ends to make one long strip. Finish the bottom edge of the chiffon using a rolled edge setting on the serger.
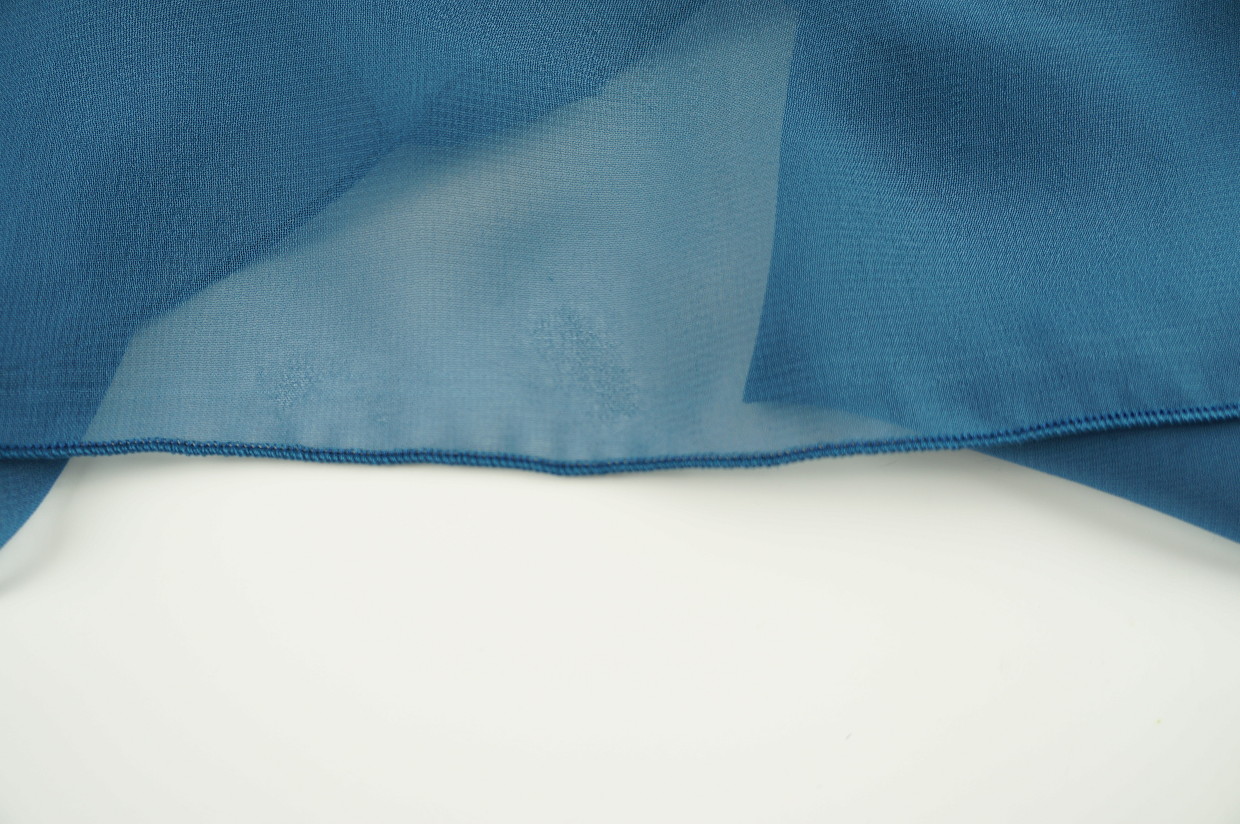
Finish the top edge so it won’t ravel. Gather the top edge using your preferred method. Sew the remaining two short ends together to make a circle and pull up the gathers so the top edge is the same length as the finished waist seam of the sweatshirt. Sew the ruffle to the seam connecting the sweatshirt body and the waistband.
For a similar but different look, you could consider adding a tulle ruffle to your Neighborhood Sweatshirt, for that check out our Tulle Hem Tutorial.
This is just fabulous. I love it.
This is really beautiful. I love the contrast between the weight of the fabrics. And the color match is spot on!
So beautiful!! I would definitely wear this!
This is beautiful Lisa. I adore the texture of that knit and the colour is so lovely. Such a gorgeous top, well done.