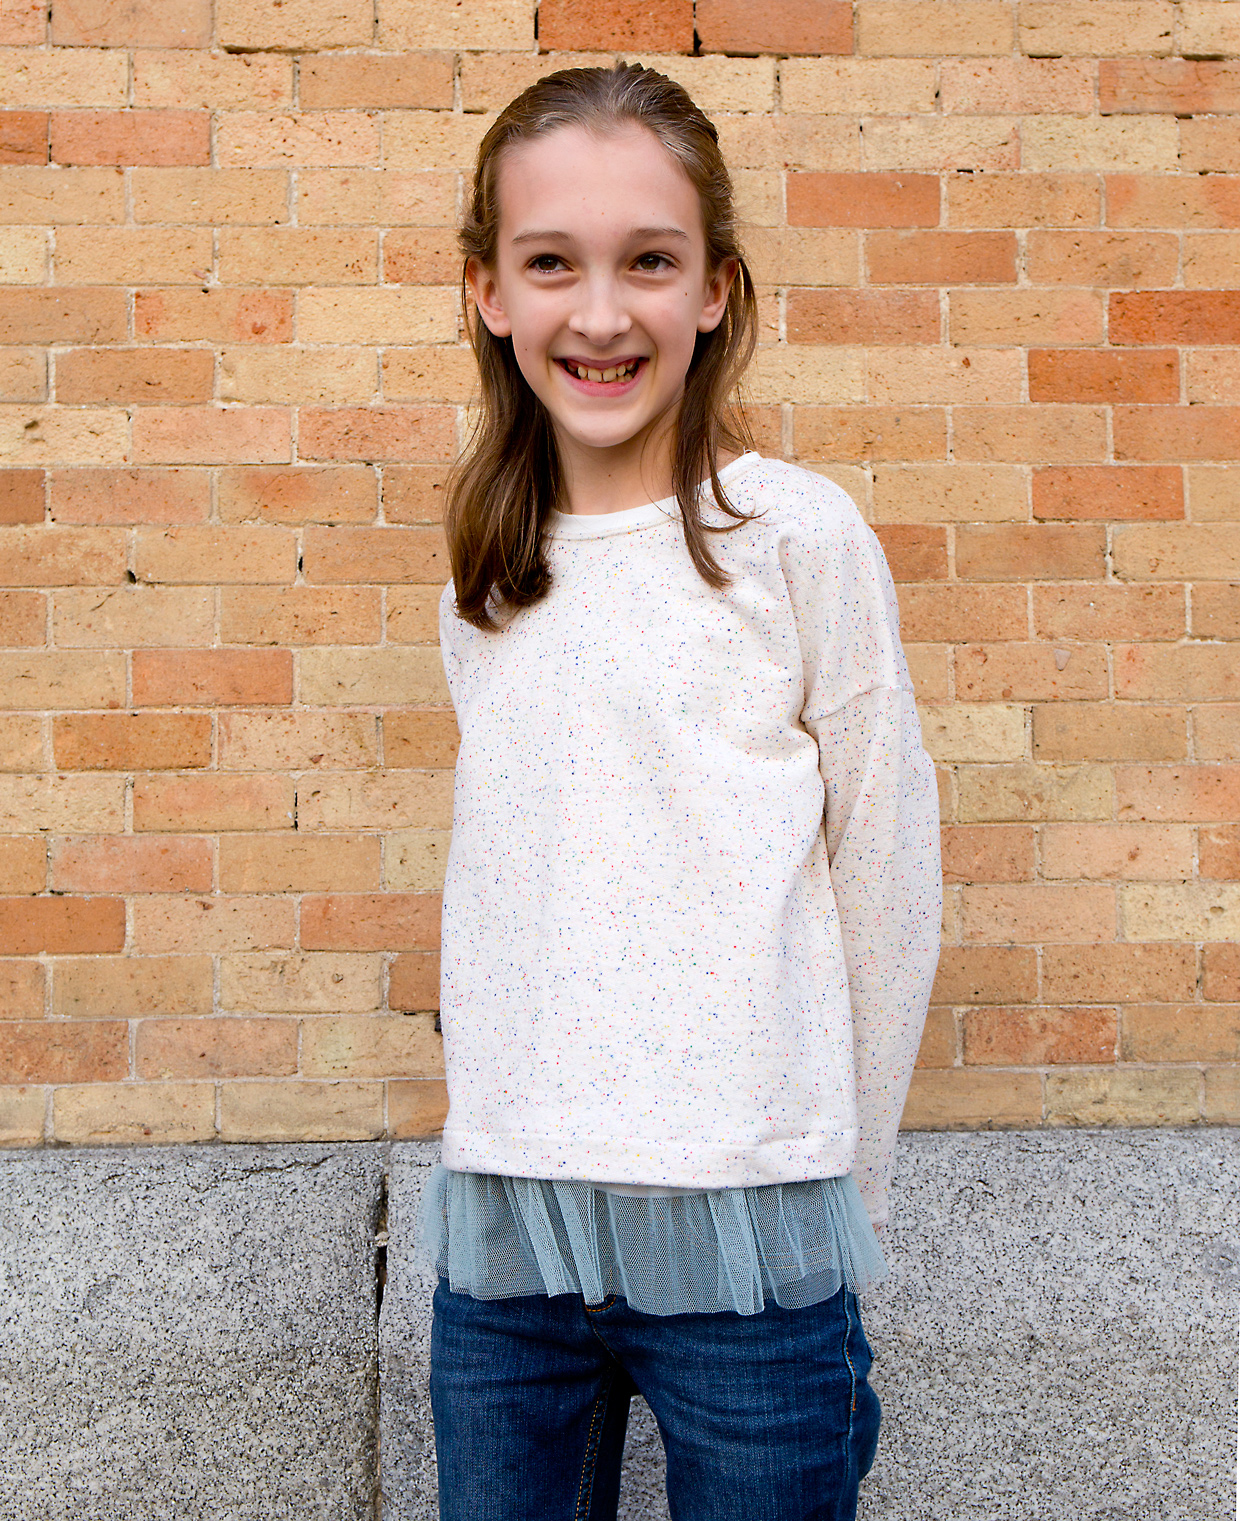
When it comes to weekends and off-hours, S knows her personal preferences. As much as she likes a good dress or skirt, she really loves to be comfortable in jeans, boots, and a comfortable sweatshirt. (After all, between her school uniform and three afternoons of dance classes every week, she spends plenty of time in strict uniforms!)
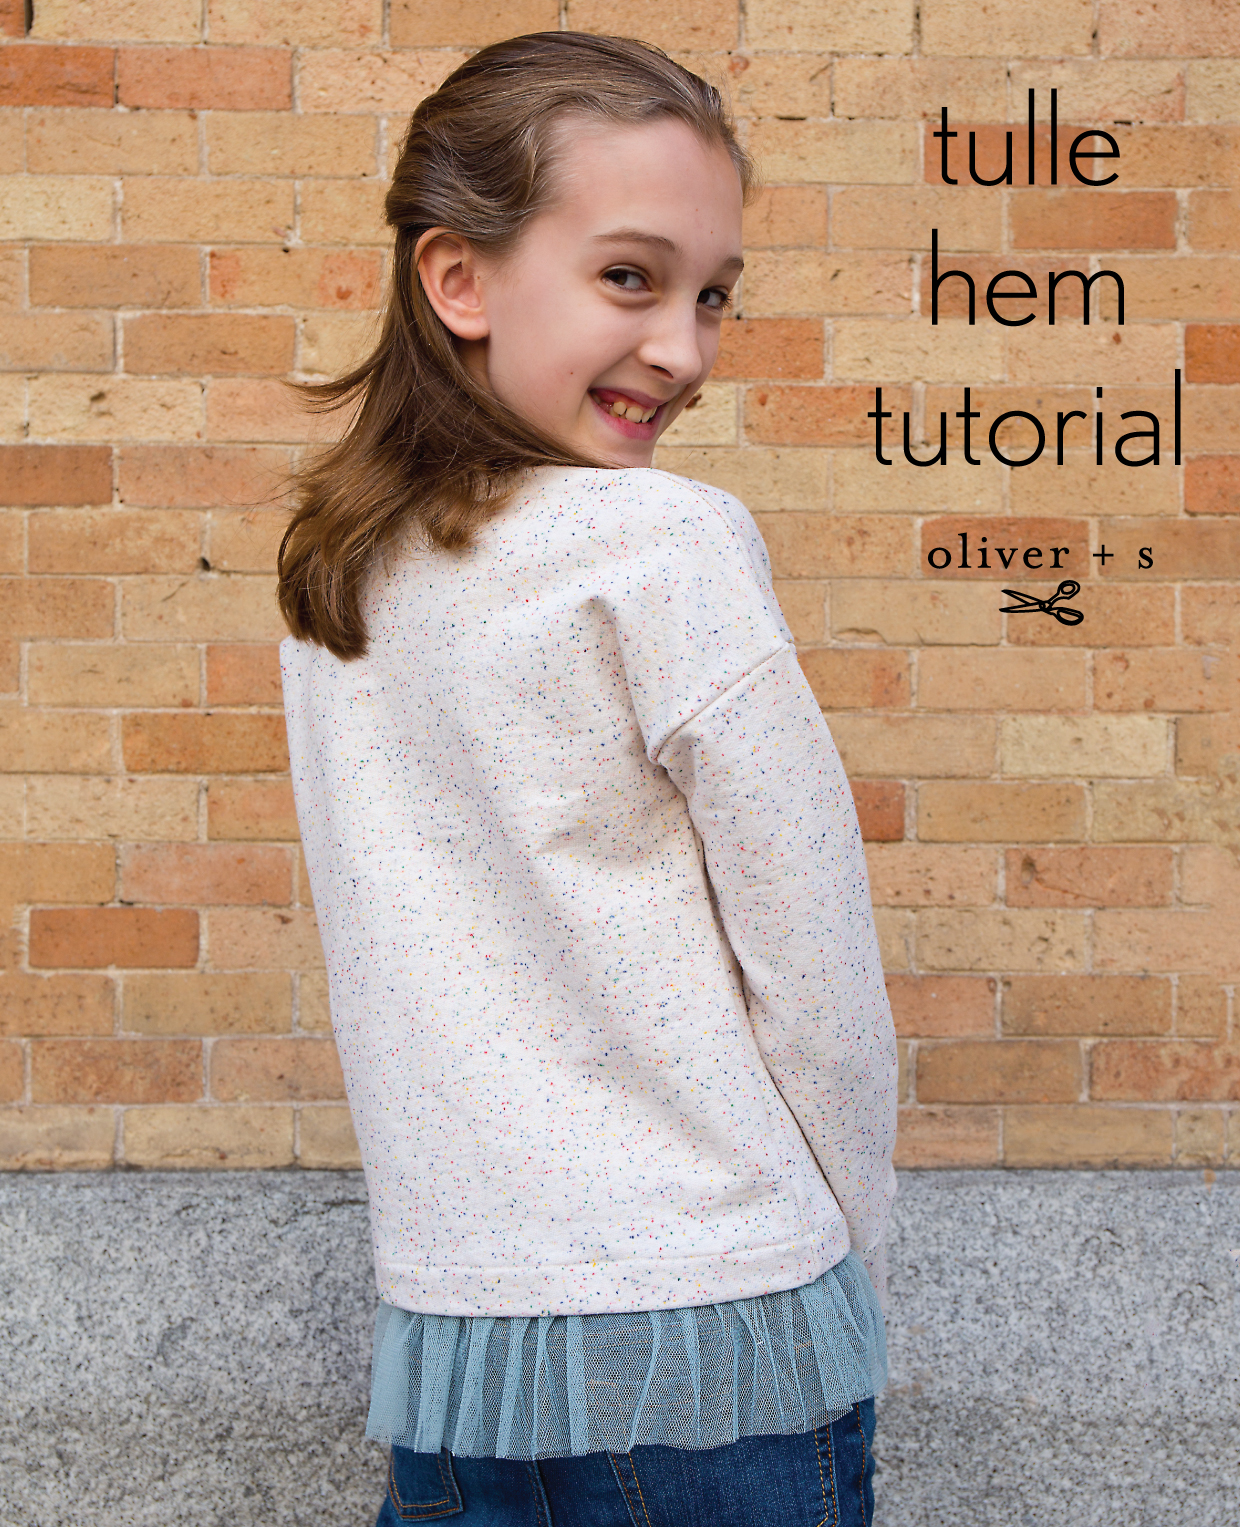
This tutorial is inspired by her style, but it can be applied to lots of different sewing projects. You can use it to add a layered effect to a Lunch Box sweatshirt, like we did for S, or you can also use it to give other shirts or skirts a layered look, as though you’re wearing two layers instead of one. In fact, last week when I was working on sewing this, a similar style landed in my email inbox!

This is a really easy technique with just a few simple steps:
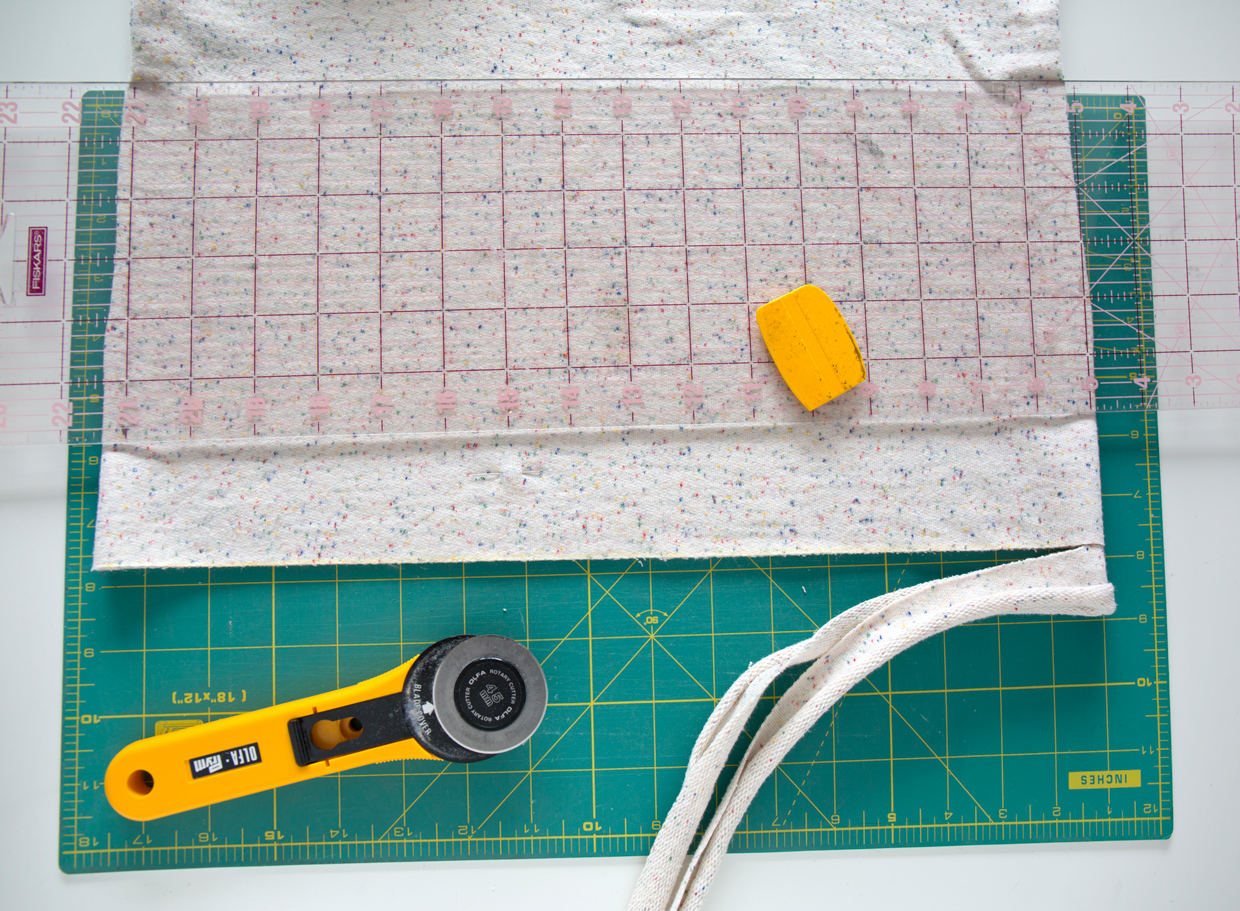
1. First, determine the finished length of the sweatshirt and add a hem plus about 1/4″. The hem on this Lunch Box sweatshirt is 1″, so I cut the length to be 1 1/4″ longer than the length I marked when S tried it on.
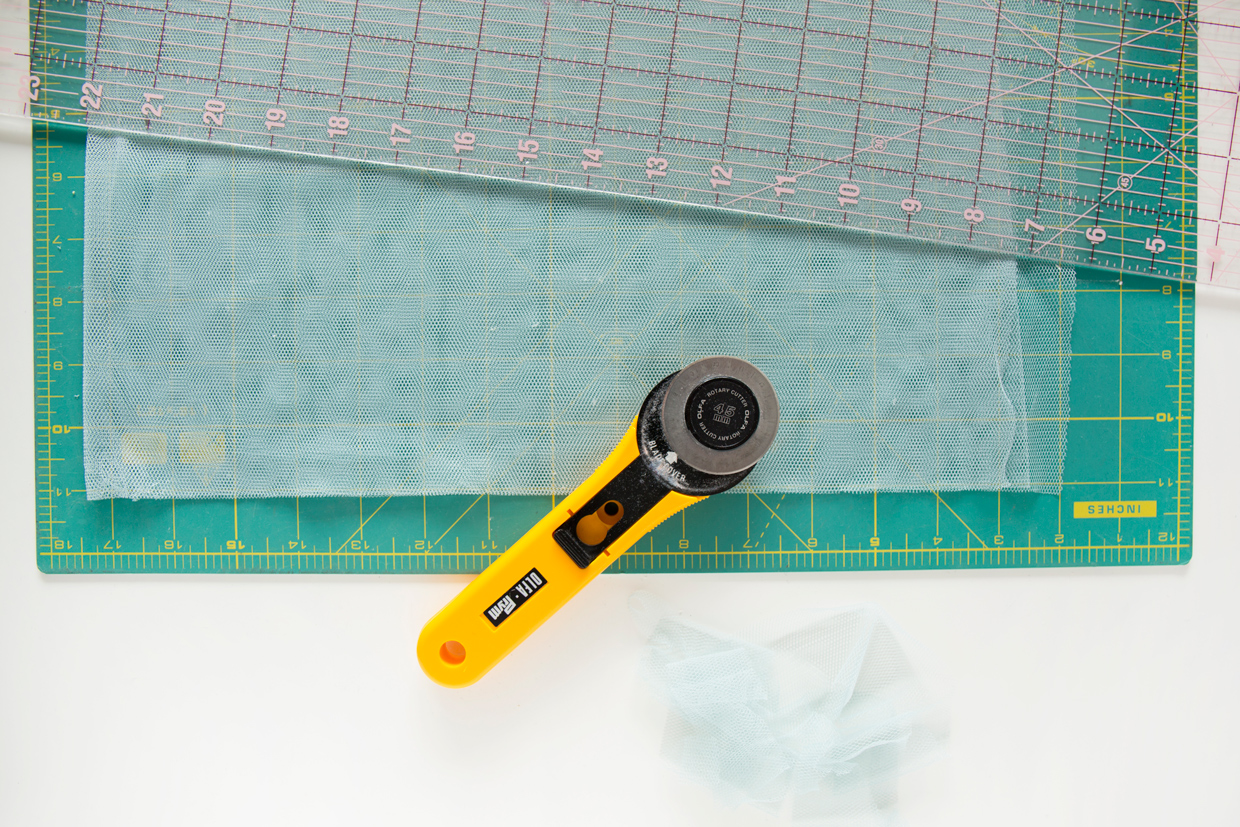
2. Next, make your ruffle, or under-layer. In this case, I decided I wanted a double layer of tulle with a finished length of 3″ below the hem, so I cut the tulle to be 8 1/2″ tall (3″ ruffle + 1 1/4″ hem multiplied x 2 for the double layer) by the width of the tulle so it would be nice and full. If you’re using a ruffle that needs to be hemmed, be sure to include enough fabric for the hem as well. (For a more in-depth discussion of gathered skirts, how full to make them, and how to hem them refer to pages 74-76 of the Building Block Dress book.)
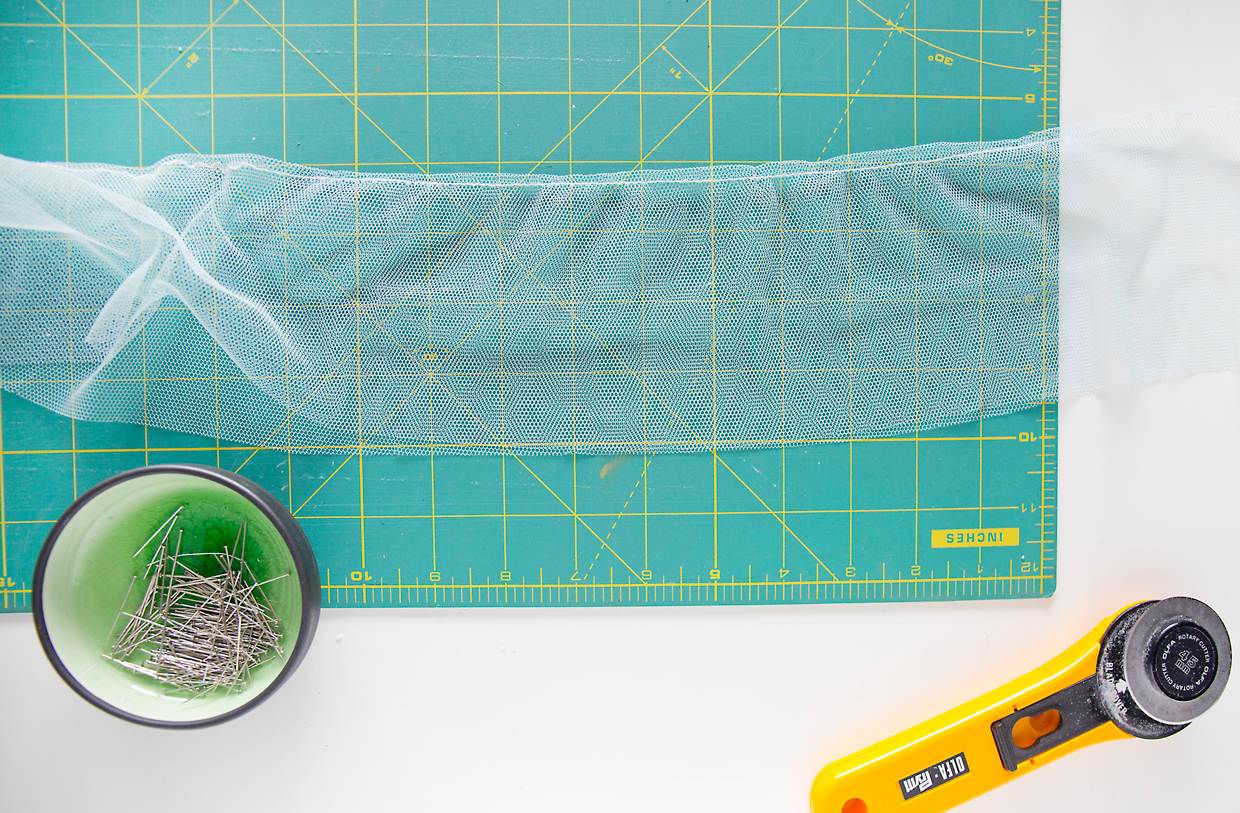
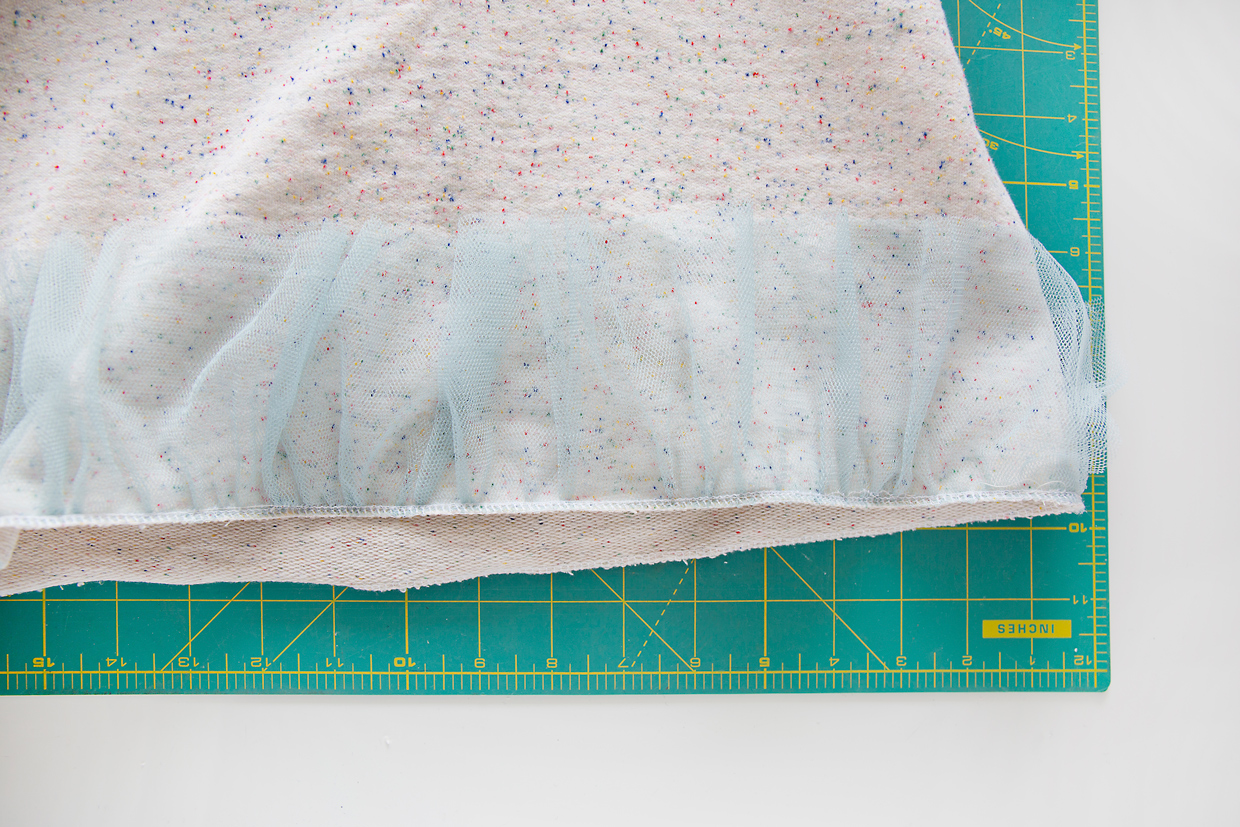
3. Sew the short ends of the ruffle together to make a wide tube, then hem the bottom edge of the ruffle while it’s still flat. If you’re using tulle, you don’t need to hem it since it won’t ravel and it looks light and pretty with a simple straight-cut edge. (In fact, I didn’t even sew the short ends into a tube since I didn’t want them to show. I just overlapped the short ends, which I’ll mention again when we get to that point.) Then add gathering/basting stitches very close to the top edge, ideally at 1/8″ and at 3/8″ from the top edge so you can stitch the ruffle at 1/4″. Since my ruffle is a double layer, I folded it in half and used just one row of basting stitches 1/4″ from the fold. The single row of basting was sufficient for the tulle, but when I’ve used this technique with other fabrics I usually prefer two rows of gathering stitches because it gives me better control over the gathers when I’m sewing.
4. With right sides together, pin the top edge of the ruffle to the bottom edge of the sweatshirt. In order to keep the amount of fullness even when you gather, it’s helpful to mark the center-front and center-back of the sweatshirt first. Then fold and mark the width of the ruffle in four equal parts so you can pin those markings to the four quadrants of the sweatshirt. This helps to keep the gathering even when you pull up on the gathering stitches to cinch the ruffle to the same width as the sweatshirt. (Here’s where I simply overlapped the two short ends of my ruffle, and the join is less visible then if I had sewn the ruffle together.)

5. Stitch the ruffle to the bottom edge of the sweatshirt with a 1/4″ seam. I like to use my serger for this step, but if you don’t have a serger a zigzag stitch or mock serger stitch is just fine. A straight stitch will also work, but it’s especially nice if you can finish the edge as you stitch it, which is best done with the serger or zigzag.
6. On the right side of the sweatshirt, mark the hem height with a water-soluble fabric-marking pen or with tailor’s chalk. I marked my hem 1″ above the ruffle/tulle seam.
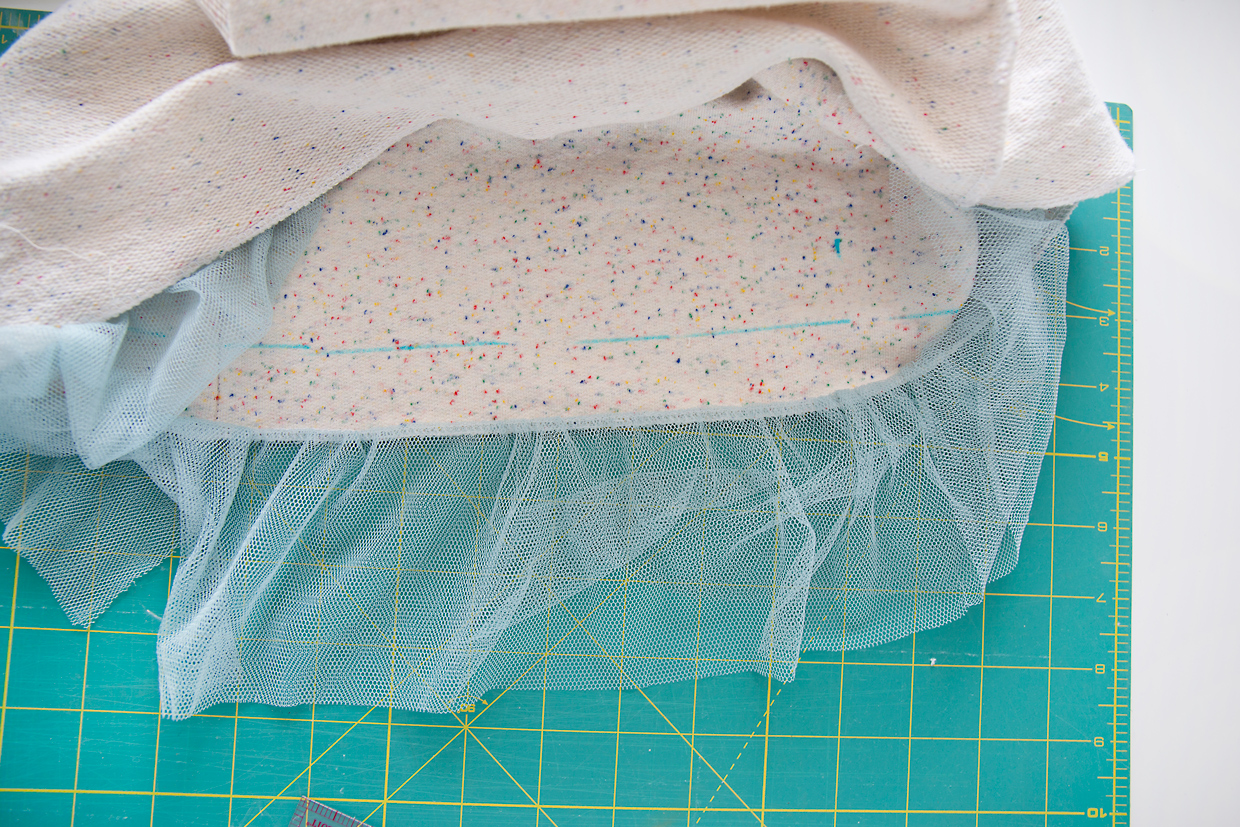
7. Fold and pin the hem along the marked hem line, flipping the ruffle out of the way for the time being. Press the hem fold, using a cool-ish iron and taking care not to touch the tulle itself if you’re using tulle, since it melts! (For S’s sweatshirt, I simply flipped the hem over and pressed it from the right side of the sweatshirt, taking care that the tulle was flipped out of reach of the iron.)
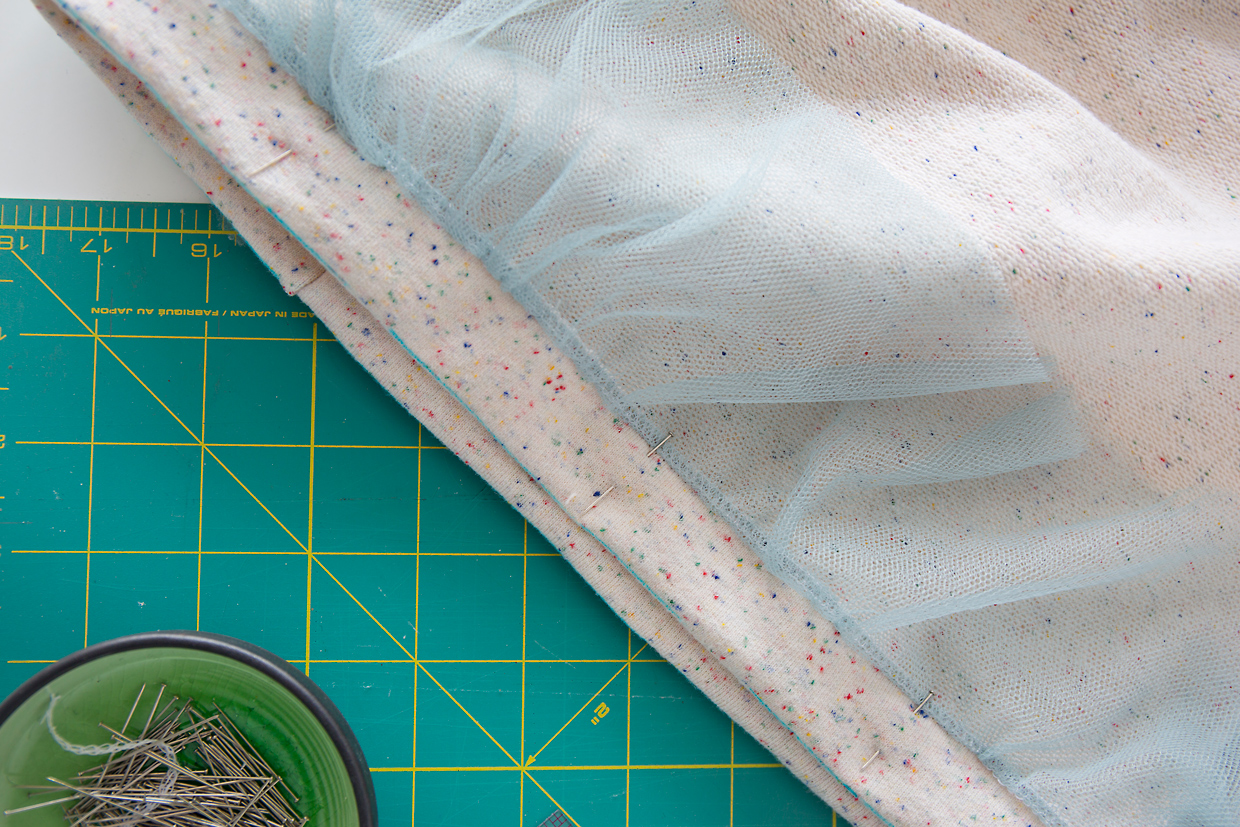
8. Stitch the hem just below the ruffle seam, with the ruffle still flipped up and out of the way. If you like, you can use an edgestitching foot or a zipper foot to help you stitch right up against the ruffle easily. I used a stretch stitch–like a tiny zigzag–for my hem so it can stretch without breaking the thread. Once the hem is stitched, you might want to press the hem again before flipping the tulle down and letting it hang below the hemmed edge.
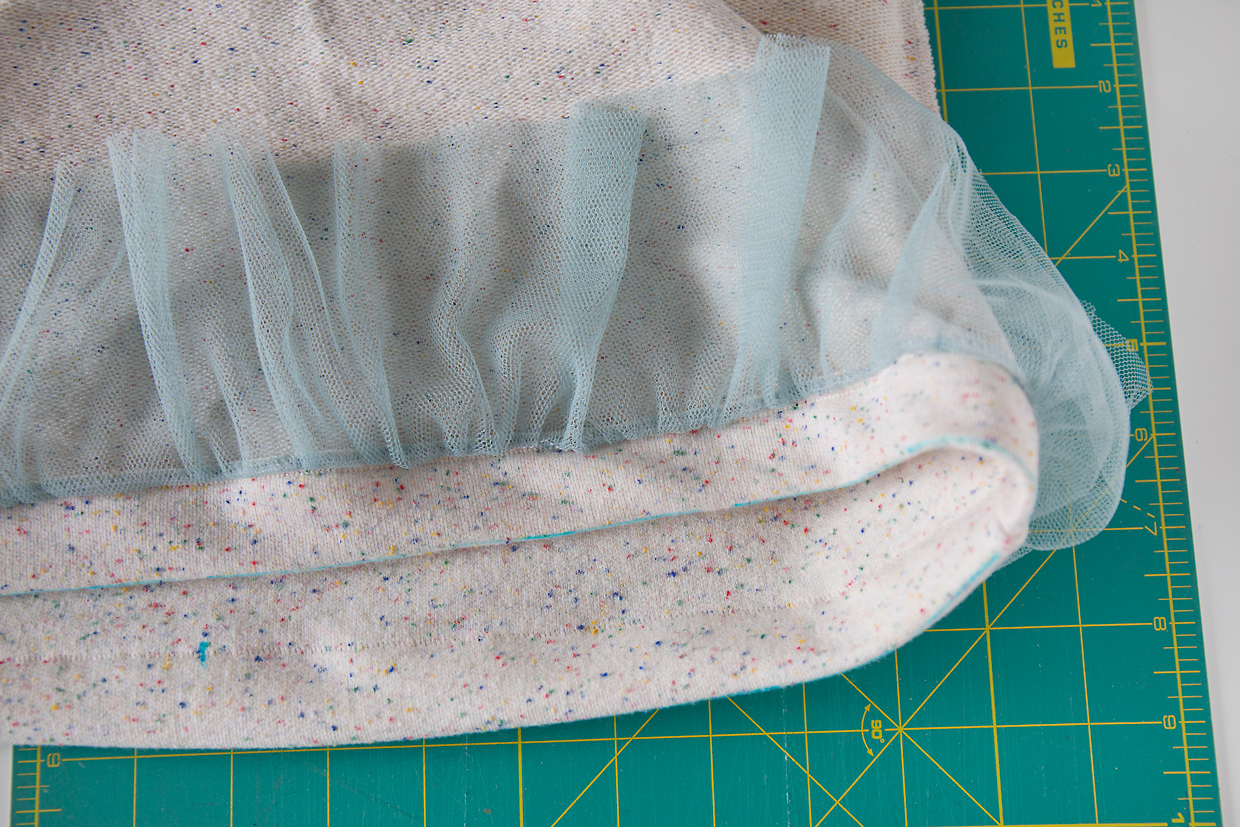
And your tulle ruffle is finished! You might want to try making this ruffle even smaller for a little detail, our you could lengthen it to skirt length for a cute dress, too! I’ve also made similar styles for myself using our Liesl + Co Bento Tee and using Bemberg lining for the ruffle, but sadly it’s back in NYC so I can’t photograph it for you.
Have fun with this tutorial, and if you make it be sure to hashtag it #tullehem so we can find it and admire your work! We’d love to see it in the Oliver + S Flickr group, too.
Project details:
Fabric: Robert Kaufman French Terry Natural Speckle in Natural (98% cotton, 2% polyester).
Tulle: Power mesh soft tulle from Ribes y Casals, 100% nylon (I think; I like power mesh because it’s more drapey then traditional tulle).
Pattern: Oliver + S Lunch Box Tee, View B body with View A sleeves, sewn as sweatshirt, sewn in size 10 with size 12(ish) length. Plus extra for really long sleeves, which we haven’t hemmed yet.
Thanks for sharing this–I’ll definitely be giving it a try!
Glad you like it, and I can’t wait to see what you make with it!
This is such a cute (and simple) idea to enhance a sweatshirt or a t-shirt. I could see how you could easily use a 6″ roll of tulle instead. I have saved this to my T-shirt Restyling Pinterest board: https://www.pinterest.com/thelostapron/t-shirt-restyling/
Ana, I didn’t know tulle came in 6″ rolls! That sounds like a great resource.
I’ve been trying to figure this out. Thanks for the tutorial!