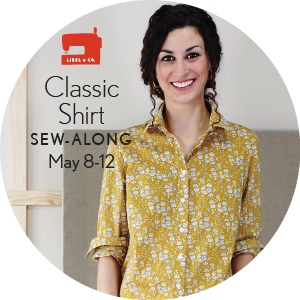
If you haven’t had a chance yet to sew the Liesl + Co. Classic Shirt that you’ve wanted to, here is your motivation to get one done! We are happy to announce that we will be hosting a Classic Shirt sew-along from May 8 to May 12. And we hope you will join us!
Pattern Description
A wardrobe staple, this shirt is both versatile and polished. The pattern features separate pieces for A/B, C, and D cup sizes and includes many professional details like separate collar and collar band, tower sleeve placket, and collar and cuff facings to help you sew beautiful looking (and fitting!) shirts. View A includes a separate (set-in) placket and workshirt-style pockets. View B features a continuous (cut-on) placket and pleated pockets with concealed button flaps.
This pattern was very well received when it was released. Liesl has already put together some great posts for you all about the Classic Shirt:
- Styling ideas
- Fabric ideas
- Faux flat-felled seams
- Machine bartack tutorial
- Shirt gusset tutorial
- Three contrast details
Classic Shirt Sew-Along Schedule
Day 1: Make the Wearer’s Right Set-in Placket (View A), Make the Continuous Cut-on Placket (View A and B), Close the Darts, Make and Attach the Pockets (View A).
Day 2: Make and Attach the Pockets and Flaps (View B).
Day 3: Assemble the Back and Yoke, Attach the Shirt Fronts, Make and Attach the Collar Band.
Day 4: Prepare the Collar, Attach the Collar to the Collar Band, Make the Sleeve Placket.
Day 5: Sew the Sleeves, Sew the Cuffs, Hem and Finish the Shirt.
How to Participate
Be sure to get your pattern if you haven’t already. It is available in both paper and digital format. Also gather your fabric and supplies, and we will see you here on the blog on Monday, May 8th!
If you have a blog, please feel free to grab the sew-along badge you can add to your posts or to your sidebar, to let people know you’re participating.
Tag your in process photos of your Classic Shirts with #lieslandco on Instagram so we can all see. When you have completed your Classic Shirt, post it somewhere and then add a link to it using the button below.


Do you think this could be made in a silk crepe de chine?
Absolutely! It would be very pretty.
Sizing question: I am postpartum, and my waist size (sz18) is very disproportionate to my hip size on the chart (sz 10). Based on the fit of the shirt and the fact that this is a transitional waist size, what would you recommend for choosing a size or for handling this BIG discrepancy?
I always recommend selecting your size based on your bust measurements. Be sure to make a muslin so you can check the waist and hips, and if you need to let them out a bit you’ll know once you’ve tried on the muslin. There isn’t a lot of waist shaping for this shirt, so you may not need to worry about it too much.
Thank you! I’m really looking forward to making a few of these shirts. This is an item that I look for in stores and don’t find what I want.
What is the fabric for the yellow shirt in this post?
It’s a Liberty of London tana lawn. I don’t remember the name of this particular pattern, but it’s been part of their continuous collection for quite a while. It also comes in other colors.
Anna
This Liberty of London print is called Capel and is in the mustard colour. It’s a new colour in this pattern and seems to have sold very quickly in the UK.
Libby
Looking forward to this! I have a sizing question, too: since this pattern comes with cup sizes, are we meant to choose the size from the body measurements chart based on high bust and then add the cup? Or full bust? For example, my full bust is 42″ and cup size is D. Should I do the 16 D?
I think this will help to answer your question and give you a better understanding of sizing: https://oliverands.com/community/blog/2013/11/finding-your-correct-pattern-size.html
Let me know if you’re still unsure, ok?
Quick question: How much fabric is required for 54″ fabric? Is it the same as for 58″? Thanks.
Since 54″ is narrower than 58″ I would suggest buying a little extra fabric. Or if you want to be precise, layout your pattern pieces for whatever size you’re making and you can confirm the correct amount beforehand.
One more question: Is it possible to do a wide shoulder adjustment with this pattern? (I don’t know if that can be done with the yoke in the back.) I have really broad shoulders. Thank you, again.
Oh, absolutely! In fact, it might be a little easier to make the adjustment since you’ll be mostly widening the yoke piece. Do you have the Fit for Real People book? The adjustment in on page 162, I think.
“Jane,” I do wish you’d use a real name! It’s much nicer to be able to put an actual person with comments…
I don’t have that book. I looked at the Sewalongs blog on wide shoulder adjustment (never done but just learned I must do it every time). Thanks for being upfront about name (had a feelign it might be bugging you); and how can I refuse since you’ve been so generous with encouragement and support?
Est-ce qu’il y a des explications en français dans le pdf? Elle est très jolie cette chemise!
Vous pouvez toujours utiliser translate.google.com Bonne chance!