We love the drama Lyndsey added to the Enmore Halter Dress with a simple pattern alteration. She is sharing the steps she used to create the look.
Hello, I’m Lyndsey Stanfill, a member of the Advisors’ Circle. My favorite Oliver + S blog posts are Liesl’s “Inspiration and Fabric” posts for new pattern releases. The inspiration pics for the Enmore Dress were so chic and contemporary that I immediately started planning how to adapt the pattern to recreate some of the looks and added this pattern to my summer capsule sewing plan. My earlier Enmore post addressed how I made fit adjustments. This post will walk you through a simple alteration to dial up the drama for this pattern.
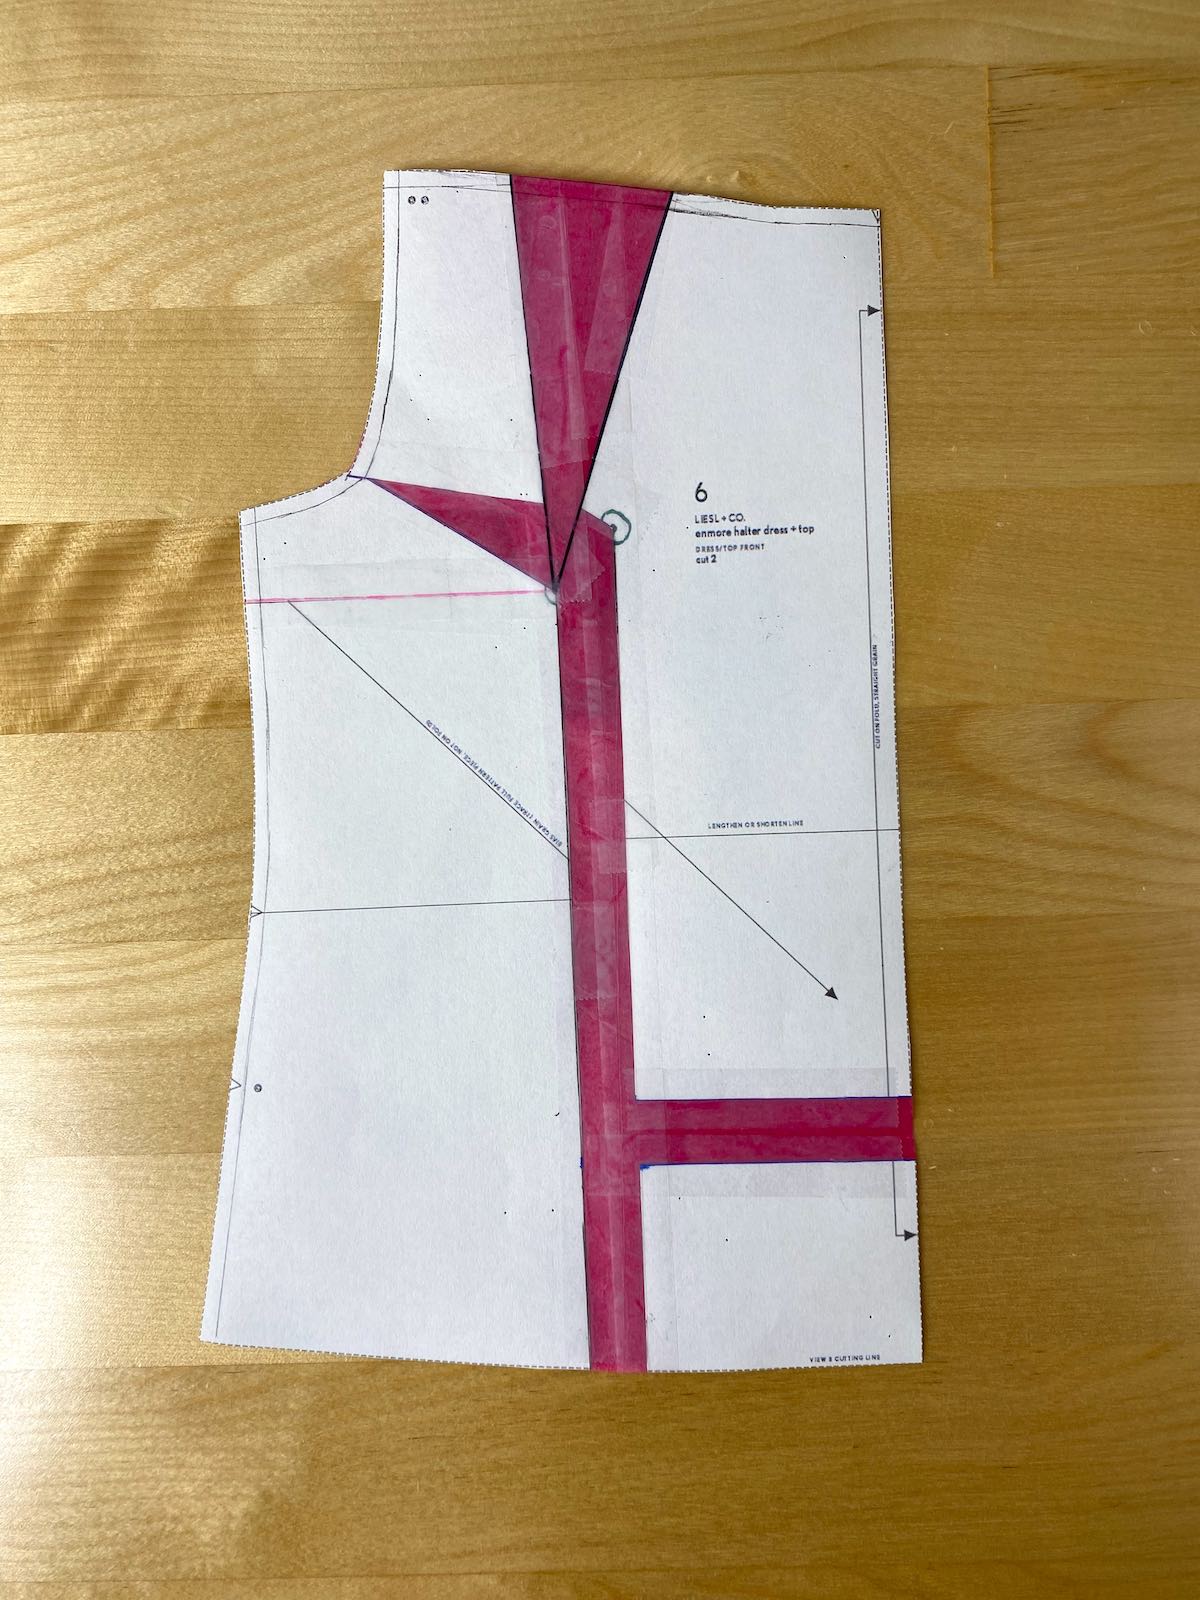
To alter the Enmore Dress pattern, I added both length and flare. I started with the pattern that had already been adjusted for fit. Below is my pattern with a full bust adjustment from my previous post, which is the starting point for the transformation in this post. You can skip this step if you don’t need fit adjustments. I already added the stitching lines to this pattern piece when I completed fit adjustments. If you are starting with a clean pattern, draw in the seam allowances. For this pattern, the seam allowances are 1/2″. Note that the pictures in this example are not drawn to scale, and I’m using the bodice top in the photos for simplicity. The steps are the same; only the scale is different.
Adding A-line Flare to the Pattern Piece
To add flare to the dress pattern, I followed the general directions for the Flared A-line Skirt from The Building Block Dress book. First, since directions are for how to transform a skirt, temporarily place paper behind the pattern to fill in the armscye.
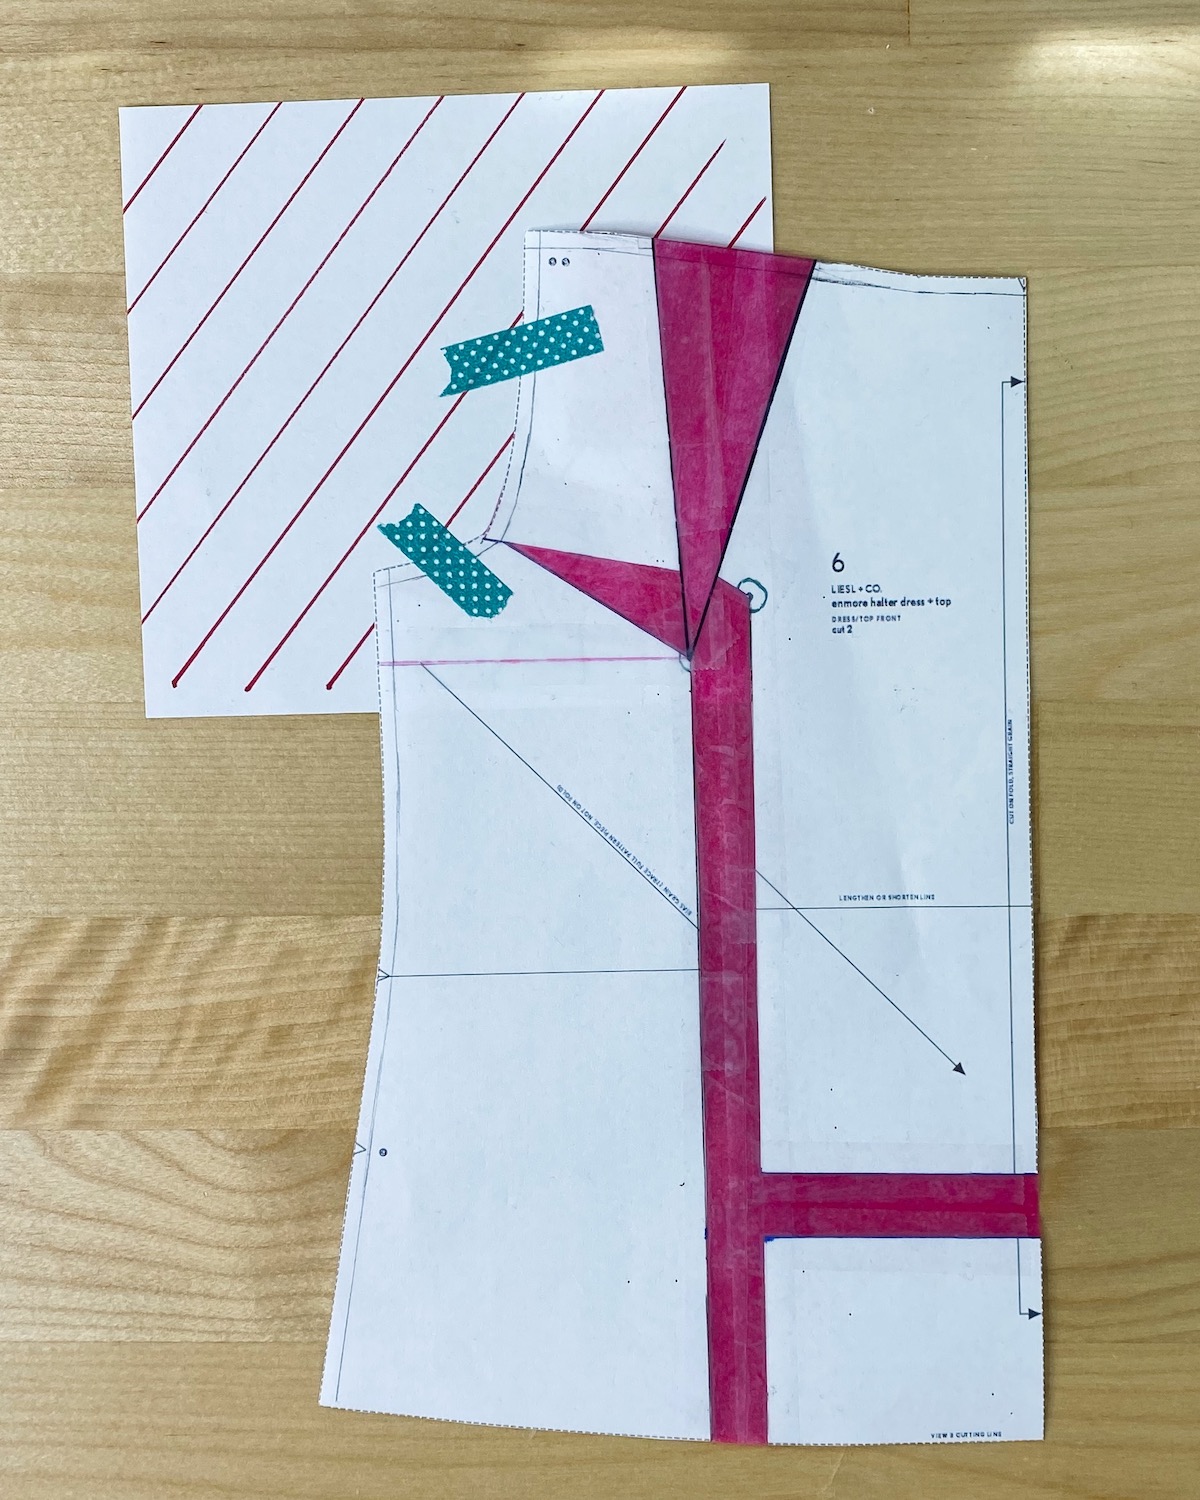
Next, extend the neckline over the armscye to the side seam and the side seam up to the neckline, creating a squared-off shape to the pattern piece (black dashed line). This does not have to be exact; we just need to use these marks to take some general measurements. We will divide the newly extended neckline and the bottom hem by 4 to create evenly placed slash lines across the pattern piece. On my pattern, the extended neckline was 12″ wide, so I made hash marks every 3 inches along the stitching line of the neckline. The bottom hem width was 16″ inches wide, so I made hash marks every 4 inches along the hemline. See the blue hash marks along the neckline and the hemline.
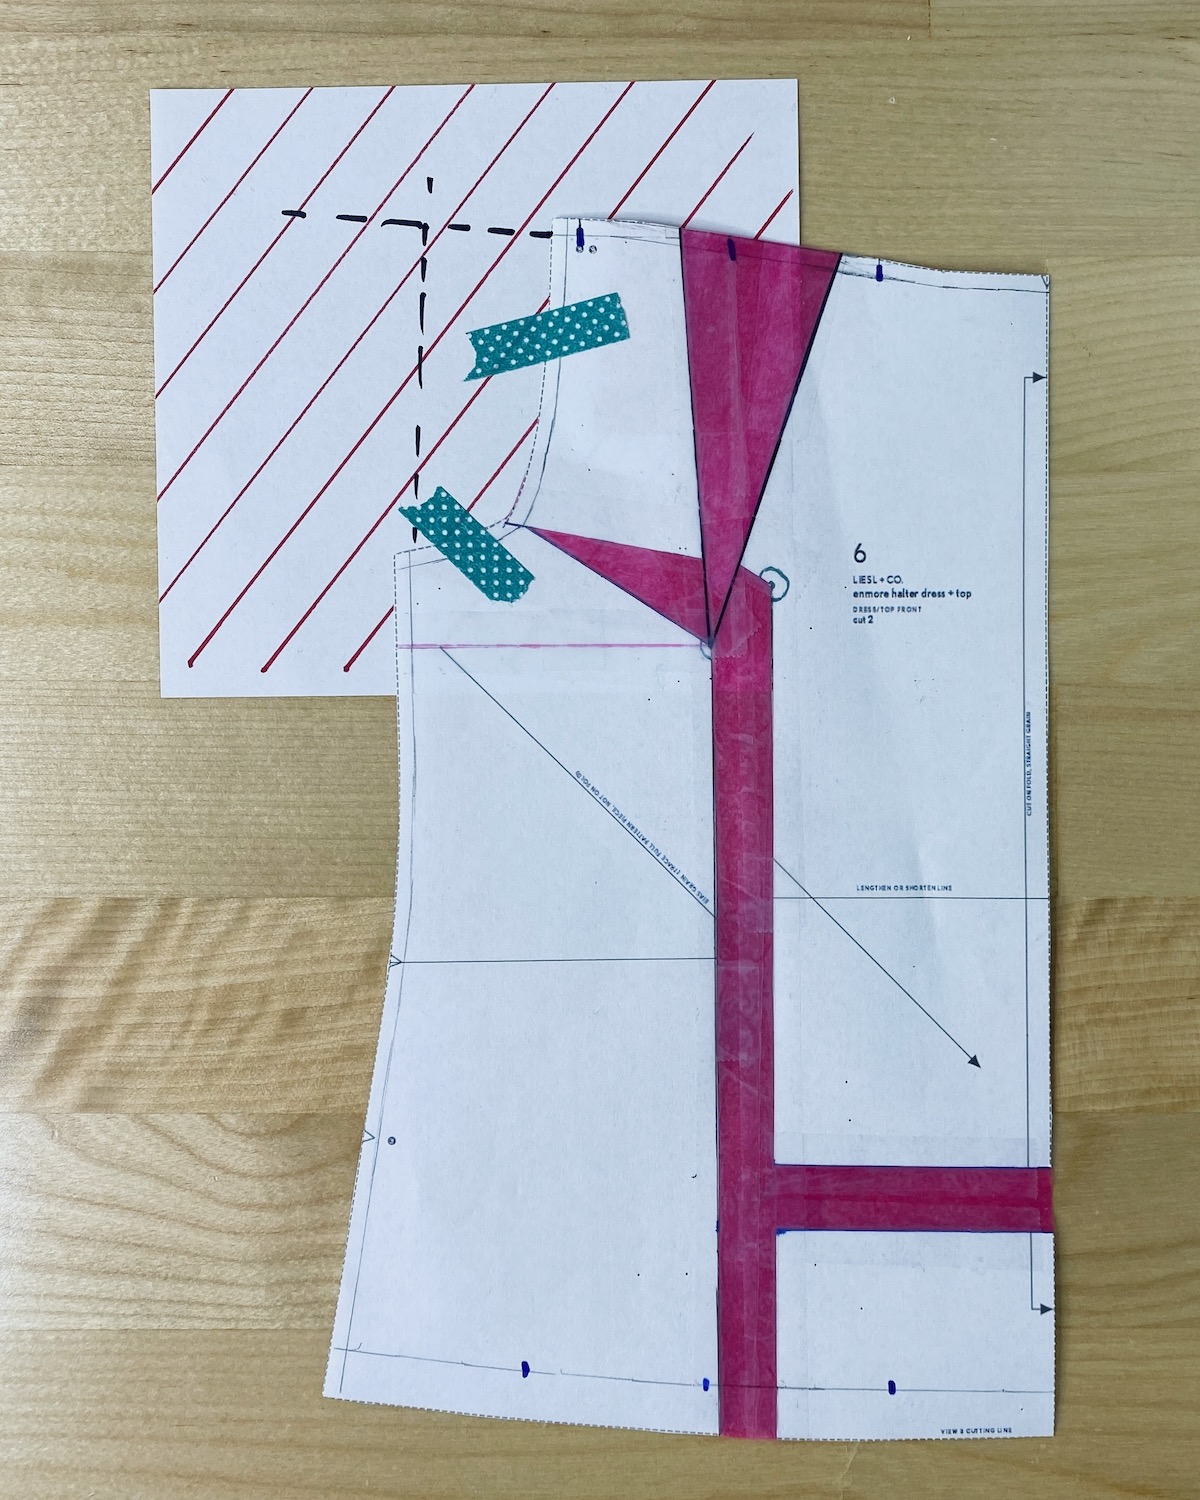
With the hash marks placed, connect the points to create three slash lines.
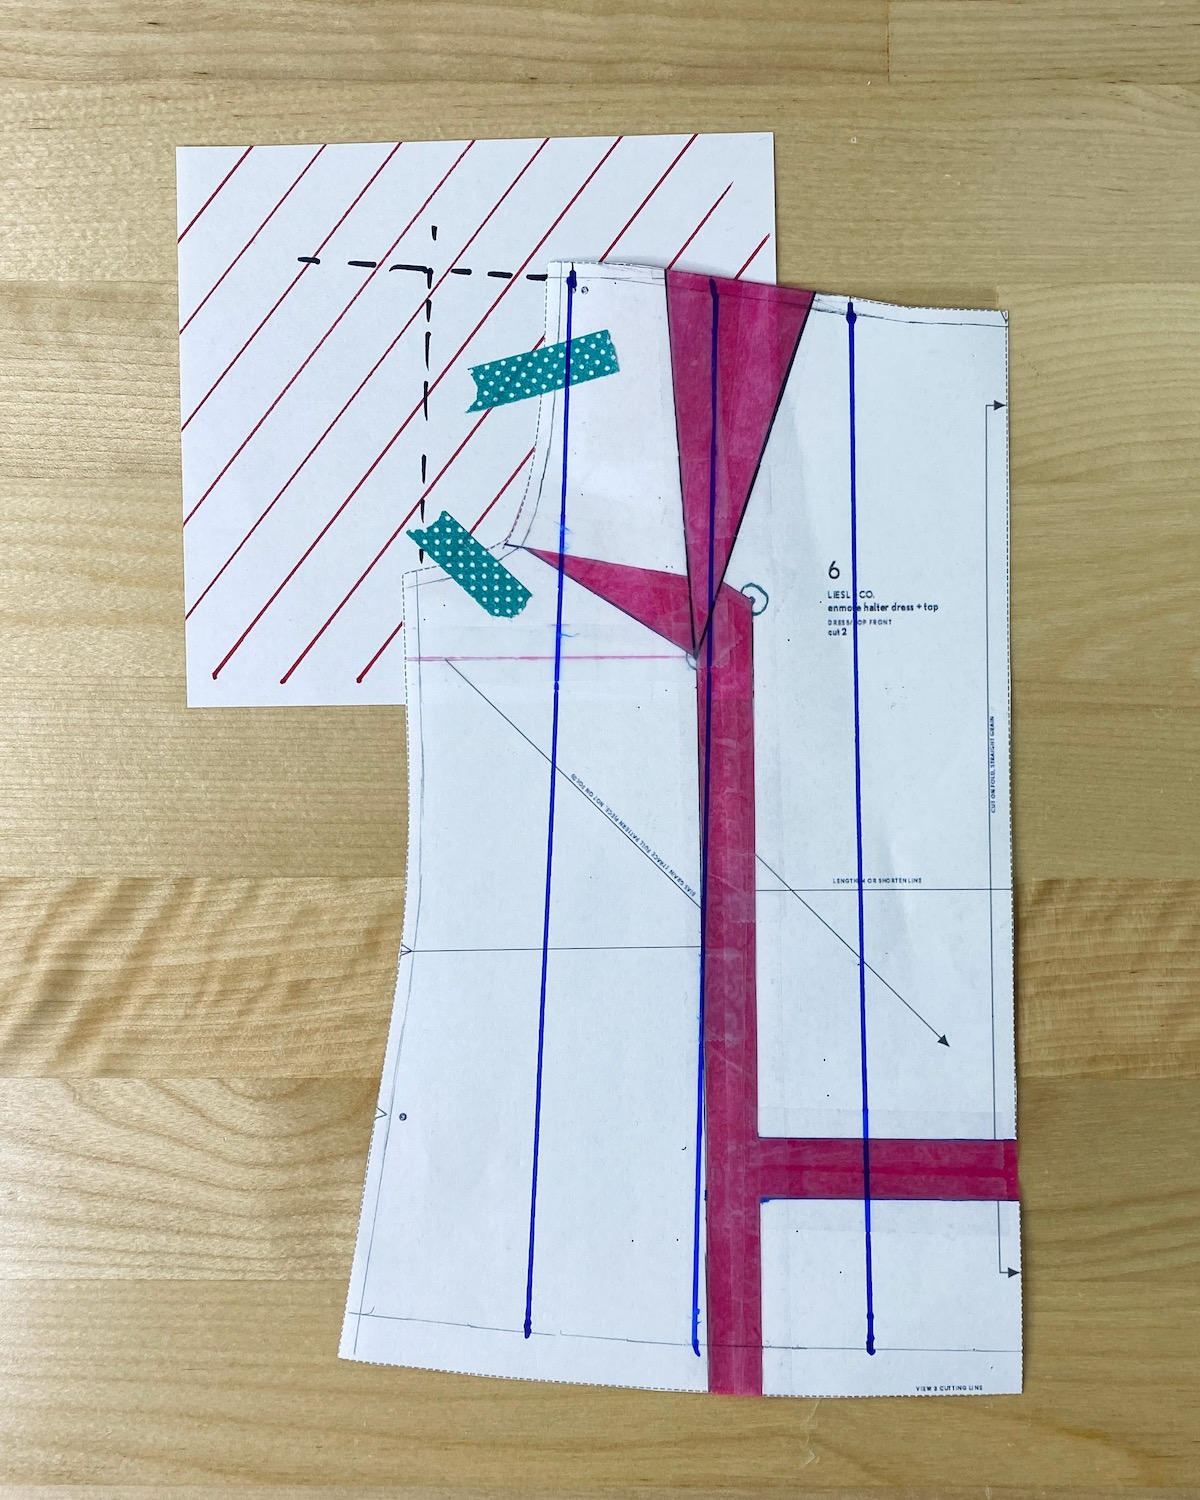
Cut along the slash lines from the bottom to the neckline, stopping at the stitching line. Do not cut all the way through the paper at the neckline; you want to leave a little hinge at the top of each cut so that the pattern piece remains connected.

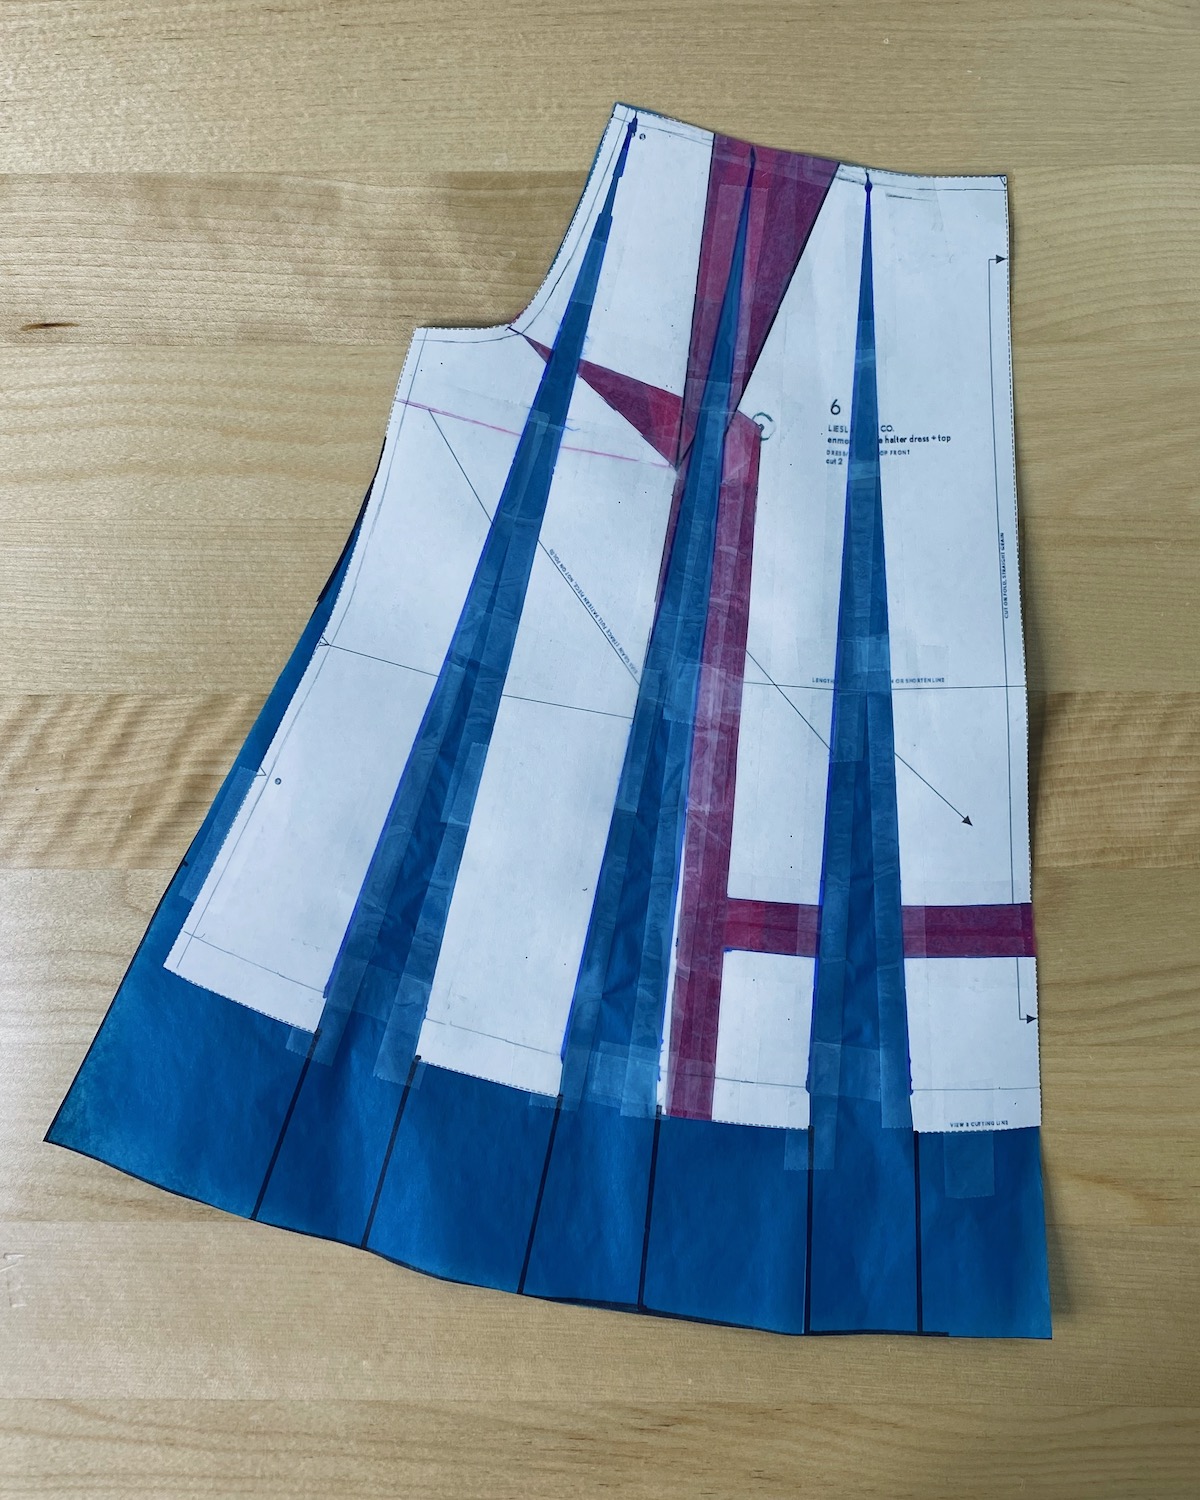
Spread the pattern pieces apart an equal distance between each slash line. I added 4″ inches in between each slashed piece on my pattern. Next, place the pattern on top of tissue paper and apply tape to secure it. On the side seam, add half of the width you used in between the other pieces. On my pattern, I had added 4 inches in between each slashed piece, so I added an additional 2 inches to the side seam. Taper the side seam up to the armscye, blending into the side seam just below the armscye to prevent adding width or changing the shape of the armscye.

Finally, extend the slash lines the amount you want to lengthen the pattern piece. You don’t have to be exact here; just add a little more than you will need. I guesstimated that I would want to add 15″ to the length. Draw your new hemline by connecting each extended slash line. Trim the new pattern piece.
Repeat each step on the dress back pattern piece.
Since flare is added to the dress and some of the hemline is now on the bias, you’ll want to hang the dress a few days before hemming. After a few days, I evened up the hem, taking 1″-3″ off the final length.
Final Look
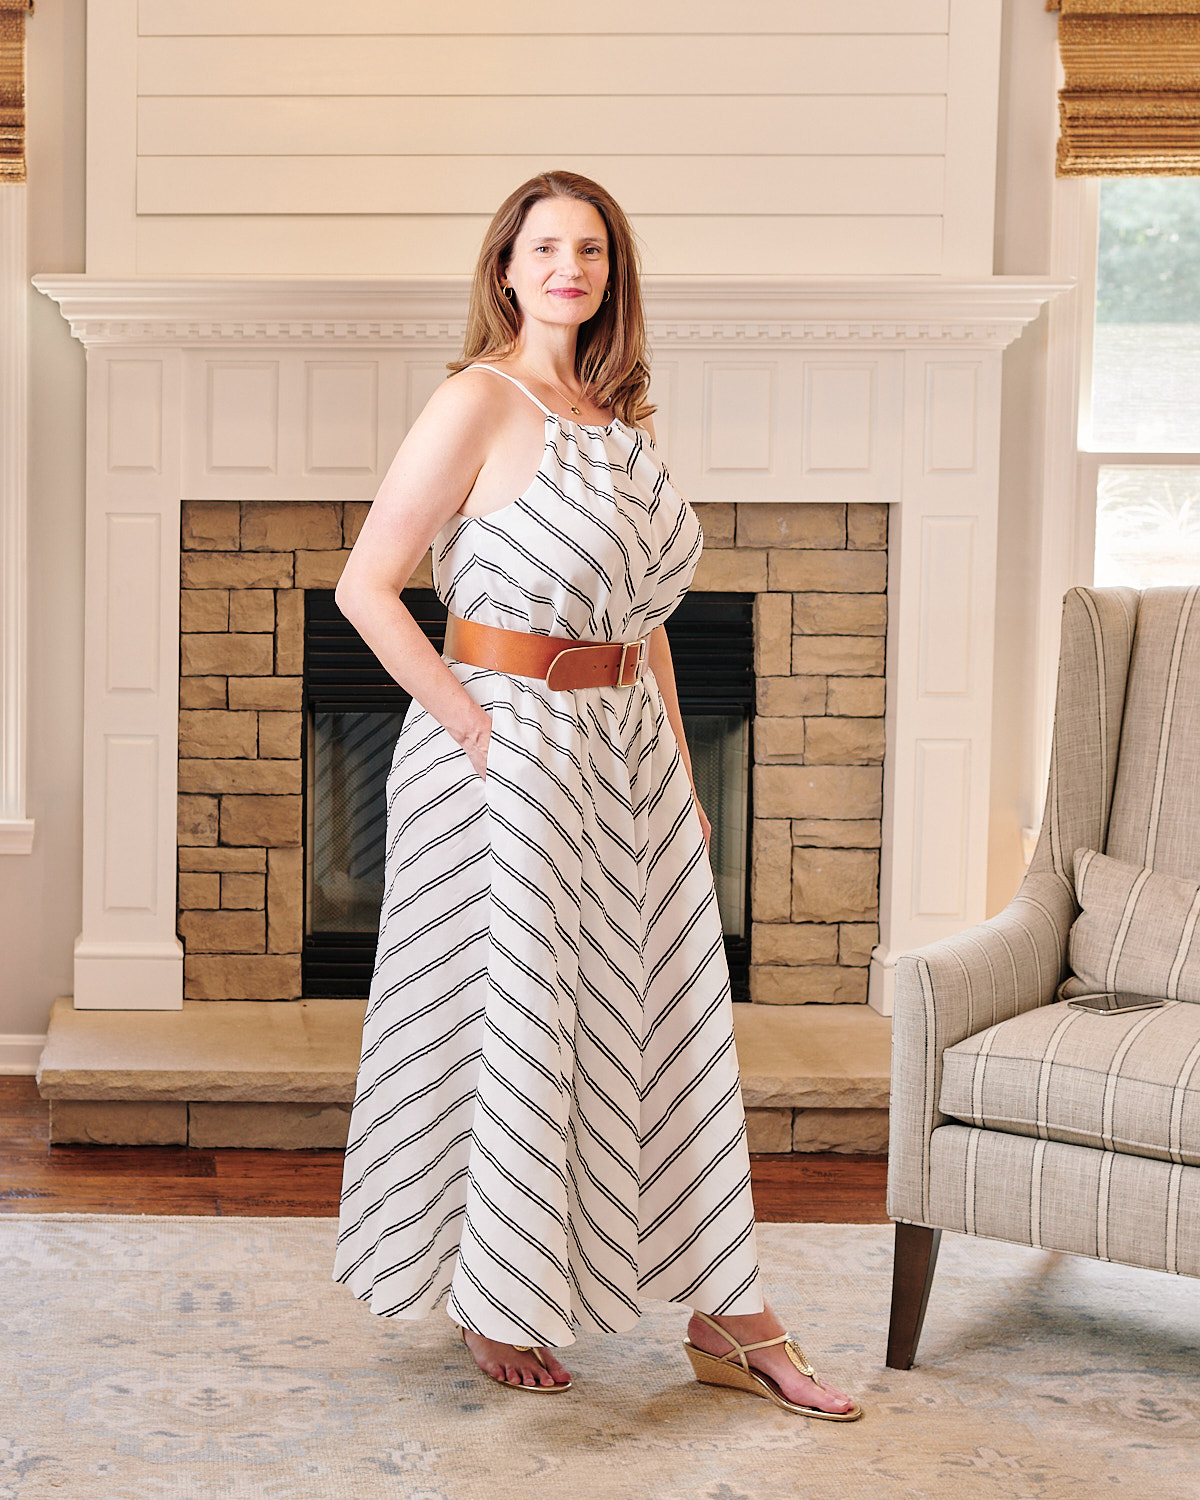
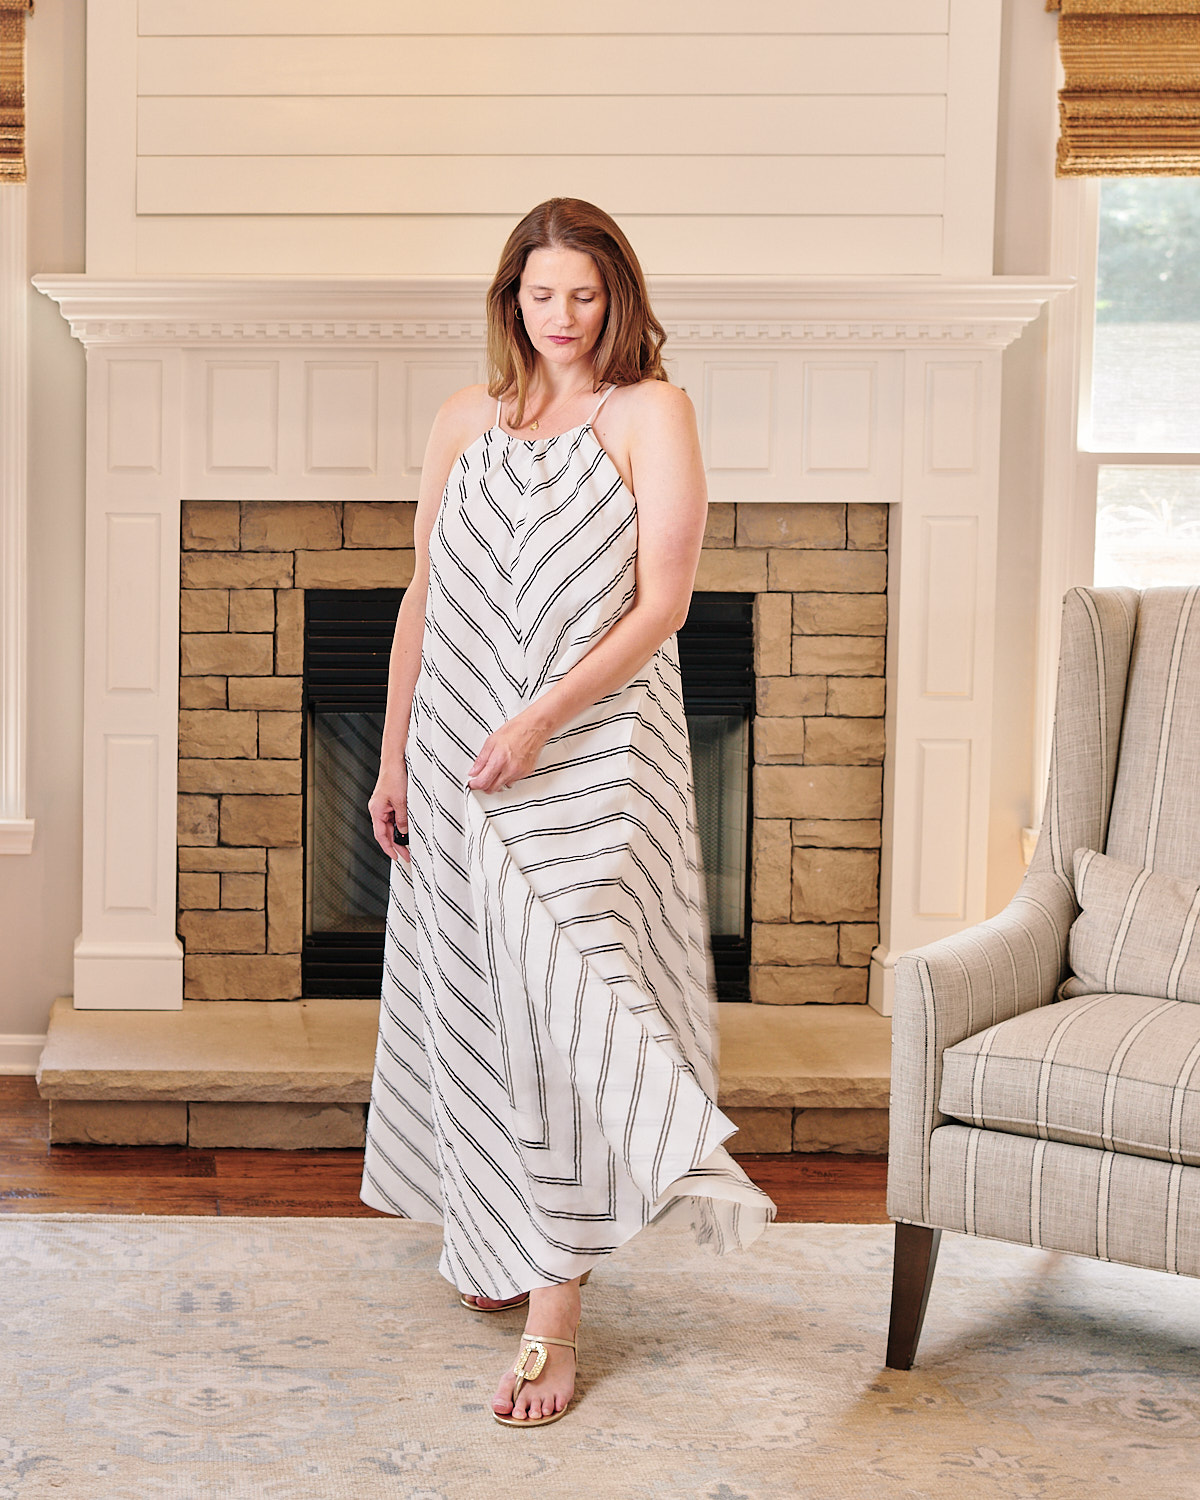
The simple pattern alteration discussed above dramatically changes the silhouette of the Enmore dress. I cut the dress on the bias for even more drama! Compare the final dress to some images I grabbed from Liesl’s inspiration board.

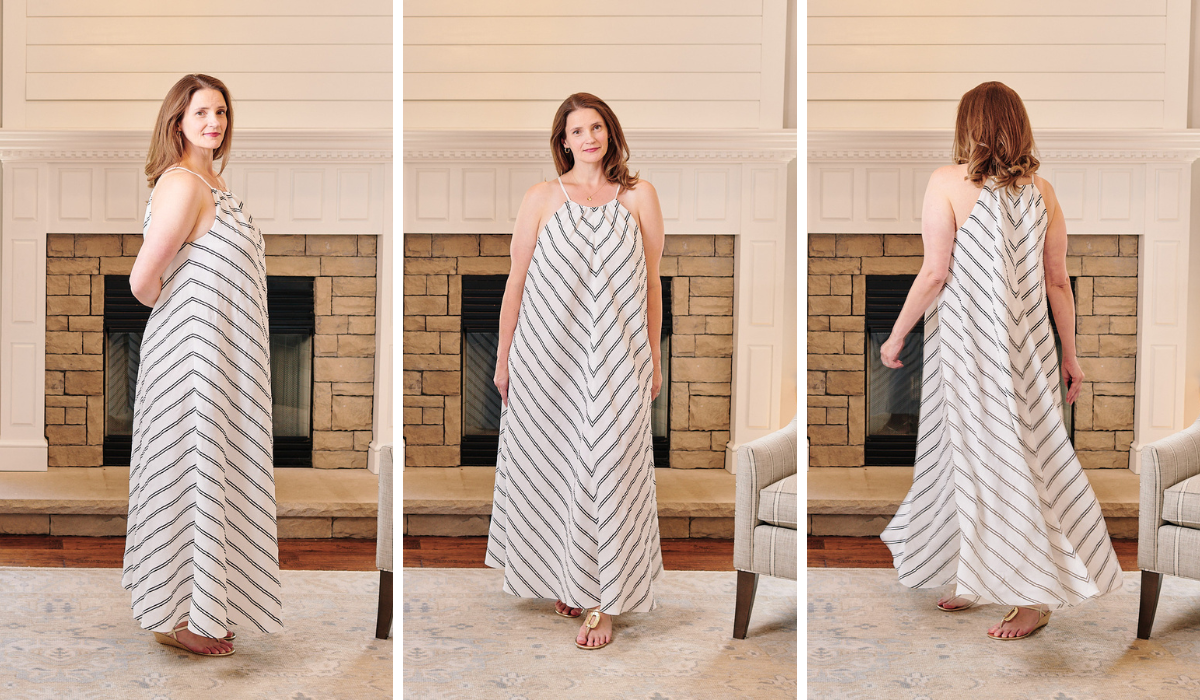
I styled the dress with a couple of belts for more variation. I like having a dress that can be styled for multiple looks. I also added bra cups to the shelf bra for more shaping and modesty since the fabric is light-colored.

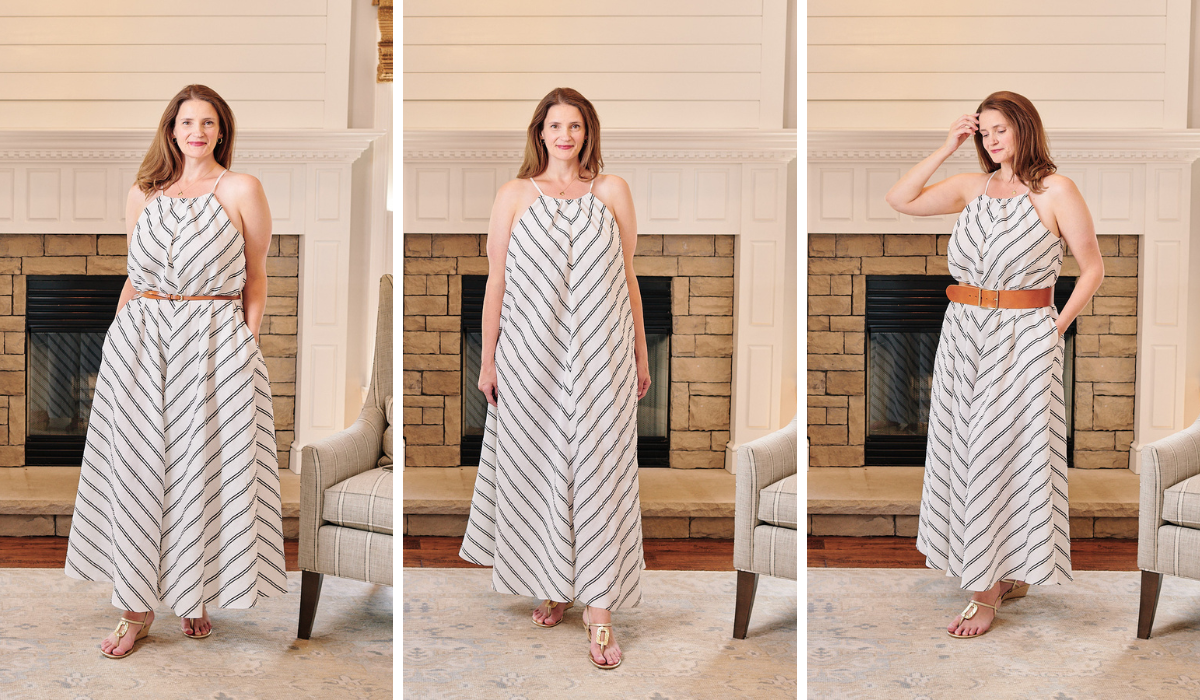
The dress has so much movement and is fun to wear.
Love it! Can I take credit for the cut it on the bias and embrace the chevron idea? 🙂
Yes!
It is gorgeous! The pattern matching, the fit on you, the drape, the extra flare, the appeal of a simple pullover style (no fastenings)—this is all so thoughtfully made and beautifully executed!
It was a joy to make. Definitely one of those projects where enough concentration was needed to get me into a flow state!
Lyndsey, your dress is stunning! Perfect for summer.
Thanks, Ginger!!!
Thank you so much. I love the way you incorporated the flow and bias cut into this dress. It is so beautiful. I have seen dresses like this but did not know exactly how to achieve this style until you showed me.
Susan
Thank you, Susan! It is an easy alteration-try it out!!!