We are so proud of Asmita, who overcame her trepidation to sew a beautifully fitting pair of classic trousers from the Hollywood Trousers pattern. Settle in to read about her fitting and muslining process, and prepare to be inspired!
When I applied to be a member of the Advisors Circle, I knew that one of the things that I really wanted to focus on this year was getting the right fit. I have long admired the Hollywood Trousers pattern that Liesl brought out a couple of years ago. So, at the end of last year I volunteered to sew one for myself for a blog post, even though I knew that it was a three-star pattern and that I was only at the beginning of my own sewing journey.
If I am honest, I will tell you that I almost gave up. As the date came closer, the whole thing, from buying the right fabric to getting through the instructions, felt too daunting. But I am glad I persisted, and today I have trousers to show you.
I decided to do a post with the notes of my journey. I hope this will help other beginners like me tackle a complex pattern which ultimately yielded incredible rewards.
Measurements, sizing and adjustments
Having never even sewn a fly zipper, and given my general dread of zippers, I knew right away that I knew I needed to make a muslin or two. Liesl has a general post on making muslins, as well as a specific one for these trousers. I did not find this post until after I made the muslin. By that time, I had made my first muslin including the pocket piece and the fly zipper.
My waist is 30”, my hips are 39”, and I am 5’4”. Based on the finished measurements, I cut a straight size 8, although I spent a lot of time thinking about whether I should cut a 10 at waist. But I have a tendency to make large toiles and so I decided to stick to an 8 for both measurements. Based on my measurements, I also reduced the front and back rise by 1/2” and reduced the pant length by 1 1/2.”
The muslin stage
You can see the result of these changes in the muslin photos. I think it is clear that I totally messed up the zipper, although at this point I could not figure out why. The pants also felt too snug around the waist, but I was still convinced that moving up a size was not going to give me the fit I wanted.
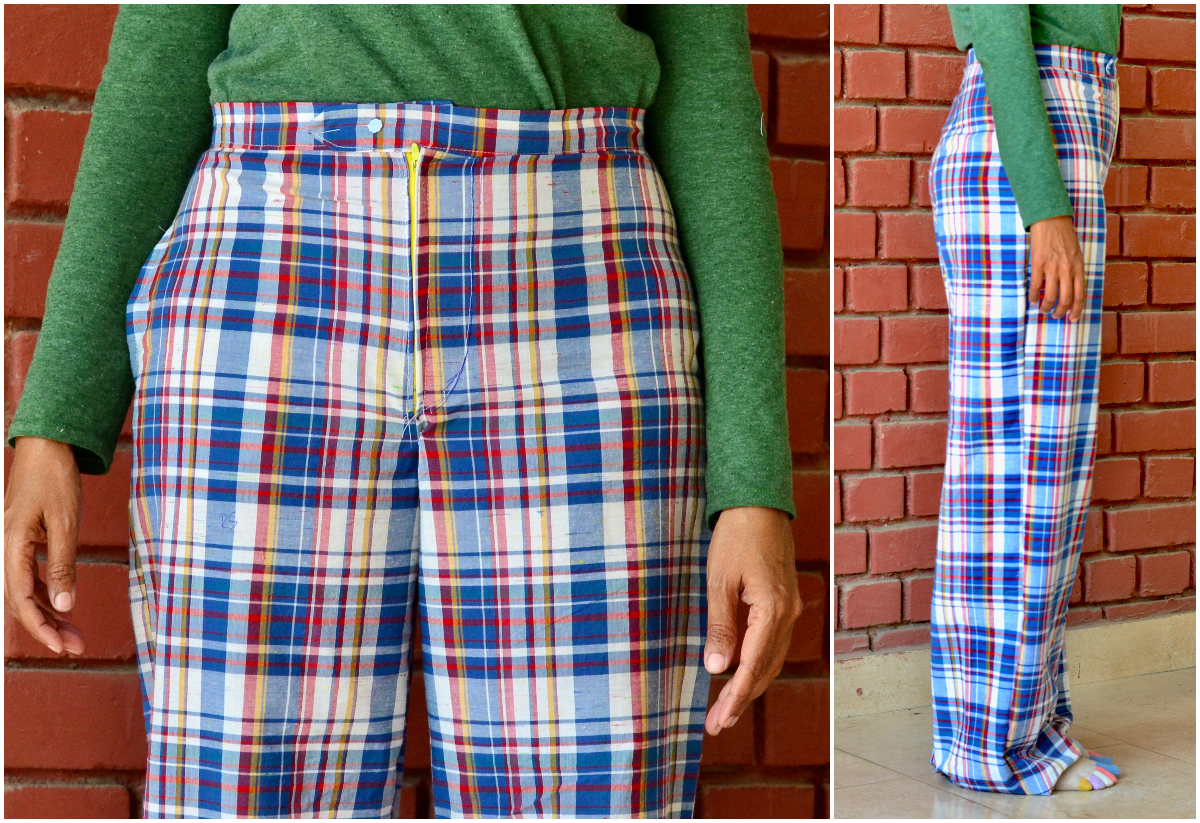
Though a muslin does not require pockets or the waist band, I was glad that I made these, because the construction became clearer to me. I also learned exactly where the pant was going to sit. Another issue was that the pants billowed out too much below my hip line. So I narrowed the entire inseam by 1/2″. I also narrowed the outseam 1/2″ from the hem, tapering back to zero at the hip notch. I ended up undoing most of this adjustment in my final version, though.
Muslin 2 was very short shorts in which I figured out the zip problem. I finally got it! The clue for me was to pay careful attention to the diagrams, especially items 8 and 9 under “Sew a zipper fly.”
I also decided to deal with the snug waist problem by making the following changes to my final trousers:
1. Reducing the width of the back dart by bringing in each foot by 1/8”.
2. Reducing the outseam seam allowance to 3/8″ from the waist to the hip notch. (This also required adjustment while sewing the pockets, so I was glad I had sewn the pockets on the muslin.)
3. Reducing the seam allowance on the back rise just by a smidge (i.e. not even by 1/8″ but just under).
You can see these changes to the pattern in the photo below.
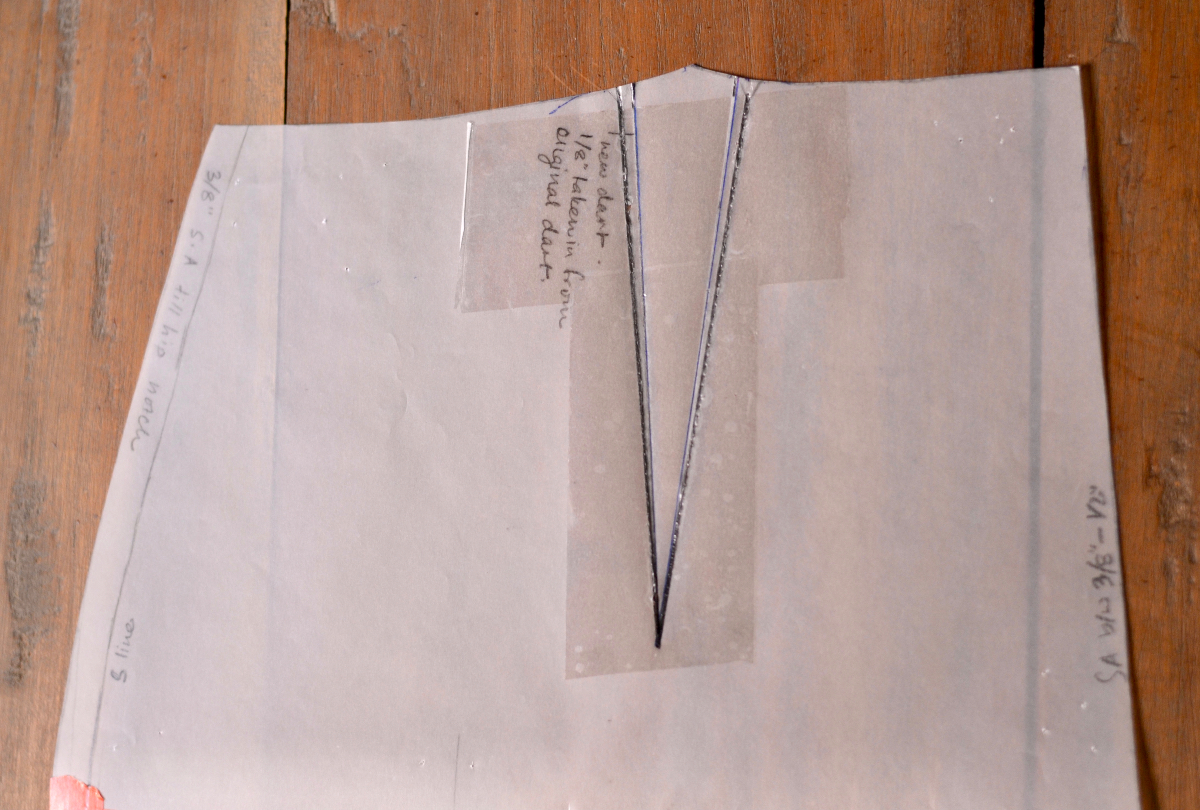
All this gave me about 1” extra waist circumference, so I increased the length of the waistband correspondingly. I did not transfer this changes to my pattern pieces, though, and that turned out to be a good thing.
Final version
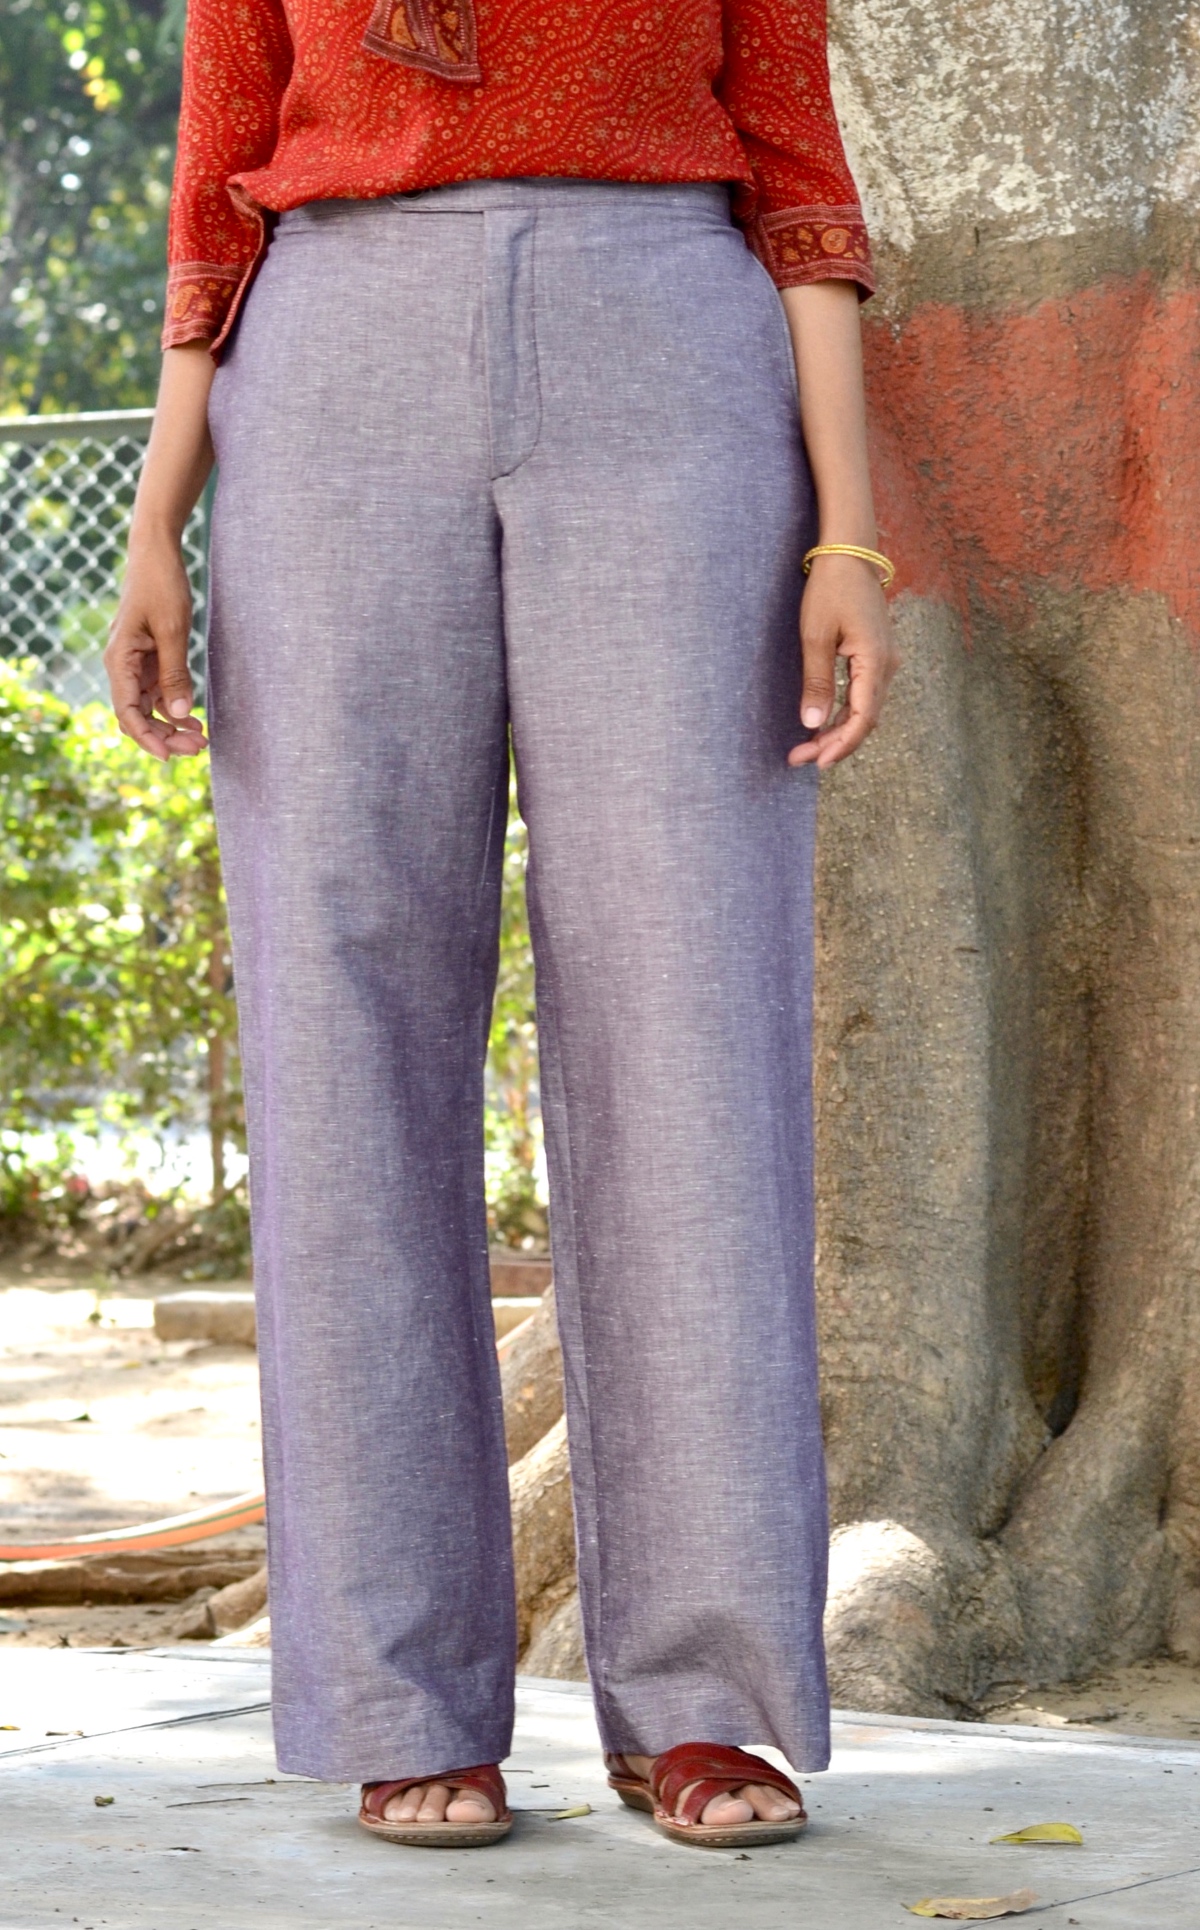
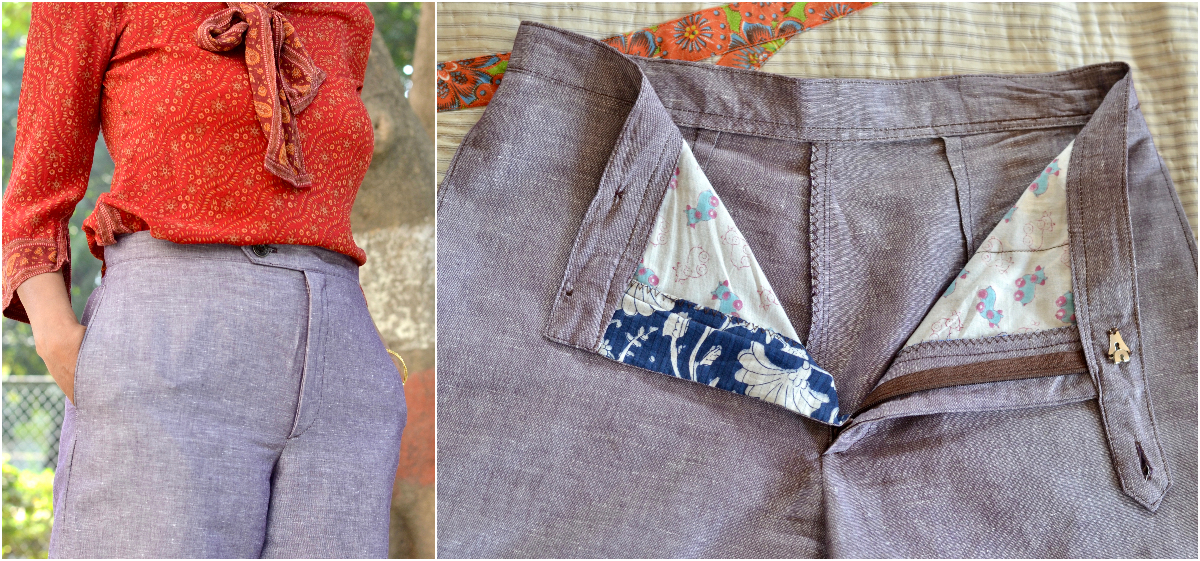
Armed with all these changes, and feeling a little bit more confident, I was ready to cut into my fabric. And ta-da! Here are my pants! The final version is in size 8, with the above alterations to increase the waist circumference, and a 2” hem. Here I am wearing them with my favorite ready-to-wear silk blouse.
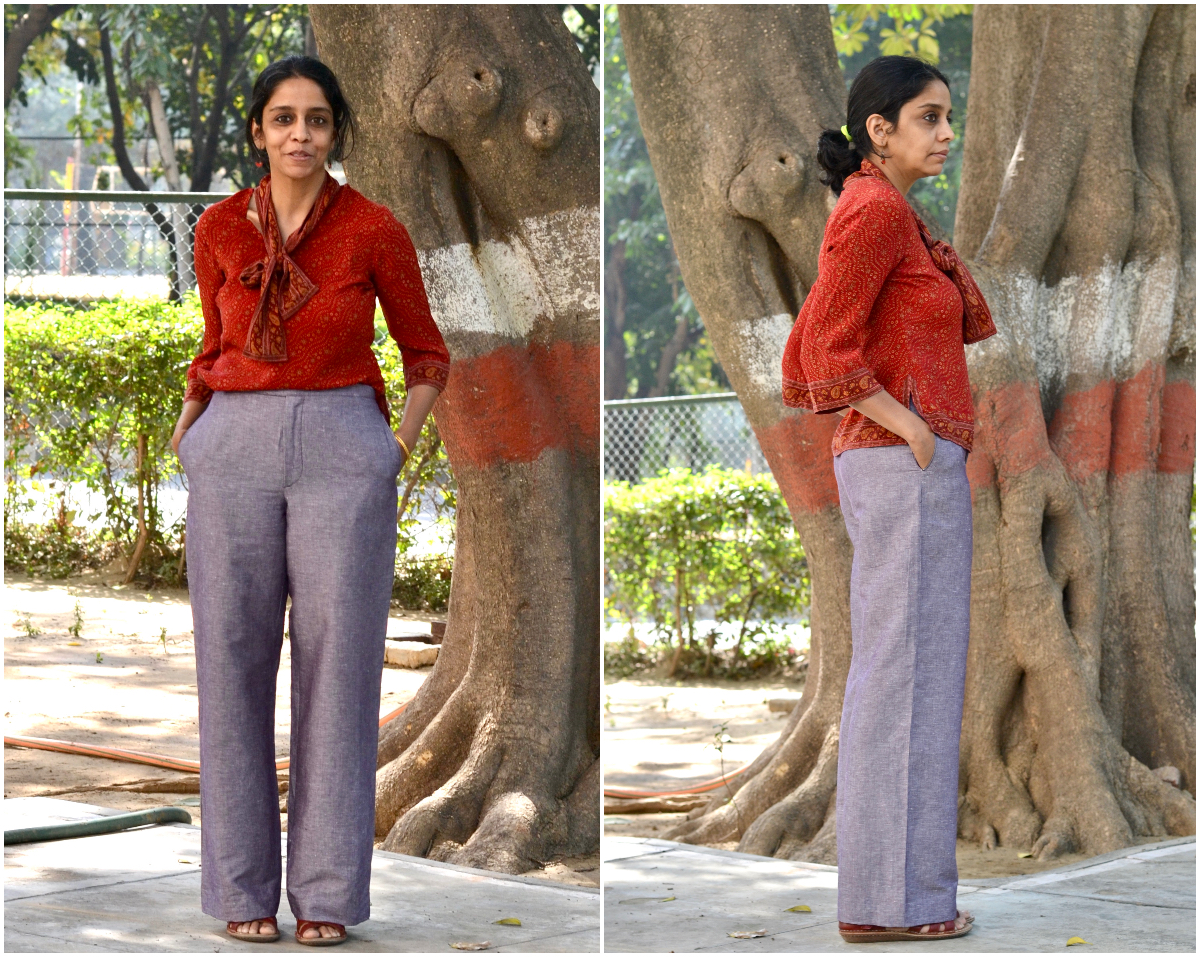
I am particularly happy with how the zipper worked out in the final version. All the techniques that I have learned in this bit of sewing definitely represent the high point of the learning curve.
A short word on the fabric: The cloth I have used here is cotton linen mix from H.P. Singh (from Nehru place, Delhi). Truth be told, having never made pants, I was obsessing a little over the fabric suggestions on the back of the envelope. A very knowledgeable saleswoman gently steered me in the direction of fabrics that would work better in the Delhi heat.
I was initially hesitant because this fabric seemed way lighter than the suggested fabric choices, but after sewing these trousers, I realize that she was right. Not only are they just the right weight for the long summer to come, but I also found that, in this fabric, I didn’t need to take out the width from the legs as I had done in my muslin.
The pants worn here have a 3/8” outseam seam allowance above the hip notch. Below the hip notch, I tapered it in to a 5/8” allowance. Similarly, for the inseam I started from the hem with the given 1/2” allowance and sewed a 5/8″ allowance at the crotch.
Finding the right color in the zipper was yet another struggle. I learned in the course of this journey that 9” pant zippers come basically only in two colors and will need to be dyed to the correct shade.

And with that, I come to the end of the trouser sewing saga for now. I feel like I have learned something entirely new, and so if there is anyone else out there like me sitting on the fence, I hope this offers some encouragement. The Oliver + S blog has a whole range of helpful posts offering some valuable handholding, and there is also a trouser sew-along for novices like me.
As for me, this is not the last pair of Hollywood Trousers I will sew. This is just the beginning. I still have a few minor issues that I can’t figure out (the waistband at the back stands out but only sometimes, and I might still try the size 10 waist to figure out how it fits), but for now I am really happy with the outcome. Thank you Liesl for this absolutely fabulous pattern and the very best instructions.
I very much appreciate this blog on making pants.
I steer away from pants unless they have elastic waists.
These look very polished, actually. I would wear them as dressing up pants.
The way she explained things really helped. I hope she will write again!
Thank you for your feedback. Yes, until I made these I have also only made pants with elastic waists. A waist band that fits me exactly do make them a whole lot dressier.
The pants are lovely! I’ve always been put off by how wide the legs in the pattern’s picture are, but yours look like they are the width that I want. Ah, and HP SIngh. We have piles of lovely fabric from them, and it’s been too long since I’ve been in India to visit them.
So glad to hear from a fellow HP Singh fan. Yes, their fabrics are the best; these days a couple of shops around there also carry very good fabric, but the salespeople in HP Singh are very knoweldgable, which in the case of these trousers was a big game changer. I also was happy with the final width of the pants, and between the muslin making and final pair I realised that how the fabric falls and its weight also determines how the width looks (the muslin actually has lesser width than the final version!)
Asmita, what a wonderful job on the trousers and also what a thoughtful, helpful and encouraging write up. The trouser’s fit you and look terrific with the red blouse. Your post encourages me to persevere on toward a more challenging pattern and challenging fit issues. Pants seem much more complex than shirts, dresses etc. Thank you so much for writing this. I also enjoyed your previous post about the 2 Kirtas you made as well. I hope to continue making a St Germaine dress. I got discouraged with sleeve fit issue and set those muslins’ aside. Maybe the time has come! Cheers and congratulations on great work!
Thank you Nirmala for those kind words. I am happy to hear that the write up proved useful to you. I think pants and shirts tend to be challenging in different ways–they key perhaps is to break the challenge in smaller parts and deal with it issue wise? I hope you persist with the St. Germaine dress and you come up with a version that you like soon.
Way to go Asmita! I think you did a great job, and your pants fit really well. I have massive pants-phobia, but maybe I’ll give them a shot myself after seeing your efforts. (I think I need to be less lazy about muslins 😉
thanks for sharing!
I have been immensely lazy about muslins for a long time (until last year) which is why my one off efforts always ended up being disappointing making me gave up. So I hope you persist too 🙂 and I will be very happy if this write up helps you take a step in that direction in any way. Thank you for comment and kind words.
You have encouraged me to give it a try, your pants are so perfect. I’d love to figure out a perfect pair of pants for myself as you have done. Thanks
Thank you Deborah. I am glad this post inspired you to do so.
Beautiful trousers. Thank you for the detailed explanations.
Thank you Ava.
The trousers are beautiful and I appreciated hearing about all of the little tweaks you made here and there. I would never have thought to decrease the dart– thank you for these ideas! I am still planning on embarking on my first personal pair of bottoms without elastic soon and really appreciate these tips.
It’s my first time decreasing the dart as well! Trousers sewing was an intimidating yet ultimately an extremely fulfilling process. Hope you embark on yours soon!
My waist measurements are usually one size bigger than the hip, and I.m often torn about cutting the smaller size, the bigger size, or grading in between. You’ve taken an approach I hadn’t thought of! These pants look great! Thanks for sharing this post, Asmita!
Thank you Christine for those kind words. To be fair, I am sure that is sometimes necessary, and I actually want to try that with these pants (use a size 10 waist that is). But I am glad that I persisted, and in the end had pants that I can wear and be proud of. I think making a muslin is the key here, which Liesl also emphasises on. I hope you make pants soon for yourself too.