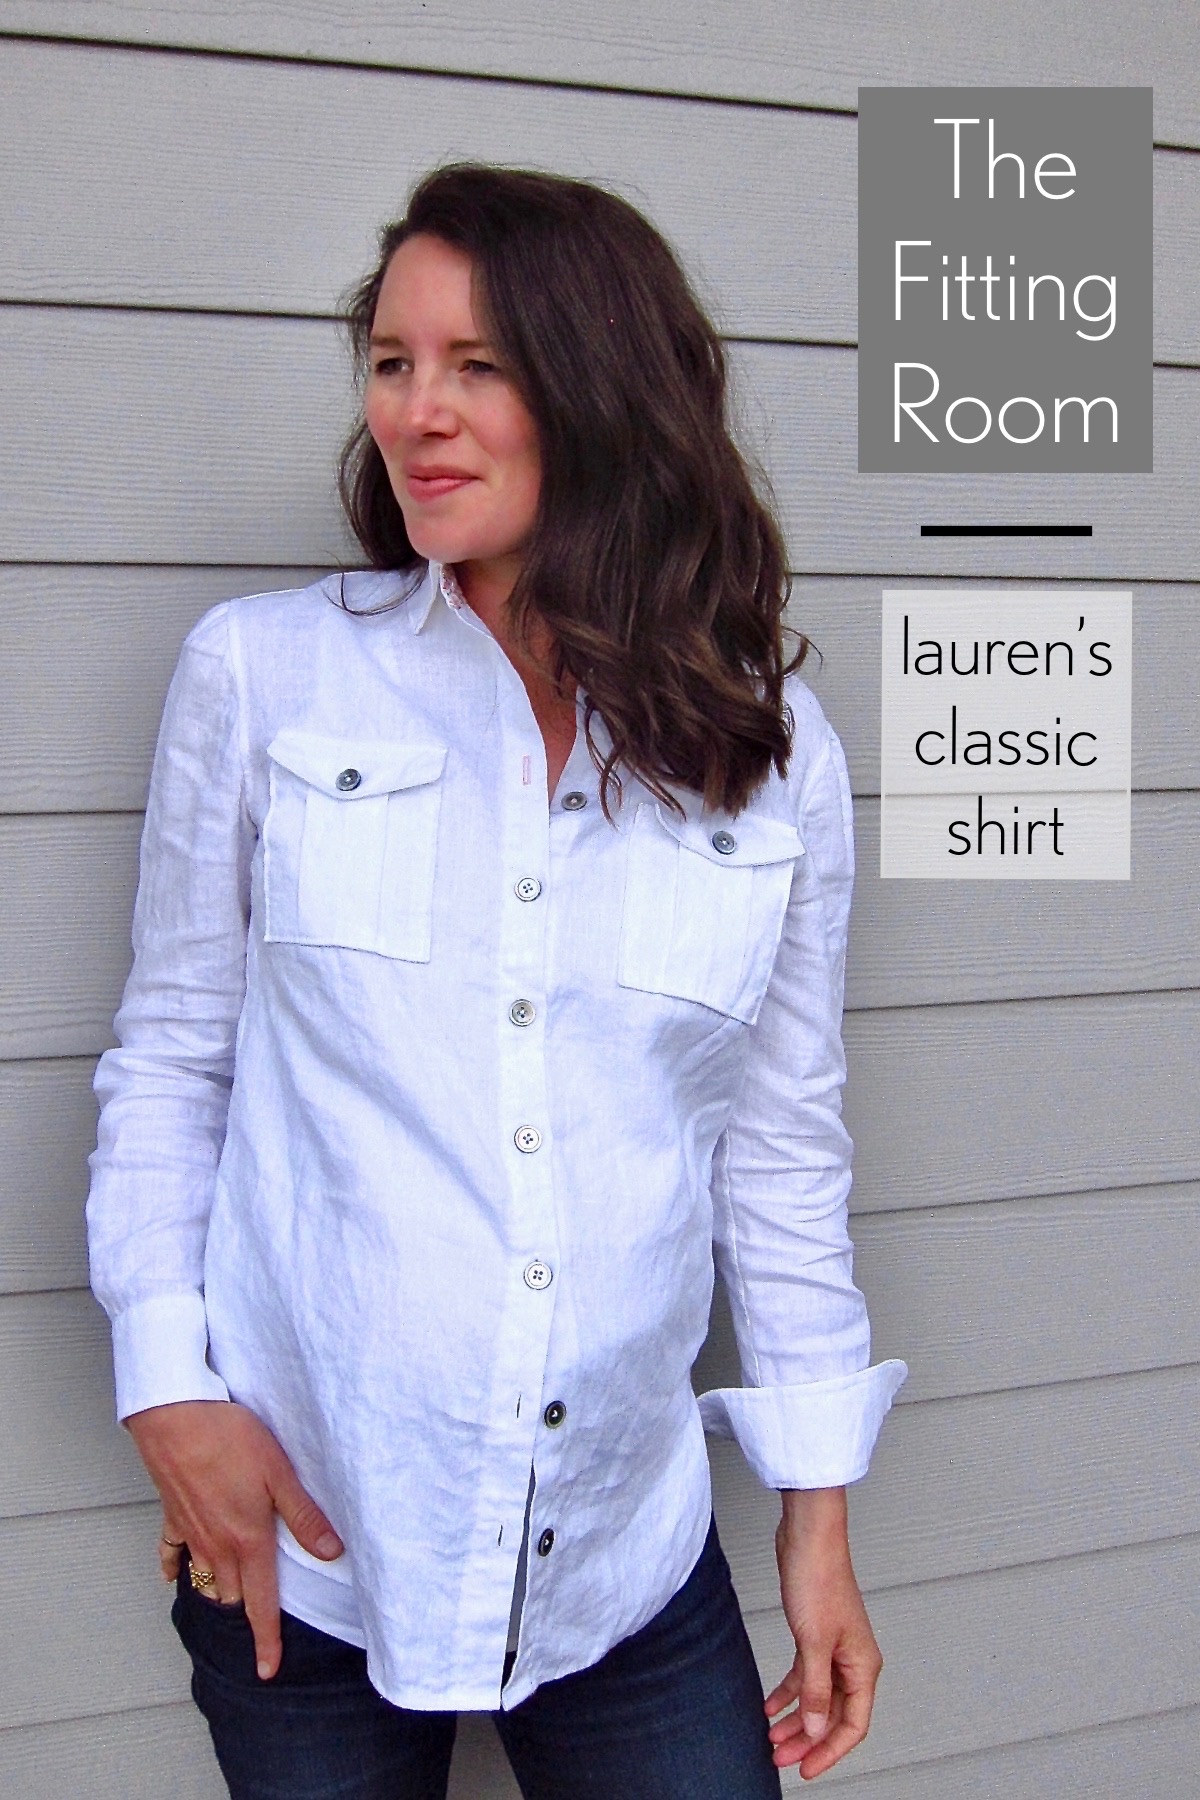
Today we’re excited to welcome Lauren to the blog, to talk about her fitting journey in sewing the Classic Shirt pattern. She’ll be walking you through her muslin and adjustment process. If you typically struggle with tightness across the back when fitting patterns, you’ll definitely want to give this a read.
I love the look and versatility of a classic button-up shirt, but I have never had success purchasing one off the shelf, which is why I knew the Liesl + Co. Classic Shirt would be a pattern worthy of perfecting the fit!
Truth be told, my garment sewing journey began just over a year ago, and fit has been my number 1 priority. I’ve taken a few courses, tinkered a lot, and read lots of books. Pattern alterations are not difficult per se, but the challenge, for me, has been knowing what alterations are needed to address my own fit issues.
My journey in creating my first Classic Shirt was slow because I was very much in the learning phase. I’ll walk you through my approach and share my learnings. I hope this helps some of you with similar issues!
Fitting the Classic Shirt: Muslin #1
To begin, I chose a size 6 based on my measurements:
| Me (in) | Size 6 (in) | |
| Bust | 35 1/2 | 35 1/2 |
| Waist | 30 | 28 |
| Hips | 38 | 38 |
| High Bust- Bust | 0 | Regular A/B Cup |
| Height | 5’10” | 5’6”-ish* |
| Shoulder Length (measured from pattern) | 5 1/2 | 4 7/8 |
[Note from Liesl: Our patterns aren’t designed for an exact 5’6″ height, but if I measured our dress form, that’s probably about how tall it would be. The drafted height will also vary a bit by pattern. For this reason, making a muslin as Lauren did (or doing a few quick measurements) is the best way to figure out if you need to alter a pattern for your height.)
Tip: I recommend taking a few measurements of your problem areas on the pattern itself before getting started.
Before I cut out my first muslin I made two adjustments:
Adjustment #1: Broad Shoulder Adjustment
The shoulder seam should meet the armhole roughly at the hinge point of your shoulder (keeping in mind that more relaxed fits, like the Classic Shirt, typically have a slight drop to the shoulder). From my measurements, I knew I needed to add width, so I did a broad shoulder adjustment to add 5/8” per shoulder.
[Note: See our tutorial for a narrow shoulder adjustment, which can be reversed to do a broad shoulder adjustment, here.]
Adjustment #2: Lengthening the Bodice
Lengthening patterns is a standard alteration for me, as most pattern companies design for 5’6 height. Lengthening (or shortening) of the bodice and sleeves is accomplished by cutting at the lengthen/shorten line and adjusting length accordingly.
The Classic Shirt is designed to be longer, so for the perfect fit, I recommend comparing the finished length to your torso before cutting. I didn’t follow my own advice and ended up removing the 1 1/2” I originally added.
Tip: Whenever you lengthen or shorten patterns, be sure to walk your seam lines to ensure they match up perfectly!
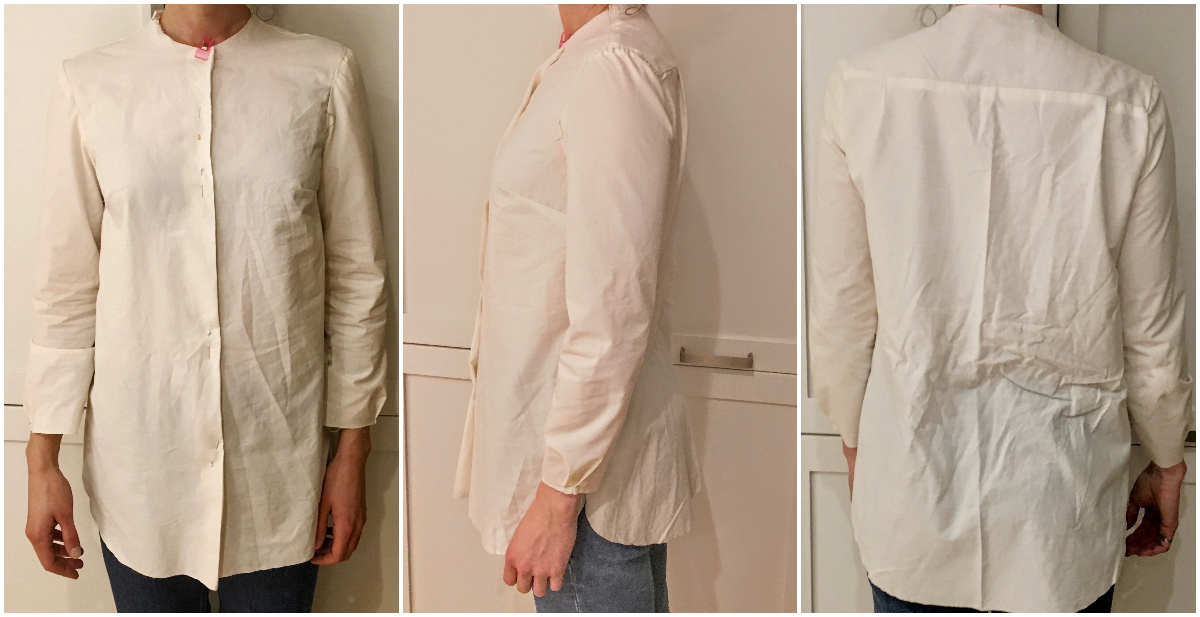
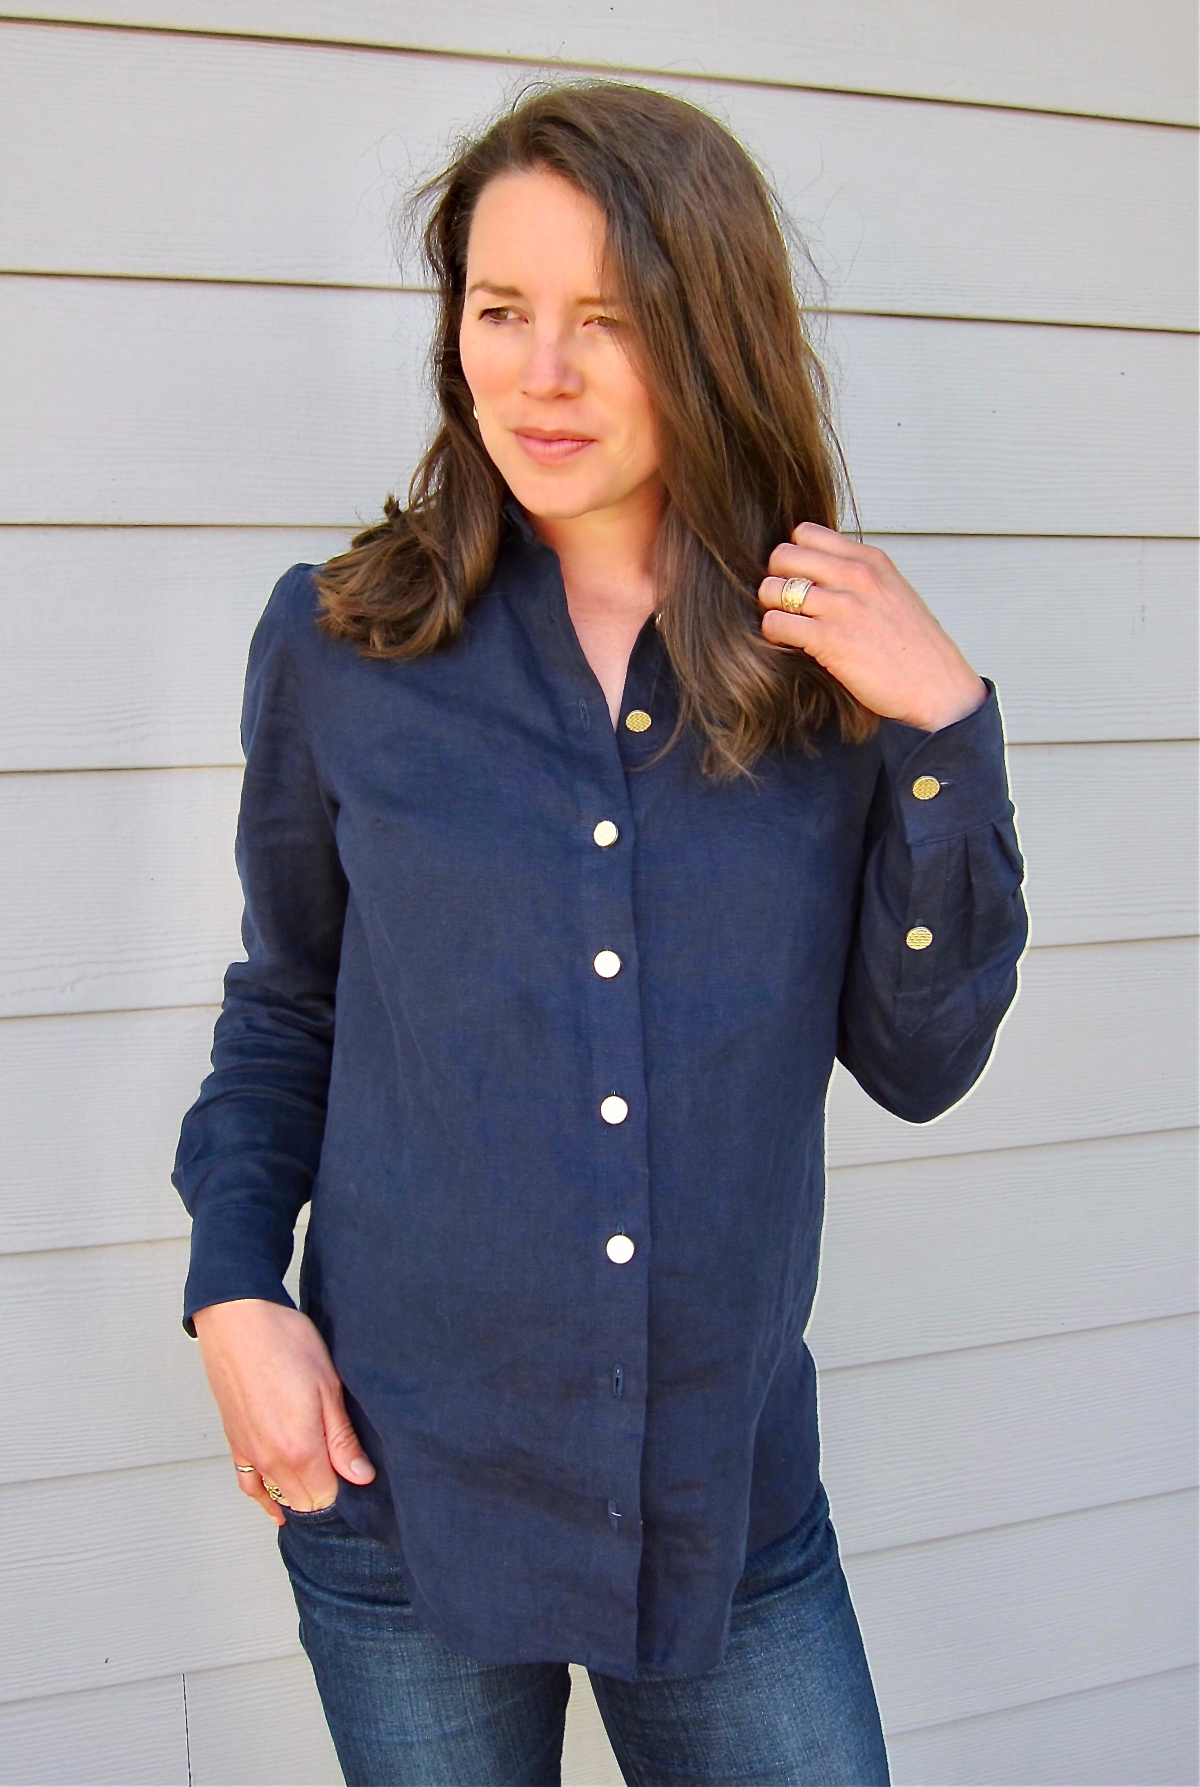
Here is my first muslin:

The fit through the waist and hips was great and the shoulder seam was falling in the right place. However, the fit through the chest was tight, with draglines from my bust apex to shoulder tip. Furthermore, my range of motion in my upper back and chest felt very restricted and the upper arms felt tight.
Fitting the Classic Shirt: Muslins #2 – #5
Knowing what I know now, muslin #5 should have been #2. After #1, I knew the fit wasn’t right, but I didn’t know what changes to make to improve the fit, so I played around with some different options on #2 and #3.
Adjustment #3: Moving Up in Size
By #4, I moved up to a size 8 in a C cup, maintaining the broad shoulder adjustment. Now, all the wiser, I should have used a C cup in size 8 to begin because C cup is my bra size and the 0” difference between my high bust and bust is due to a broad chest, indicating I likely needed more width in this area. Muslin #4 then became #5 when I learned a very important lesson in pattern drafting: Be sure to true shoulder seams at right angles! This leads me to the fit of muslin #5:
The fit through the bust and shoulders was now perfect, with no pulling or draglines. The darts also looked to be fitting well (perhaps even a tad low in this photo). However, the chest and back still felt very restrictive.
Finally, I had that ah-ha moment and realized that the culprit was a tight upper arm, which is clear from the back and profile photos above.
Tip: Have someone take lots of photos of you in your muslins and scrutinize them for tightness, gaping and draglines to identify your problem areas.
Muslins #6 and #7
Adjustment #4: Increasing Sleeve Cap Ease
On my 6th muslin, I added 1/2” ease to the sleeve cap.
[Note: Liesl wrote a full bicep adjustment tutorial a few years ago, which you can see here.]
At this point, the fit was much better through the chest, back and upper arms. The perfectionist in me thought the fit could still be improved, but I was at a loss as to how, so I reached out to an instructor of mine for a private lesson.
Adjustment #5: Redrafting the Armscye
This included:
- dropping the armhole by 3/8” and taking in the side seam at the base of the armhole by 3/8”
- reshaping the armscye to provide more width through the chest and back

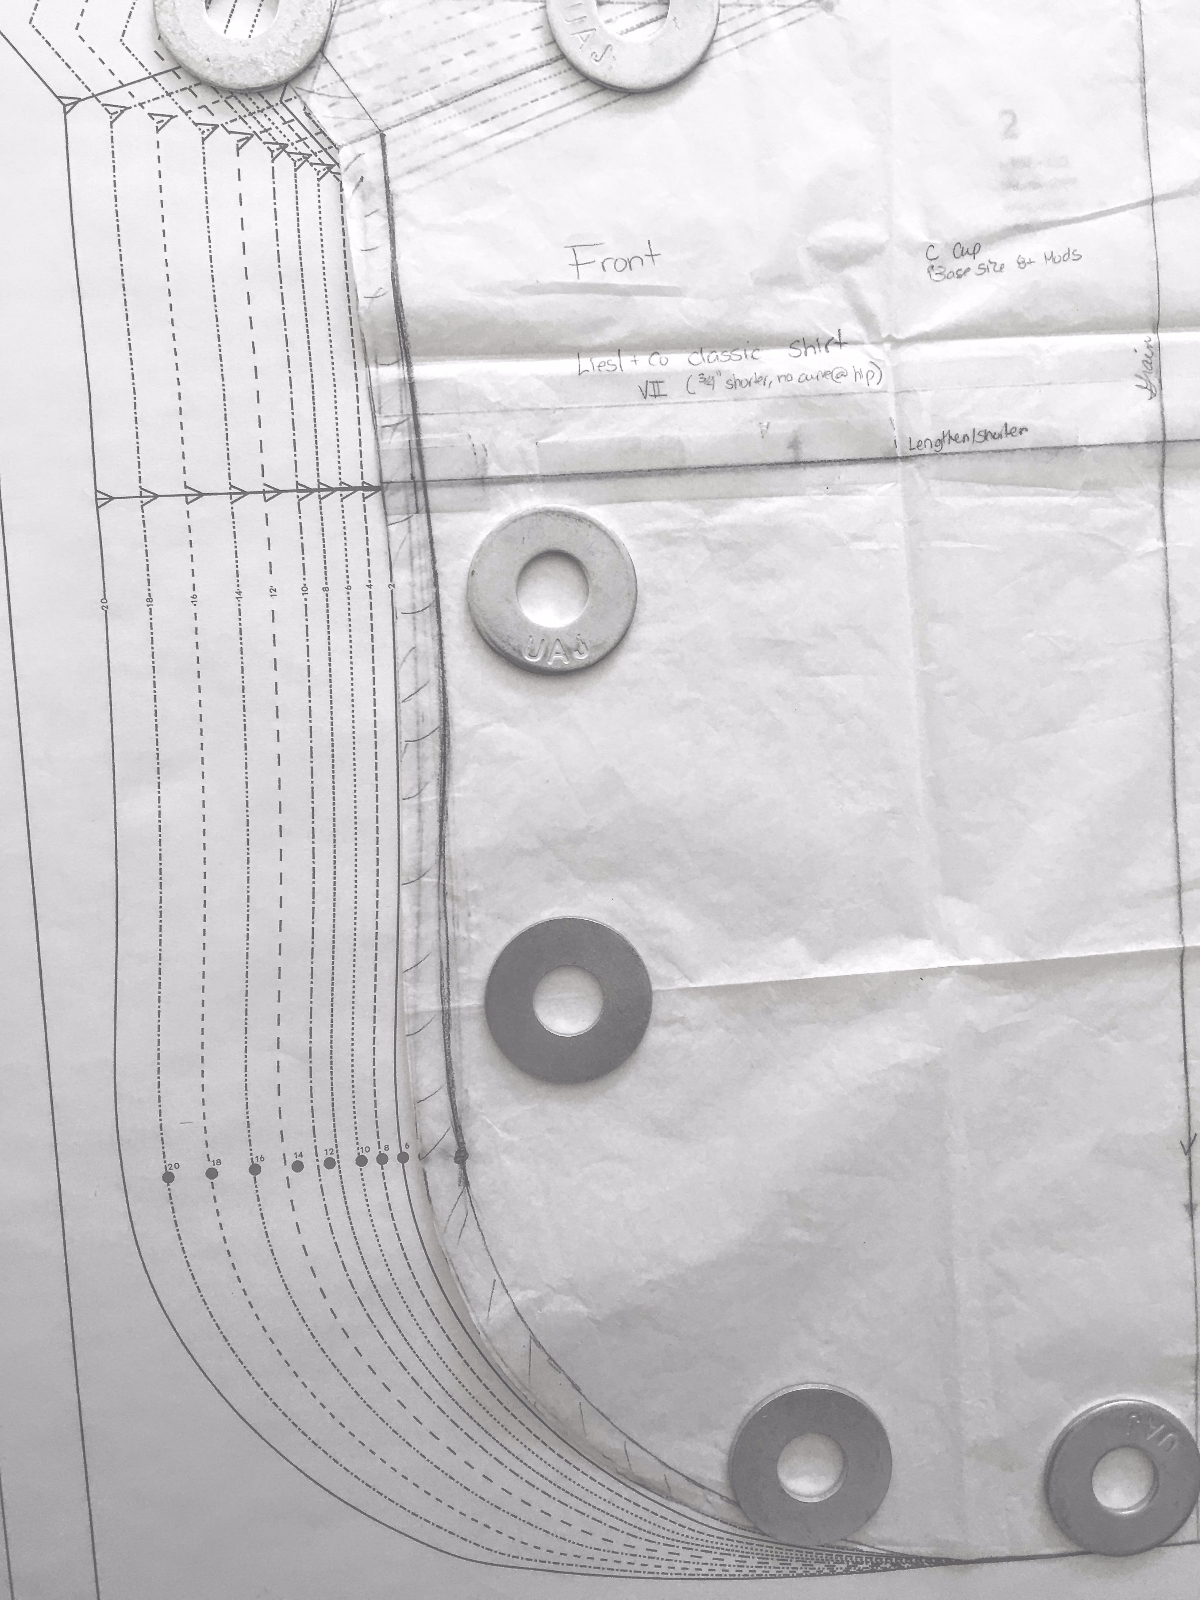
From the above photo, you can see how my final pattern through the shoulder and armscye differed from the size 8 pattern. I added width from the tip of the shoulder down to the armhole notch. This began at 5/8” (as per my broad shoulder adjustment), tapering to nothing at the notch, and then scooping out the armhole depth by 3/8” below the notch, and moving in my side seam accordingly. I took a similar approach on the back of the shirt.
Here are a few things to keep in mind when altering armholes (which hopefully you won’t need to do):
- do your best to maintain the shape of the armscye by using a French curve or vary form curve
- always work from the seam lines rather than the cut lines
- true your patterns on seam lines
In the above left photo, you can see how I trued the pattern by matching up the front, yoke, and back at the seam lines and ensuring the curve was smooth.
Adjustments #6 and 7: Lengthening Sleeve and Taking in Side Seams
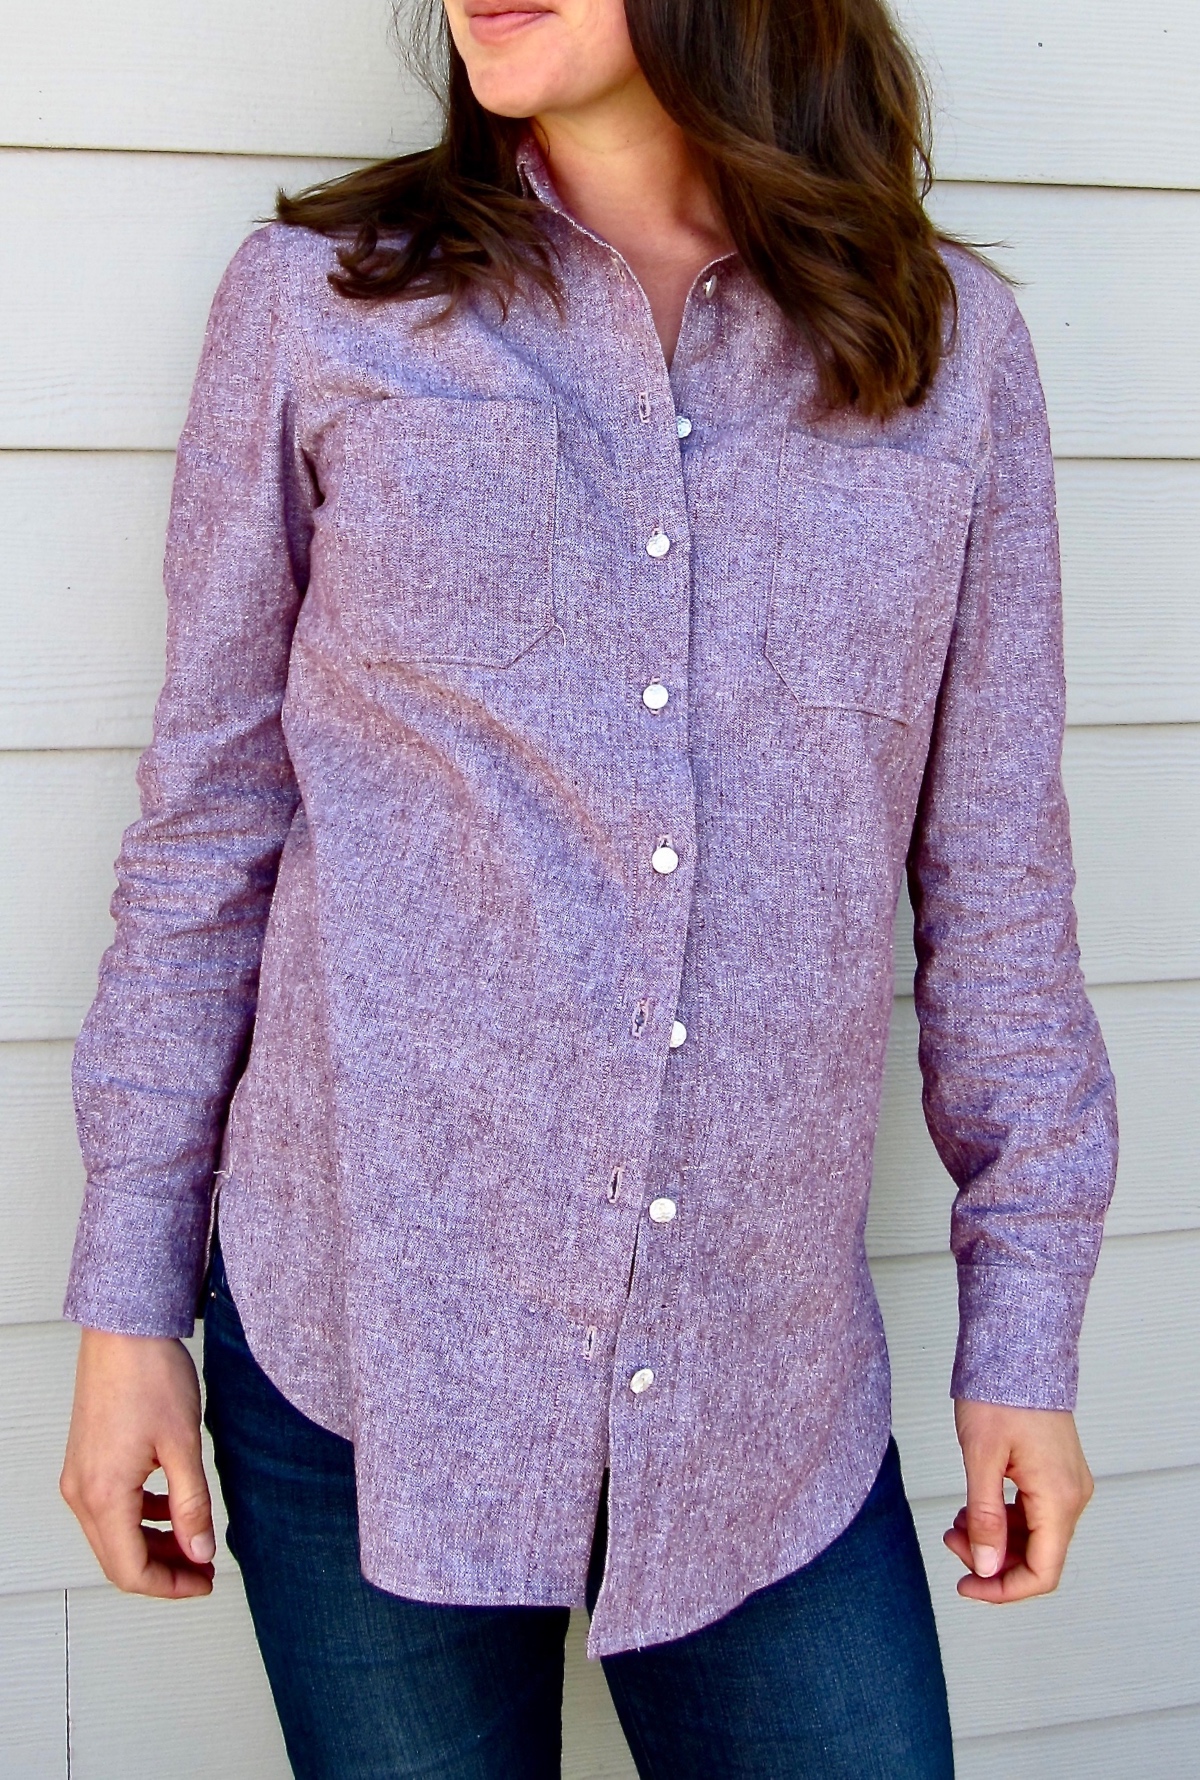
In addition to the above alterations, I lengthened the sleeves by 1/2” and I removed about 3/4” from each side seam at the waist, tapering to about 1/2” at the bottom. This was effectively the same as grading from a size 8 to a size 2. After sewing my first shirt (the purple version), I altered the curvature of the bodice slightly (to better suit my silhouette), and removed the 1 1/2” of length I originally added. You can see how my final pattern through the front side seams varied from the original size 8 here:
Final Shirts
Here are my three Classic Shirts to date, taken at 36 weeks pregnant with baby #3 … needless to say, they’re fitting a little differently right now!

Next up for me: turning this pattern into a t-shirt dress with a half placket, and going through the fitting process to fit the All Day Shirt for my husband!
Do you have an interest in garment fitting? Do you use pattern adjustments to customize your garments regularly? If you’re interested in writing about your experience fitting a Liesl + Co. or Oliver + S garment, drop us a line at contributors@oliverands.com. We’d love to hear from you.
Good for you, sticking with it through all those muslins! If I were to guess I would say that next time it would take you a lot fewer? Analyzing fit is a skill that will get easier with experience, for sure.
Thanks Liesl! And absolutely, I have learned SO much from this process. If I were to do this again now, likely by the second I would’ve had it just about right. I reckon fitting the All Day Shirt for my husband and brother should be much easier given the learnings I have and also that I won’t be using a mirror to assess fit!
Fitting is truly the hardest part of sewing and this article is one of the best I have ever read on the process. I usually lose patience after the third muslin, but I’m going to use your tip about having someone take photographs. I have learned that if my husband says something is fine that I need to work on that area because fine is code for something is not right, but he is at a loss for telling me what is wrong. Thanks, this will really help me. And your shirts look great!
Thanks Jill! I’m happy to hear you found this article helpful! Best of luck to you on your fitting journey!!!
I enjoyed reading about your process to achieve a good fit, (such patience!) and I love the finished products. The lavender shirt especially appealed to me. A job well done!
Well done! It’s the fit that keeps many of us from sewing more for ourselves. I often chicken out and sew something for the grandchildren instead. Thanks for the very informative read.