If you’ve ever hesitated to purchase or sew a particular pattern because you didn’t like the neckline, you’re going to like today’s post! Don’t let a simple detail like a scoop or crew neck prevent you from sewing for yourself. Since I know many of you like a V neck, today I’ll show you how to alter a pattern to a V neck. Then I’ll give you some pro tips to help you get a great fit, how to draft a facing and–especially–some tips to help you sew it so that it doesn’t stretch or distort!
A muslin is for more than just fitting
By now most of you know that I strongly recommend making a muslin, or toile, of virtually any garment you sew for yourself. A muslin, of course, allows you to work out any fit issues and to fit the garment to your body. It takes only a small amount of time and you’ll be so much happier with the finished garment in the end! But in addition to helping you to fit a garment, another big benefit to making a muslin is that you can tailor the details to your liking. The muslin is a great opportunity, for example, to change a neckline to suit your preferences.
Tips for developing a new neckline on your muslin
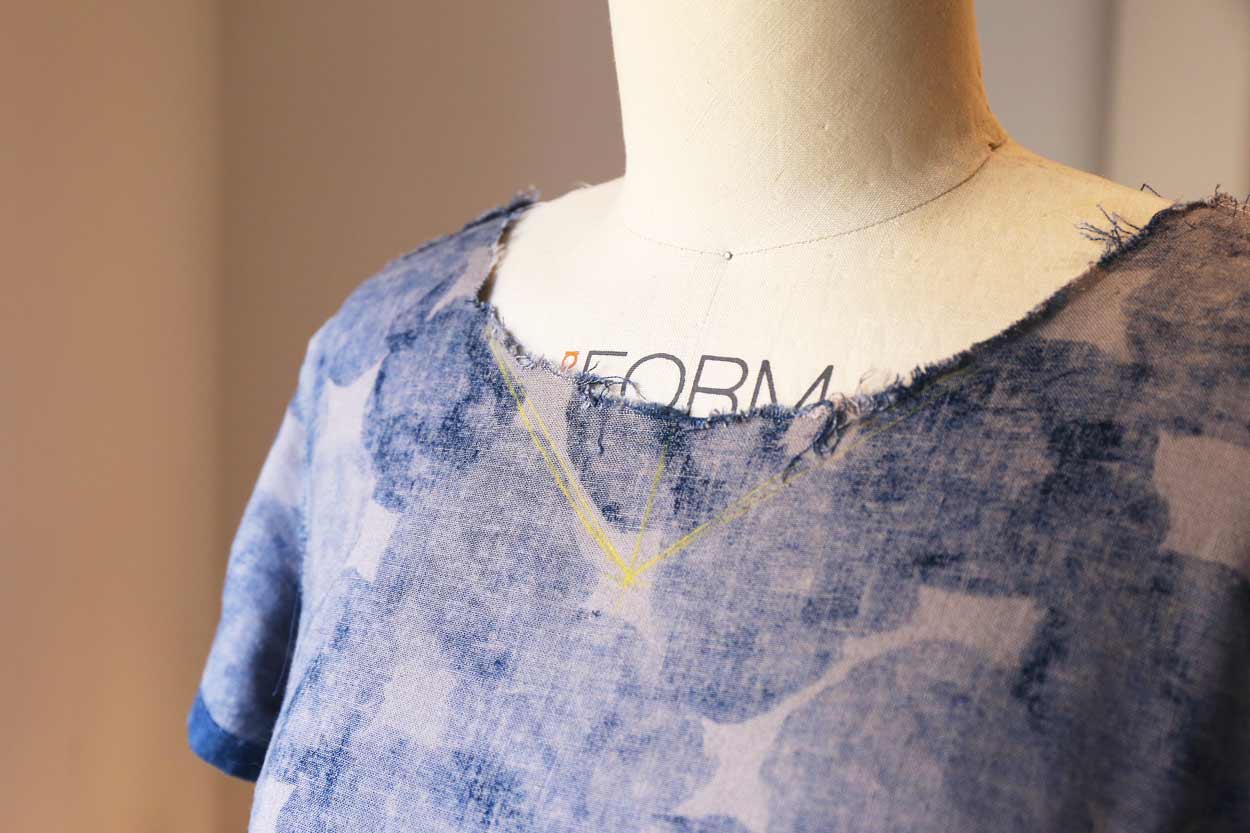
How do you change the neckline? On your muslin, mark the desired depth and width of your neckline. Use a pencil or a pen, marking lightly at first, then darker as you determine the position and shape of the neckline. To demonstrate, I marked the V neck on the wrong side of this Gelato Dress I need to repair, since it’s already been fitted. I used chalk to draw the neckline as I wanted it.
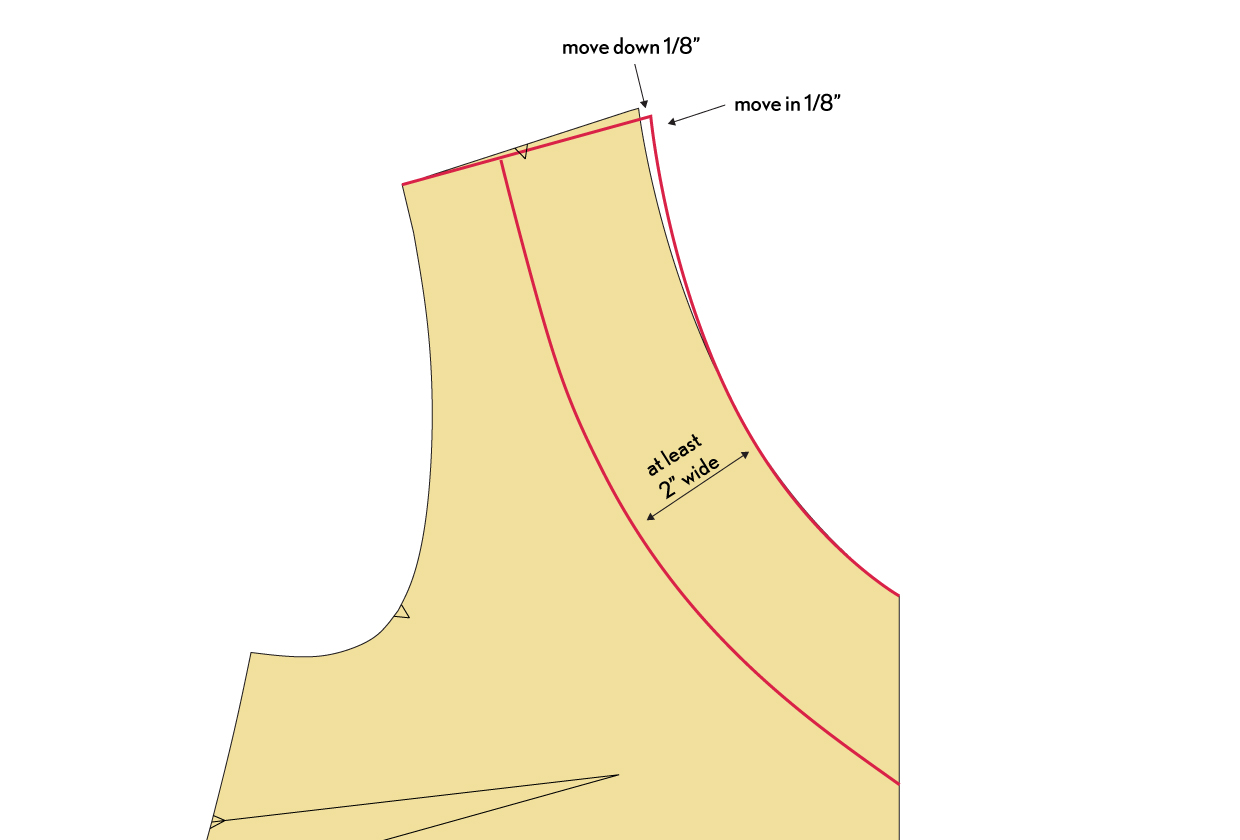
Note that you can also make adjustments to the width of your neckline this way. Mark the changes you want to make directly on your muslin (or take a measurement to determine how much narrower you want it to be), and when you transfer your markings to your pattern pieces, align the front and back pieces at the shoulder seam to be sure you get a smooth curve. Here’s an example of raising the back neck and narrowing the neckline slightly while adding a V neck.

Tips for sewing pattern alterations
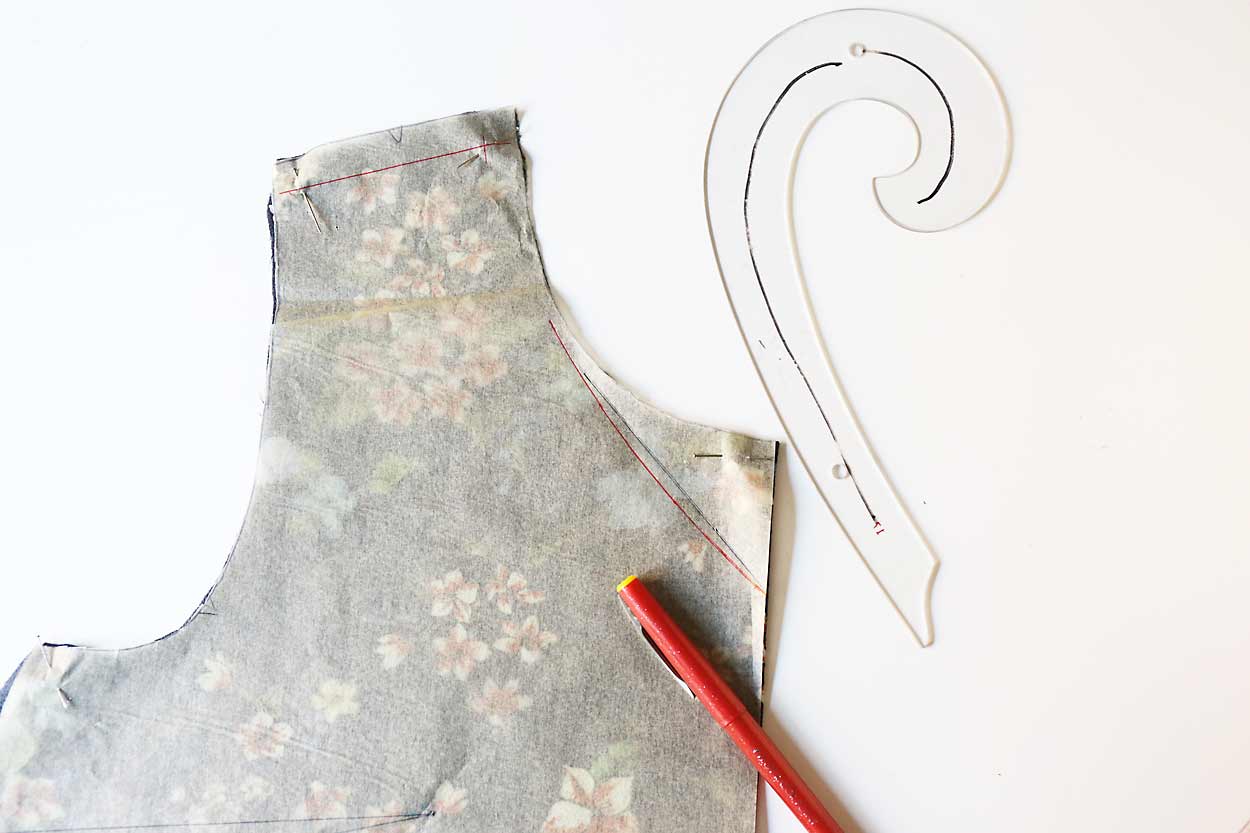
You can often get a better-looking and better-fitting neckline by gently curving the shape of the V instead of giving it perfectly straight lines. For this example, I first used a ruler to draw a straight line from the widest part of the neckline to the center depth of the V. Then I used a French curve (you can use any curve you like) to gently draw a curved line. I think this gives a nicer result most of the time.
When you transfer the new neckline to your sewing pattern, be sure to add seam allowances to the neckline! I added 1/4″ to my neckline. And keep in mind that seam allowances can be very deceiving, so when you’re testing a new neckline be sure to fold the seam allowances out of the way or you may find that your finished neckline is more revealing than you had intended.
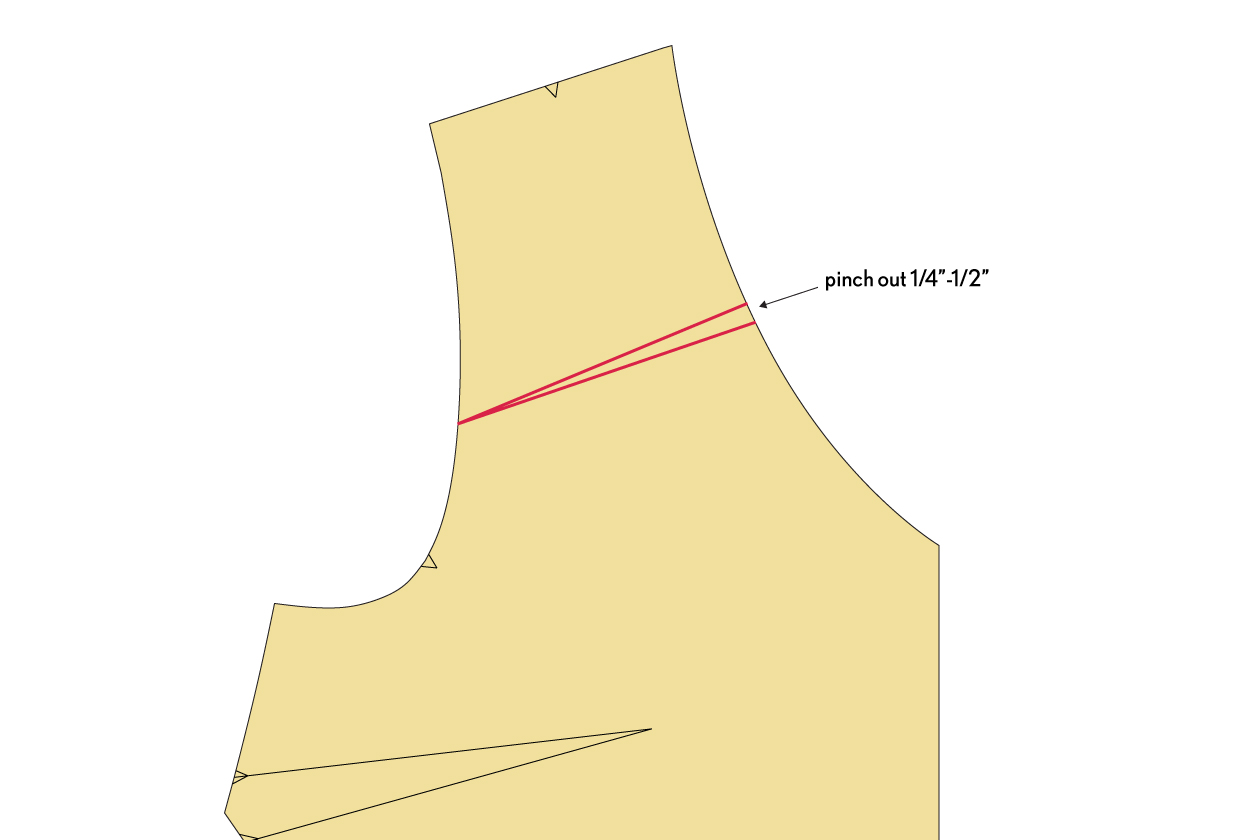
Here’s another tip you don’t hear very often: To prevent a gaping V neck, pinch out a small wedge-shaped V of about 1/4″-1/2″ (depending on the depth of your V neck) from the neckline into the armhole on your pattern piece, almost like a dart. Fold your pattern to eliminate this wedge before you cut your fabric. This shortens the edge of the neckline a little so that it hugs a bit closer to the body. (Note that this only works if you’ve already fitted the bust; if the bust is too small you may have substantial gaping at the neckline or the armhole that can only be fixed with a full bust adjustment.) Since a V neck is cut mostly on bias, taking that little dart-shaped wedge out of the pattern piece just shortens the neckline edge a bit and helps it to contour a little better. It may seem like a crazy alteration, but it really works!
If you’re lining or facing your neckline, the lining or facing will take the same shape as the neckline. To coax the neckline to roll slightly inwards so the facing or lining doesn’t show, trim the facing/lining by 1/8″ where the neckline meets the shoulder and at the inner shoulder as well. This will shorten the lining/facing just a bit so it pulls the outer fabric in, rolling the neckline seam to the inside so it doesn’t show once it is finished.
Tips for sewing
Before sewing, I like to interface the neckline with a narrow strip of interfacing right along the seam line. I cut the fusible non-woven interfacing so it has a bit of stretch (some directions have stretch and some don’t, so test your interfacing to determine which way it stretches). Then I stretch the interfacing a bit as I fuse it. This can ease in the neckline a bit and help it to contour to your body.

When you staystitch your neckline (which is really important to do immediately after cutting since a V neck can easily stretch out of shape), hold one finger down on your fabric directly behind your presser foot as you stitch. This pressure will prevent the feed dogs from moving your fabric along as much as usual when you sew. The result is that you’ll be subtly shortening your neckline and easing it in a bit. This video shows you how to do that.
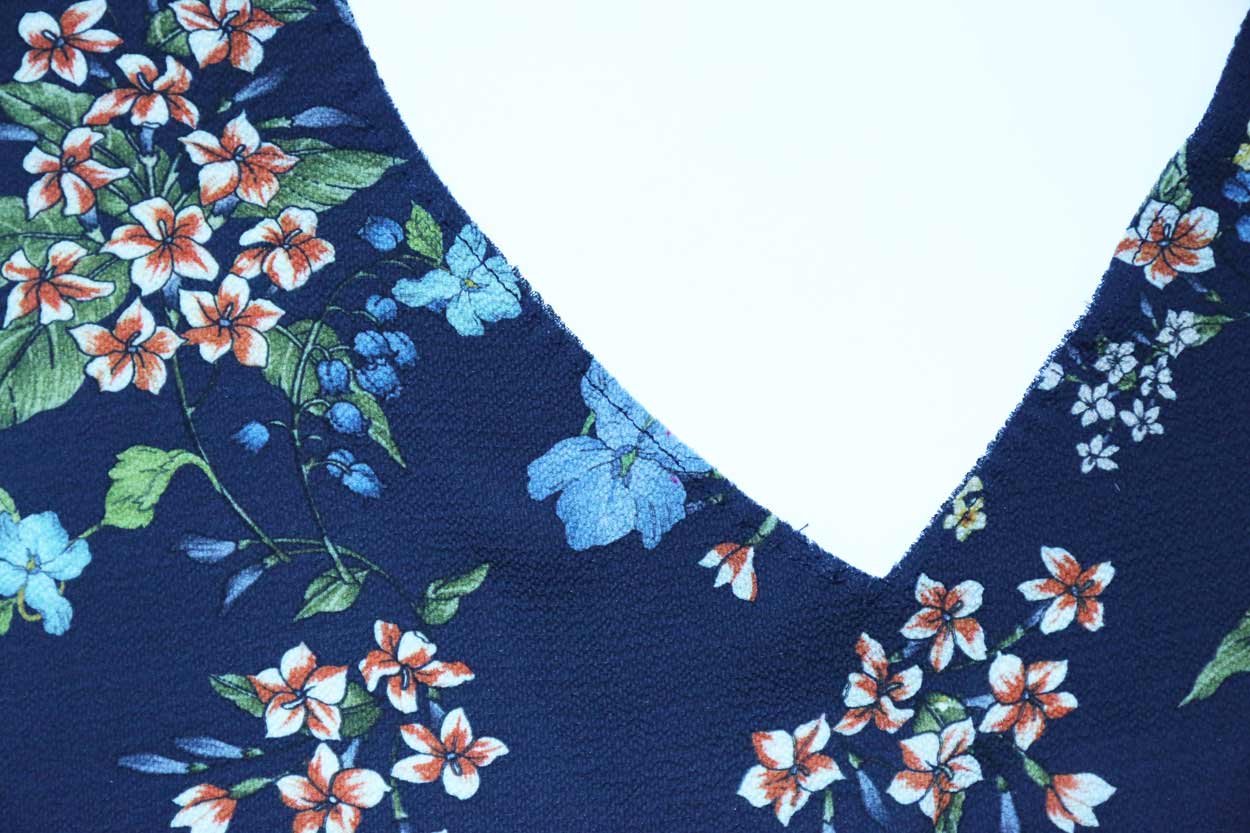
It will look a little puckered, like this, when you take it out from under the machine. Press it gently with your iron and it will be ready to go.
With these little tips and tricks you’ll have a better-looking and better-fitting neckline! And the best part is that you can adjust any neckline to your personal preferences. You can use these tips to alter many of our patterns like the Rush Hour Dress + Blouse, the Gelato Blouse + Dress, the Terrace Dress, and the Breezy Blouse. You’ll also find some of these tips useful for the Saint Germain Wrap Dress, to keep that neckline in check so it doesn’t stretch or distort.

And speaking of the Saint Germain Wrap Dress, we’ve just started the sew-along, and you’re welcome to join us. Have fun!
Great tips. I learned a lot from this post!
Thanks Liesl. Happy to learn how to do this correctly.
So many useful tips! I can’t wait to try altering the Breezy Blouse to a V-neck. And, I am sure I will be using that stay-stitching tip often. Thank you, Liesl, for helping us to achieve such professional results!
Wow great tip!! Thank you for helping us to achieve such good results!! At the moment I have been sewing patterns in straight sizes, I think I am now ready to start fitting more and altering them.
Thank you for the great ideas for improving the fit of a V neckline – especially for someone like me whose chest is slightly hollow! Love the tip about pinching out a bit of the neckline. Also raising the back neck slightly is a helpful improvement on converting from a scoop to a V.
Thus explaining why my self-drafted copy of a v-necked top ended up with a much larger neckline! Thanks for doing this post, it will be invaluable for my second go at the top.
Wow, such great tips! Thank you for sharing.