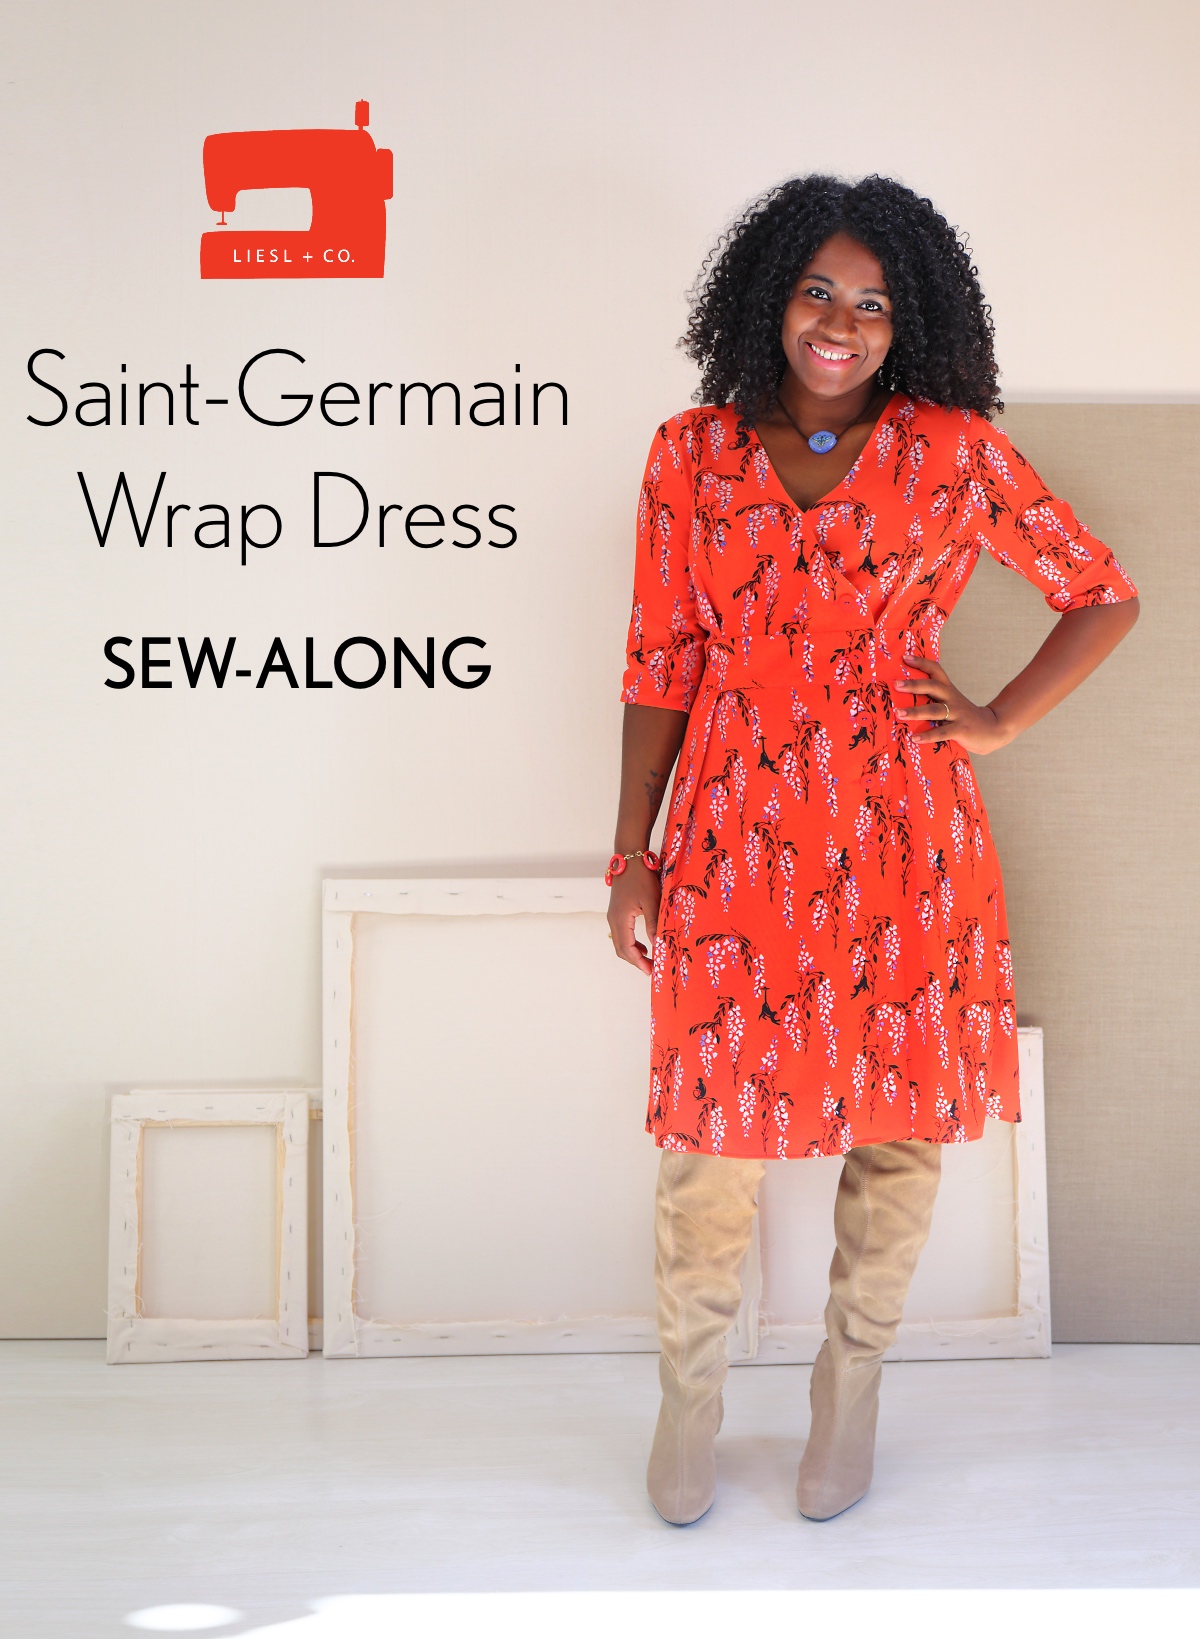
Welcome to the Saint-Germain Wrap Dress sew-along! We’re so happy you’ll be sewing along with us to make the perfect wrap dress for spring. If you’re not quite ready to sew, you can come back any time to reference all of the sew-along posts. They’ll be here waiting for you, on your schedule.
Saint-Germain Wrap Dress Pattern Details
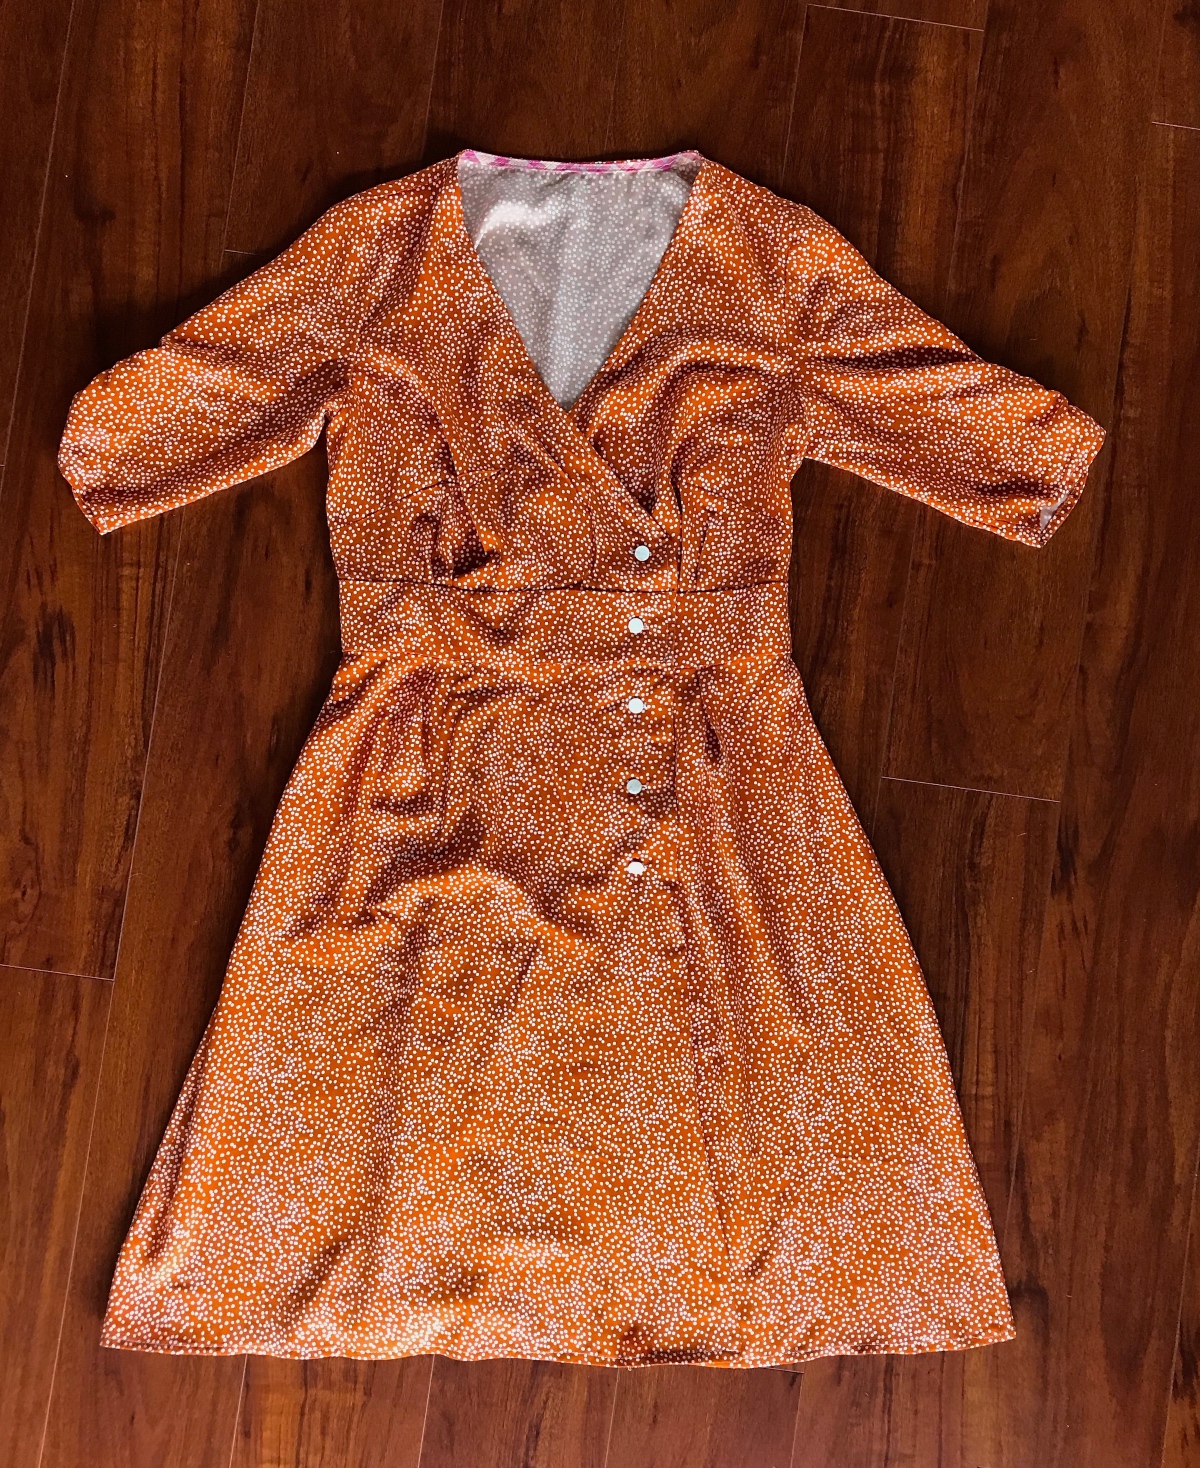
Description: Romantic, flowy wrap dress fastens securely with buttons. Front and back pleats give the dress a relaxed fit. View A includes flutter sleeves and a midi-length skirt. View B features 3/4-length sleeves with shirring detail at the sleeve hem and a below-the-knee skirt length. This pattern includes separate pieces for A/B, C, and D cup sizes to help you get the perfect fit.
Sewing level: Advanced Beginner: Suitable for someone who has sewn from a pattern before, or has taken a few classes and completed several projects.
Suggested fabrics: Light- to medium-weight drapey woven fabrics like linen, silk, and rayon. It can also be sewn in crisp fabrics like cotton shirting, lawn, and voile.
Notions: Coordinating thread, featherweight fusible interfacing, seven 5/8″ buttons. View B: 12″ of 3/4″ elastic.
Get the pattern: It’s available in both paper and digital formats.
Sew-Along Schedule
We’ve broken down the planning and sewing process into a few easy steps. Here’s how we’ll be working through the process of creating your new dress together.
| Preparation Steps | Sewing Steps | ||
 |
1. Gather Your Materials Choosing fabric, gathering notions, deciding on customizations, and purchasing your pattern. |
 |
1. Getting Started, Make the Pleats and Assemble the Bodice and Skirt We begin by preparing our interfacing pieces, sewing our pleats (and dart, if you put one in), and sewing together the bodice and skirt. |
 |
2. Select Your Size, Make Pattern Adjustments Deciding on the size you will sew and making any necessary adjustments to the pattern. |
 |
2. Assemble the Waistband, Sew the Facings We assemble the waistband, attach it to the bodice and skirt, and sew in the facings. |
 |
3. Sew the Sleeves, Hem the Dress, Finish the Dress We sew the sleeves, hem the dress and put in buttons and buttonholes. |
||
Gather Your Materials
Are you excited to get started? I am! This is such a sophisticated design with thoughtful details that really stand out. I’m sewing mine for Easter. If you need some inspiration, Liesl has a few ideas in this post. There are lots more ideas in the Liesl + Co. Saint-Germain Wrap Dress Pinterest board.
Choosing Your Fabric
Let’s talk about fabric. You’ll want something with a little drape for this style. Rayon, viscose, bamboo, silk, or blends including those materials are ideal. I chose this rayon twill for my dress. You could also try a light cotton shirting or linen, but keep in mind the dress will have more body, making the skirt more voluminous rather than draping over your hips.
Choose Your Notions
You’ll need seven 5/8″ buttons. Two of the buttons are hidden, so you can use non-matching buttons for those if you don’t have enough. You’ll also need some featherweight fusible interfacing. Be sure to match your interfacing to your fabric. In other words, look for something that adds a bit of stability to your fabric without completely changing the hand. If you’re unsure, ask for help when you’re shopping for your fabric and your salesperson should be knowledgeable enough to make suggestions. For View B, you’ll need 12″ of 3/4″ elastic for the ruching on the sleeves.
Here’s what else you’ll need to assemble:
- Thread. All-purpose thread works great for most fabrics, but choose your thread according to your fabric.
- Any special sewing needle, depending on your fabric choices.
Other tools you’ll need:
- Sewing shears or a rotary cutter and self-healing cutting mat.
- Thread snips or a small scissors, which are nice to keep by your sewing machine so you can keep your sewing cleaned up while you’re progressing.
- A good straight-edge. I use a 6″ x 24″ quilting straight edge, which is also really convenient when cutting out.
- A small ruler. The 1″ x 6″ size rulers are a good size.
- Tailor’s chalk or a water-soluble fabric marking pen.
- A seam ripper (always important to have on hand).
- A measuring tape to determine your size and to help if you want to make any alterations.
- Pins (or pattern weights and fabric clips if you prefer).
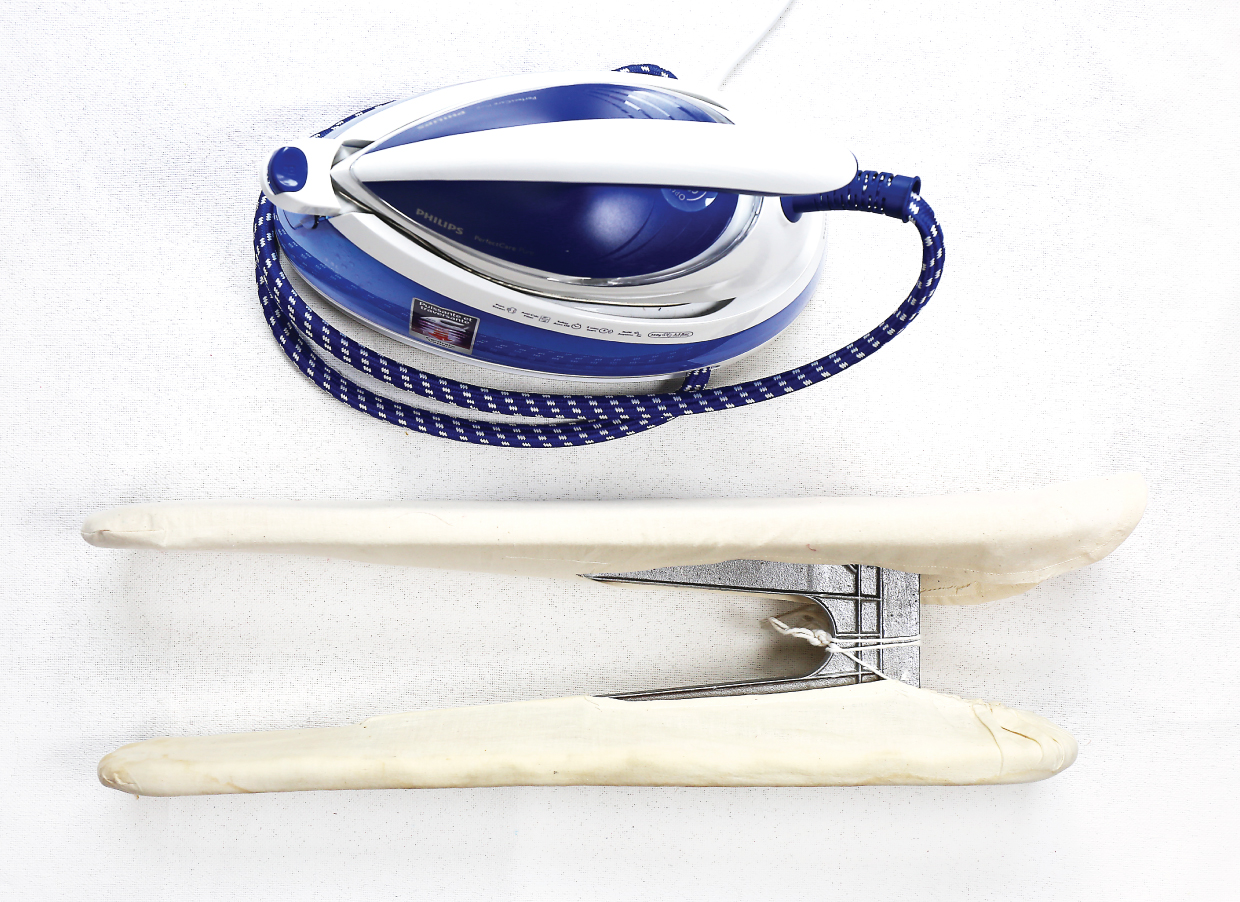
Obviously you’ll want access to a good iron (your second-most important tool after your sewing machine) and an ironing board. A sleeve board is also very useful.
Purchasing Your Pattern
And of course you’ll need a copy of the pattern, which you can purchase in paper format or as a digital PDF.
Select Your Size
Let’s talk about choosing your size.
You can use our measurement chart as a starting point, but keep in mind there are other factors that go into choosing your size.
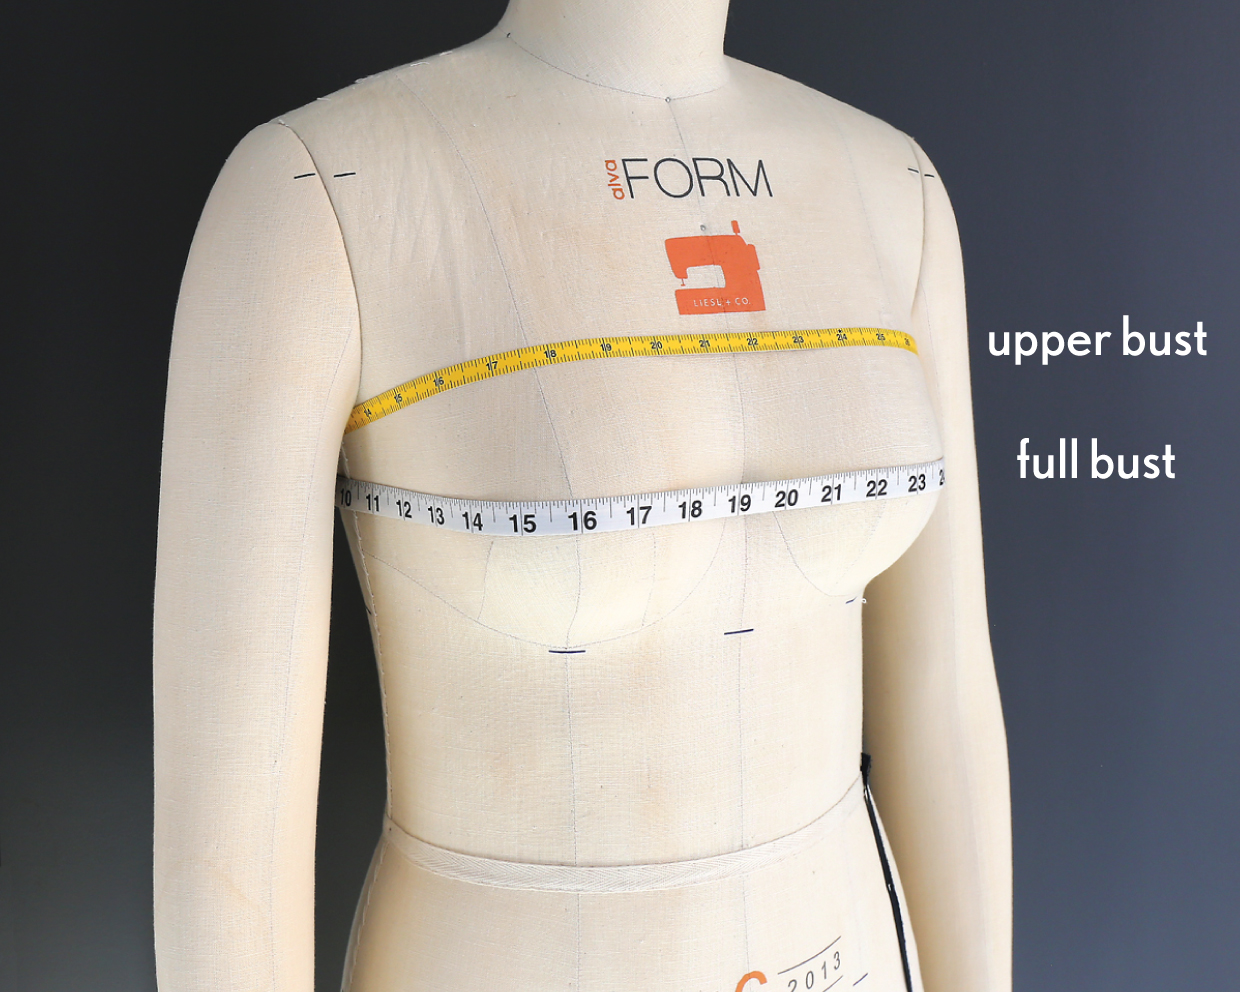
First take your full bust measurement. This measurement will be taken across the fullest part of your bust. Then take your upper bust measurement. This measurement is taken just under your arms, across the upper part of your chest, like in this photo.
OK, now some quick and easy math:
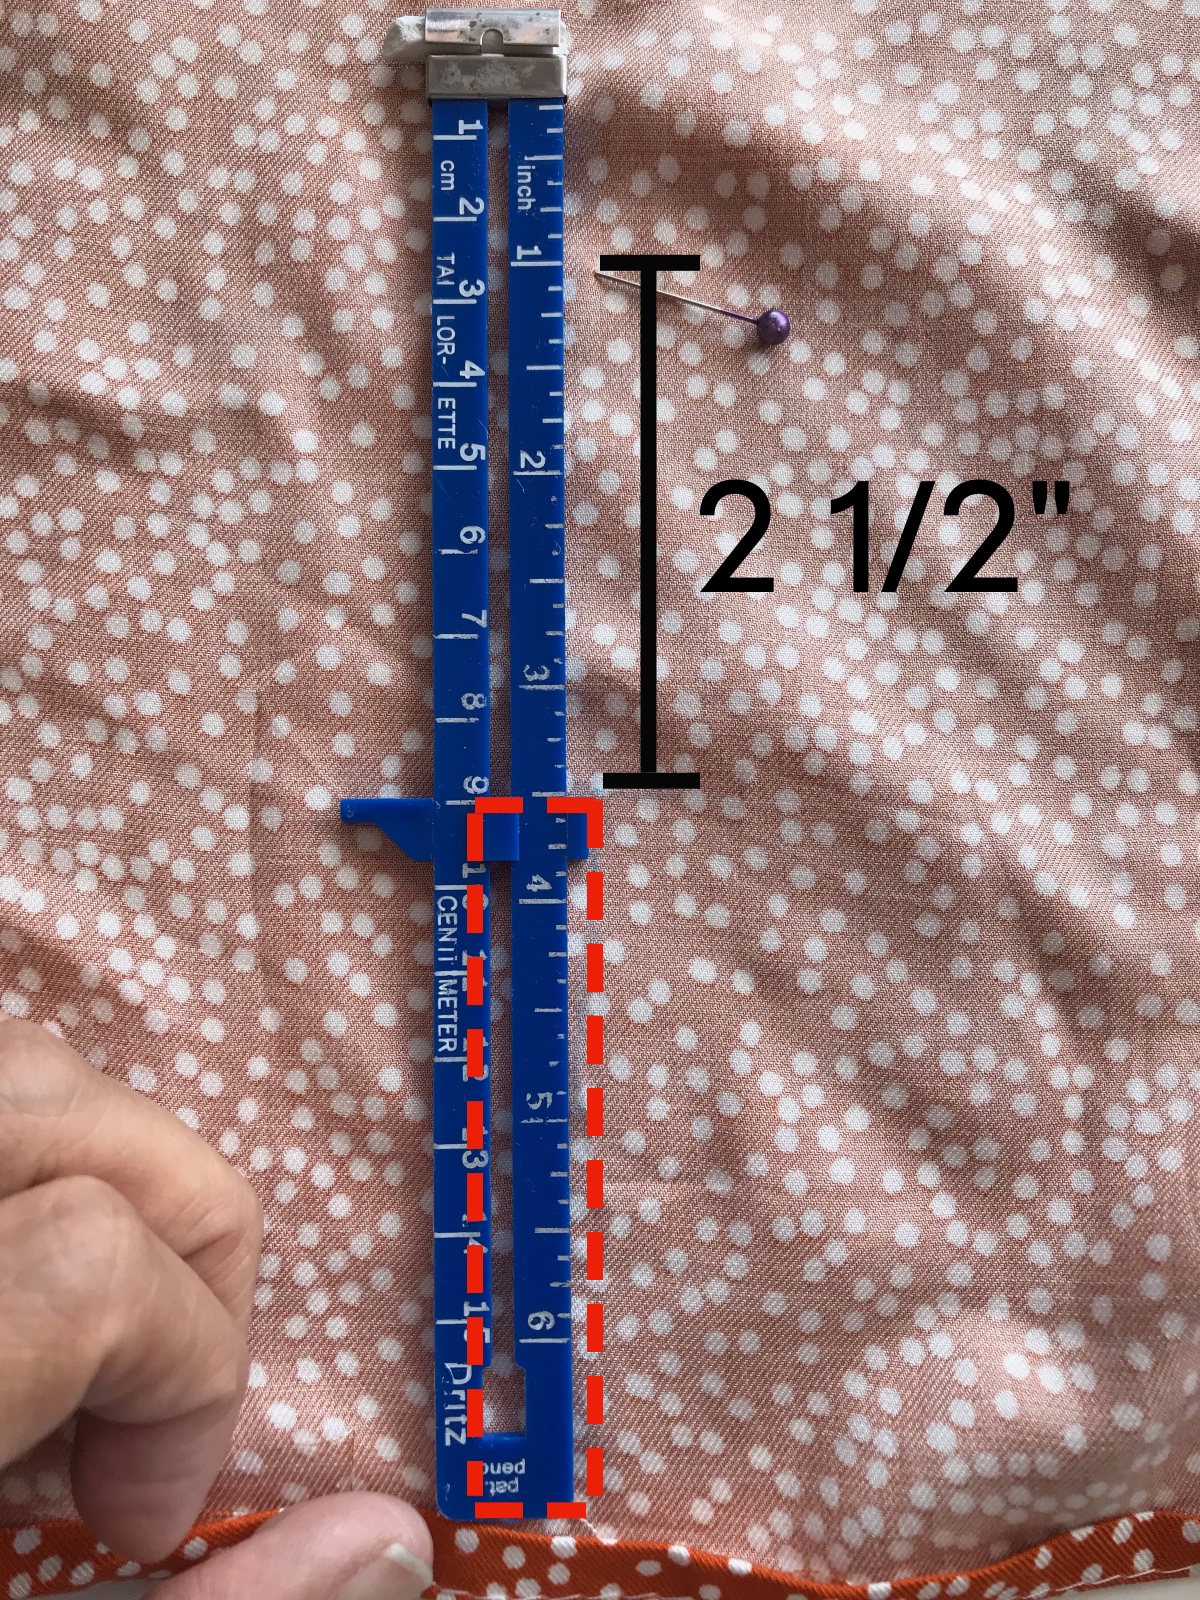
full bust measurement – upper bust measurement = x
If x is more than 2 1/2″, use your upper bust measurement instead of your full bust measurement when looking at the measurement chart. If x is less than or equal to 2 1/2″, use your full bust measurement. I’ll tell you why in a minute. Now, choose your size by looking at the bust measurements on the size chart and using either your upper bust measurement or your full bust measurement, depending on your results from the math problem above. (You will also use the results of this exercise to determine whether to do a full bust adjustment for this pattern.)
| Sizes 0-20 | |||
| Pattern Size |
Bust (in.) |
Waist (in.) |
Hips (in.) |
| 0 | 32 1/2″ | 25″ | 35″ |
| 2 | 33 1/2″ | 26″ | 36″ |
| 4 | 34 1/2″ | 27″ | 37″ |
| 6 | 35 1/2″ | 28″ | 38″ |
| 8 | 36 1/2″ | 29″ | 39″ |
| 10 | 37 1/2″ | 30″ | 40″ |
| 12 | 39″ | 31 1/2″ | 41 1/2″ |
| 14 | 40 1/2″ | 33″ | 43″ |
| 16 | 42″ | 34 1/2″ | 44 1/2″ |
| 18 | 44″ | 36 1/2″ | 46 1/2″ |
| 20 | 46″ | 38 1/2″ | 48 1/2″ |
If you’d like a more in-depth explanation, Liesl wrote a blog post a few years ago about finding your correct pattern size.
To summarize, basically, we want to get a good fit through the upper chest and shoulders, so if your bust differential is more than 2 1/2″ you’ll probably get a better fit through the shoulders by using your upper bust measurement instead of your full bust measurement when you look at the measurement chart.
In this case, choosing your size based on your full bust measurement would leave you with a fit that is too big through the neck and shoulders, which generally looks sloppy. (And when you shop in stores you often have to purchase this way because you can’t do a full bust adjustment, so there’s one of the many advantages of sewing for yourself!)
Keep in mind that this math is only intended to give you a size approximation. Your shoulders might be broader or narrower than average, in which case you may find that you need a larger or smaller size. That’s why it’s always a good idea to make a muslin first.
Are you with me so far? Next we’ll be talking about any adjustments you might want to make to your pattern.
Pattern Adjustments
If you are choosing a size based on your high bust measurement, you will probably want to do a full bust adjustment for this pattern. I started with the 8D bodice according to my 36″ high bust measurement. I knew that I was going to have to add room for my 40″ full bust, but I didn’t know how much room.
There are a couple of different ways to figure this out. You can either make a muslin, or you can tissue fit. In my case, I’m “paper-fitting,” because I’m using a PDF printout of the pattern. Although paper has the disadvantage of being stiffer than fabric or tissue, I’ve done it enough that I can get a pretty good idea of how the garment will fit with this method. If you don’t have a lot of experience fitting your bust, I’d definitely recommend making a bodice muslin instead. Once you’ve cut out your pattern pieces, the methods are the same.
How to Make an FBA on the Saint-Germain Wrap Dress
After cutting out the pattern pieces, make any adjustments to the back and shoulders before starting the FBA process. In my case, I did a forward shoulder adjustment and a high round back adjustment.
Next, pin the pleats on both front and back bodice pieces, then pin the shoulders and side seams of the bodice pieces together (or baste, if you’re using fabric) and try them on.
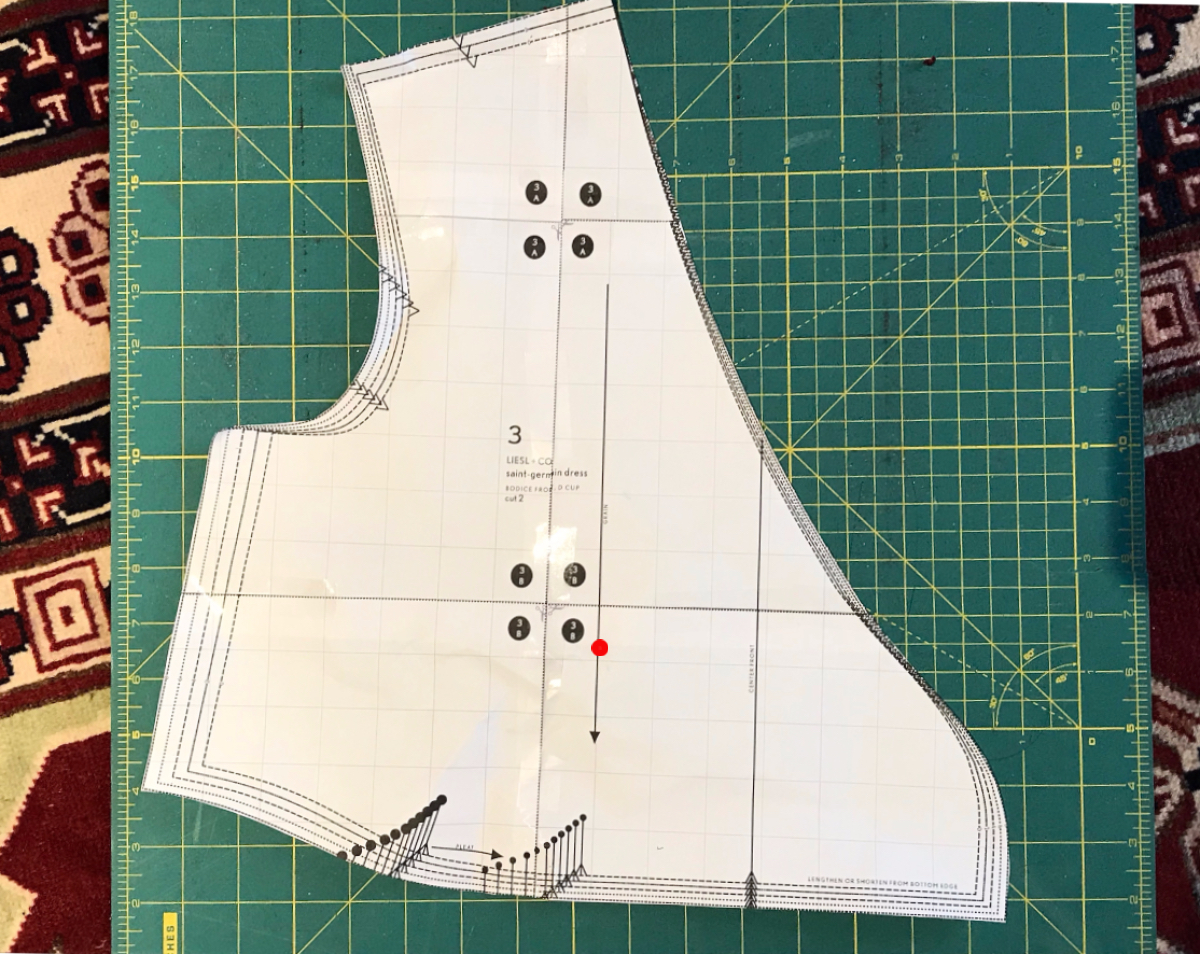
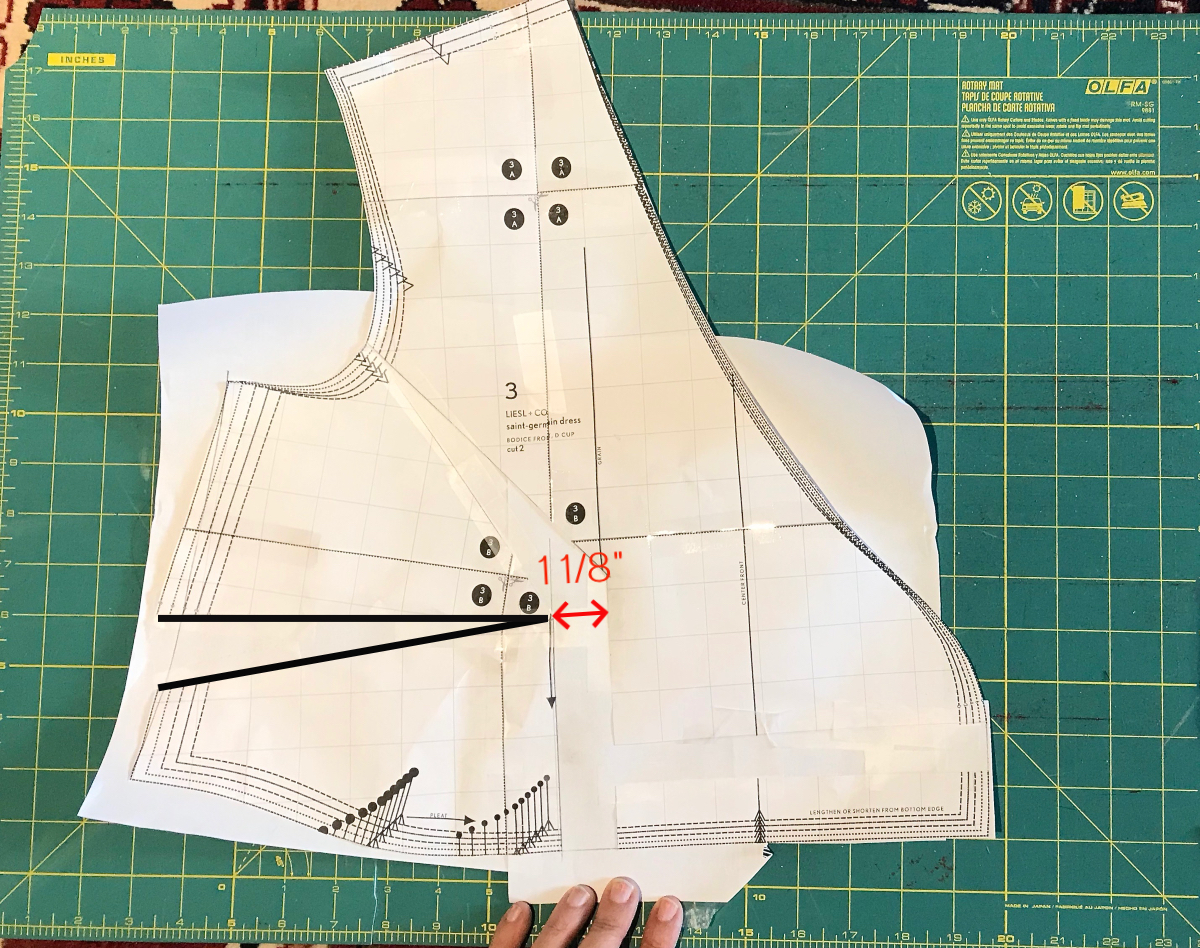
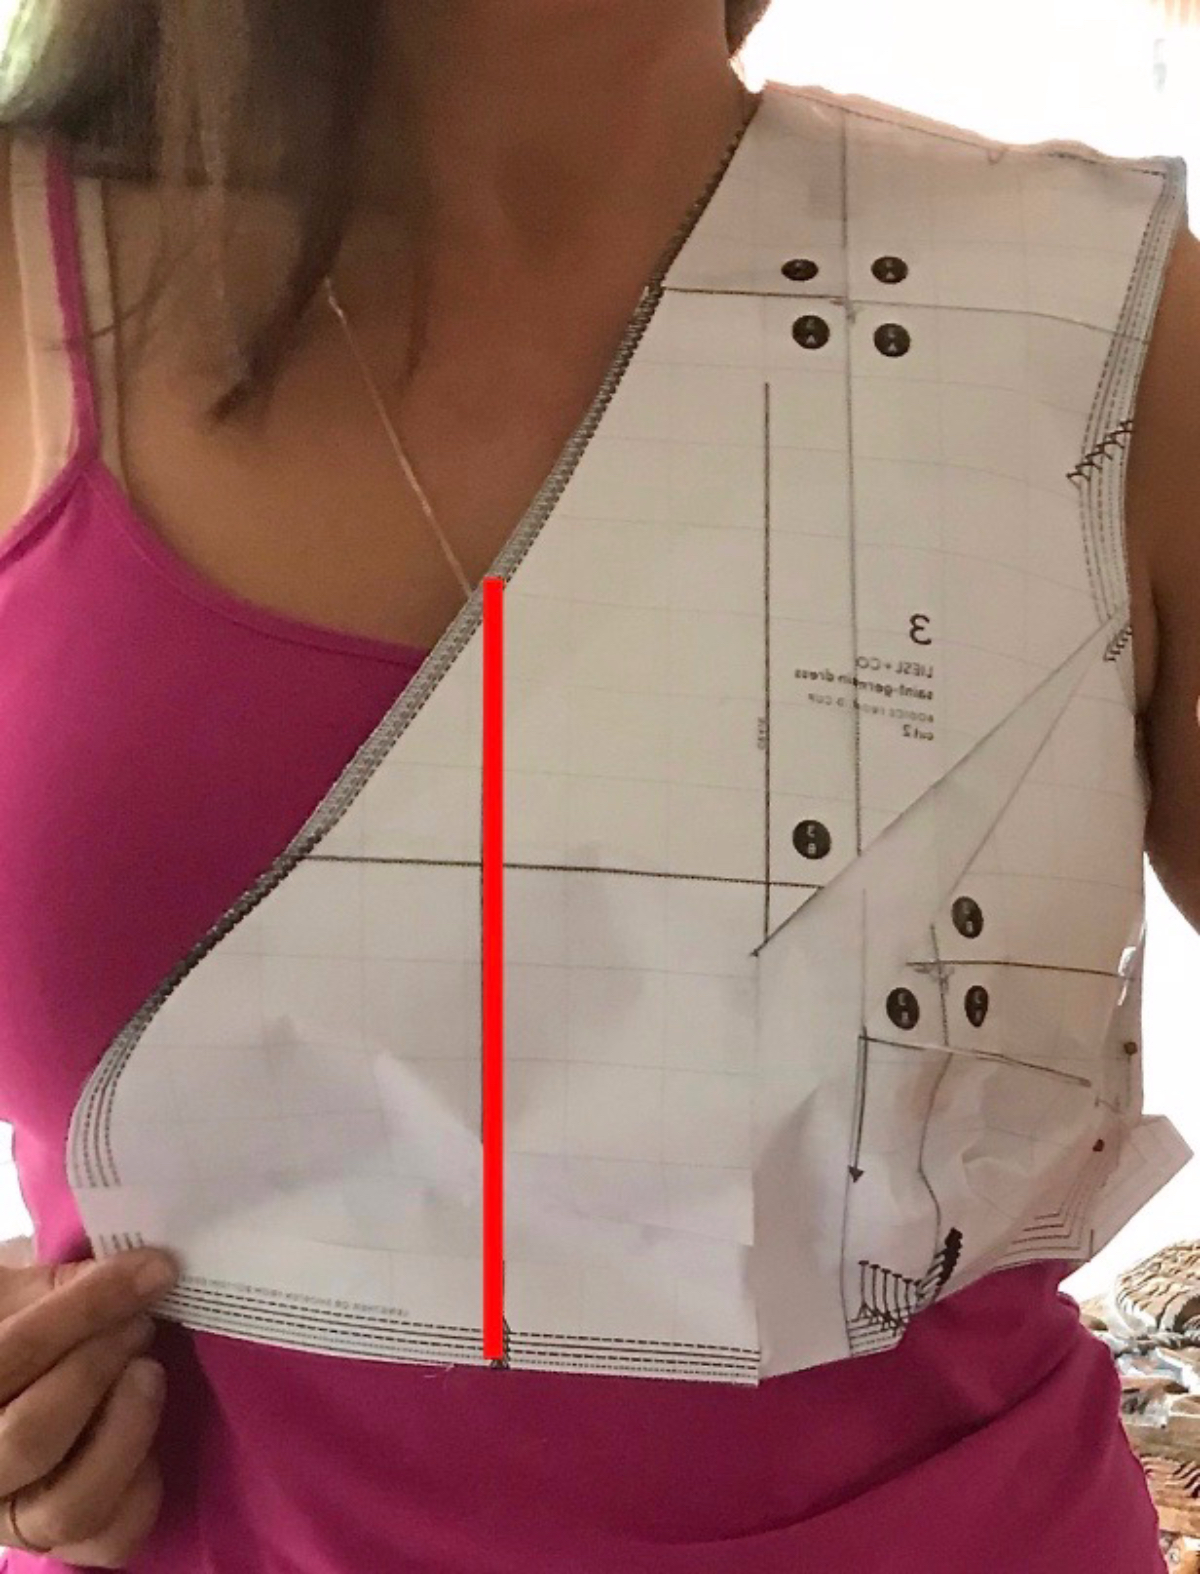
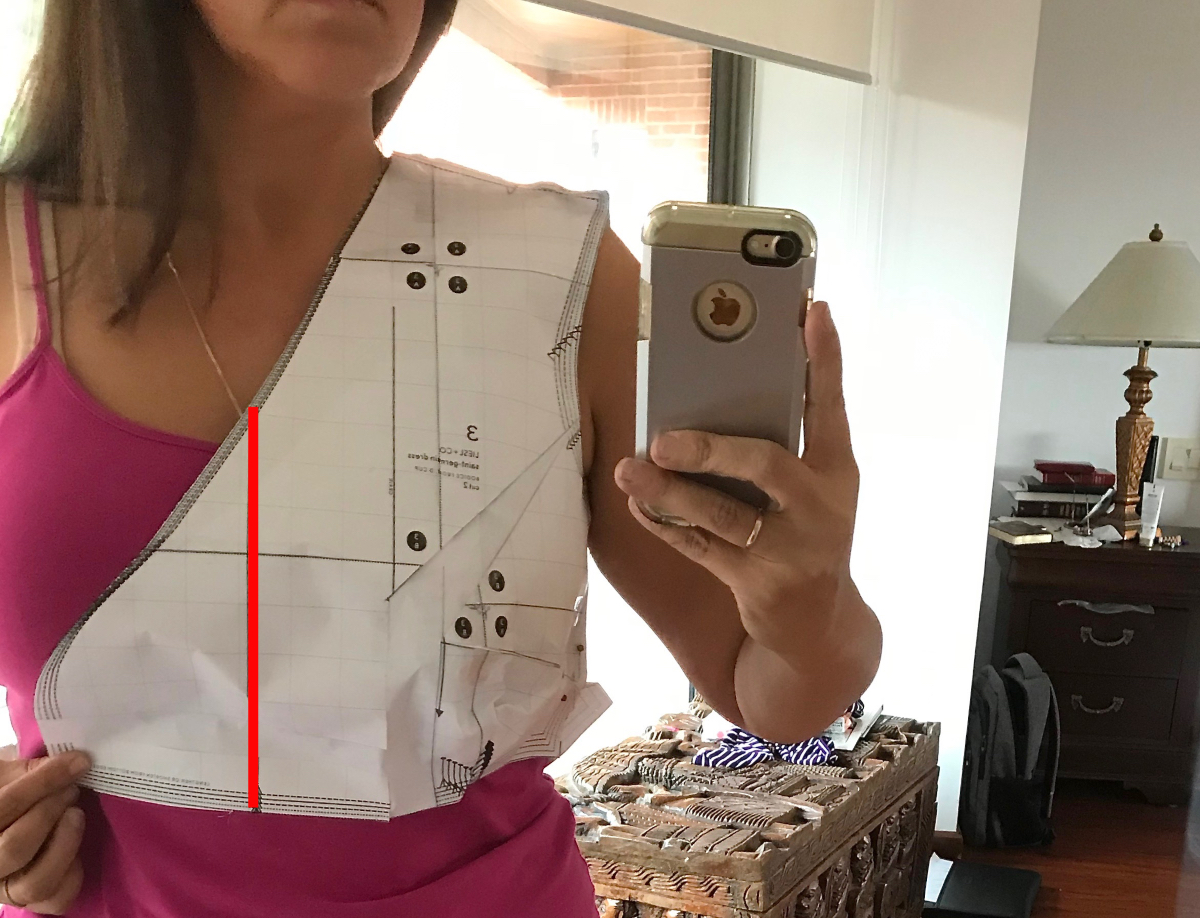
The Saint-Germain front bodice pattern piece includes a line indicating where the center front should be. You can see it below marked in black on the pattern piece. You can also clearly see that the center front is not at my center front (indicated by the red line). There is a difference of 1 1/8″ between the pattern’s center front line and my actual center front.

Measure the distance between your center front and the center front of the pattern piece and write the measurement down. You’ll need this measurement when we perform the FBA.
Next, while the pattern pieces are still on your body, mark your bust apex on the front bodice piece. You can see mine below, indicated by the red dot. (Note: The dart point will “drop” when you perform the FBA maneuver. The amount that it will drop increases as the size of the FBA increases. For this reason, it is often helpful to mark your bust apex a little higher – in my case, about 1/2 for a 1 1/8″ increase on each side. If your increase is more or less, you can adjust as needed.)
Now it’s time to draw some FBA lines. If you have been working with a muslin up to this point, it’s time to switch to your paper front bodice pattern piece. If you’ve done an FBA before, you will be familiar with this process. We are going to draw four lines. (Note: If you’re using a printed pattern and you haven’t traced your pattern piece, you may want to do that before performing the FBA, to preserve the original pattern in case you need to refer back to it.)
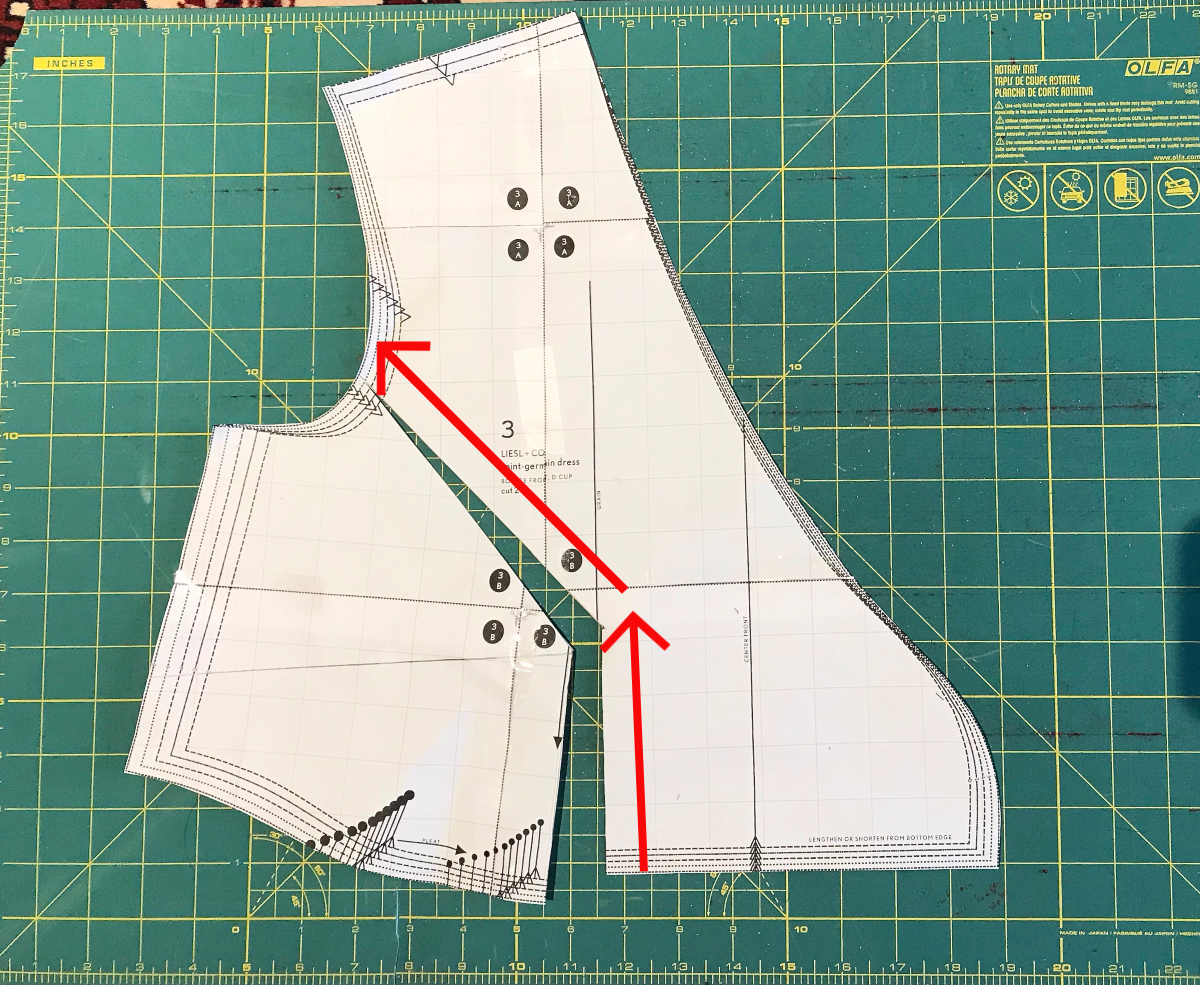
Line 1: Make a line that is parallel to the grain line, from the bust apex dot to the bottom of the bodice.
Line 2: Mark a point about 1/3 of the way up the armscye (just estimate, this does not need to be exact) and connect it to the bust apex dot with a straight line.
Line 3: Draw a line from the side seam to the bust apex dot. You can make this line perpendicular to the grain line if you’d like. I prefer to have my dart start lower, so that it angles upward towards the bust apex. I drew my dot at the side seam about an inch lower than the bust apex.
Line 4: Draw a line that is perpendicular to the grain line, connecting line 1 to the inner, or wrapping, portion of the bodice.

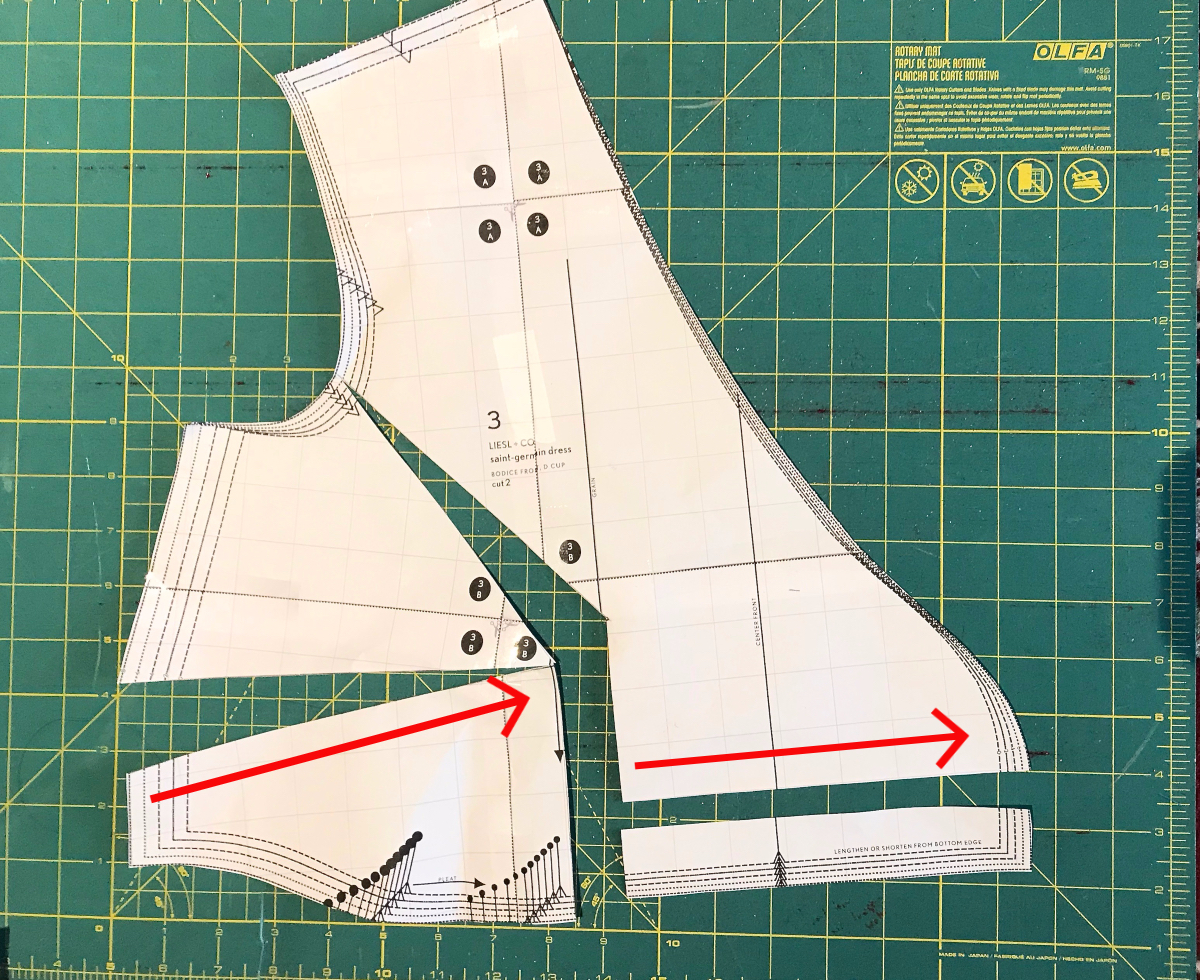
Now it’s time to cut along our lines. First, cut up line 1 to the bust apex dot, pivoting onto line 2. Cut along line 2 all the way to, but not through, the armscye. You need to leave a little hinge of paper at the edge. See illustration below.
The next cut will be along line 3, starting from the side seam and cutting to, but not through, the bust apex. Again, we need to leave a small paper hinge.
The last cut will be along line 4. Cut all the way through this time, separating the paper entirely.
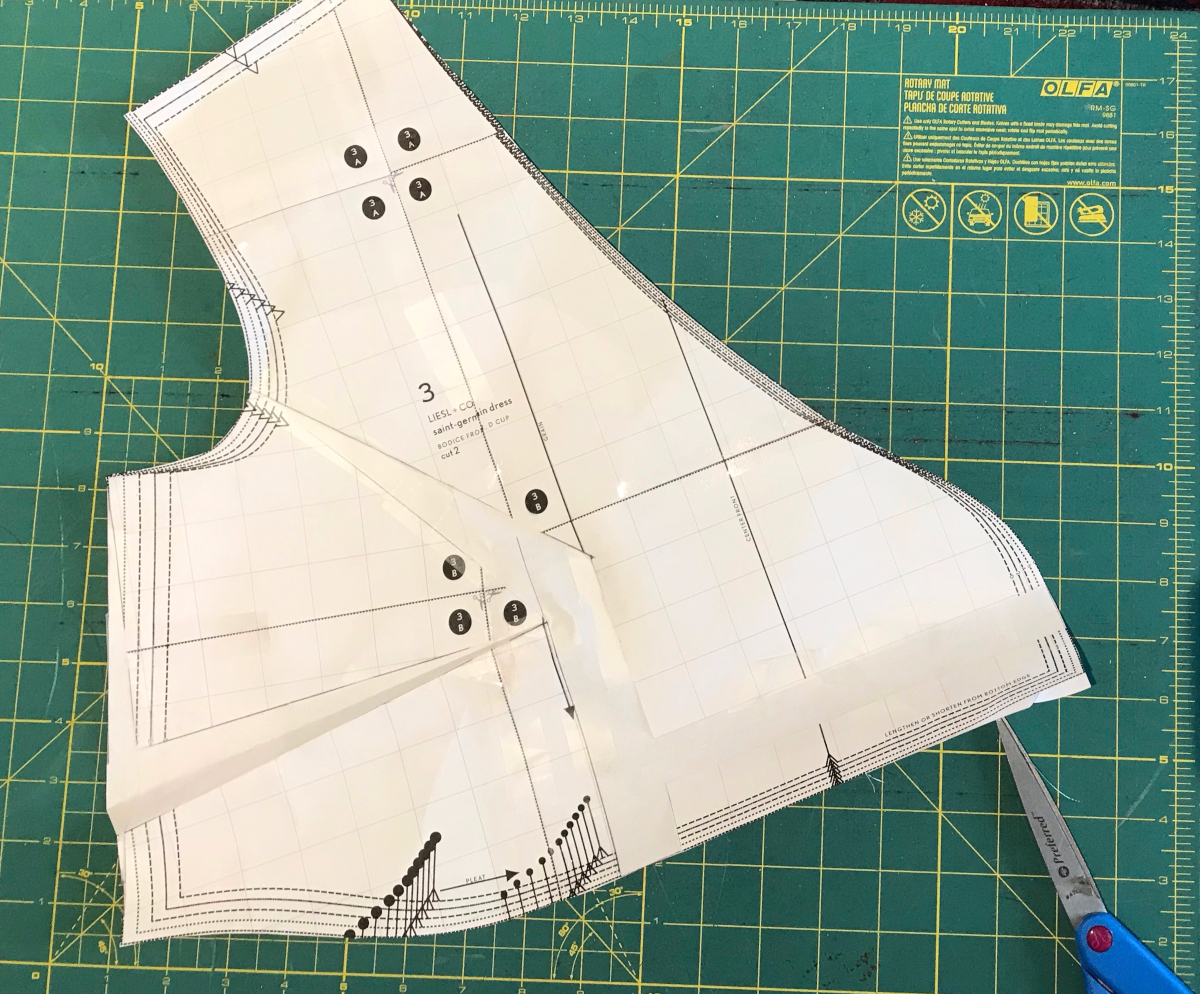
Next, slide some paper underneath the cuts you made in preparation for spreading the pattern. Make sure the paper extends outward from the side seam at least an inch; you will need the excess for the dart legs.
Spread the pattern at the cuts you made on lines 1 and 2. The distance you will spread them is the measurement we took above, measuring how far the center front line was from your center front. In my case it was 1 1/8″, so that is how far I spread my pieces. When you spread those cuts, a dart will open along line 3 (shown in bold black lines below). Tape the paper down where you have spread it.
The last thing you need to do here, is to take that extra bit of paper you cut off when you cut line 4, and move it down to line up with the bottom of the bodice. Tape in place.
Now it’s time to true up our seam lines. Smooth out the center front area of the bodice where you moved the paper down. Next, fold up the dart you created. Traditionally, darts are folded downwards, so that the excess fabric points towards the waistline. I’ve read, however, that it’s better to fold up if you have a particularly large bust. Either way you do it, make sure you do it the same way when you sew the garment, or the side seam won’t be true.
After folding up the dart, all we have to do to true up the side seam, is to draw a line connecting the bottom corner of the bodice side seam with the top corner. Then cut along that line.

After you unfold the paper, you should have an angled area at the side seam, which turns into a straight side seam when the dart is folded up. This ensures there is enough fabric in your dart to catch it in the side seams when you sew them up.
Next, pin the dart and pleats, and pin the front bodice to the back bodice again and try it on. Alternatively, you can make another bodice muslin to check fit and dart position. Your dart should point to your bust apex, and the center front line on the pattern should be at your center front.
If you’ve done a significant FBA like mine, the pleat may not be centered under your bust apex and you may wish to move it. This is as easy as just folding the fabric in a different spot. Though the hem of the bodice is shaped, I found that moving the pleats under my bust evened out the bottom of the bodice so that it was straight all the way around when I sewed it, which is necessary before you sew it to the waistband.
If you have a larger bust like mine, you may want to split your pleat into two separate pleats. To do this, just measure the size of the pleat, and then split that measurement in half to calculate how large each pleat should be. This creates a more gentle slope from the waist up to the bust. If you go this route, I do recommend making a full bodice muslin after completing the FBA. This will help you determine where you want your pleats and to check that your FBA was large enough. I made a muslin and then figured out where I wanted my pleats by moving them, pinning them, trying on the muslin, and repeating until I was happy with their placement.
If you need more information on making a bust dart, Liesl has directions in this blog post. She also has a class to help you: Creativebug Bust Adjustment Class.
Fitting the Rest of the Dress
The pleats in the bodice and skirt of this dress make grading between sizes relatively easy. You can use the pleats to enlarge (by taking a smaller pleat) or reduce (by taking a larger pleat) the size of the bodice and skirt to fit the waistband as necessary. Also, because the dress is a wrap dress, you have a little leeway in the overlap.
If you are unsure, you can always make a full muslin. If you choose to do so, you just need to cut out one waistband piece and the skirt pieces – don’t worry about the facings. Make your skirt pleats, sew the skirt together, and then attach it and the bodice to the waistband. Check that your bodice pleats and skirt pleats line up. If they don’t, you can move them until they do. Because I split my bodice pleats into two, I lined up my outer bodice pleat with the skirt pleat, but you could do it the other way, or center the skirt pleat under the two bodice pleats. You’ll just want to make sure it makes sense visually.
If you are taller or shorter than about 5’6″. you may want to lengthen or shorten the dress. I am 5’8″ and I lengthened the skirt 2″.
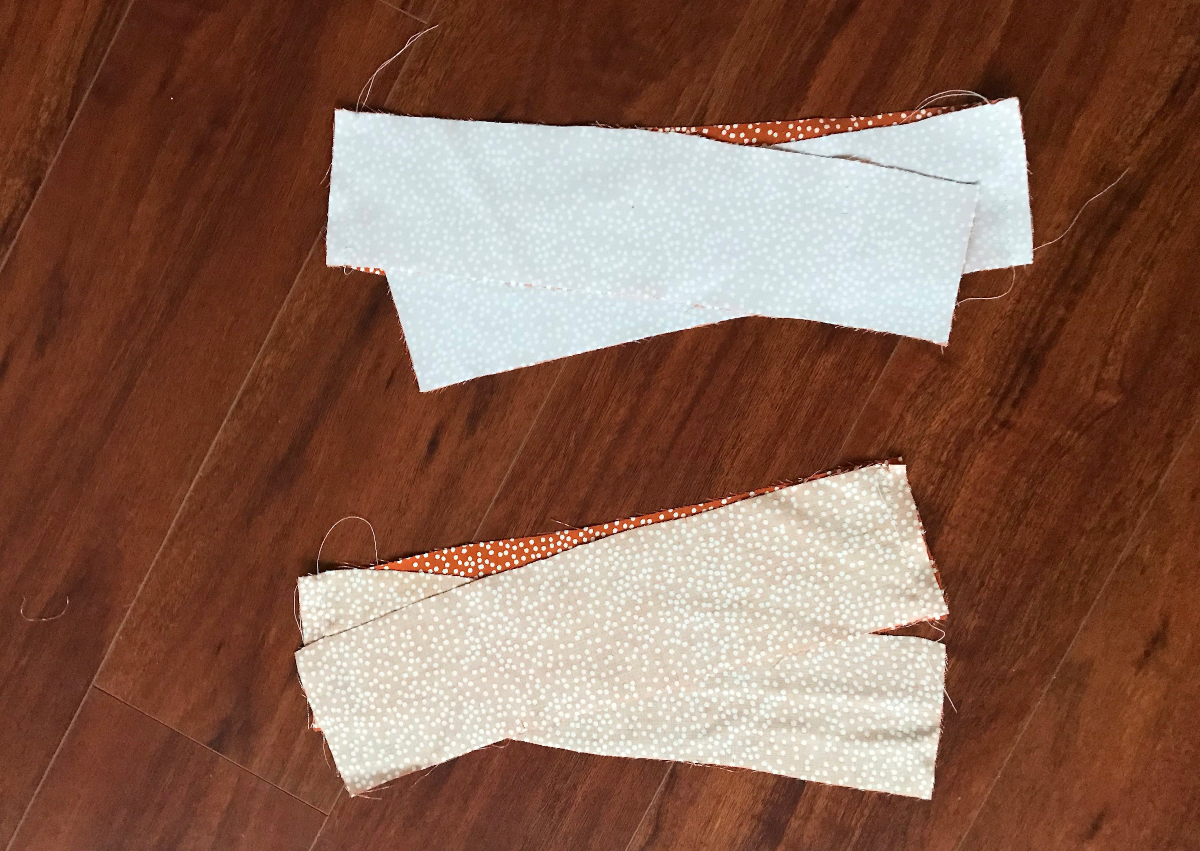
Sewing Day 1
Getting Started
1) Using tailor’s chalk or a water-soluble fabric-marking pen, transfer the dots and pleat-line markings from the bodice-front, bodice-back, skirt-front, and skirt-back pattern pieces to the wrong side of the corresponding cut fabric pieces. For View B, transfer the stitching guide from the 3/4-length-sleeve pattern piece to the right side of the cut fabric pieces.
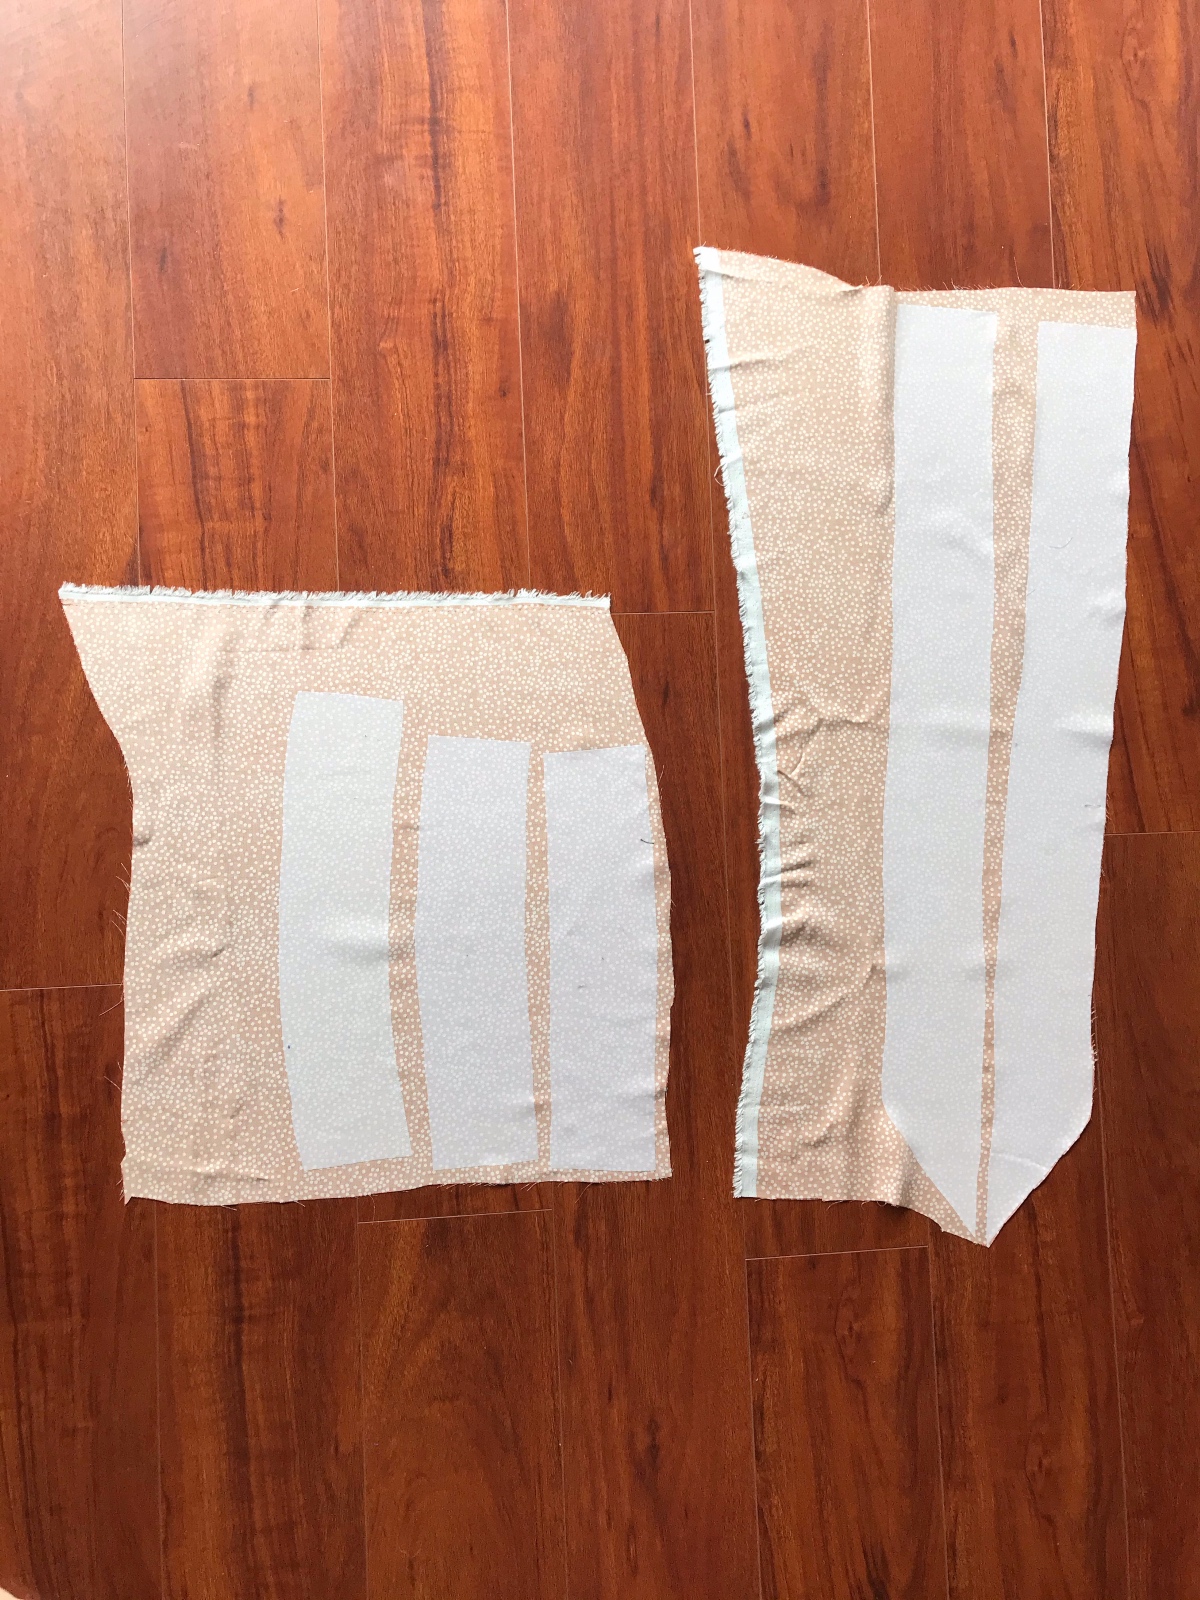
2) Following the interfacing manufacturer’s instructions, fuse the pattern pieces cut from featherweight interfacing to the wrong side of their corresponding cut fabric pieces. You’ll interface both front facing pieces, one waistband-back and two opposing waistband-front pieces.
You can block-fuse these pieces, which is what I did here, by tracing the pattern pieces onto the interfacing only. Fuse those interfacing pieces directly to one large piece of fabric at the same time. After they’ve been fused, you can cut out the interfaced pattern pieces by using the interfacing as a guide. This saves tracing and fusing time as well as the frustration that can come with trying to get the cut pieces to match exactly.
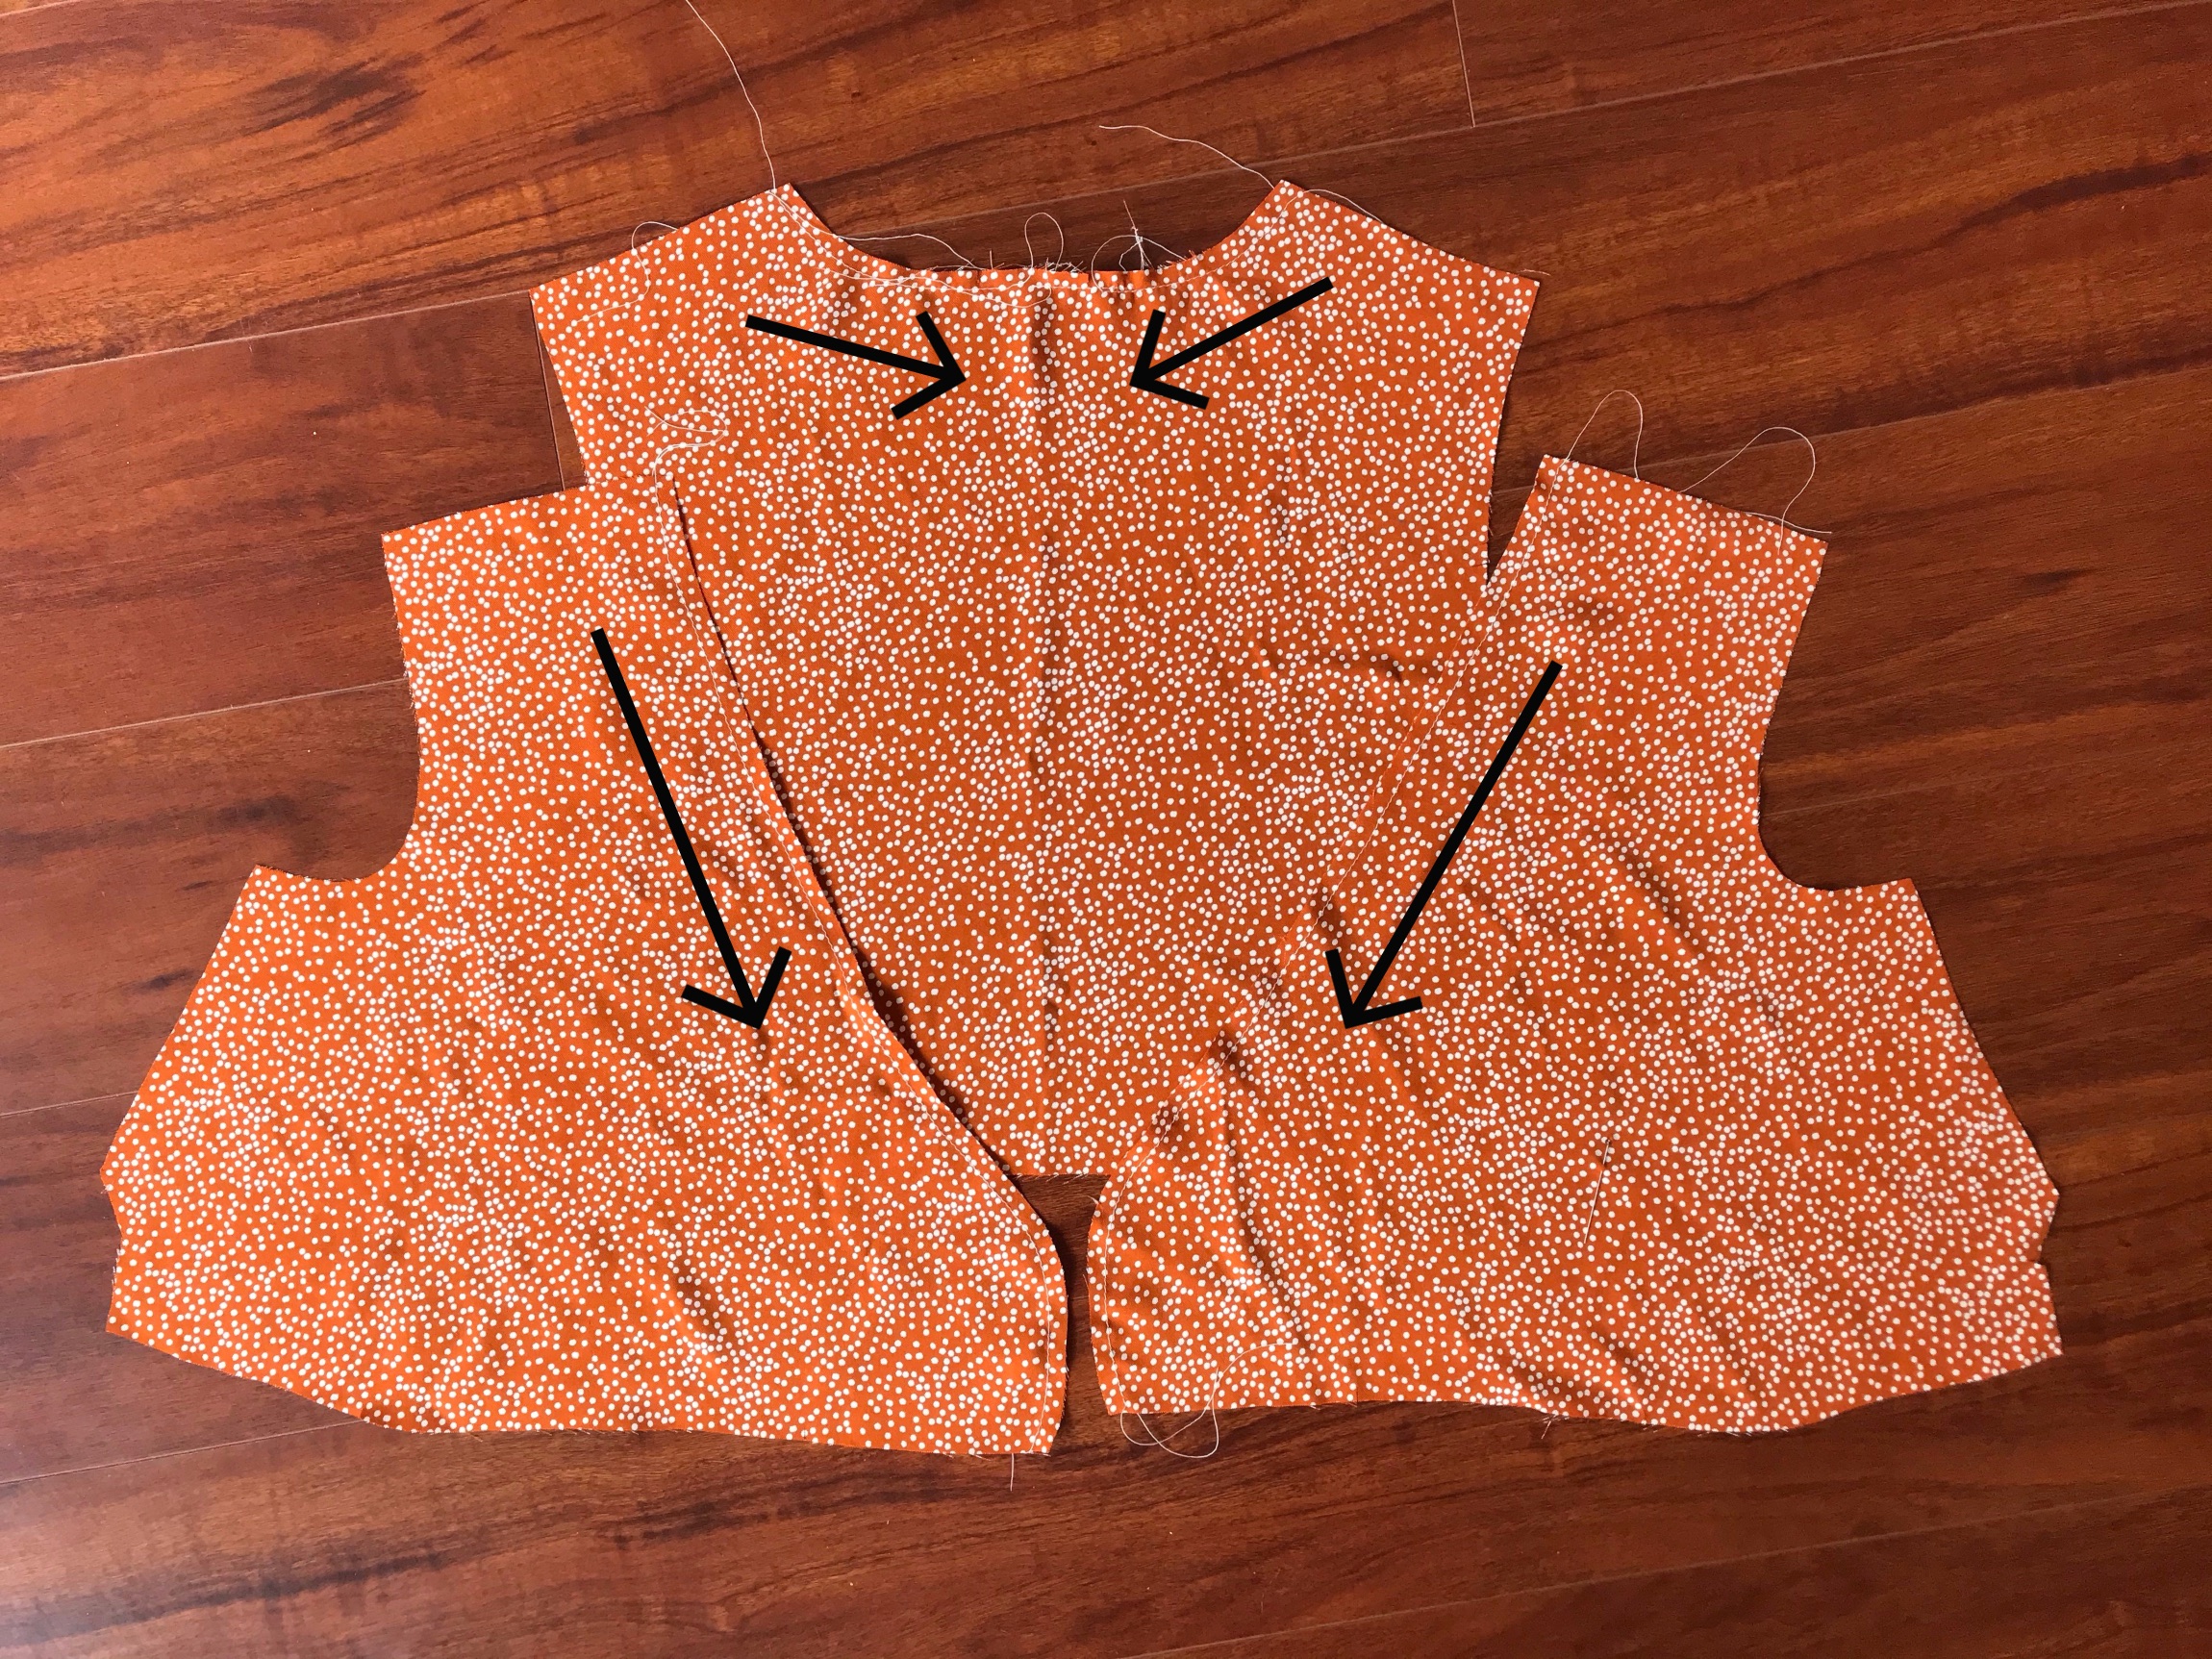
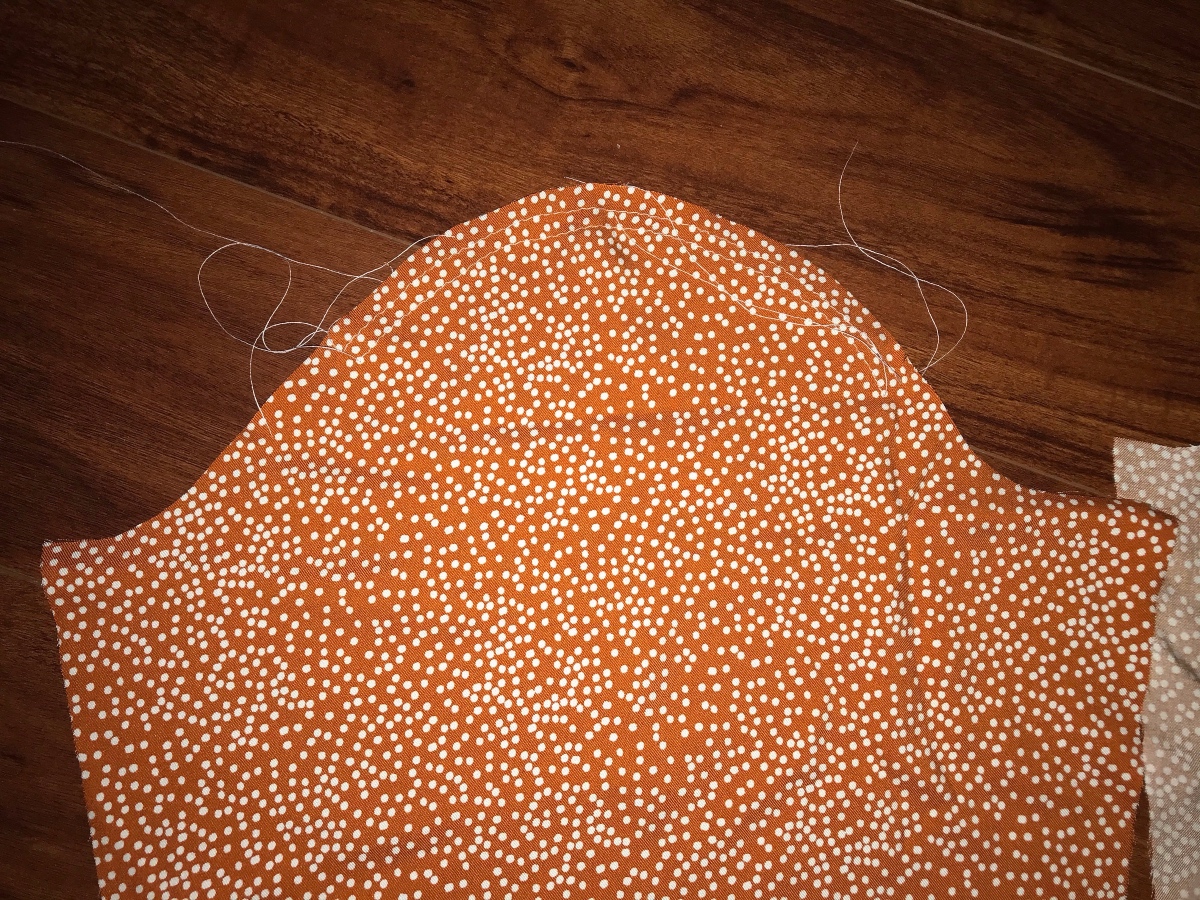
3) Staystitch the necklines of the bodice-front and bodice-back pieces a scant 3/8″ from the raw edge in the direction of the arrows. The staystitching is permanent and helps stabilize the fabric so it doesn’t stretch or distort during assembly. (Note that the staystitching will not be shown in the illustrations after this step.)
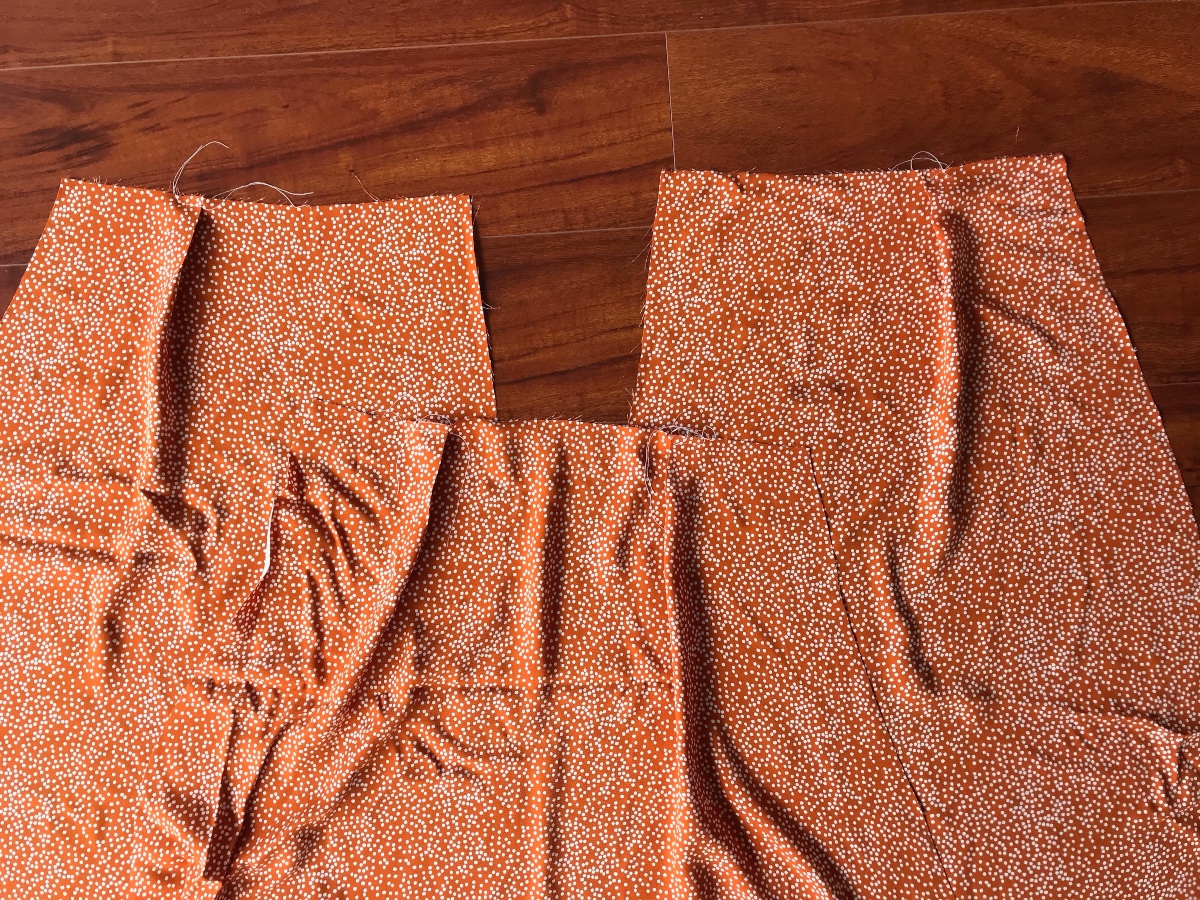
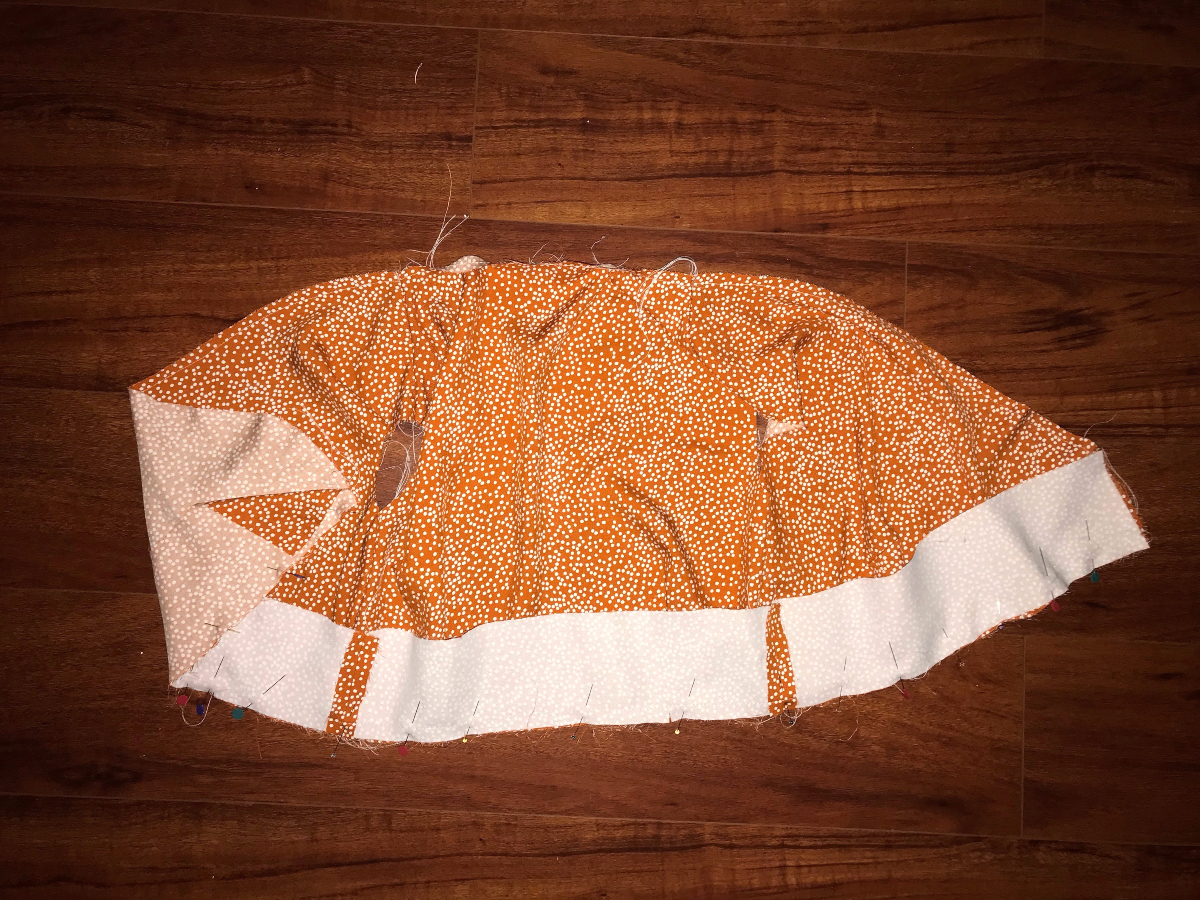
Make the Pleats
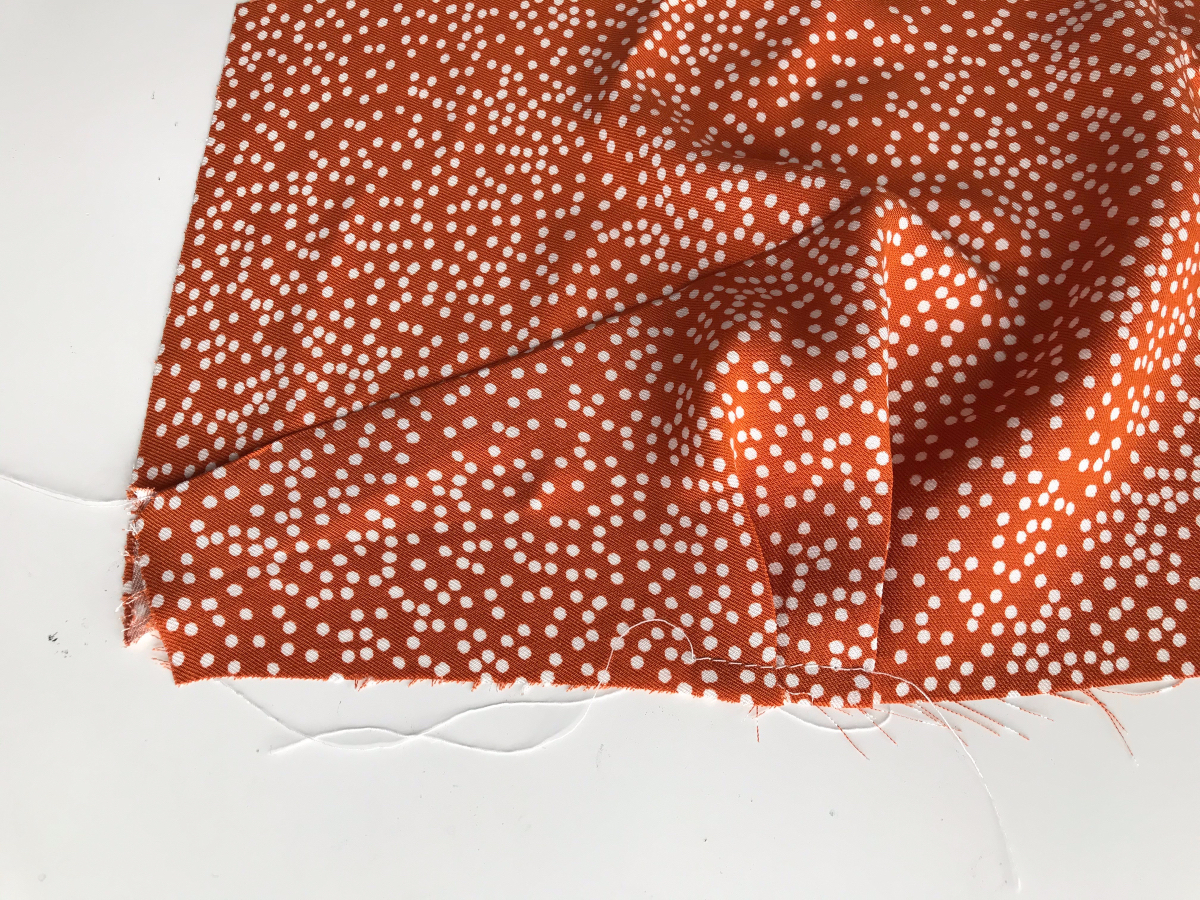
1) To form the bodice pleats, work from the right side of the fabric and fold the bodice front along the line with the large dot, wrong sides together, and match the crease to the line with the small dots. Baste the pleats to the bottom edge of the bodice with a 3/8″ seam to hold them in place.
I split my bodice pleat into two smaller pleats. If you did not do that, you will only be making a single pleat here as instructed in the pattern.
2) Repeat Step 1 to make the pleat on the opposite bodice front as well as the two pleats on the bodice back, being mindful of the direction of each pleat. Note that the fullness of the pleat should point toward the side seam on the wrong side of the fabric for all pieces. This will make it easier to remember which way to fold the pleats.
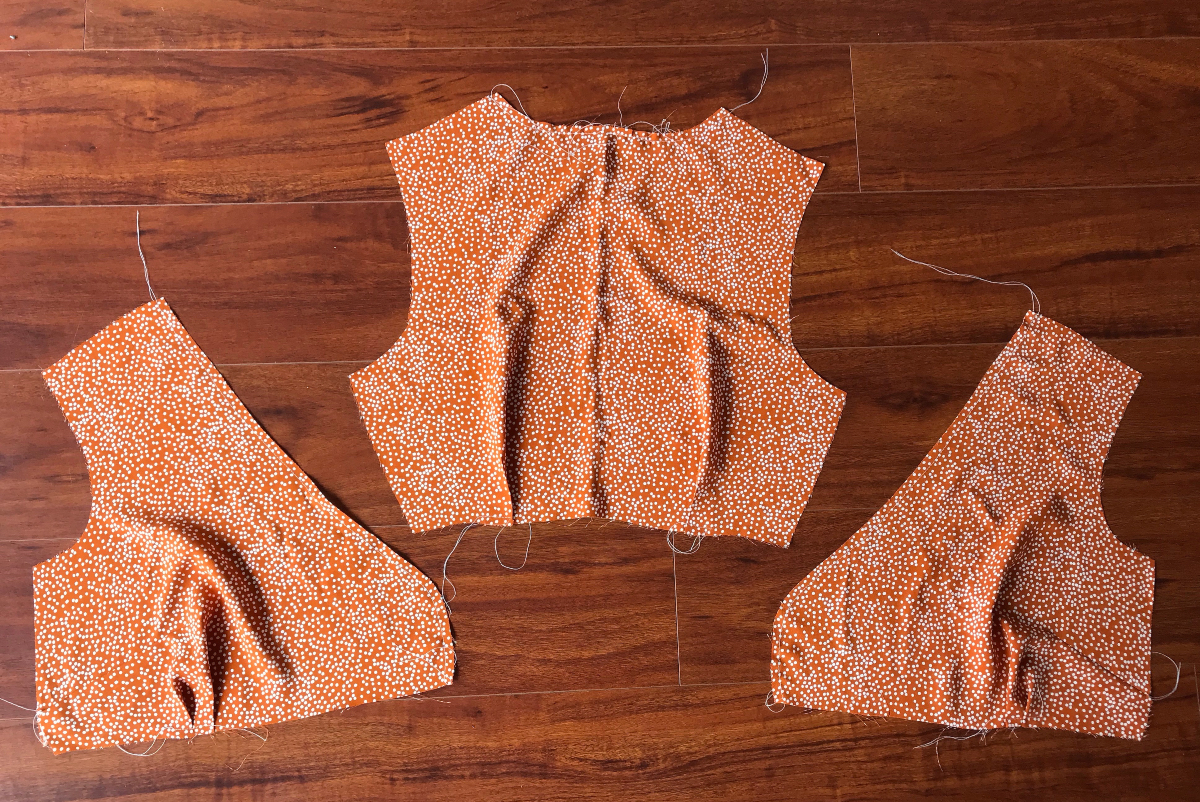
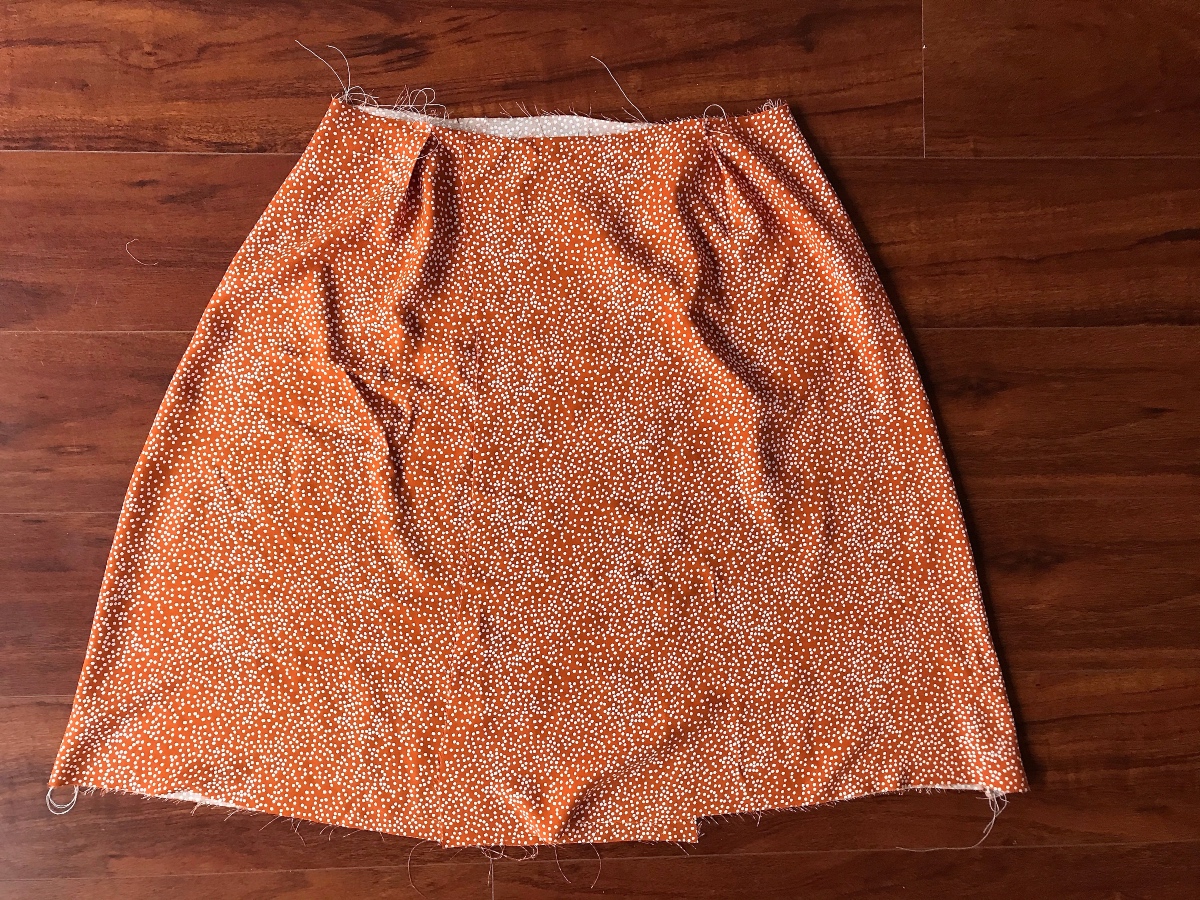
3) Sew the pleats on the skirt-front and skirt-back pieces in the same way.
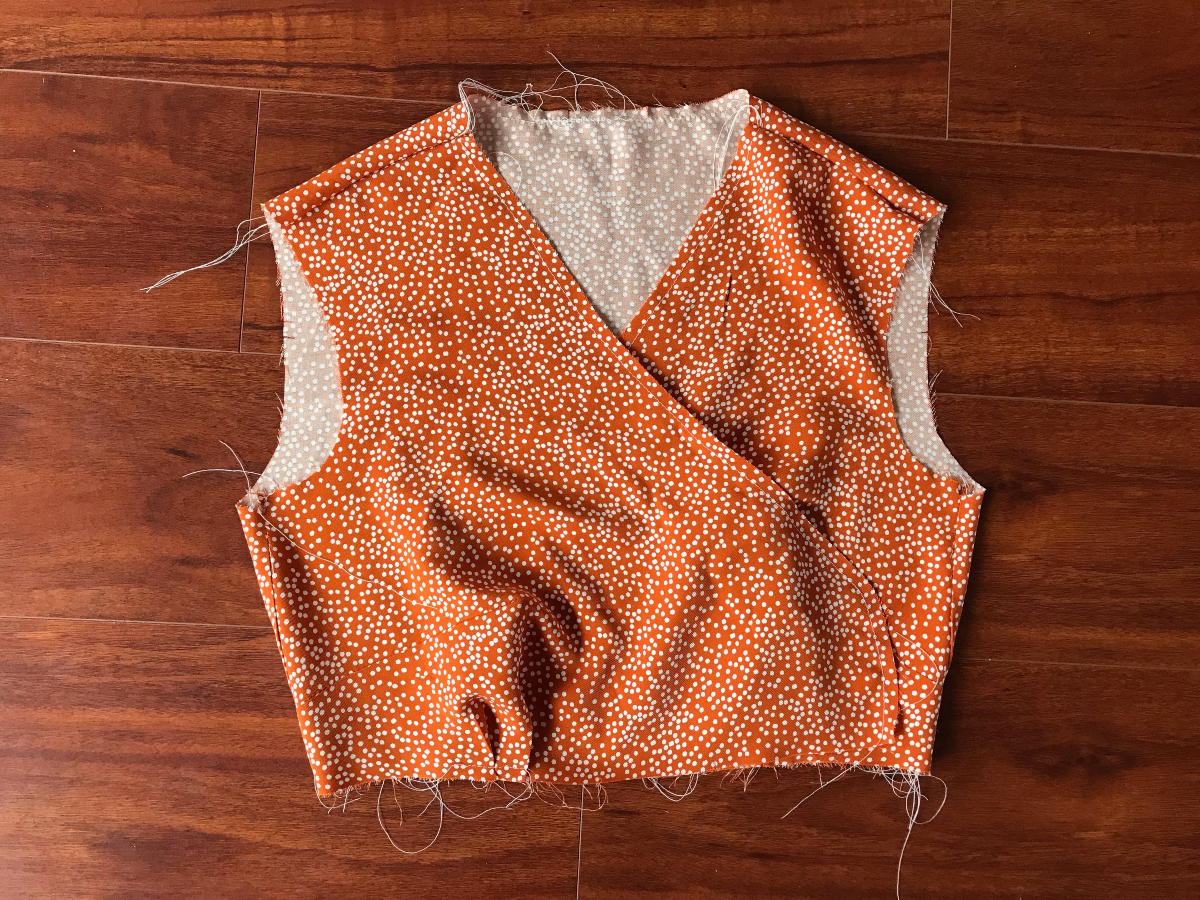
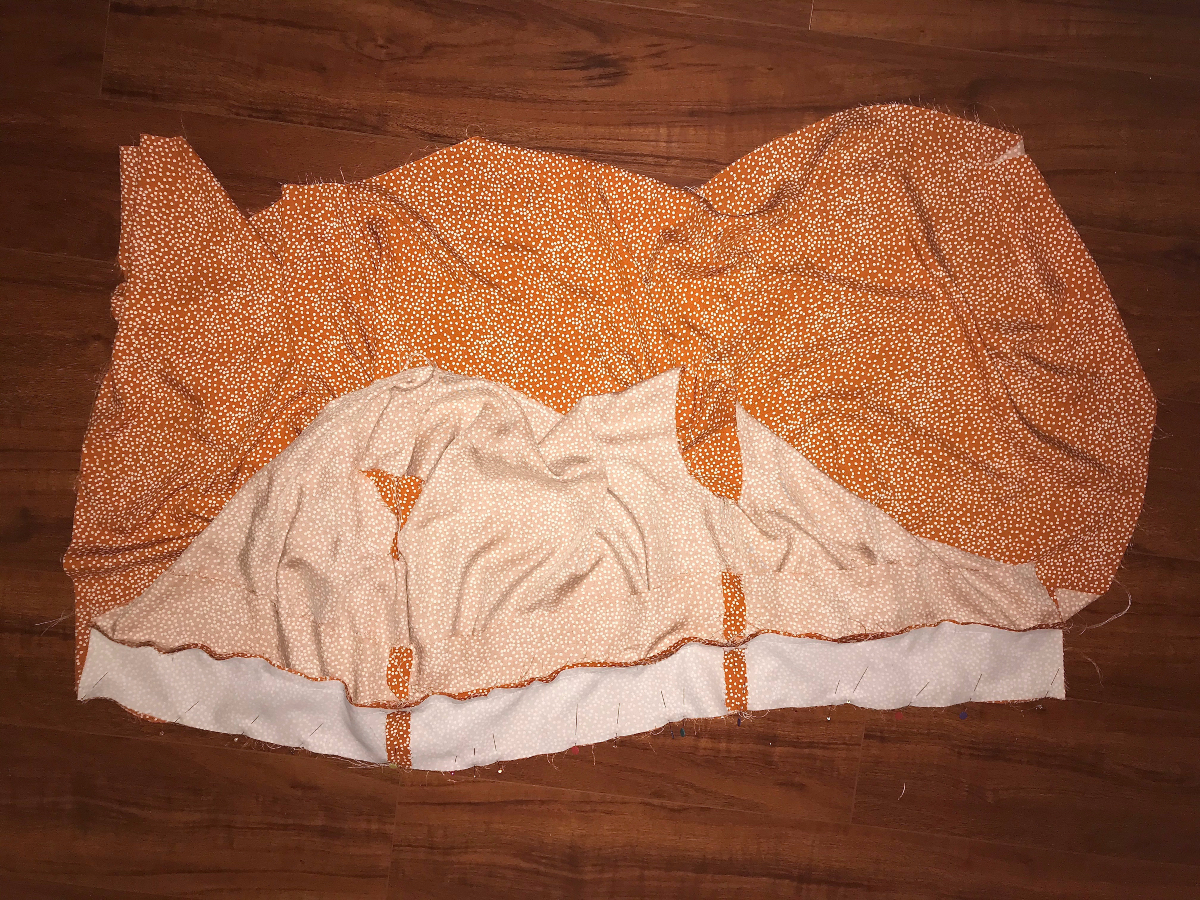
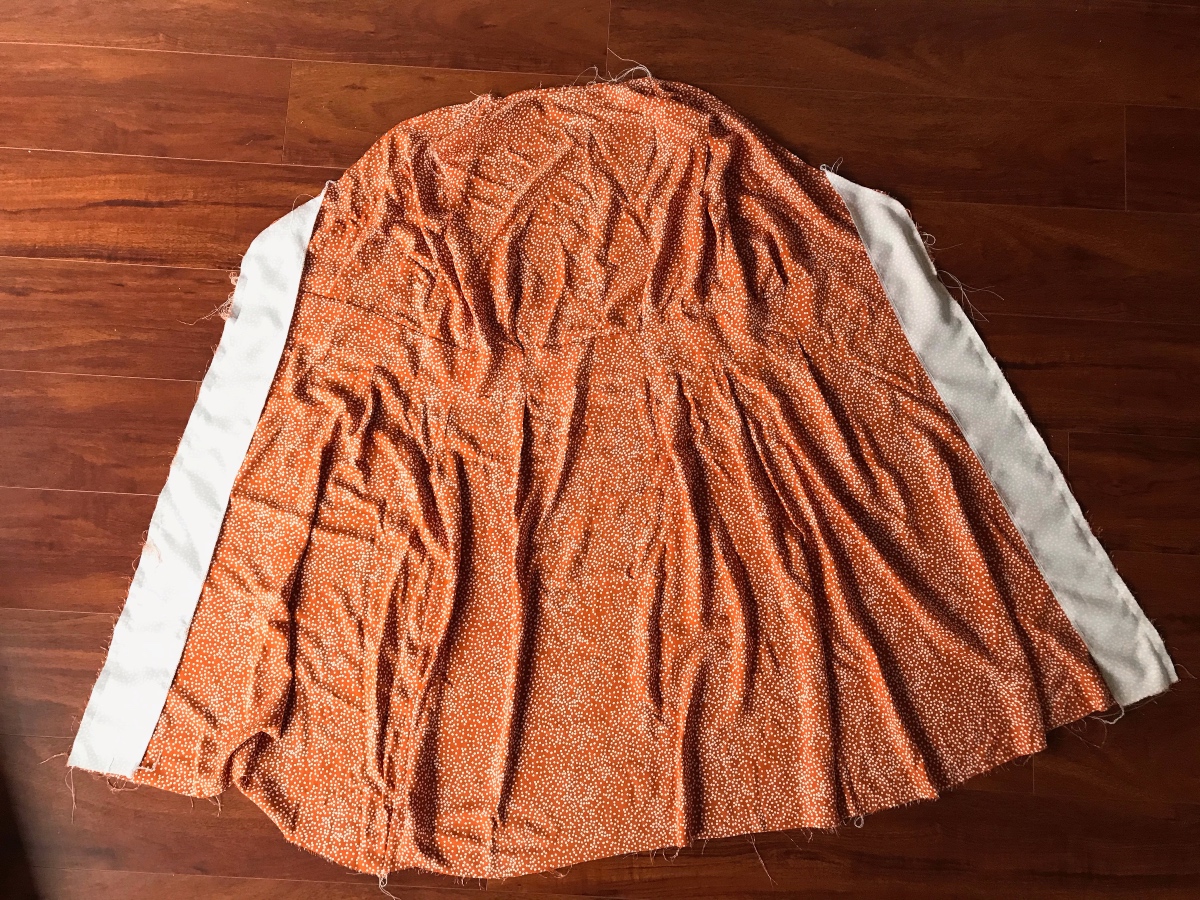
Assemble the Bodice and Skirt
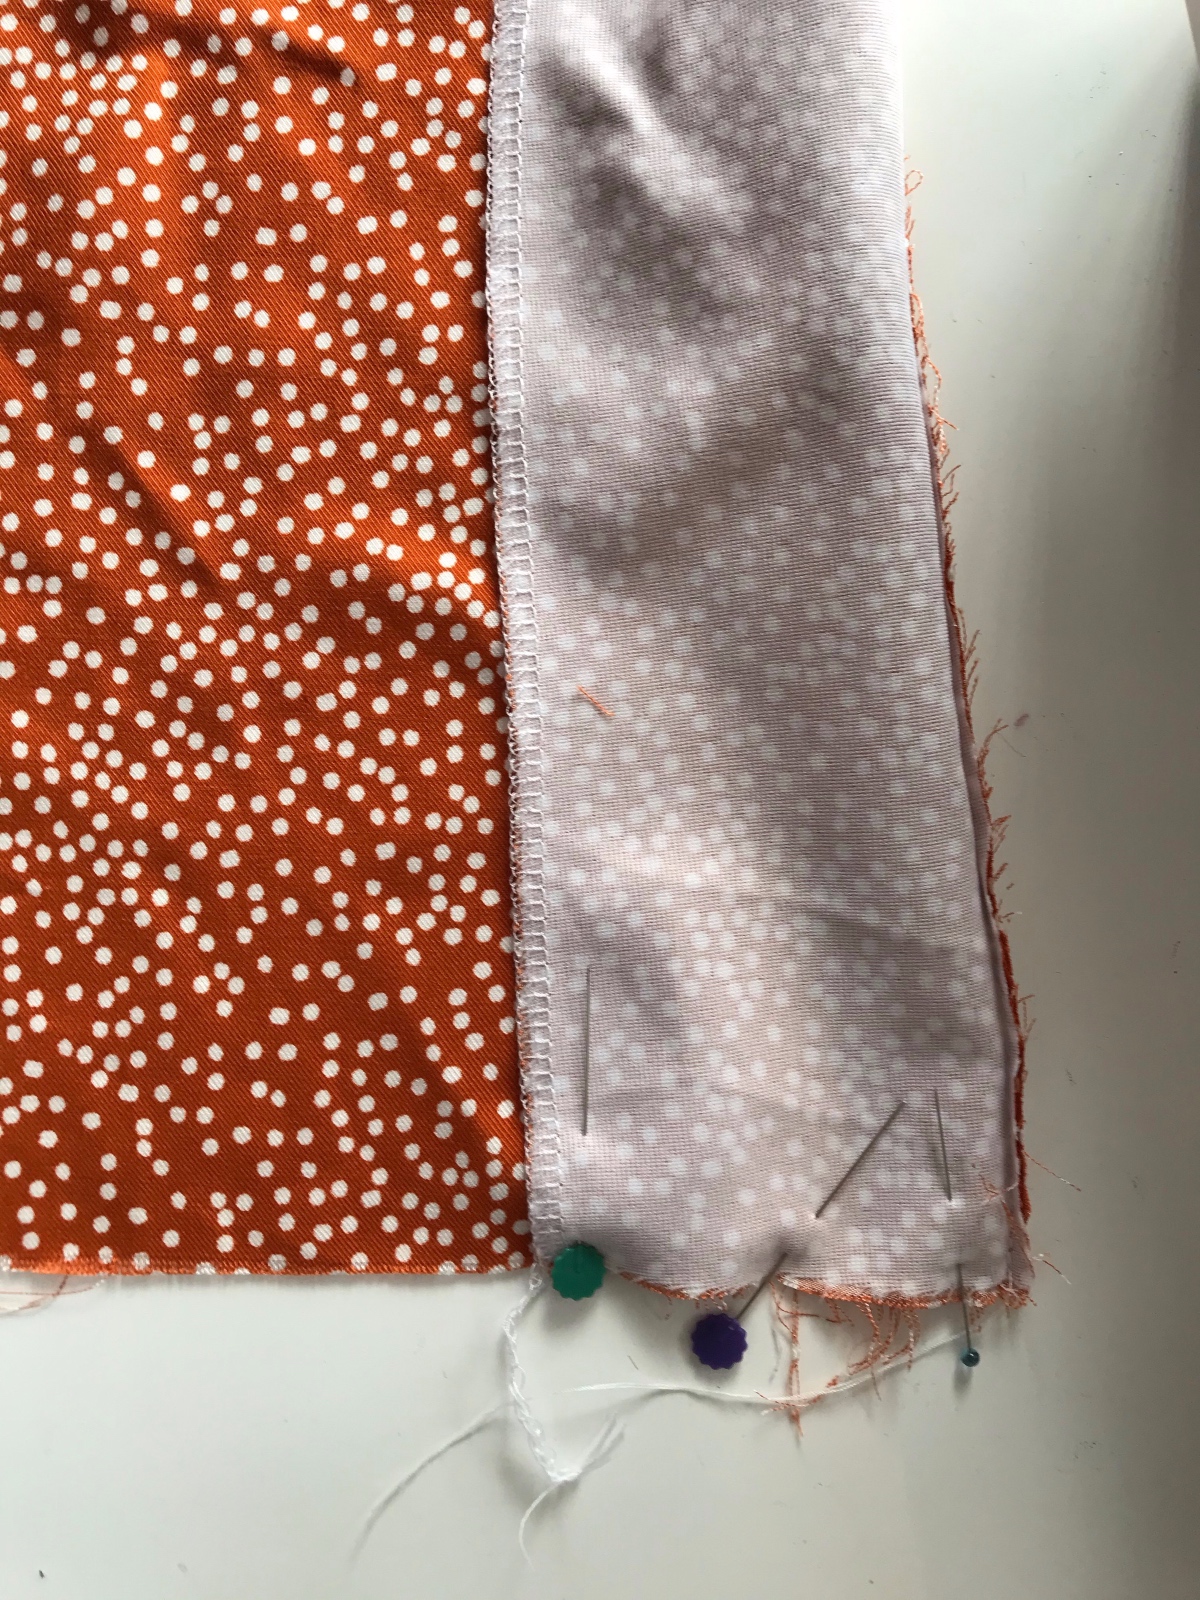
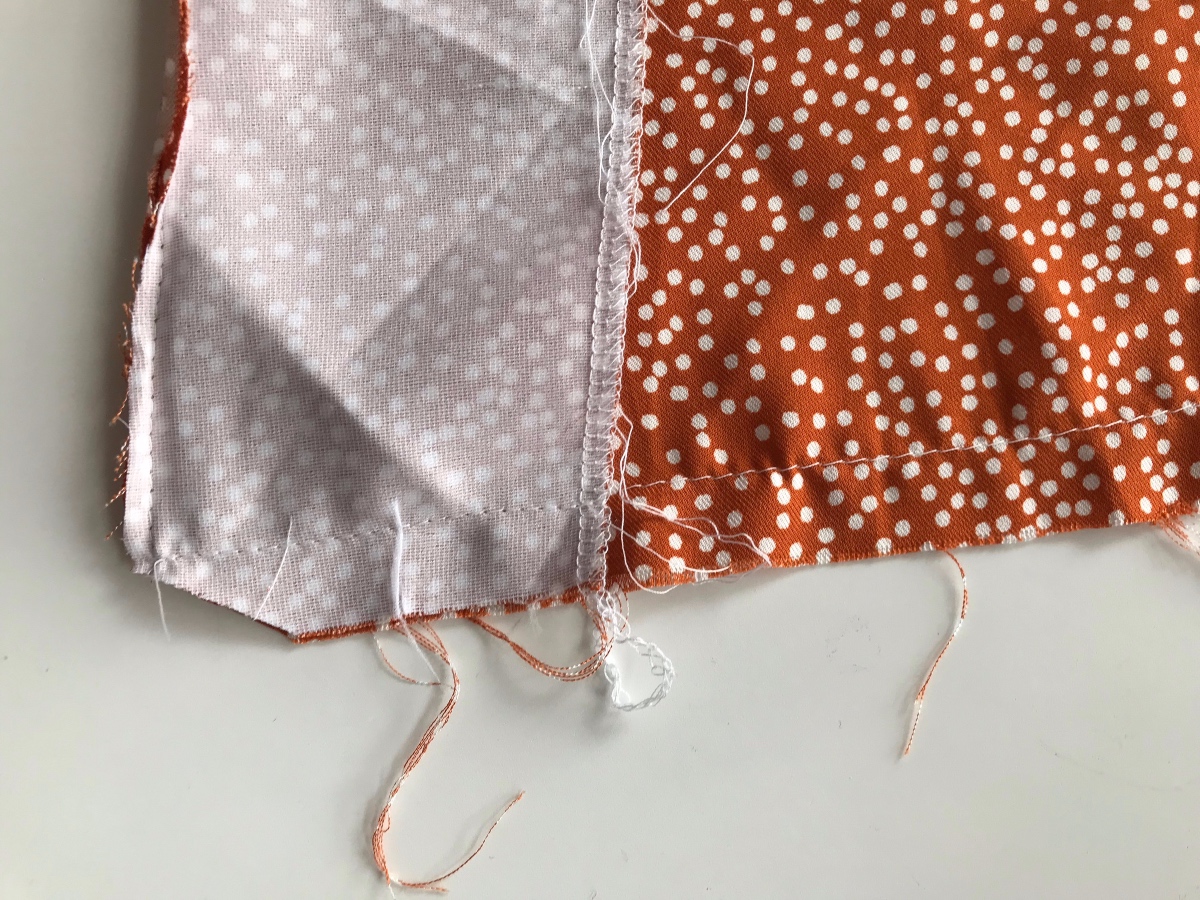
1) Pin the two front bodices to the back bodice at the side seams and shoulders with right sides together, matching the edges and notches. Stitch the sides and shoulders with a 1/2″ seam, backstitching or lockstitching at both ends. Press the seam allowances open and finish them using your preferred method.
This is a great place to use French seams if your fabric will permit it, in which case you would start by pinning the fabrics with wrong sides together. There is a tutorial for French seams on our blog.
2) Pin the two skirt fronts to the skirt back at the side seams with right sides together, matching the edges. (Depending on what version of the pattern you have, it may instruct you to match notches. You can ignore that instruction, as there are no notches on the skirt). Stitch the sides with a 1/2″ seam, backstitching or lockstitching at both ends. Press the seam allowances open and finish them using your preferred method.
This is also a great place to use French seams if your fabric will permit it.
Sewing Day 2
Assemble the Waistband
NOTE: You’ll be assembling two waistbands for this dress: one for the outside and one to neatly finish the inside. Before you start, mark the top of each waistband piece so they don’t get confused.
1) Select the interfaced waistband back and the two opposing interfaced waistband fronts you prepared in Step 2 of the “Getting Started” section. Pin the waistband fronts to the waistband back, matching the edges and notches. Stitch the side edges with a 1/2″ seam, backstitching or lockstitching at both ends. Press the seam allowances open. Repeat to assemble the non-interfaced waistband pieces. Going forward we’ll refer to the interfaced waistband as the waistband and the non-interfaced waistband and the waistband facing.
2) Pin the top edge of the (interfaced) waistband to the bottom edge of the bodice with right sides together, matching the edges and seams and matching the notches on the waistband to the pleats on the bodice. Pin the top edge of the waistband facing to the bottom edge of the bodice with the right side of the facing to the wrong side of the bodice so the bodice is sandwiched between the two waistbands. Stitch the two waistbands to the bodice with a 1/2″ seam, backstitching or lockstitching at both ends. Press the seam allowances open, then press them toward the waistband.
If you have graded between sizes, like I did, you may have to adjust the size of the pleats on the bodice or the skirt, or both, to match your waistband. You may also need to move the skirt pleats slightly to line up with the position of the bodice pleats. Use the notches on the waistband as a guide to make sure all your pleats match up. If the dart doesn’t match the dart, simply shift and adjust it until it does.
3) Pin the bottom edge of the (interfaced) waistband to the right side of the skirt, matching the edges and seams and matching the notches on the waistband to the pleats on the skirt. (Flip the waistband facing out of the way for this step.) Stitch the waistband to the bodice with a 1/2″ seam, backstitching or lockstitching at both ends. Press the seam allowances open, then press them toward the waistband.
4) Finish the waistband facing by first sewing a row of basting stitches 1/2″ from the bottom unsewn edge of the waistband facing. Then using the basting stitches as a folding guide, press the seam allowance to the wrong side of the waistband facing along the basting. Smooth and pin the waistband facing to the bottom edge of the waistband so the folded bottom edge covers the stitching line, then blindstitch the waistband facing (by hand) from the inside or edgestitch it (by machine) from the right side to finish it.

Sew the Facings
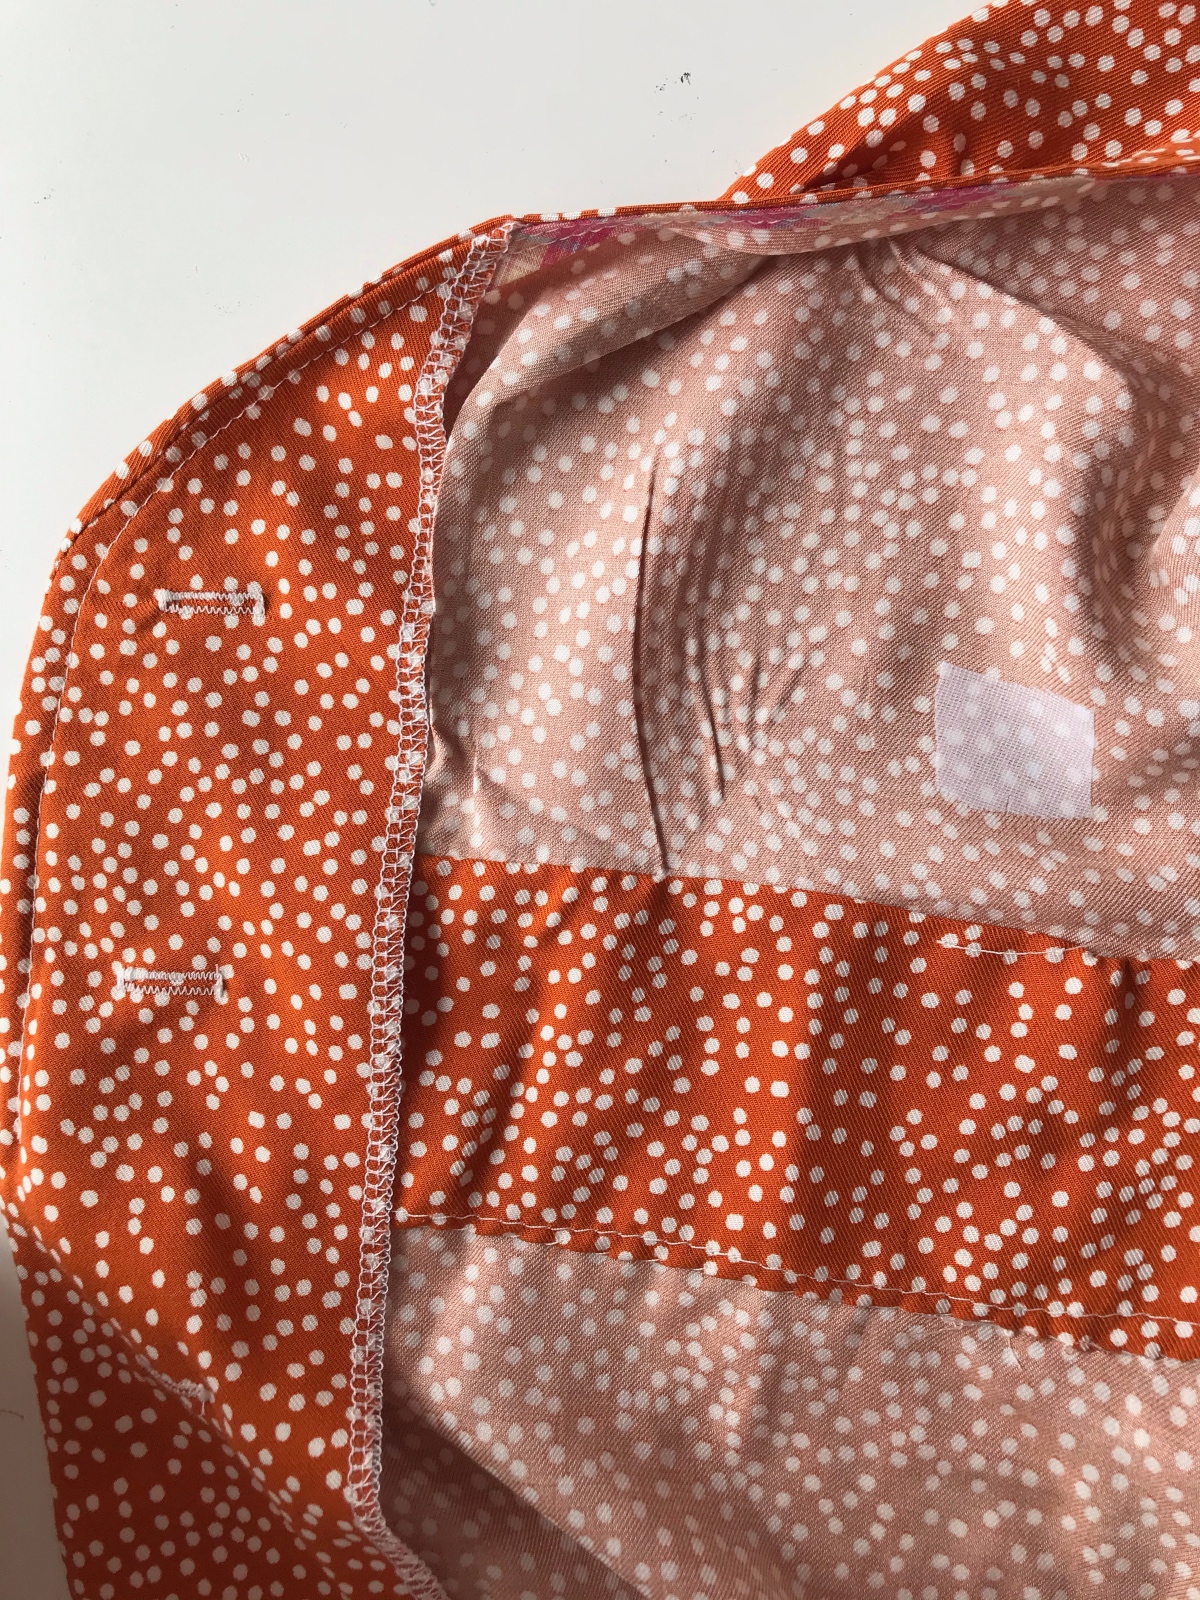
1) Working with the interfaced front facings you prepared in Step 2 of the “Getting Started” section, finish the outer (un-notched) edge of each facing using your preferred method. If you are using a serger, don’t trim the edge as you stitch it.

2) Pin the unfinished (notched) edge of the front facings to the front edges of the dress with right sides together, matching the edges and notches. Stitch the facings to the dress with a 1/2″ seam, backstitching or lockstitching at both ends.
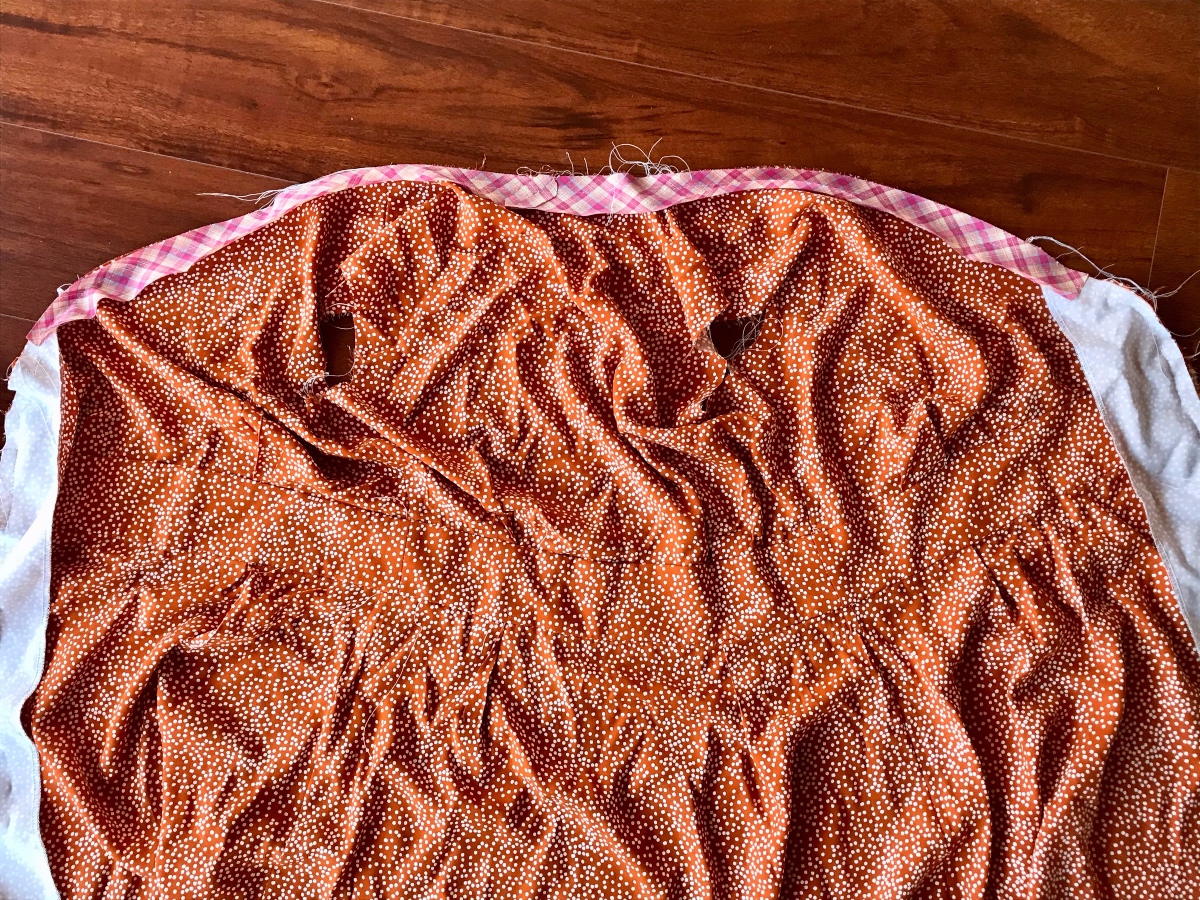
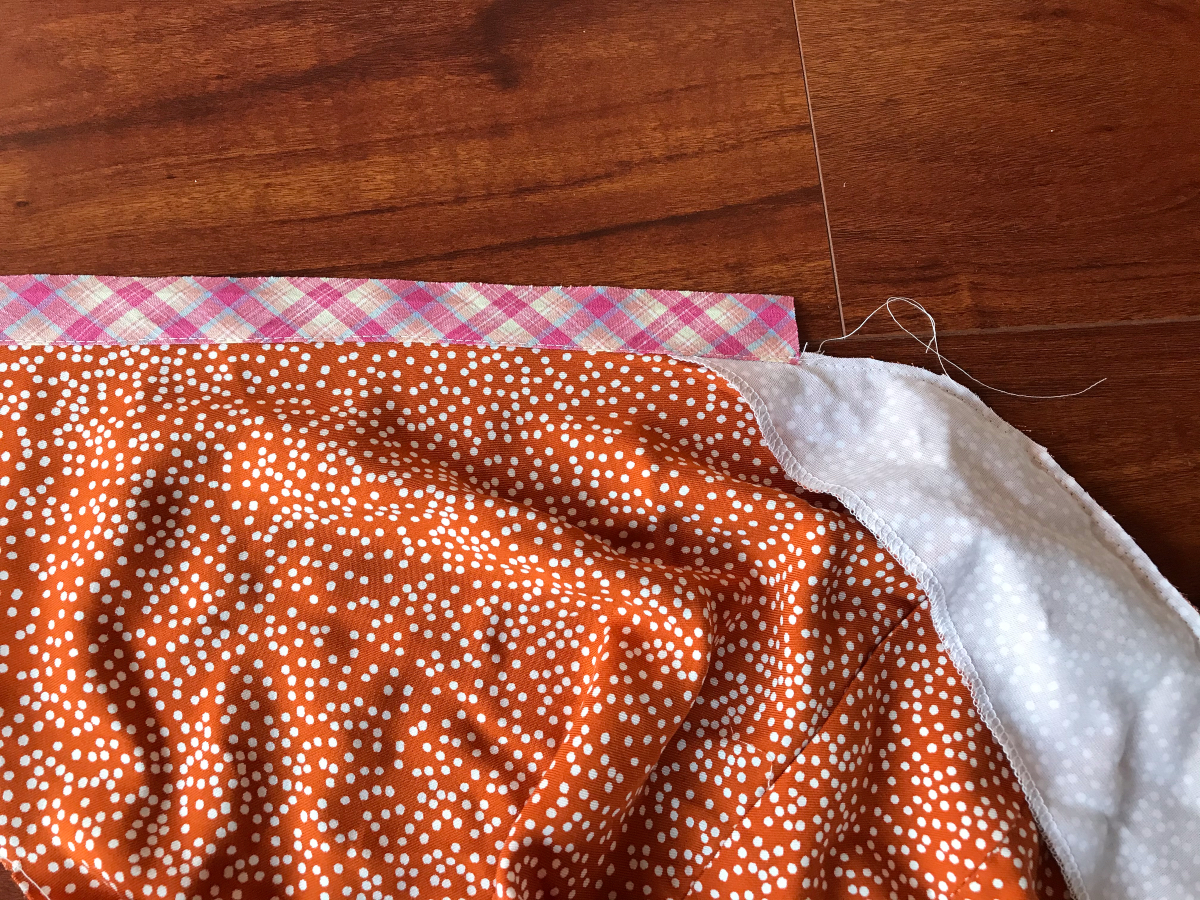
3) Pin the right side of the neckline bias facing to the right side of the neckline, starting about 1–1 1/2″ over the edge of the front facing so the end of the bias will be covered by the facing when they are both turned to the wrong side of the dress. Pin the bias facing evenly around the neckline, taking care not to stretch the bias facing. Once you’ve reached the opposite front facing, trim the end of the bias facing to extend 1–1 1/2″ beyond the edge of the facing again. Then stitch the bias facing to the neckline with a 1/2″ seam, backstitching or lockstitching at both ends. As you stitch, try to match your stitch line to the previous stitch line attaching the facings to the dress front.
I find rayon self-binding to be very fiddly to work with. I decided to use some homemade double bias tape that I had made out of cotton lawn. Because the bias tape was wider than the bias binding called for in the pattern, I needed to trim it down to size, which wasn’t difficult to do. I would not try this with store-bought bias tape, because the pre-packaged variety is very stiff and it would have changed the hand of the fabric too much. However, my cotton lawn bias was very light and flexible and worked well for this application.
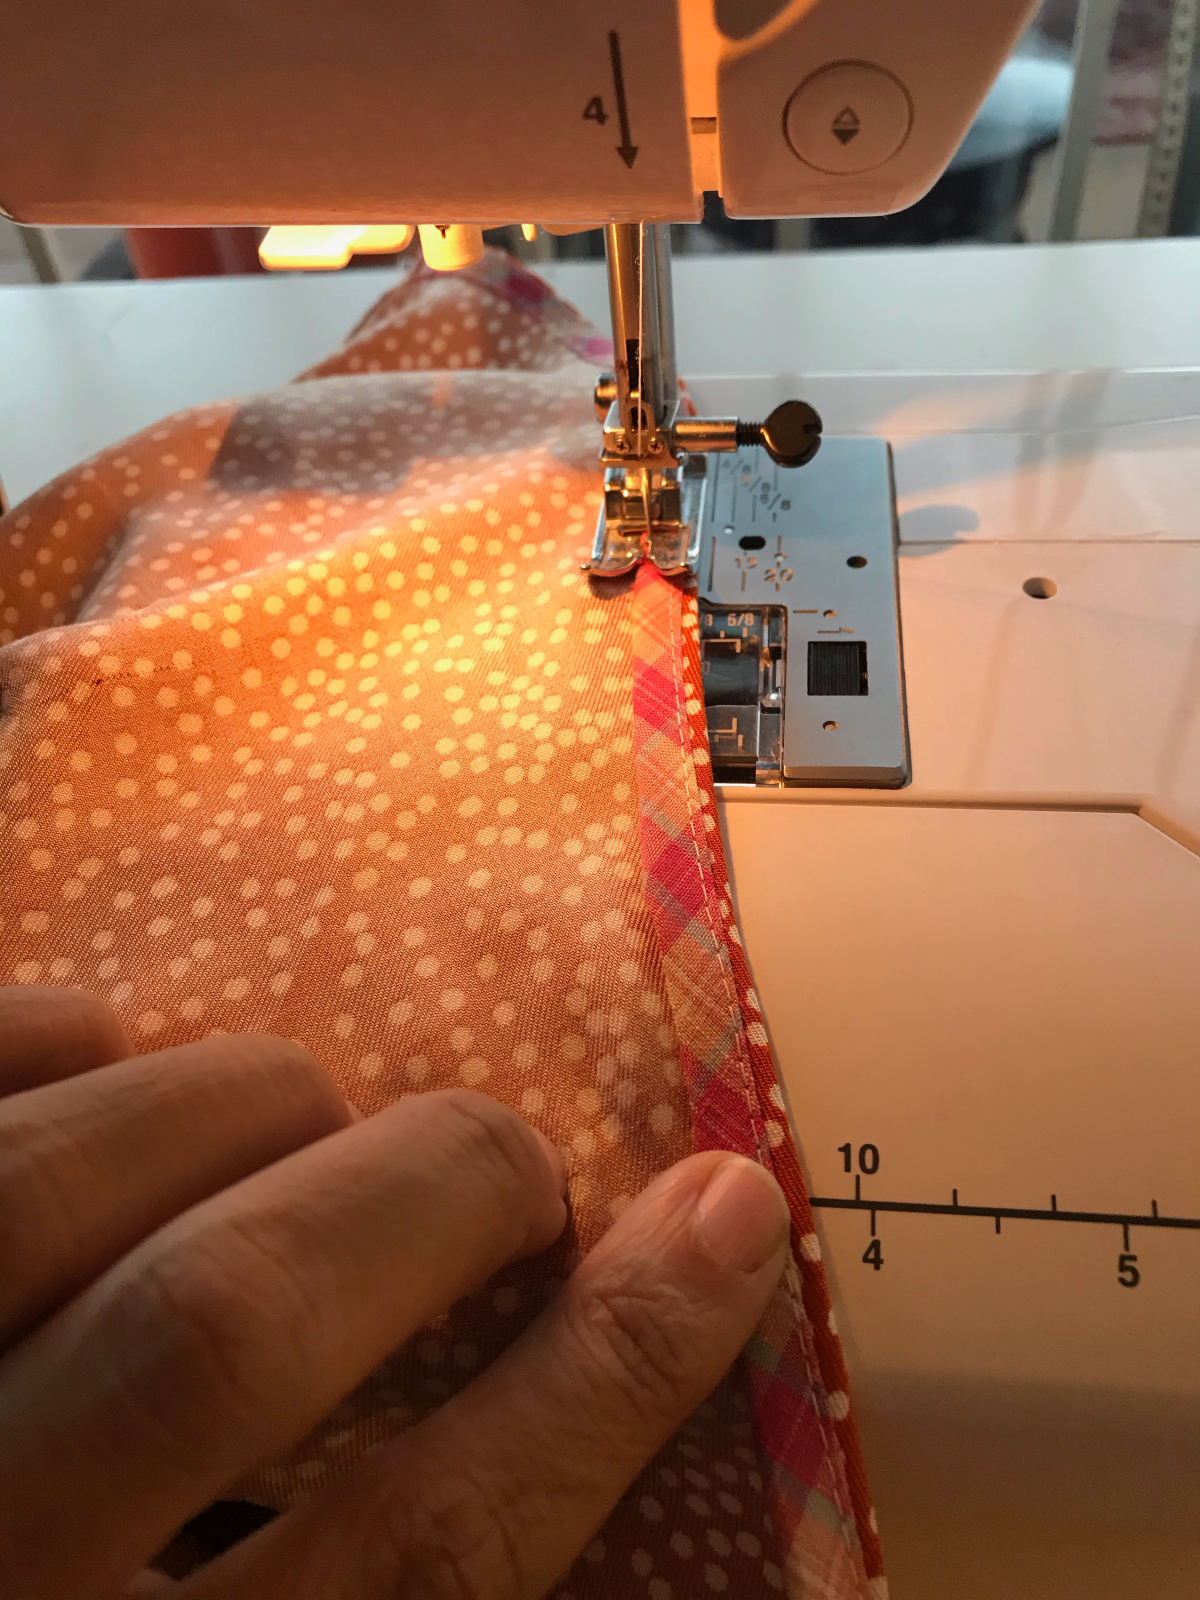
4) Trim the stitched neckline and front facing seam allowances to 1/8″ and press the bias facing toward the seam allowances, away from the neckline. Understitch (or edgestitch) the neckline bias facing as close as you can manage (1/16″ is ideal, but a narrow 1/8″ is OK too, as long as you catch the seam allowances in your stitches). Try to sew as evenly as possible so the inside of the neckline will look neat.
5) Working from the wrong side of the neckline, fold and press the long unsewn cut edge of the bias facing to meet either the neckline seam or the understitching if you prefer the bias facing to be a bit wider.

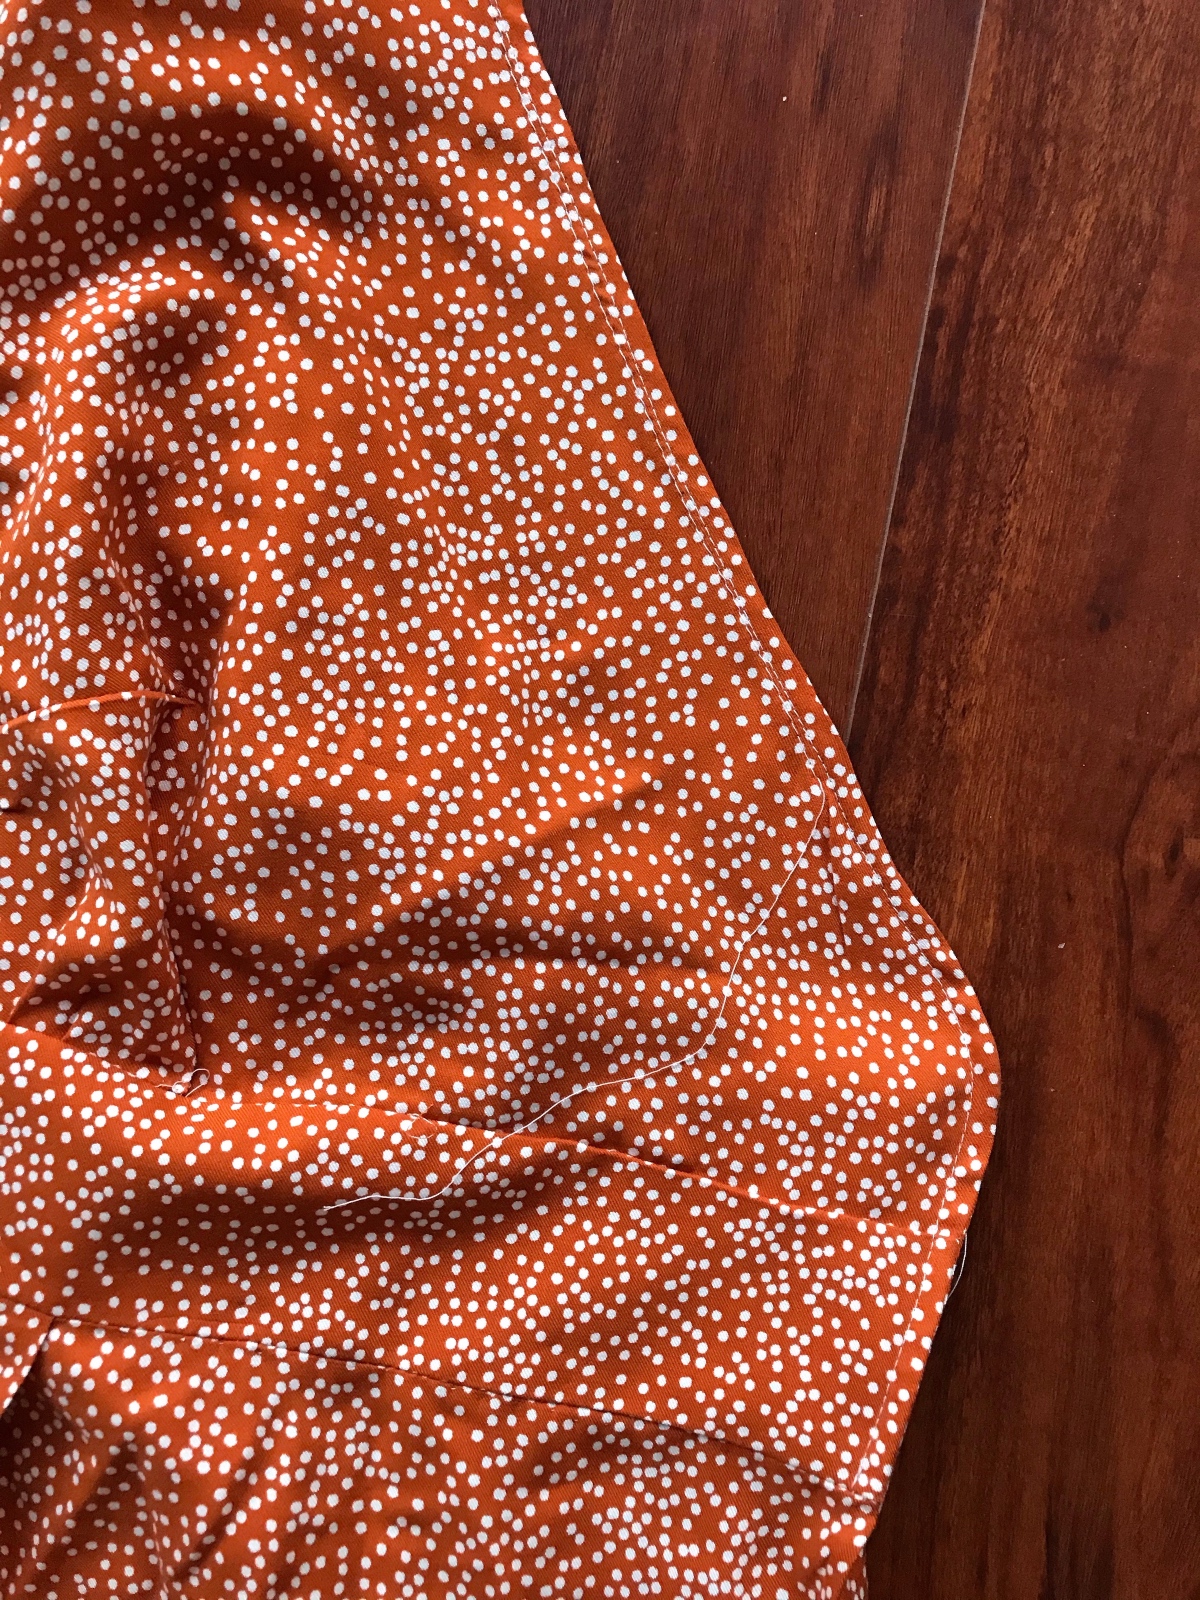
6) Fold and press the bias facing again, this time turning the entire bias facing and front facings to the inside of the dress and rolling the seam slightly to the inside so it won’t show when the dress is worn. The front facings will cover the ends of the bias facing. Baste the innermost folded edge of the facing to the dress from the inside of the dress so you can stitch as close as possible to the fold.
Once you’ve basted, turn the dress to the right side and topstitch the neckline to finish it, using the basting stitches as a stitching guide. Start and stop your stitching at the base of the waistband, stitching approximately 1/4–3/8″ from the neckline edge, depending on the position of your basting stitches, and backstitching or lockstitching at both ends. Once you’ve topstitched you can remove the basting stitches.
Sewing Day 3
Sew the Sleeves
1) Sew a row of gathering stitches 3/8″ from the raw edge of the cap of one sleeve, starting and stopping at the sleeve cap’s side notches and leaving thread tails several inches long on both ends of the gathering stitches. Sew a second row of gathering stitches 1/4″ below the first row (5/8″ from the raw edge). (Note that the sleeve cap also has a center notch, which you’ll use in Step 6 to help you align and pin the sleeve and armhole to join them.) For View B, if you haven’t done so already, transfer the stitching guide to the right side of the fabric.
2) To prepare the sleeve for hemming, sew a line of basting stitches 5/8″ from the sleeve’s bottom edge. This basting line will become the fold line for the sleeve hem. Fold and press the fabric’s bottom edge to meet the basting line on the wrong side. Then fold and press again along the basting line to enclose the raw edge and prepare a narrow hem. Don’t stitch the hem yet. Unfold the sleeve hem, keeping the creases in place for finishing the sleeve later.
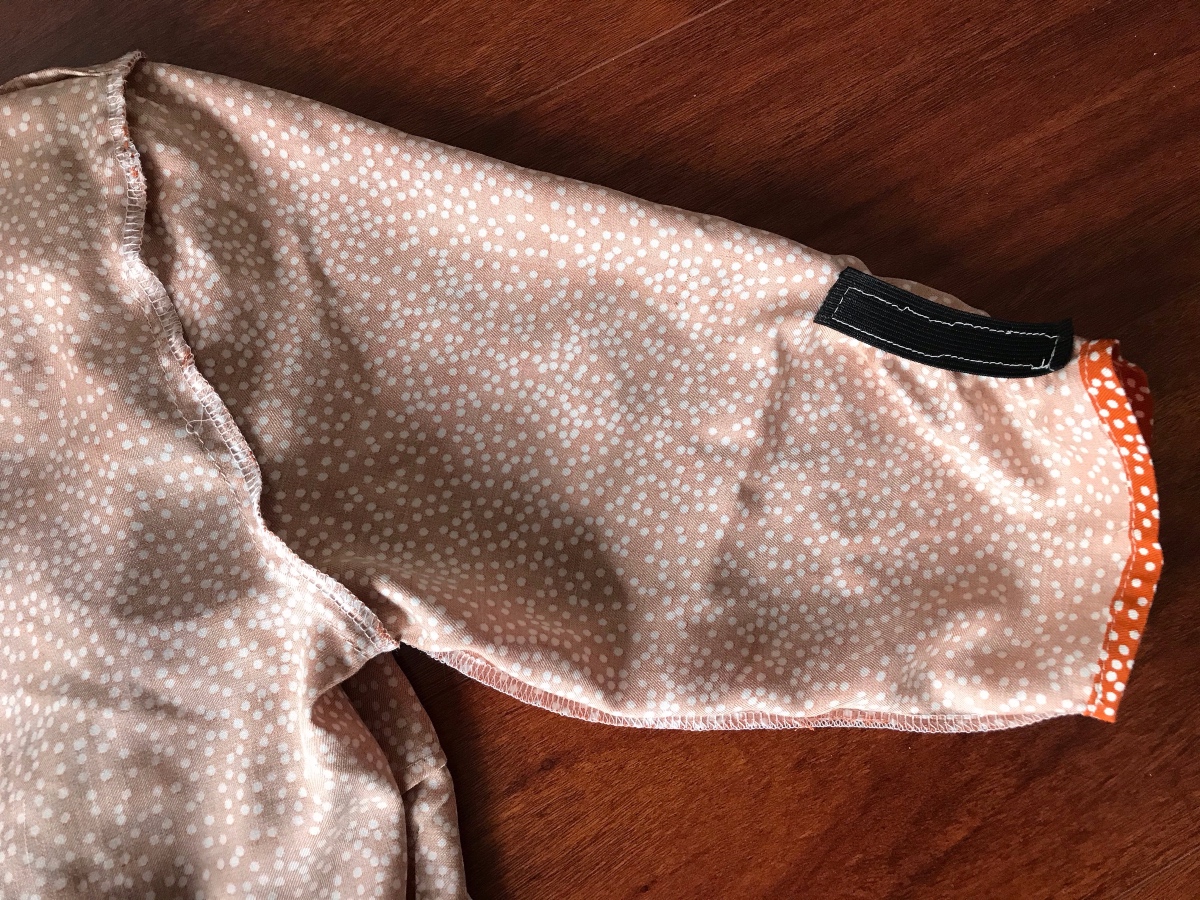
3) For View B, position a 5″ piece of elastic on the wrong side of the fabric, directly behind the topstitching marks you transferred from the pattern piece. Start by pinning one end of the elastic to the hem edge of the fabric, then pin the opposite end 2 1/2″ above the top of the stitching guide.
Turn the sleeve to the right side so you can see the stitching guide, then stretch the elastic as you sew along the stitching guide. Start at the bottom end of the rectangle so you can sew across the short end without stretching. Then, needle down, pivot and stretch the elastic while you stitch the other three sides. You should be able to hold the ends of the elastic as you sew. Backstitch or lockstitch at the end. Check to be sure that your stitching stayed on the elastic, then trim the extra elastic that extends beyond the top and bottom of the stitching.

4) Fold and pin the sleeve in half, with rights sides together. Stitch the sleeve seam with a 1/2″ seam, then press the seam allowances open and finish them using your preferred method.

5) To hem the sleeve, refold the sleeve along the previously folded creases before edgestitching by machine or by blindstitching by hand along the innermost fold to finish it.
6) Turn the sleeve right-side out and slip it inside the corresponding armhole of the inside-out dress. Match and pin the sleeve’s seam to the bodice’s side seam and the upper notch on the sleeve cap to the shoulder seam. Match the remaining notches on the sleeve to the corresponding notches on the armhole. Pull the gathering threads to cinch up the extra fabric and make the sleeve fit the armhole, adjusting the ease evenly across the top of the sleeve with no puckers or pleats. Pin the gathered raw edge of the sleeve to the armhole. Stitch the sleeve to the armhole with a 1/2″ seam.

Press the seam allowances toward the sleeve and finish them together using your preferred method. Once the sleeve is sewn, you can remove any visible basting stitches.
Hem the Dress
1) Fold the front facings back around to the right side, smoothing them against the skirt and pinning them at the hem.
Stitch across one facing with a 5/8″ seam, back-stitching or lockstitching at both ends. Then baste along the rest of the hem with a 5/8″ seam. The basting stitches will serve as a folding guide for the hem. When you reach the second facing, stitch it with a regular stitch like you stitched the first facing, backstitching or lockstitching at both ends. Trim the stitched corners at the facing to reduce bulk when you turn the facings right-side out in the next step.
2) Use the basting stitches as a folding guide for the skirt hem. First press the raw edge of the fabric to meet the basting stitches, then fold and press again along the basting stitches so the raw edges are enclosed. Turn the facings back to the inside and edgestitch across the facings and along the innermost fold of the hem to finish the hem, easing in the curved edges of the fabric as you stitch.

Finish the Dress
1) Use the button and buttonhole template to transfer the button and buttonhole markings as follows. On the wearer’s left side of the dress sew only the top two buttonholes. On the wearer’s right side sew all the marked buttonholes. Then sew buttons for each buttonhole by first matching the front edge of the dress to the pleats on the opposite side of the dress. Try on the dress to mark the button placements where they best suit you. Where there isn’t a facing and interfacing, you might want to fuse a small square of interfacing behind the button to reinforce it.
On the wearer’s right top button, take care to catch just a few threads of fabric as well as the fused interfacing so the button stitching isn’t visible from the right side of the dress. Additionally, you can add a small snap at the base of the V neck to help keep the neckline closed if you need it. Remove any visible basting stitches and enjoy your lovely new dress.
The Luxembourg Gardens are quite pretty this time of year. Time for a stroll?
Can’t wait to get started!!!!!
This is really helpful but my fitting issue is a little different. I am petite and have too much fabric between the shoulder seam and the bust. Should I take the difference out in the armscythe or below? Or maybe I can just raise the shoulder seam and raise the entire neckline, etc. Do you have any experience or opinion?
I have the hardcopy pattern and I chose a lightweight black handkerchief linen, so I guess I will muslin the bodice. I plan on wearing the dress forever. 😉
I am not petite, but I actually sometimes have this problem too. I would let your muslin dictate the best solution in your particular case. You’ll want to evaluate whether or not your armscye is the right depth. If it is too large/low, you can shorten the bodice from armscye to front overlap by just slashing horizontally and overlapping the pattern pieces. You will have to do the same to your sleeve if you do this. On the other hand, if your armscye is the right depth and not too low, perhaps all you would need to do is take a wedge out so that the armscye stays the same depth.
I have a question about the waist measurement. Both my bust & hip would be size 10 but my waist is bigger then 30″ – should I add room at the waist or does it really matter with a wrap style dress that is adjustable? thanks
You’ll likely want to grade between sizes. The bodice and skirt have pleats that you can adjust to make the waist larger, so you may not need to actually change those pattern pieces. You will want to lengthen the waistband though.