From Liesl: Are you ready for the Classic Shirt sew along? We’re so delighted you’re here! I hope you’ll find this pattern rewarding to sew. It’s so satisfying to have a really professional-looking shirt when you’re done, and I hope you’ll learn some new techniques along the way. I spent a lot of time researching various construction methods when I was writing this pattern, so it’s written in a way that I hope will give you great results with a minimum of fuss. Rachel will be guiding us through the week, and I will jump in every now and then with special hints or tips in italics. But now, I’ll turn it over to Rachel.
Note: the construction for the Classic Shirt is the same as that used for the men’s All Day Shirt pattern. So if you are sewing an All Day Shirt, you can follow along with this sew along for help.
We’ll be working through the pattern over the next five days. Here’s our schedule:
- Day 1: Make the Wearer’s Right Set-in Placket (View A), Make the Continuous Cut-on Placket (View A and B), Close the Darts.
- Day 2: Make and Attach the Pockets and Flaps (View A and B).
- Day 3: Assemble the Back and Yoke, Attach the Shirt Fronts, Make and Attach the Collar Band.
- Day 4: Prepare the Collar, Attach the Collar to the Collar Band, Make the Sleeve Placket.
- Day 5: Sew the Sleeves, Sew the Cuffs, Hem and Finish the Shirt.
And, remember. If you want to grab a badge to share on your blog, you can get one from the post announcing the sew along.
Over the rest of this week, we will be updating this post by adding the steps for additional days as they arrive. So be sure to check back here if you are sewing with us day-by-day instead of looking for a new post each day.
And with that, let’s kick off the sewing! Here we go with….
Make the Wearer’s Right Set-in Placket (View A)
From Liesl: Keep in mind that this set of steps is for the set-in placket, which we used on View A. You can certainly use on on View B as well, and I’ve even used it as the wearer’s left placket when I wanted to add a contrast fabric to the inside of the shirt. (I just reversed the application and sewed it to the right side of the fabric in Step 3, below, so it ended up on the inside of the shirt when it was finished.) I love the look of a set-in placket because it adds another detail to the shirt that looks fancy but is really easy to sew.
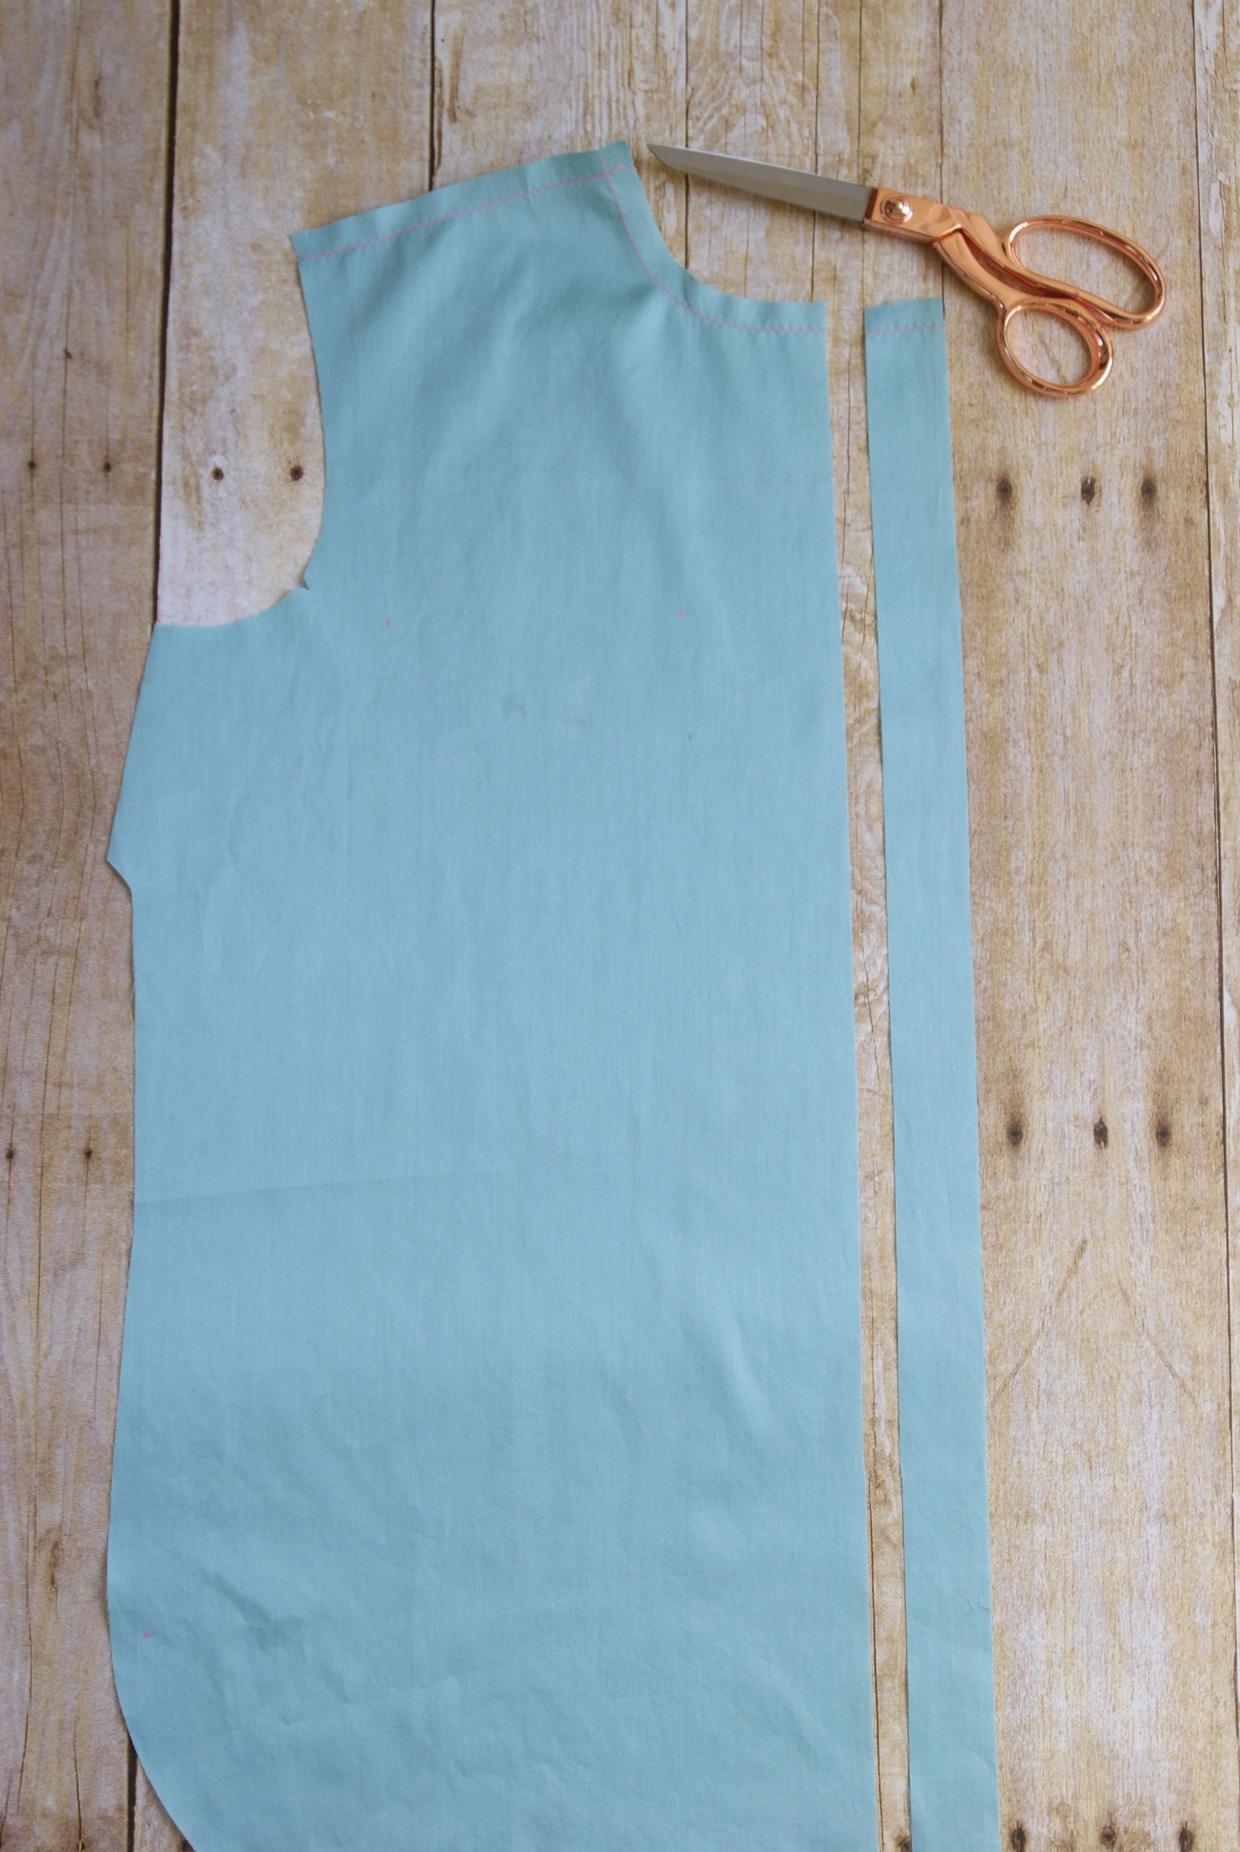
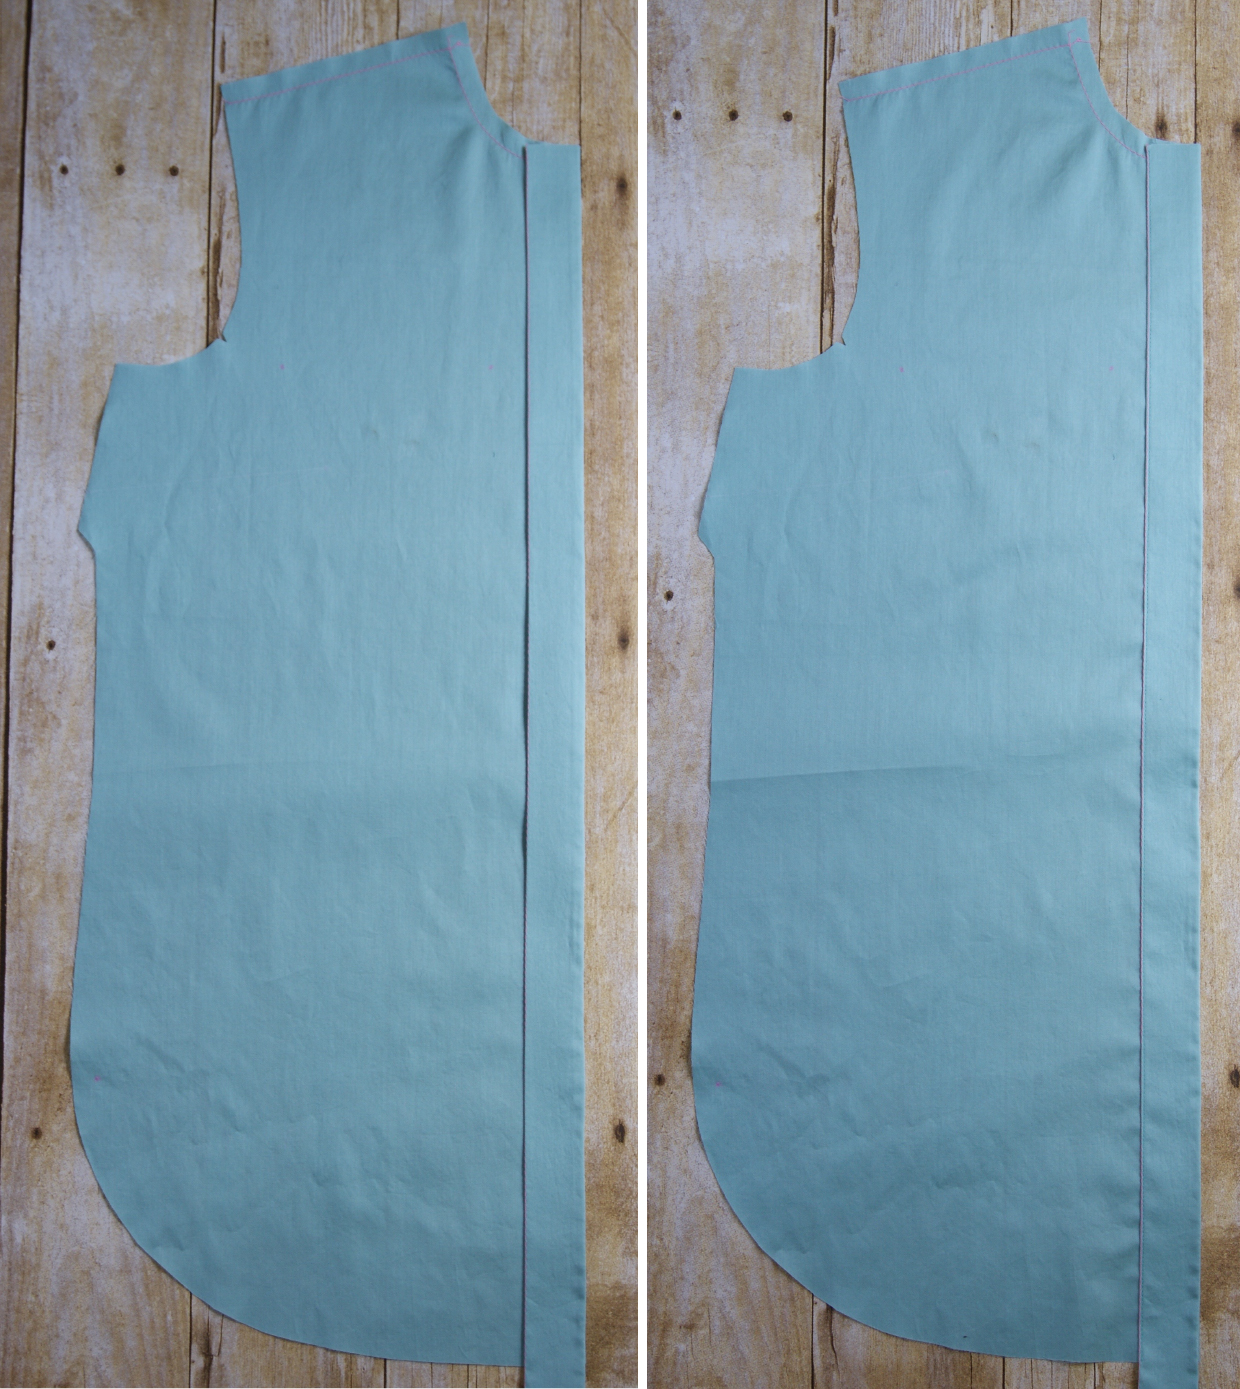
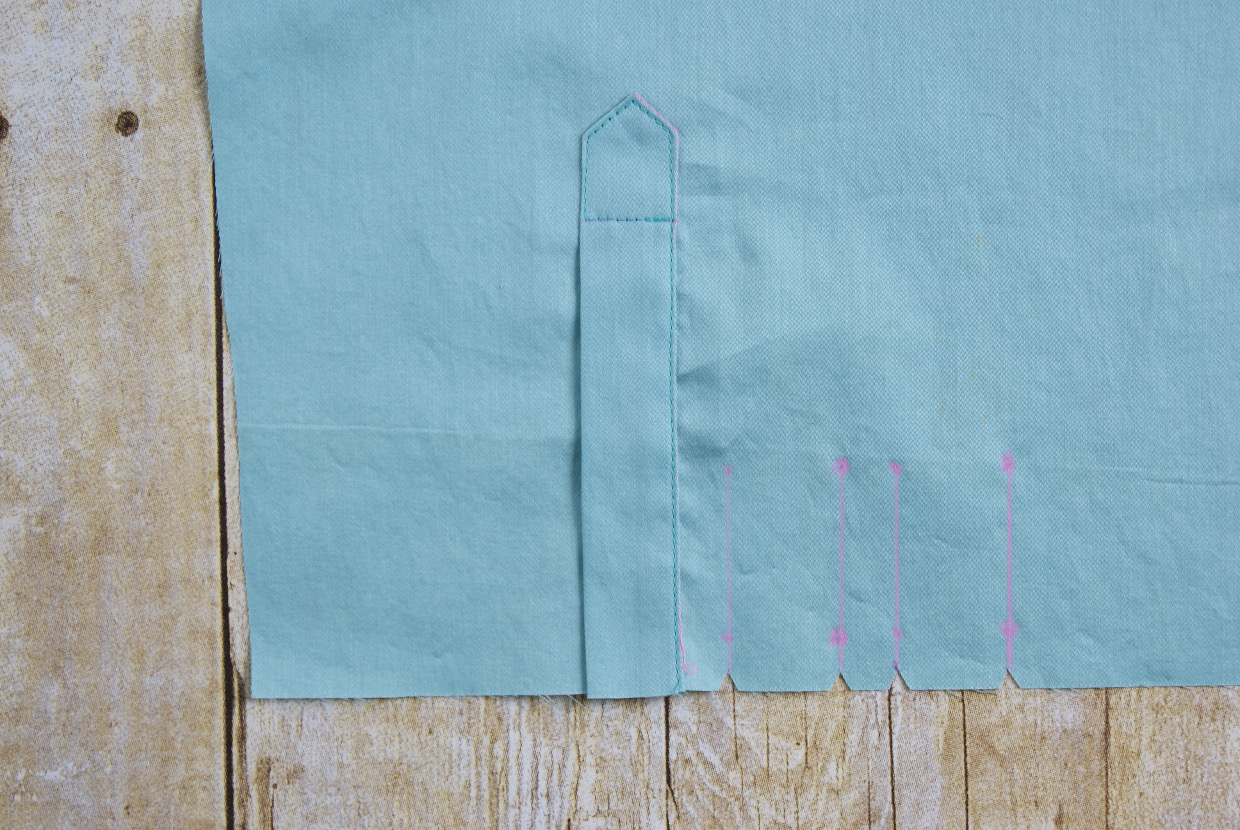
1. For the wearer’s right front placket, trim 1” from the front edge of the wearer’s right shirt front, using the marked line on the pattern piece as a guide. (Trim only the wearer’s right shirt front; leave the wearer’s left shirt front edge intact for the continuous cut-on placket.)
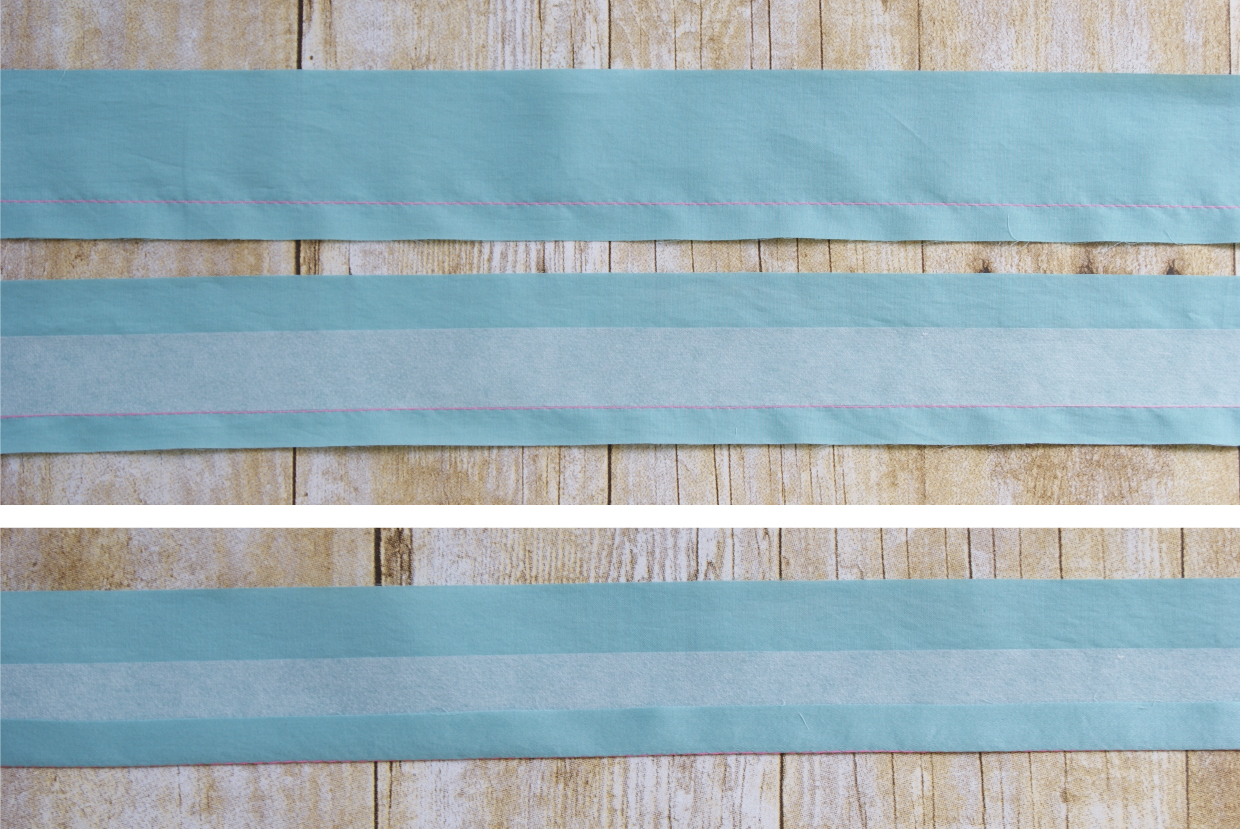
2. Sew a row of basting stitches 1/2” from one long edge of the cut placket piece. Follow the manufacturer’s instructions to fuse or baste a 1” by 29” strip of interfacing to the center of the wrong side of the placket, aligning the edge of the interfacing with the basting stitches. Then fold and press the seam allowances of the placket toward the interfacing, using the basting stitches as a folding guide.
3. Pin the non-folded long edge of the placket to the wearer’s right shirt front, with the right side of the placket against the wrong side of the shirt front. (Note that the placket will be longer than the shirt front.) Stitch the placket to the shirt with a 1/2” seam, backstitching or lockstitching at both ends. Trim the stitched seam allowances to 1/4”.
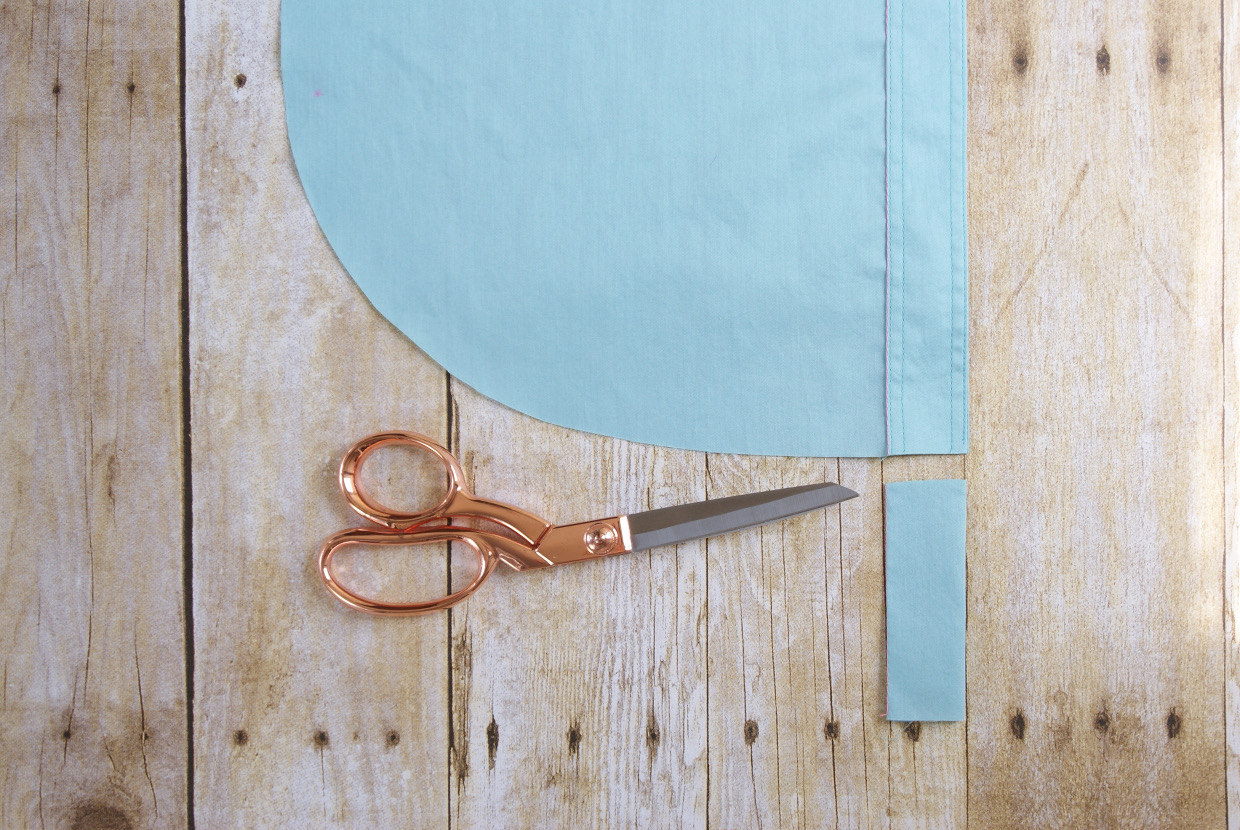
4. Press the placket and seam allowances away from the shirt front and trim one of the two seam allowances to 1/4” to reduce bulk. Then fold the placket along the seamline to the right side of the shirt, rolling the seamline just slightly to the wrong side so it won’t show on the finished shirt. Edgestitch both the front folded edge and the innermost folded edge of the placket to finish it. If desired, add a row of topstitching 1/4” from each row of edgestitching. Trim off the extra length of the placket so it is flush with the neckline and the hem edges.
Make the Continuous Cut-on Placket (Views A and B)
From Liesl: A continuous, or cut-on, placket gives a shirt a smooth, clean finish without a lot of fuss. I think it’s especially appropriate for really dressy fabrics and shirts that you want to look refined without a lot of extra details. It’s also a great way to finish the underplacket of the shirt for View B so you don’t have extra bulk at the center front.
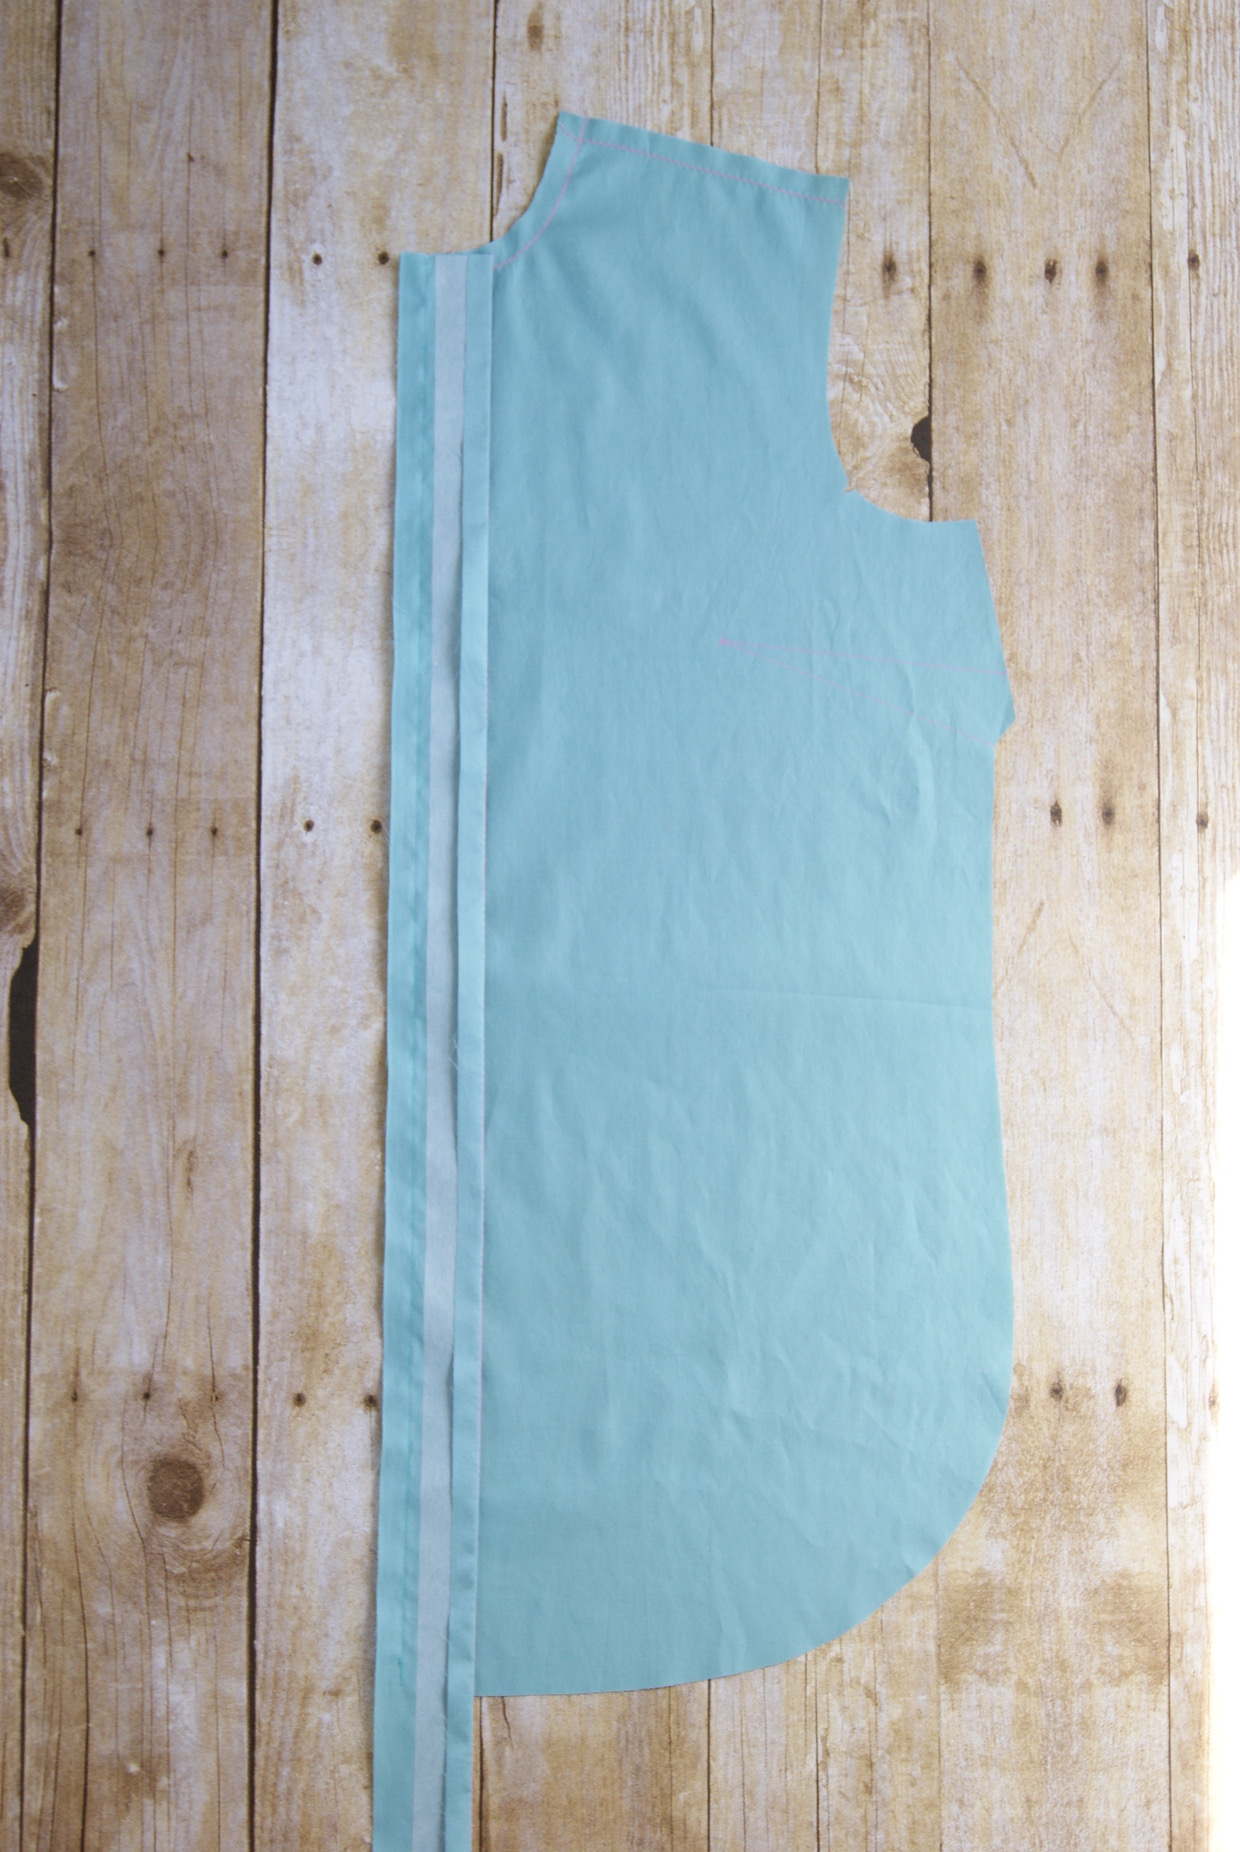
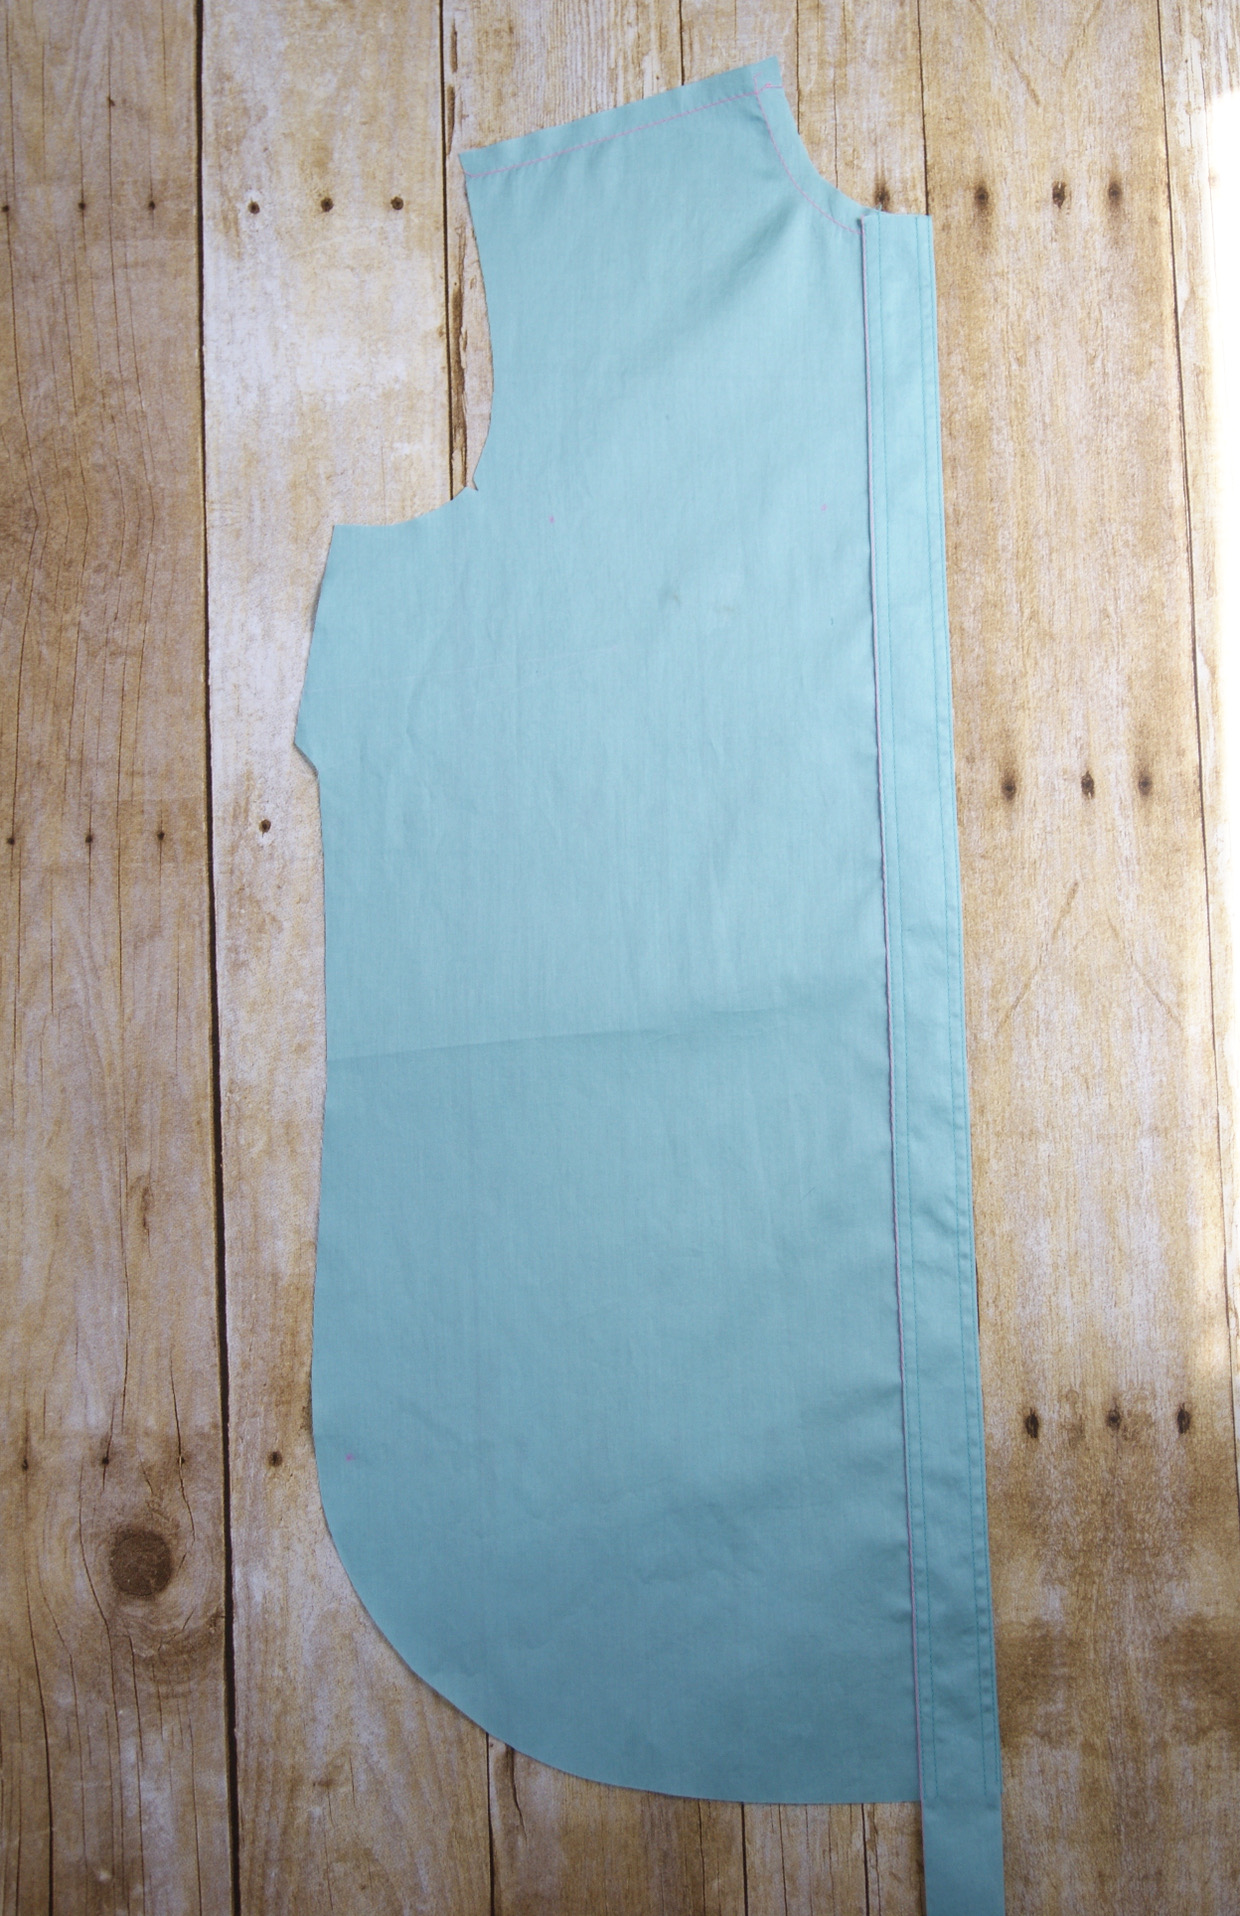
1. To form the placket on the wearer’s left side for View A, and on both shirt-front pieces for View B, sew a row of basting stitches 1/2” from the front edge of the wearer’s left shirt front. Follow the manufacturer’s instructions to fuse or baste a 1” by 29” strip of interfacing to the wrong side of the fabric, aligning the edge of the interfacing with the basting stitches. Fold and press the seam allowances to the wrong side of the fabric, using the basting stitch as a folding guide.
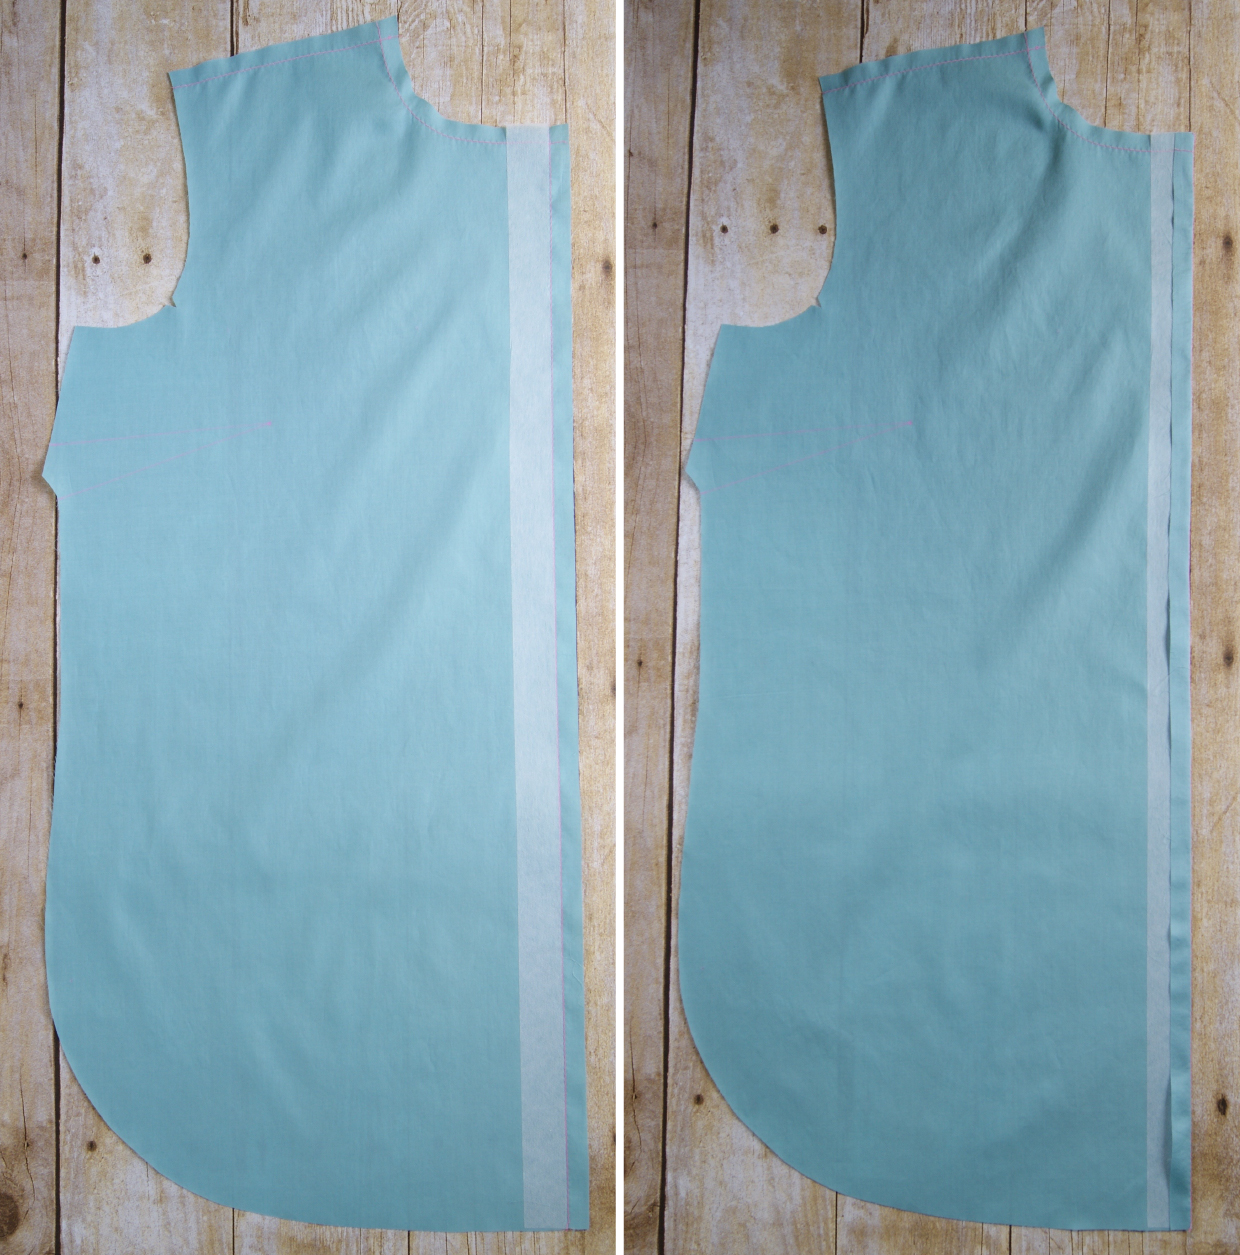
Fold and press a second time, using the opposite edge of the interfacing as a 1” folding guide, to form the placket on the wrong side of the fabric. Edgestitch only the innermost fold to finish the placket. For View B only, repeat in the same manner to form the placket on the wearer’s right shirt-front piece.

Close the Darts
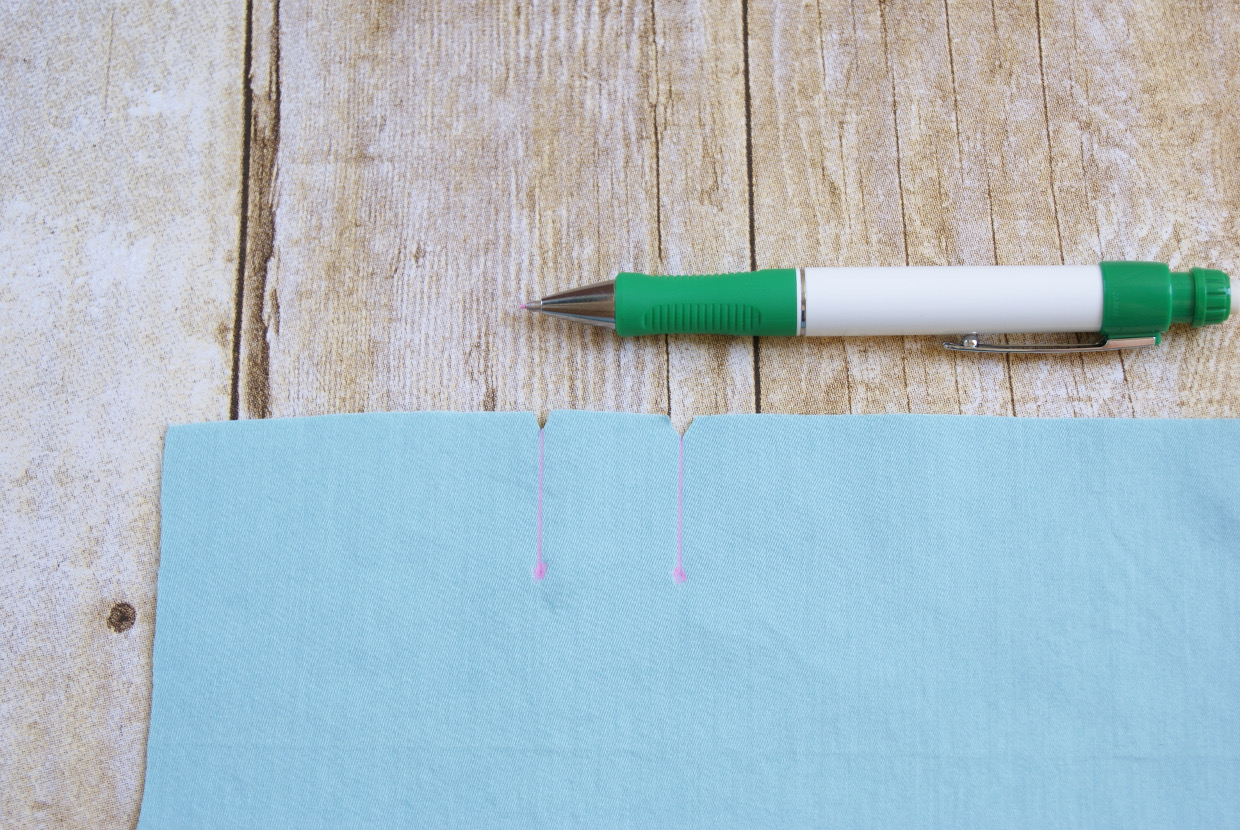
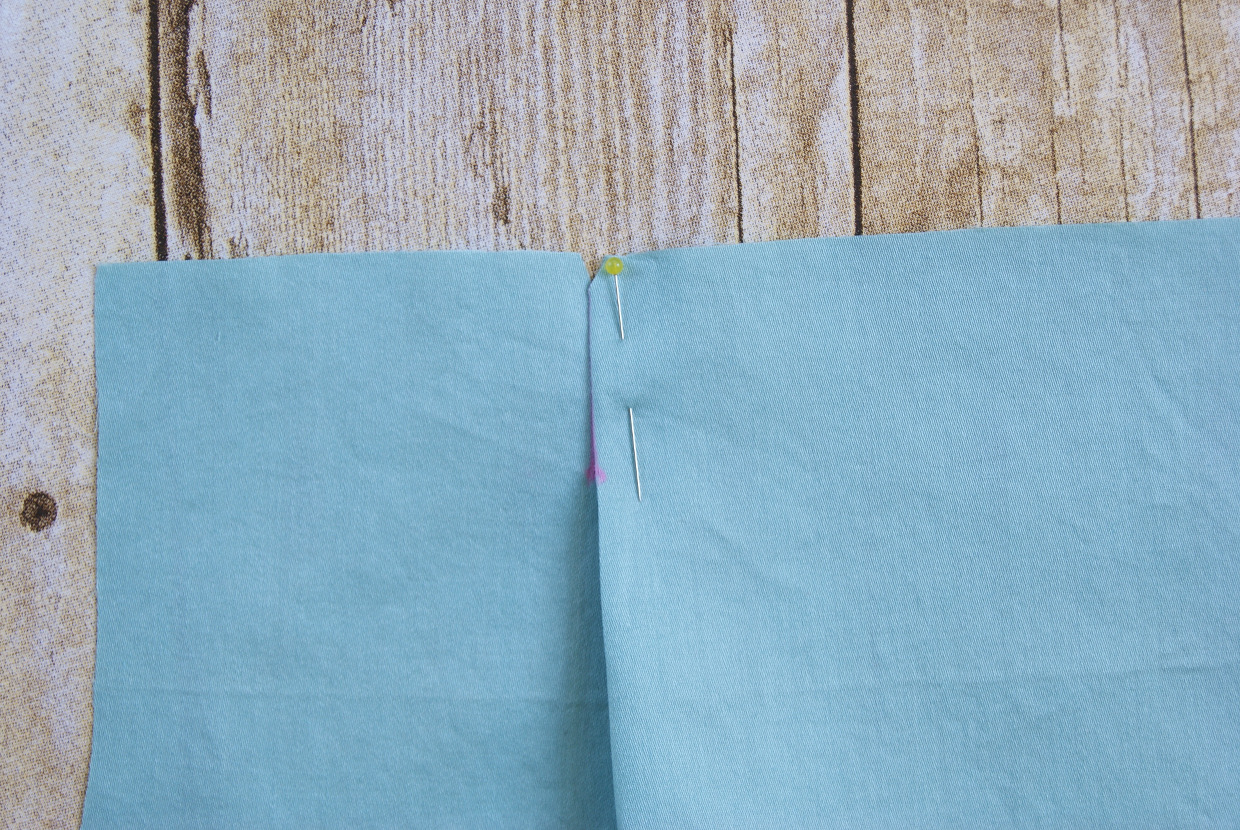
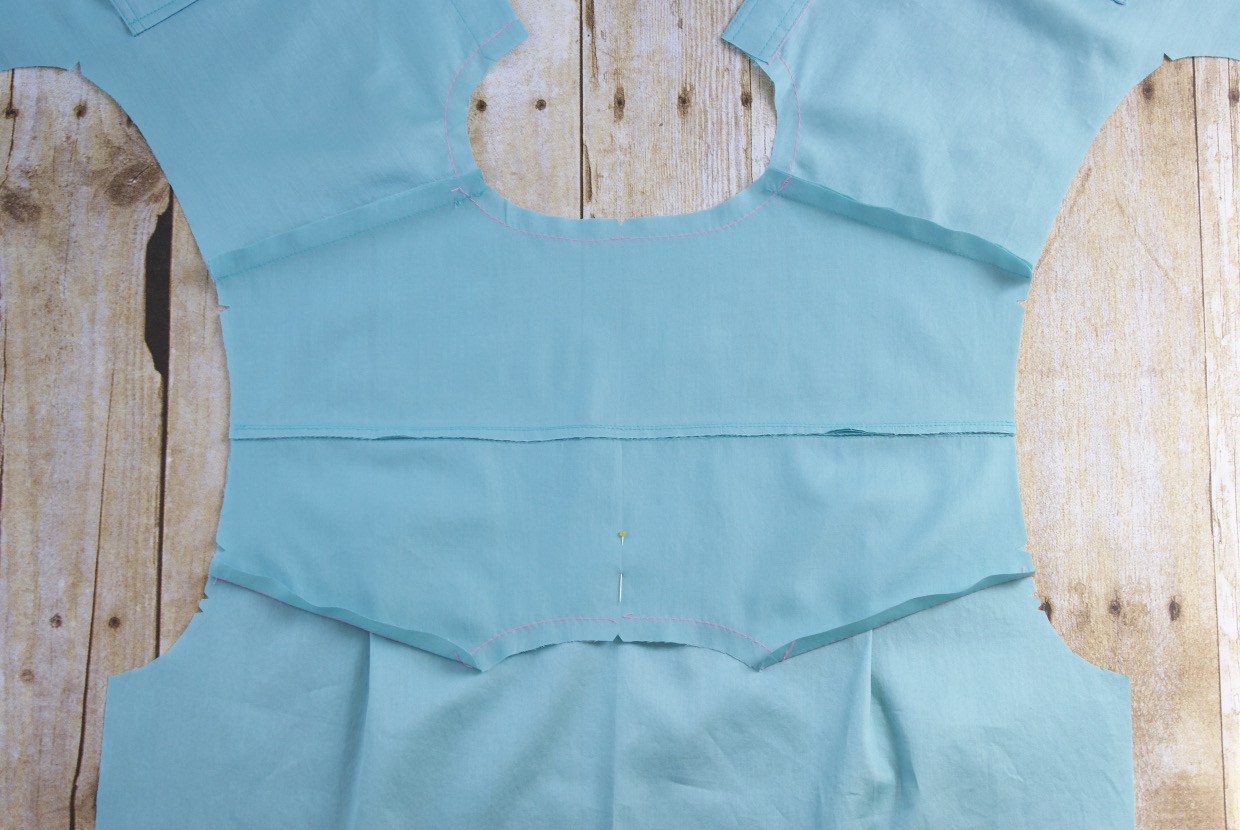
1. To close the darts, fold one shirt along the dart’s center, with the fabric’s right sides together and the marked dart legs aligned. Pin and stitch along the aligned dart markings, backstitching at the widest part of the dart but not at its tip. Instead, at the dart’s point, leave thread tails several inches long and knot the thread tails together a couple of times to secure the thread. This will reduce bulk at the tip of the dart and prevent the dart from puckering.

Press the dart flat to set the stitches, then press the fold of the dart toward the shirt hem. Repeat with the dart on the second shirt-front piece.
From Liesl: If you have a tailor’s ham you can place it under the dart to help give the tip of the dart a smooth finish.

We’ll see you back here tomorrow for Day 2 of the sew-along. Happy stitching!
From Liesl: Welcome back to day 2 of the sew along. Today Rachel will be walking you through the pockets for both views of the Classic Shirt. Which view are you sewing? Or are you combining views? Either way, I hope it’s going well so far! Here’s Rachel:
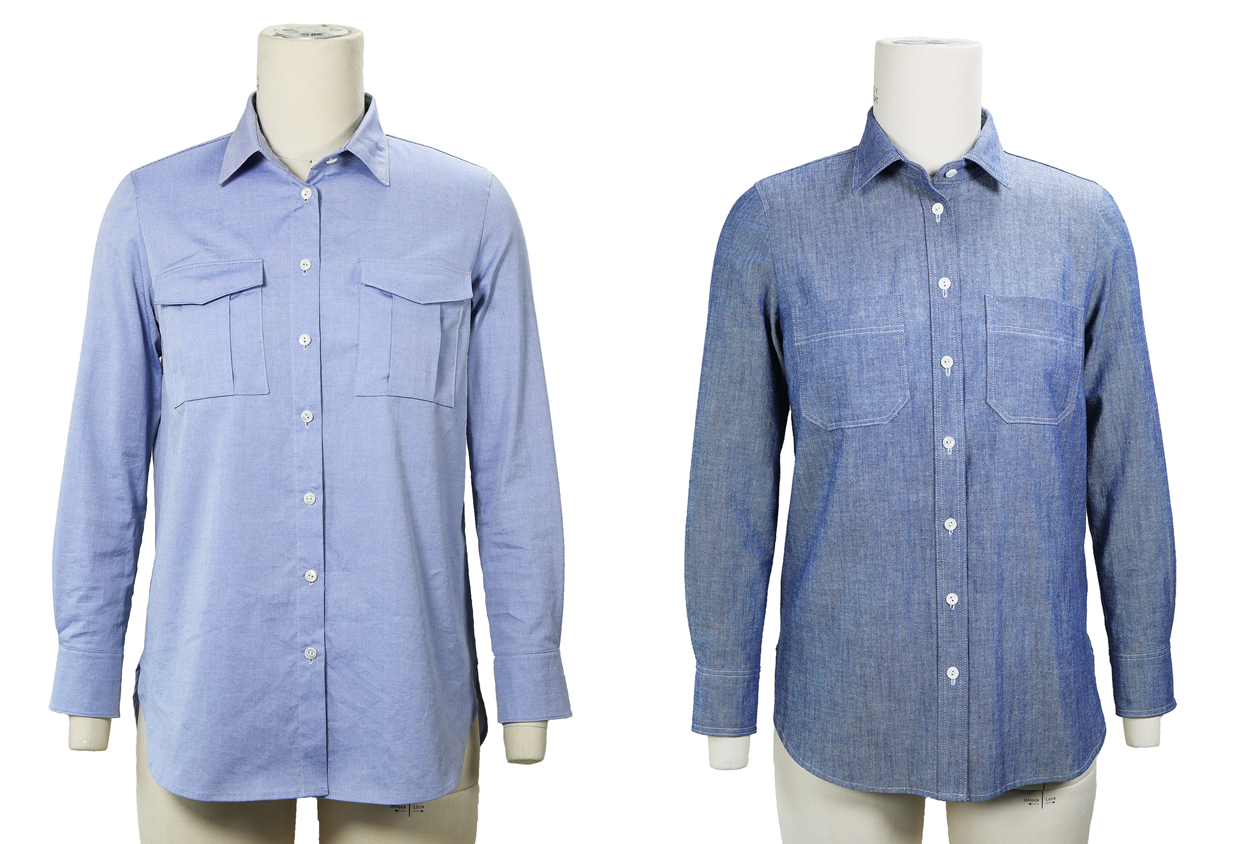
Make and Attach the Pockets (View A)
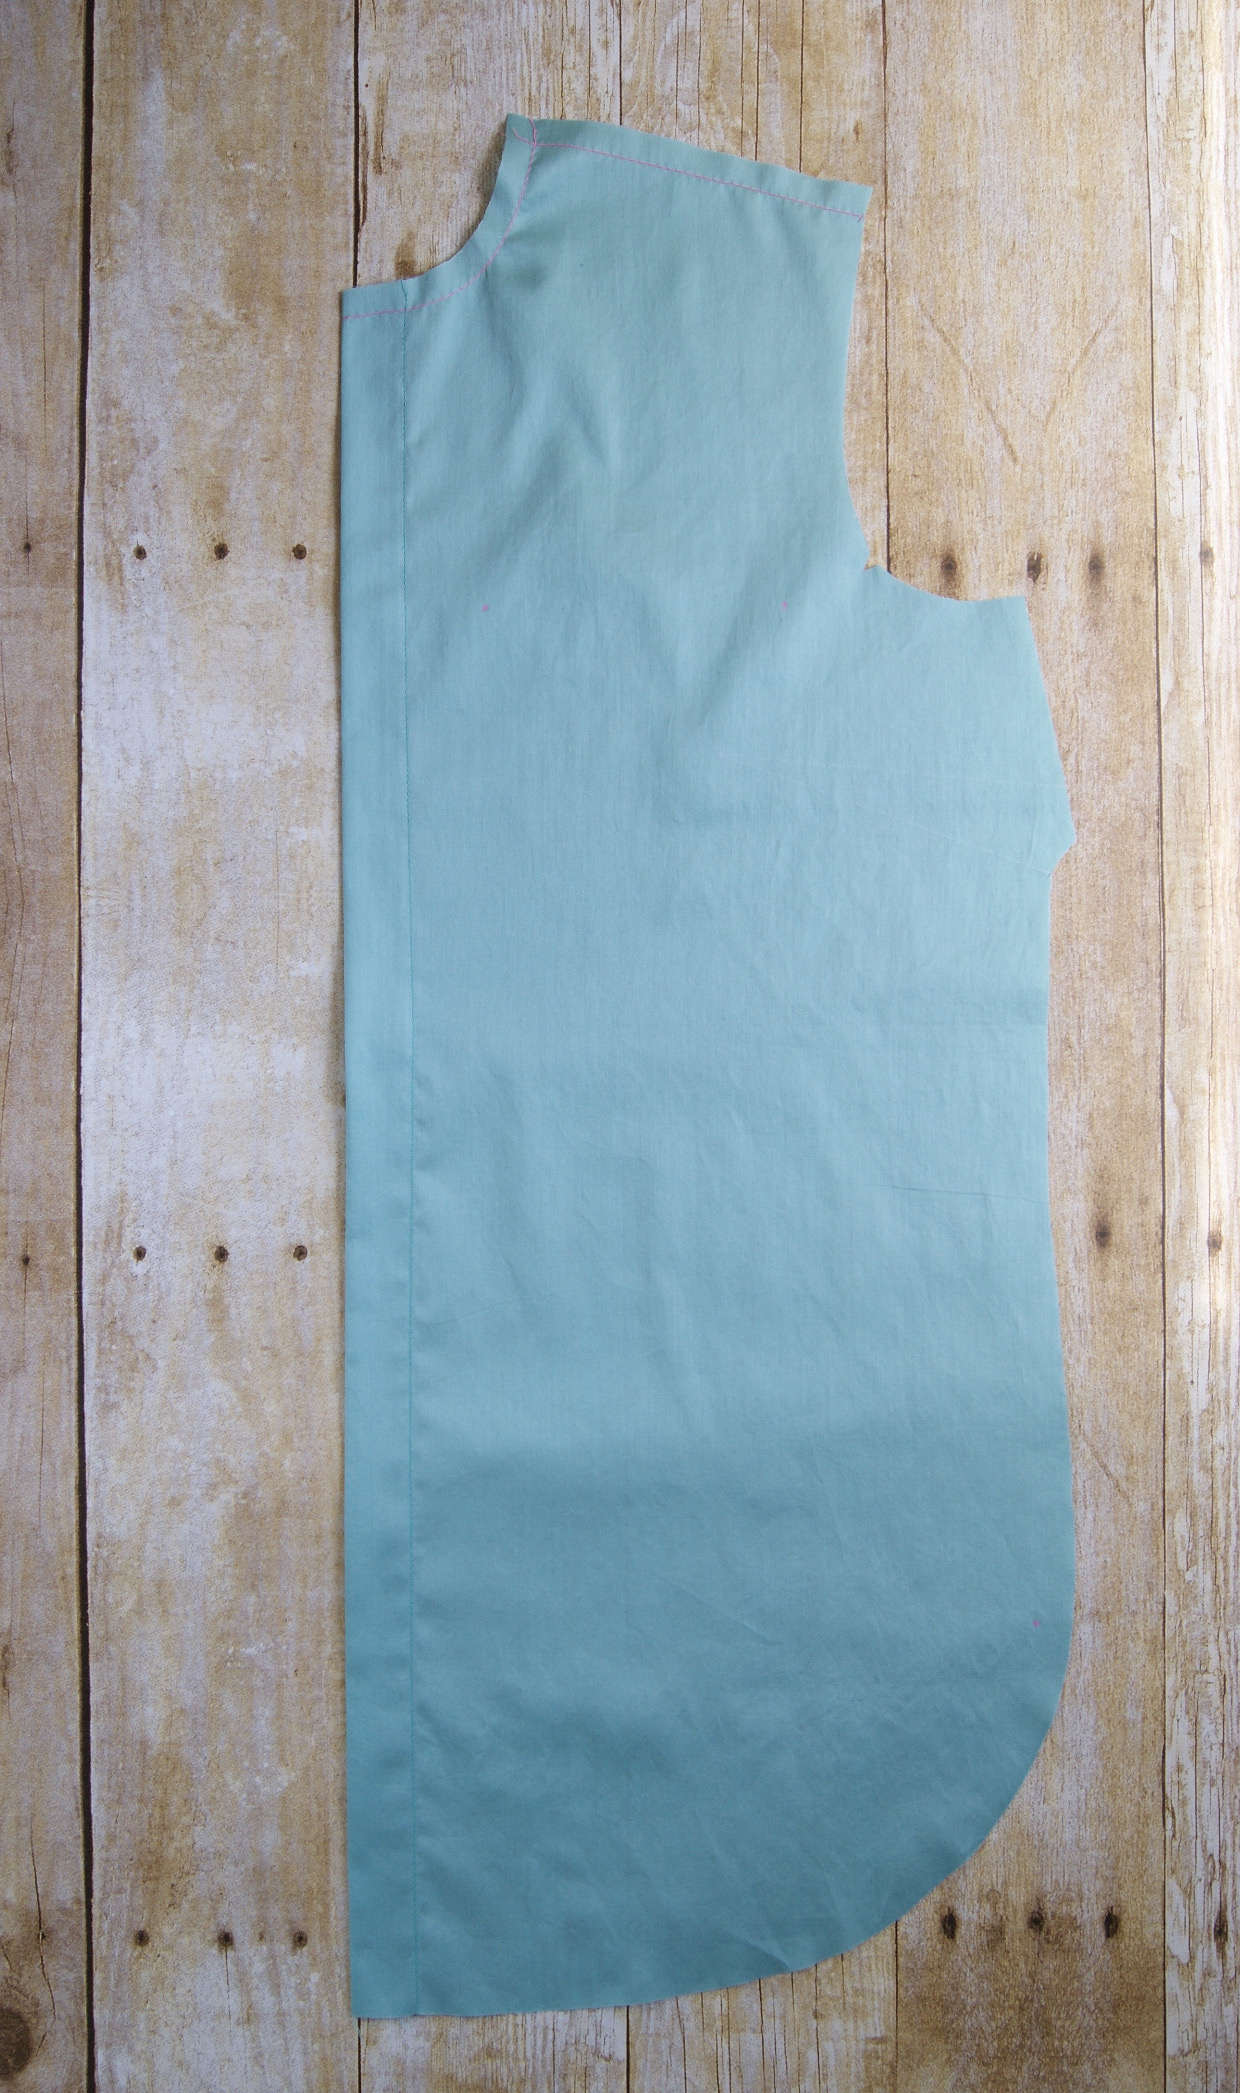
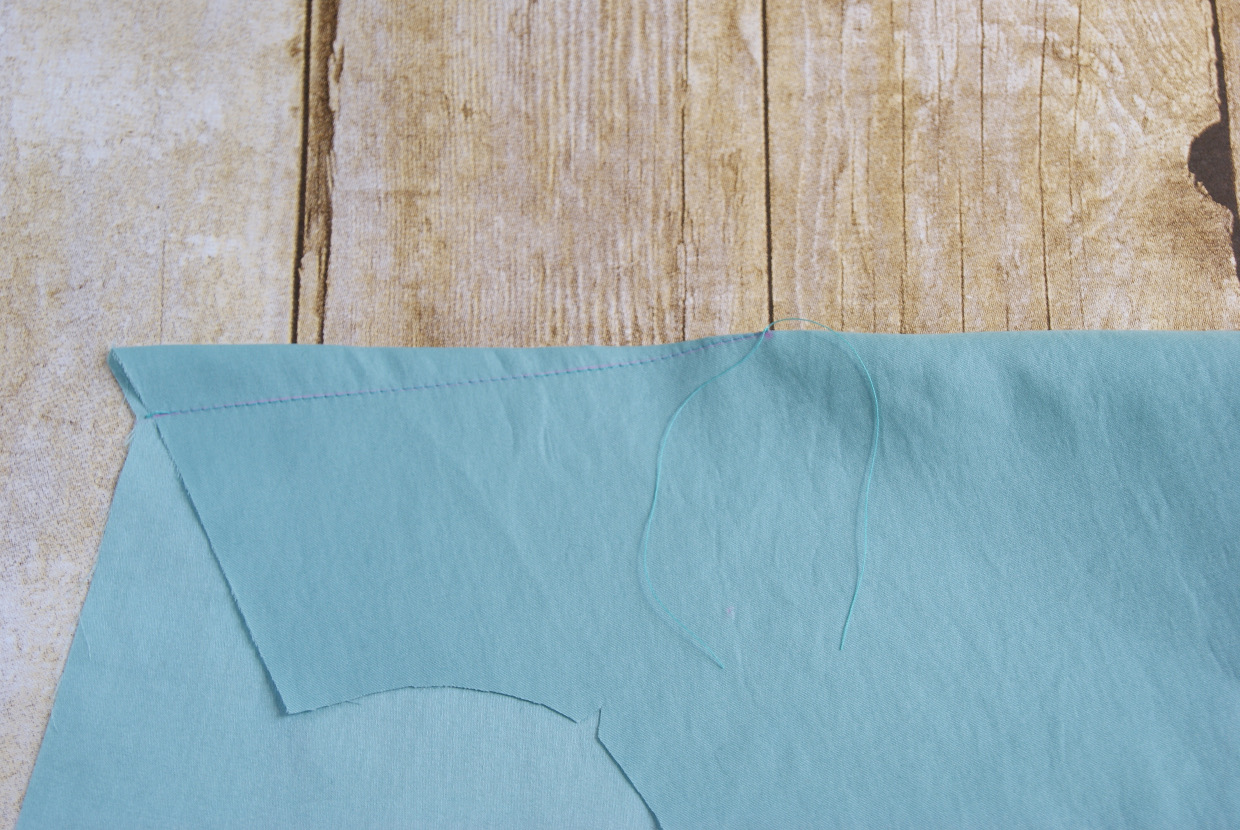
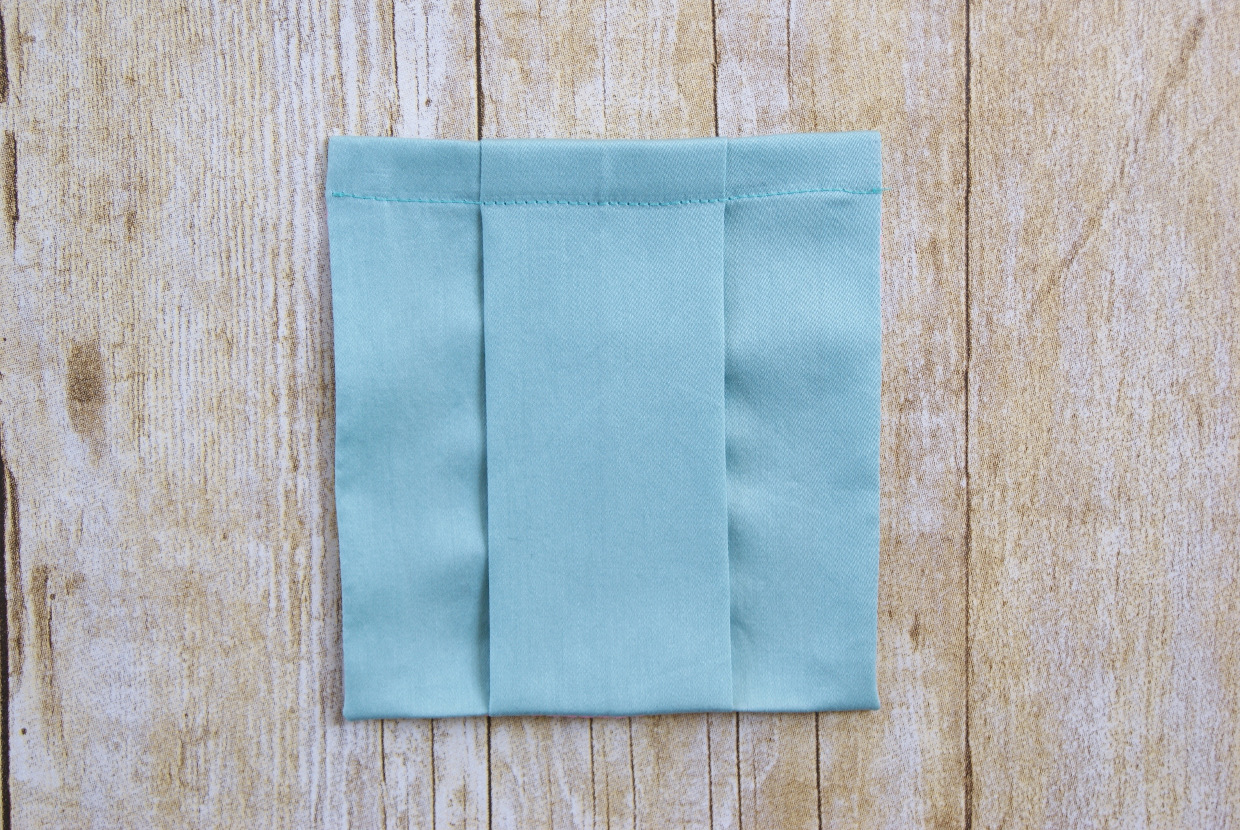
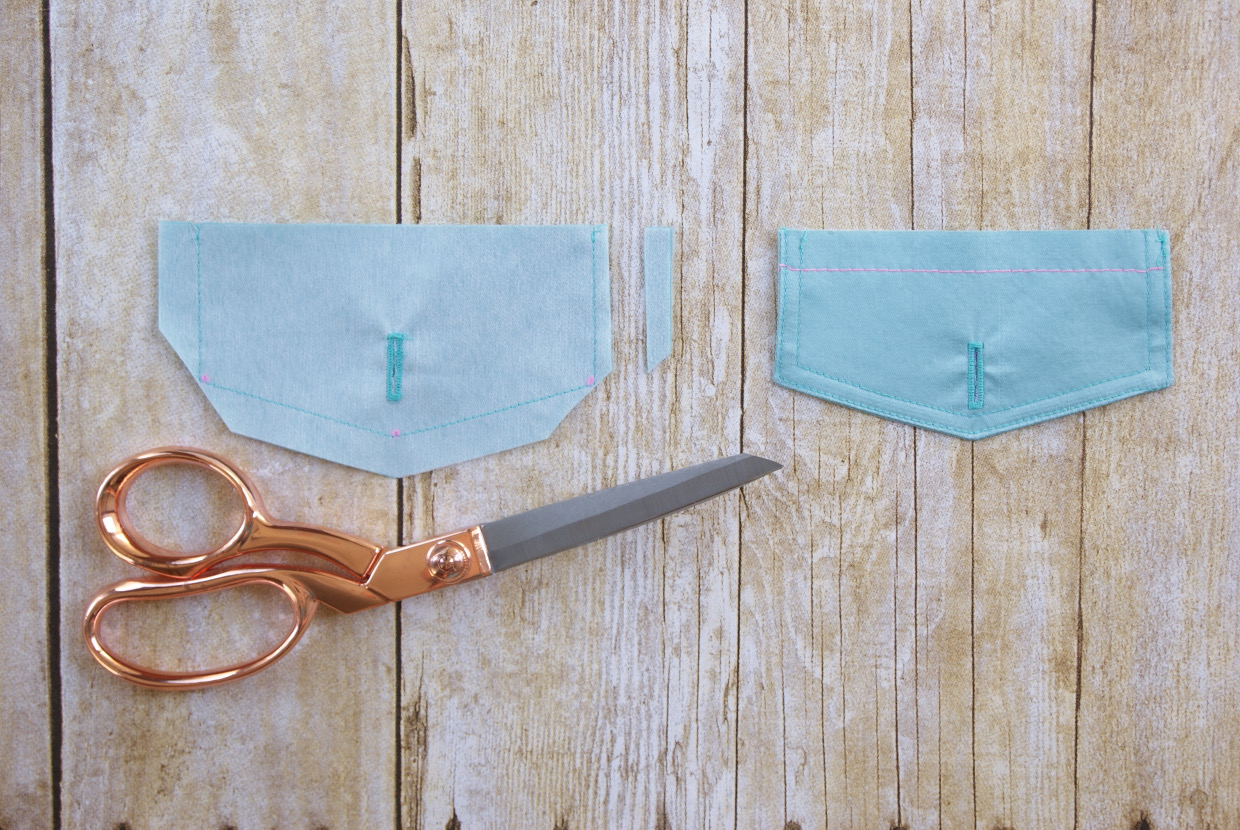
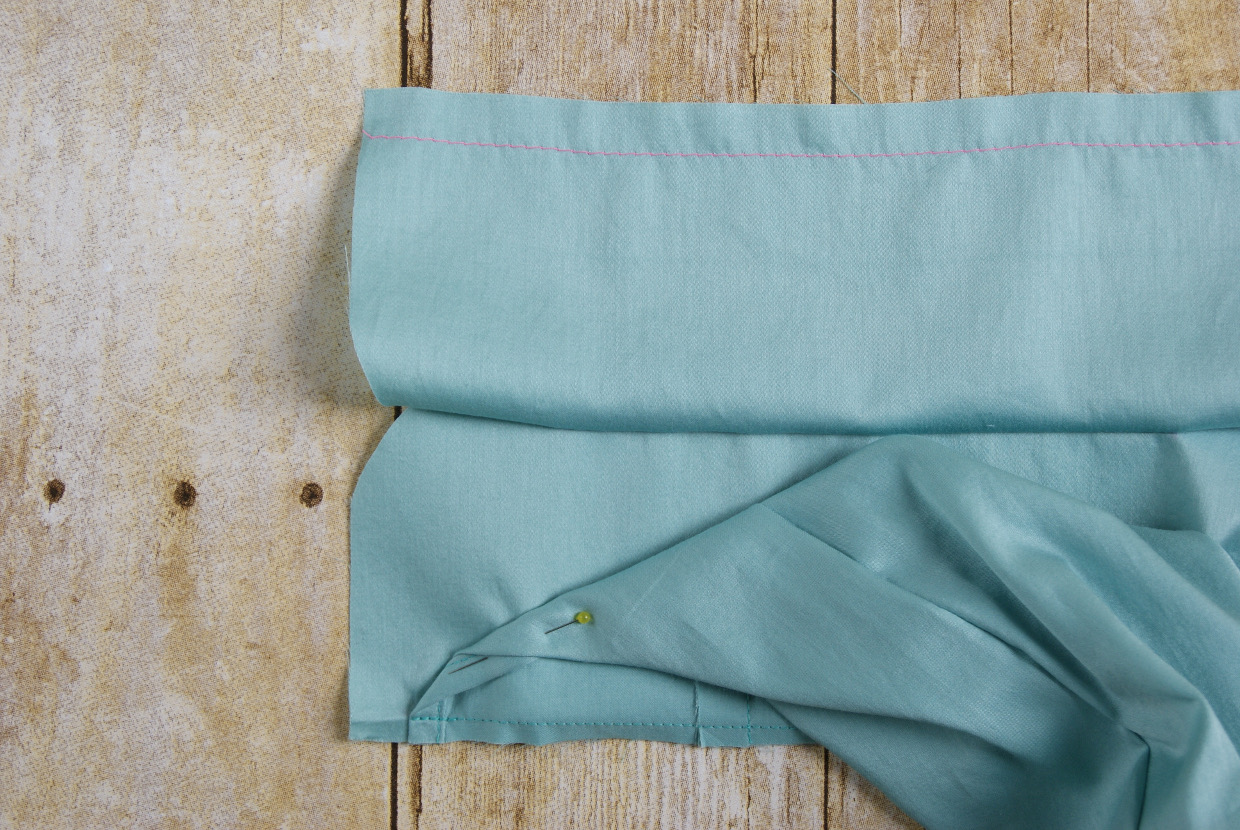
1. To hem the pocket, first fold and press the top edge of one pocket to the wrong side by 1/2”. Then fold the top edge again, this time to the right side by 1” (use the notches as a folding guide) and pin it in place. Stitch the side edges of the pocket at the folds with a 1/2” seam.

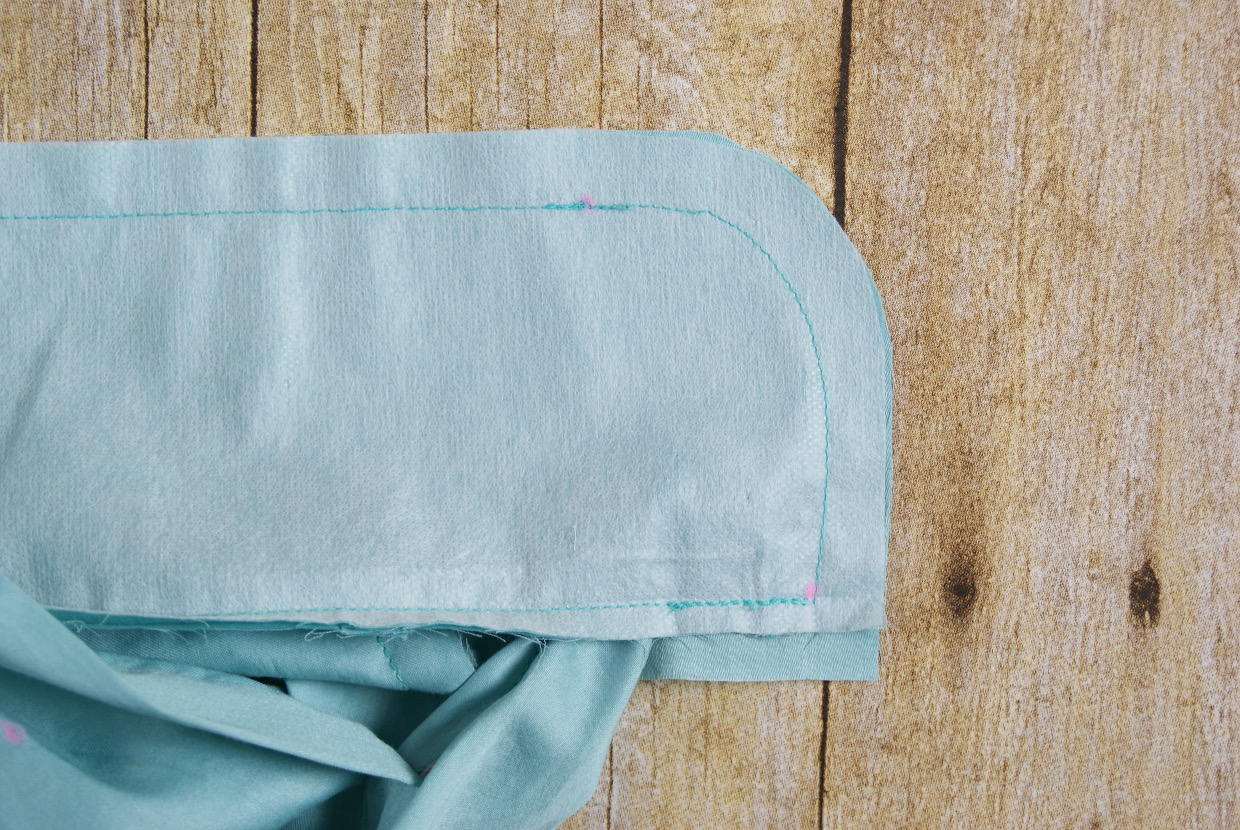
2. Turn the resulting hem of the pocket to the right side, gently pushing out the corners with a chopstick or knitting needle, and press it. Fold the angled corner edges toward the wrong side by 1/2” and press. Fold the side and bottom edges to the wrong side by 1/2” and press.
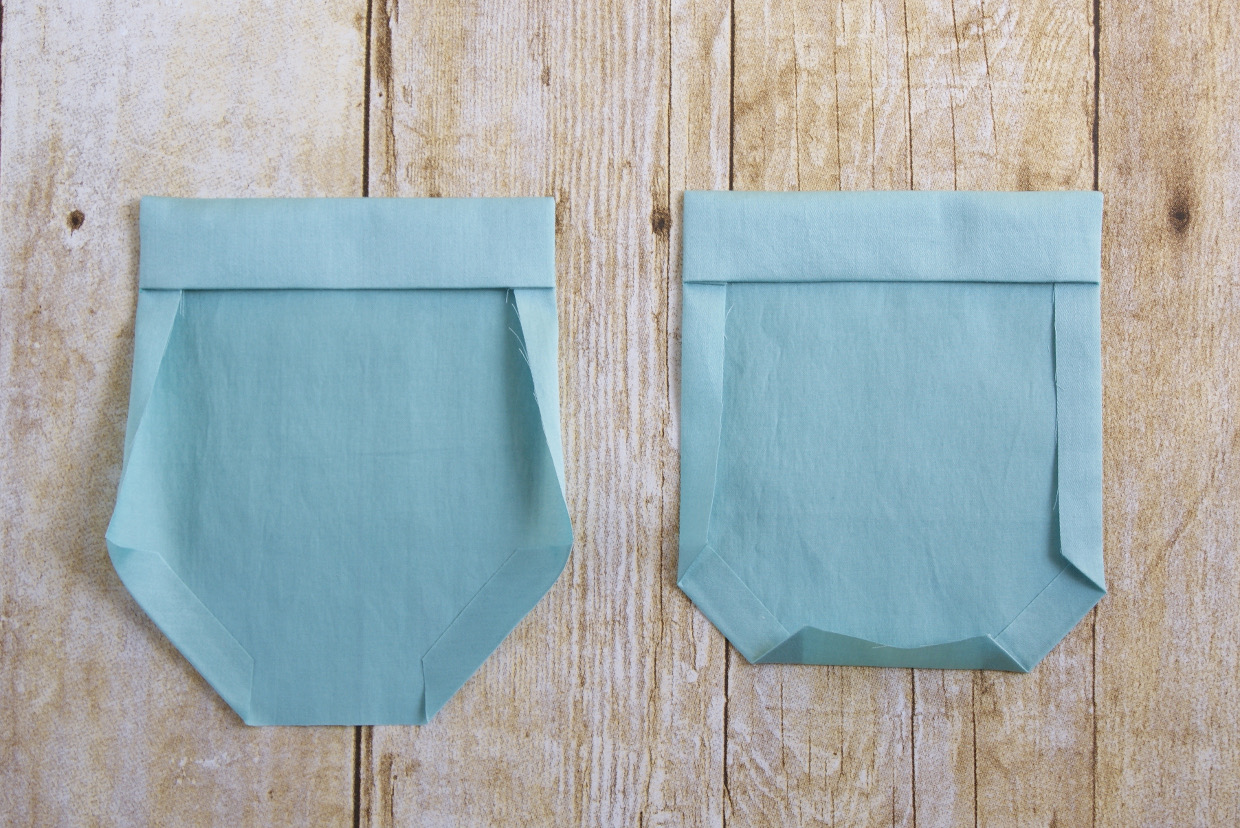
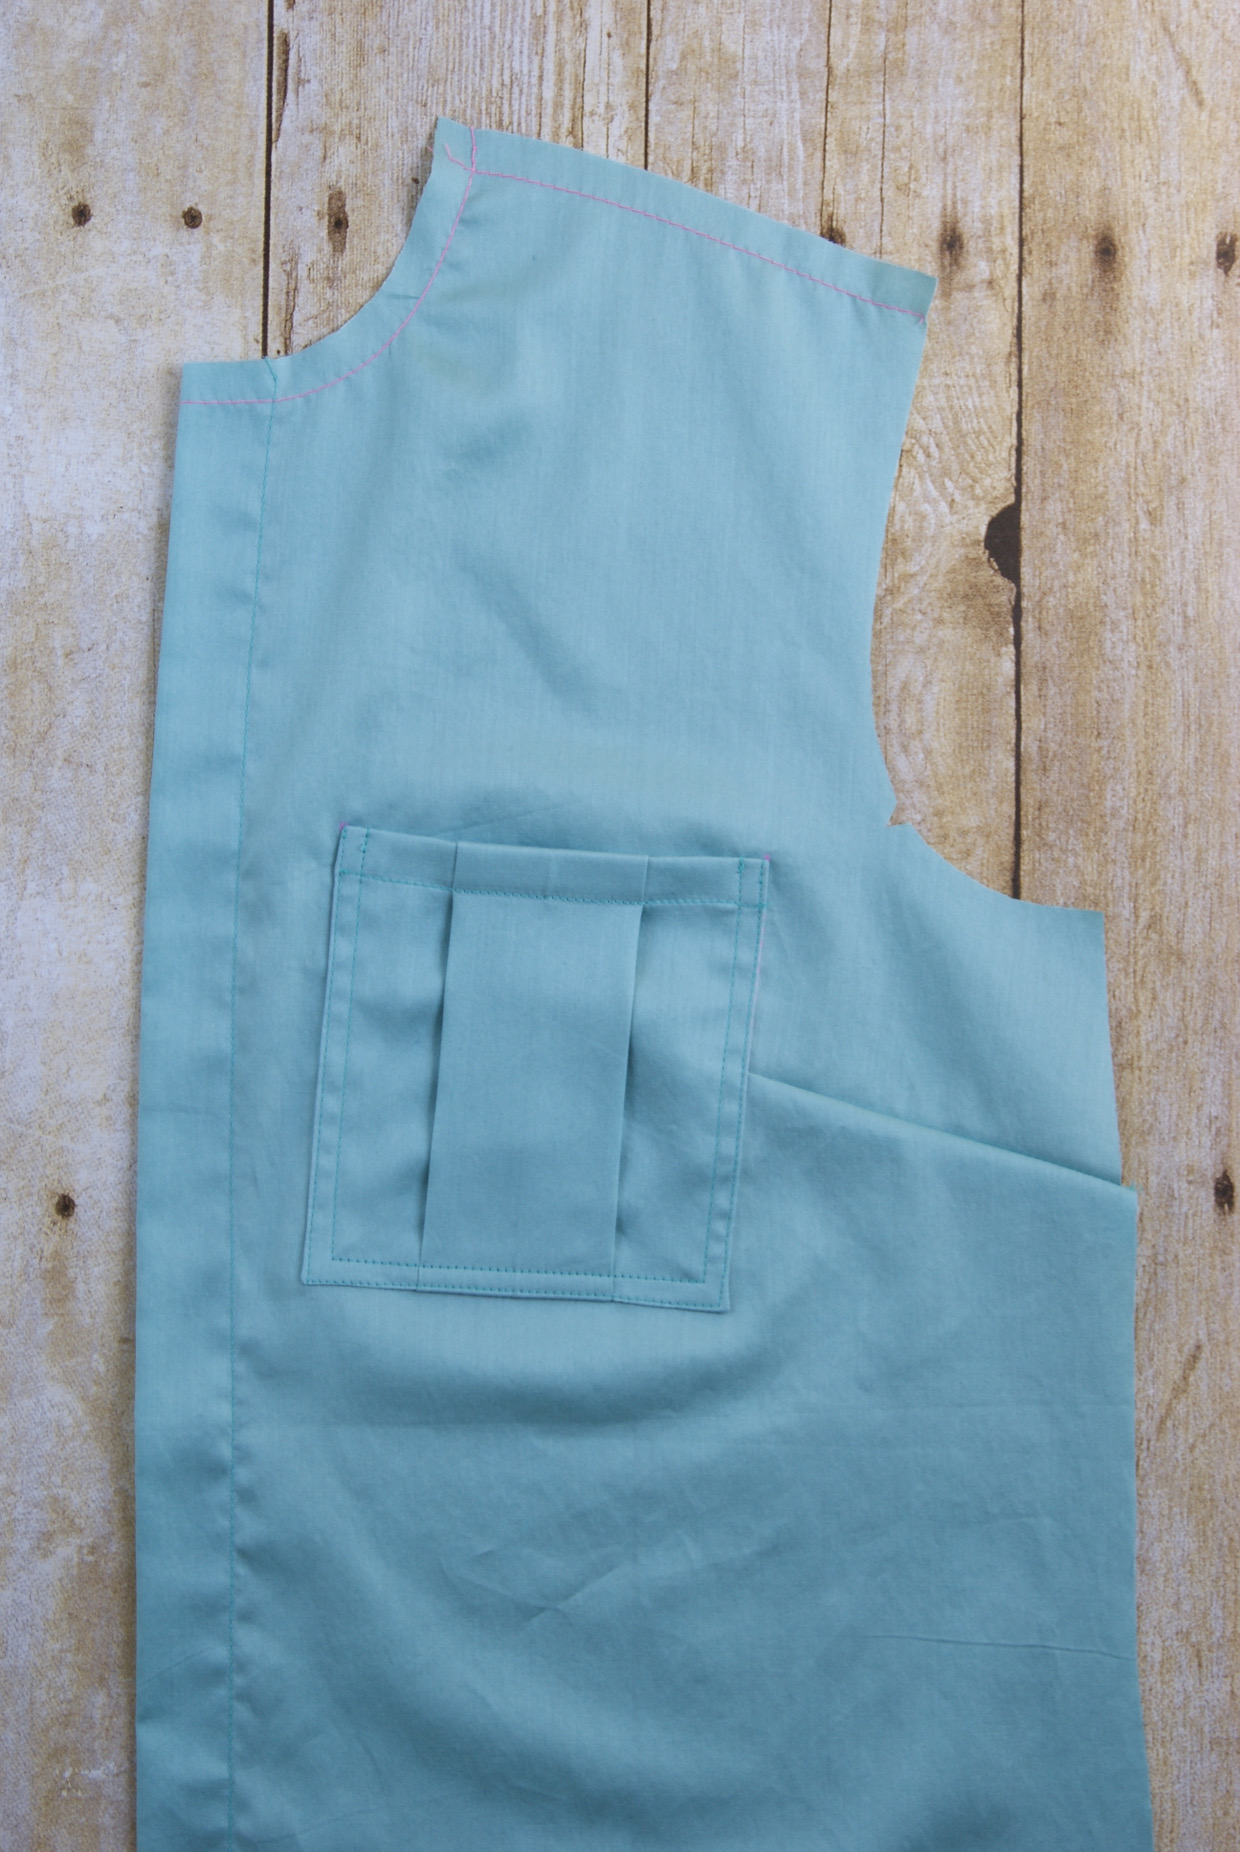
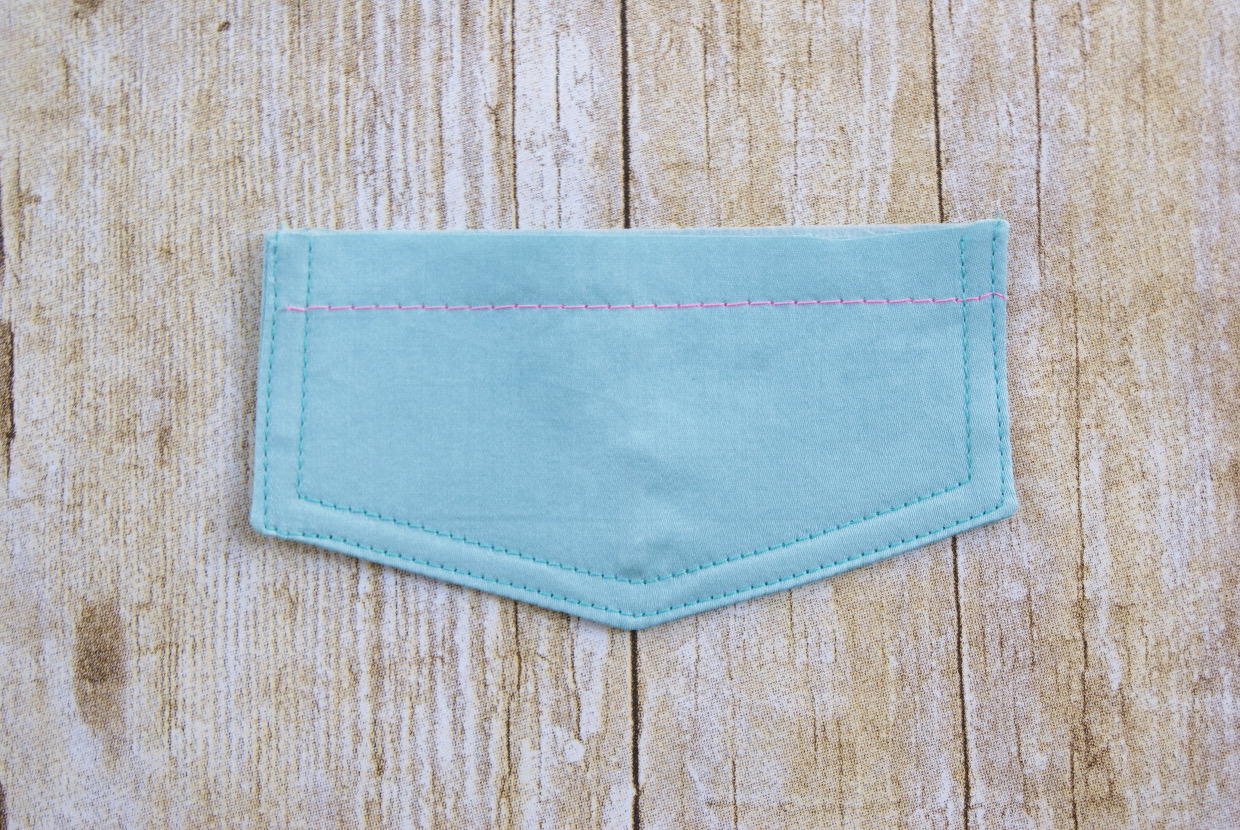
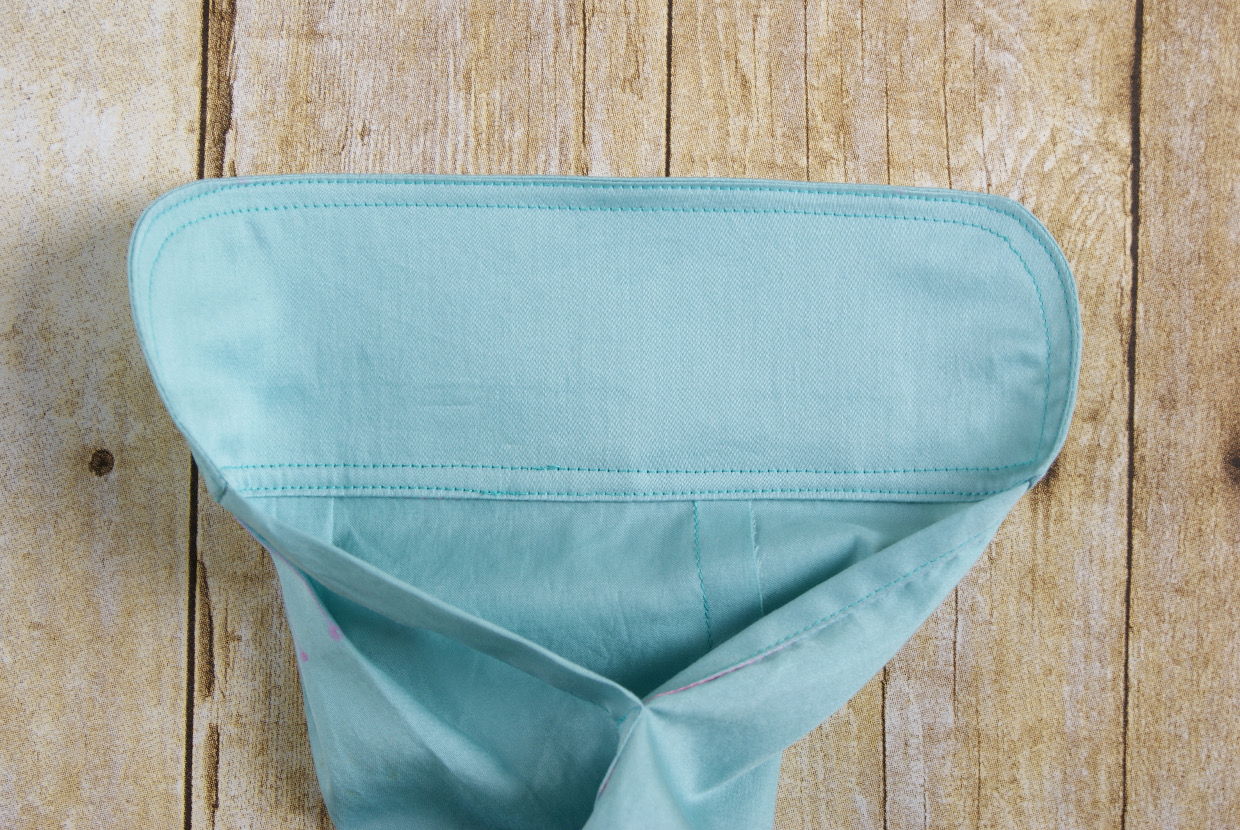
3. Edgestitch the pocket hem at the innermost folded edge to finish it. If desired, add a row of topstitching 1/4” inside the edgestitching. Then pin the pocket to one shirt-front piece at the placement markings you transferred from the pattern, smooth the pocket against the shirt, and edgestitch it in place, pivoting at the corners and backstitching or lockstitching at the beginning and end of the edgestitching to secure it. If desired, add a row of topstitching 1/4” inside each row of edgestitching.
From Liesl: Placing the pocket can be a little tricky if your shirt has a larger dart. Keep smoothing the pocket over the placement dots until you’re happy with it, doing your best to keep the innermost edge parallel to center front. Take your time here and with a little patience you’ll succeed.


4. Repeat steps 1-3 to make and attach the second pocket to the other shirt-front piece.
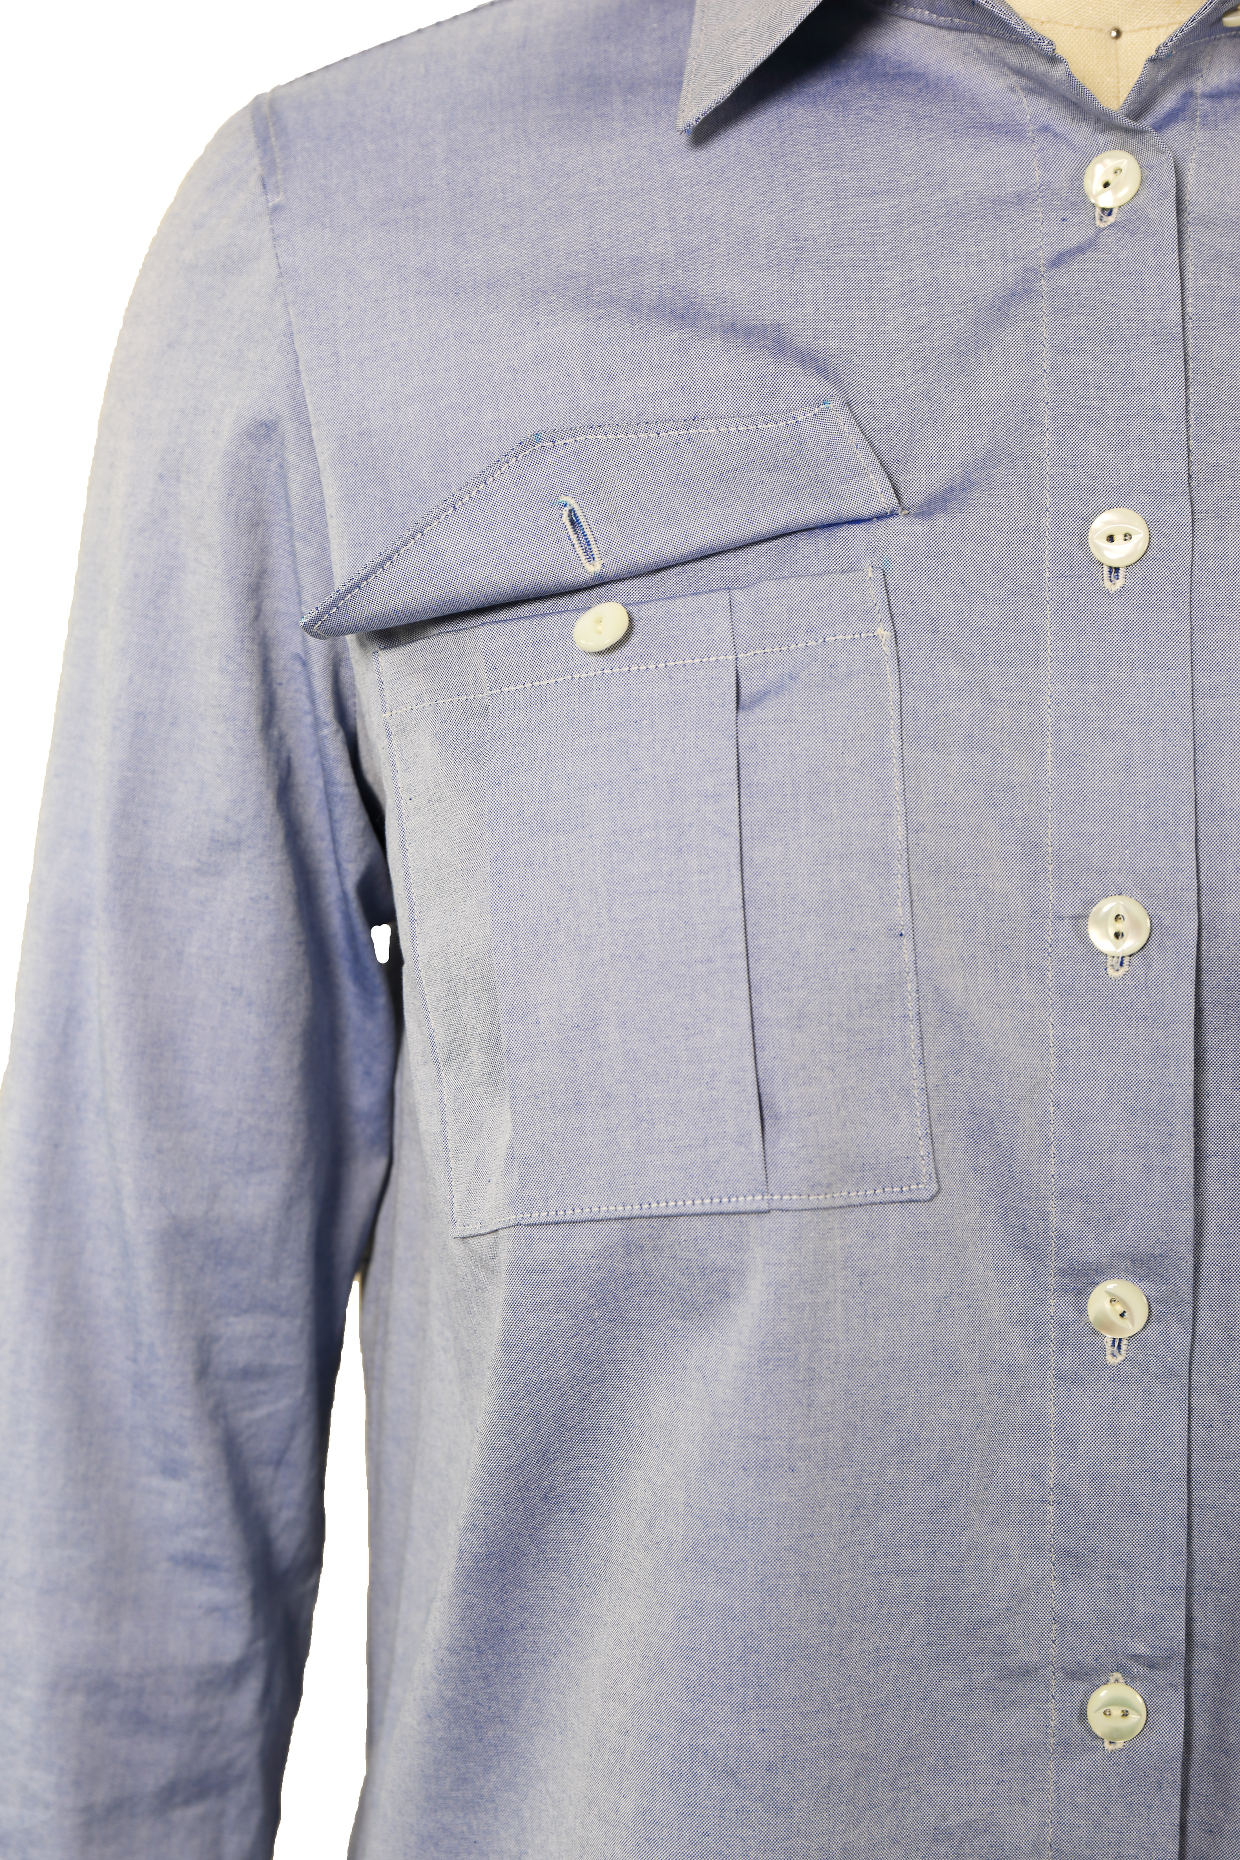
Make and Attach the Pockets and Flaps (View B)
From Liesl: If you want, you could also make an inverted box pleat on the pocket by fold the pocket with right sides together in Step 1, below, and basting it together instead of stitching it. Then, when the pocket is finished and attached to the shirt, you can remove the basting stitches to let the pleat open up. Just another idea for customizing your own shirt!
1. To form the pleat on the pocket, fold the pocket in half, with wrong sides together, matching the notches and the pleat lines that you transferred from the pattern. Stitch the pleat along the lines, backstitching or lockstitching at both ends.
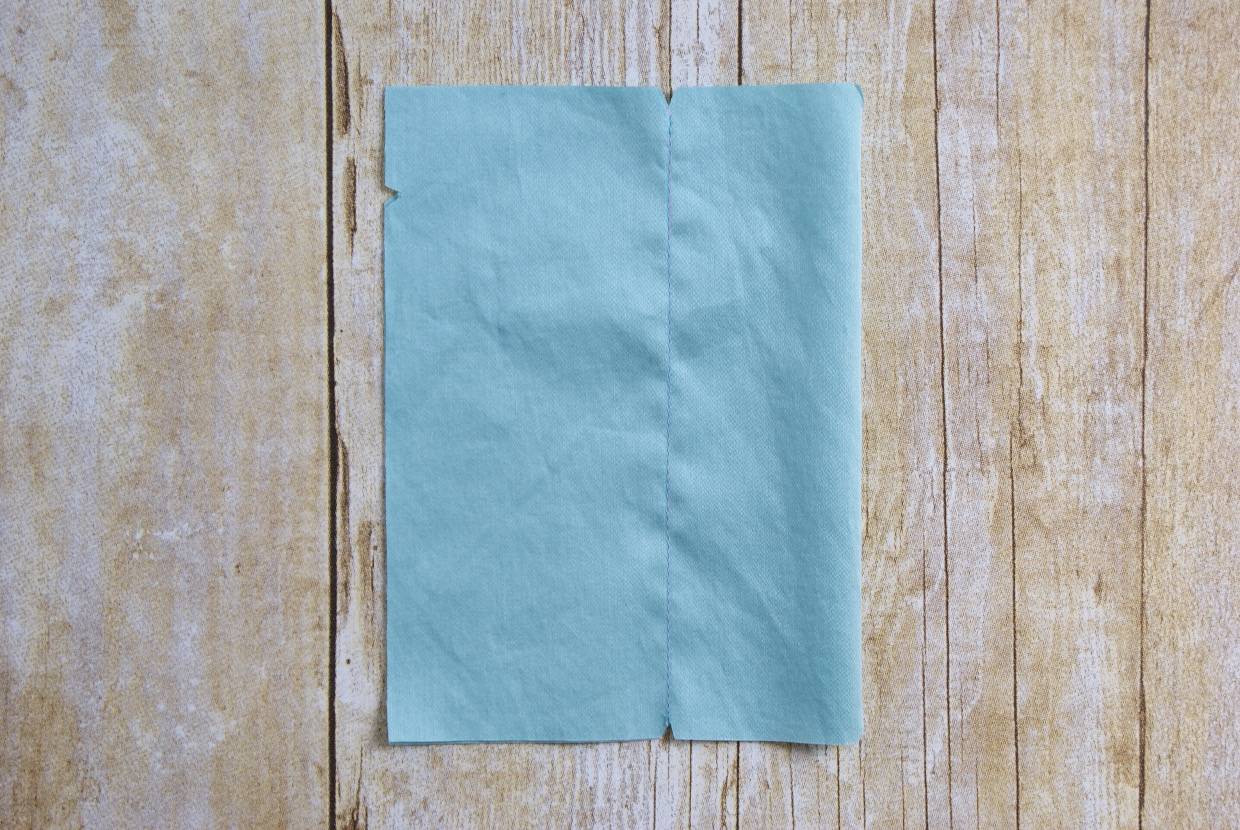
2. Press the fold; then open the pocket right-side up. Open the center pleat and align and pin its center crease to the seam line. Press the pleat to form a box pleat on the fabric’s right side and baste the pleat at the pocket’s top and bottom edges with a 3/8” seam.
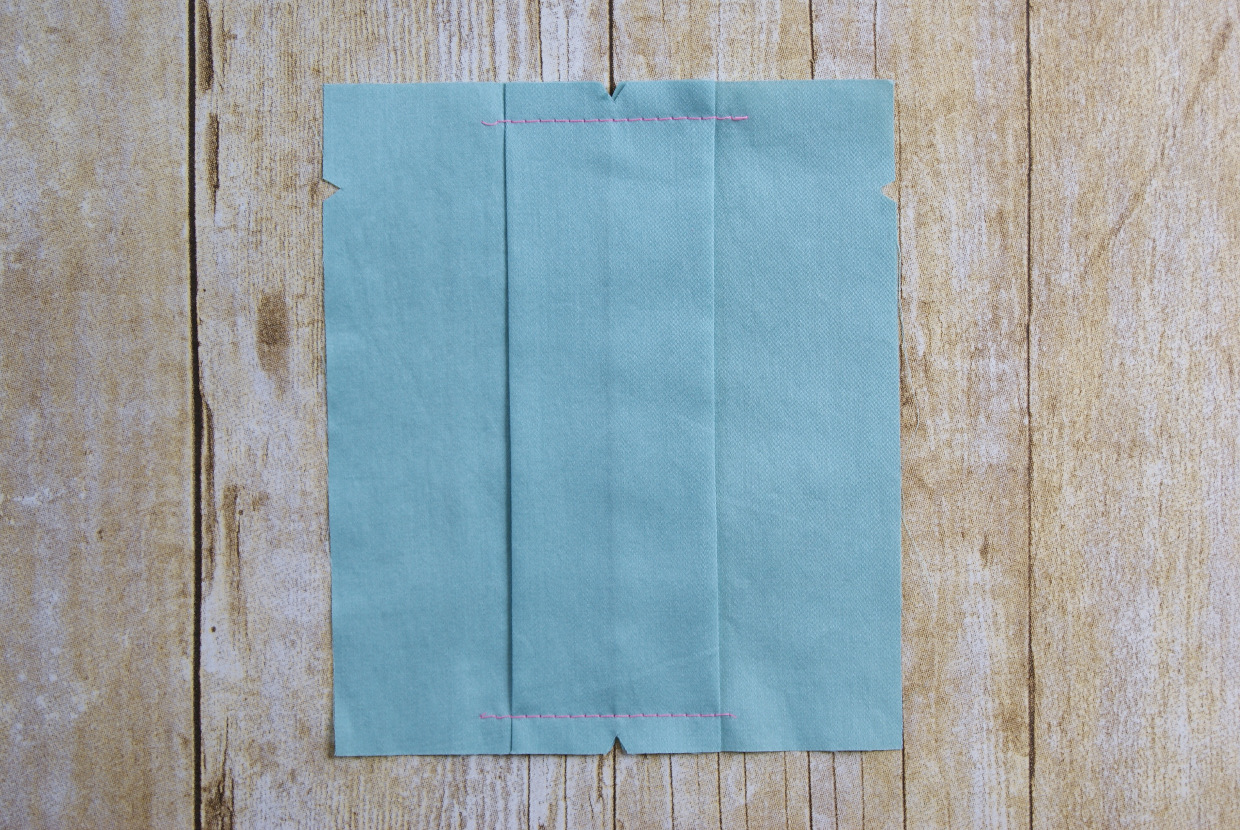
3. To hem the pocket, first fold and press the top edge of the pocket to the wrong side by 1/2”. Then fold the top edges again, this time to the right side by 1/2”, and pin it in place. Stitch the side edges of the pocket at the folds with a 1/2” seam and baste around the remaining side and bottom edges with a 1/2” seam.
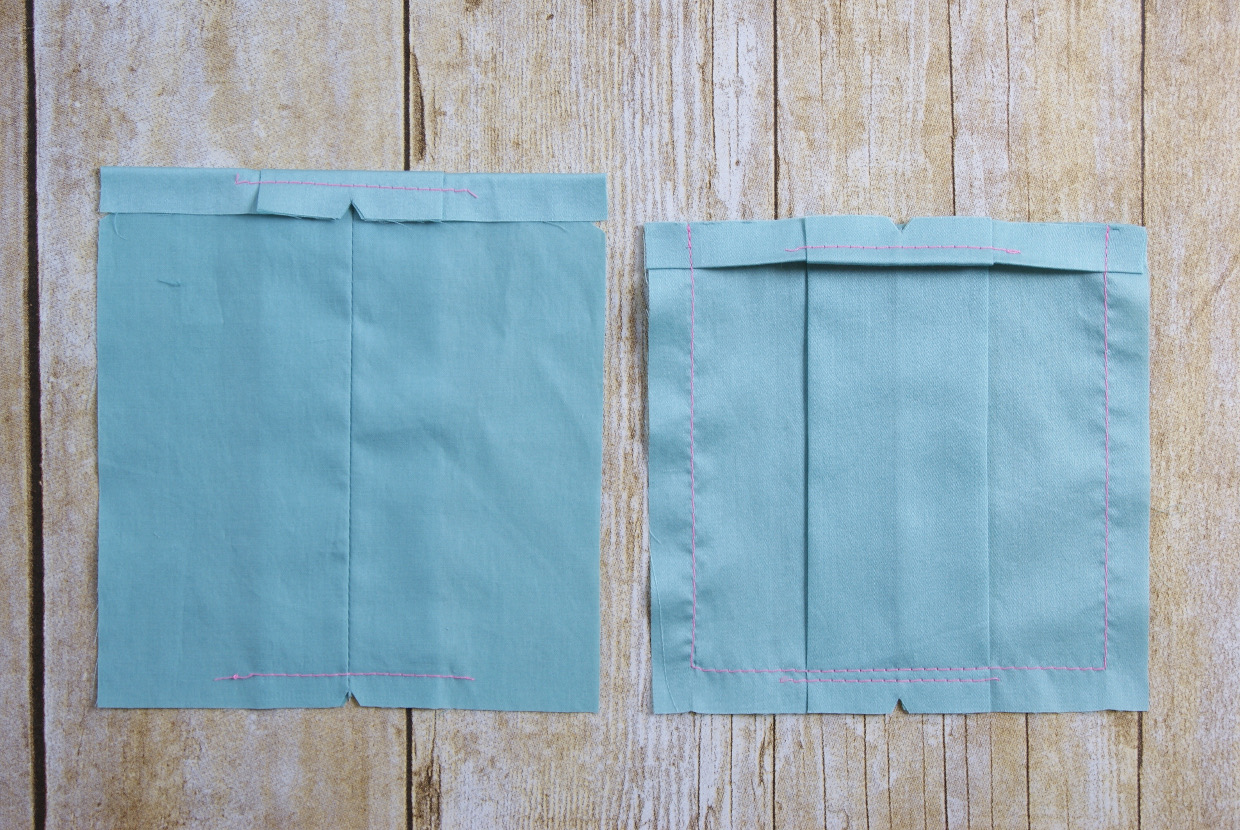
4. Turn the resulting hem of the pocket to the right side, gently pushing out the corners with a chopstick or knitting needle, and press it. Fold and press the bottom corners at an angle (this will help to get neat corners), then fold and press the side and bottom edges to the wrong side by 1/2”, using the basting as a folding guide. To finish the pocket’s hem, edge stitch the innermost folded edge.
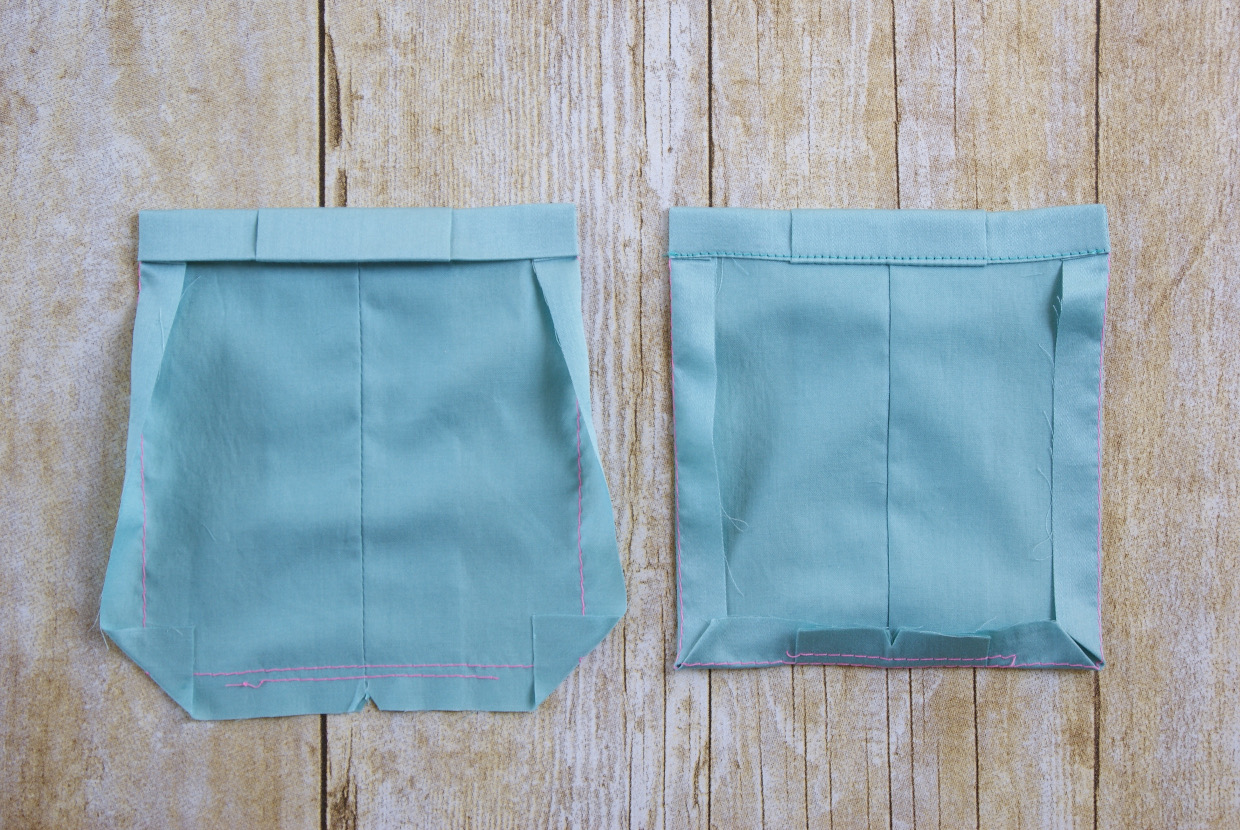
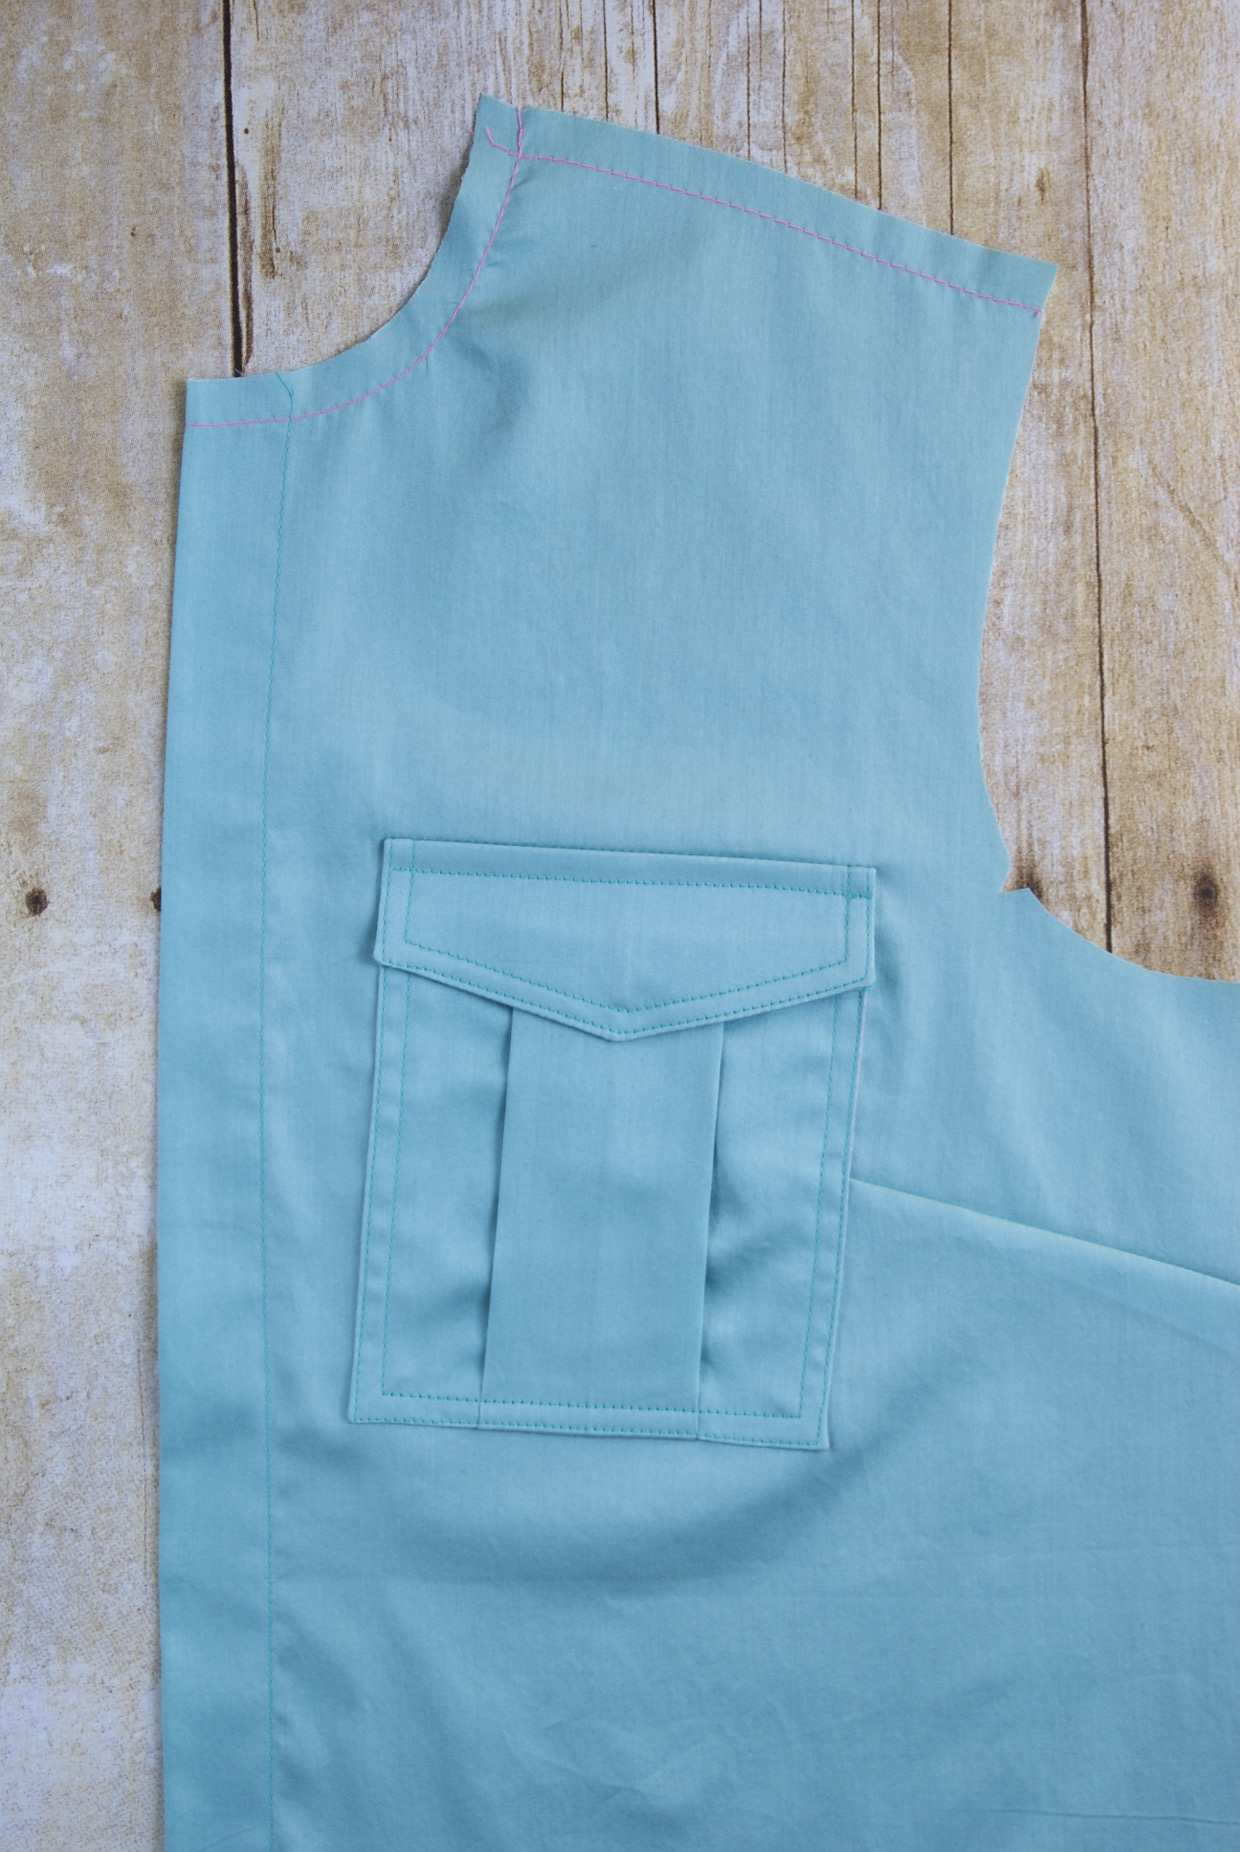
5. Pin the pocket to the front shirt at the placement markings you transferred from the pattern, smooth the pocket against the shirt, and edge stitch it in place, pivoting at the corners and backstitching or lockstitching at the beginning and end of the edgestitching to secure it. If desired, add a row of topstitching 1/4” inside each row of edgestitching.
6. Repeat steps 1-5 to make and attach the second pocket to the other shirt-front piece.
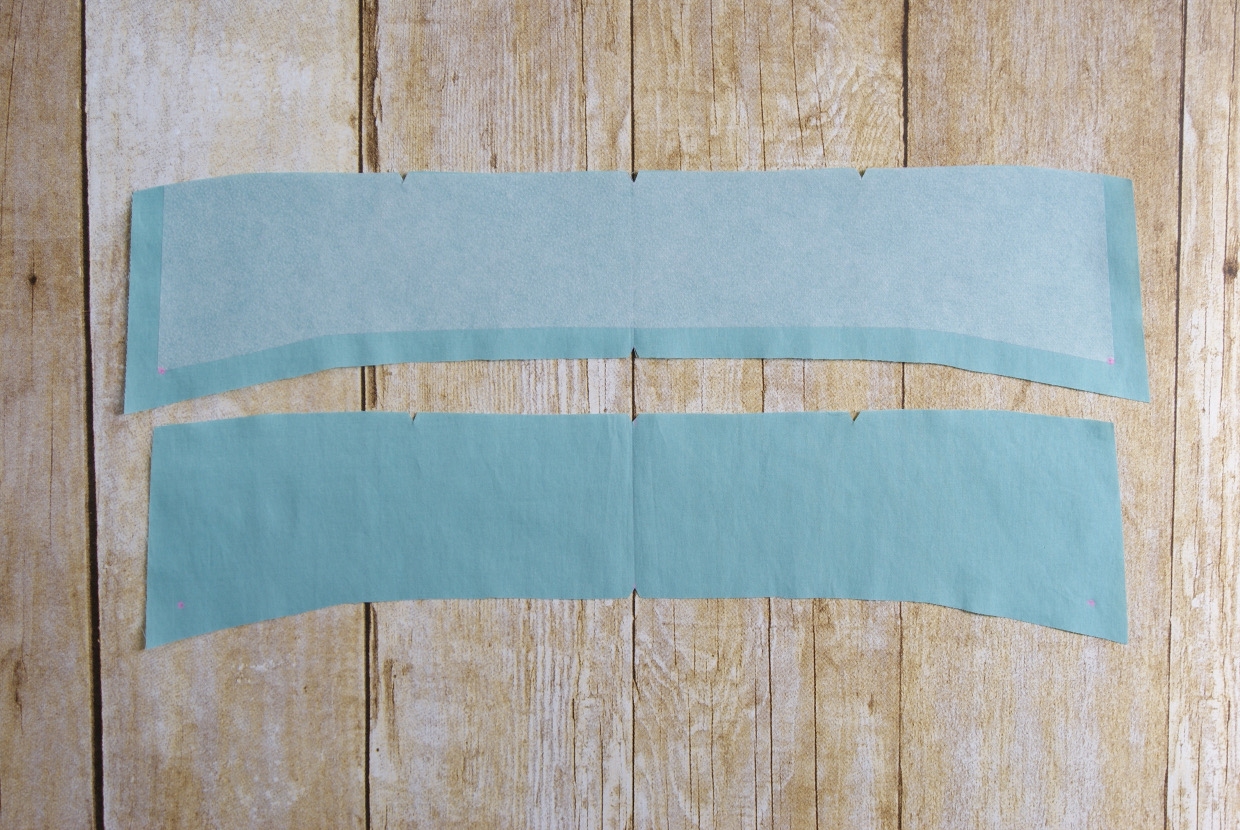
7. To make the pocket flaps, follow the manufacturer’s instructions to fuse or baste the cut interfacing to the wrong side of two pocket flaps. Using tailor’s chalk or a water-soluble fabric-marking pen, transfer the buttonhole markings from the pattern piece to the right side of these interfaced pocket flaps and stitch the buttonholes as marked. Cut open the buttonholes.
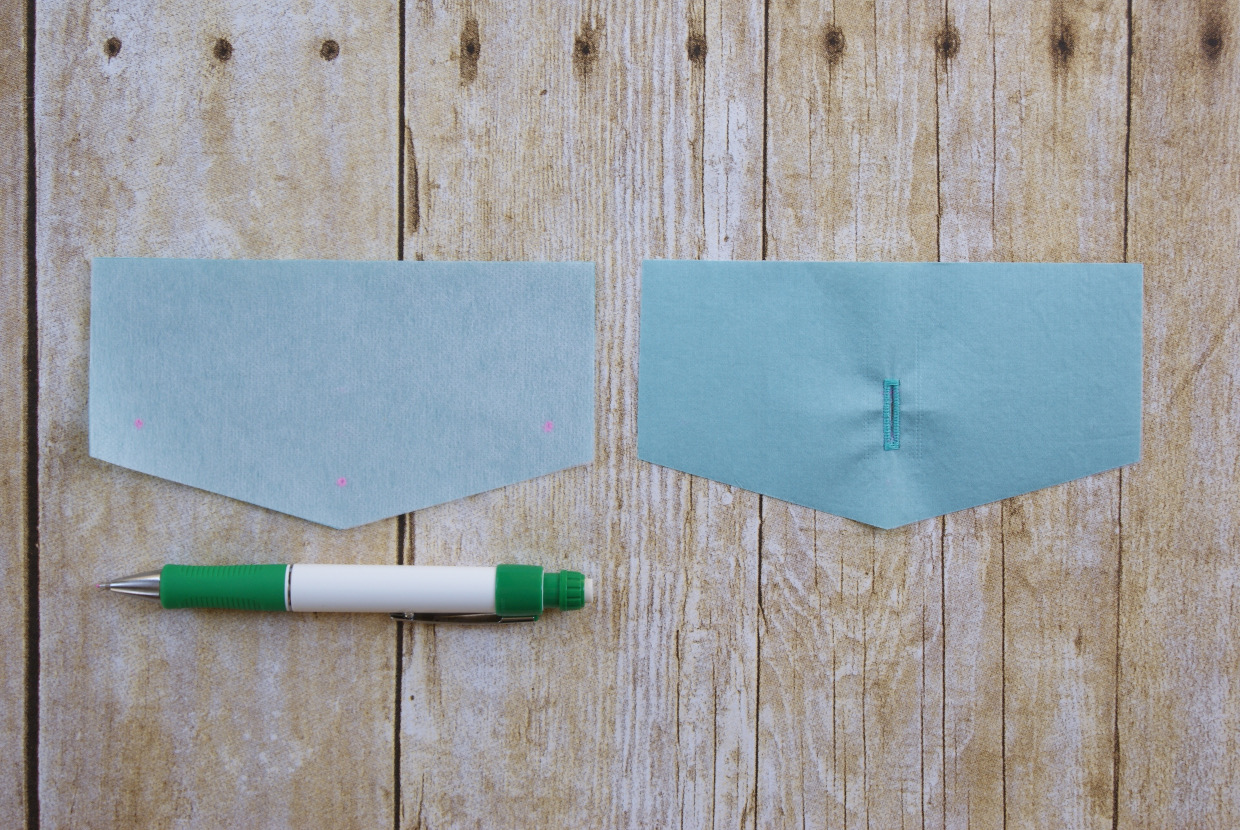
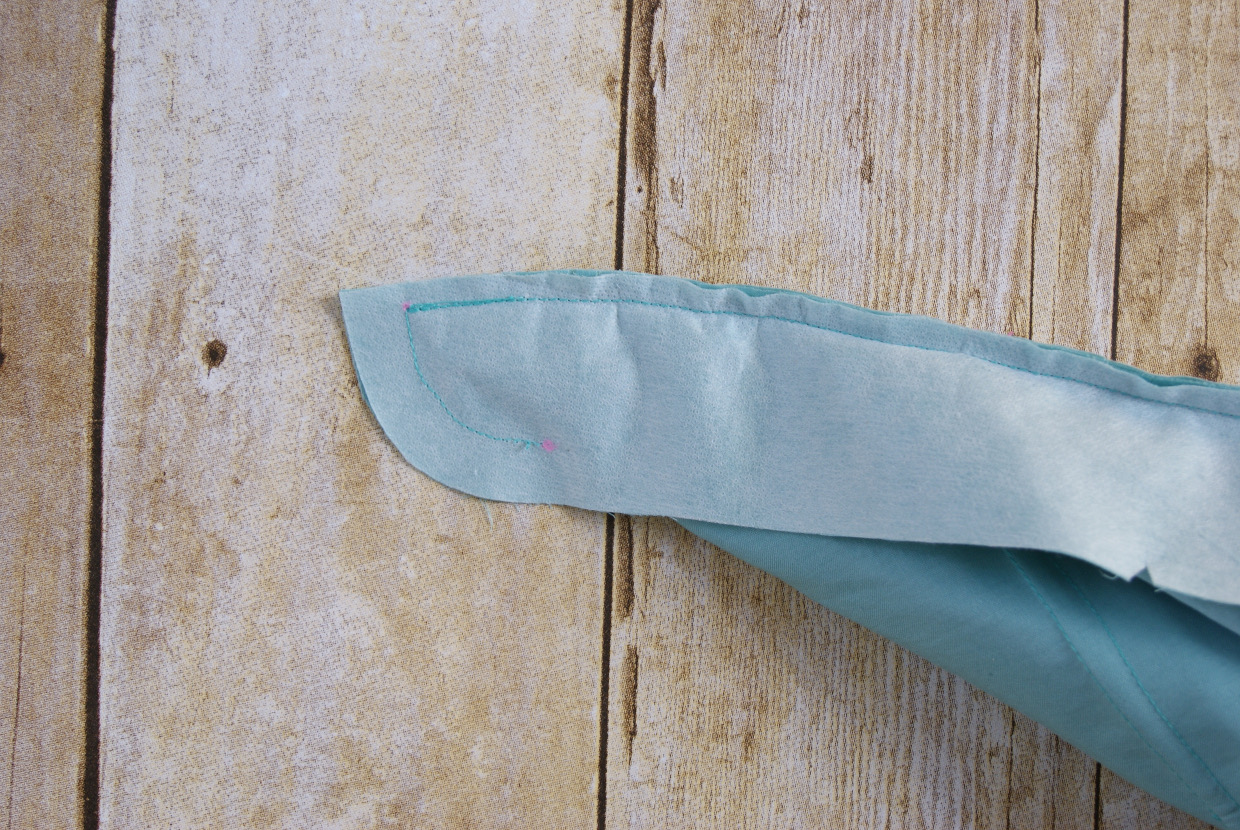
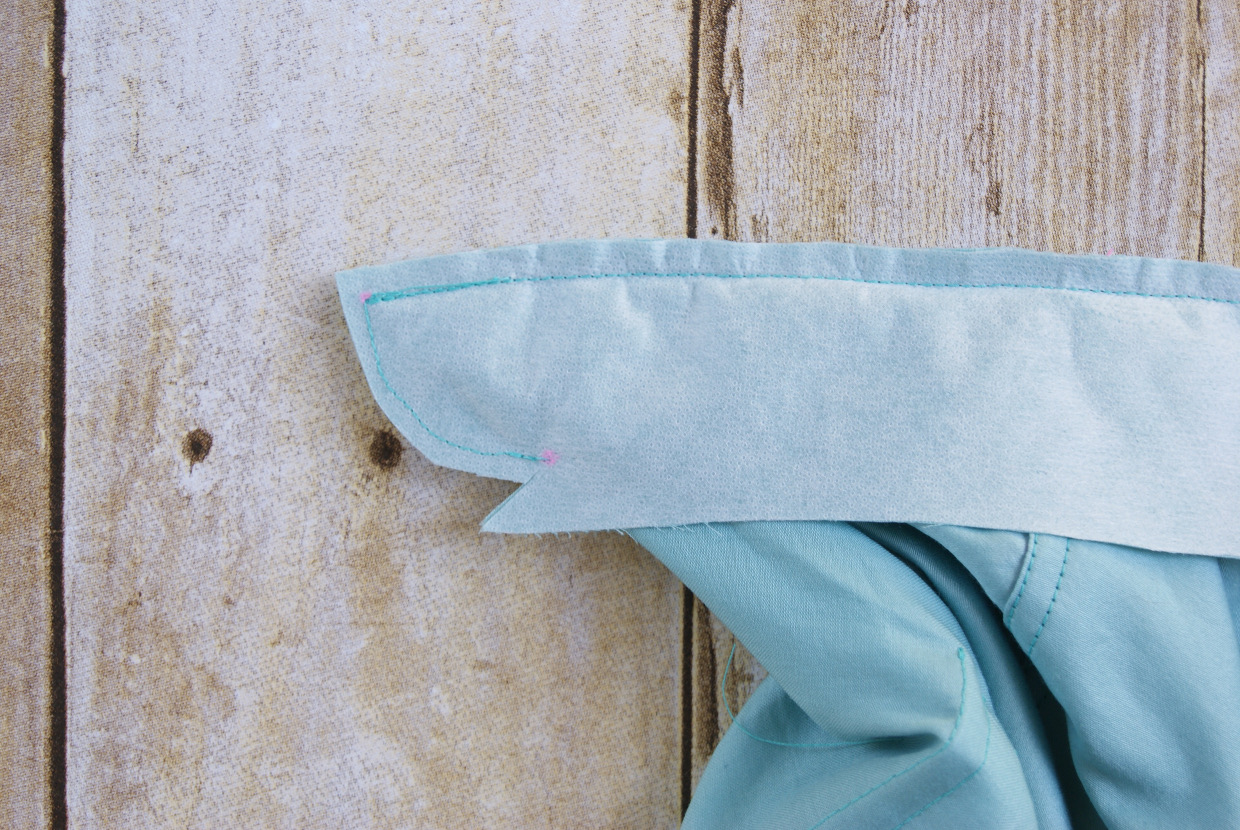
8. Pin one interfaced pocket flap (with stitched, opened buttonhole) to one non-interfaces pocket flap with right sides together. Stitch the sides and angles edge with a 1/2” seam, pivoting at each corner.
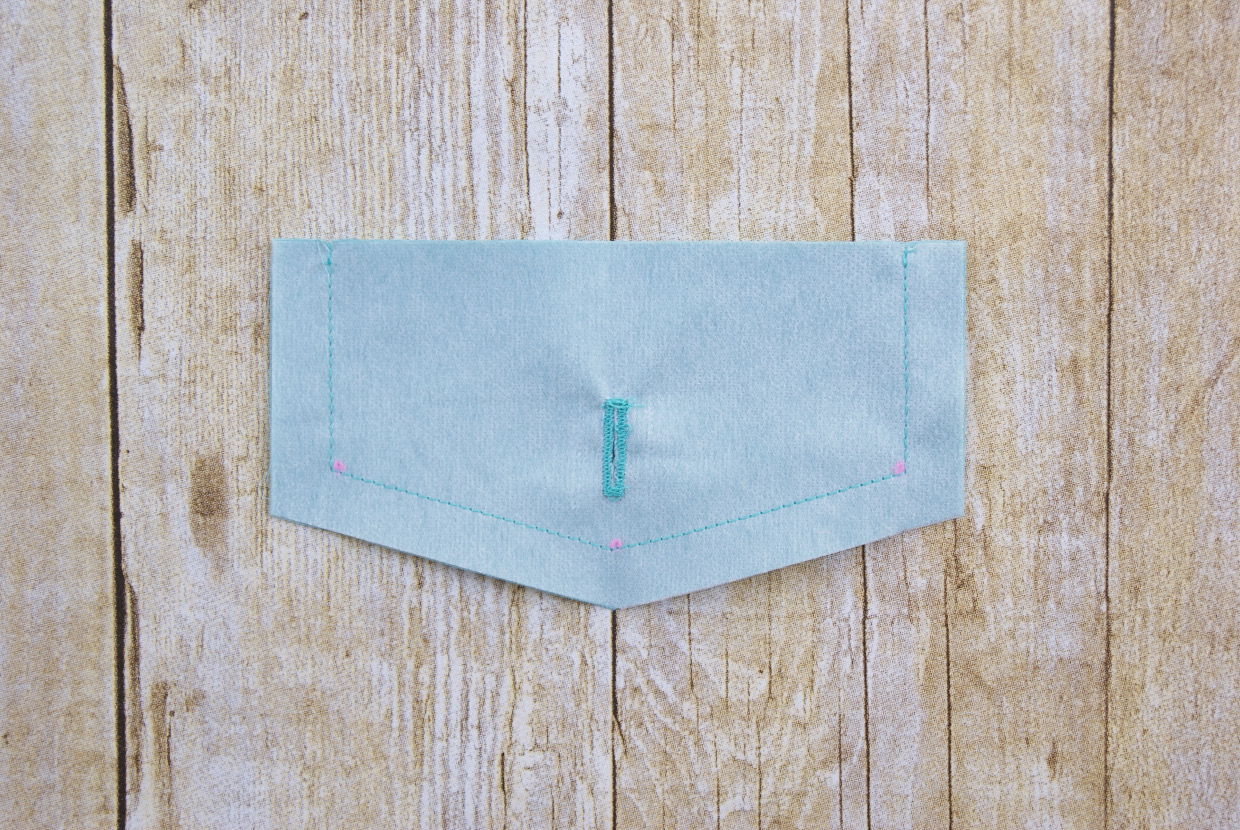
9. Trim the stitched seam allowances to 1/4” and clip the corners, then turn the flap right-side out, gently pushing out the corners with a chopstick or knitting needle, and press it. Baste the open edge with a 1/2” seam. Edgestitch the pocket’s edges from the side without the buttonhole (which is the right side of the pocket flap), pivoting at the corners. If desired, add a row of topstitching 1/4” inside the edgestitching.
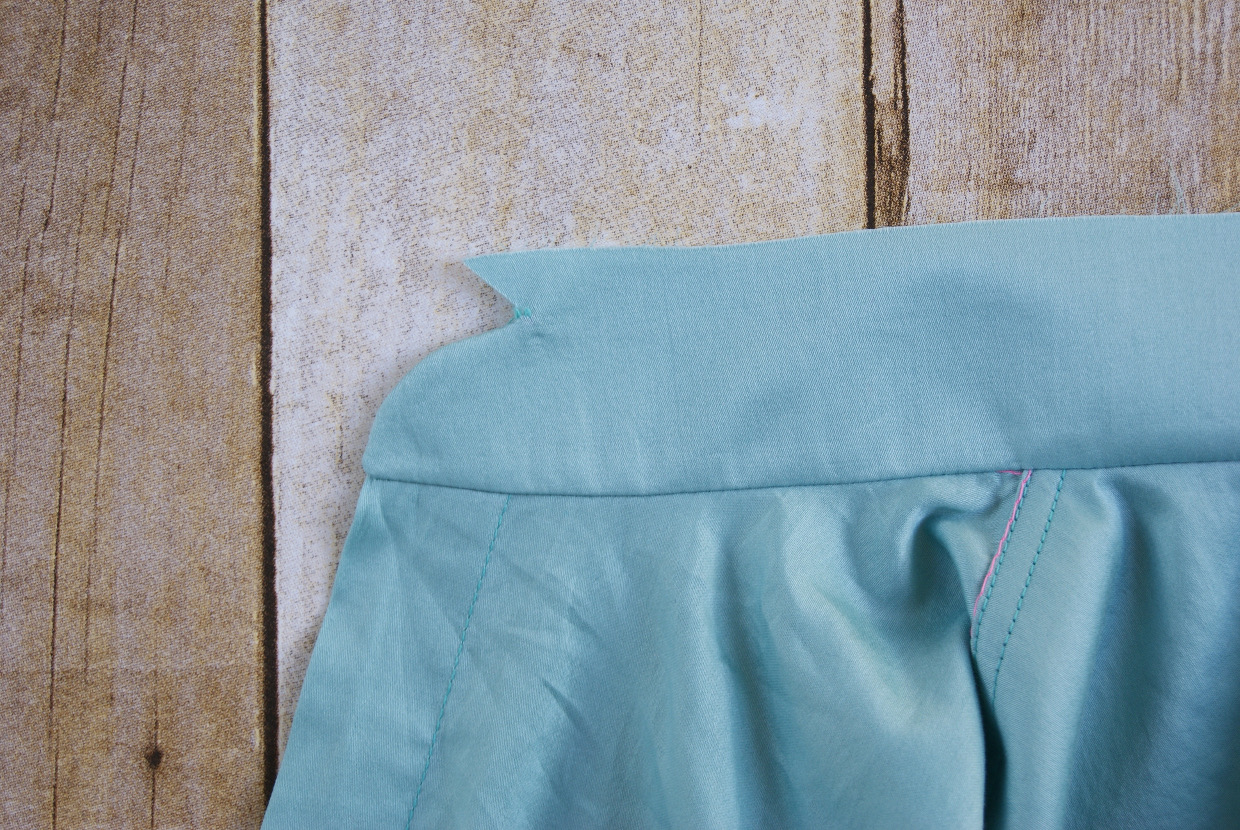
10. Pin the pocket flap to the front of the shirt, positioning the right side of the flap against the right side of the shirt (buttonhole side facing up) and aligning the unfinished top edge of the pocket flap with the top edge of the pocket. Stitch the pocket flap to the shirt with a 5/8” seam, backstitching or lockstitching at both ends. (Use a water-soluble fabric-marking pen to mark the stitching line.)

11. Trim the stitched pocket flap seam allowances to 1/8” and press the pocket flap down toward the pocket itself. To finish the pocket flap, stitch the folded top edge of the pocket flap with a 1/4” seam, backstitching or lockstitching at both ends.
12. Repeat steps 7-11 to make and attach the second pocket flap to the other pocket.
From Liesl: Great work, everyone! That’s all there is to the pockets, and I hope yours turned out well. Tomorrow we’ll be to assemble the shirt (back, yoke, and front) and attach the collar band. See you then!
From Liesl: Is it really the third day of our sew-along already? I hope your Classic Shirt is coming along well. Today we’ll start bringing everything together: assembling the back, yoke, and fronts of the shirt. And we’ll sew the collar band in preparation for the collar, which comes tomorrow. Are you ready? Here’s Rachel:
Assemble the Back and Yoke
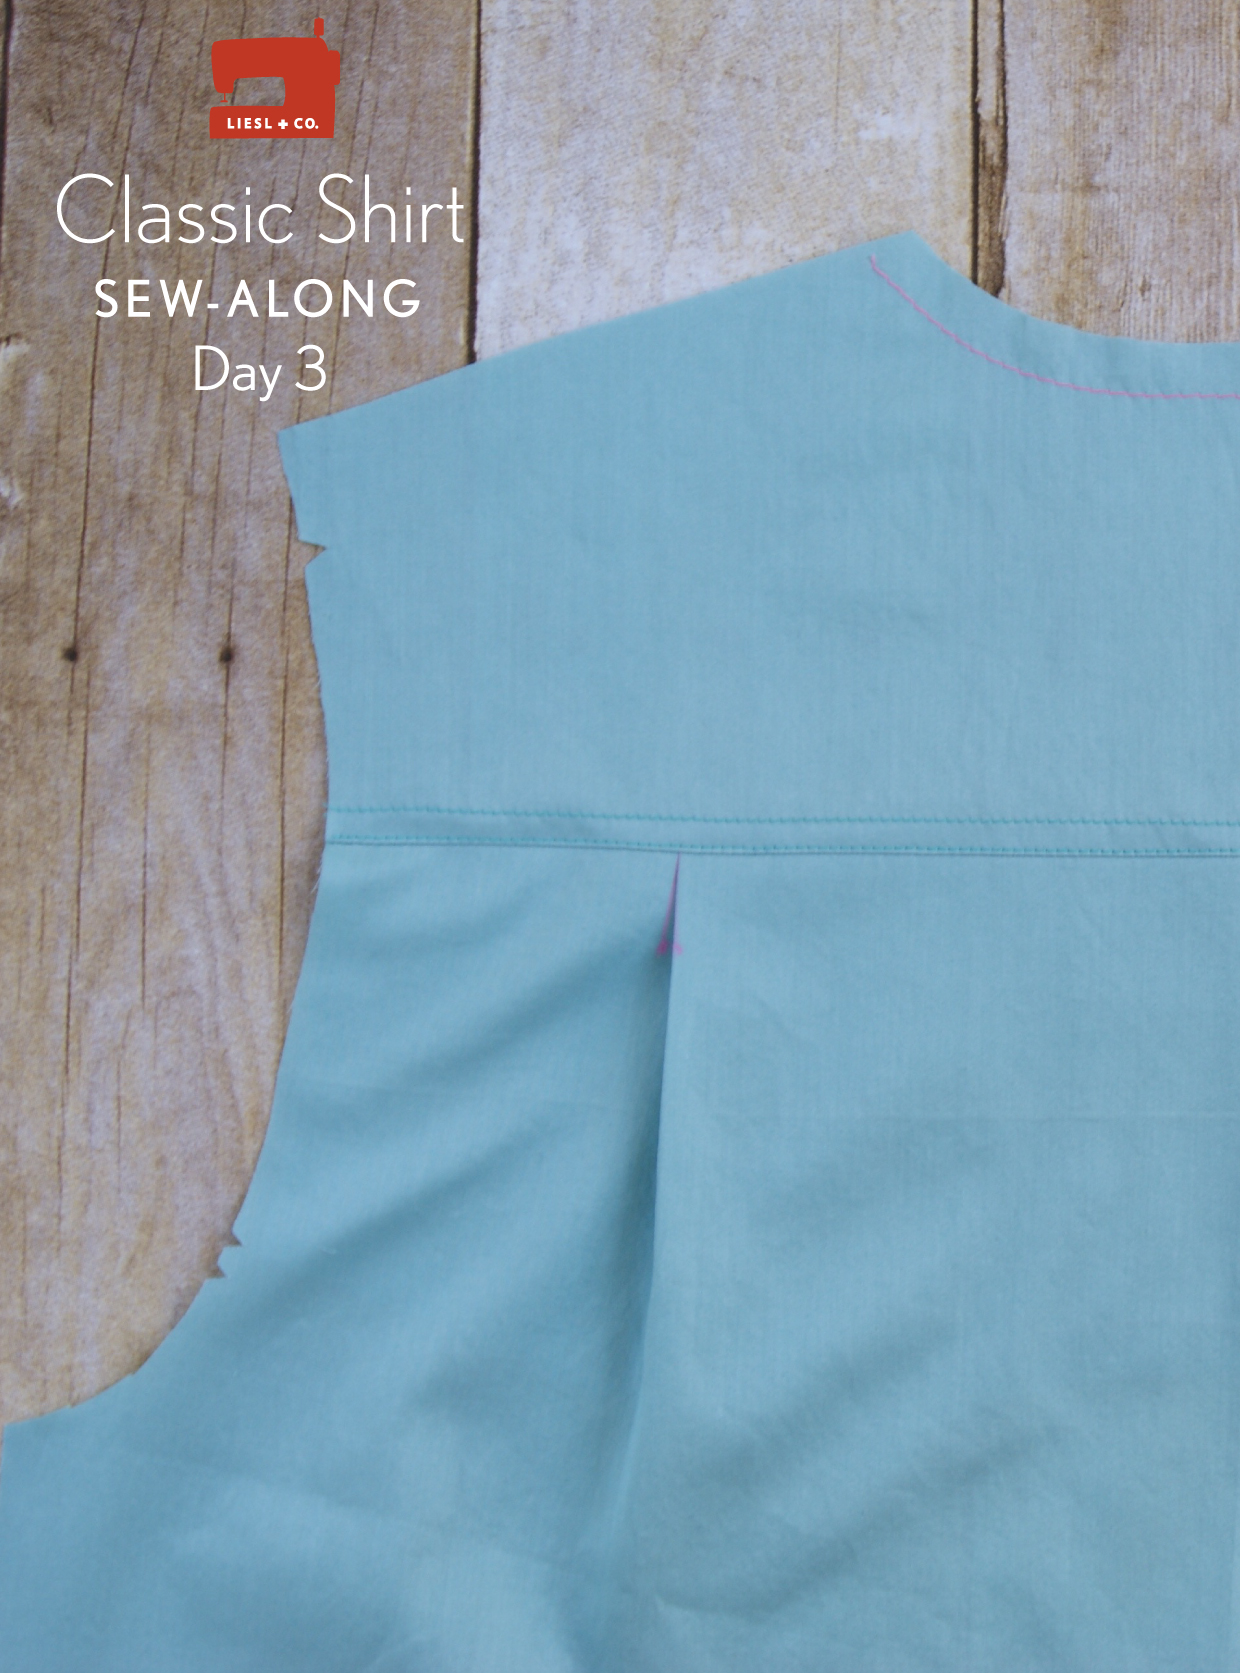
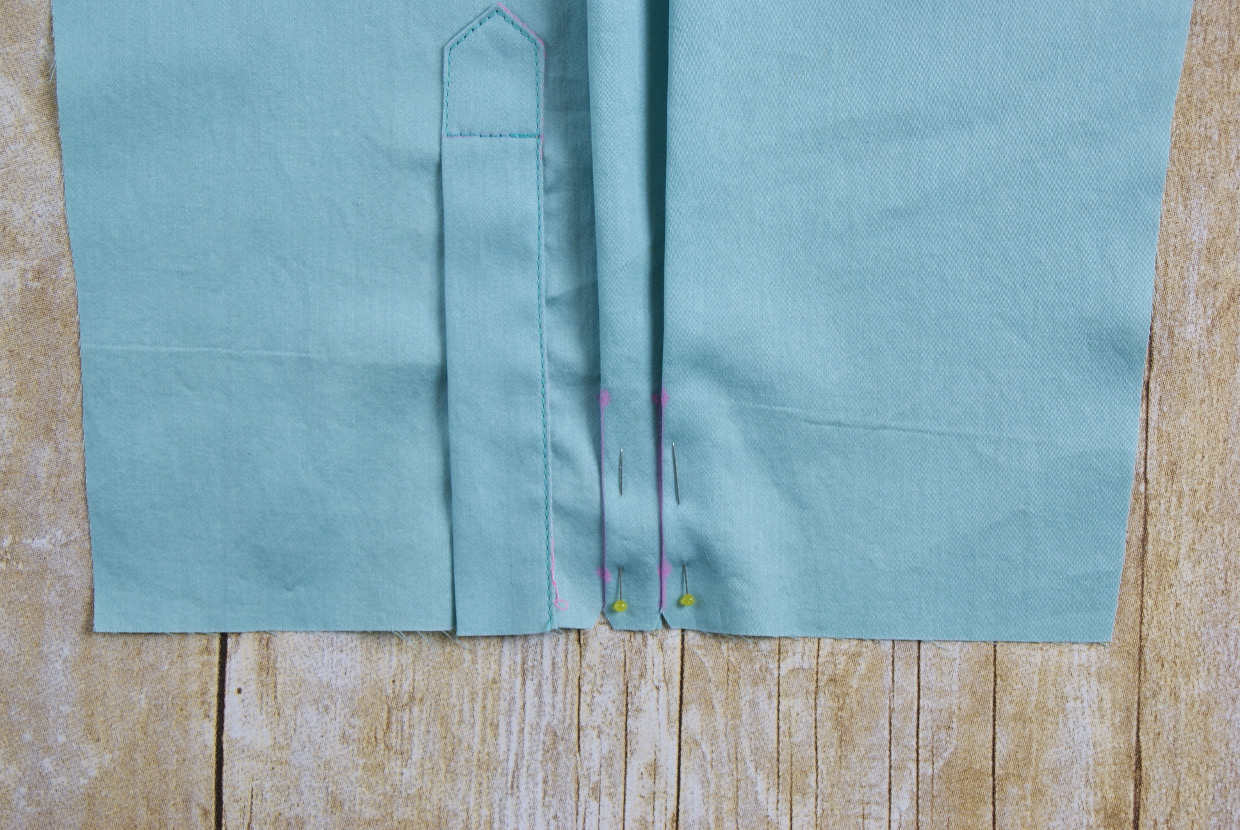
1. To form the pleats on the shirt back, fold the fabric along the line with the large dots, wrong sides together, and match the crease to the line with the small dots.
Baste the pleats to the shirt with a 3/8” seam to hold them in place.


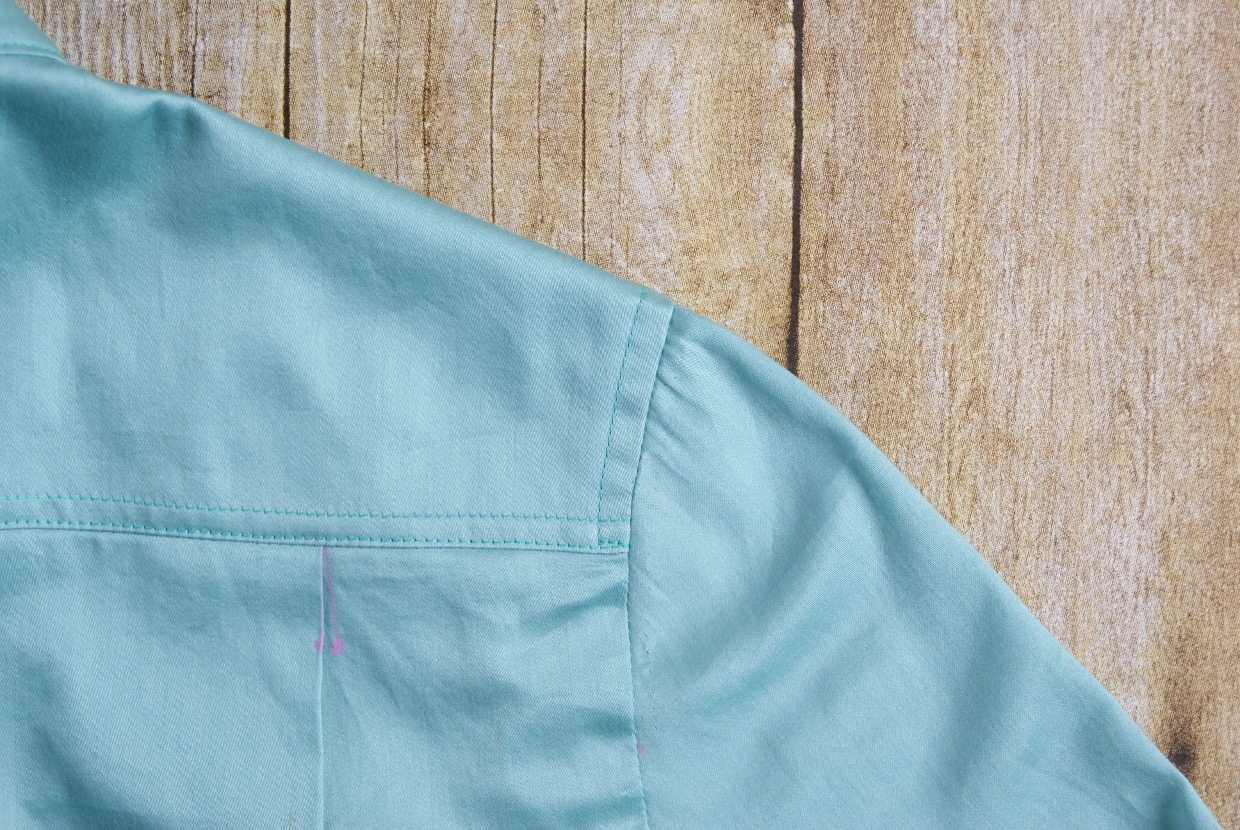
2. Pin the yoke to the shirt back with right sides together, aligning the notches and raw edges. Pin the right side of the second yoke to the wrong side of the shirt back so the shirt back is sandwiched between the two yokes. Stitch the three layers with a 1/2” seam, then trim the seam allowances or grade the seam allowances if the fabric is heavy.
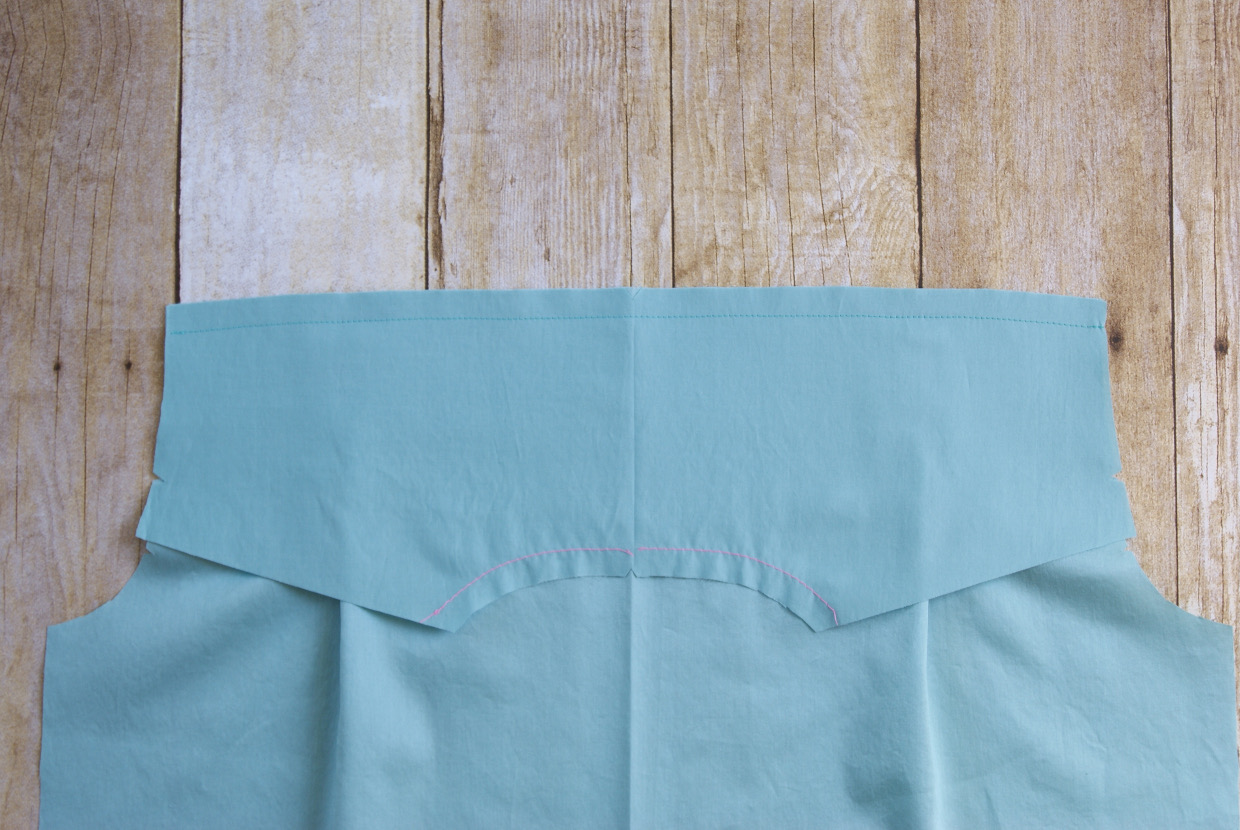
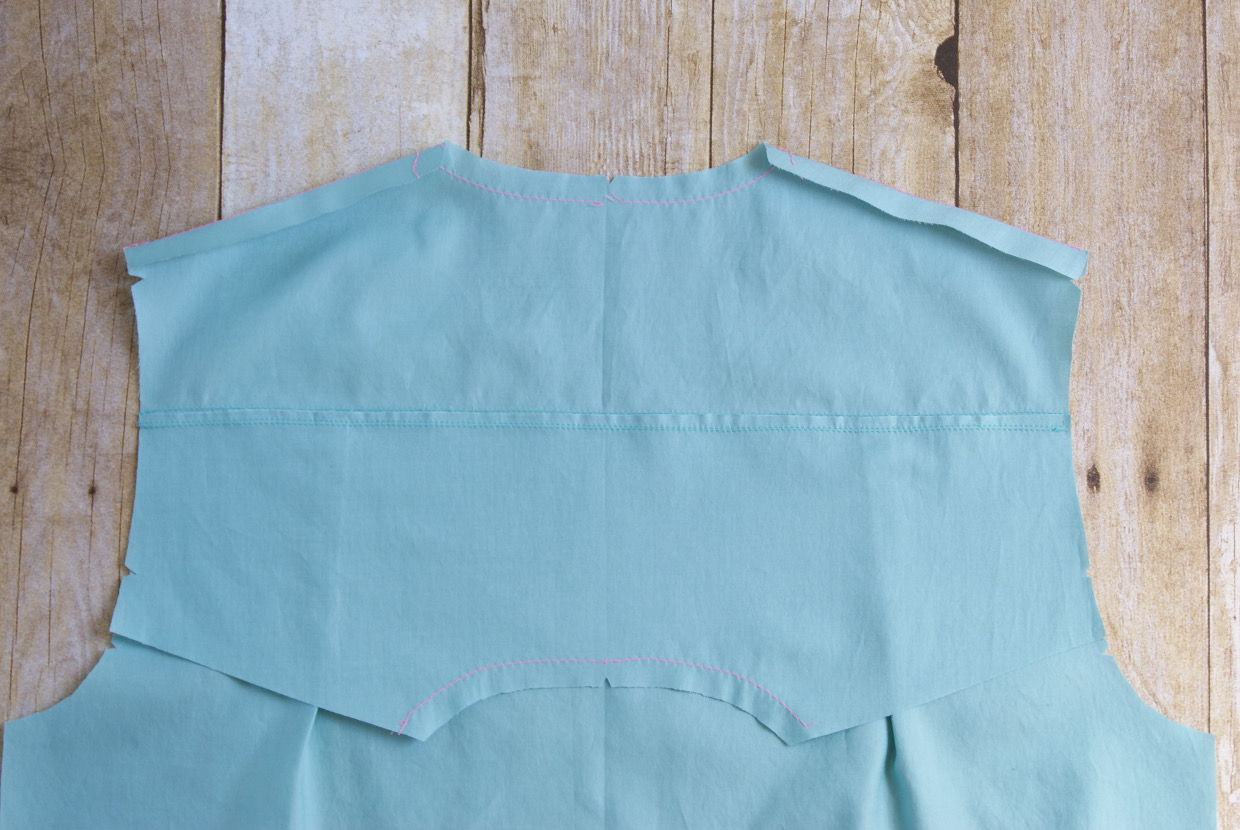
3. Press only the outer yoke and the seam allowances away from the shirt back, leaving the yoke facing (the inside yoke) pressed against the shirt back on the wrong side of the shirt back. Edgestitch the outer yoke, catching the seam allowances in the stitching. If desired, add a row of topstitching 1/4” above the row of egdestitching. Then sew a row of basting stitches 1/2” from the shoulders of the outer yoke and use the basting stitches as a folding guide to press the seam allowances of just the outer yoke to the wrong side.

Attach the Shirt Fronts
From Liesl: This is my favorite way to finish the yoke because it’s much less fussy than other methods, and the finished results are more accurate. Just be sure you’re paying attention to right sides vs. wrong sides for each step, especially Step 1 below.
1. Pin the outer yoke to the shirt back for the time being, and press the yoke facing away from the shirt back. Pin one shirt front to the yoke facing, positioning the wrong side of the shirt front to the right side of the yoke facing, and with the raw edges and notches aligned. Stitch the shoulder with a 1/2” seam, then trim or grade the seam allowances and press the seam allowances toward the yoke. Repeat with the second shirt front.
2. Pin the pressed, folded edges of the outer yoke shoulders to cover the shoulder stitching lines and edgestitch the shoulders to finish. If desired, topstitch the shoulders 1/4” from the edgestitching as well.


Make and Attach the Collar Band
1. Follow the manufacturer’s instructions to fuse or baste the collar band pieces cut from interfacing to the wrong side of both collar bands.
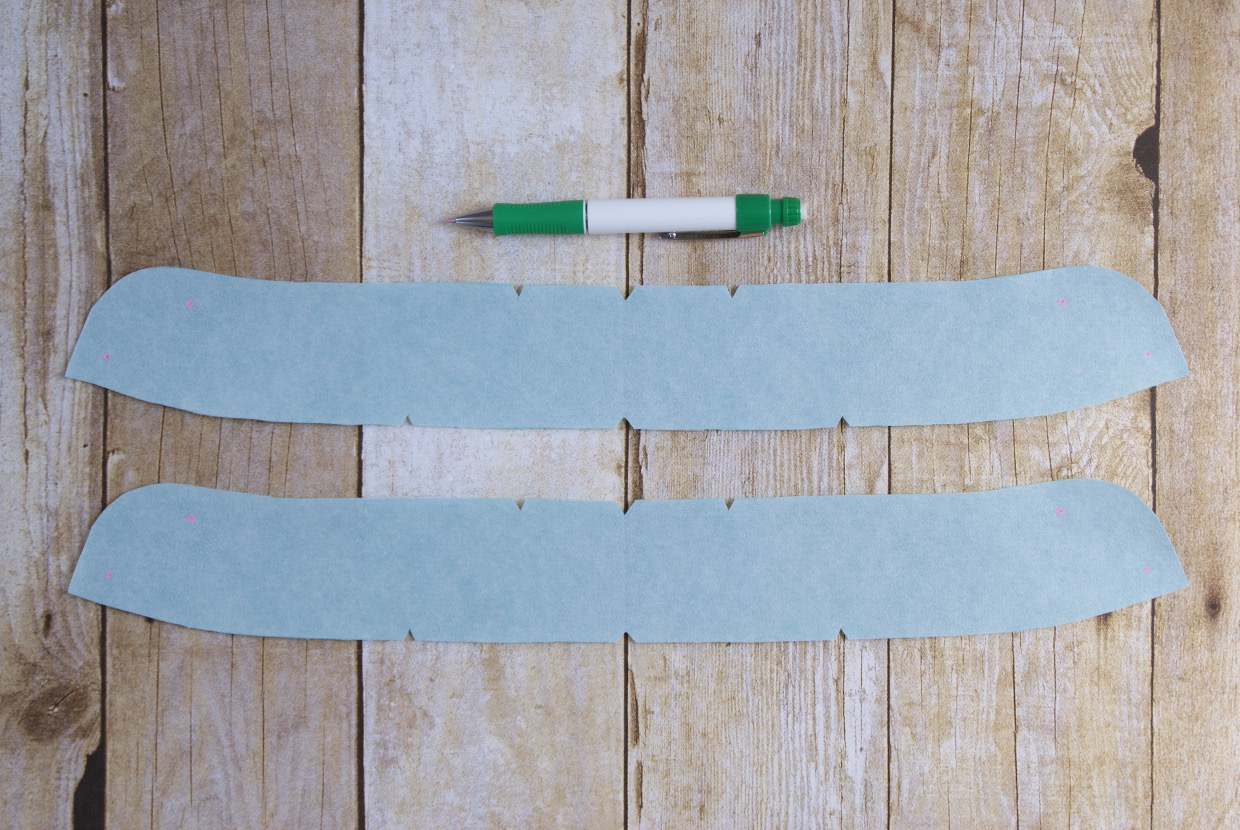
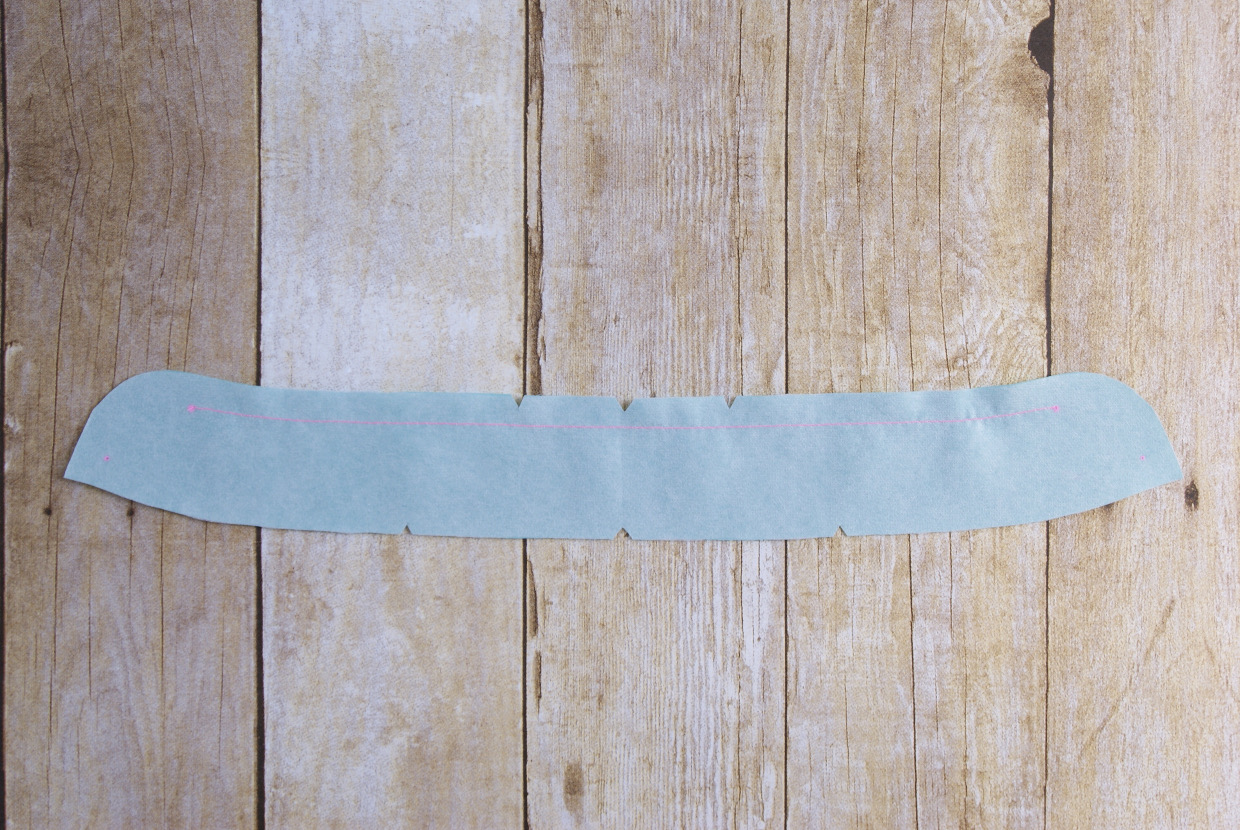
2. Sew a line of basting stitches 1/2” from the top edge of one collar band along the straight portion between the dots at the top edges of the band. This basting will serve as a folding guide later in the collar-sewing process. (Note that this collar band will be on the inside of the shirt, so if you want to use a contrast color for part of your collar band keep this in mind.)
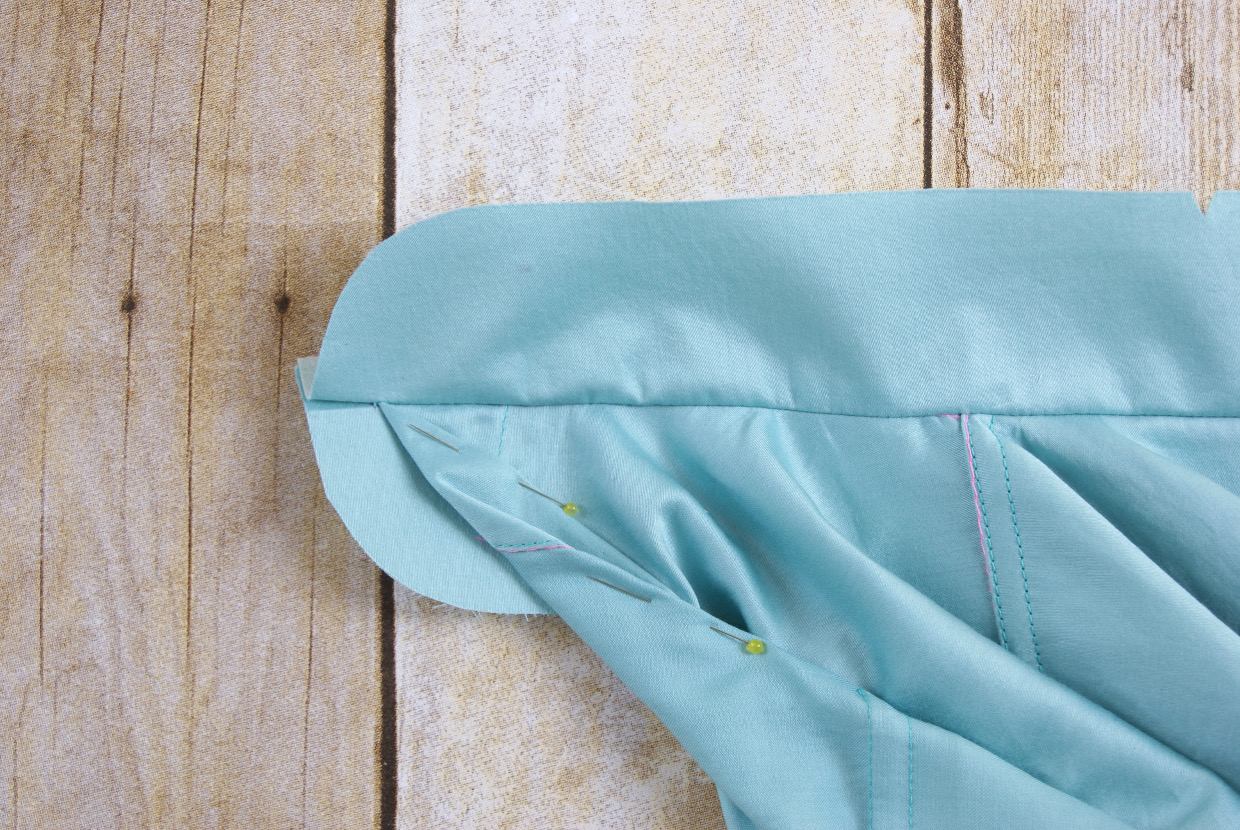
3. Pin the right side of the basted collar band to the wrong side of the shirt’s neckline. Match the dots at the outer edges of the band to the center-front edges of the finished button plackets, and match the notches on the collar band to the shoulder seams of the shirt. Pin the second (non-basted) collar band with the right side of the band to the right side of the neckline (the two collar bands will be right sides together with the shirt’s neckline sandwiched in between). As you pin the two collar bands to the shirt, pin on the neckline seamline itself-the basting line of the shirt’s neckline can be your guide. Because the neckline is curved, you may need to clip into it to release the seam allowances so the stitch lines can match. Clip into the shirt’s neckline only as needed, as little as possible. Stitch through all the layers with a 1/2” seam, starting and stopping precisely at the shirt’s center front edges (the dots on the collar bands) and backstitching or lockstitching at both ends. Check for puckers and re-stitch as needed.

4. Trim the stitched seam allowances to 1/4”, then press the collar bands away from the shirt. Next, roll the placket away from the ends of the collar band and pin them to keep them out of the way for the next step. Re-pin the collar bands with right sides together over the pinned, rolled button plackets. This will allow you to re-stitch the last 1” of the neckline, then pivot at the dot (precisely at the end of the front button placket) and sew the curved portion of the collar bands, backstitching or lockstitching when you reach the second dot at the top of the collar band. Repeat to sew the opposite end of the collar band.
From Liesl: For best results on this step, carefully mark the very edge of the placket with a pin before you roll the placket and pin it out of the way. That way you’ll be able to sew precisely to the edge and the collar band will finish at exactly the same point as the front placket. Once you’ve done this a few times it’s much easier!
5. Trim the stitched seam allowances to 1/4” and clip up to the dots at the top of the collar band to release the seam allowances at the unstitched portion of the collar band. Turn the collar band right-side out again, exposing the unstitched seam allowances at the top middle portion of the collar band. Gently finger-press the stitched edges before pressing the band with an iron.
From Liesl: That wasn’t so bad, was it? This is a great time to take a break, too, because you’ve worked hard. Assembling the collar tomorrow is loads of fun, and you’ll also have the satisfaction of sewing the tower plackets on the sleeve, which give you a great feeling of accomplishment. We’ll see you back here then!
From Liesl: Today is the day when our Classic Shirts really start to come together. Not only do we finish the collar, but we get to sew the tower placket on the sleeves, which leave just a few steps tomorrow to finish up. I hope you’re having fun and learning a lot we we go! Here’s Rachel.

Prepare the Collar
1. Trim the 1/2” seam allowances from the cut collar interfacing. (You will only trim the side and top edges of the interfacing.) This will reduce bulk in the collar and will also act as a stitching guide, so be accurate in your trimming. Follow the manufacturer’s instructions to fuse or baste the interfacing to the wrong side of the cut collar.
2. Pin the collar and collar facing with right sides together, matching the edges, dots, and notches. (Note that the collar facing is shorter than the collar itself, which will cause the collar itself to curve and gently hug the neck when the finished shirt is worn.) Stitch the outer edges with a 1/2” seam, starting at the center of the collar and stretching the collar facing as you sew to the dot. Then pivot and stitch the short side of the collar. Use the edge of the interfacing as a stitching guide. Repeat to stitch the opposite half of the collar, stretching the facing as you stitch.

3. Clip the corners, then fold the seam allowances along the seam lines toward the non-interfaced collar facing before turning the collar right-side out, carefully pushing out the corners with a chopstick or knitting needle.
Press the collar, rolling the seam line toward the non-interfaced facing so the seamline won’t show on the finished collar, taking care with the corners and using the natural curve of the collar that develops from stretching the collar facing to fit the collar.
4. Edgestitch the collar with the right side up and baste the open edges together with a 3/8” seam. If desired, you can also add a row of 1/4” topstitching to the collar.

Attach the Collar to the Collar Band
1. Pin the wrong side of collar to the right side (outside) of the outer collar band, matching the edges of the collar to the dots on the collar band. The collar should fit the opening exactly. Stitch the collar to just the outer collar band with a 1/2” seam, matching the end of the seam to the dot so the seam is continuous.

2. Press the collar up, turning and pressing the seam allowances toward the neckline. Trim the stitched seam allowances to 1/4”. Then finger-press the inner collar band along the basting line (see Make and Attach the Collar Band, Step 2) and pin the folded edge so it covers the seamline. Pin or glue the folded edge and edgestitch the inside collar band, holding the collar band taut as you stitch. Continue to edgestitch all the way around the collar band to finish it.
From Liesl: This is my favorite step because it’s so easy to finish the collar without a need for any hand stitching. I think it’s so satisfying!
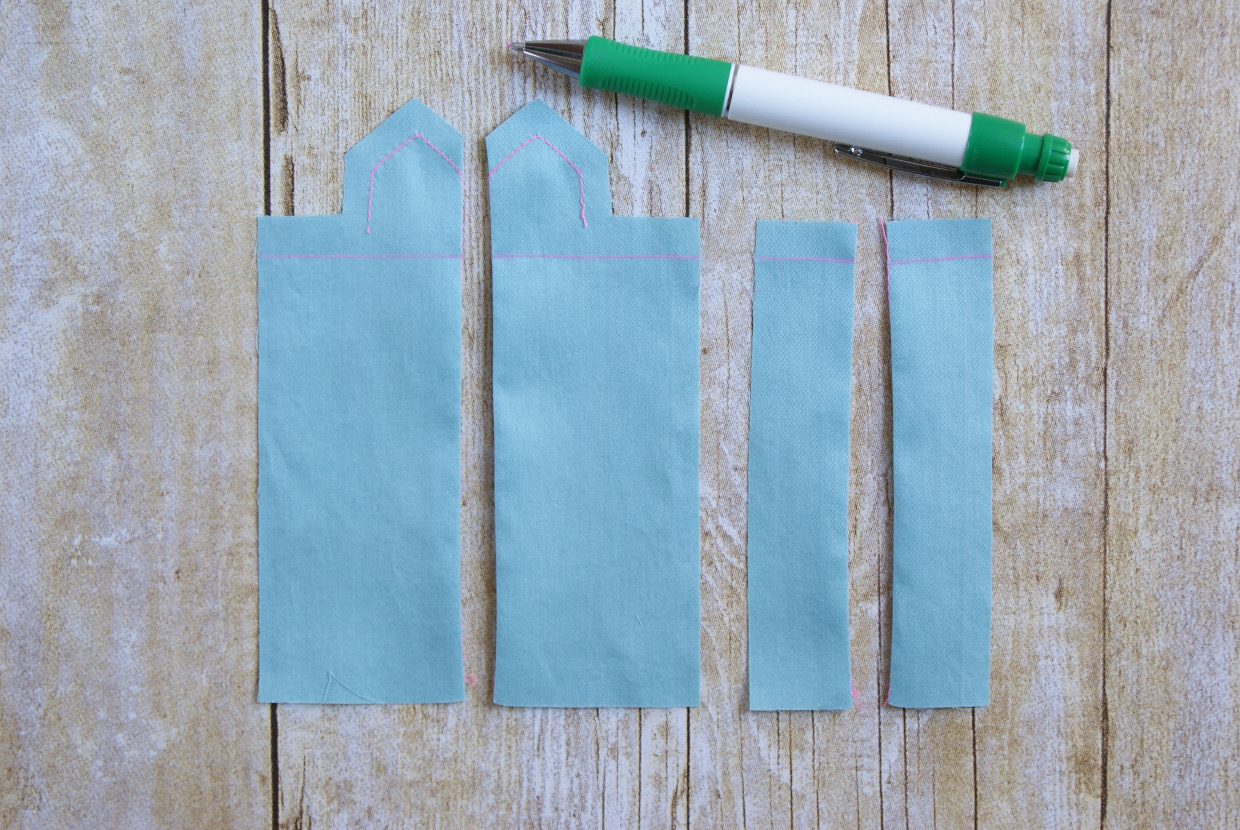
Make the Sleeve Placket
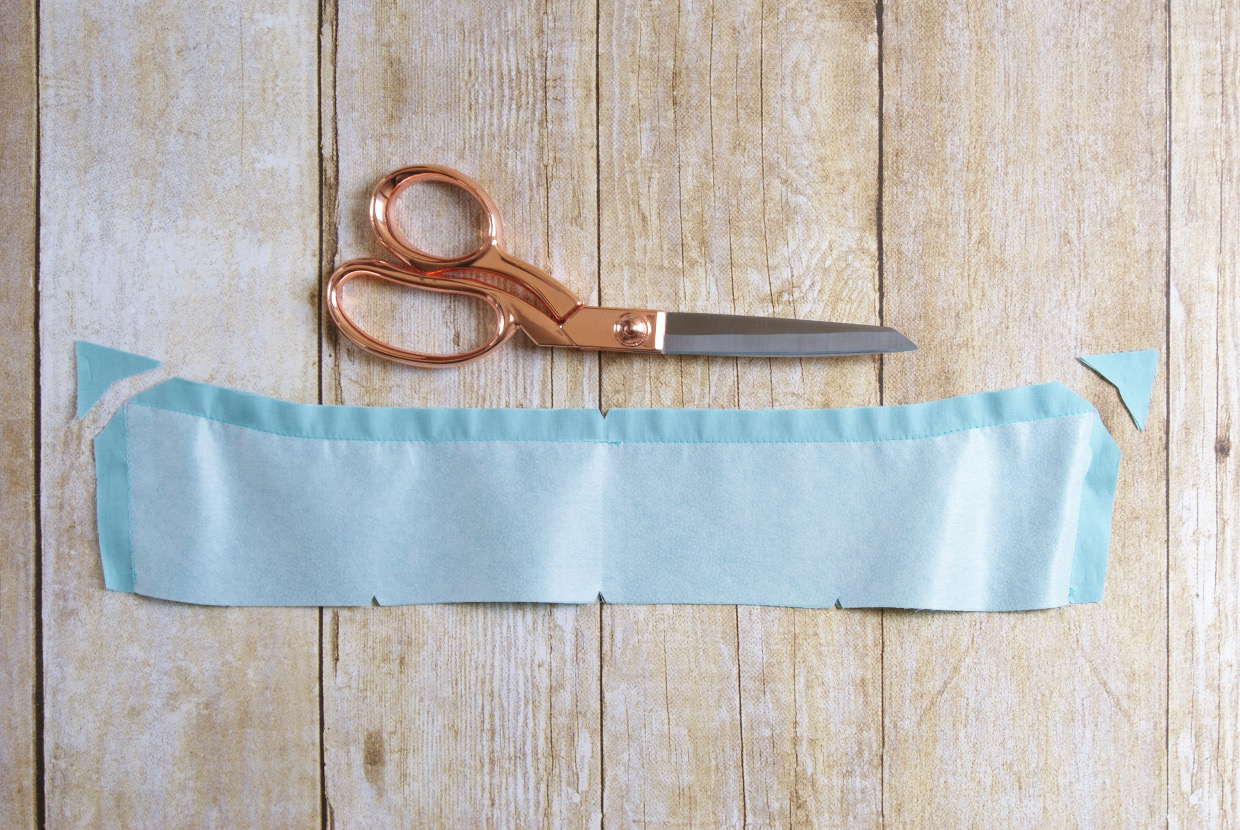
1. Cut each sleeve placket into two pieces along the cut line. Baste the outer edge of each sleeve placket piece with a 1/4” seam. Using the basting stitches as a folding guide, fold and press the fabric to the wrong side along the basting stitches.
NOTE: If you want to swap out the smaller portion of the sleeve placket for a contrasting color or print, here is your chance!
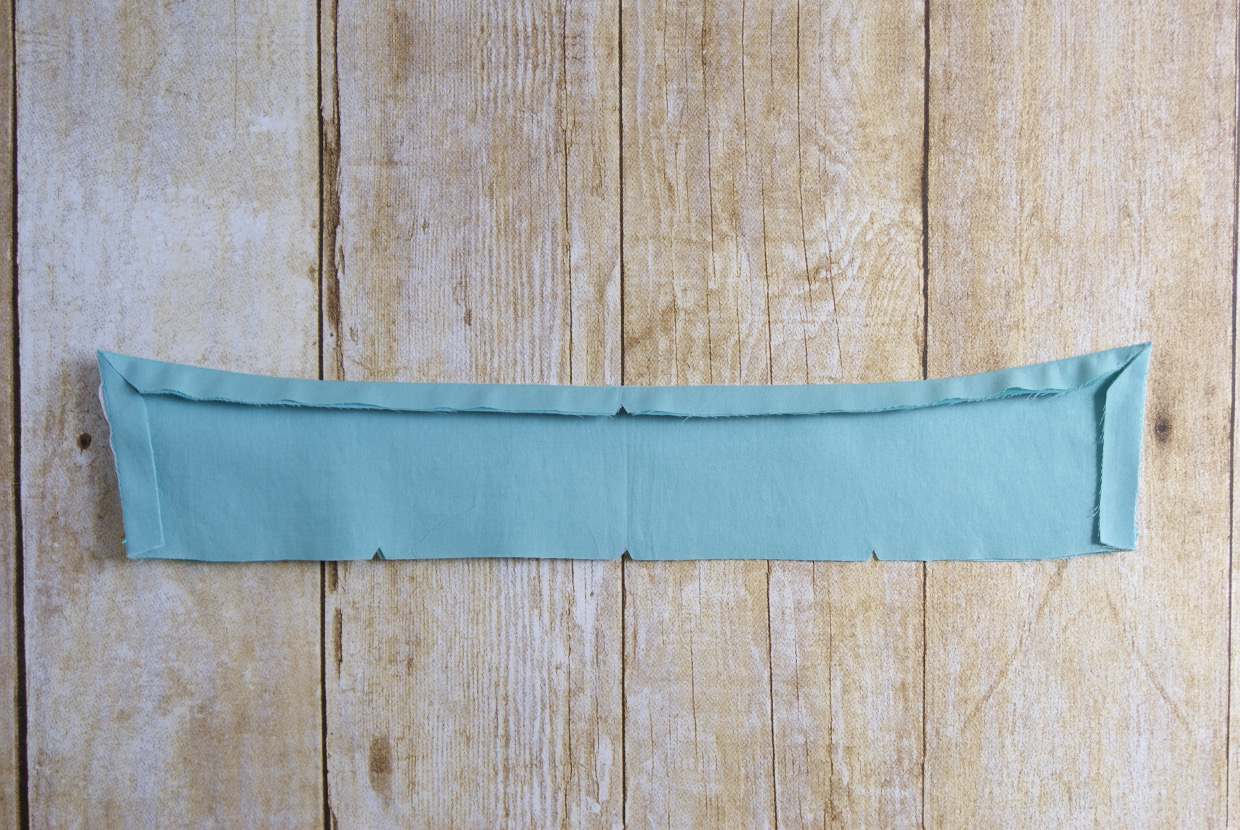
2. Turn the plackets over and draw a line 3/8” from the top edge with tailor’s chalk or a water-soluble fabric-marking pen.
From Liesl: I like to sew this placket with the placket line already cut so I can use the seam gauge on my sewing machine to accurately stitch the 1/4″ seams, but if you’ve ever sewn our Oliver + S Jump Rope Dress you know it’s OK to sew the placket before cutting as well. Do whatever you’re more comfortable with.
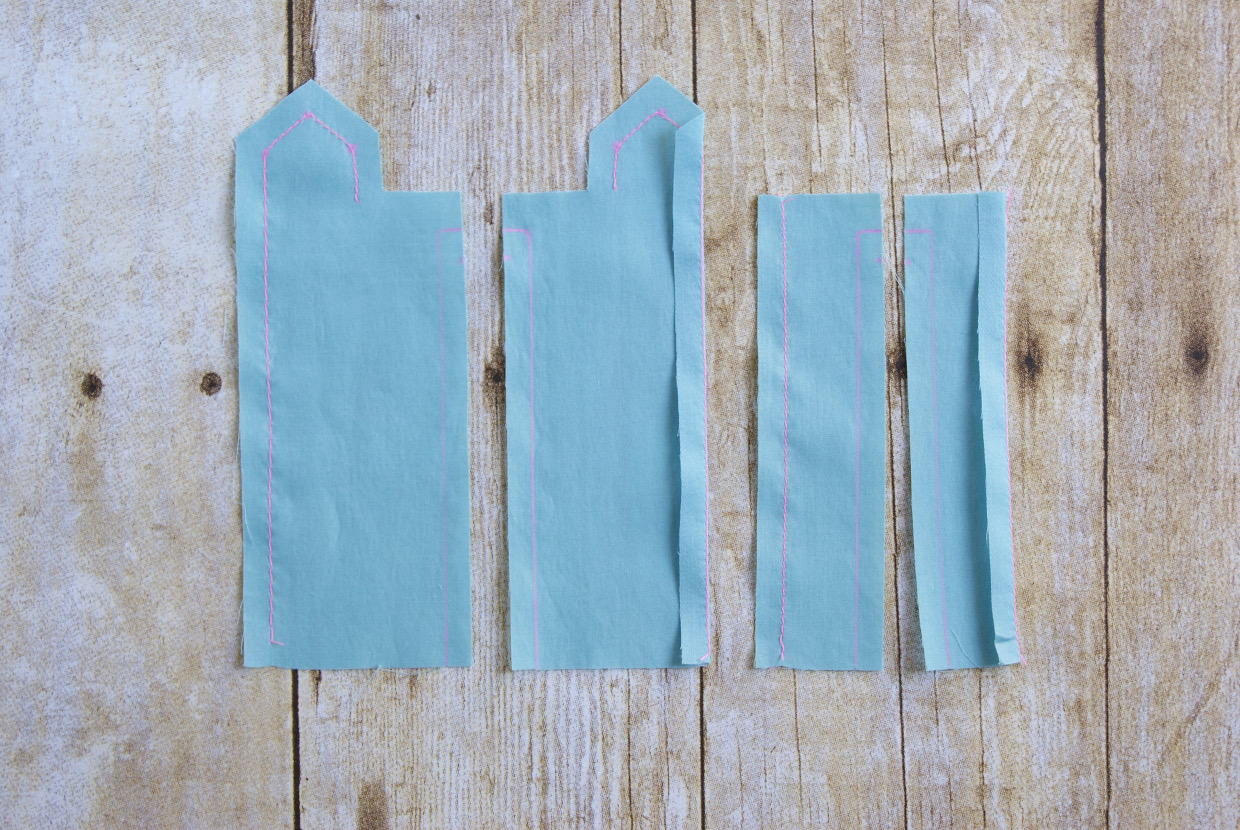
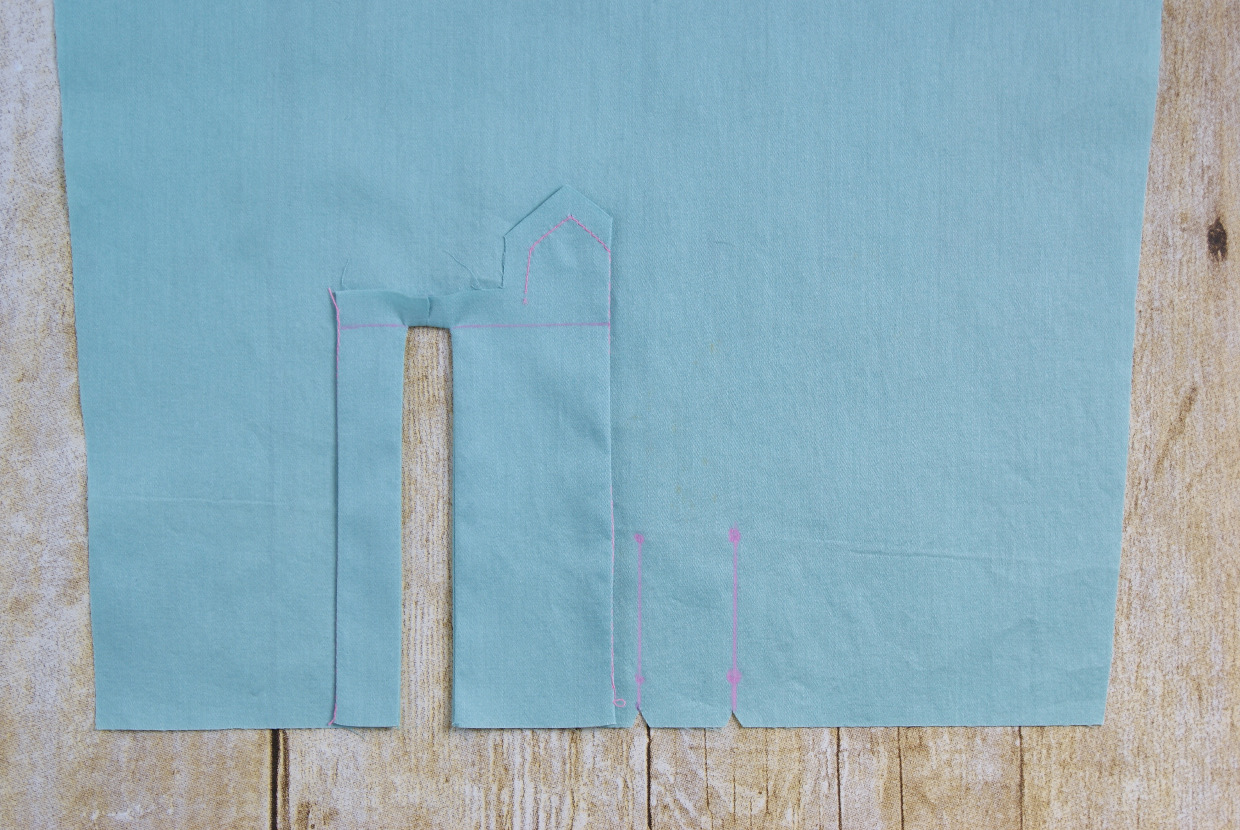
3. Transfer the placket cut line and pleat lines to the right side of each cut sleeve piece. Cut along the placket cut line to the dot.
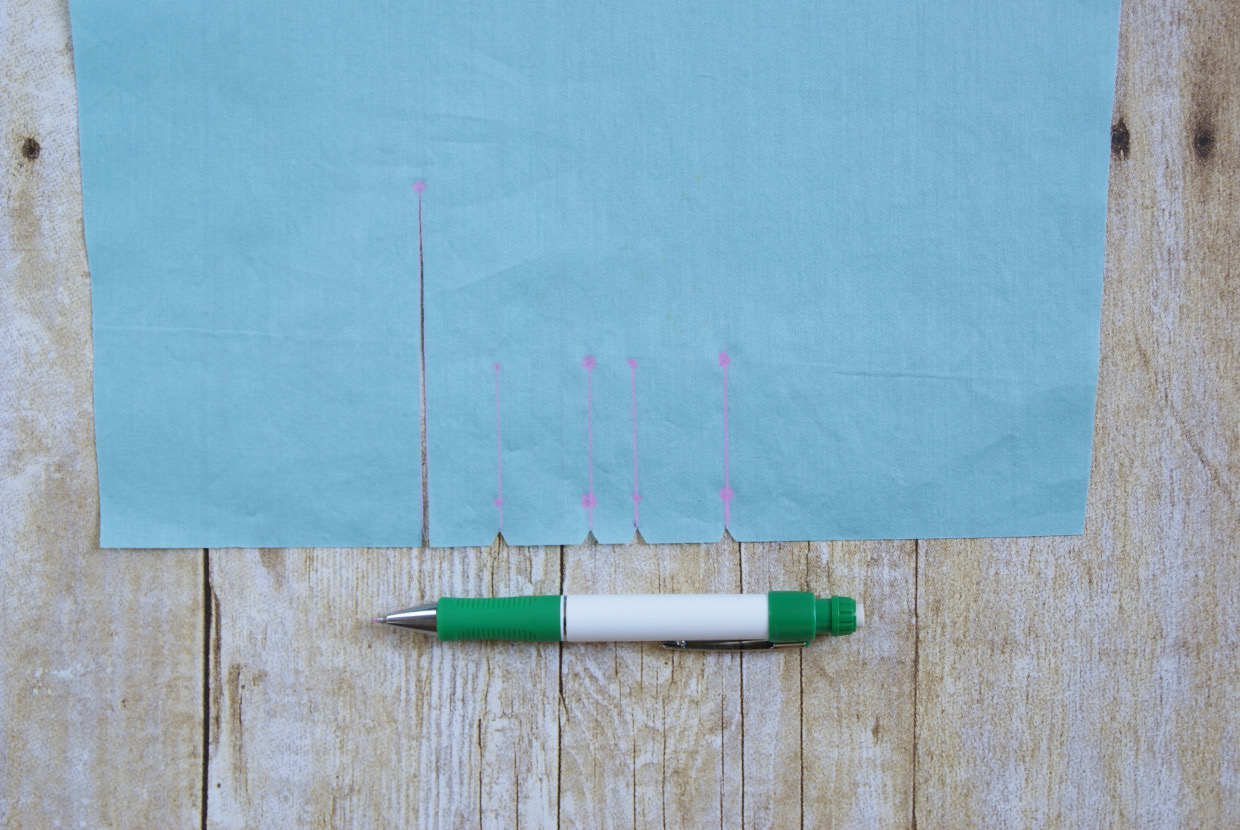
4. Pin the right side of one set of sleeve plackets to the wrong side of one sleeve, positioning the smaller placket piece on the narrower side of the sleeve and the larger placket piece on the wide side of the sleeve. Stitch the opening with a 1/4” seam, following the markings you transferred from the pattern pieces to pivot and stitch across and then back down the other side.
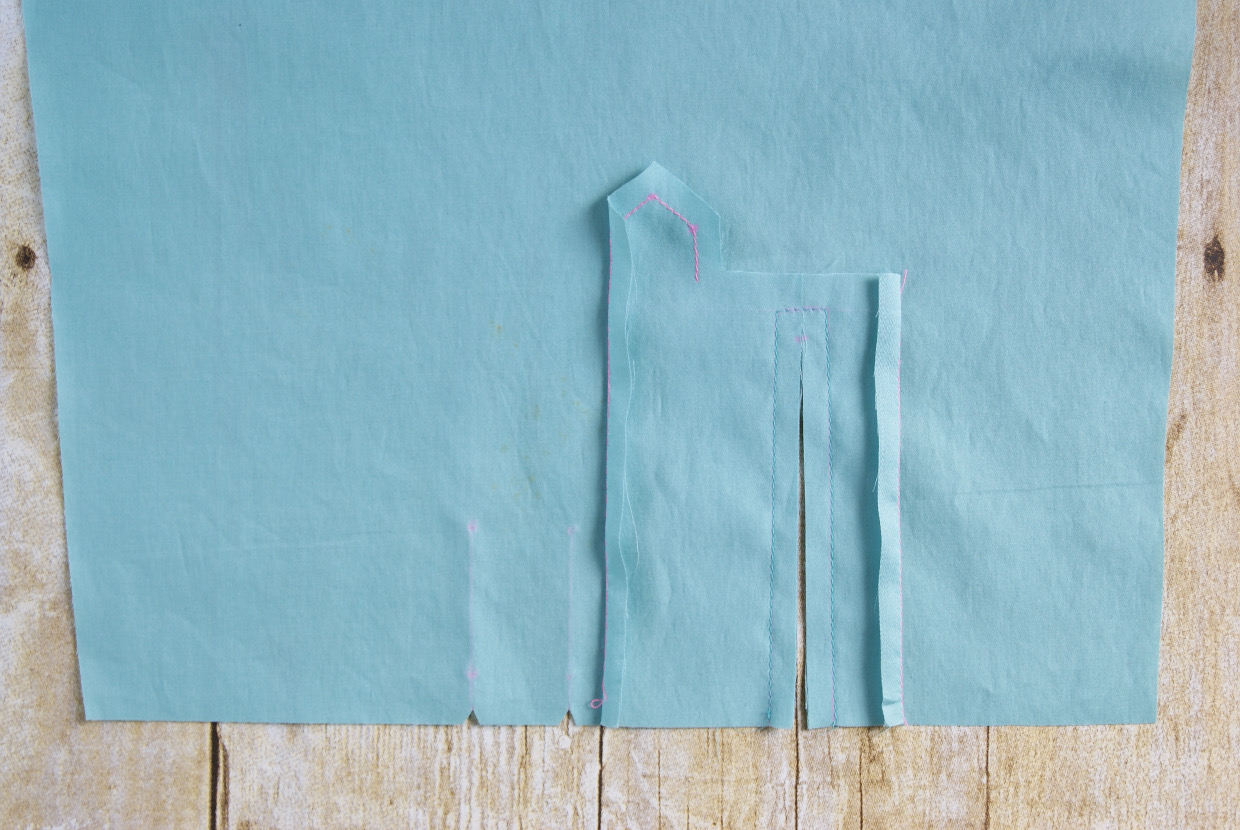
5. Clip from the end of the placket cut line (the dot) to the corners, cutting as close to the corners as possible. Don’t be shy here; it’s better to clip very close than not close enough.
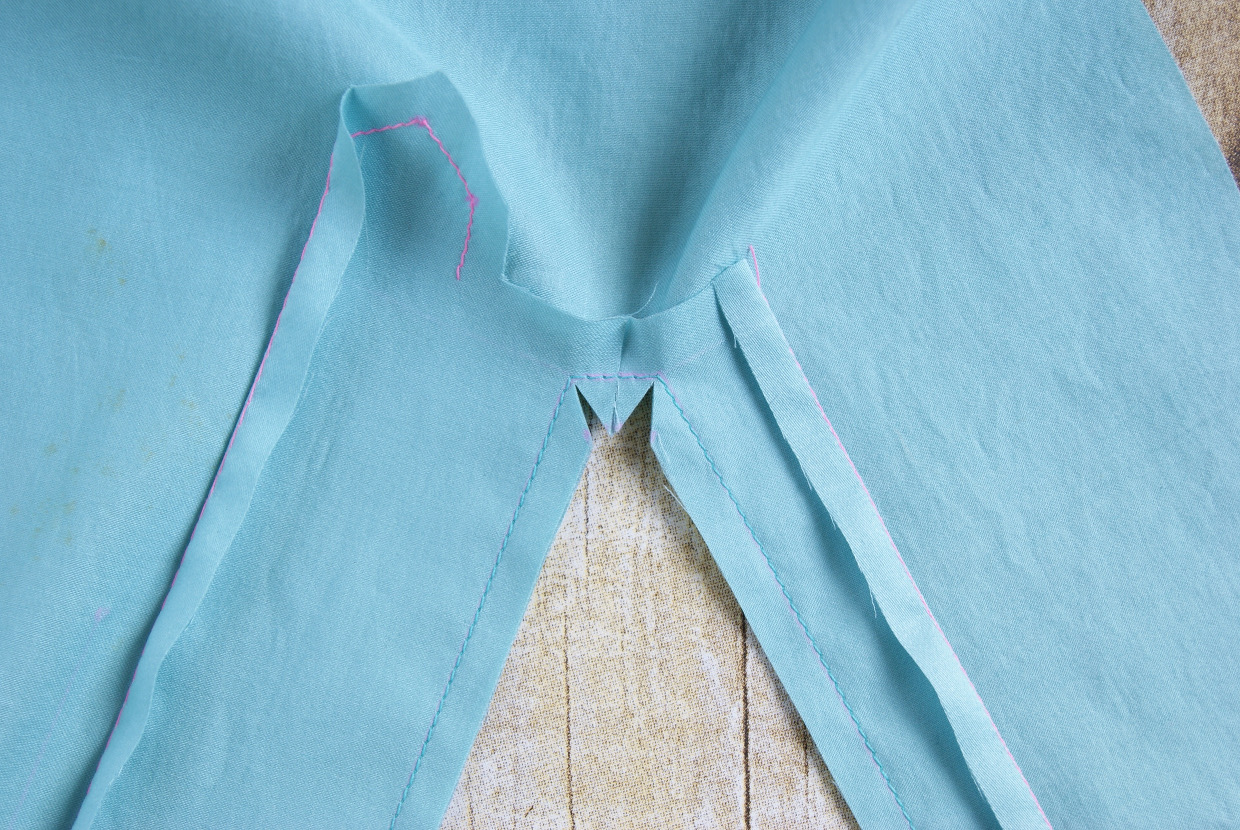
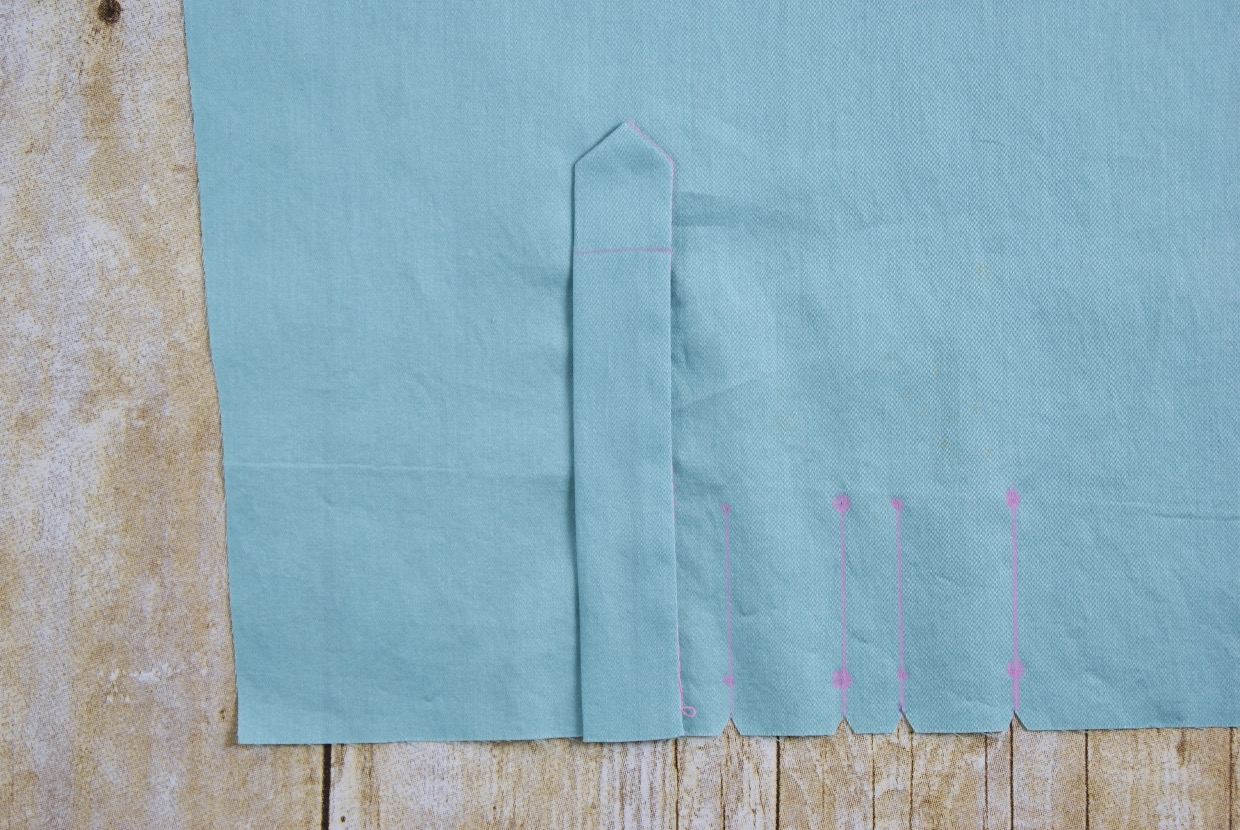
6. Turn the placket through the cut to the right side of the sleeve and press the plackets and seam allowances away from the sleeve. Press the small seam allowances at the top of the opening up. You’ll be working with the narrower side of the placket first, so flip the wider side of the sleeve and the larger placket out of the way for the time being.
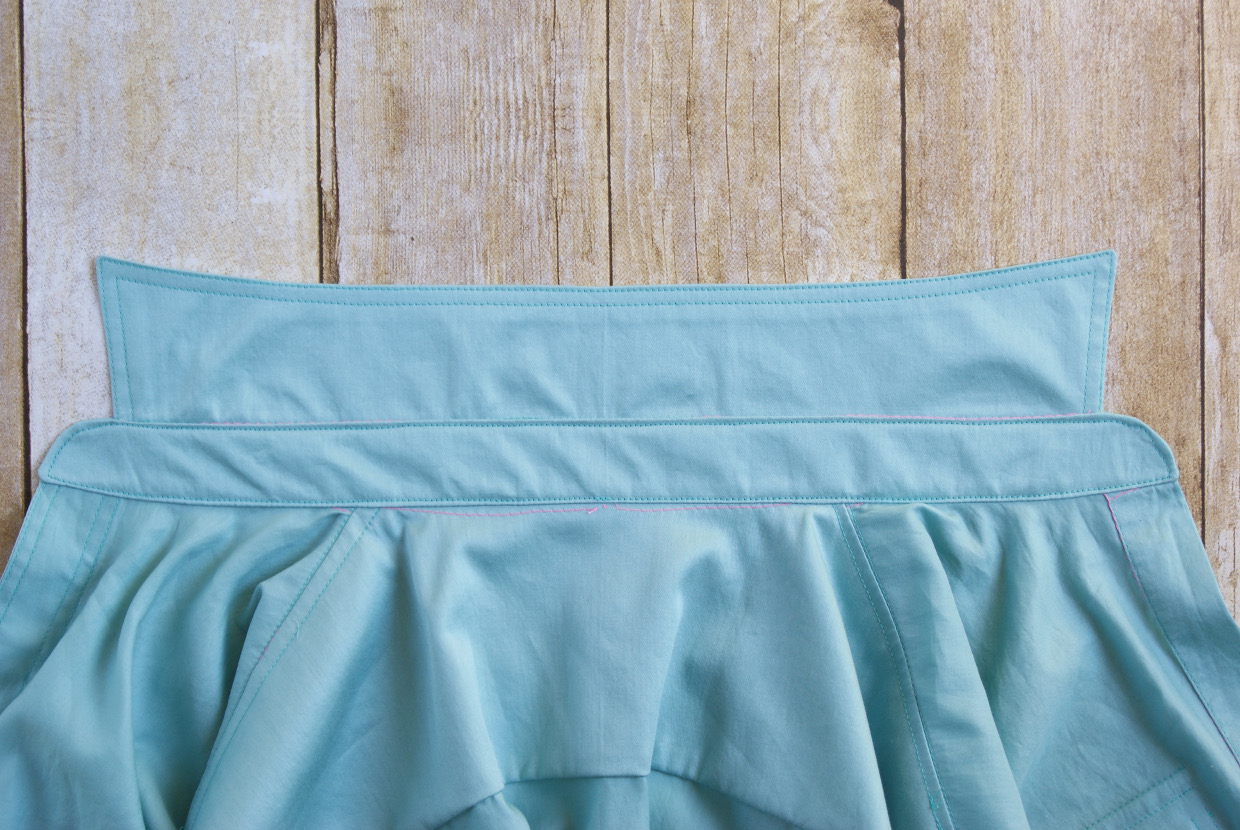
7. Fold the long, folded edge of the smaller placket in half to cover the stitching line. Edgestitch the innermost folded edge, stopping just above the line you drew on the right side of the placket. That half of the placket is finished!

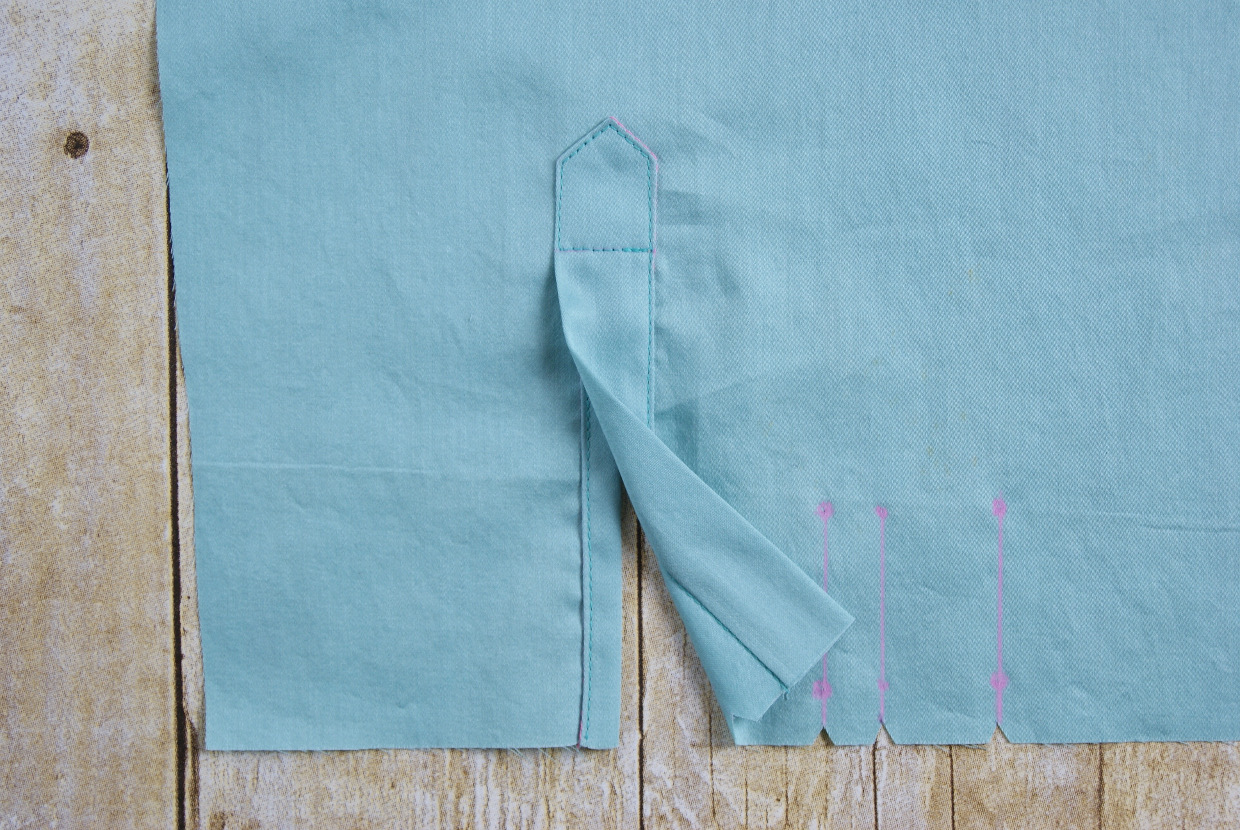
8. Now working with the larger placket, fold it in the same way as the smaller placket so the pre-folded edge covers the stitching line. Finger-press the other edges of the placket along the 1/4” basting stitched to form a sharp point at the top of the placket. Pin or glue the top of the placket in place, then edgstitch, beginning at the open edge and stitching across at the level of the line you dress on the shirt. Pivot and continue to edge stitch around the placket to finish it, as shown in the written instructions.

9. Repeat steps 4-8 to attach the other sleeve placket to the other sleeve.
From Liesl: There you go! Not only did you finish the shirt collar, but you’ve got a head start on the sleeve, which we’ll finish tomorrow. You’re nearly finished, and you’ve got some nice details to show for your efforts. We’ll see you shortly for the big finish.
Well, here we are on the very last day of the Classic Shirt sew-along! Today, we’ll finish up, and I think you’ll notice that some of these steps seem very familiar. Sewing the cuffs will feel a lot like sewing the collar band, so you’re more than ready to tackle these last few details. Here’s Rachel.
Sew the Sleeves
1. To form the pleats on the sleeve, fold the sleeve along the line with the large dots, wrong sides together, and match the crease to the line with the small dots. Baste the pleats to the bottom edge of the sleeve with a 3/8” seam to hold them in place.

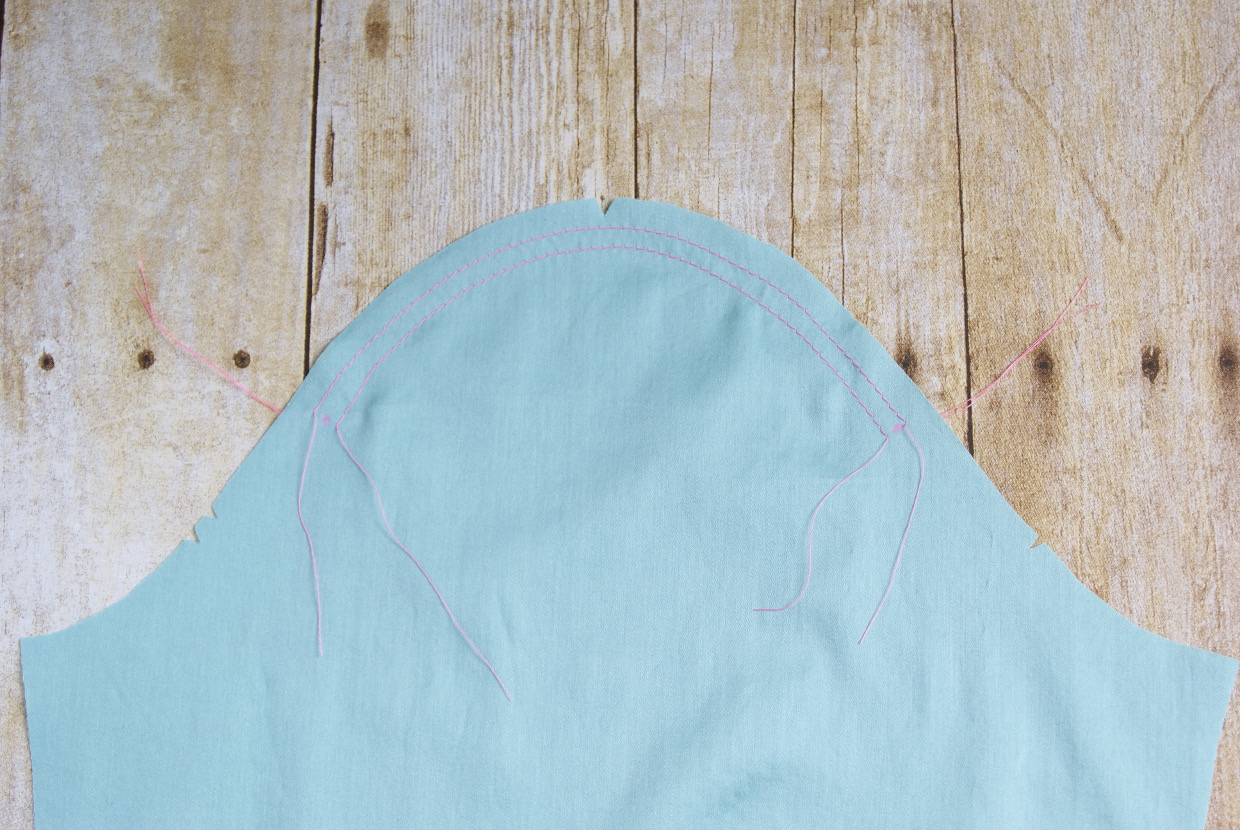
2. Sew a row of gathering stitches 3/8” from the raw edge of the cap of the sleeve, starting and stopping at the dots and leaving thread tails several inches long on both ends of the gathering stitches. Sew a second row of gathering stitches 1/4” below the first row (5/8” from the raw edges). (Note, too, that the sleeve cap also has a center notch, which will align with the notch on the shoulder seam when you sew the sleeve to the armhole in the next step.)

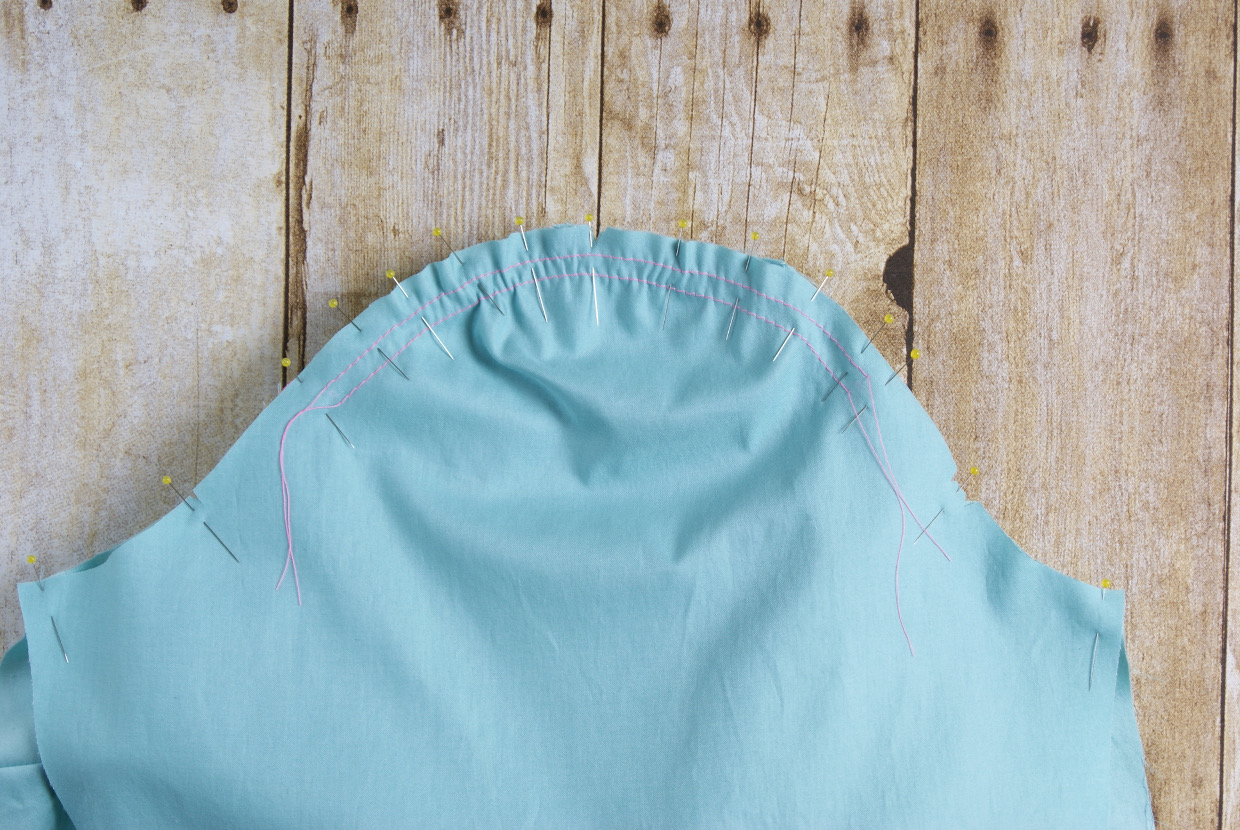
3. Align and pin the sleeve to the shirt’s armhole, with right sides together and matching the sleeve and armhole notches. Pull the thread tails on the gathering threads to help the sleeve fit the armhole, adjusting the resulting ease evenly across the top of the sleeve so there are no pockets and the sleeve cap is smooth. Then finish pinning the eased top edge of the sleeve to the armhole. Stitch the sleeve to the armhole with a 1/2” seam. Press the seam allowances toward the neckline, and finish the seam allowances together using your preferred method.
4. If you like, topstitch the armhole seam allowances 1/4” from the seamline, starting at the lower edge of the yoke on the back of the shirt and ending 2” in front of the shoulder seam on the front of the shirt, pivoting to end the stitches at the sleeve seam. Pull the thread tails to the inside and tie them off to give the sleeve a professional finish.

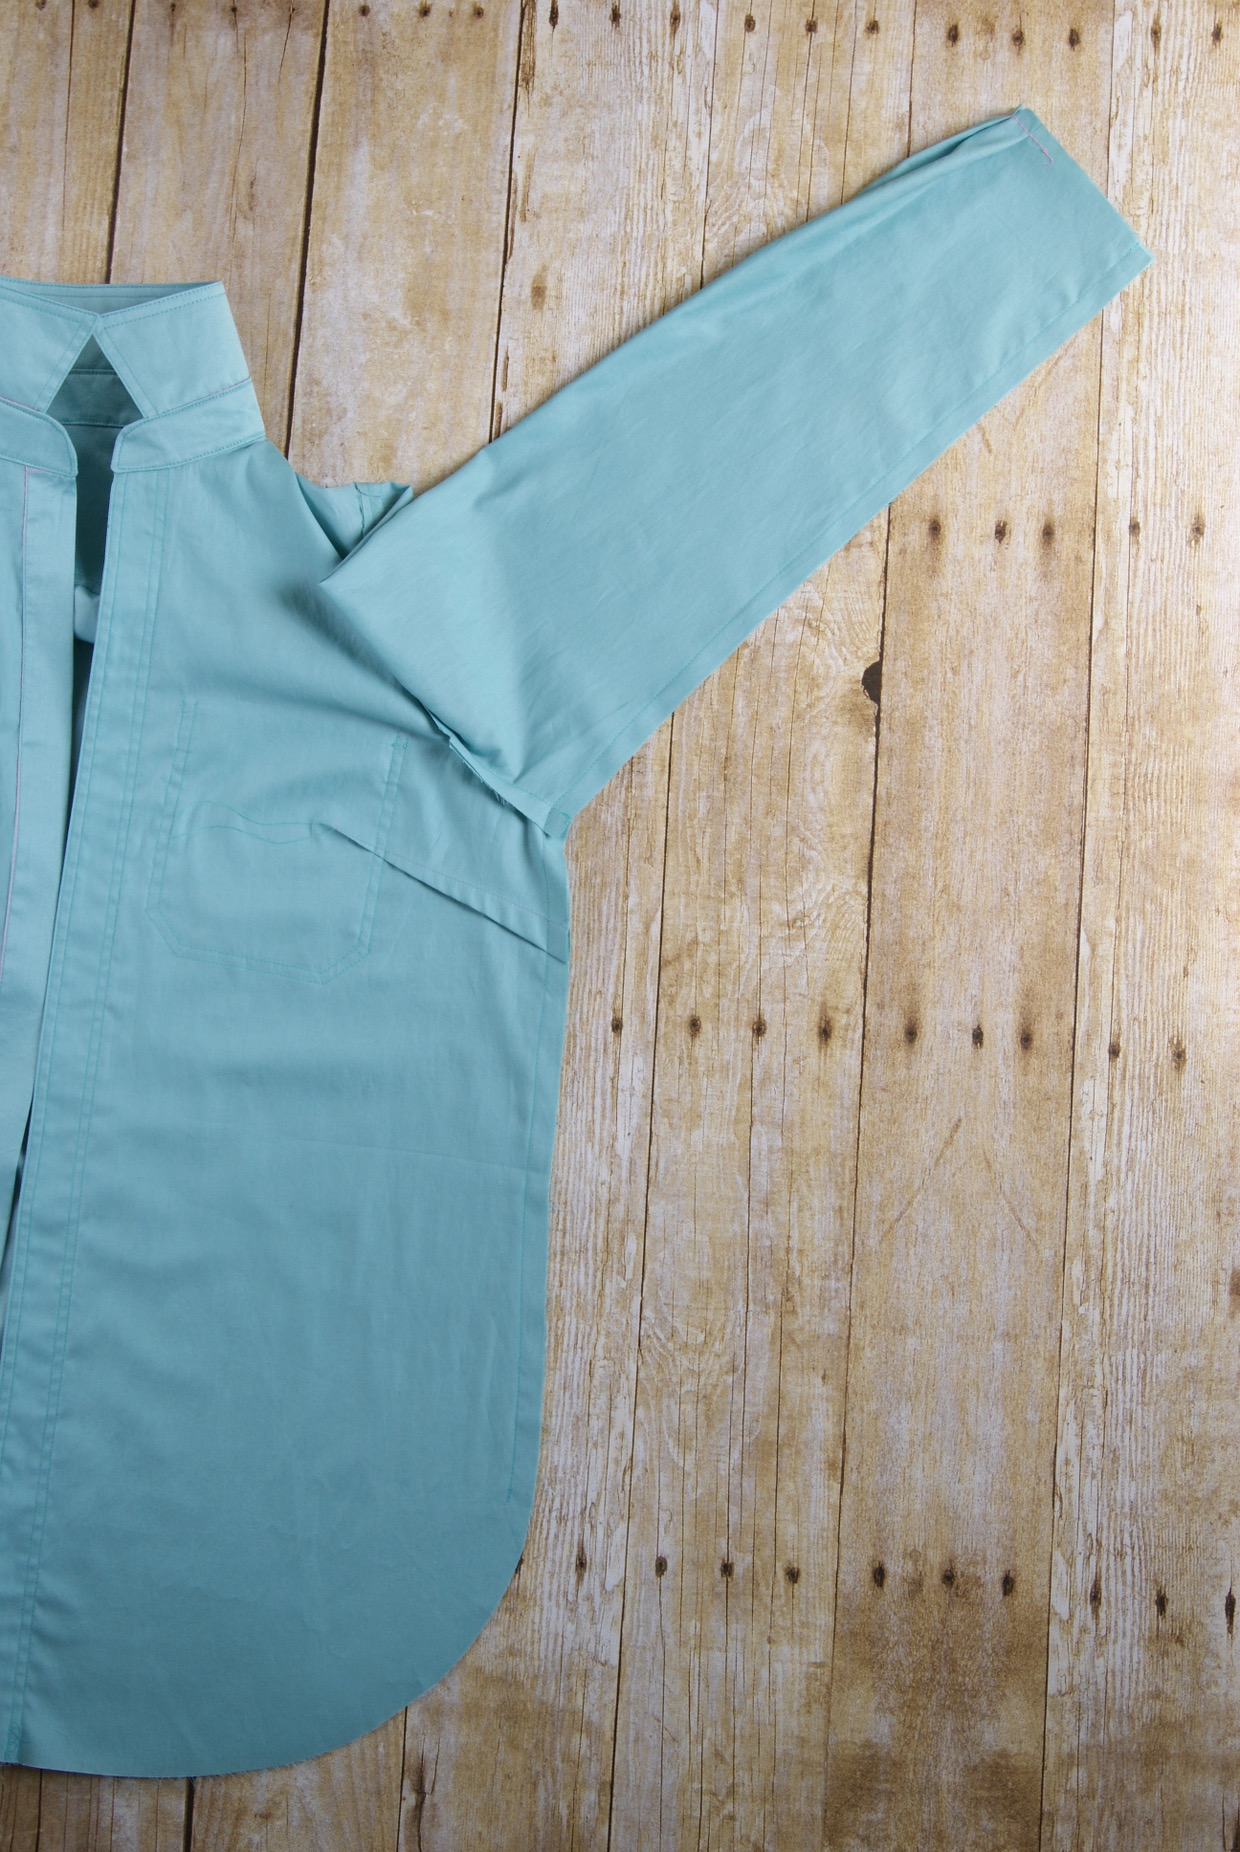
5. Repeat steps 1-4 to prepare and attach the second sleeve.
6. Pin the shirt front and shirt back together, with right sides facing and edges aligned; pin the sleeve sides, matching the underarm seam. Stitch each side and sleeve seam with a continuous 1/2” seam, starting and backstitching or lockstitching at the sleeve edges and stopping and backstitching or lockstitching at the dot you transferred from the pattern onto the shirt front/back.
7. Clip the seam allowances of the front shirt at an angle to the dot, taking care not to clip into the stitches itself. Then press the seam allowances toward the shirt back and finish them together, only to the dot, using your preferred method. Edgestitch or topstitch the side seam with a 1/4” seam, if desired. Or you might like to finish the side seams with a faux flat-felled seam if you prefer. (For details about the faux flat-felled seams visit the tutorial.)
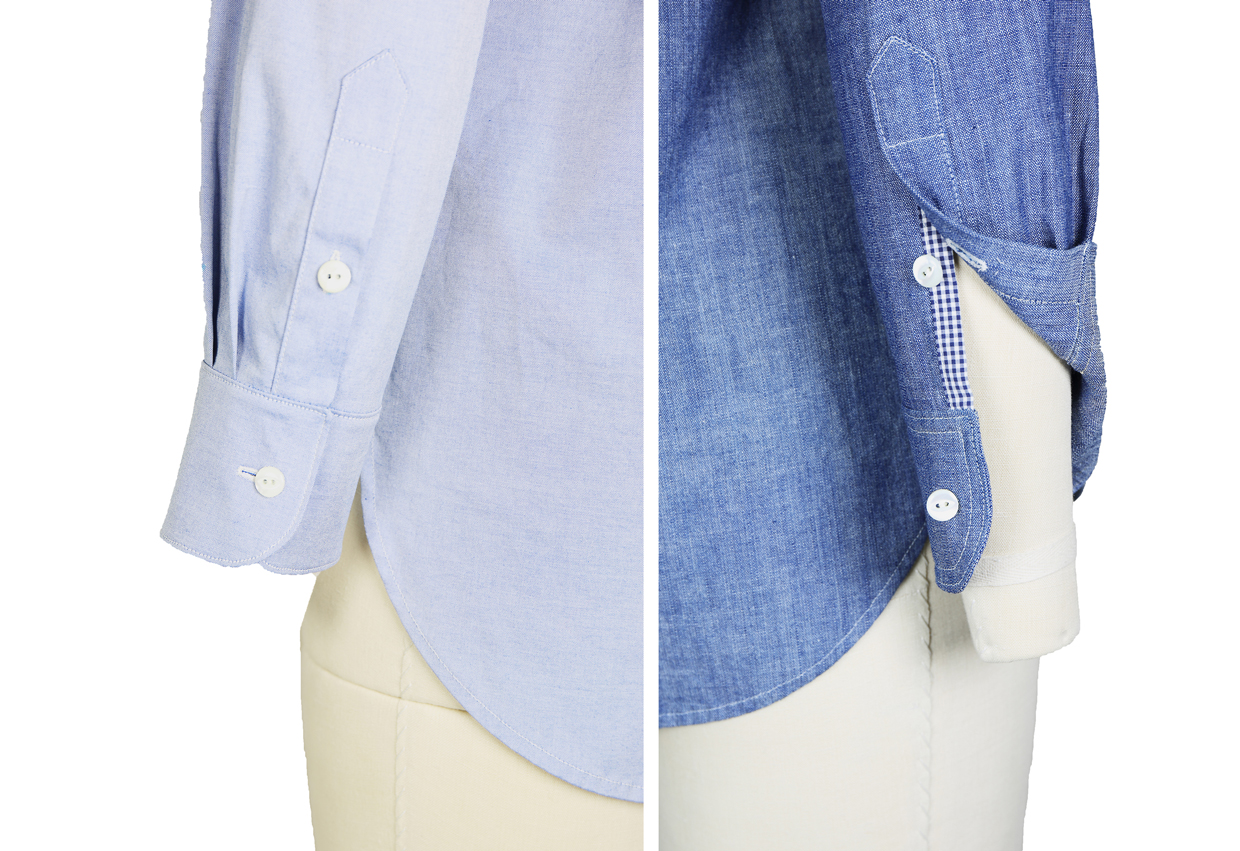
Sew the Cuffs
1. Follow the manufacturer’s instructions to fuse or baste the cut interfacing to the wrong side of the two sleeve-cuff pieces. Stitch a row of basting stitches 1/2” from the long straight edge on the two sleeve-cuff-facing pieces. You’ll use this basting as a folding guide later on.

2. Pin one interfaced cuff to one sleeve, with right sides together, aligning the raw edges and notches and matching the dots on the cuff to the edges of the finished sleeve plackets. Stitch the cuff to the sleeve with a 1/2” seam, starting and stopping precisely at the dots (the ends of the placket) and backstitching or lockstitching at both ends.
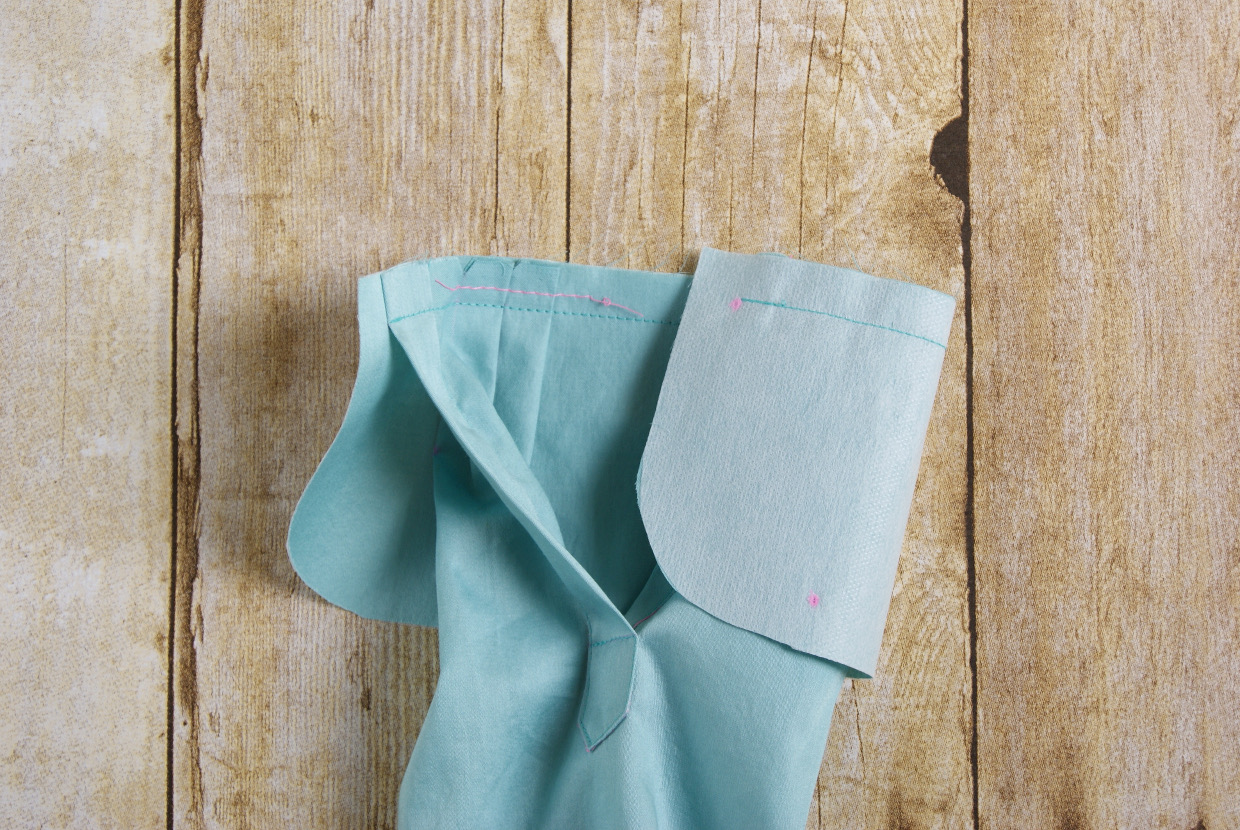
3. Trim the stitched seam allowances to 1/4” and press the cuff and seam allowances away from the sleeve. Pin one cuff facing to the interfaced cuff, with right sides together and raw edges and notches aligned. Note that the cuff facing is shorter then the cuff itself, which will cause the cuff to curve gently when it is finished. Stitch the top edge of the cuff between the dots with a 1/2” seam, stretching the cuff facing as you sew and backstitching or lockstitching at both dots.

From Liesl: Here is the spot that will feel familiar after having sewn the collar band. Again, insert a pin through the cuff at the end of the sleeve placket before you roll the placket out of the way and you’ll get a perfect edge. Finishing the cuff will seem a lot like finishing the collar, too!
4. As you did with the collar band, roll the edges of the sleeve placket out of the way so the ends of the cuff can be stitched. Then, one end of the cuff at a time, unfold the pressed stitched cuff seam allowance so you can pin the two cuffs with right sides together at the sleeve edge of the cuff. Re-stitch the last 1” of the cuff, then pivot at the dot (precisely at the end of the sleeve placket) and sew the curved portion of the sleeve cuff, backstitching or lockstitching once you’ve reached the dots where the cuff and cuff facing are sewn together.
5. Trim the stitched seam allowances to 1/8” and turn the sleeve cuff right-side out, gently pressing the edges and rolling the seam slightly to the inside of the cuff so it won’t show on the finished garment. Finger-press the cuff facing along the basting line and pin the folded edge so it covers the seamline. Pin or glue the folded edge, and edge stitch the cuff, catching the folded edge of the cuff in the seam. Edgestitch the rest of the cuff and add a row of 1/4” topstitching if desired.
6. Repeat steps 2-5 to prepare and attach the other sleeve cuff.
Hem and Finish the Shirt
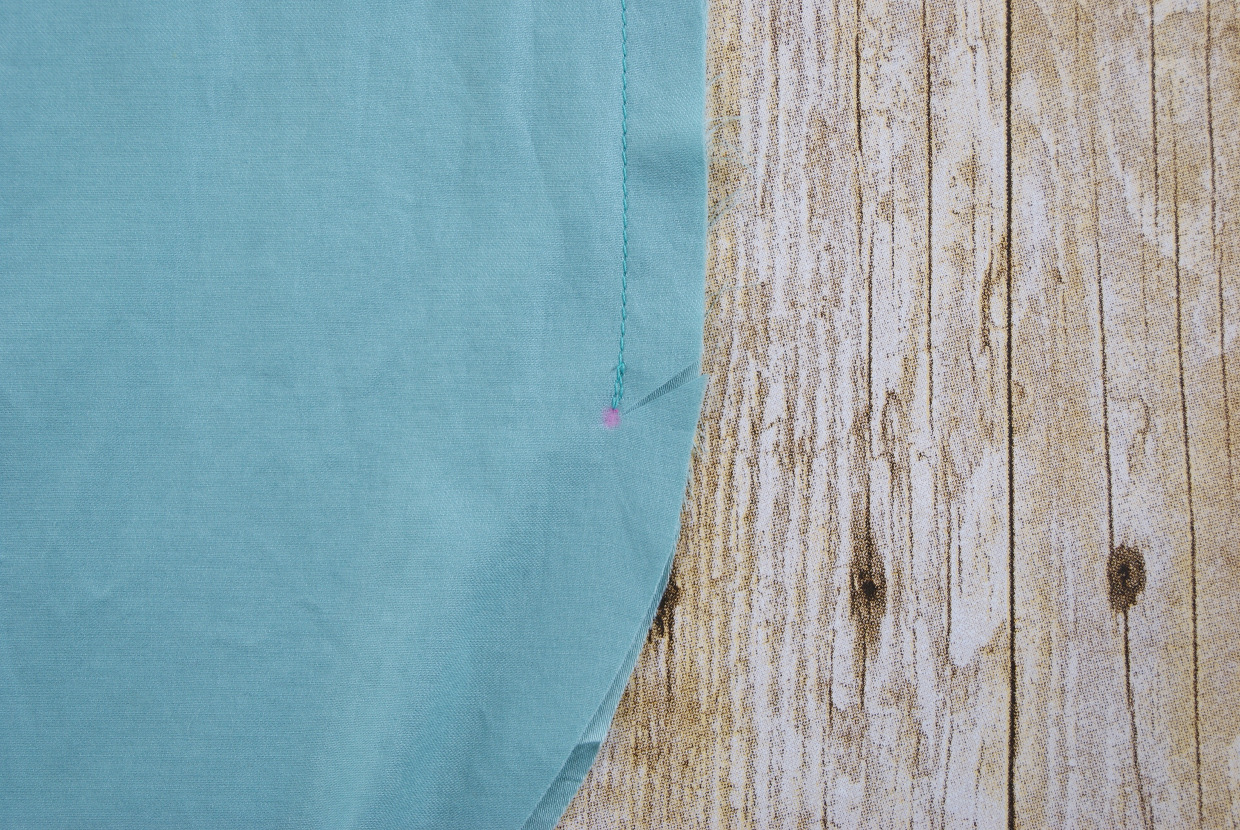
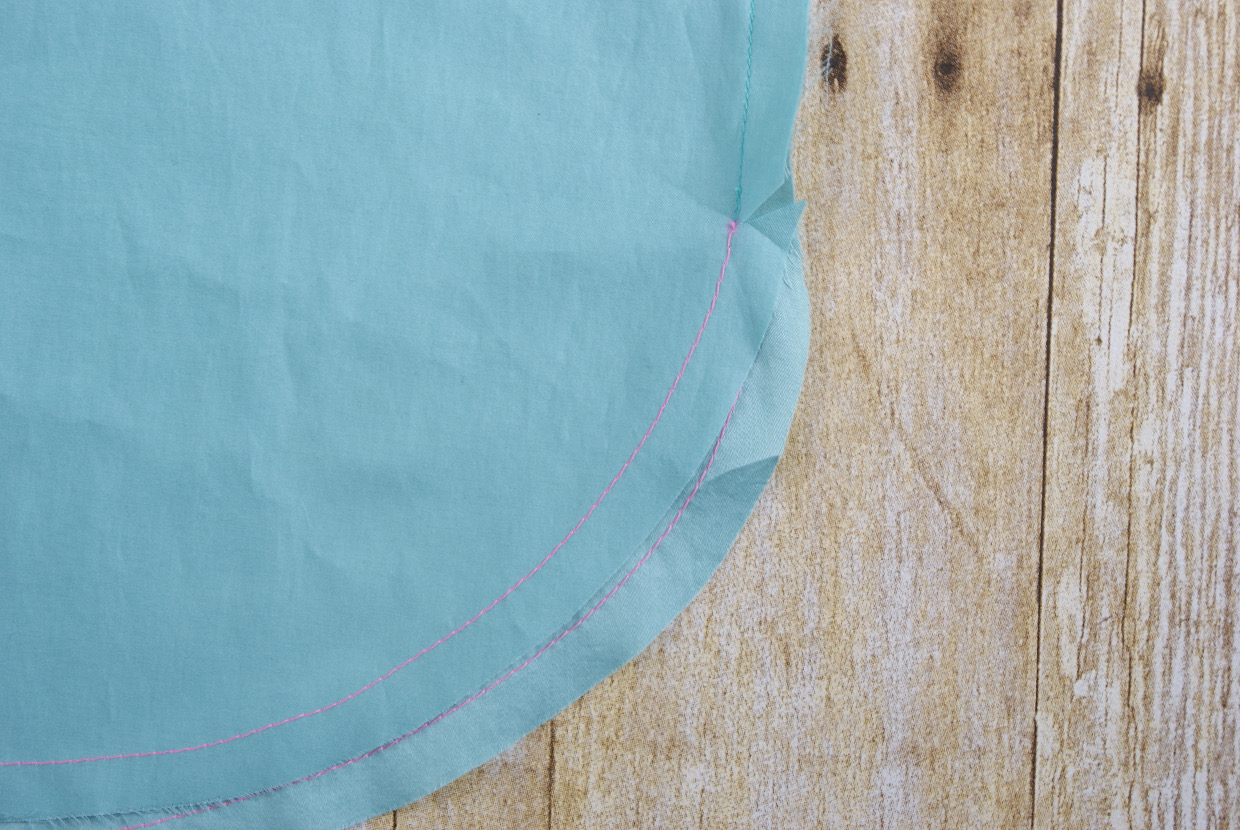
1. For the front hem, sew a line of basting stitches 1/2” from the shirt’s raw bottom edge on each shirt front, ending at the dots at the side seams. Repeat this process for the back hem, stitching from side seam to side seam. Use the basting stitches as a folding guide: first press the raw edge of the fabric to meet the basting stitches, then fold and press again along the basting stitches so the raw edges are enclosed. Edgestitch the innermost fold to finish the hem, easing in the curved edges of the fabric as you stitch.

2. At the corners, you might like to stitch a small triangle or a barrack to reinforce the shirt at the join. (Visit the Oliver + S blog for other finishing tips and tricks.)

3. Sew the front placket buttonholes and buttons as marked on the template, sewing the buttonholes on the wearer’s right placket and the buttons on the wearer’s left side.
Sew buttons and buttonholes on the sleeve cuffs and the sleeve plackets as well, following the markings from the sleeve cuff and placket templates for placement.
Add buttons to the chest pockets for View B as well, using the buttonholes as a guide for the placement of the buttons.
4. Remove any visible basting stitches and you’re finished!
From Liesl: Well done, everyone! I can’t wait to see how your finished shirts look. Now it’s time to share what you made! Post photos to our Liesl + Co. Flickr group or tag them #classicshirtpattern on Instagram. And then make sure to add them to the linky party here so everyone can see. Thanks for participating, and let us know how it went!
I couldn’t wait to start (novice sewist) and should have. I think I’ll be spending some time with my seam ripper this week!
Oh no! What happened?
Please help – I cut the set in placket from View A which is 1 1/4″. Then I stitched my basting stitch 1/2″ from the edge of the placket. That leaves me with 3/4″ on the other side of the stitching. Then, I need to fuse a 1″ strip of interfacing so that it sits along the edge of the basting stitch. I only have 3/4″ of space to fuse a 1″ piece of interfacing. I can’t figure out what I am doing wrong – the math isn’t working out.
Kelly, once you remove the 1 1/4″ piece, you discard it (put it in your fabric scrap basket). Then take pattern piece #16 called the “front button placket” and use that. It’s approximately 2 1/8″ wide. Hope that helps.
Ooooh! 🙂 Thank you for clarifying!
Oh my goodness! I couldn’t figure it out either so I winged it. That’s where my mistake is. So do I rip it out or try to work with it? I have the collar on.
I had the exact same problem too. I knew I was doing *something* wrong as it said the placket would be longer and should be cut. And, I thought, if I cut the 1.25″ from the front of the shirt how could it be longer?!
I did not see pattern piece #16 indicated in the pattern instructions. It says “Sew a row of basting stitches 1/2″ from one long edge of the CUT PLACKET PIECE.” (my emphasis). The one we were just instructed to cut. Hmmmm…. Glad for this blog or I suspect this would not turn out based on the written instructions.
Wow. THAT CLARIFICATION IS CRUCIAL! THANKS!!!! That instruction about the cut off piece is a huge fuzzy spot, as one year later, here I am checking on that same problem. Might be a good idea to edit to clear that up, Liesl folks, since I have been hyper-vigilant and still ended up as baffled as all the other commenters.
Thanks so much for this sew-along. I know I will learn a lot. I had been looking at the classic shirt pattern, but I hesitated to tackle it. This gave me the boost I needed. I’ve finished Days 1 & 2, and now I’m working on the yoke. So far, it looks good, but expect the most problems from the sleeves and collar.
Looking forward to getting started once I get this pattern taped together!
Day 2 is done! Used the pleated pocket, and it took a bit of fiddling. It turns out that Double Gauze is quite bulky when the pleat is added and then the top of the pocket is folded over twice. The plain pocket would have been a better choice, but I love the pleat!
Oh, that’s true! Double gauze is quite bulky. And since it’s not very crisp, it the pleats will be quite soft. But I bet it will look great when it’s finished!
I was hoping you were going to say a few words about choosing your size, especially for those of us who are small in frame but large in bust. I am planning to muslin a size 8 with D cup, but my high bust puts me in size 4 and I actually have an F cup, so … (I KNOW. IT’S RIDICULOUS.)
Look at the finished measurements for the different cup sizes.
My high bust makes me an 8 and full bust means a D cup, that’s what I made and it is perfect. It might be a bit big on you if your high bust is a size 4.
Thanks Lisa! The problem is that my cup size is much bigger than a D. I think technically I should be doing an FBA on a size 4, but that’s annoying. I’ll see how the muslin fits, maybe I can go down a size!
What would happen if I left out the collar interfacing? I know it helps keep the shape, but it seems very bulky and stiff with the interfacing — even using featherweight.
Oooo, I love this format with little blurbs from Liesl!
I’m not sewing along (8 3/4 months pregnant, so I’m not doing much lately) but I’m learning so much from this sew along. This collar construction method is new to me and I really want to try it. I’m looking forward to making this in a few months.
I just finished the collar and was so impressed with my work. It came out perfect! Until I realized I attached the collar upside down so the rolled under seam now faces out instead of hidden underneath! I have decided to make it an “interesting ” detail no one but me will know was a mistake. I can’t rip out all the hard work!
Thank you for this great sew along!
Just a suggestion: Is it possible link the headers in the introduction to the single days of the sew along? This would be very convenient and save a lot of scrolling down if you want to find something particular…
Great idea Susanne! Thanks for suggesting it. I’ve added those links.
I wasn’t able to join the sew-along, so I’m starting it now. For Day 1 step 3 it says trim the seam allowances, and then in step 4 it again says trim one of the two seam allowances. Is this a mistake in the instructions or am I not getting something?
HI Julia: I’m even later to the party than you are, and I am also stuck with the step 3 “sewn seam allowances” trimmed to 1/4″ and then the instruction to trim “one of the two” seam allowances” to 1/4″. I am leaning towards trimming the second one that has not been seam, just ironed over. We’ll see what happens. Clarification would be great for future sewists, as I’m about to find out for myself. . . . 🙂
I am Just about making a shirt for a male friend and this comes in handy. I love the clear instructions even for a “Dutch Housewive” lol.
I am late to the party (as usual!) but having fun sewing never-the-less! I do have a question about finishing the side seams. I have trimmed and pressed the seams, but am worried about how to get into the sleeves to sew it down. Or do I only “faux flat-fell” on the body and something else (what?) up the sleeve? Any help much appreciated, thank you!
Rebecca, I sew the entire side seam and sleeve seam with the faux flat-felled seam. I sew as far as I can, bunching the sleeve up and adjusting the fabric as I go, and then I cut the threads and finish sewing from the end of the sleeve. It can be done (even on kids’ shirts!) with a little patience.
I am looking for some guidance choosing a size to make. I need the D cup pieces. My full bust measures anywhere from 41 to 42″ depending on time of day, time of the month, how humid it is…. My high bust measures 37.5-38.5″. I noticed that there is a lot of ease built in to the pattern as well. Should I make the 12D or 14D? Or would the 10D or 16D be more appropriate?
Thanks!
I know I’m so late to this party, everyone’s gone home, but on the off chance someone circles back to these comments: I’m on my 2nd go round with this shirt and once again my collar stand is at least 3/4″ longer than the neck line. Anyone else running into this? Last time, I just trimmed one end of the stand after I attached it to the neckline before moving on to attach the collar, which went on perfectly. Any ideas what I’m doing wrong? Thank you in advance for any suggestions!
I had this problem with my first shirt so I did what you did and just trimmed the collar stand and that worked out fine. I think the confusion is coming from the placket. I’m pretty sure I did the placket wrong the first time and chopped off a piece that should have stayed on so the whole neck line was more narrow than it should have been. It worked and it fits well, so I’m happy with the shirt, but if I was going to button it all the way to the top (which I never do) it would be quite snug around the neck.
I’m part way through the second shirt and I found it worked out perfectly and I didn’t cut anything off the placket. I found the placket instructions kind of unclear with the two options. I just sort of wrangled it into submission.
I think if you made it work, then good for you!
I have found the instructions for this pattern exceptionally clear aside from one place, Like some of your other sewers, I was also stumped by the front placket. Initially, I used the cut-off piece instead of the one that I had cut from the pattern. Which is what led me to this site – to try to figure out how my math was so wrong!!! Clarification in the pattern would be a fantastic idea. Thanks for this great design, I am almost finished putting mine together.
I like this pattern very much. It’s my first shirt and it came out great. However i did have a problem with the cuffs. You say to stitch an inch of the previously sewn cuff seam allowance and then go on to stitch the curved edge to the dot on the top edge. I did that but when i turned the cuff right side out, the placket was folded over itself. I ripped out that inch of sewing to release the placket and it seemed fine. Please explain what i did wrong and why you’re doing this step. Thanks.
Hi Phyllis,
Sorry I didn’t see your comment earlier. Once a sew-along is finished it’s probably best to post questions in our discussion forums to ensure that we see it, ok?
Regarding your question, if you look in the photos for the sew-along you’ll see that, just before you stitch the ends of the placket, you roll the sleeve out of the way. that way you can stitch the end of the placket and start finishing the inside edge of the cuff. It just makes it easier, quicker, and hopefully neater. You will indeed be sewing the cuff closed for that first inch or so, but you’ve left enough room to turn the cuff right side out and then you just need to finish the opening. I hope that helps!
I’m ready to start sewing this pattern in my fashion fabric, already made a basic fitting muslin. This sew along says, “1. For the wearer’s right front placket, trim 1” from the front edge of the wearer’s right shirt front, using the marked line on the pattern piece as a guide.” The pattern instructions and marked line say 1 1/4″ should be trimmed off. Even a quarter inch difference will affect the perfect fit of the collar, so which is it please?
I purchased the Classic shirt a while ago from Fabric Mart. The other day I took the instruction sheet out and page 2 is not printed on, would you please send me a copy. of it. Thank you