Shelley is back. Last week she was here with her How to Hem Everything: Woven Fabrics post. Now she is here with her extensive tutorial that covers knit fabrics and demonstrates eight different kinds of hems you can use with them. Take it away Shelley!
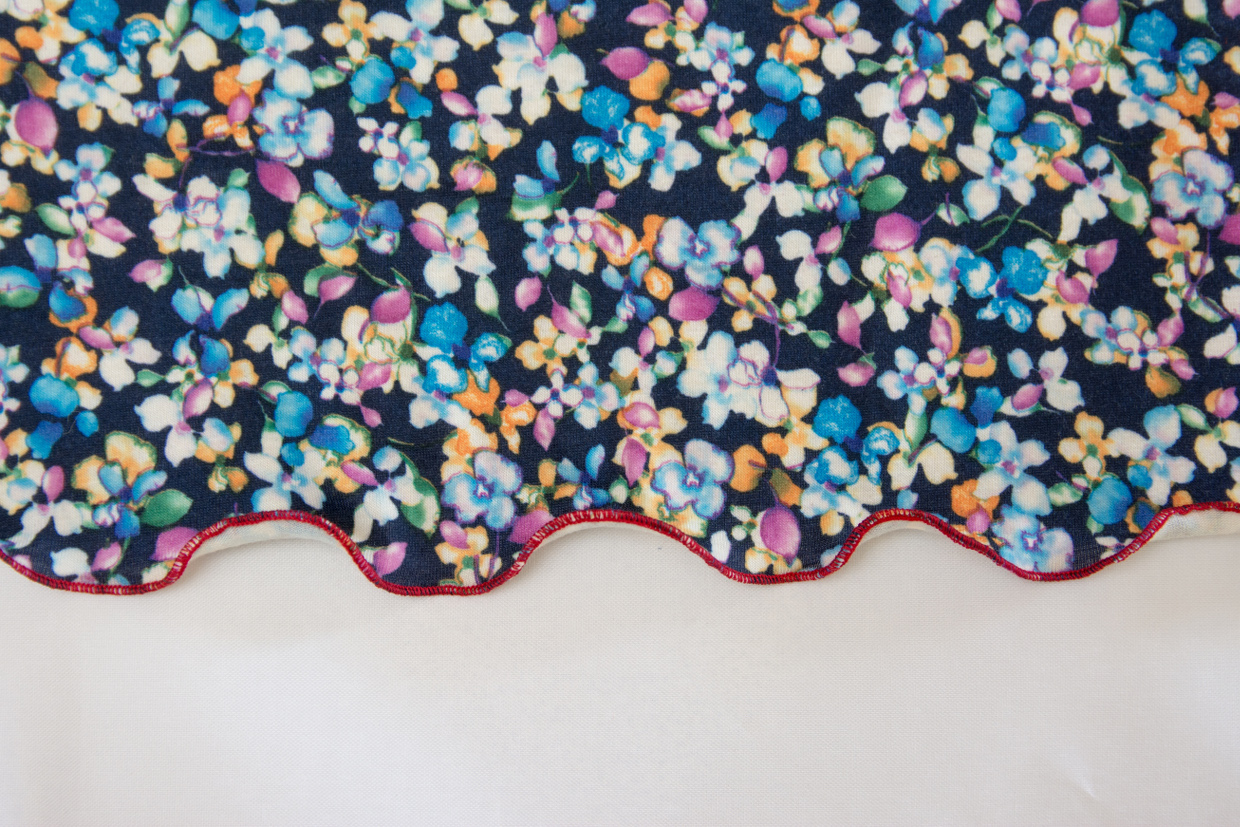
None (Raw Edge)

When to Use: You know the answer to this, right? It’s when you can’t be bothered creating a hem and know you can get away with it. However, I have some Designer Vogue patterns that call for raw, unfinished knit hems, so sometimes it can be a design choice.
For: Can it get any easier than doing nothing?
Against: Many knit fabrics will curl if the edge is raw. This may be a design choice, in which case count it as an argument For instead of Against. You need to be careful about how you finish any seams that end at the raw hem edge as they may be visible.
Tip #1: If you are going to leave your knit fabric with a raw edge, use a rotary cutter when cutting the fabric. This avoids the little jaggedy lines that can result from cutting with scissors.
Tip #2: Here’s how to avoid visible straggly ends of your serged side seams. Leave a long tail on the serger threads and tie off the threads with a single overhand knot close to the end of the stitching line. Then, thread the tails onto a large needle and pass them back under the lower looper threads of the serged seam by an inch or so. Trim the thread ends. The discussion topic for this is found here.
Single Fold – Zigzag Stitch

When to Use: A lot of the time for hemming knits.
For: Simple, easy to do with just a sewing machine.
Against: Be careful about stretching the fabric as you sew to avoid the hem growing and going all wavy. Can look a bit amateurish.
How to do: Press the seam allowance then stitch with a narrow zigzag.
There’s no need to finish the raw edge of knit fabric, but if you have a serger, then serging the edge before you press it up and stitch the hem will help the hem to lay flat. This is especially true of those notoriously curly edged cotton spandex fabrics.
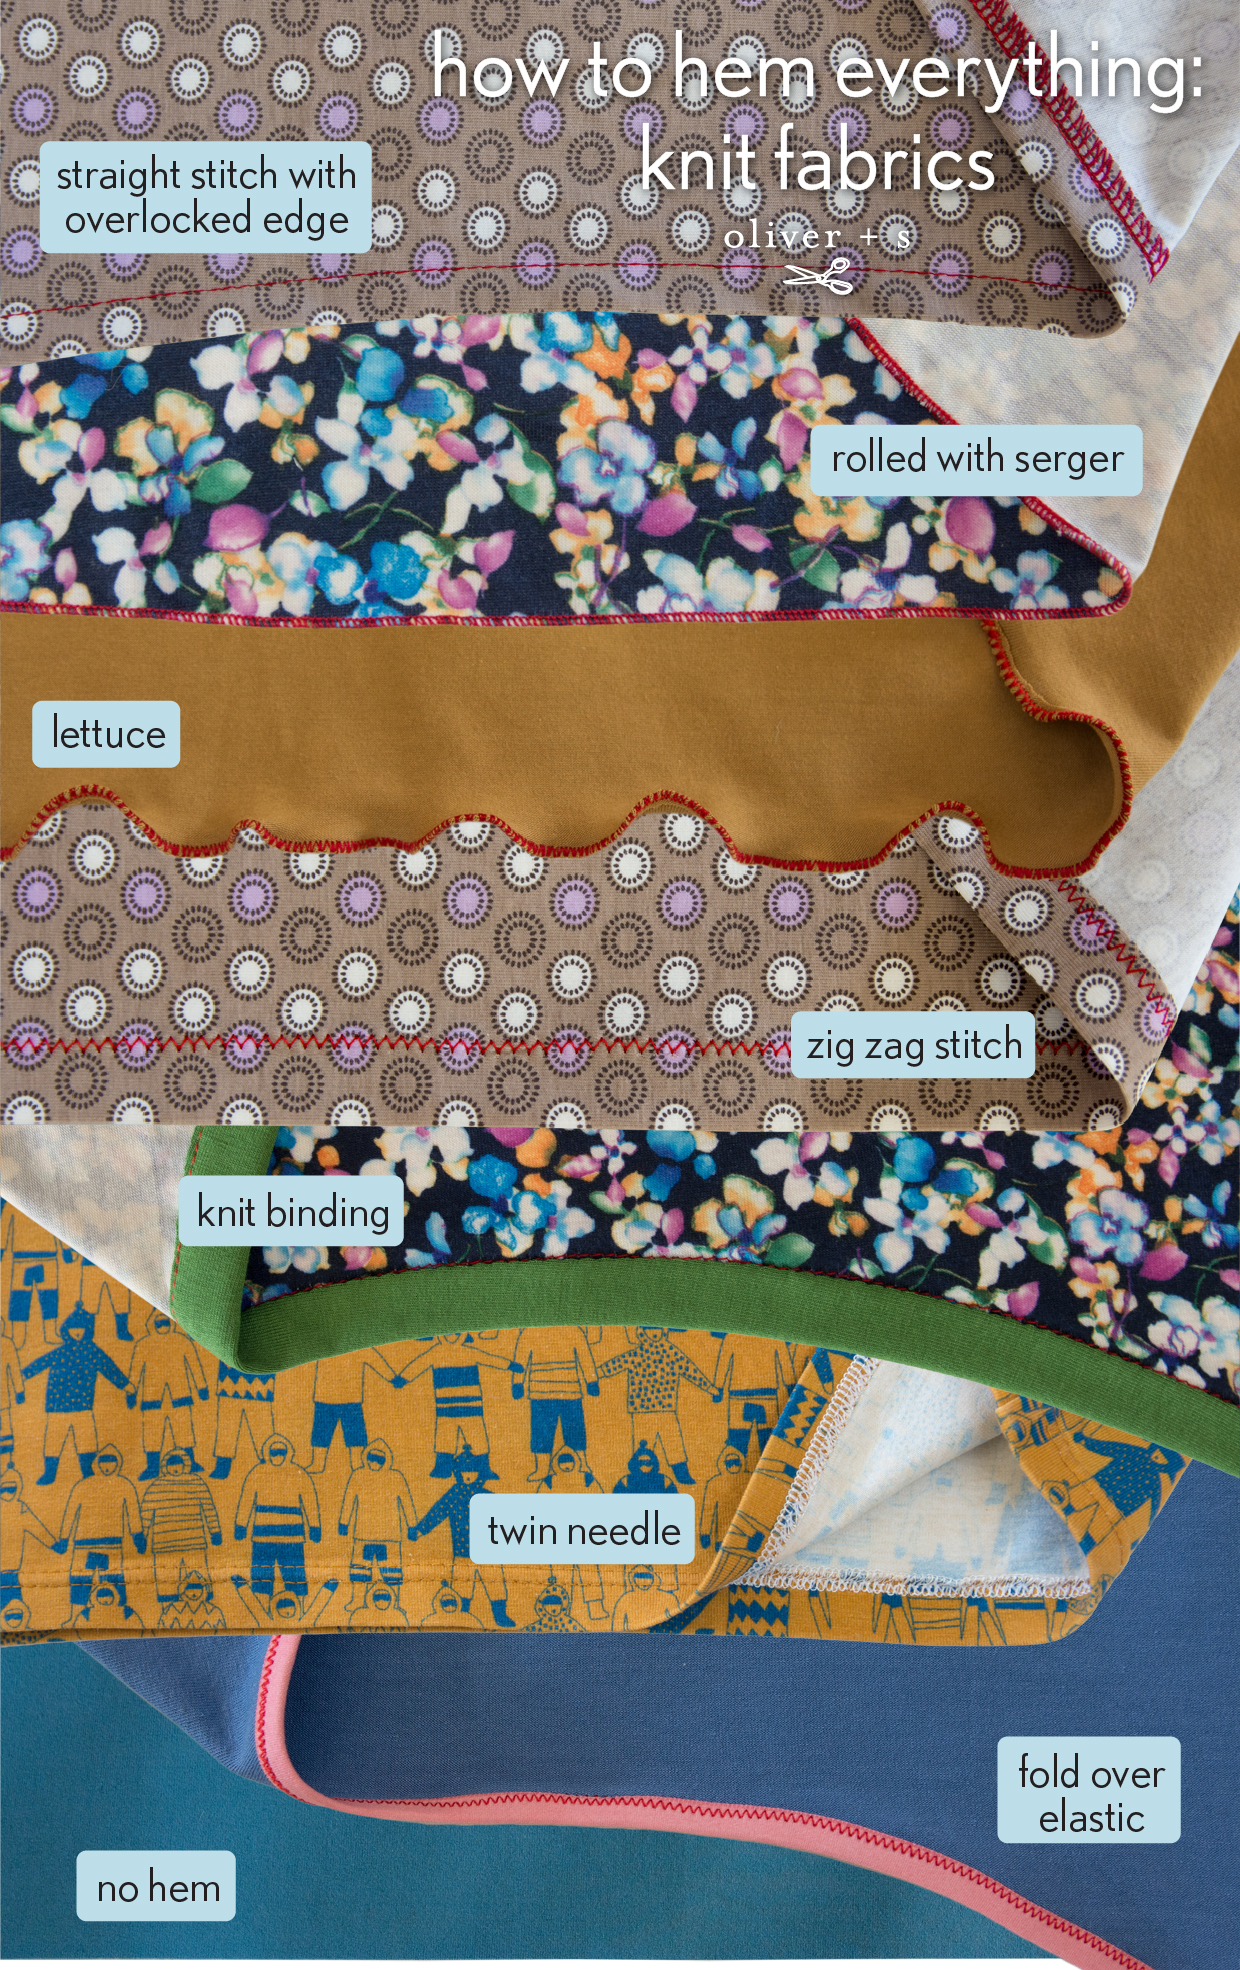
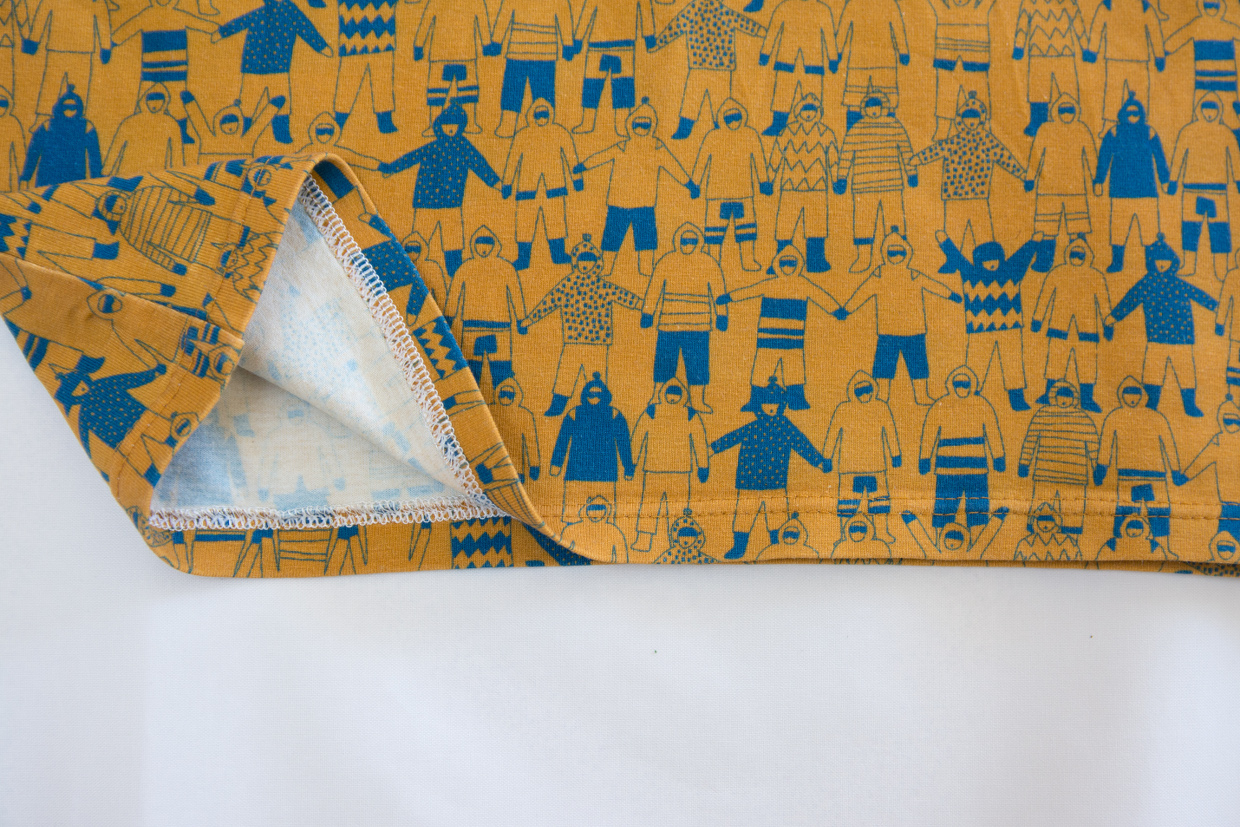
Single Fold – Straight Stitch
When to Use: If the hem doesn’t need to stretch much or at all (e.g. a wide, boat neck neckline), then a single straight stitch can be used instead of a zigzag stitch.
For: Nice, neat appearance. Quick and easy to do.
Against: Less stretch than a zigzag stitch.
How to do: Finish the raw edge if desired, then press up the hem. Select a long, straight stitch on your sewing machine. Stitch the hem.
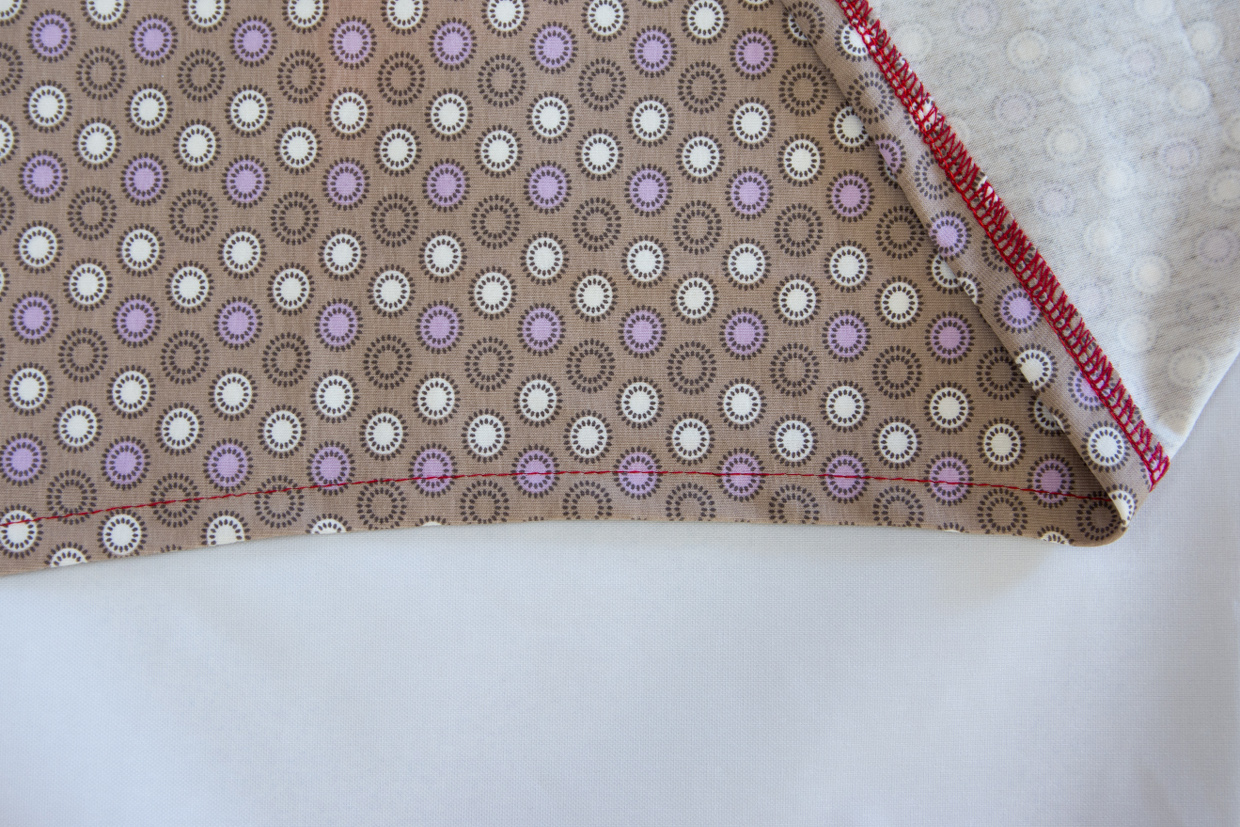
Rolled Hem
When to Use: As a narrow, decorative hem.
For: Quick and easy to do. Allows for a pop of color if contrasting thread color is chosen.
Against: Hem can pull off fine knit fabrics. Difficult to do on a sewing machine. Requires a serger.
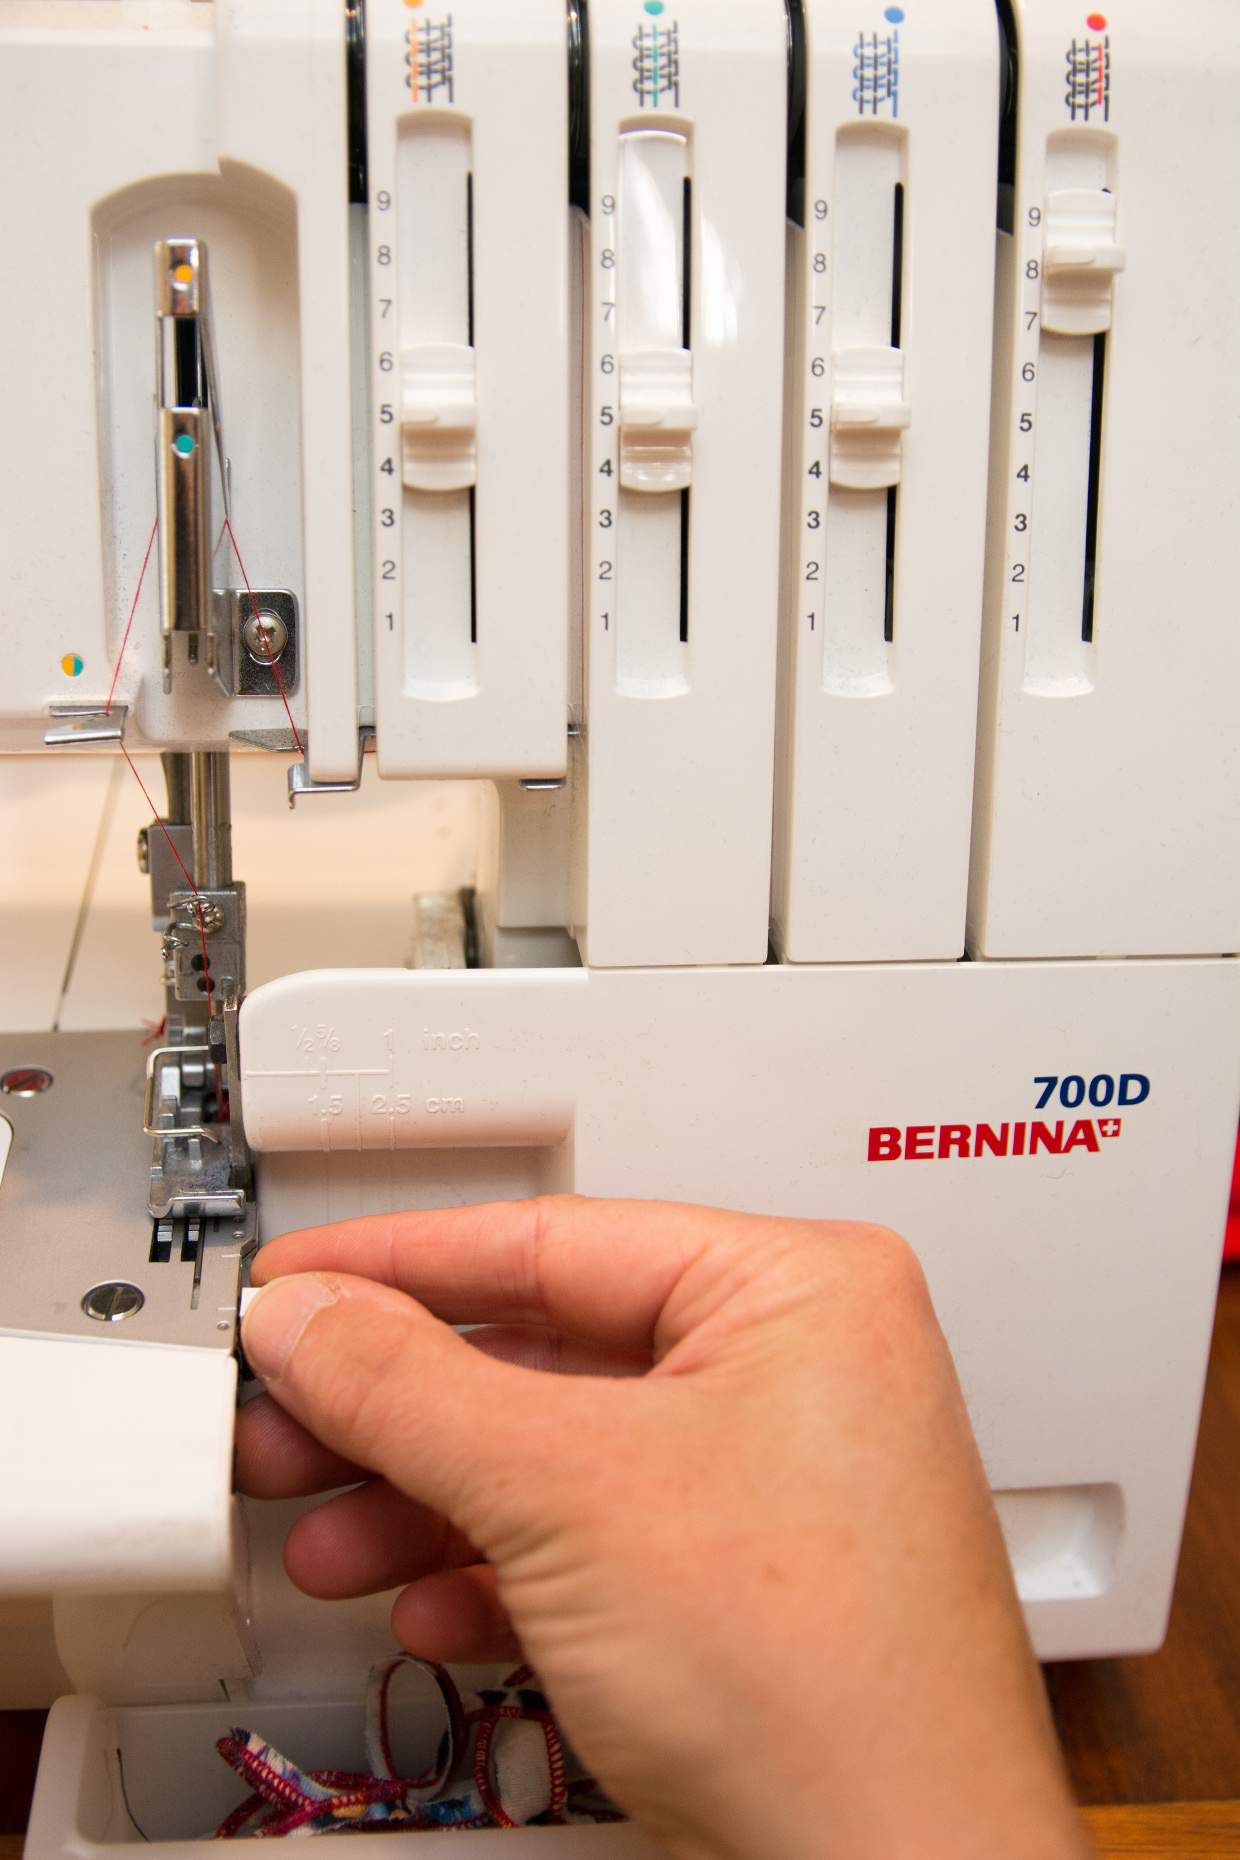
How to do: Hopefully your serger has instructions for how to achieve a rolled hem that works for your machine. Here’s how to do it in principal using my machine as a demonstration model:
Remove the left hand needle. Leave the right needle and upper looper tensions at their normal settings. Increase the lower looper tension to its upper limits. Move the selection lever to the roll hemming position (my fingers are on this lever in the image below). Choose a very short stitch length. The stitch tends to be quite tight, so adjust the differential feed towards the neutral setting.
Lettuce Hem

When to Use: As a decorative hem finish, giving a wavy edge to knit hems.
For: Very cute for the bottom of casual dresses or knit pajamas. Can be done with a sewing machine or a serger.
Against: Visible threads. Prone to coming away if the fabric is not sturdy enough.
How to do: A lettuce edge can be done with a serger or a sewing machine. To do it with a serger, the thread set-up is just like for a rolled hem (above), only this time the differential feed should be set for a fine, woven fabric. That way the fabric will get stretched out as the edge is serged. You can encourage this further by stretching the fabric a bit as you create the serged, rolled hem.
To sew a lettuce hem using a sewing machine, Liesl has a great tutorial here.
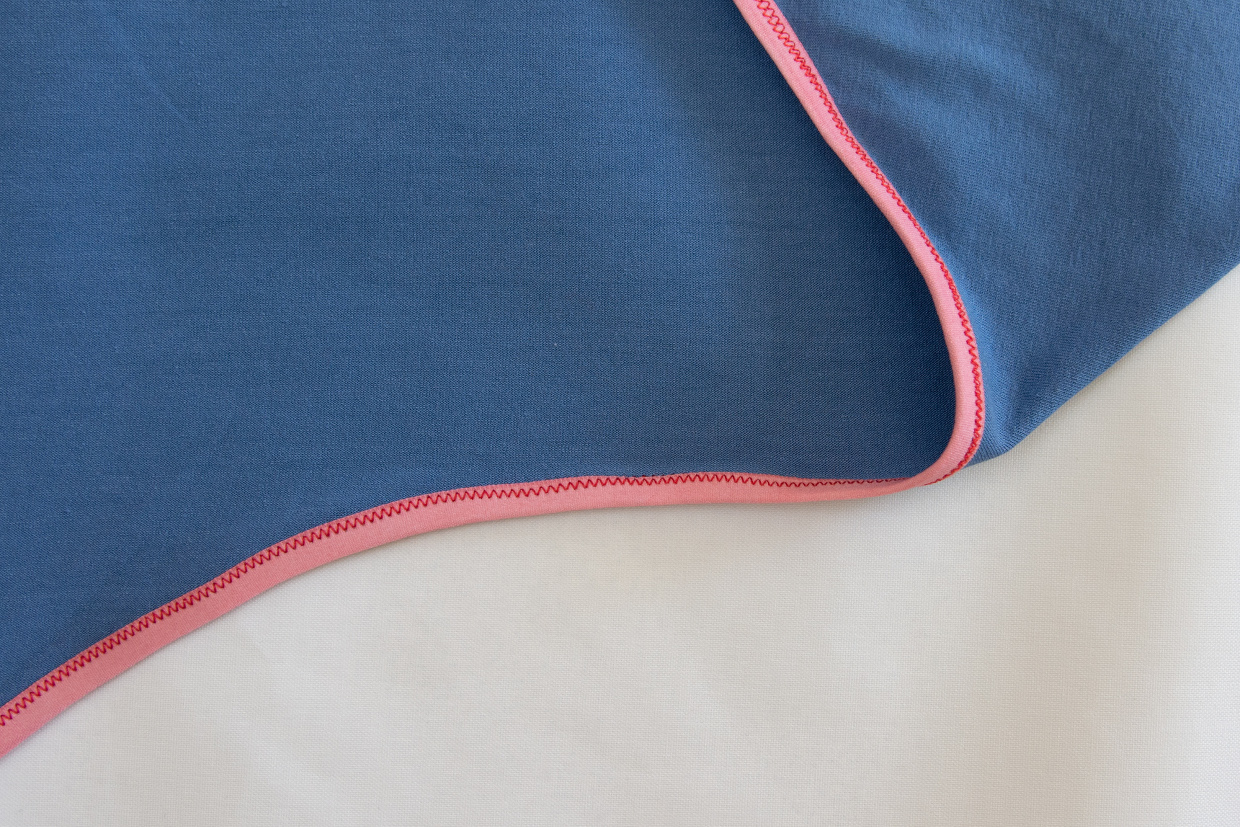
Knit Binding
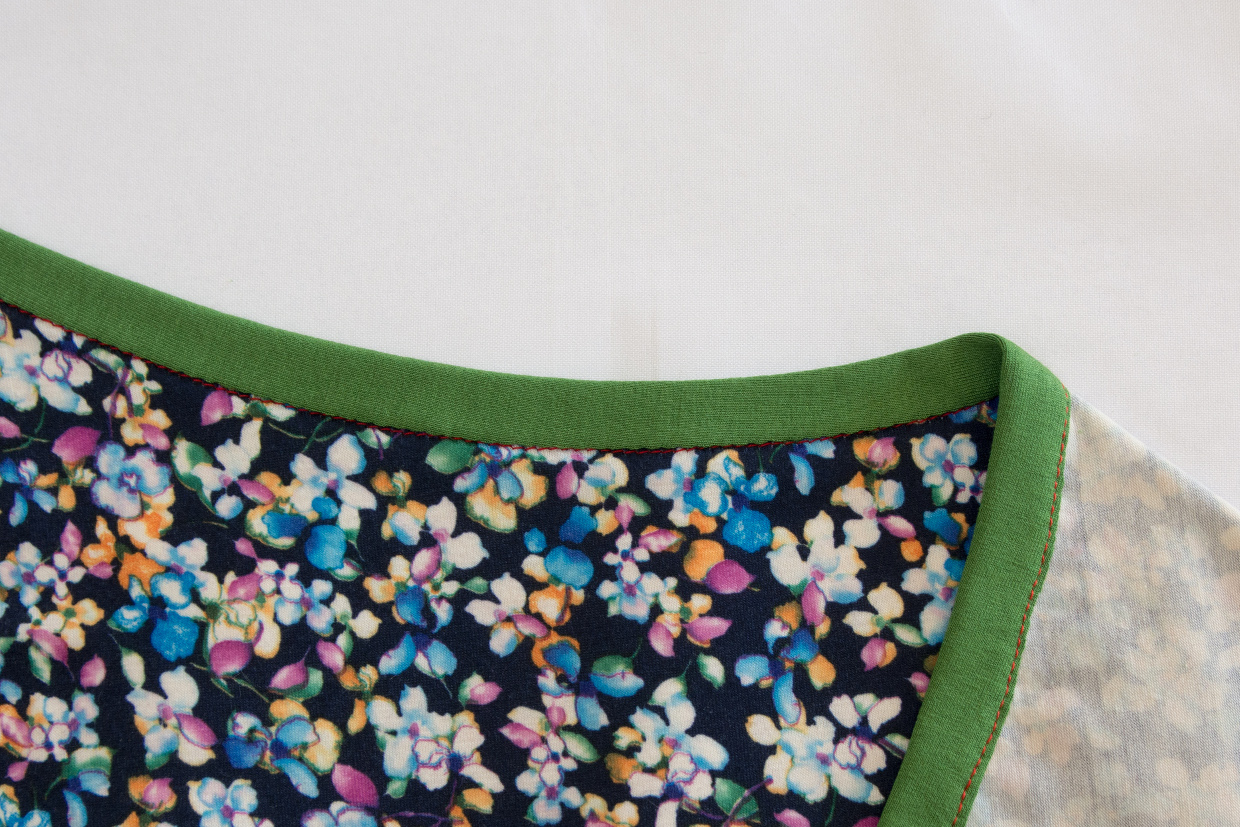
When to Use: A clean, neat finish to a knit edge such as a neckline.
For: Very neat. Adds a little satisfying weight to the finished edge. Doesn’t alter the length of the garment at all. Good for when you’ve got the neckline just right and don’t want to fold it over, or add a neckband. Knit binding can be cut in the direction of maximum stretch, so takes less fabric than bias cut woven finishes. Works well on tight curves such as pocket openings.
Against: If attached with a straight stitch there will be some loss of stretch (usually negligible). A bit more time consuming than a neckband or other finish.
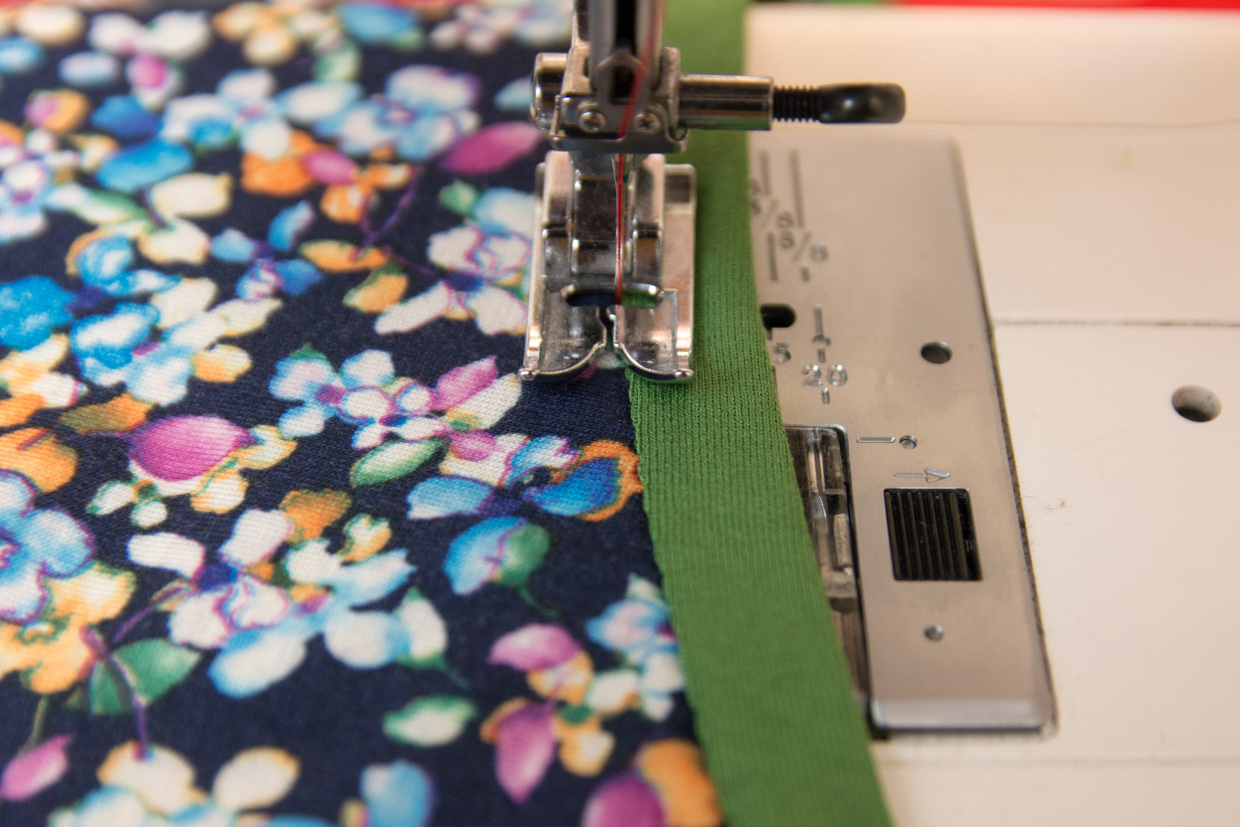
How to do: Cut a strip of knit fabric a fraction more than three times the width of the desired finished band. For example, for a ½” finish, cut the strip 1 3/4” wide. The length of the strip should be about 75% the length of the raw edge you’re going to use it to finish. If you like to, you can finish one long edge of the strip with your serger (or leave unfinished if you don’t have a serger).
With right sides together, stitch the unfinished edge of the binding to the raw edge of the neckline, stretching the binding a little as you go. Attach either with the serger, or using a narrow zigzag sewing machine stitch.

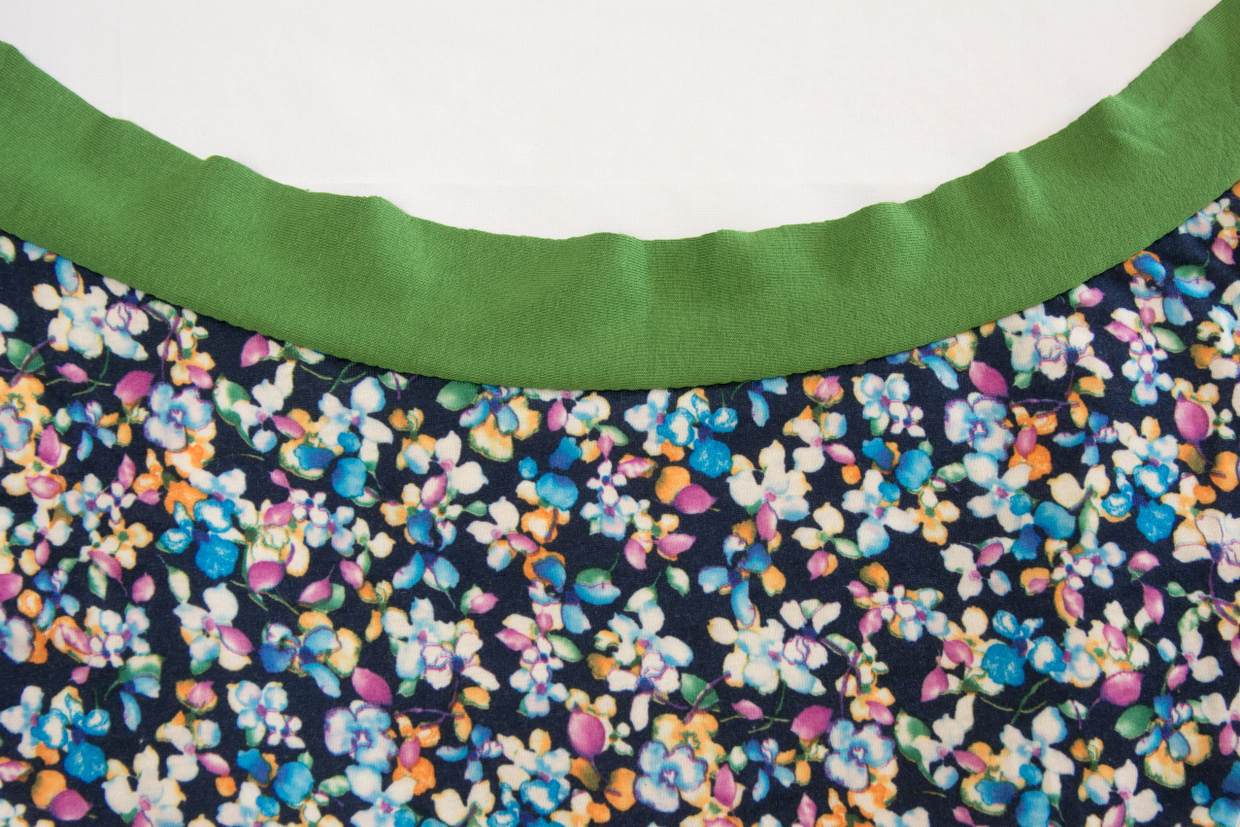
You can see in the image below that by stretching the binding slightly it already wants to flip up and away from the body of the garment.
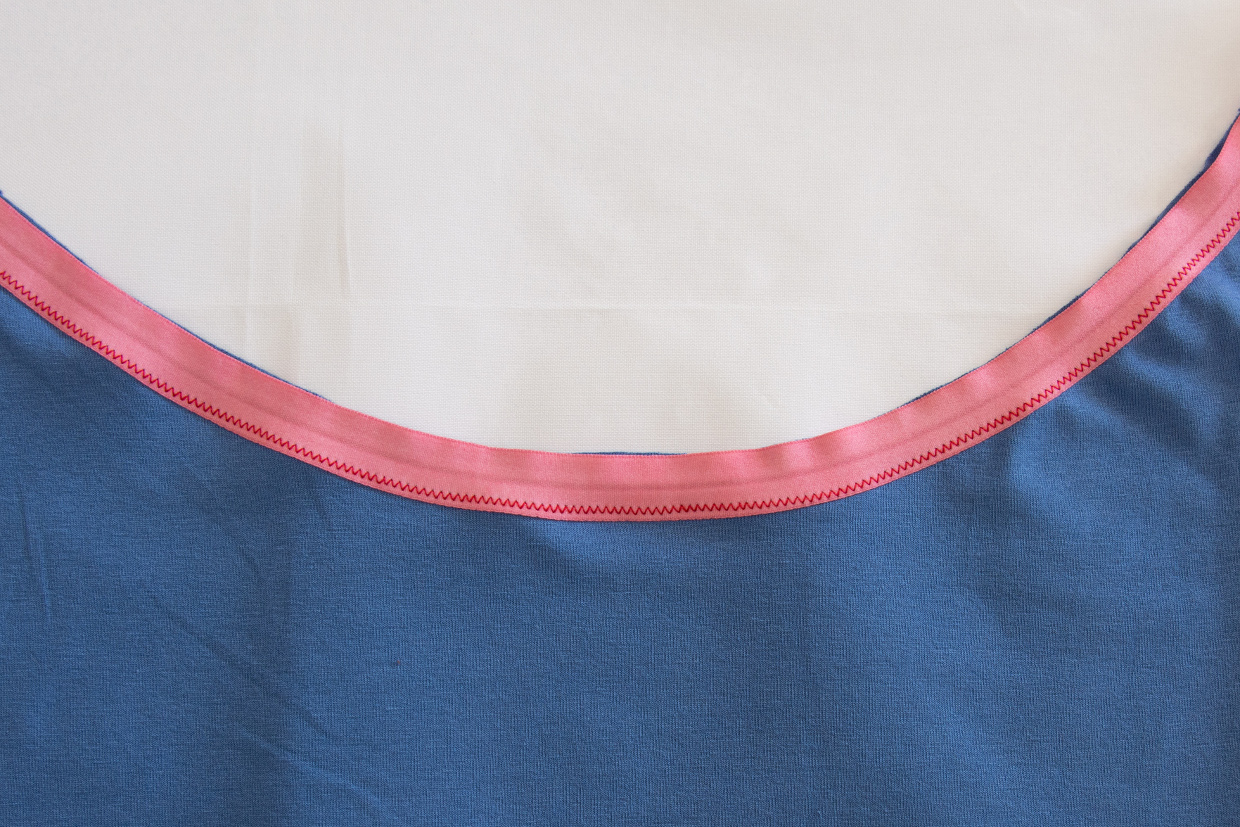
Press the seam allowances towards the binding, then wrap the finished edge of the binding to the inside covering the previous stitching.

Working from the right side of the garment, and using a long straight stitch, edgestitch the binding, or stitch “in the ditch.” Be sure to catch the finished edge on the other side.
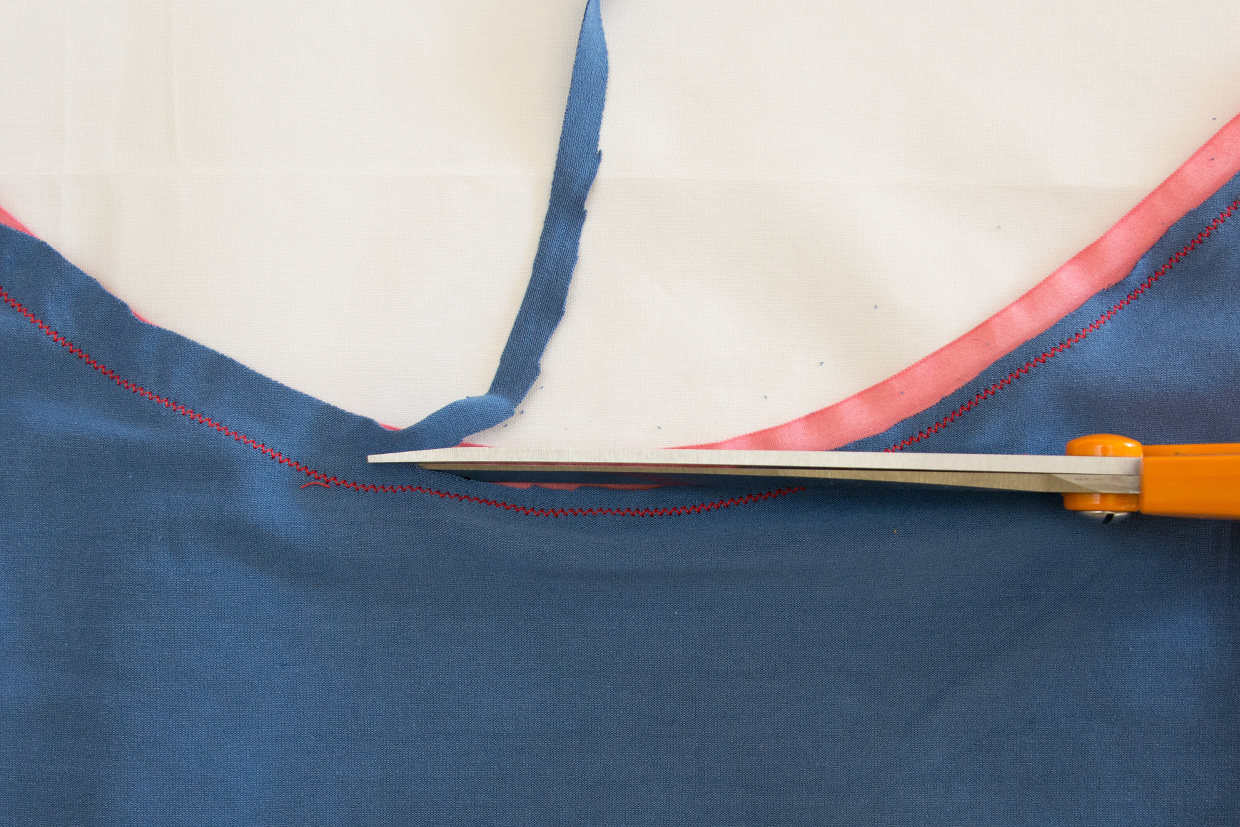
If you didn’t finish the inside edge of the knit binding now is the time to trim it with scissors. Trim close to the stitched edge for a nice, neat finish.

Fold Over Elastic
When to Use: To enclose a fabric edge like a binding does but with the benefit of an elastic finish. Used when sewing undergarments, lingerie, sportswear and sometimes swimwear.
For: Easy. Comfortable finish. Fold Over Elastics now come in a great variety of colours and widths making them a real design feature if used on outer garments. Can be used to great effect instead of shoulder ties for patterns such as the Popover Sundress.
Against: Visible stitching. Requires Fold Over Elastic (FOE). Take care using pins on elastic to avoid them snagging or pulling.
How to do: With both the fabric and the FOE right sides down, place them together with their edges aligned. Using a narrow zigzag stitch, sew along the innermost edge of the elastic.
Turn the garment to the right side and then trim the seam allowance of the fabric to half its original width.
Fold the elastic to the outside of the garment and then, working from the right side, zigzag stitch the free edge of the FOE to secure the hem.
Double Needle
When to Use: I’m biased, so I’d say almost always when making knit garments such as T-shirts or dresses. When you don’t own a coverstitch machine.
For: Professional finish. Affords stretch to knit garment hems. Quick once you’ve got your set up working well. Easy to change thread colors to suit fabric.
Against: Set-up can take some tinkering. Prone to popping or breaking if standard bobbin thread used. Requires a twin needle.
How to do: While it can be as simple as inserting a twin needle, threading it and stitching with a straight stitch, it’s the extra tinkering that makes it really work. I wrote a blog post here about my journey with twin needle hemming and how I arrived at easy to do, good looking and durable knit hems.
Your zig zag hem looks so much neater than mine ever does! I am wondering if a walking foot would help with mine as it just seems to stretch out a bid and looks very amateurish.
Yes! At least on my machine, a walking foot is an absolute must if sewing anything on knits, even straight stitches with the grain. Otherwise it gets wavy and stretchy, prone to breakage, and very amateurish. Truth be told, I sew everything with my walking foot except zippers and piping.
Helena I confess I chose a very stable knit to demonstrate the zig zag hem 🙂 (and I don’t think I did use my walking foot).
A walking foot will probably help but sometimes you can blame the fabric. Wash away stabiliser is your friend in those situations.
I’m currently having a beast of a time with swimwear Lycra, so I’d never say perfect knit hems were easy!
I’ve been sewing swimwear lately, too, and I love the zigzag stitch for it. It definitely takes a little practice, but it looks great once you get it right!
I really appreciated especially your advice re the FOE. I love FOE but I’ve had challenges with getting it on without it getting too stretched or too loose (causing gaping) there is a bit of a knack to know just how much to “pull” it while stitching. What would you advise?
Hi Kathleen, sorry for the late reply. I’m afraid I don’t have any advice other than to practice. Every elastic will behave differently so I don’t think there can be any “rules” as such, but just keep going and keep trying different tensions until you have a feel for it. Kids undies out of knit scraps are a great way to practice.
I am always having an issue. My hems on knits always turns up when wearing my sewn t-shirt. Really frustrating! How can I fix this?
Hi Kathryn. Oh I hate flippy hems too! I’ve found this happens a lot less often now that I always overlock/Serge the raw edge before hemming. The other thing that is likely to help is to deepen the hem slightly. Anything less than a 3/4″ single fold hem is bound to flip up. Rayons and slinky knits seem to be the worst in my experience and using some fusible hem tape to stabilise the hem before stitching can help a lot. Just be careful if you need to maintain stretch at the hem that you don’t lose it all with a fusible hem tape.
Hope that helps.