Shelley joins us today with what we hope will be a useful tutorial. We wanted to put together a guide to hemming that covers just about any kind of hem you would want to make. Shelley has written this extensive tutorial that covers woven fabrics and demonstrates ten different kinds of hems you can use with them. Now I’ll hand it over to her.
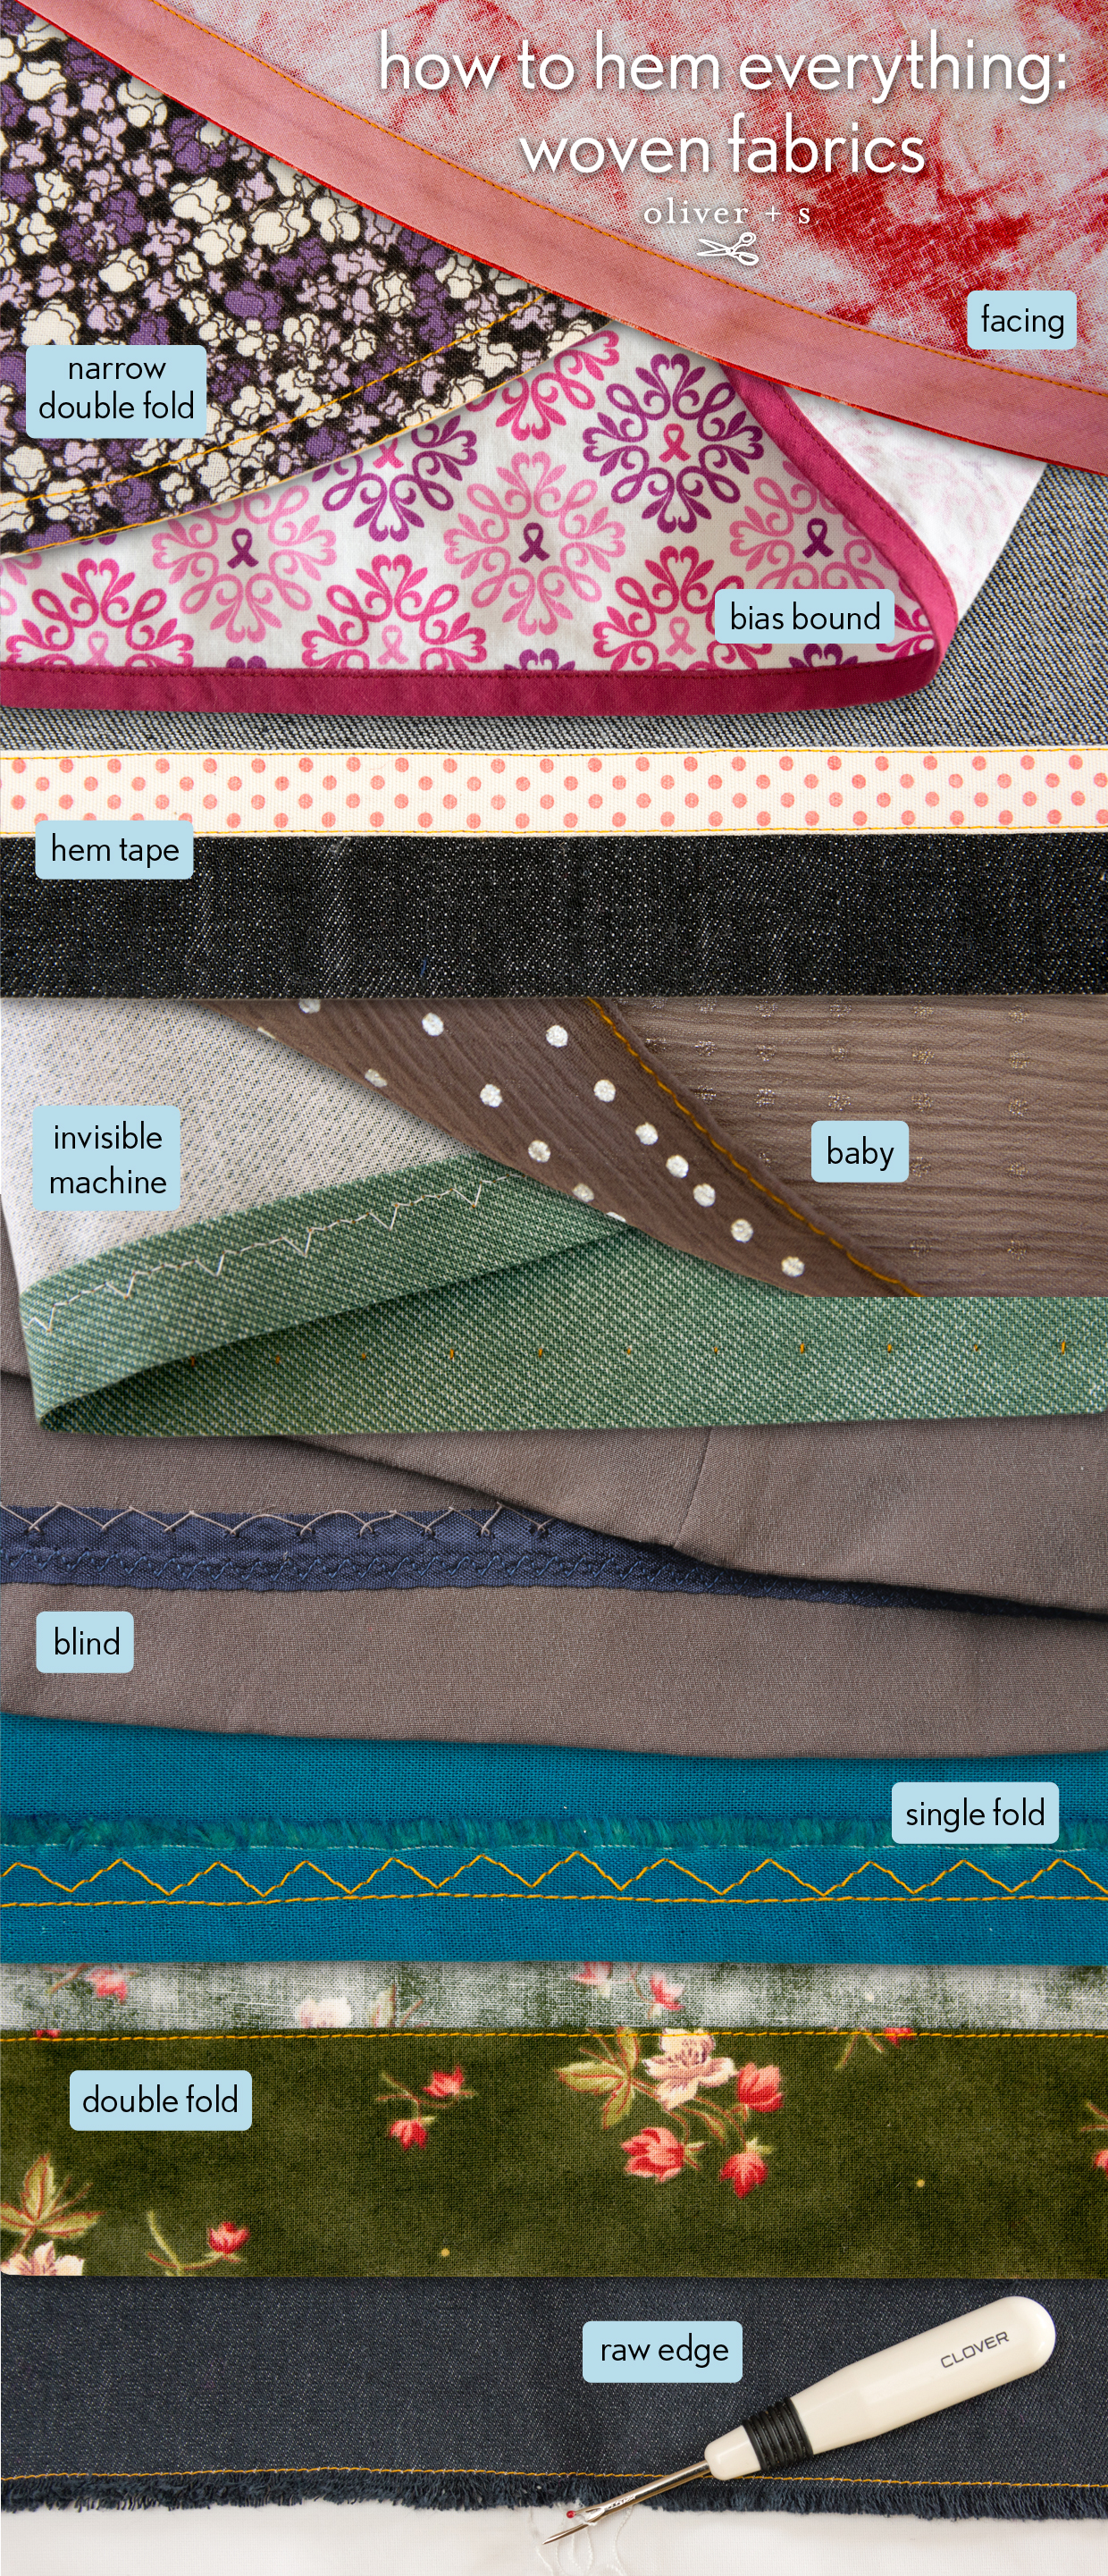
Hemming your garment is often the last thing you do, but how you’re going to do it is worth considering right from the start. Here’s a rundown of almost every hem you could ever use for woven fabrics, when to choose each one, and how to do them.
The first decision to make is whether you want an invisible (blind) hem–that is, one where the stitching of the hem is not seen from the outside of the garment. Let’s look at blind hemming first.
Blind Hem
When to Use: When a visible hem is too casual. When you know your mum/grandma/sewing nemesis is going to inspect your work!
For: Invisible hems give a tailored, polished look to a garment. Hand sewn blind hemming can be done away from the sewing machine (e.g., while “watching” kid’s sport).
Against: Time consuming. Not as durable and unsuited to really clumsy dressers. (Yep, I snag my heel in these all the time!)
How to do: An invisible hem can be done by machine, or by hand.
In these tutorials, Liesl shows how to blindstitch or catchstitch by hand to finish an invisible hem. The examples show handstitching of a double fold hem, but there are many hem types that can be finished by blindstitching.
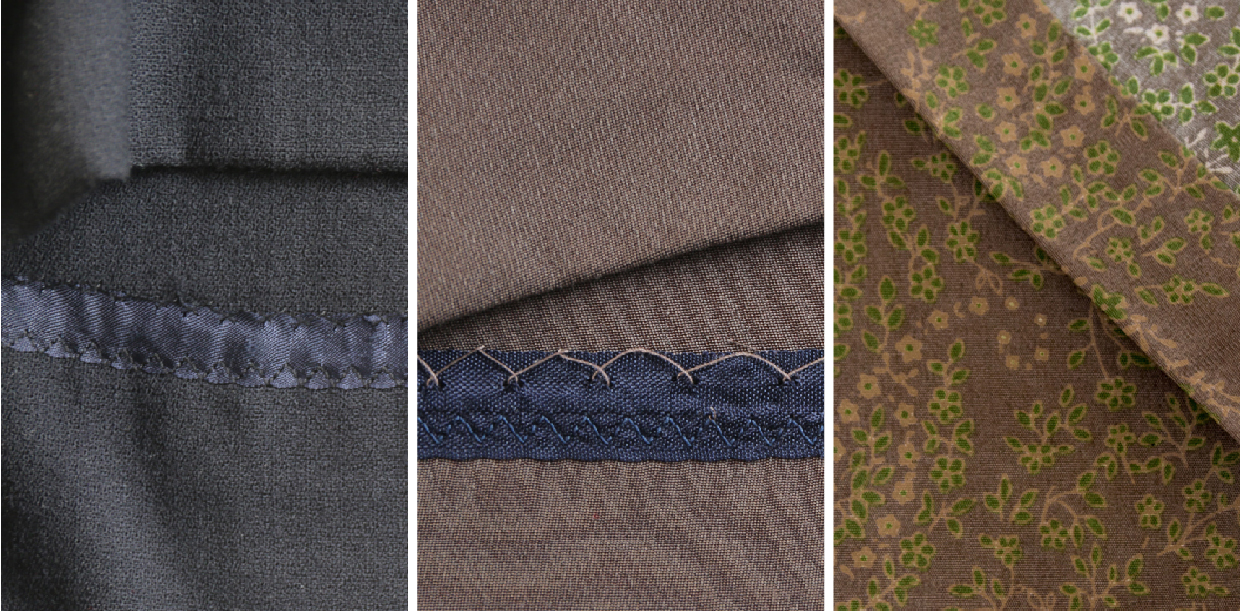
You may find your machine has a stitch that enables you to do blind hemming with your sewing machine. This is certainly quicker, but it’s very easy to get it wrong and end up either missing the hem edge, or taking too big a “bite” of the skirt fabric. We’ll come back to how to sew a machine blind hem later on.
To keep things simple all of the following hems are shown with machine stitching, but remember, you can always blindstitch a hem by hand.
Now let’s look at some other hem finishes, starting with….
No Hem (Raw Hem)
When to Use: For that distressed edge (and edgy) Japanese style look on loose linen garments, or if you’ve been invited to an ’80s party and need some frayed cut off jeans turned into shorts. When using net or tulle for patterns such as the Onstage Tutu Skirt.
For: As a design element with fabrics that fray, or just because you can with fabrics that don’t fray such as net or tulle.
Against: On woven fabrics, it’s not as easy as just leaving the garment unhemmed as it may unravel uncontrollably. Mostly only suitable for straight edges. May still require some finishing to prevent continued unravelling of the hem edge.
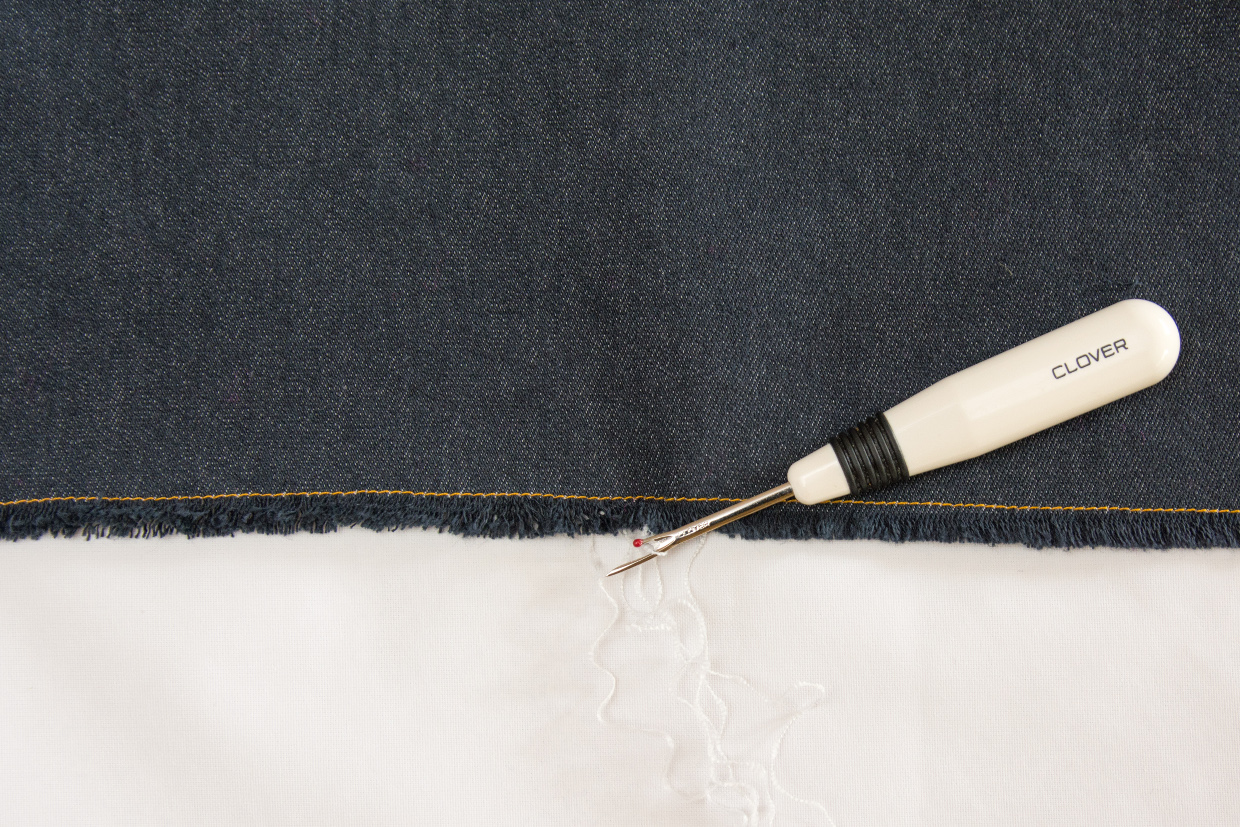
How to do: When cutting tulle or net, using a rotary cutter rather than scissors helps to avoid any jagged lines along the edge.
For fabrics that unravel a bit, such as linen or denim, sew a straight stitch about ¼” from the raw edge. Then use your quick unpick to tease out some of the warp threads leaving a nice fringe of weft threads.
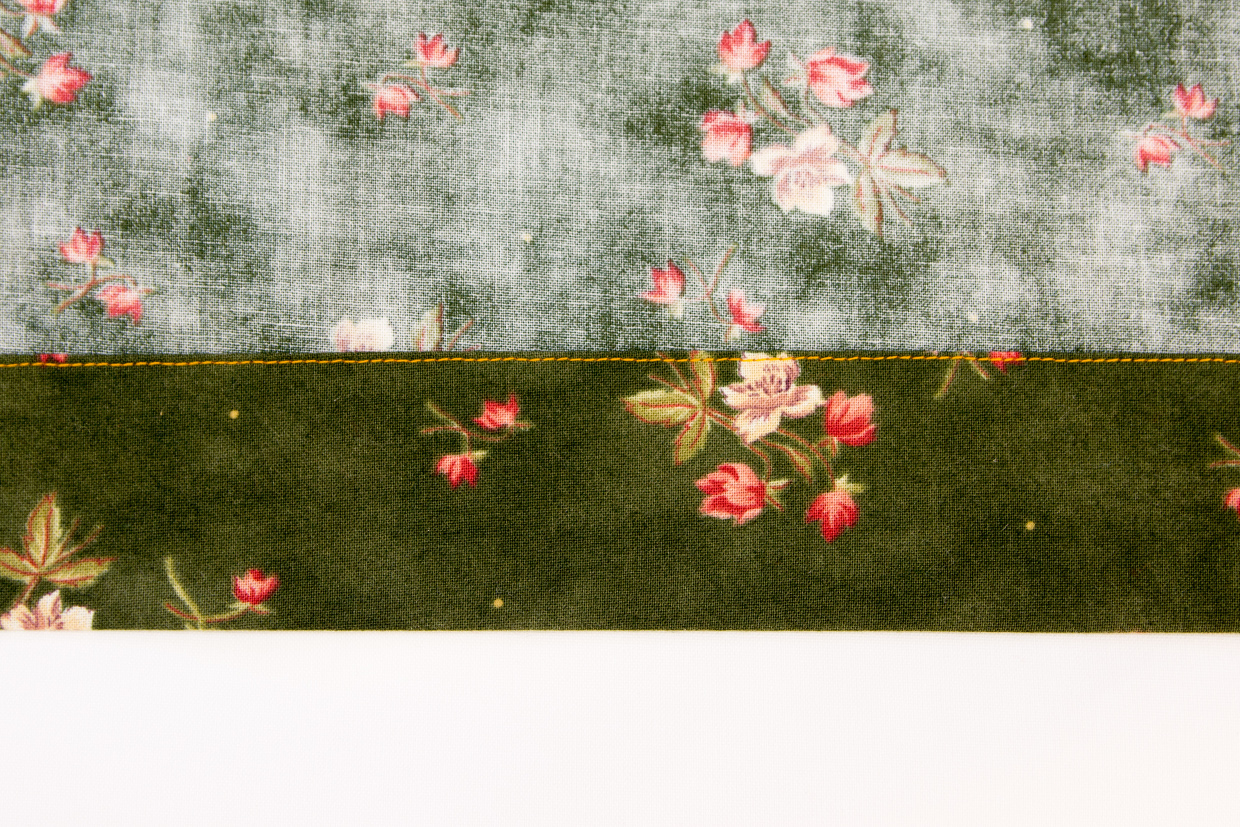
Double Fold
When to Use: Most of the time for sewing kid’s clothes. It’s a sturdy and quick hem and is the go-to hem for sewing casual garments. It can be blindstitched instead of machine stitched.
For: Easy, quick, durable. Deep double fold hems give extra body to a skirt’s hem, such as in the Fairy Tale Dress.
Against: Stitching line is visible (unless blindstitched). Deep double fold hems are limited to straight or almost-straight hems.
How to do: Press up the raw edge of the fabric to the wrong side by ½”. Then press the hem up again by the depth of the hem. Edgestitch the fold.
Tip #1: A row of basting stitches sewn at the hem’s fold line will help to keep the depth of the hem consistent and assist in turning the fabric.
Tip #2: A row of gathering stitches at the hem’s second fold can help to ease in the fabric and prevent unsightly puckers in the hem. This is especially useful for certain curved hems and is demonstrated for the narrow hem.
Narrow Hem
When to Use: As above but also for curved hems such as the hem of the Sketchbook Shirt. This one is great for lightweight hems that don’t need a lot of depth or weight to them.
For: Easy, quick, durable. Used to hem gentle curves.
Against: Stitching line is visible (unless blindstitched). Beware burnt fingers when pressing narrow hems!
How to do: As for the double fold hem. In this instance the hem is usually pressed up by the hem allowance first, then the raw edge is tucked under and the upper edge of the hem is pressed.
The basting stitch to guide turning up the hem is even more important when sewing a narrow double fold hem. In the image below you can see a line of basting stitches at the hem allowance, and another line within the hem allowance at the area with the most curve.
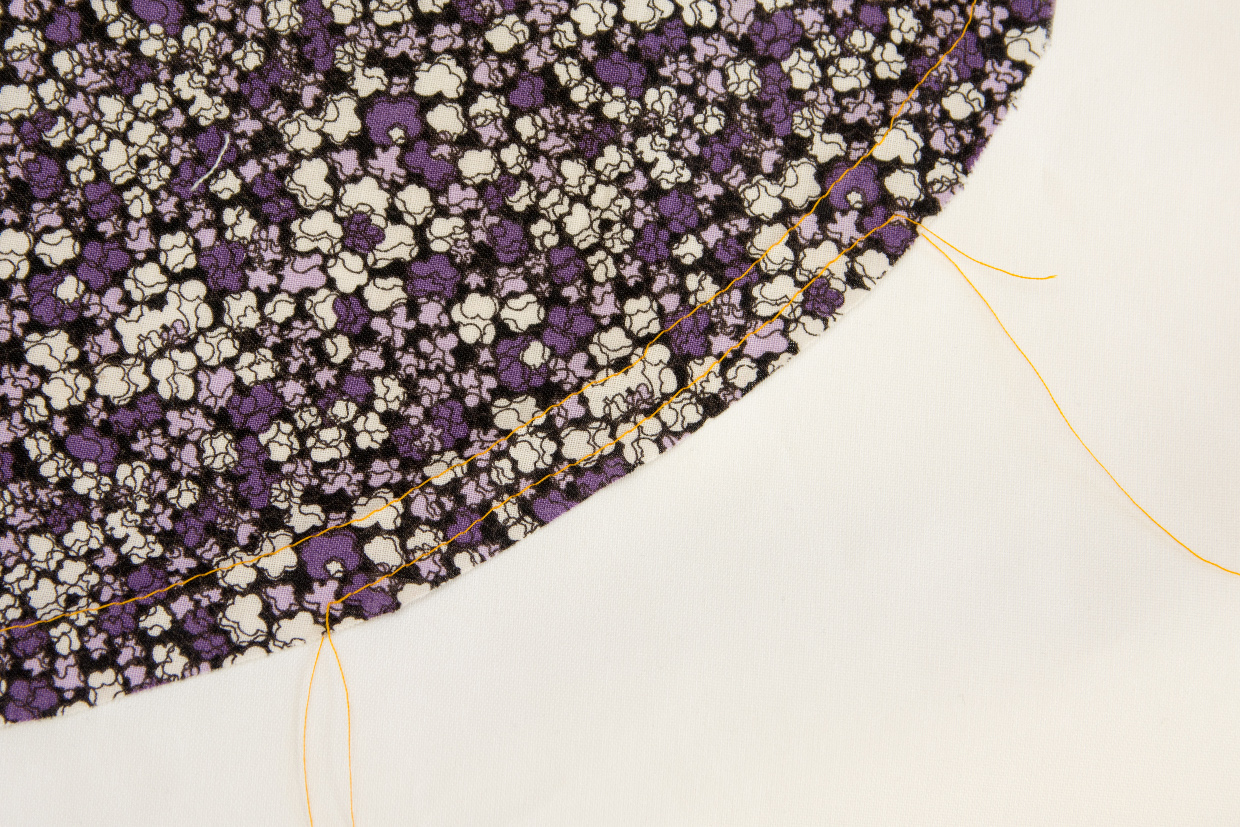
By pulling on the bobbin thread of the inner line of basting stitches the excess fabric of the hem can be eased into a nice, smooth fold. This technique works very well for turning in the edge of curved pocket pieces, for easing curved hems into place, or for helping to smooth the upper edge of the hem of an A-line skirt.
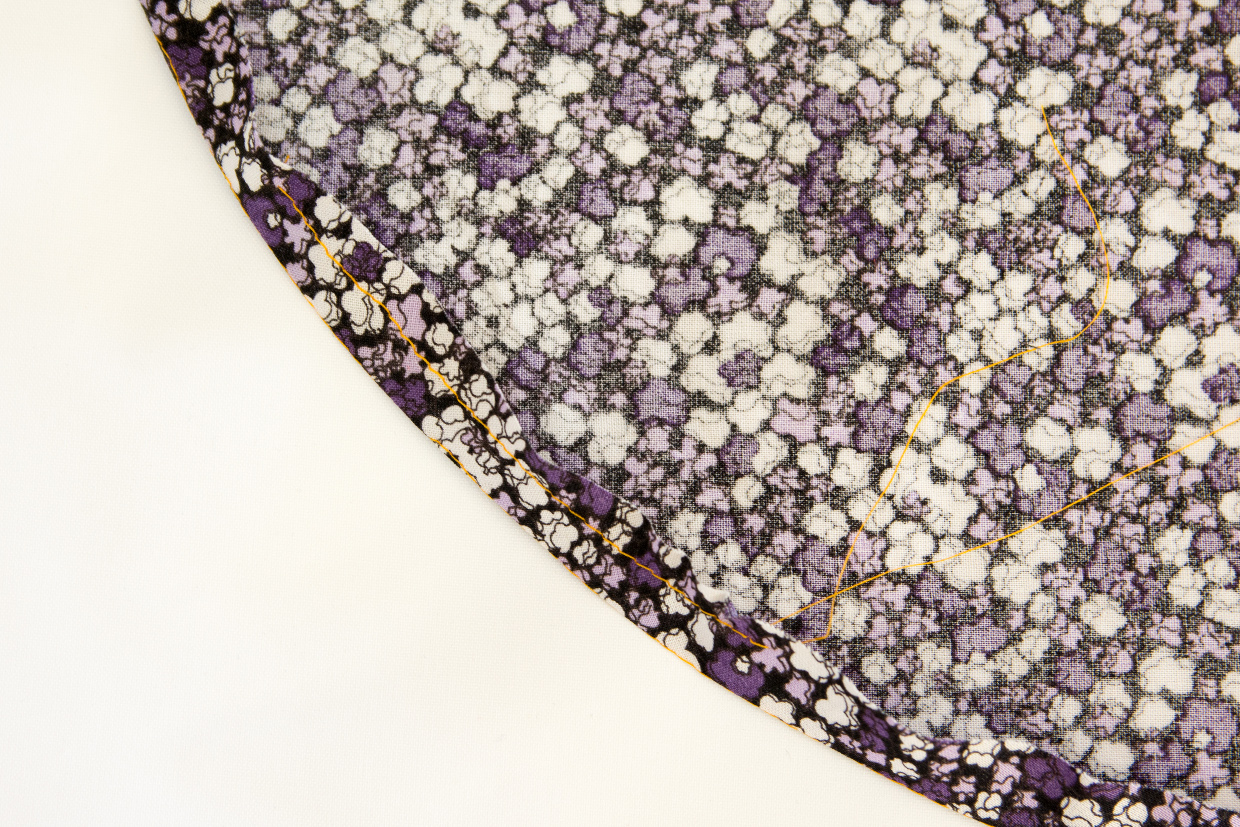
Once the hem is sewn, don’t forget to remove the basting stitches that are visible at the hem fold.

Baby Hem
When to Use: For fine or sheer fabrics requiring a tiny hem that doesn’t look bulky or thick.
For: Fine or sheer fabric such as chiffon. Relatively quick and easy compared to a hand sewn rolled hem.
Against: Not suitable for thick fabrics such as cottons as the hem will be too bulky. Can be fiddly. Has visible stitching on the outside of garment.
How to do: Liesl has written a wonderful tutorial using Ban-Rol to create a baby hem.
Here’s another way to do it which doesn’t require any extra products:
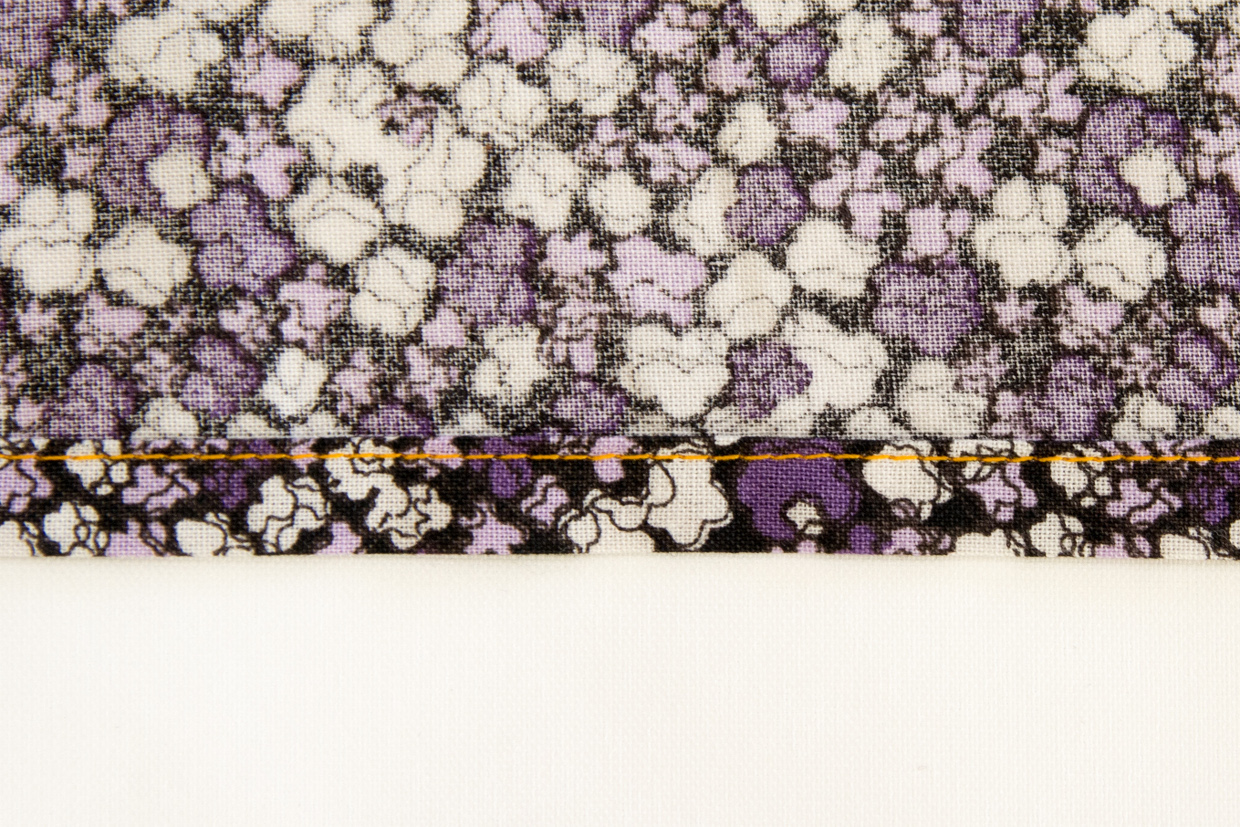
Press up the hem, e.g. by 5/8”–a row of basting stitches may be useful here. Now stitch just above the pressed edge, aim for 1/8” or less.
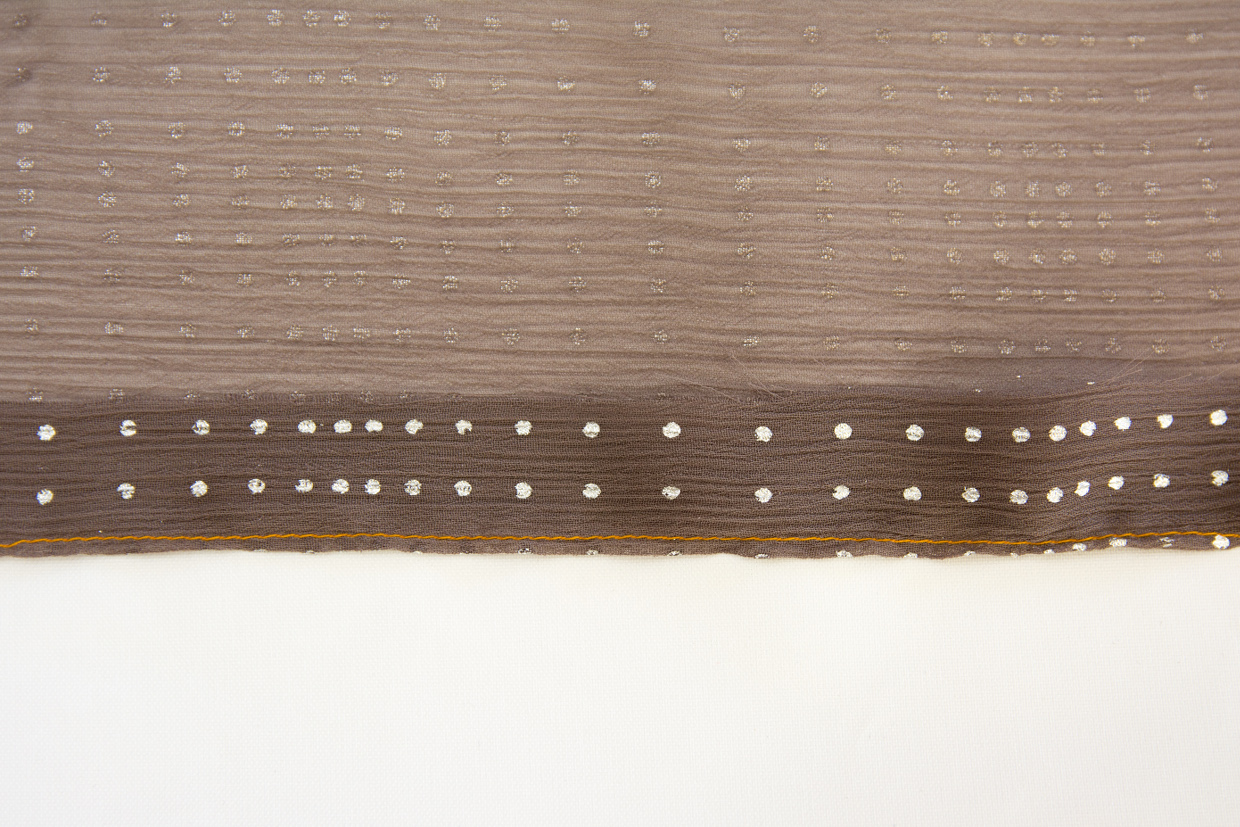
Trim the seam allowance above the stitched edge as closely as you can – be careful not to accidentally cut your garment fabric which is underneath.

Now roll the stitched edge to the inside of the garment and press the baby hem. (As best you can; some fabrics just don’t like being ironed!) Working from the inside of the garment, use your fingers to keep the hem rolled over as it approaches the presser foot and stitch on top of your previous stitching line.

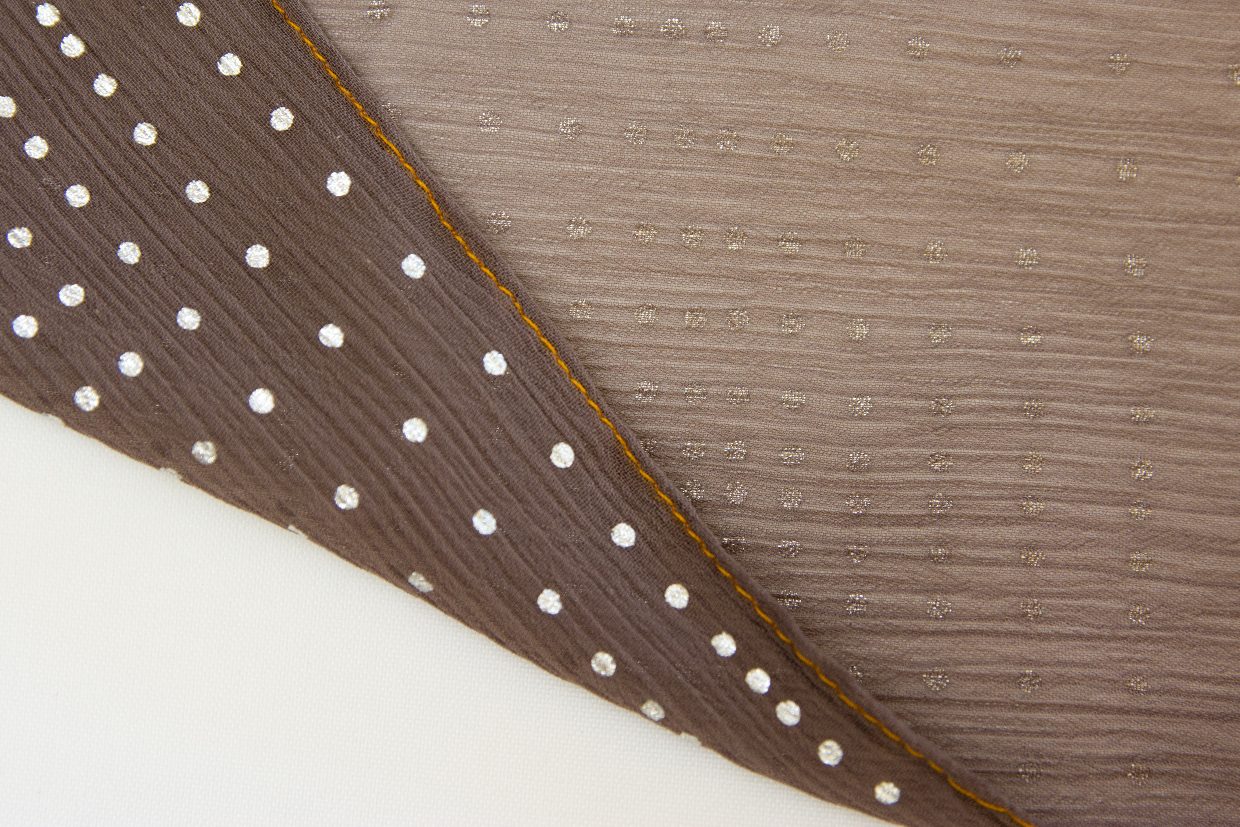
You will end up with two rows of stitching (hopefully one on top of the other) on the inside.
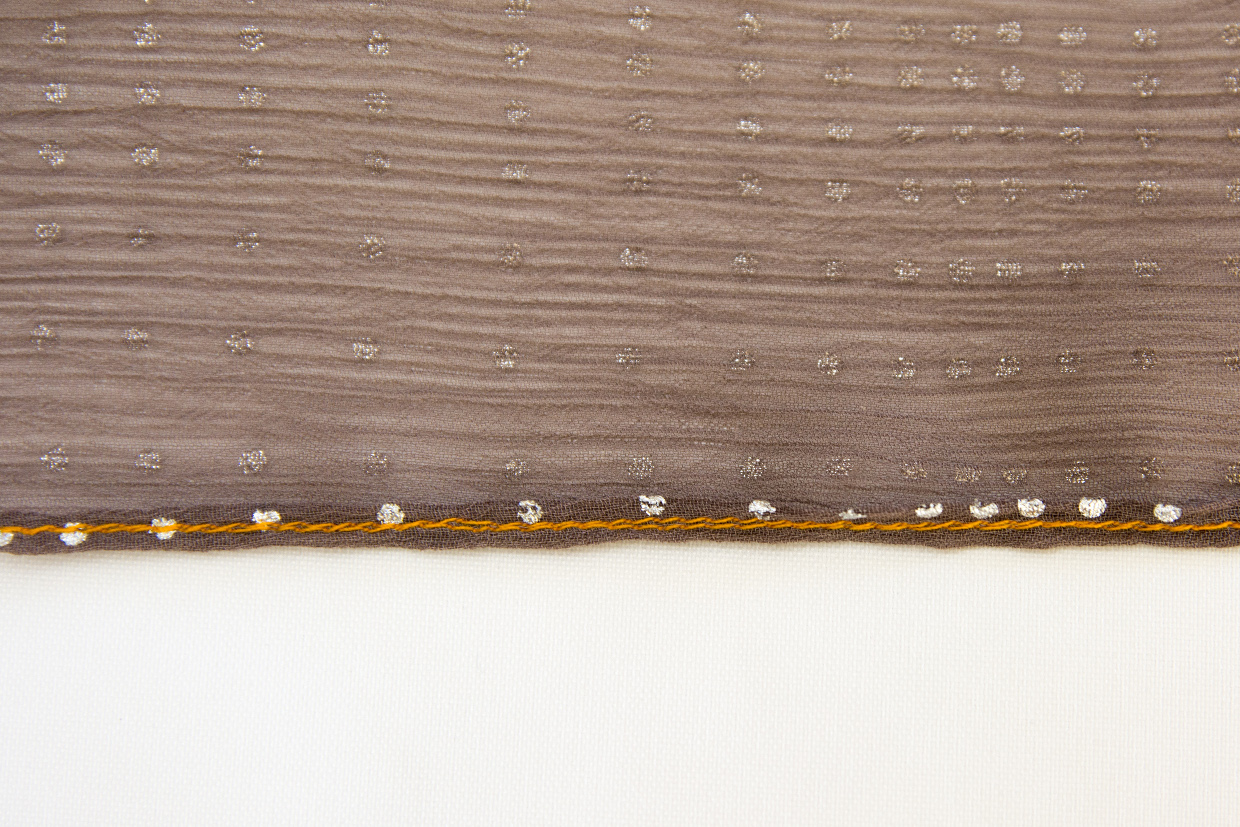
And one row of visible stitching on the outside.
Tip: Starting a row of stitching on very fine fabrics can result in a big chiffon-feed-dog tangle. Put a small piece of tissue paper under your presser foot at the start of each row of stitching. It prevents the delicate fabric getting sucked down into the feed dogs and can be easily torn away afterwards.
Single Fold Hem
When to Use: Not used often as it’s a bit of a rough looking finish. Useful if you’re short on fabric for your hem, or you’re letting down a double fold hem on some outgrown trousers to try and make them last.
For: Quick, easy. Allows lengthening of an out-grown garment.
Against: Untidy hem if able to be viewed from the wrong side at all (e.g., skirt or dress). Better suited to trouser hems.
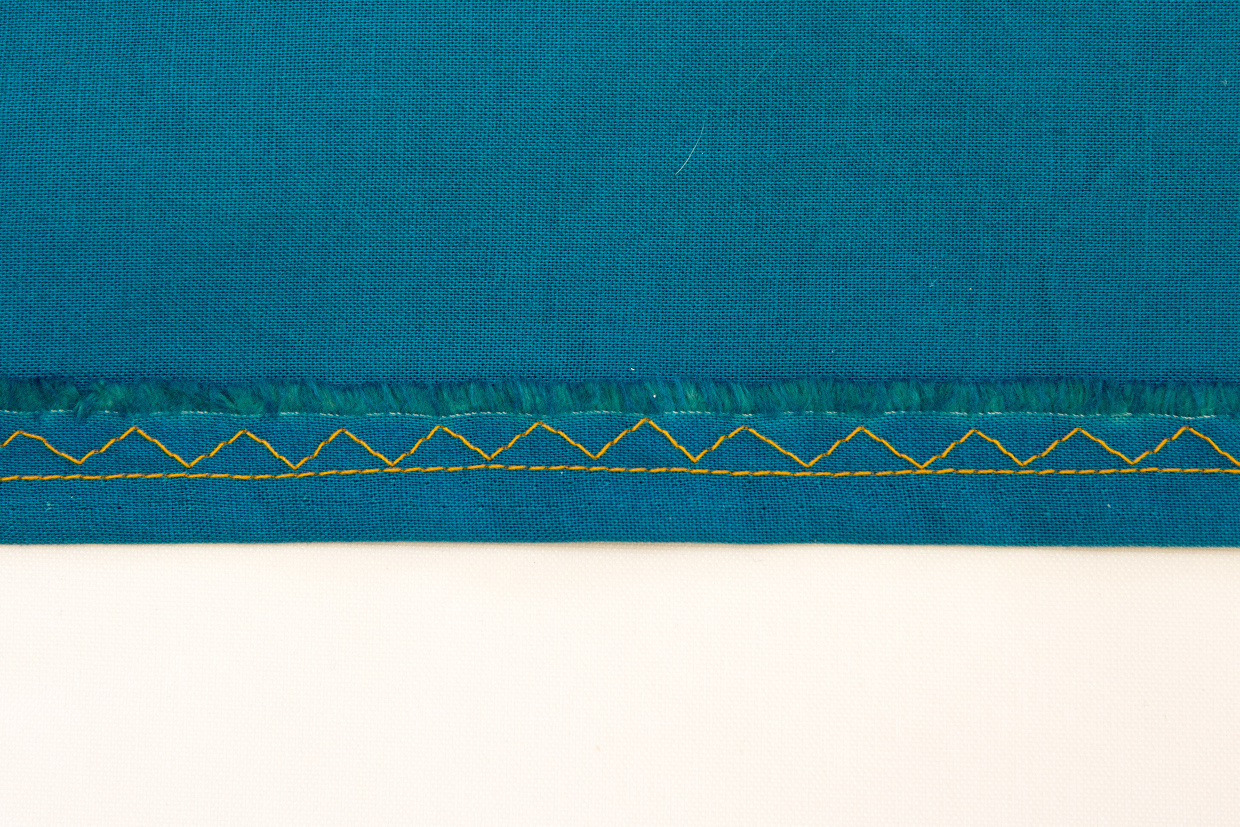
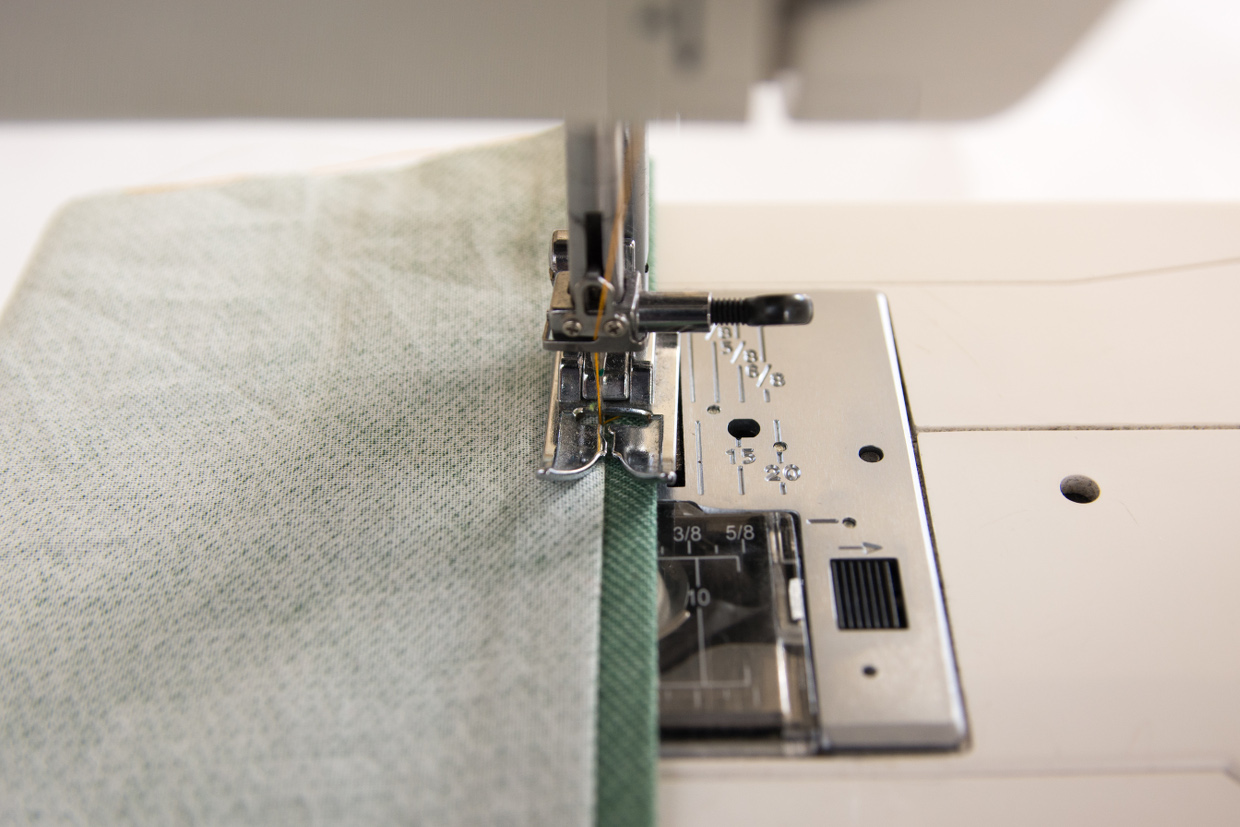
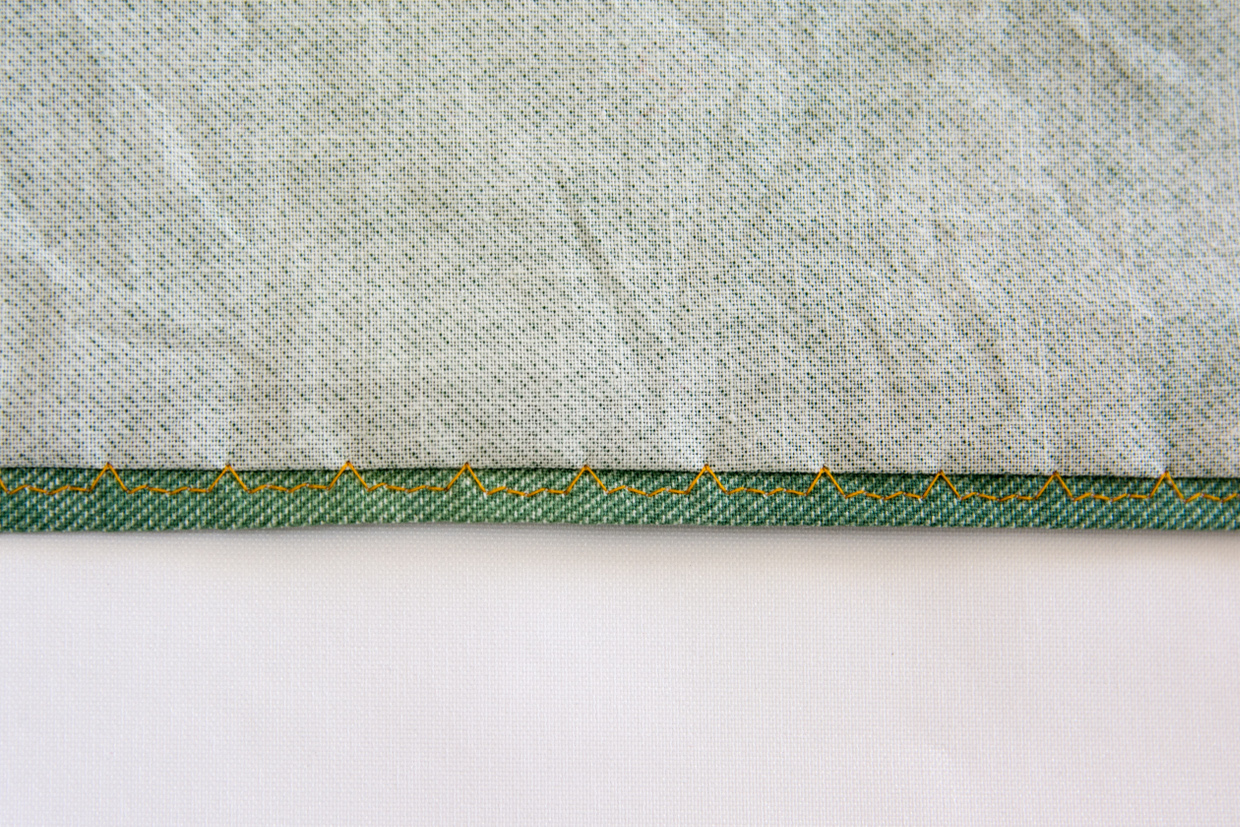
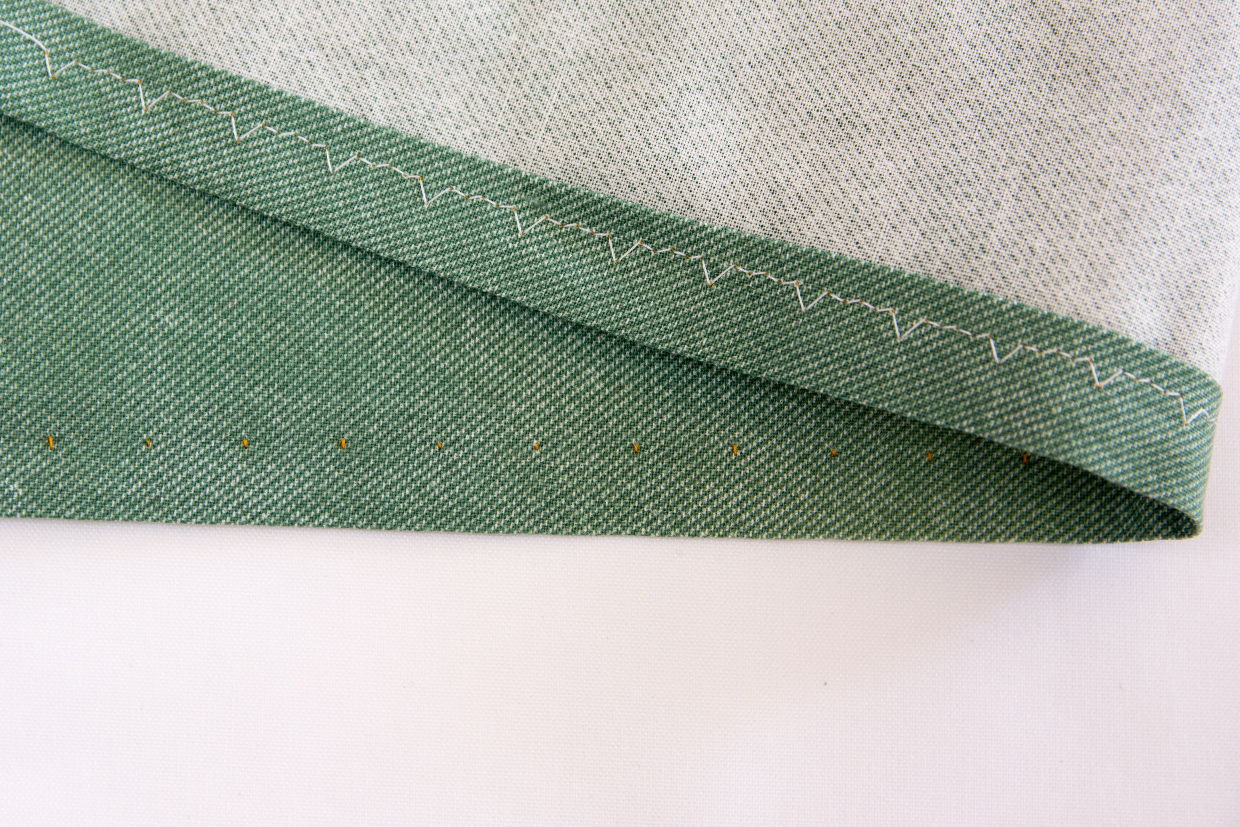
How to do: Finish the raw edge of the fabric somehow (serger, zig zag or tricot stitch), fold up, then stitch. The tricot stitch (or triple zig zag) is shown in the picture below. For lighter weight fabrics, the tricot stitch causes less puckering of the hem allowance than a regular zig zag stitch.
Bias Bound Hem
When to Use: When you want to add color, or visual emphasis to a hem. For added weight on a hem.
For: Binding the hem edge gives a little more weight and structure to a hem (think of the Pinwheel flounce). Allows for a pop of color and gives visual emphasis to the garment’s hem.
Against: Time consuming. Requires bias binding (self made or purchased).
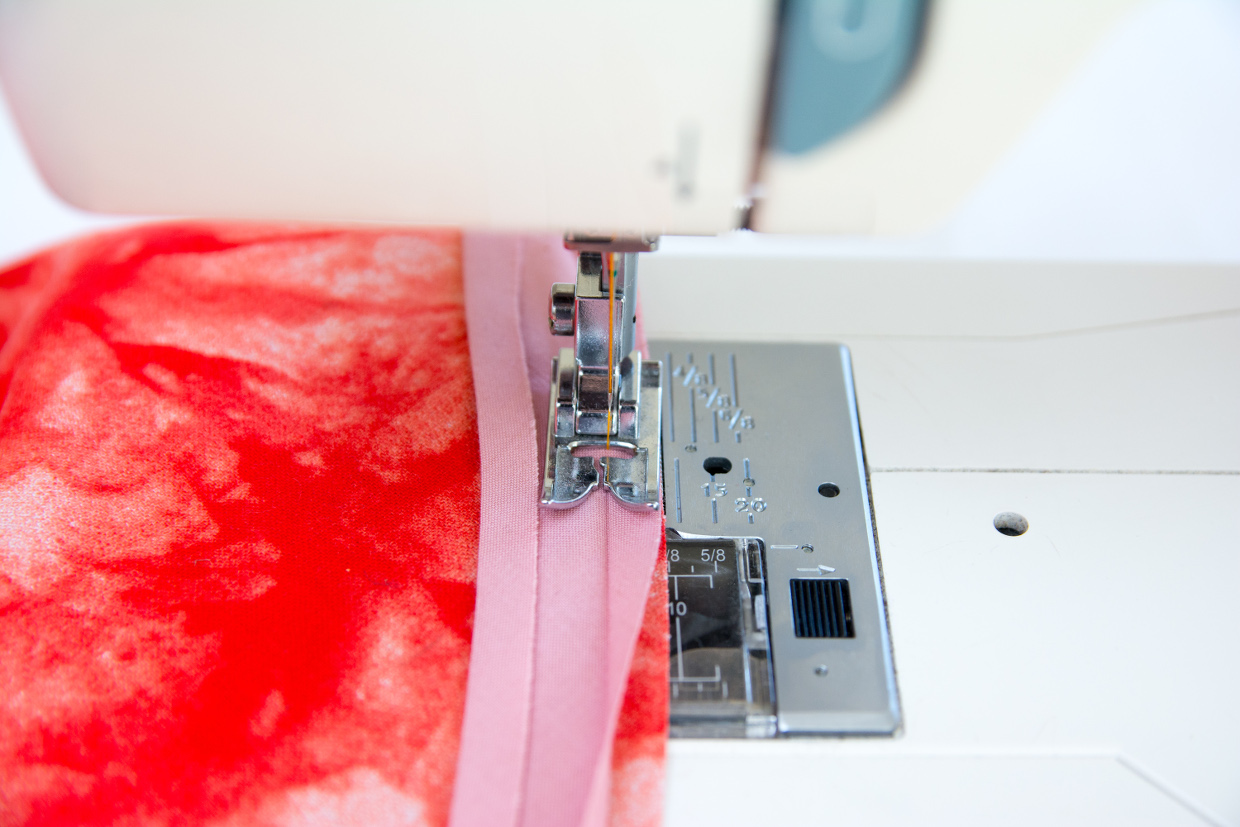
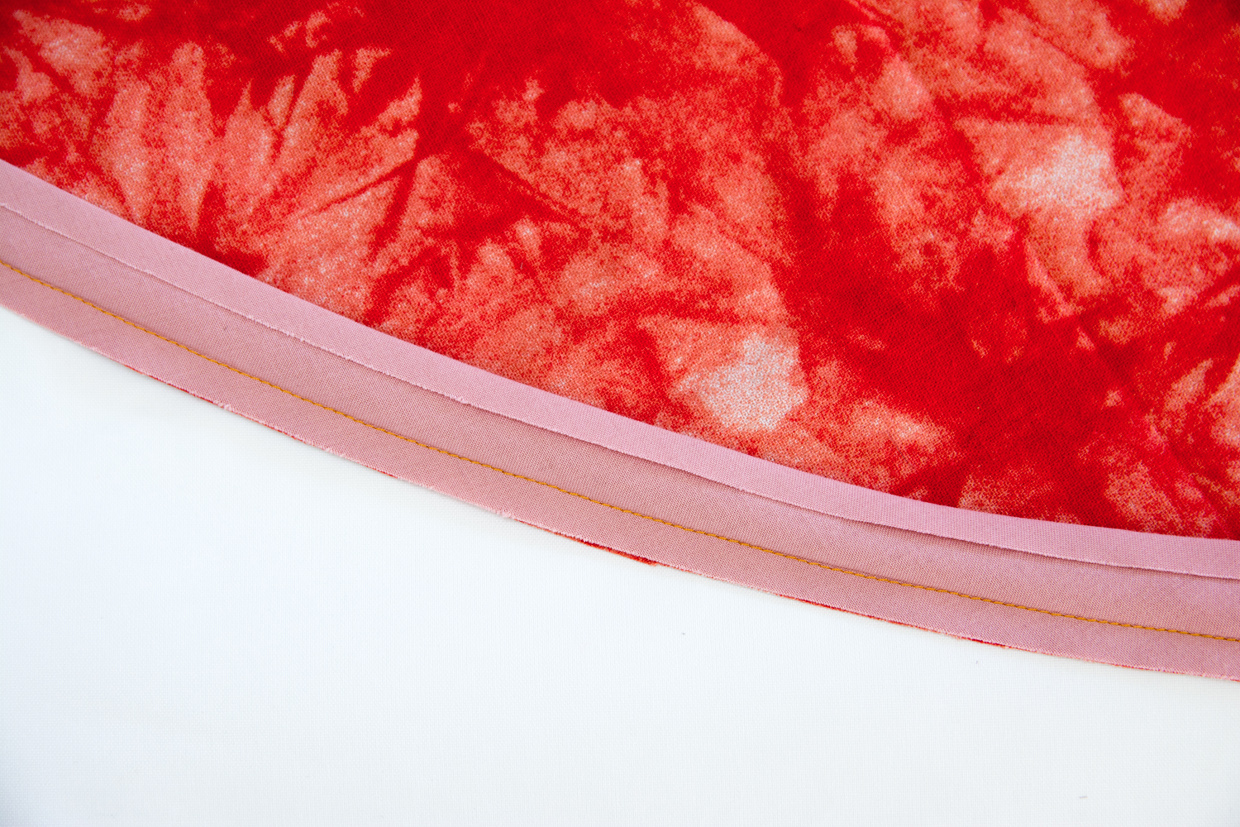
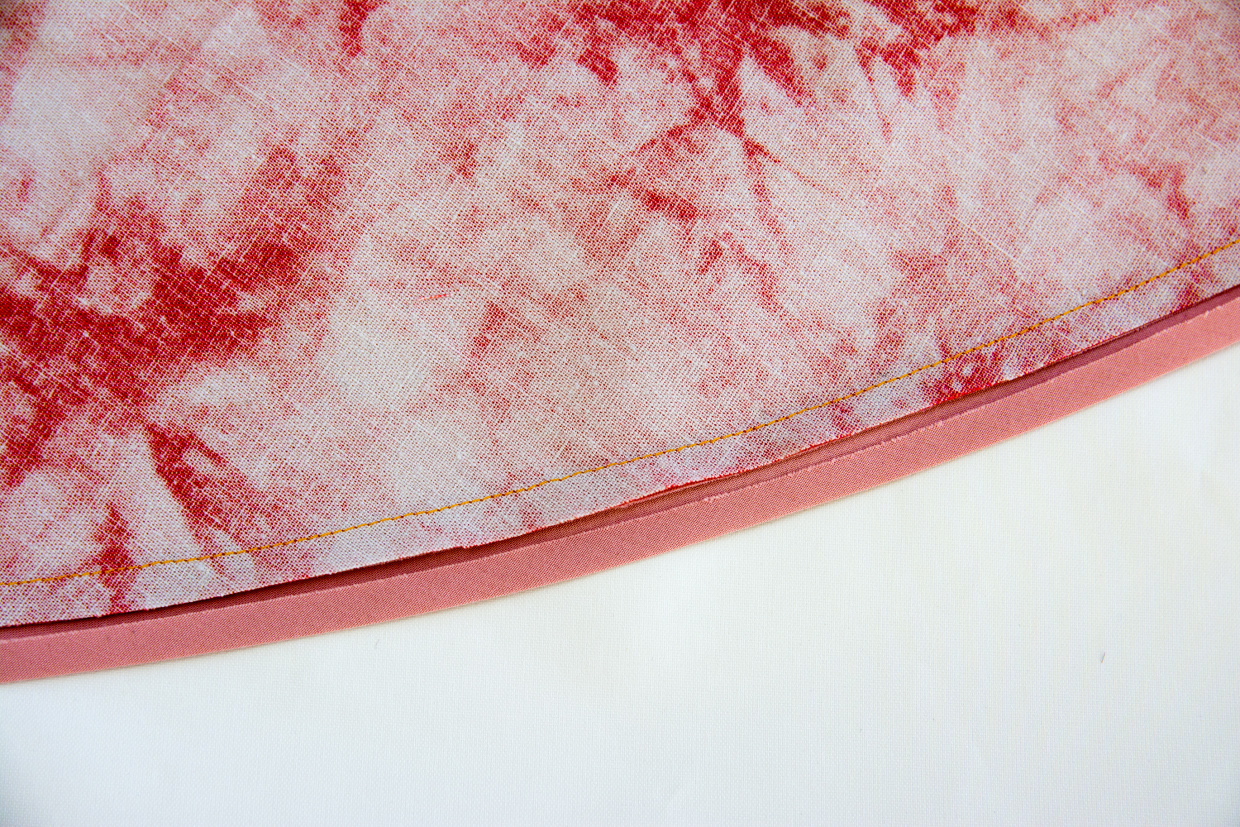
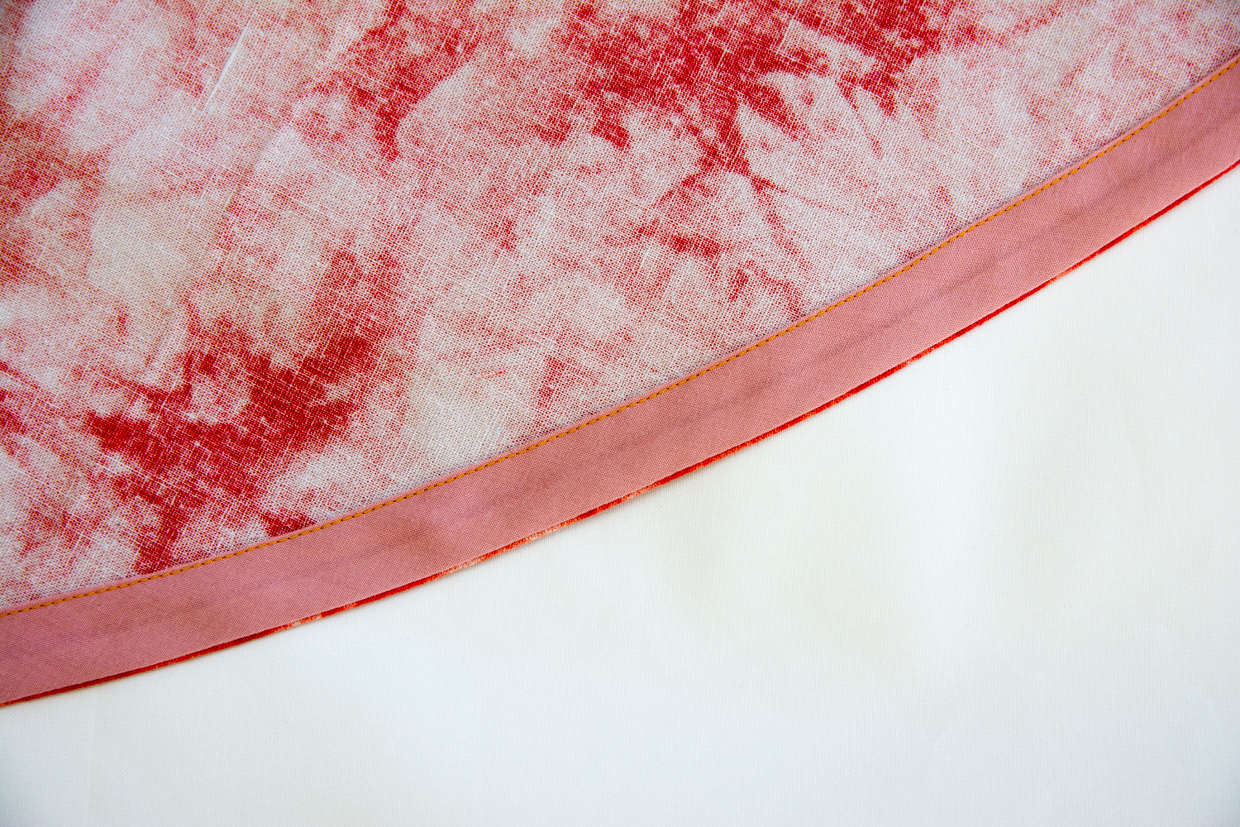
How to do: The best way to achieve a neat finish on both sides of your bias bound hem is to apply the binding to the garment’s right side first. We have a great tutorial for neat bias bound hemming on the blog here.

Tip: I find that pinning the folded bias binding in place creates little bumps and puckers and makes it much harder to keep my stitching neat and evenly on the bias edge. Fabrics that behave well for bias binding, like quilting cottons, can be ironed into place and then usually stitched down without requiring any pins. Often, I will use ¼” quilters fusible web to fix the binding in place with the iron, then stitch it down.
Hem Tape
When to Use: When a double fold hem is too bulky or you don’t have enough fabric for a deep hem.
For: A nice, neat finish. Using a lace or contrast colored hem tape makes for a pretty hem if it peeps out from under a skirt. Adhesive hem tape can be used as temporary no-sew hemming option for when you just have to wear that new dress straightaway! Allows the insertion of horsehair braid into the hem and under the tape to give a hem more stiffness. Can be machine stitched or blindstitched.
Against: Requires hem tape (or similar). Best suited to straight hems, unless a bias tape is used.
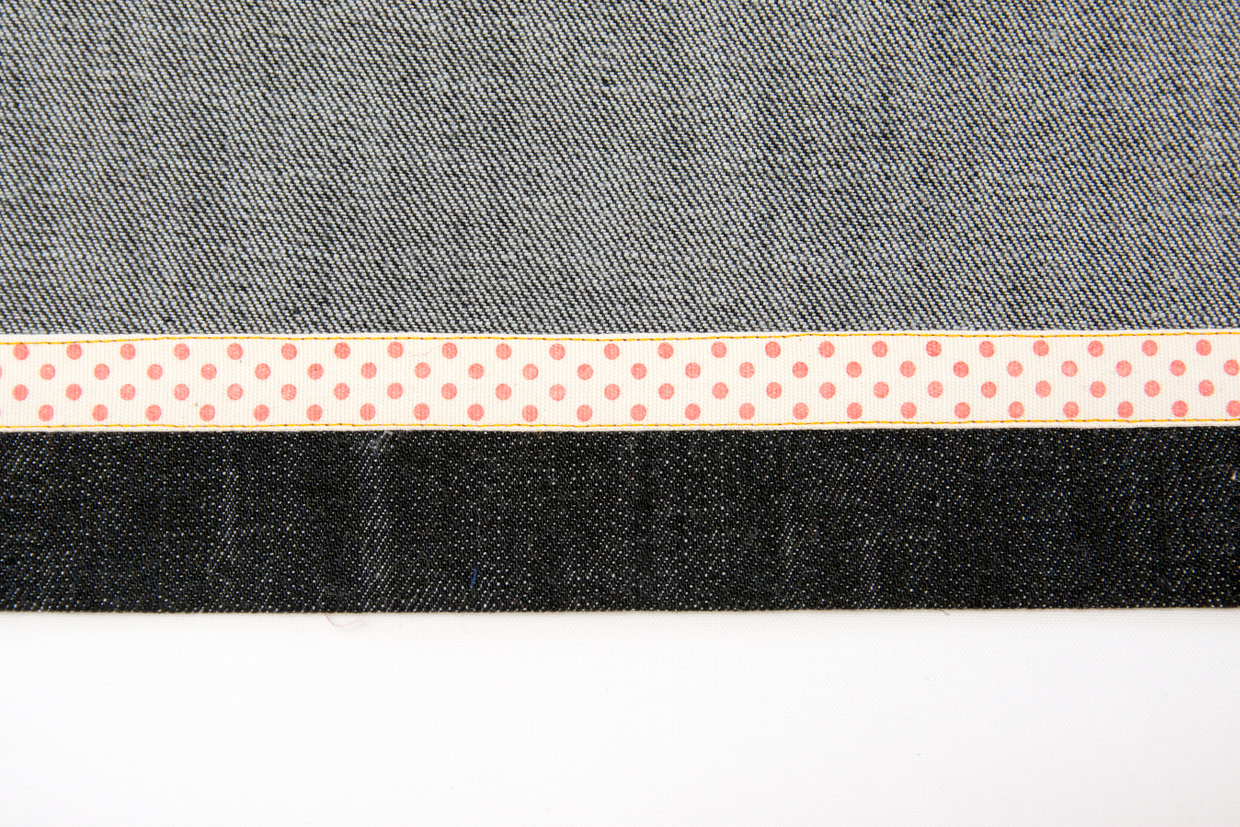
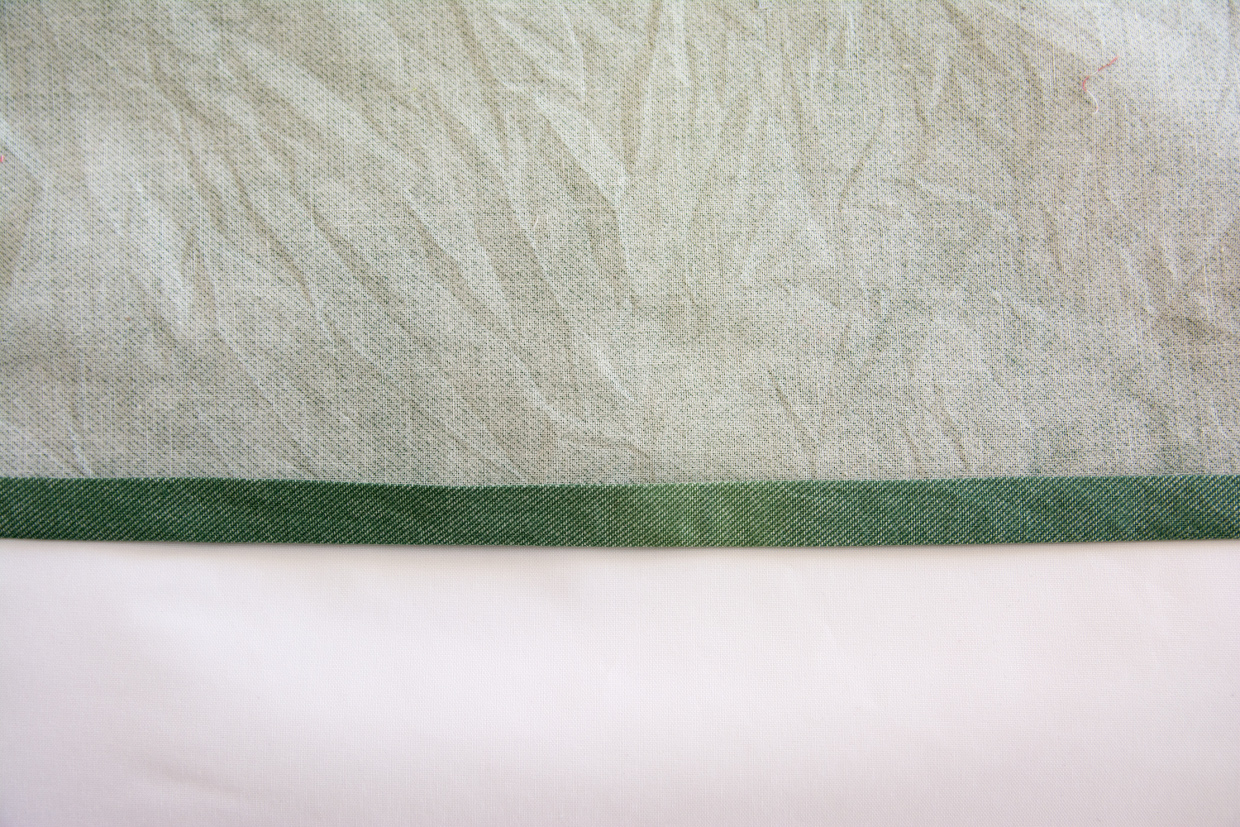
How to do: Press up the hem by the hem allowance. Unfold the pressed hem and lay the hem tape over the right side of the fabric, such that the raw edge of the fabric runs down the middle of the hem tape. Stitch close to the edge of the hem tape, securing it to the fabric.
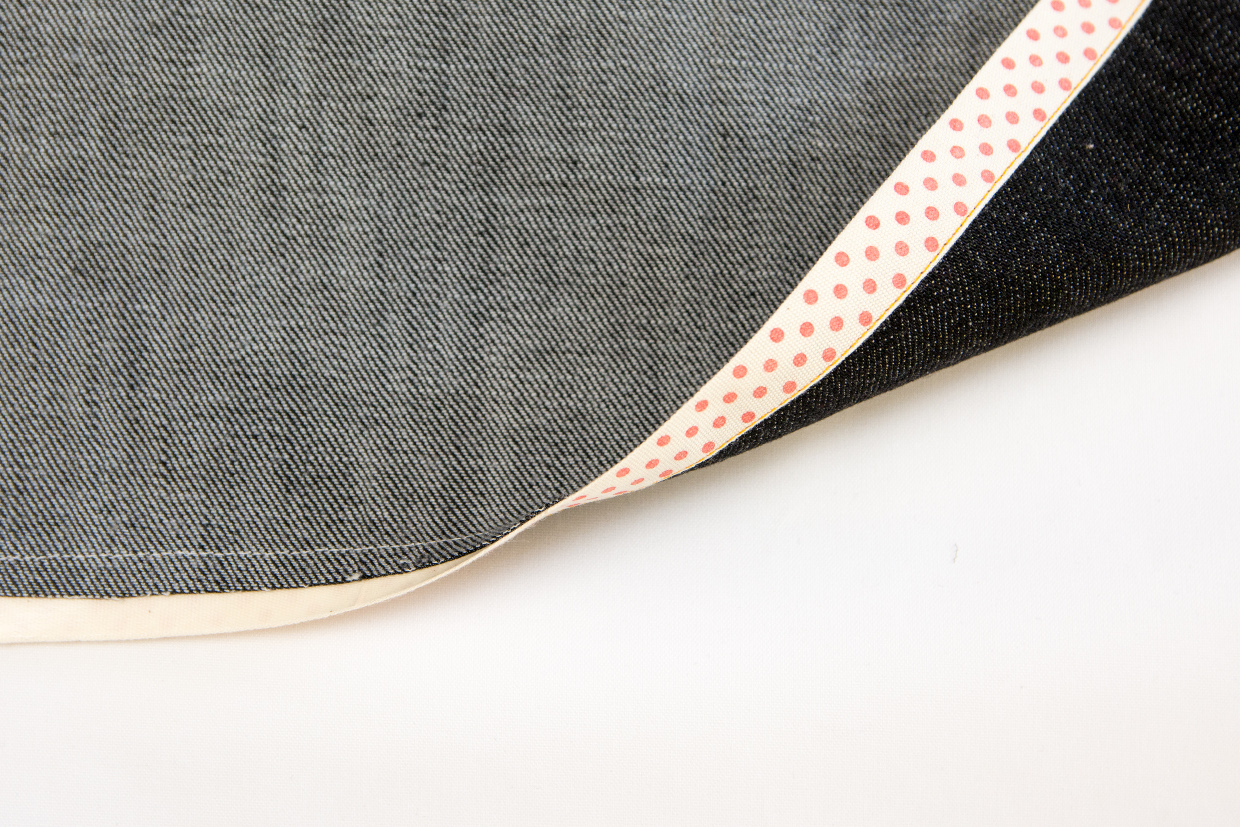
Press the hem again, then, working from the inside of the garment, stitch the upper edge of the hem tape securing the hem. I’ve shown a machine stitched hem finish using a cotton adhesive tape. Alternately, the hem tape can be handstitched for a classic blind hem.
Hem Facing
When to Use: For curved, or oddly shaped hems.
For: Allows almost any shape of hem–think of the delightful scallops at the hem of the Badminton Skort. Preserves hem length if you find your garment is running a bit short. Adds some weight and structure to a hem, especially if topstitched like that lovely Family Reunion Dress hem.
Against: Requires either bias binding, or a pattern that includes a hem facing pattern piece. Perhaps you might draft your own using the bottom edge of the garment pattern piece.
How to do: For many hem lines a hem facing can be as simple as using a strip of single fold bias binding. For how to create and join your own bias binding there are tutorials here. Alternately you can use store bought bias binding. Whether it’s a deep facing, or a strip of single fold bias binding, the technique is much the same:
Stitch the raw, unfolded edge of the bias (or facing) to the fabric, right sides together. For bias binding, stitch in the crease of the first fold. For a hem facing, stitch at the seam allowance.
Press the facing and the seam allowances down, away from the garment. Clip into the seam allowance at any curves that require clipping in order for the seam allowance to lay flat when pressed up.
Tip: Now is a good time to understitch the facing. Understitching is a row of stitching that attaches the seam allowances to the facing. It is stitched just below the previous line of stitching and is only visible on the facing and not the outside of the garment. It helps the facing to roll to the inside and not be visible at the edge of the hem.
Press the facing to the inside and then machine stitch or blindstitch in place.
Alternately: A hem facing can also be applied to the outside of the garment to give an eye-catching hem. The Building Block Dress Book shows how to deal with those pesky side seams if you’re going to attempt this.
Sewing Machine Blind Hemming
When to Use: When you want an invisible hem but don’t have the time or inclination to hand sew it.
For: An invisible, or very nearly so, blind hem that’s quite quick to do.
Against: Can be tricky to ensure you catch the garment enough to secure the hem, but don’t end up with big stitches that are visible from the outside. Requires a sewing machine with a blind hemming stitch option. As per the handstitched blind hem, some care is required when getting dressed to avoid snagging the hem.
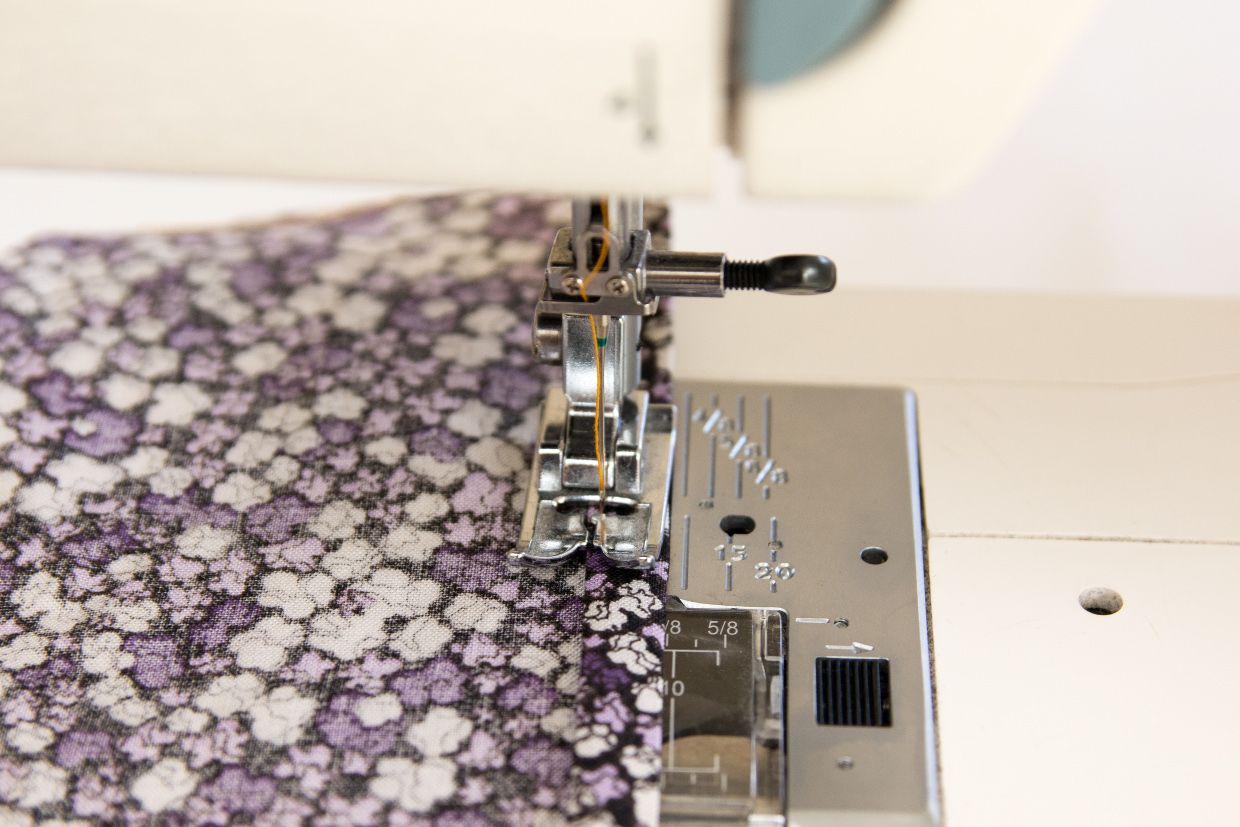
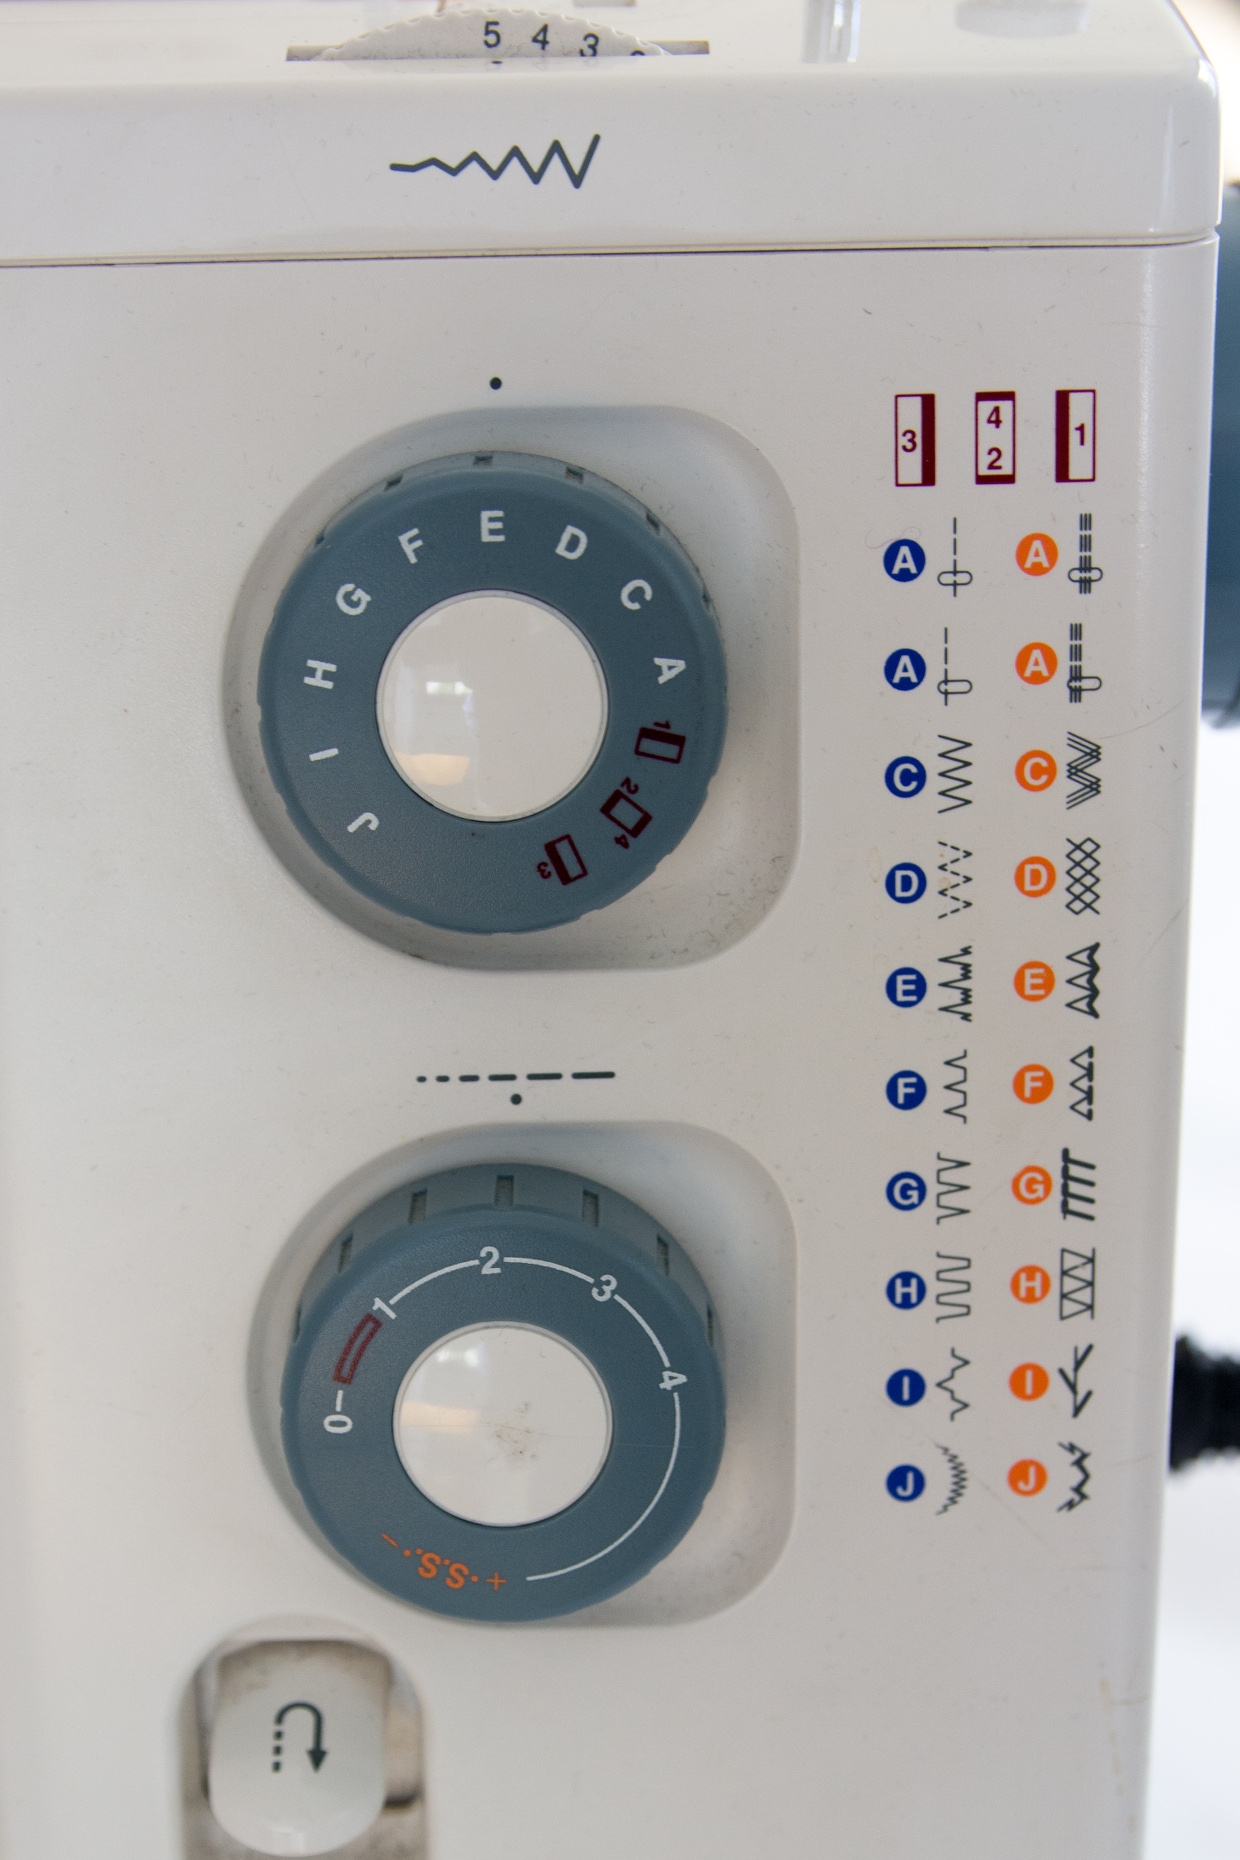
How to do: Select the blind hem stitch on your sewing machine. It’s the one that shows a narrow zig zag with the occasional bigger “lurch to the left”. On my machine, pictured below, the blind hem stitch is indicated by the letter E.
Press up a double fold hem. This is done by turning the raw edge to the wrong side of the fabric by ½” then turning again by the remainder of the seam allowance.
Take the double folded hem and turn it up and under, towards the right side of the fabric, leaving just a ¼” or so of the hem fold visible. The hem fold that was at the top in the first image is now at the bottom in the following image.

Working from the inside of the garment set your sewing machine so that the majority of the stitches will be on the small strip of visible hem fold, and only the occasional extra “leap to the left” stitch will catch the fold of the garment fabric. Adjust the needle position so that the stitches that catch the garment don’t go too deep. The bigger the “bite” the more visible the stitches will be.
Stitch around the hem, then press the hem back down.
Phew, that’s a lot of hem options and we’ve only touched on woven fabrics. Next time we’ll go through hemming options for knit fabrics. Until then, happy hemming!
If you found this post useful, you might want to view the next in the series: How to Hem Everything: Knit Fabrics.
The included hem facing pattern piece was one of the first things that I loved about O&S patterns. Flip it inside or outside for different effects.
This article is good timing for me as I am struggling to figure out how to hem a dress I just finished. It’s a party dress with a half-circle skirt made of two layers: a fairly hefty satin underneath and a lace outer layer. Both layers float freely so have to be hemmed separately. I’m thinking of doing a hem facing with bias tape for the satin layer, but can’t figure out how to hem the lace layer. The pattern says to just press up 3/8″ and do a narrow hem, but my lace is hard to press evenly because of the cording bits in the lace pattern. Any suggestions?
Without the advantage of seeing the lace, I’d be inclined to use hem tape to make a narrow hem facing for the lace and a baby hem for the satin. You might also be able to do a narrow hem with the lace if you use a wash-away stabilizer or something similar. I hope that helps!
This is the most comprehensive, yet simple, hem tutorial I have even seen. It is so complete. I have a long chiffon dress that has been waiting to be hemmed. I now have a plan of attack. That’s for the added feed dog tips. I have saved this to my Sewing Techniques Pinterest board: https://www.pinterest.com/thelostapron/sewing-techniques/
I save my tear away stabilizer scraps after machine embroidery and I use these scraps when I need something to keep fabric from being eaten by feed dogs or need something to pull on when starting a seam. The stabilizer scrap has much more body and stiffness to it yet tears away easily right down the seamline when I’m done.
This is a really helpful, informative and also entertaining read. I look forward to further similar posts. Thank you, Shelley!
Thank you for all those tips!
There is one kind of hem missing which I find myself using really often when sewing children’s (i.e. girls’) clothes: a hem with added lace or ricrac trim. Just attach the trim with a serger or a zigzag stitch to the right side of your garment, turn under, press and then topstitch. (See for example: http://galerie.farbenmix.de/details.php?image_id=71486&mode=search – a dress I made long before discovering Oliver+S…) – Simple, quick and pretty!
And there is a nice Farbenmix tutorial for rounded hems (in German only): http://naehzimmer.farbenmix.de/index.php/tipps-und-tricks/26-naehen/1117-runde-saeume
All the best!
Susanne
hi there
I am having difficulties every time I stitch half round shape, curve shape, and square shape because every shape has their finishing which is very difficult to sew:
CURVE-HOW TO SEW PERFECTLY
SQUARE -HOW TO SEW WHEN REACH THE END
ROUND- HOW TO SEW EXACTLY TO GET THE ROUND SHAPE AS DESIRED
Please help
What about tencel fabric? I’d like to cut into a mock turtle neck sweater and hem the v created. But I don’t know how the fabric will take the cut? Does the edge need to be covered with bias tape or some hem material to keep the fabric from fraying? It is not an expensive shirt, but I’d like to have a fighting chance of having the renovation work.
I have a skirt or Jean pants that the hem turns upwards and even ironing them it is hard to keep them down what can I do to make them permanently stay down and still look good?