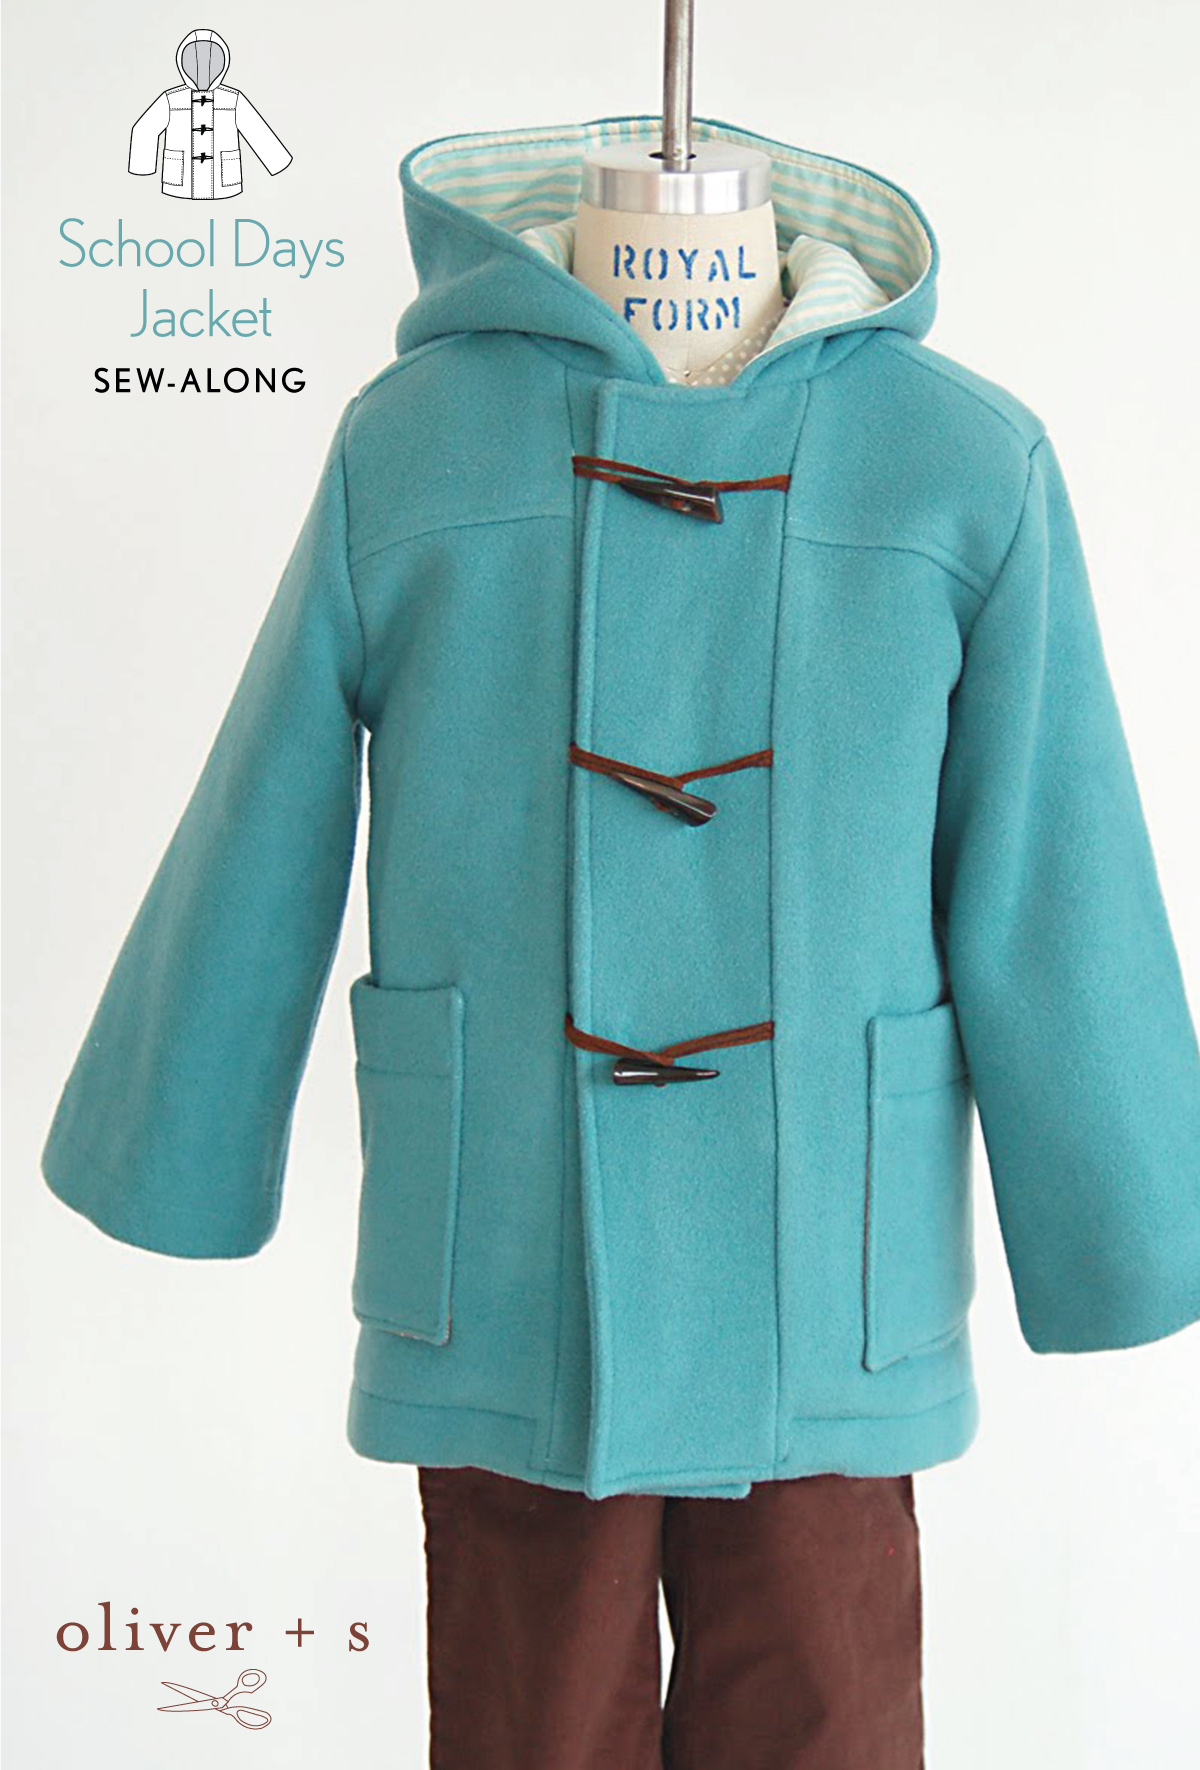
Welcome to day one of the School Days Jacket Sew-Along. Today Janice is going to cover fabric selection, assembling the hood, and assembling the front-jacket panels. Thank you for being here Janice!
Thanks so much to Liesl for hosting the School Days Sew-along on the Oliver + S blog!
I’m Janice, and I blog at So-Cal Sewing Mom, and I’m Juliamom2009 on Flickr. I sew for my fourth and final child, Julia.
I bought the School Days Jacket pattern as soon as I got hooked on Oliver + S patterns, but haven’t made it – for a few reasons. I was daunted by the many pattern pieces, and we live in Southern California and really don’t need a heavy winter jacket. But, I love the pattern so much, I really wanted to make it. So, here it goes!
One of the toughest thing about making this jacket is the preparation. What are you going to make? A raincoat? A wool coat? A denim jacket? And where to source good/proper fabric? What closures are you going to use?
If you read through the many posts in the Oliver + S forums, many questions are about where to source good wool, etc. Well, here’s my advice:
I like to go with what I know, what I’ve felt and sewn with.
- Pendelton: Pricey, but worth it. You can get it online in their shop, and I’ve actually been to some small town shops that stock it.
- Johnson Woolen Mills: I was just in this shop a month ago, and bought some beautiful pink plaid (unfortunately not listed on their website). The staff there is really nice, and I bet if you were looking for something specific, they would be very helpful.
- Moda wool: I’ve used wool from the manufacturer Moda for a prior project and can absolutely vouch for it. It’s 80% wool, 20% nylon and the bolt indicates that it’s washable. I haven’t washed mine yet, you can do a Google search for Moda wool and you should be able to find on-line shops that stock it.
- Thrift shops/eBay: I just got a full length women’s size 16 coat in gorgeous authentic suede. The good thing about “recycling” fabric is that it’s most likely been cleaned already, so you know how it’s going to wear. Look in the big and tall men’s section – a great source of lots of fabric, for a thrift store price. One of my all-time favorite pieces from the amazing Nicole is this creation. Nicole suggests searching eBay, extra large men’s size, and sort by prices under whatever you’re willing to pay. Smart idea!
- Brick and mortar shops: Not quilt shops, but the shops that have been around for years and mostly the locals know about them. You have to really hunt these shops down; I’ve had good luck using technology in my travels – when I’m in a new city, I check Yelp for nearby fabric shops. You can generally get a sense of the type of shop from the reviews. I’m lucky to live near the garment district in Los Angeles, but sometimes, too much selection actually becomes overwhelming. I’d still rather go to the small shop.
If anyone would like to contribute their favorite sources for jacket fabric – wool, etc – I’ll gladly do a round-up on my blog. Just shoot me an email through the “email me” link on my blog – I’ll make it nice and pretty and sortable.
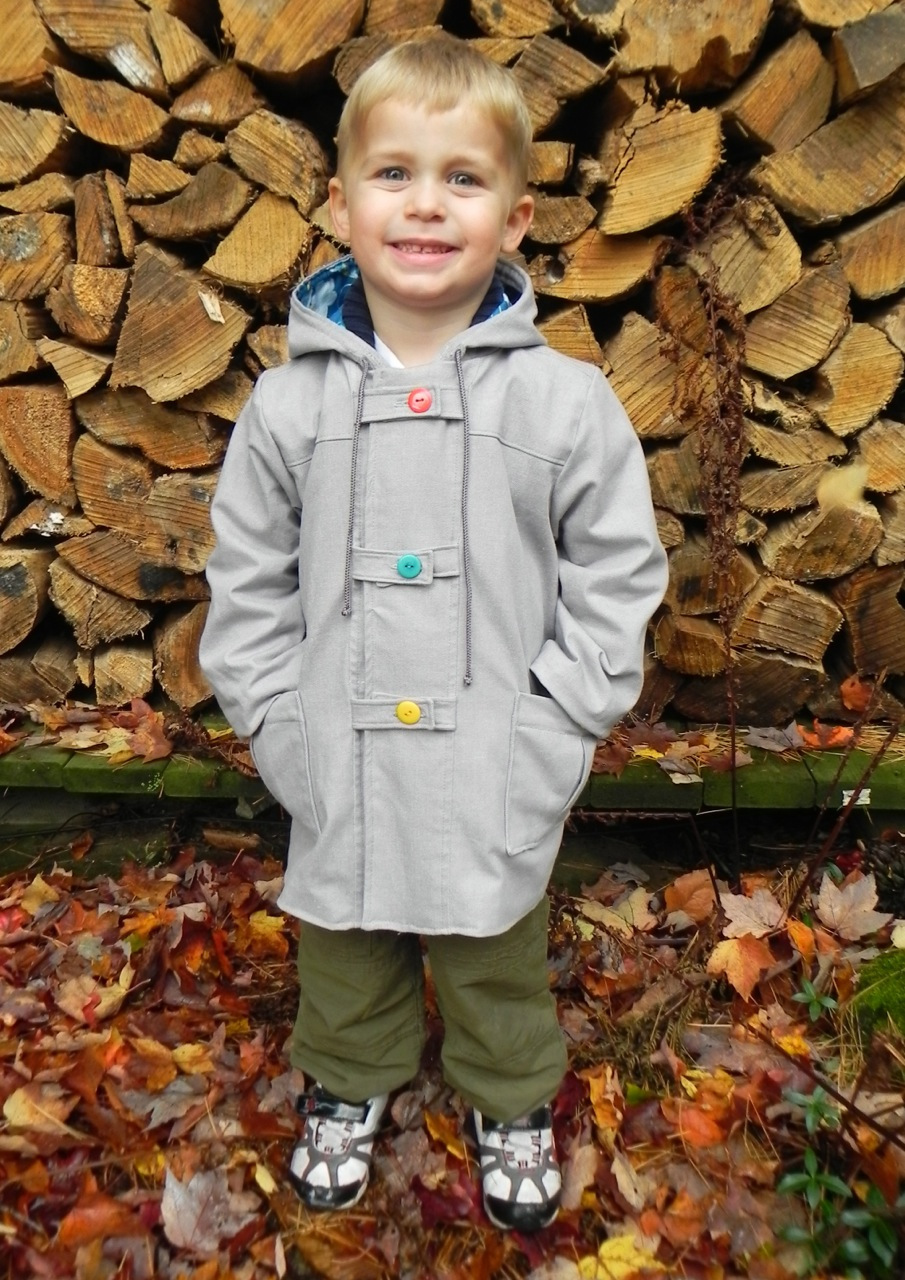
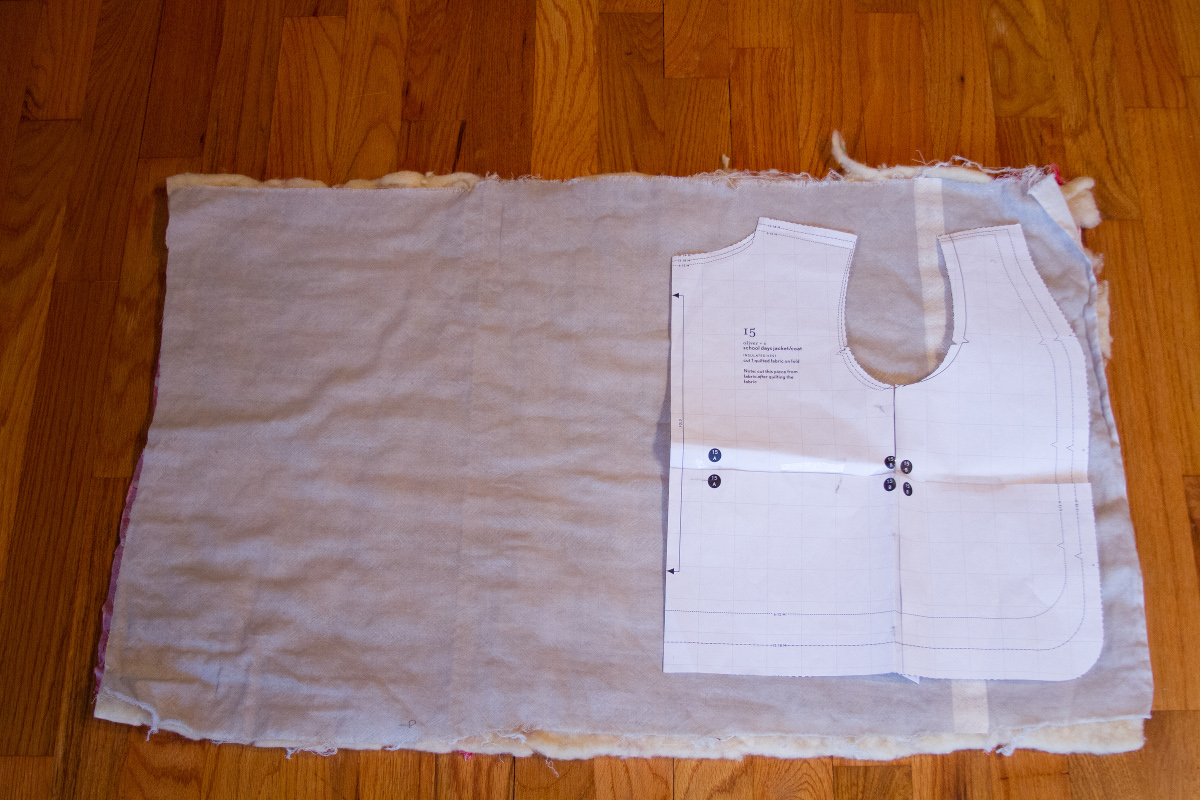
After much thought and reading, for my first version of this jacket, I decided to use some beautiful dark brown corduroy, lined with Polartec Classic 100 (fleece) in the body, and quilting cotton (oh yes, designed by Liesl Gibson from her Ladies Stitching Club line for Moda) backed with Thinsulate in the arms and hood. We’ll see how this goes.
There are of course many great instructions as in all Oliver + S patterns. The ones for the jacket that jump out at me are to grade the seam allowance if you are using wool, and the hint on page 2 about edgestitching versus topstitching.
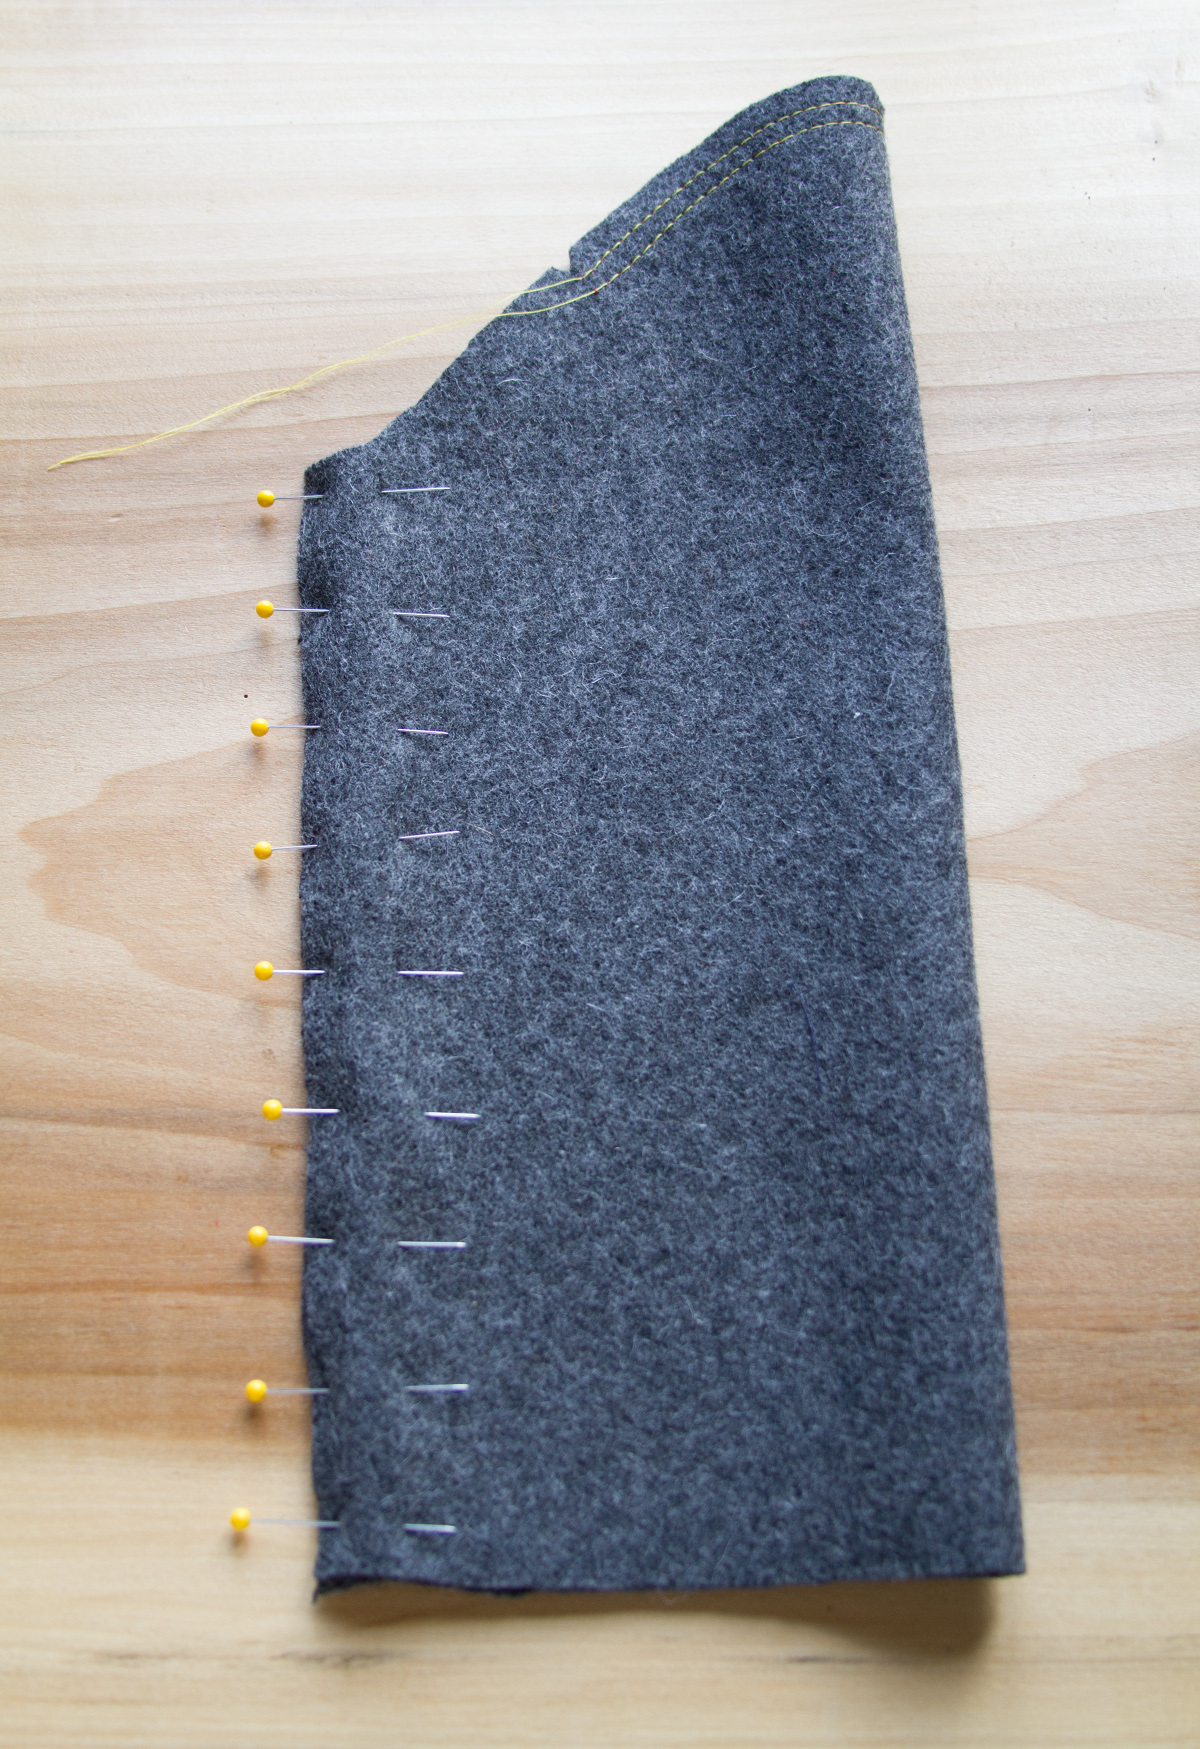
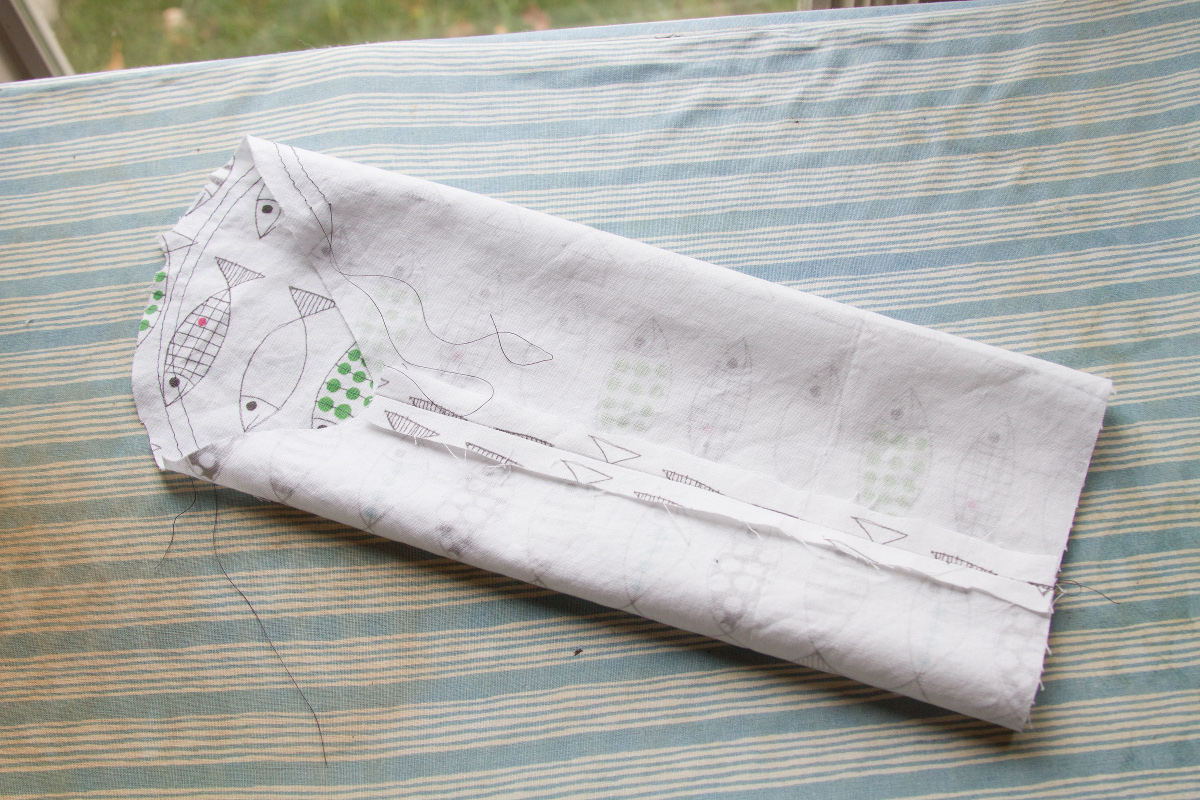
Assemble the Hood
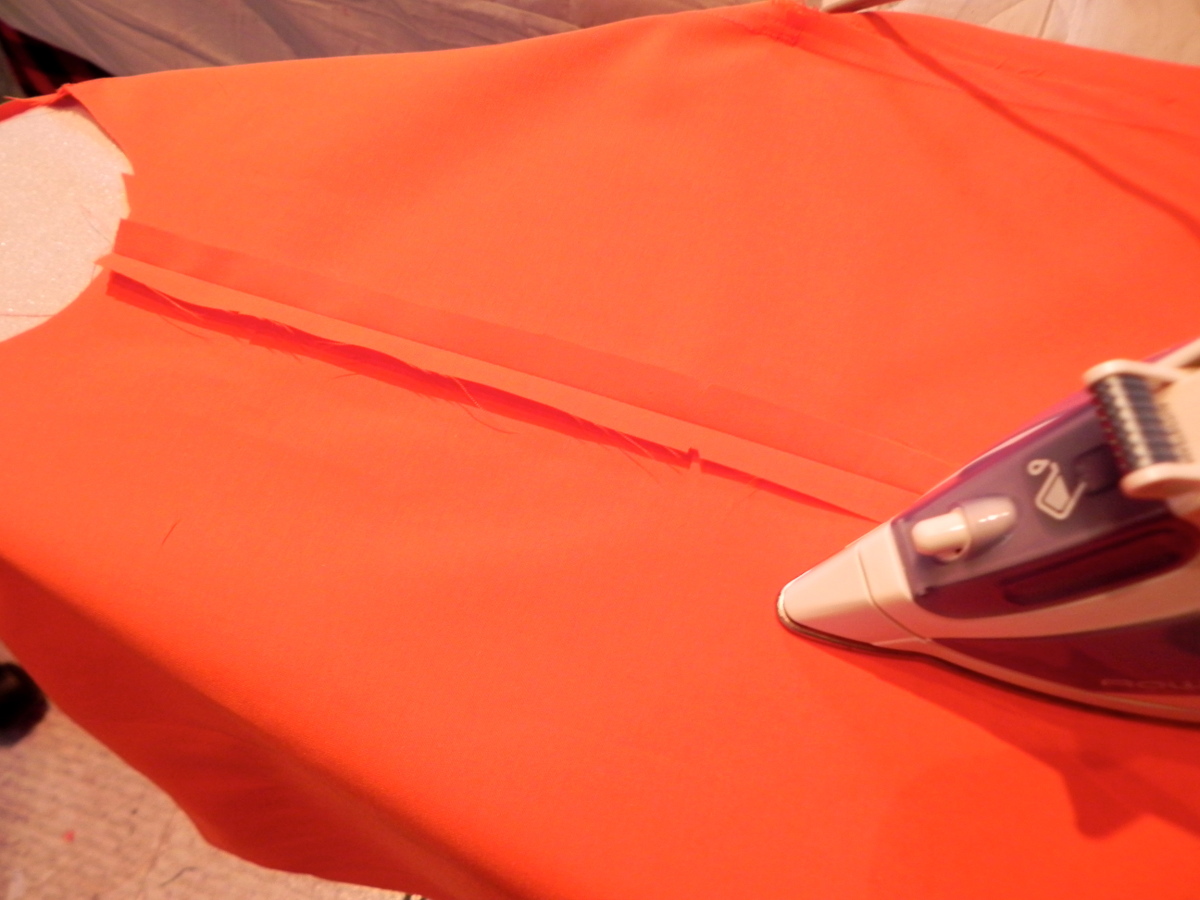
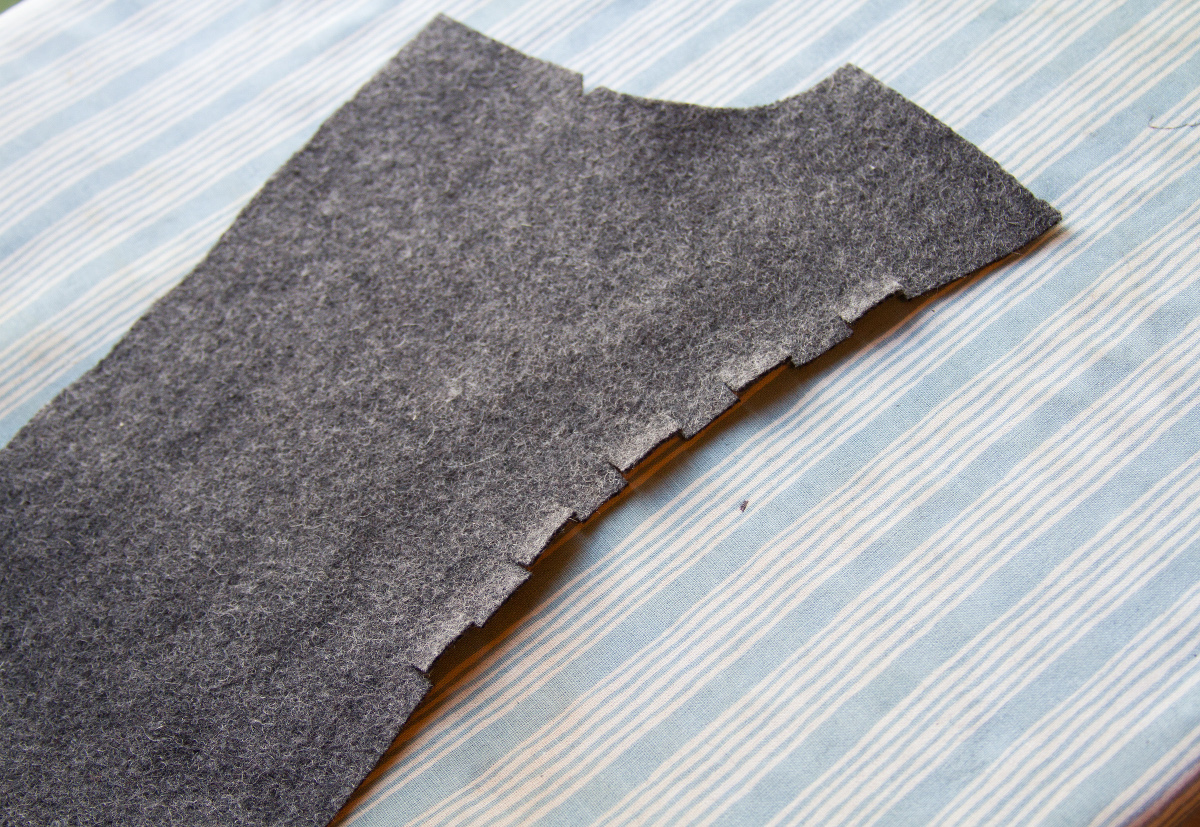
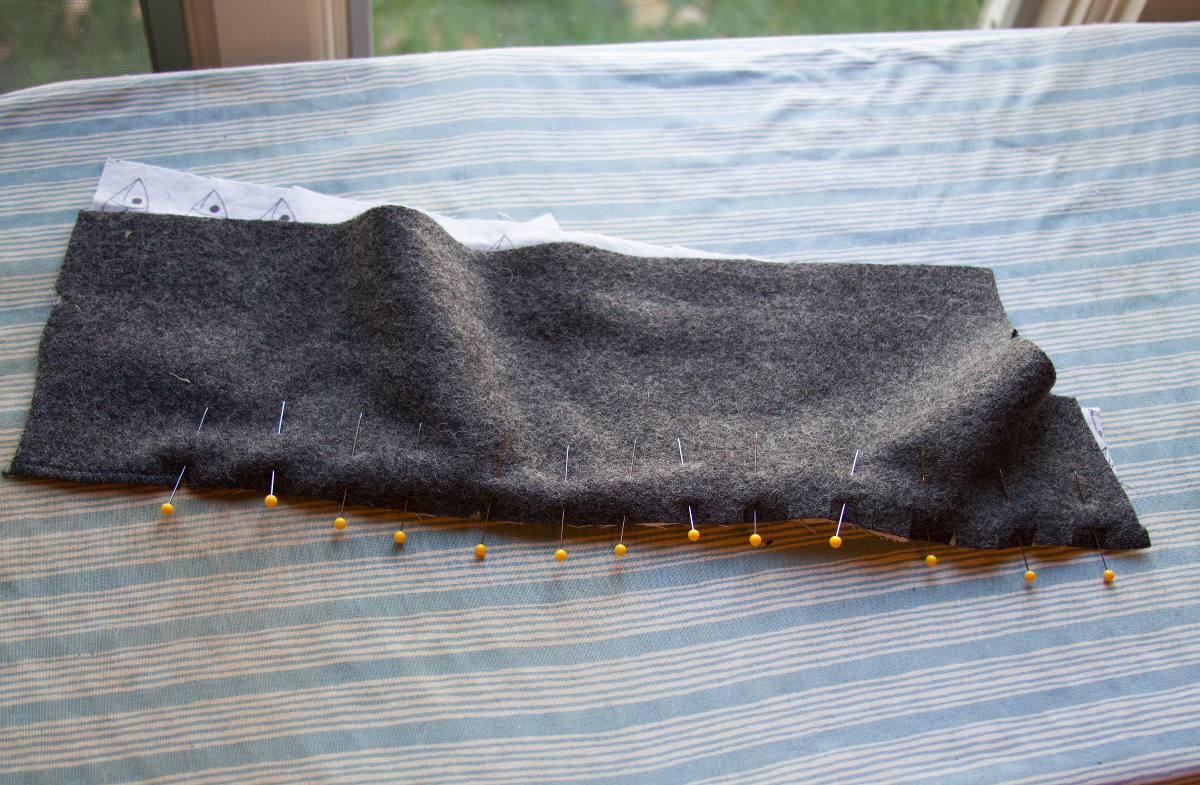
Step one shows the insertion of the center hood between the two side hood panels. For me, when inserting a flat piece into a curved piece, I always pin from either end first, leaving the curved part to be eased in last. Although the directions don’t mention this, I will run a line of stitching just inside the seam line along the part of the hood that is to be eased to give me a “stop” line for my clipping.

I chose to edgestitch as I am using corduroy – not a really heavy or bulky fabric.
Repeat steps one and two for the lining, but don’t edgestitch the lining seams.
For steps five and six, pin the lining and outer hood with right sides together and sew the perimeter with a 1/2″ seam (leaving the neck edge open). Turn the hood right side out, edgedstitch the outer edge of the hood, and then baste together the lining and the hood at the neck.

Assemble the Front-Jacket Panels
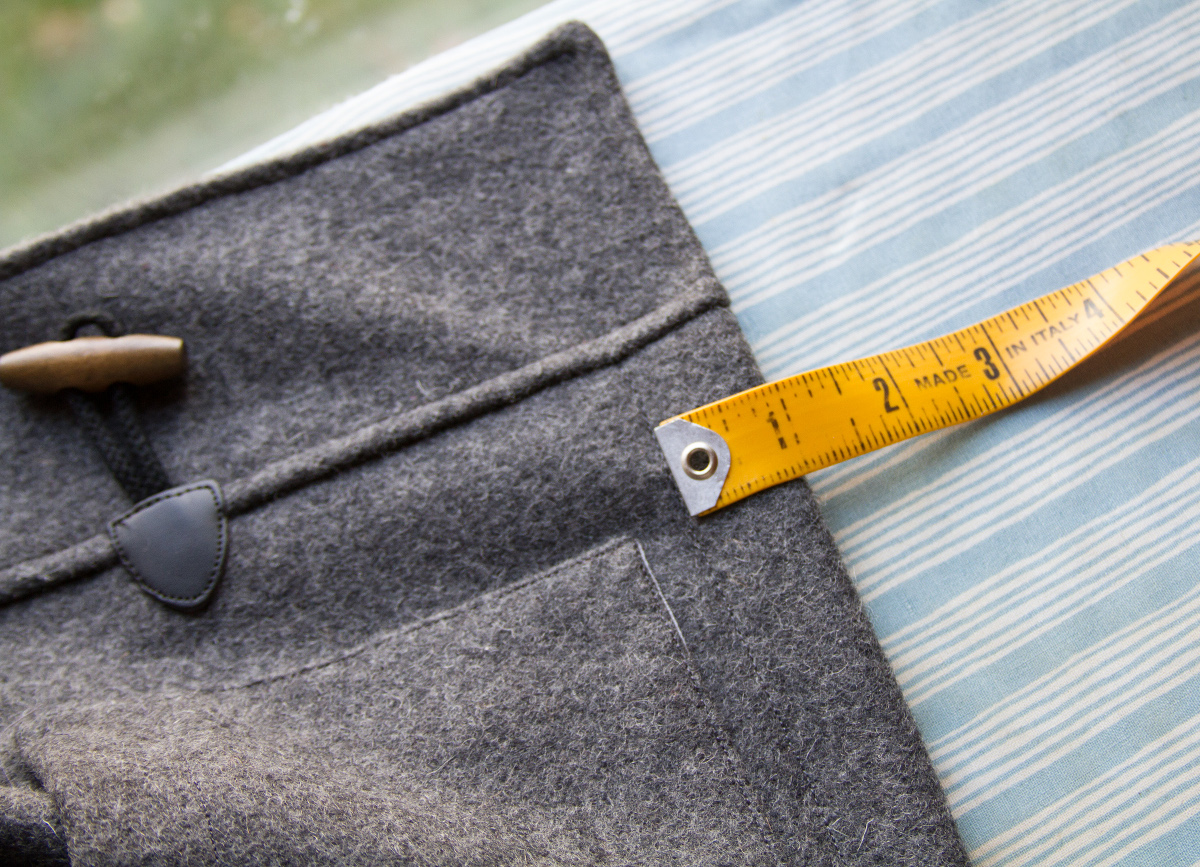
Here’s where you have to make choices. Are you using Velcro or snaps inside the jacket? Are you using toggles? If you’re using toggles, are you making the closures, or are you using cord? Or perhaps leather? This is where a good read through the Oliver + S forums on the School Days Jacket really comes into play. Leather closures, although amazing looking, seem NOT to pass the kid-test. I personally attempted to make fabric cord from the corduroy I was using for my jacket and a loop turner with no success whatsoever as the fabric was too heavy.
So, since I’m a sewing supply hoarder, I pulled these from my stash:

I don’t know how they are going to look/work/function, so I’ll have to report back – but that’s what I’ve decided to use for my test version.
I am hoping to use magnetic snaps inside the jacket, but am unsure when to insert them, this is why you do a test version!
Attach the front yoke to the jacket, and either edgestitch or topstitch – another decision!
Per the instructions, depending on what you are using, either attach Velcro to the front closure, or wait to insert snaps.
If you’re using toggle closures or tab closures, steps 3 and 4 will guide you through making and attaching them. In step 5, attach the front placket to the jacket/yoke panel. Edgestitch/topstitch the seam allowance on the placket side – making sure not to catch the toggle cords or button tabs.
Isn’t all this topstitching/edgestitching looking good already? Wouldn’t it be great in contrasting thread? Maybe next time.

Check my blog/Flickr for my finished jacket later this week!
Send me off any suggestions you may have for sourcing wool, etc. And I hope to see everyone’s kid in a gorgeous School Days Jacket soon!
This is day two of the School Days Jacket Sew-along. Our friend, Deb, is back today. You remember Deb, right? She has stopped by before with her lab coat, favorite pattern, and Flat S visit (which included pirates!). Today she is taking us through this second day with the following steps: assembling the back jacket, sewing the shoulder and side seams, and sewing and attaching the patch pockets. Now I’ll hand it over to Deb.
This section of the jacket is easy and for the most part, fairly quick.
With your cut out pattern pieces #5 back yoke, #7 back, #10 pocket, #11 pocket lining and the finished front portion that was done during day 1 of the sew-along, let’s get going.
Starting with pattern piece #5 the back yoke, pin it to pattern piece #7 the back, with both pieces having their right sides facing each other.
Stitch with a 1/2” seam allowance.
Next, flip the yoke upwards and then press the seam so both sides of the seam allowance are on the yoke portion.
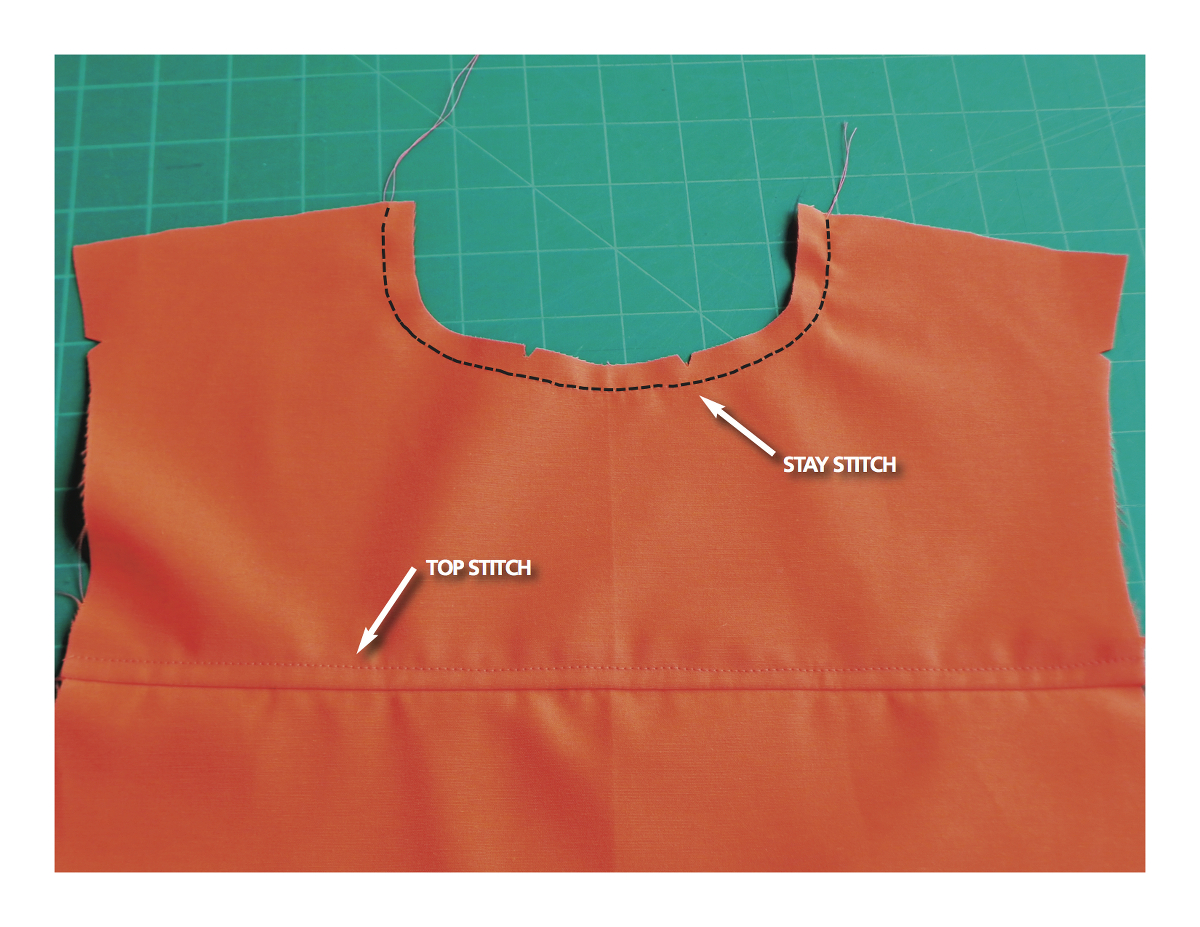
On the outside (right side) edgestitch or topstitch on the yoke side of the seam. Use the same topstitching distance and stitch length as you did on the front of the jacket.
When you’re finished, trim the excess seam allowance on the inside (wrong side) if you want, being careful not to cut into the stitching or jacket.
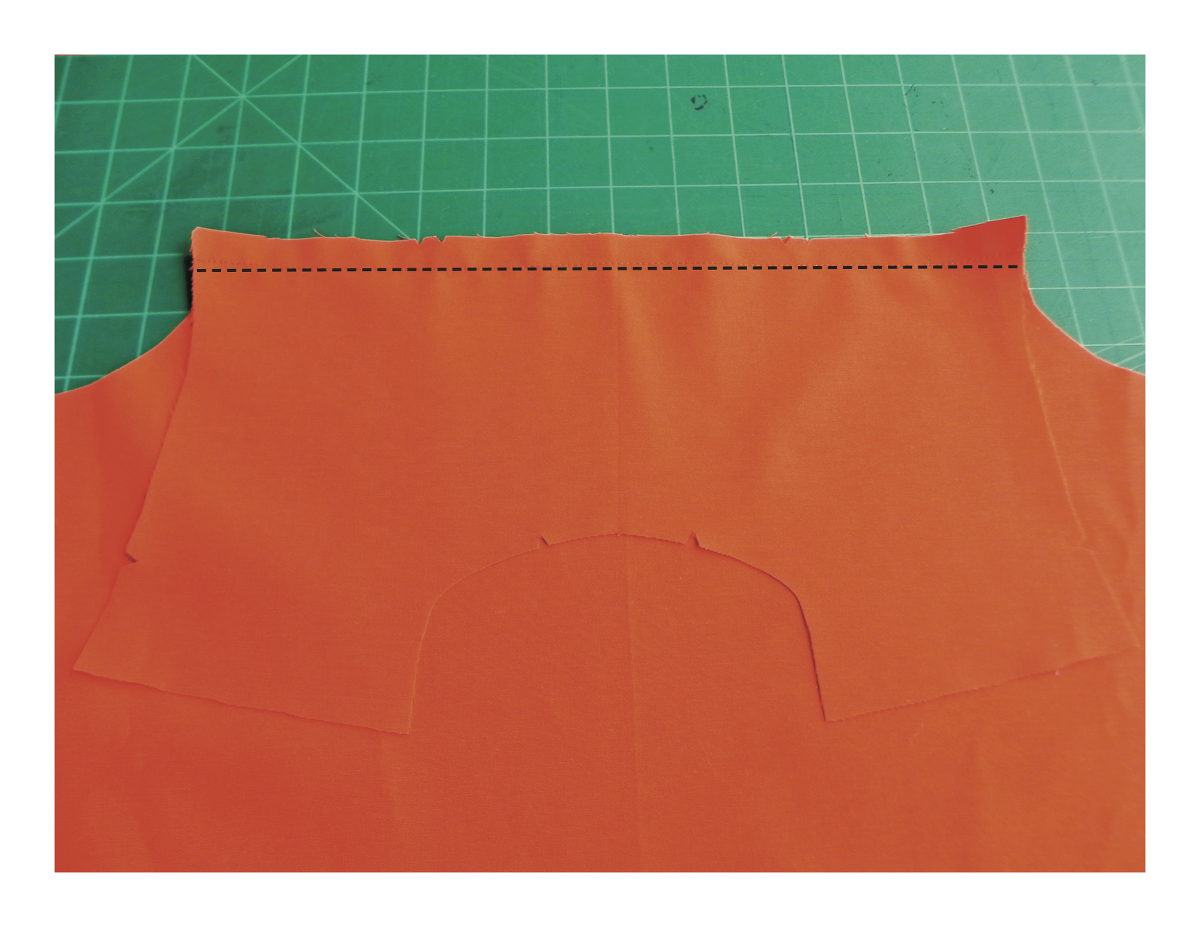
Then move up to the back neck edge, and stay stitch all around the neck 3/8” from the edge.
The next step is to attach the two front pieces with the back piece you just finished.
With the right sides together, pin the front sections to the back section at the shoulders and stitch with a 1/2” seam.
(Note that the shoulder seams have been moved 1″ forward therefore the lengths for the front and back will look uneven. This is part of the design but will look perfect when the jacket is completed.)
Press the seam towards the back section and edgestitch or topstitch.
On the inside, trim excess seam allowances if you want being careful not to cut the wrong bit of fabric!
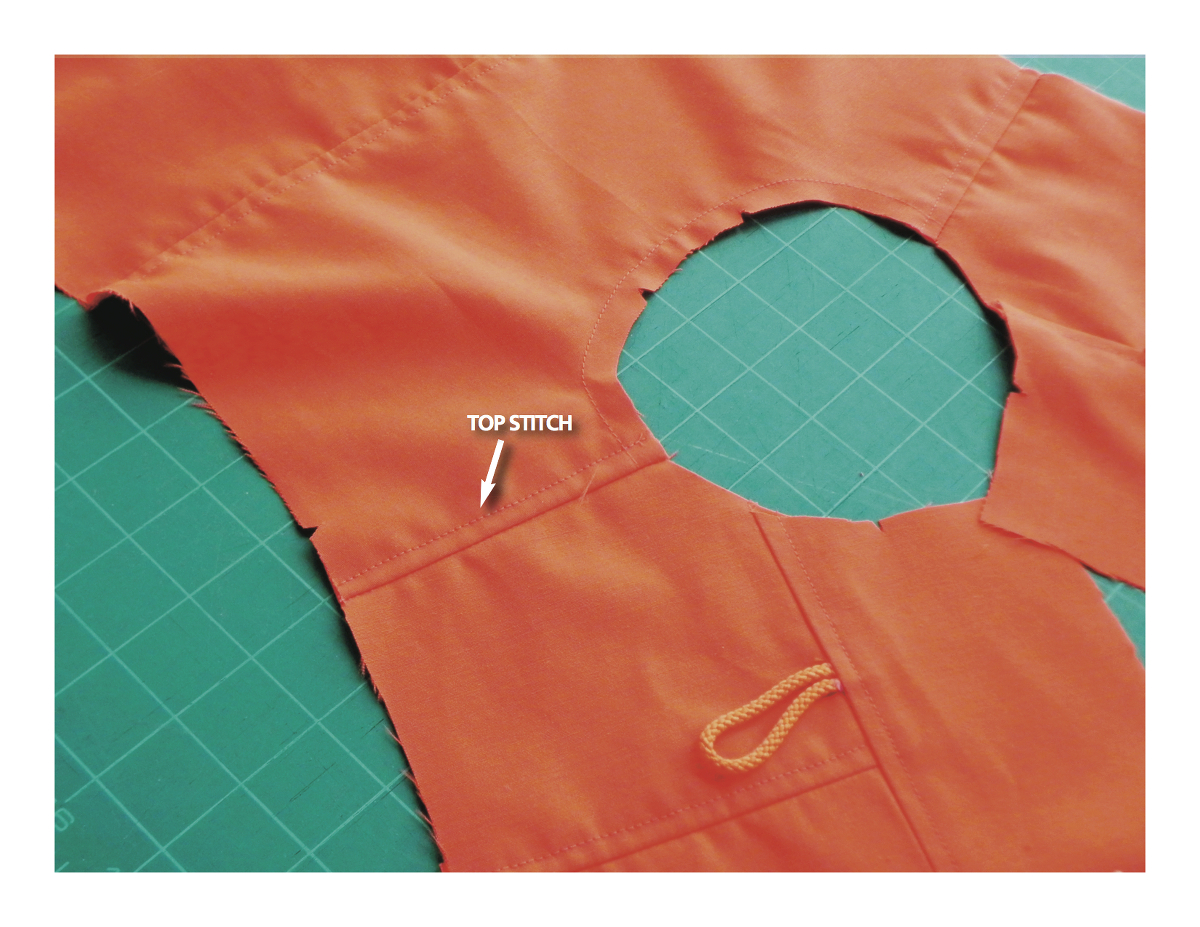
With right sides together, pin the sides of the jacket together matching the notches and stitch with a 1/2” seam allowance.
Then press the seams well. The pockets are going on that area so those two seams need to be flat.
Since the side seams will be hidden in the lining, it isn’t necessary to finished the seam allowance edges.
Say, this project is starting to look like a jacket now! There’s a front section with closures, a back section and even side seams.
It’s also time to turn the instruction sheet over to Page 3. Woo-hoo, progress!
Now we’re going to construct the pockets.
At the end of the instructions for Pocket Construction are some tips and ideas for pocket lining and design.
You may want to read ahead before continuing with the pocket construction.
Pocket Construction
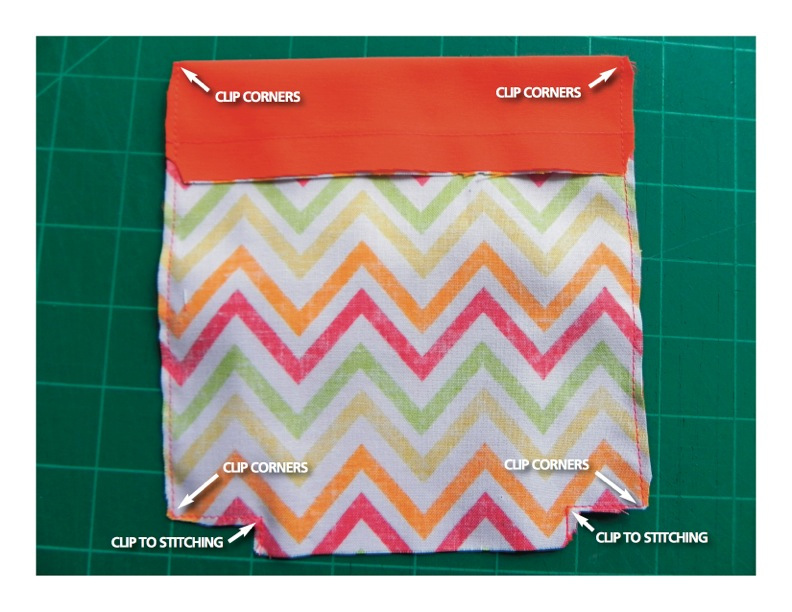
Using pattern piece #10, the outside pocket, pin it to pattern piece #11, the pocket lining, with right sides together along the unnotched edge.
Stitch the two together with a 1/2” seam allowance.
Press that seam downwards toward the lining and trim the edges to reduce bulkiness.
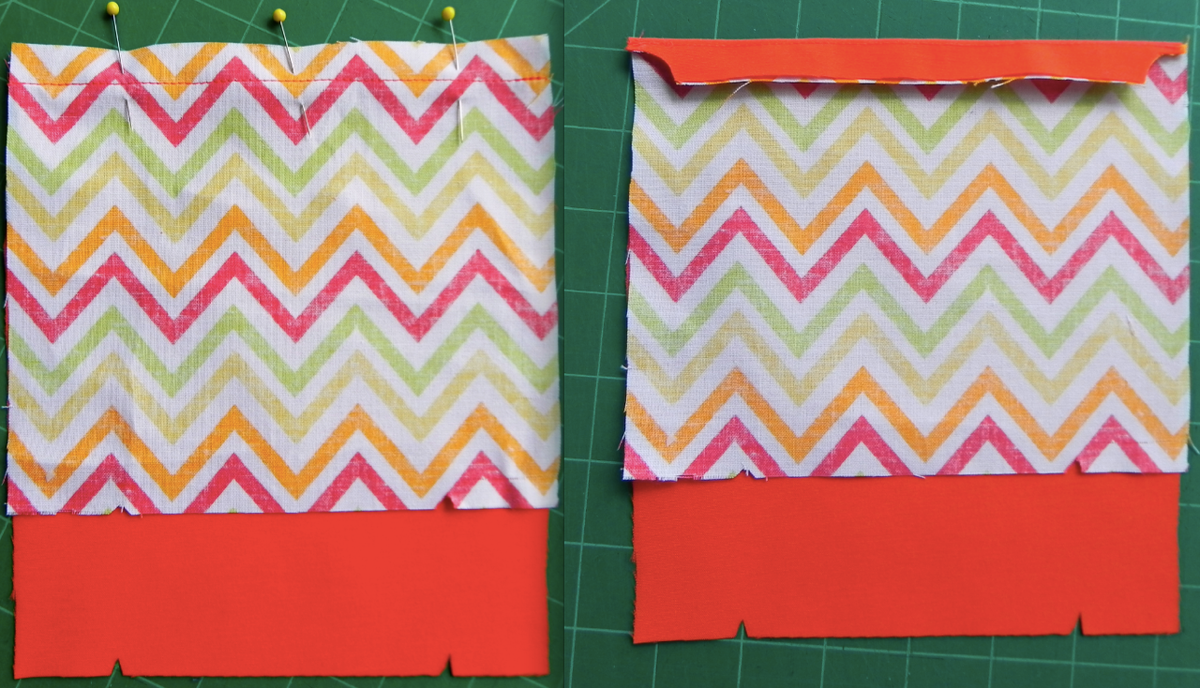
With right sides together, line up the notches on the lining piece with the notches on the outer pocket piece along the bottom edge. To do this, it will be like pulling the lining piece down to meet the outer pocket piece. In doing so, you will notice that there is more of the outer piece fabric showing at the top.
Pin and stitch with a 1/2” seam allowance, but leave open the area between the notches. When you get to the notches, pivot the fabric so that you are stitching into the seam allowance.
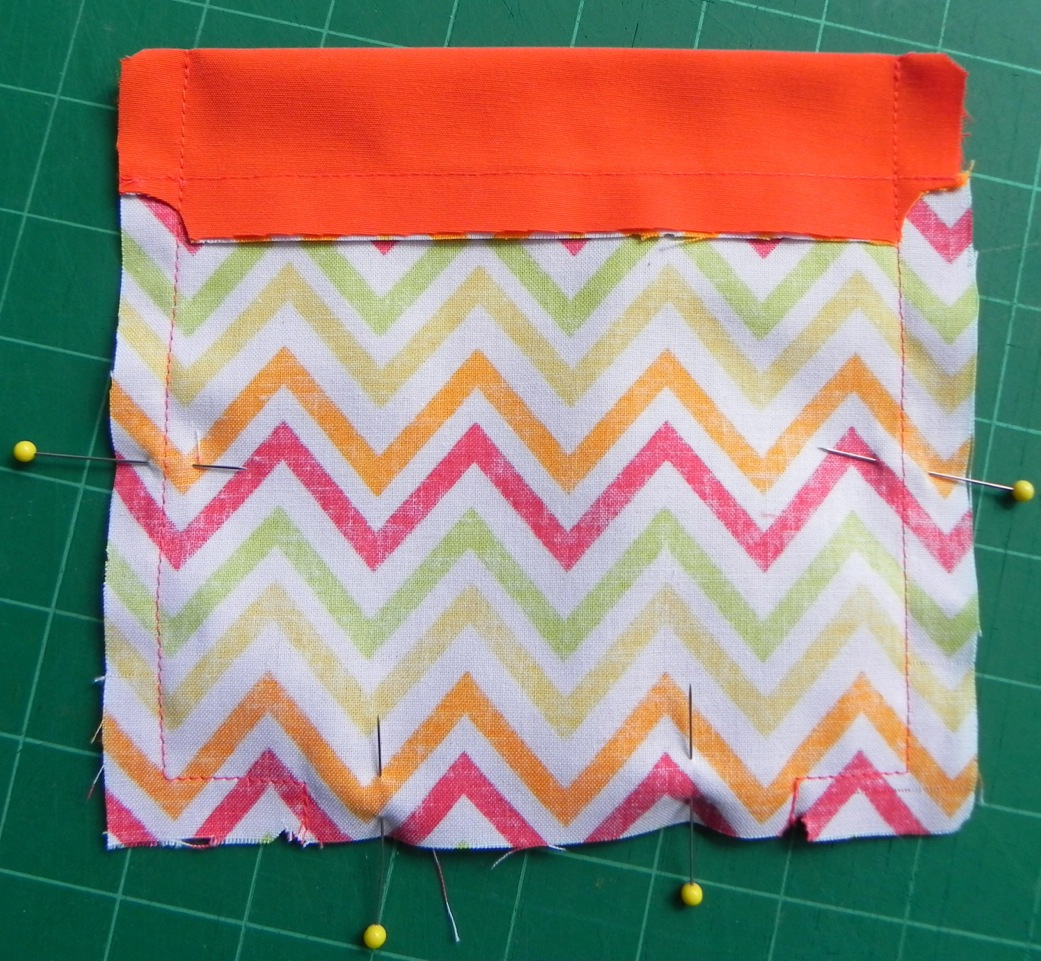
With your scissors start trimming all around the pocket to within an 1/8th” or so, clipping corners and being very careful not to clip into the stitching. Leave the seam allowance at the bottom between the notches untrimmed. You’ll need to turn the pocket inside out through that opening and because of the stitching into the seam allowance by the notches, that section will be forced neatly inside.
Now turn your pocket right side out.
My favorite tool for this task is to use a bamboo point turner and presser The pointed end isn’t too sharp so it’s perfect for poking corners out.
It’s slightly contoured and because it’s wood, it can lay behind fabric and then ironed without fear of melting.
Oliver + S sells them in their ‘Supplies and Tools’ section and they aren’t very expensive.
Actually, I have two point turners in case one goes missing mid-project. My husband does the same thing with his hammers.

Then topstitch along the top edge of the pocket on the outside (right side) 1″ from the top edge.
The bottom open edge will get sewn shut when it’s placed on the jacket and stitched in place.
Do the same procedure for the other pocket and then your pockets are ready to stitch to the jacket.
Pocket Tips and Ideas
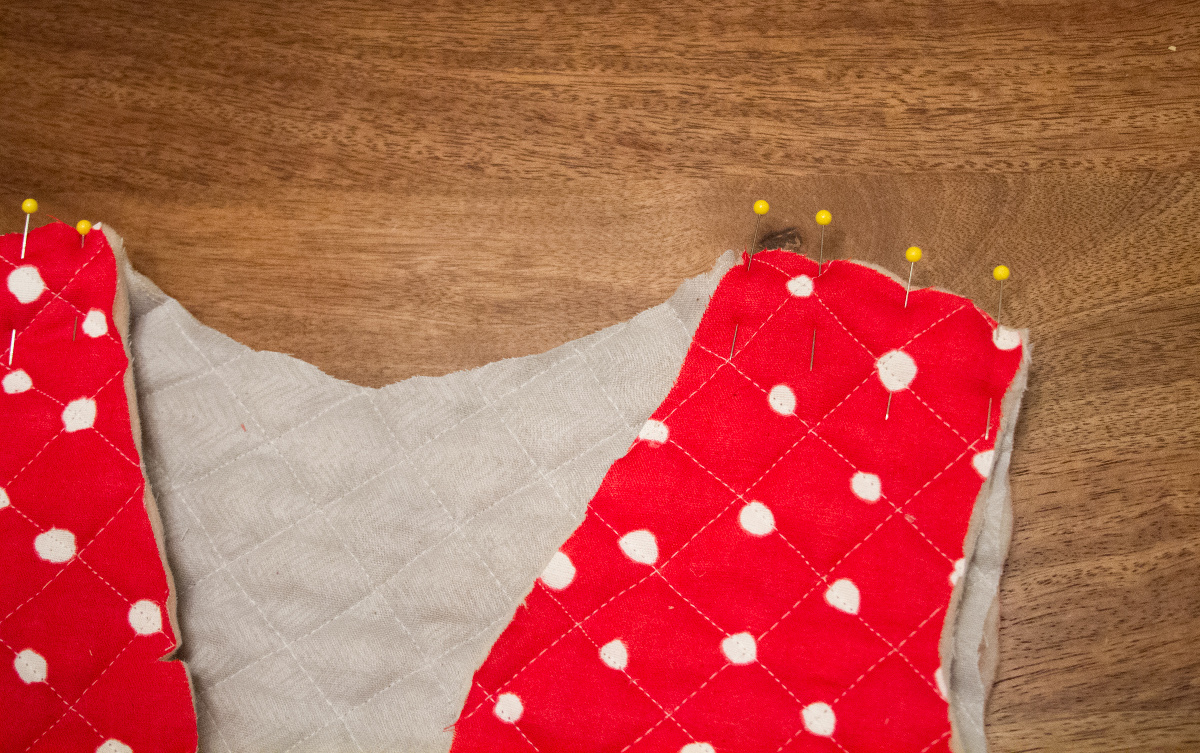
Because I used a heavy wool, pink Melton and black Cashmere for two of the jackets I made, (you can see them on my blog) I found the lining needed to be made from broadcloth in the same color as the outer fabric. The pockets sit nice and flat on the jacket and don’t look bulky at all.

On the grey denim jacket I made, the plain pockets looked a little bland to me so I created an inverted pleat.
To do that, I simply cut the fabric wider than the pocket pattern piece and played around folding and creating a pleat until I was happy with how it looked.
Then I placed the traced pattern piece over what I had been folding and cut it to the correct size.
Because the denim was fairly thin, it could be used for the pocket lining too.
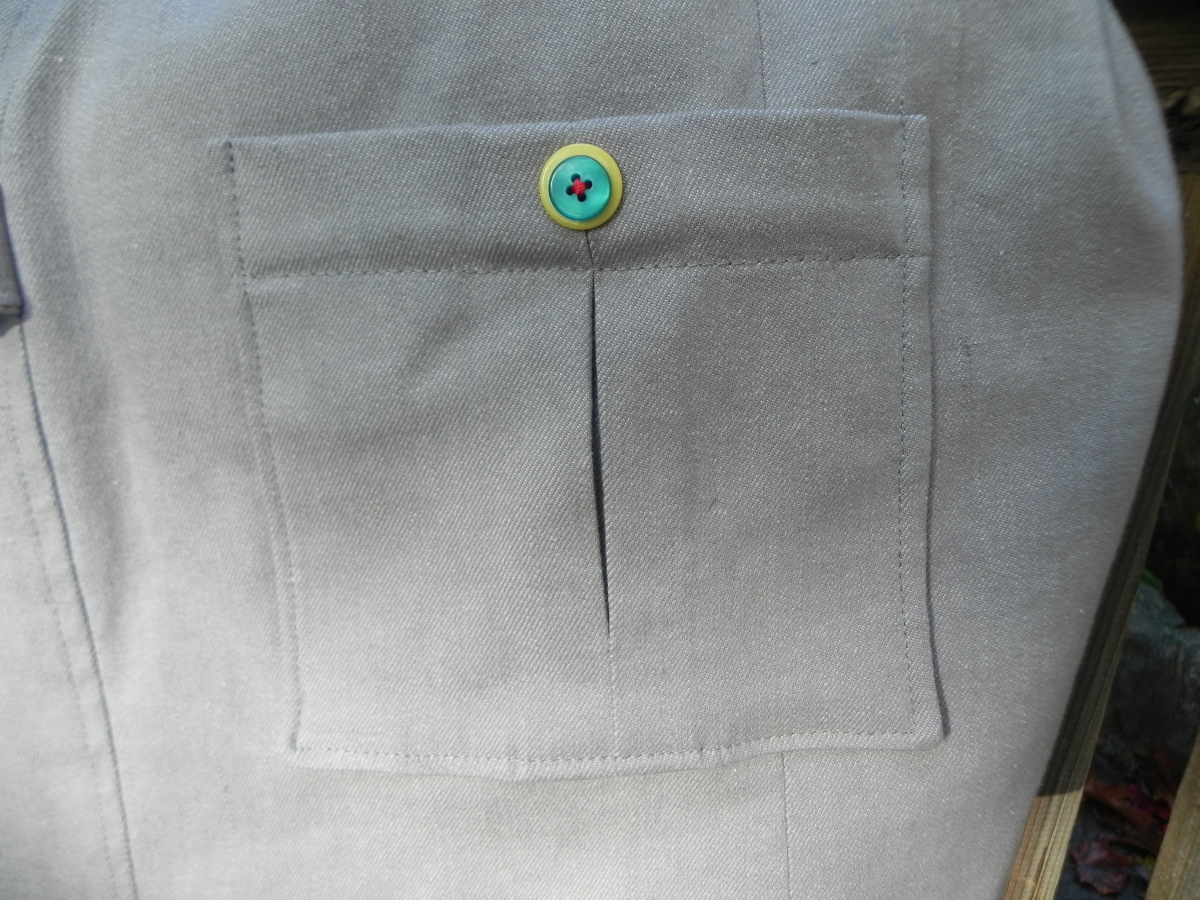
For added interest (and because I have a small cache of colorful buttons thanks to a sale at a craft store) I stacked and stitched some buttons matching the jacket lining on the pocket.
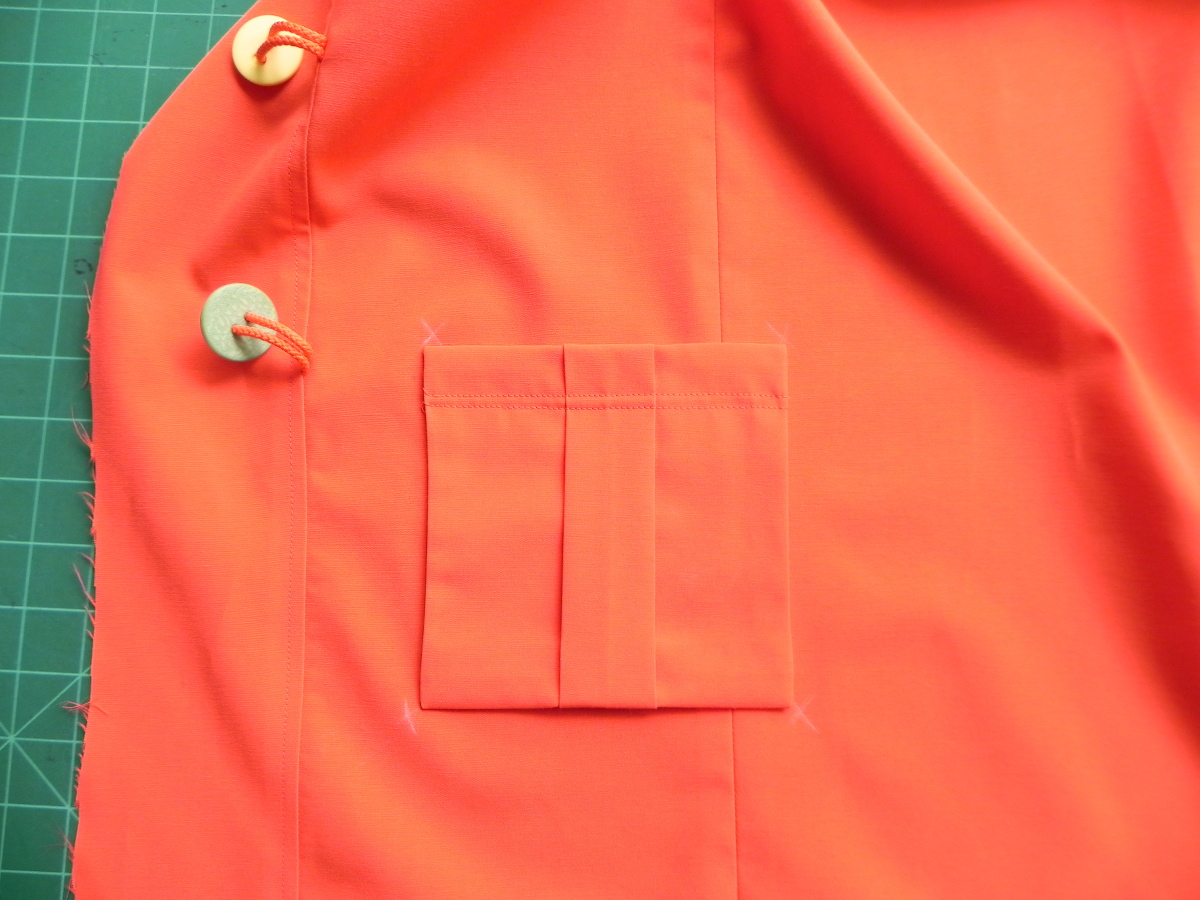
After making an inverted pleat pocket on the grey denim jacket, for the orange rain jacket I thought I might try making a regular pleated pocket and with a flap.
The pocket was constructed the same way as the grey denim pocket, playing with a wider piece of fabric and then cutting it to fit the traced pattern piece.
The lining was also the same outer fabric, except for the flap because I wanted the lining fabric to show.
The pocket flap pattern piece comes from the Explorers Vest in Little Things to Sew book.
Topstitch it on the jacket, the flap straight edge was butt up to the top edge of the pocket, stitched on the inside, then topstitched on the outside and lastly trimmed on the inside.
Once again, the big box of colorful sale buttons came in handy to decorate the flap.

Pockets for this jacket could be many different styles depending, of course, on the type of fabric used.
You could make pockets like the ones on the Field Trip Cargo pants, ….or like the pockets on the Hopscotch skirt …. or the pockets on the Secret Agent Trench coat ….or a welt pocket …or a repurposed jean pocket …. or a zippered pocket … or a shaped pocket …or an appliquéd pocket … or a machine embroidered pocket …. goodness, I’m starting to sound like Bubba from Forest Gump when he was describing ways to prepare shrimp!
Okay, so let’s get our pockets attached to the jacket.
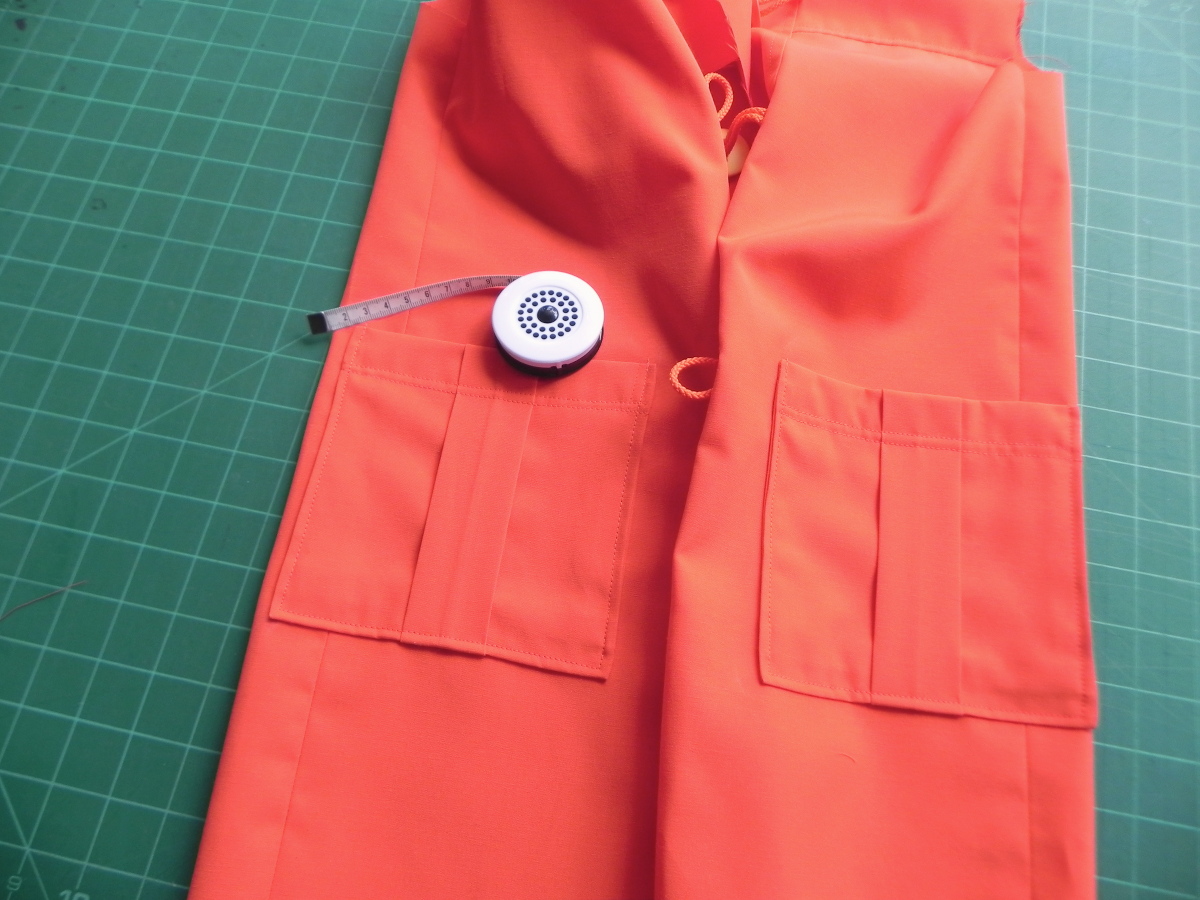
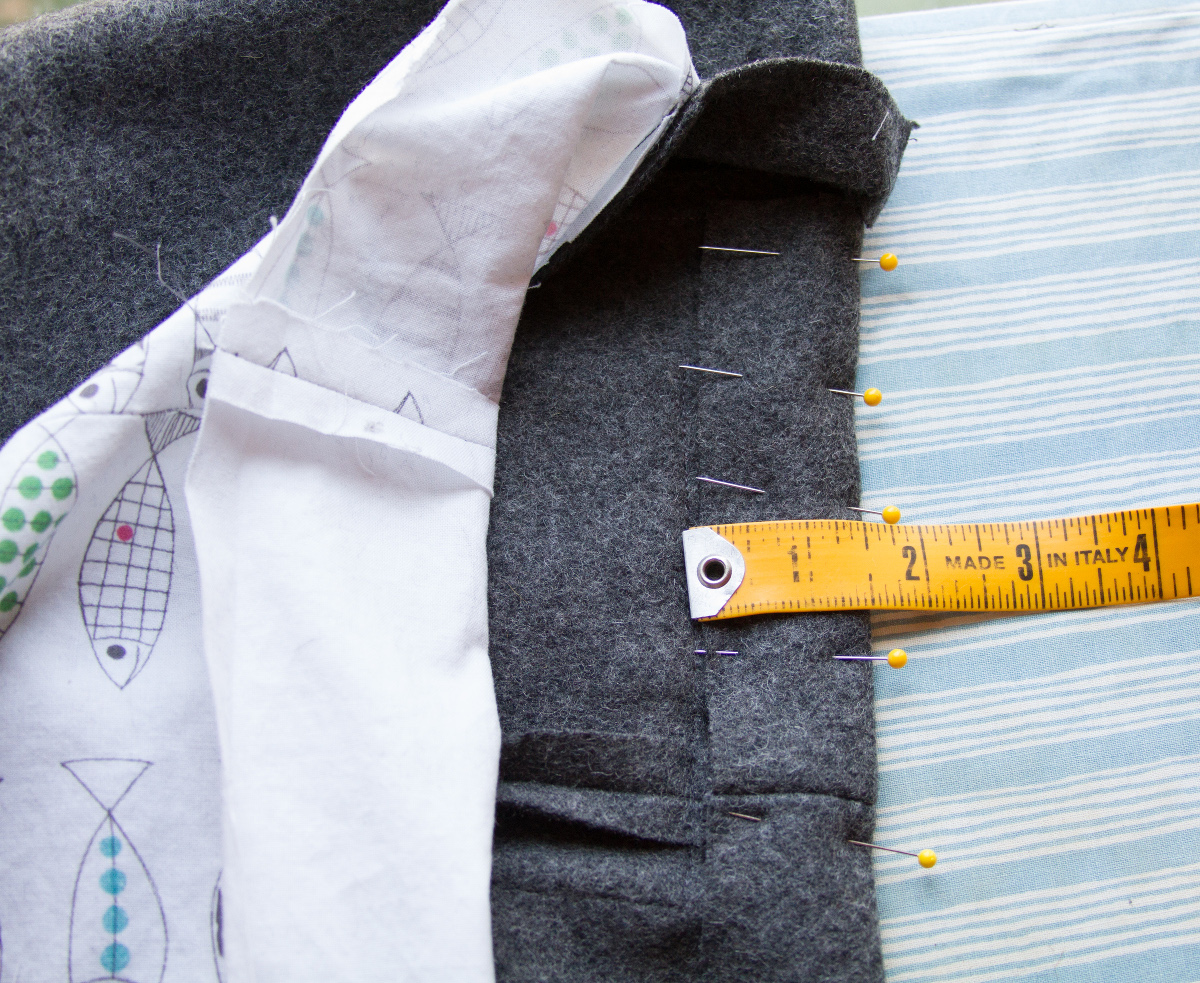
Hopefully, on the front and back pieces you cut out, the pocket placements have been marked with either chalk or water soluble marker.
Place the finished pocket within that marked area and pin in place.
You will notice that a small portion of the pocket is about an inch on the other side of the side seam sitting on the back piece.
Do this step on both sides of the jacket.
To make sure the pockets are the same on both sides, after pinning them in place, take the time to measure.
Measure up from the hem, in from the placket and over the side seam.
When they both have the same measurements you can edgestitch the pockets in place along the sides and across the bottom, pivoting at the corners and backstitching and the beginning and end of the stitching.
In the stitching, you’ll be encasing the open edge that’s on the bottom of each pocket.
Well, that’s it from me for my section of the sew-along.
Tomorrow Amanda will take you through more steps. In the meantime, sit back and admire your handiwork. The jacket is working up quickly and overall, rather easily don’t you think? All the jacket needs now are the sleeves, hood, and lining.

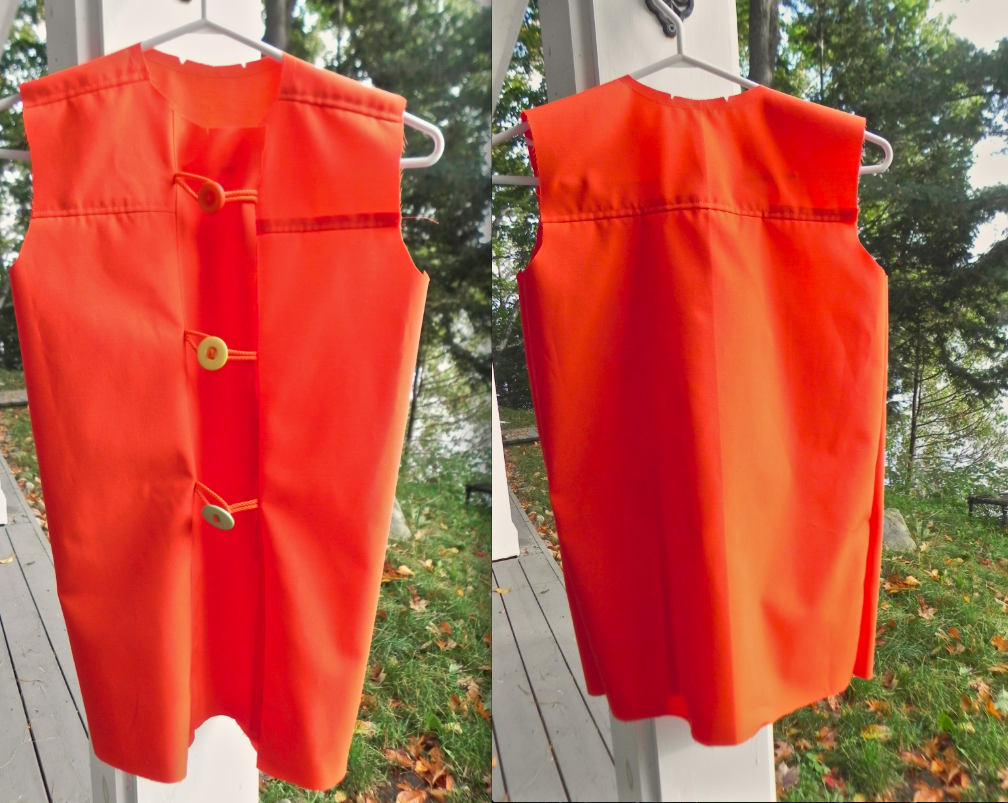
Here are my finished School Days Jackets.

I have documented on my sewing blog some tips, tricks and short cuts that I discovered during my journey with this pattern.

Welcome to day three of the School Days Jacket Sew-along. Today we are delighted to have Amanda join us. She will not only be taking us through all the steps for day three, but for day four as well. Thanks so much for being here Amanda!
Hi, I’m Amanda from LilypadMontana and I’m pretty thrilled to be a contributor for this sew-along! I’ve always loved sewing for my kids, but it wasn’t until I discovered Oliver + S patterns that it became a true passion. I’m sure many of you have felt the same way; discovering such a great resource as Oliver + S to help create such lovely things for our little ones! Anyway, let’s continue with the School Days Jacket Sew-Along! Today we will be preparing and attaching the sleeves, preparing the lining and facing, and assembling the jacket, hood, and lining.
Let’s get started!
Prepare and Attach the Sleeves
First we will be working on the sleeves. Sew the gathering stitches as directed, being sure to leave your threads long enough to pull later, and then pin and stitch the sleeve sides.
If using bulky fabric, do follow the hint provided to trim away the seam allowances to allow for easy hemming, and then hem the sleeves either by machine or by hand. I choose to use the machine since I like using the stitching line as reference for hand-sewing in the lining later.

Attach the sleeves, making sure there are no puckers along the armhole once sewn in. The gathering is to ease in the sleeve, not to create a gathered puffed sleeve! If necessary you can rip out the seams where any puckers are, smooth it, and re-sew. This part can be tricky so you may want to take the advice of the directions and baste this seam first before stitching. Once the sleeve is sewn in to your satisfaction press and trim the seam allowances and repeat for the other sleeve.

Prepare the Lining and Facing
Next we will be preparing the lining and facing. If you are using Velcro now is the time to sew it on! I’m using snaps so those will be sewn on later. Finish the side edge of the facing as directed and then sew the front facing to the front lining. When sewing two opposing edges clipping into the seam allowance (but not past) will help your edges line up.
Here you can see how the opposing edges line up after clipping the edges.
Baste the pleat at the center back of the lining, and then sew the shoulder and side seams of the lining together.

Prepare and attach the lining sleeves in the same manner as the outer sleeves. The lining sleeves are 1” shorter than the pattern so be sure to trim them down before ironing up the hem.
Also iron up the lining bottom hem.

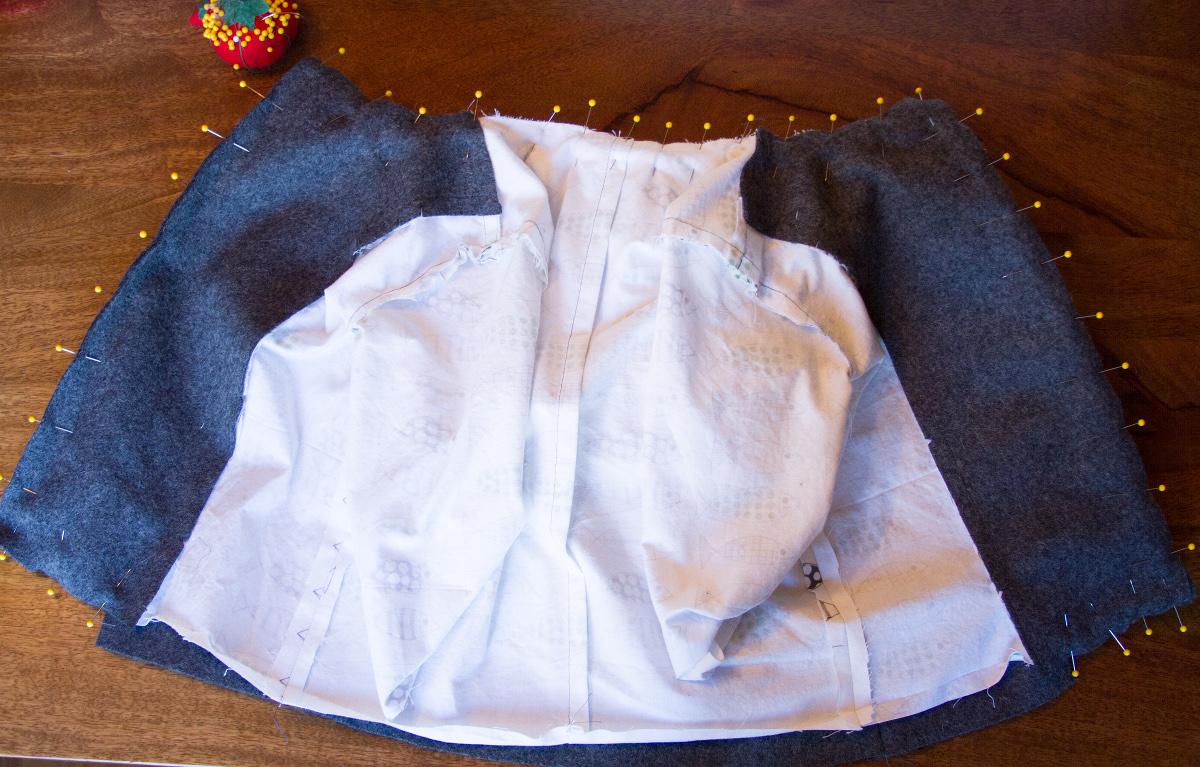
Assemble the Jacket, Hood, and Lining
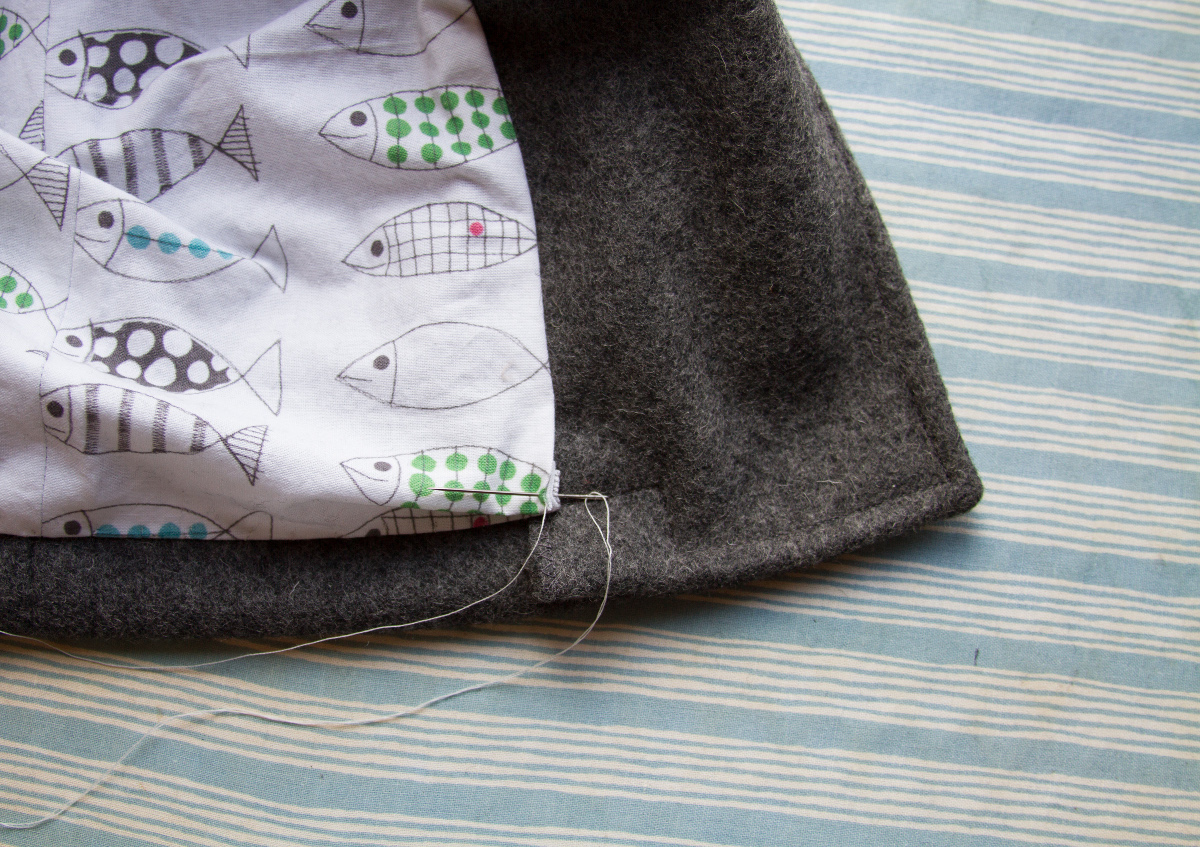
Now to assemble the jacket, hood, and lining. First baste on the hood.
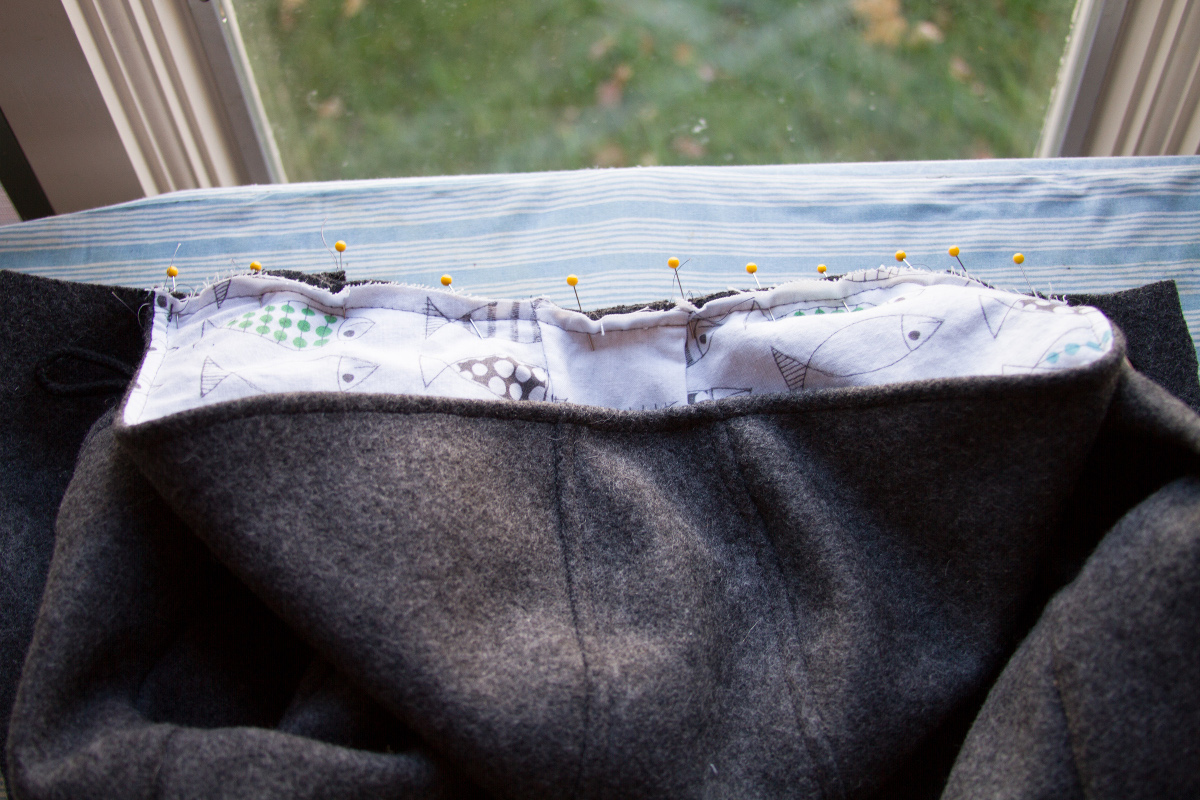
Sew the lining to the jacket with the hood sandwiched in-between. As you can see, I like to use lots of pins to make sure everything lines up nice and neat! Make sure you don’t stitch your sleeves into this hem by accident. Trim your seams and corners, turn right side out and press.
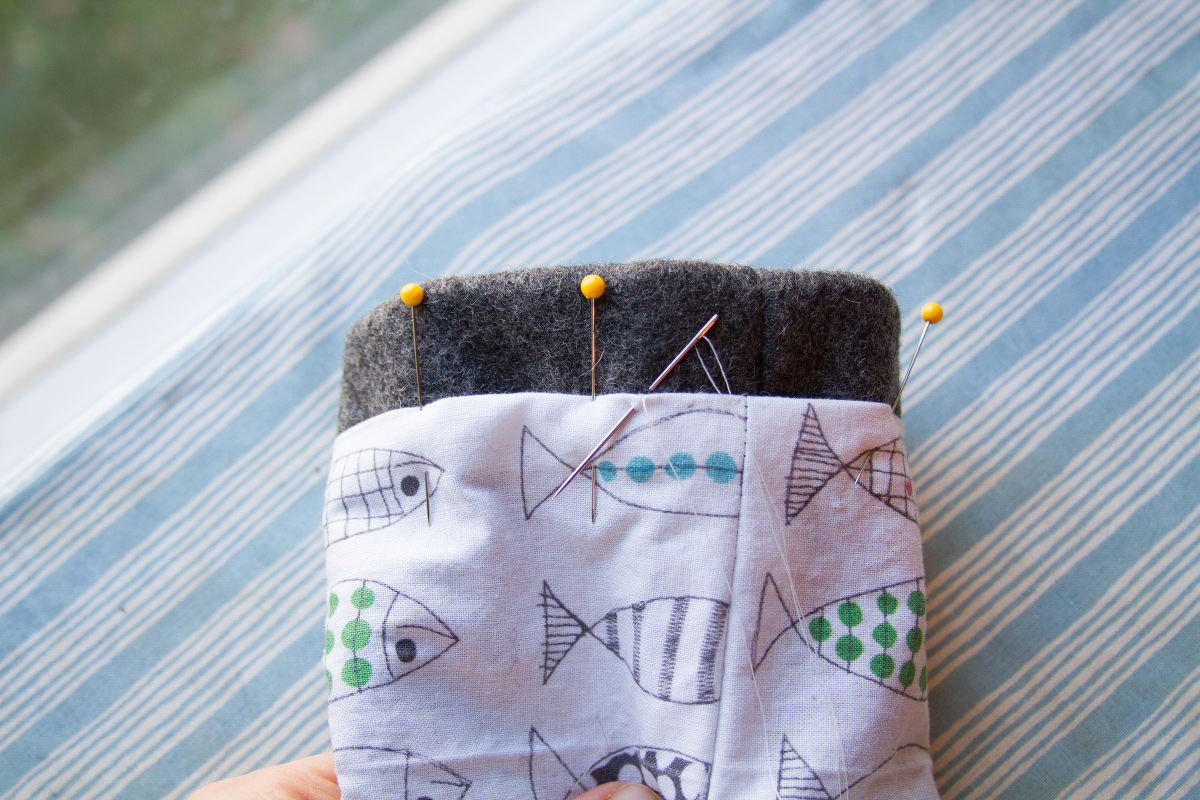
Last step for today! Sew the sleeve lining down with either a slipstitch or blindstitch. While sewing this part, I like to keep the sleeve wrong side out to more easily reach the seam. Also, if you sewed the outer sleeve hem by machine you can now line the edge of the lining up with this seam, giving you an easy reference of where to sew.
That’s all for today! Join me again tomorrow, and we will finish our jackets plus sew the optional quilted lining.
We have reached our fourth and final day of the School Days Jacket Sew-Along. Thanks for joining us this week for the sew-along. Amanda has returned to finish things up, so I will hand it over to her. Thank you Amanda!
Hi! This is Amanda from LilypadMontana back today for the final installment of the School Day’s Jacket Sew-Along. By now you should have a pretty awesome and nearly complete coat or rain jacket, so let’s finish it up! Today we will be finishing the jacket and sewing the optional insulated vest.
Finish the Jacket
First, we are hemming up the jacket bottom edge. Pin up the hem making sure the lining is out of the way.
Then topstitch the facing and jacket hem at the same time in the order stated in the directions, starting at the neck facing and pivoting down, around, and back up until ending at the other neck facing.
You have the option to edge stitch the neckline as well to help keep the lining in place. I have found that stitching this portion with lining side up helps to prevent puckers at the neck and shoulders on the inside of the jacket.

Blind-stitch or slipstitch the bottom edge of the lining to the outer jacket at the topstitching sewing line.

You can also tack down the little fold at the bottom corner of the lining to make it a bit neater, as well as the loose bit of facing directly beneath it.
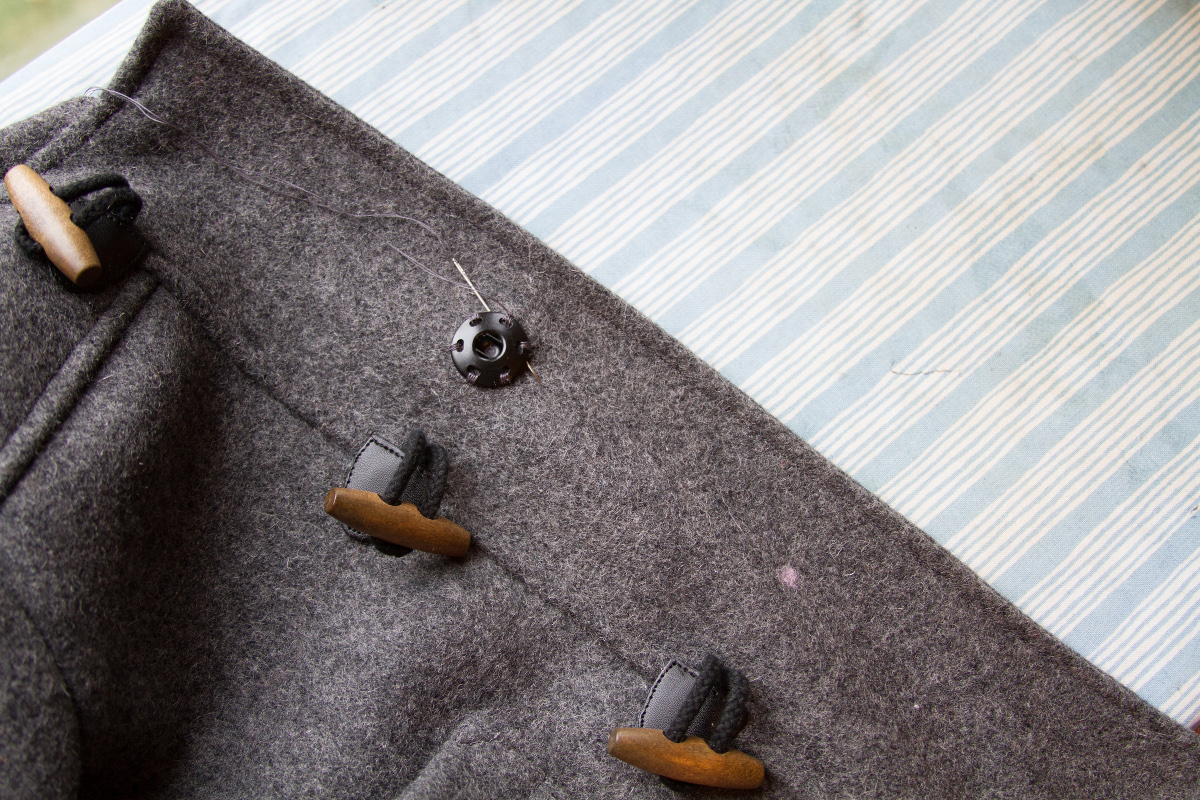
Remove your basting stitches at the lining center back and then sew on snaps (if using) at the marks indicated on the pattern pieces. If using button tab closures sew on your buttons now as well.
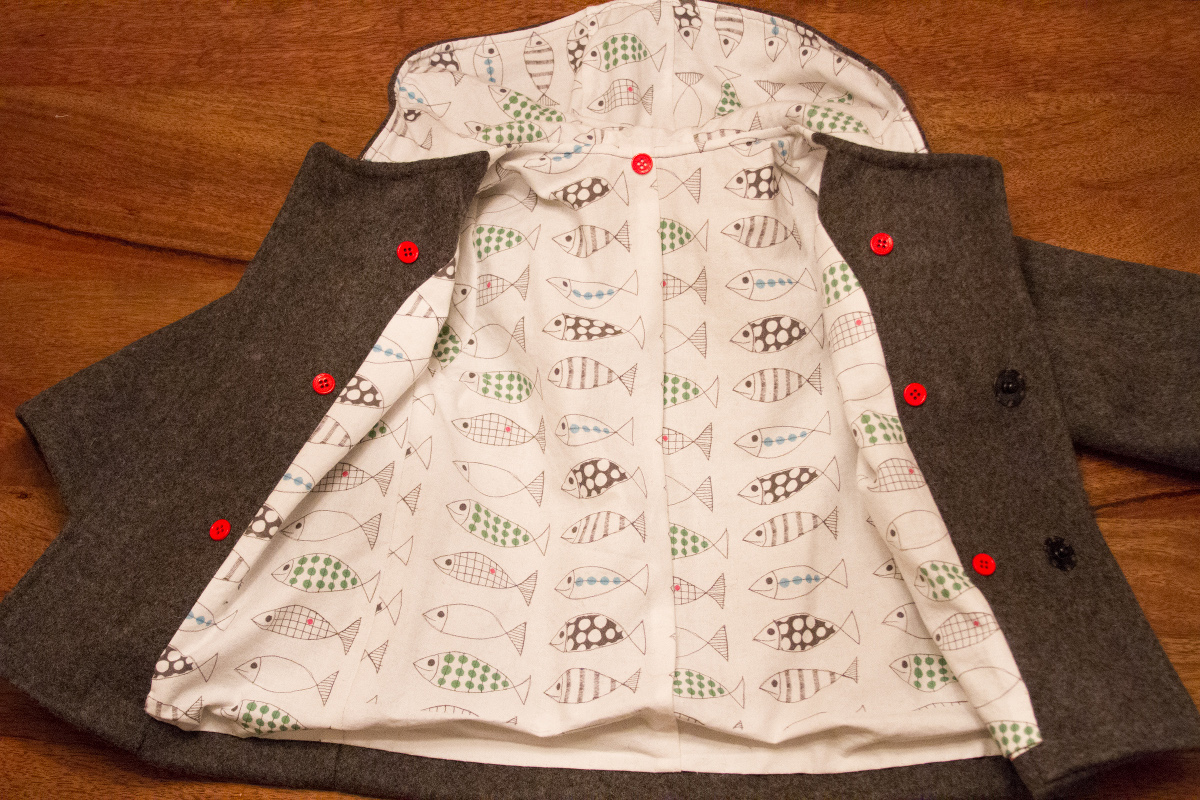
Optional Insulated Vest
Although this vest is optional I highly recommend to go for it and make one! It adds quite a bit of versatility to your jacket, taking it from something lightweight to cozy warm in an instant. Plus you get to add a bit of fun with additional cute fabrics to coordinate with those of your jacket. It’s really an amazing addition to the jacket and you absolutely will not regret making it! So now that I have you convinced let’s get started.
You can purchase pre-quilted fabrics for the vest, or you can quilt your own. To quilt your own, here are a few tips; first be sure to use a walking-foot (or darning foot for free-motion quilting), use woven fabrics rather than stretchy ones, and use fabrics that are neither too heavy or too lightweight. Quilting cottons tend to be the best, along with double-gauze, and flannel. Of course any other fabrics in that weight range should work wonderfully as well!

To construct the quilt sandwich first lay down your first fabric choice right-side down, followed by your batting, and then your other fabric choice on top right-side up. Smooth out all the wrinkles as best you can on both sides. Then lay down your vest pattern piece and cut a rectangle slightly bigger than the pattern (the pattern is on the fold so cut out your rectangle big enough to accommodate this). Repeat this for the sleeves if including them.
Thoroughly pin your quilt sandwich together and quilt as desired. There are lots of options here, including a free-motion design, or marking nicely-spaced lines with a fabric pen and ruler, or you could even stitch a fun pattern of your own creation. Whichever you decide to do, go ahead and quilt it now.

Once done quilting your fabric, cut out your pattern pieces. If you are making a sleeveless vest make sure to trim away .5” from the armholes now.

Pin and stitch the shoulder seams right side’s together. For the vest the right side is the inside (while worn) and the wrong side is the outside. This is because once the vest is buttoned inside the jacket the side you see will be the inside so it is called the right-side. Keep this in mind while sewing so that the fabric you want to be seen the most is on the inside. Instead of pressing the shoulder seam allowances open I opt to serge them together and then stitch them down towards the vest back, resembling a flat felled seam. Feel free to finish them however you wish! If adding sleeves to the vest follow step 3 to prepare and sew them in.
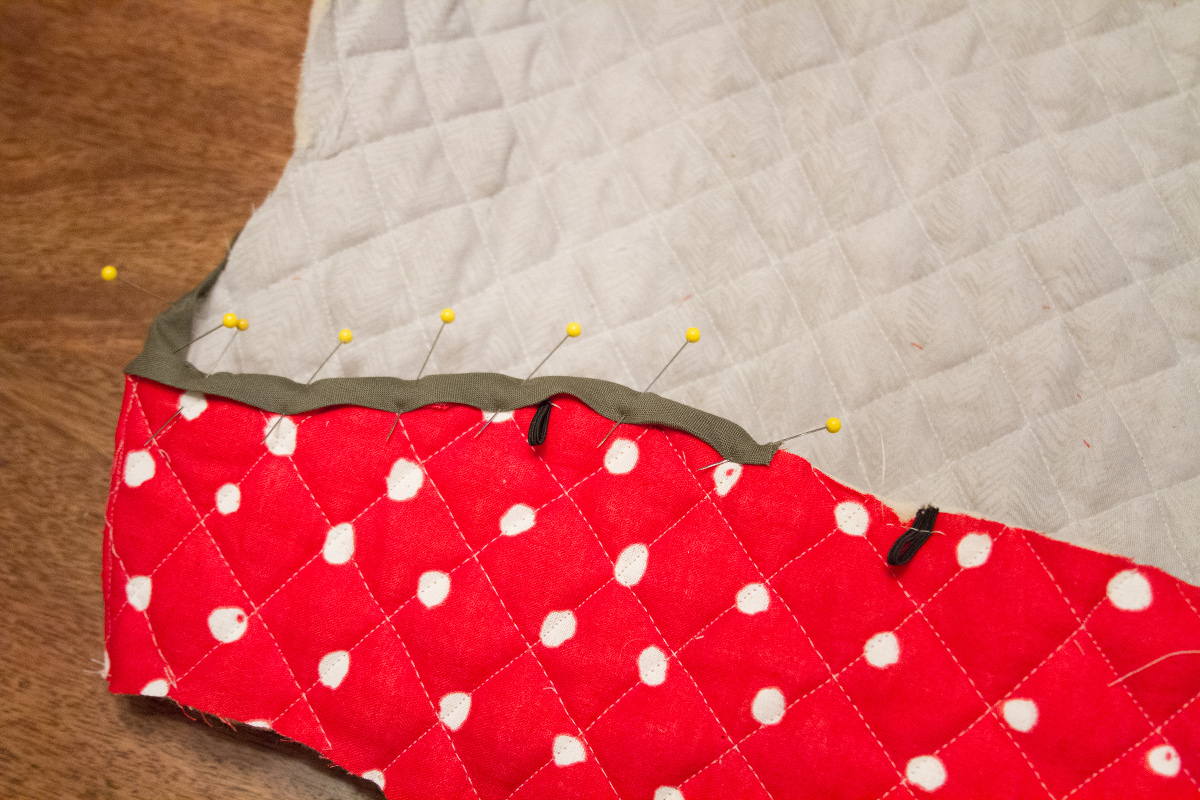
Cut seven (or nine if you’ve made sleeves) pieces of elastic, fold in half, and baste at the wrong side of center back neck plus at the notches of the vest front (and at the sleeve seams).

Apply bias tape starting at the bottom hem as well as around the armholes. I accidentally started mine up at the vest front in this picture and ended up re-pinning the whole thing before sewing it, so don’t do what I did! Start at the bottom center back. If you decide to make your own bias tape there is a great tutorial for it here. For tips on how to sew on the bias tape you can check out this tutorial here.
Lastly sew in the buttons to secure the vest into the jacket with while being worn. The button locations are specified on your pattern pieces; six on the facings, one at the center back neck, plus two at the sleeve hems if you’ve included the sleeves with your insulated vest.
Congratulations! You’re done! Take some pictures and post your lovely creations to the Oliver + S flickr group. We’d love to see what you’ve made :).
Thank you for the wonderful walk-through! I am still searching for the best toggle closure than the brick and mortar stores near me have (I now wish I had done this in advance online!). I look forward to all the wonderful School Days Jacket pictures to come!
Your coat is going to look gorgeous Janice!
I’ve used magnetic snaps for the inside closures and they’re fantastic. There’s a picture in this blog post showing when to insert them: http://bartacksandsingletrack.blogspot.com.au/2013/07/a-pattern-to-make-product-to-be-proud-of.html?m=0
It’s completely the wrong season for coats over here but this series is really going to make me want to sew one….
Janice, you’re amazing! I love how this sew-along is a real community effort. And I can’t wait to see how each of the jackets turn out!
Thank you Janice! This post really motivated me to do the first two sections of the pattern today (and trace the pattern and cut it out which I started at 4am this morning). This is my second time sewing the coat. Between your post and it being my second time I was much less nervous sewing this than I was before. I am even using some pricey wool 🙂 I am looking forward to seeing how your jacket comes out.
Thank you Janice!
Without this sew-a-long I probably would have used Hugo’s old baby coat. Now Trixie will get a nice new one.
PS Thank you for a walk down memory lane 🙂
Any tips on replacing the lining in this coat? My coat is still going strong but the lining needs to be replaced. Thanks for any help!