Have you ever sewn bias binding onto something using the “traditional” method where you stitch in the ditch to finish it, and then you turn it over afterward and discover that your stitching didn’t catch sections of the trim in your seam? I get so frustrated when that happens, and I dislike the messy back side of the bias so much that I decided I needed a better way to sew the binding. Yes, you can hand stitch it to finish it, and I sometimes do that. But when you’re sewing a lot of binding and just want a quick machine finish that looks nice from both sides, what do you do?
In previous tutorials I’ve shown you two ways to cut bias strips (the continuous method and the traditional method), and I’ve also shown you how to use a bias tape maker to fold and press it so it’s ready to sew. (I use and recommend Clover bias tape makers. I have one in each size that they make.) But I’ve never shown you my favorite method of sewing bias binding. This is the way we do it in most of our pattern instructions. So here it is, with photos.
There are two simple steps to my favorite method of applying bias binding.
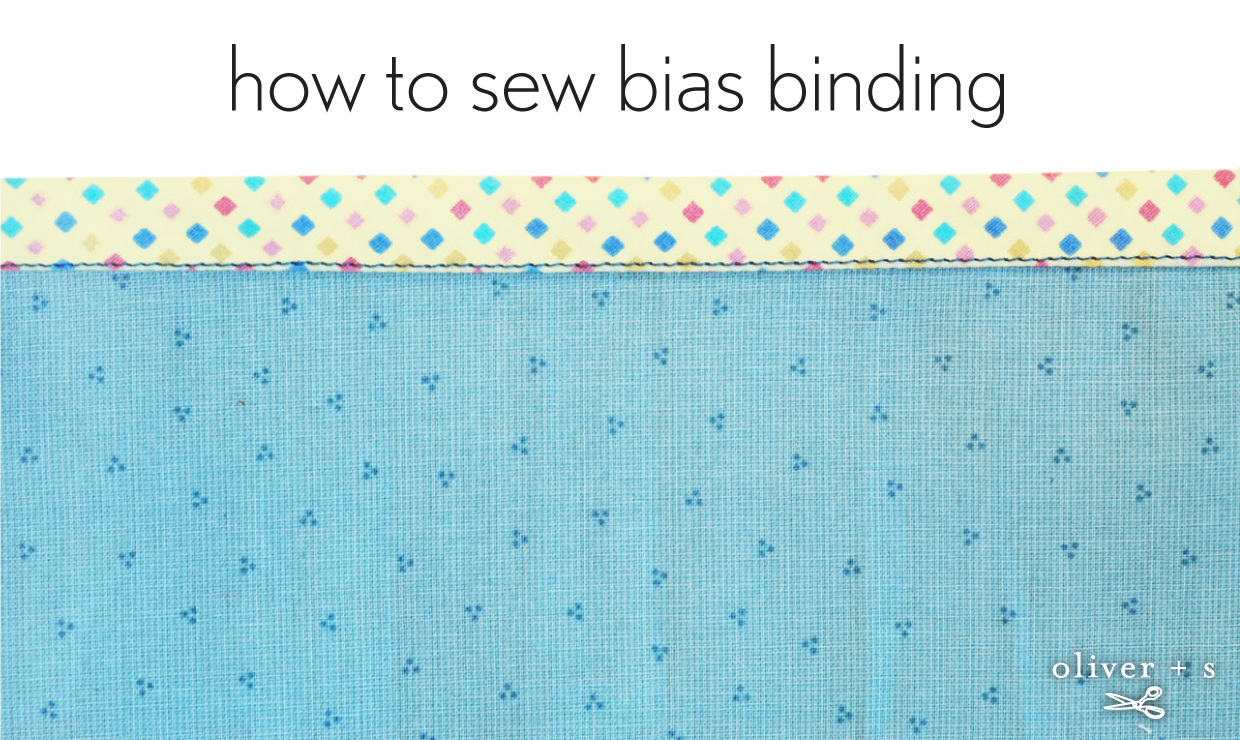
Applying Bias Binding
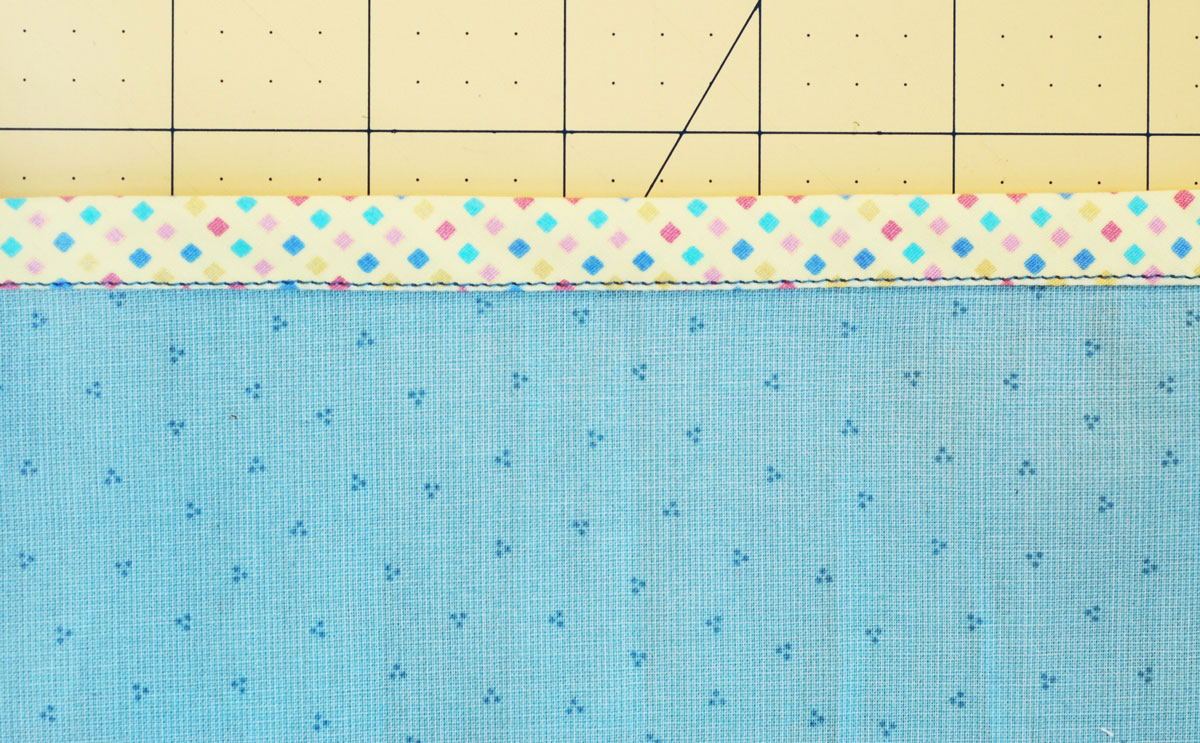
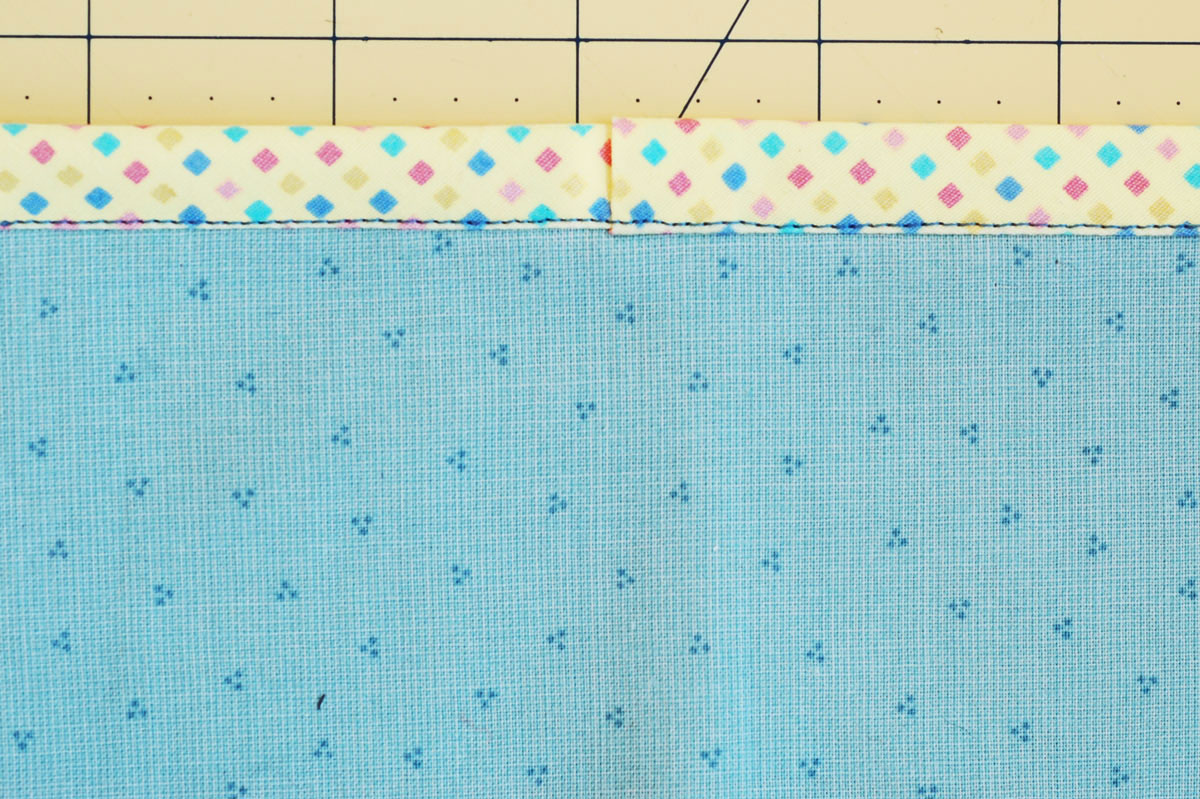
1. Unfold the prepared bias strip, and align and pin the right side of one of its raw edges to the inside (wrong-side) edge of your project. Stitch the bias strip to the fabric in the first crease of the bias strip.
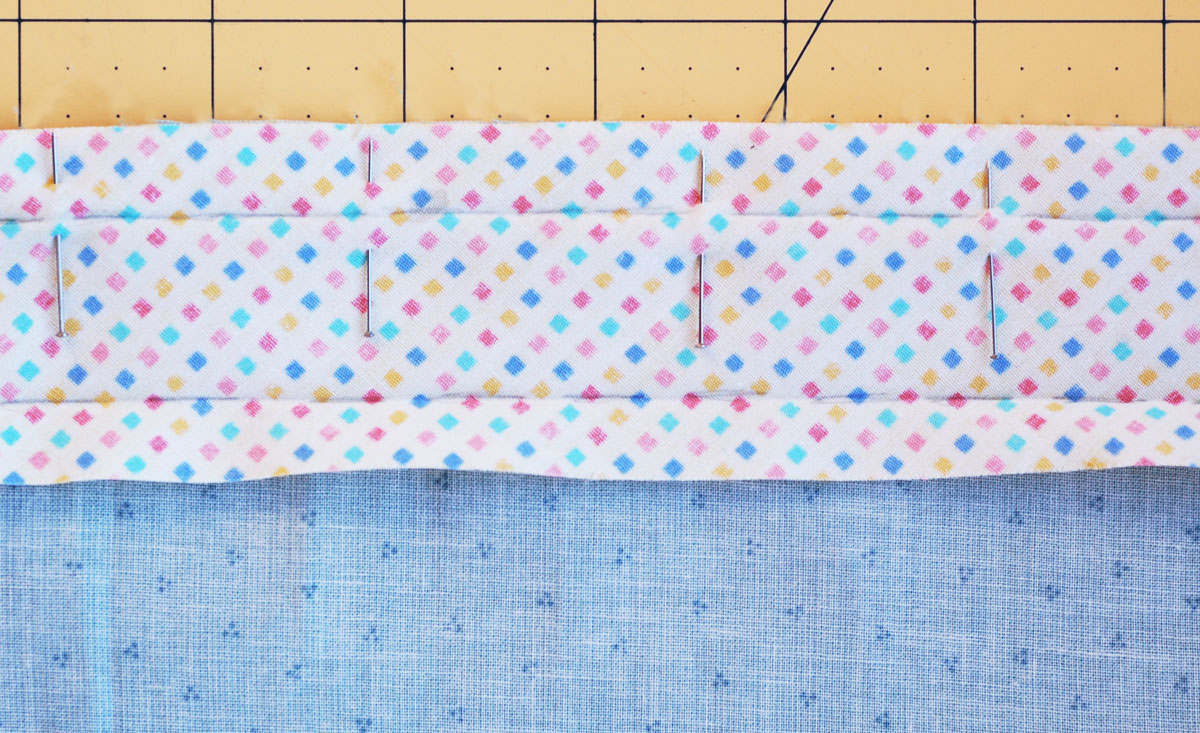
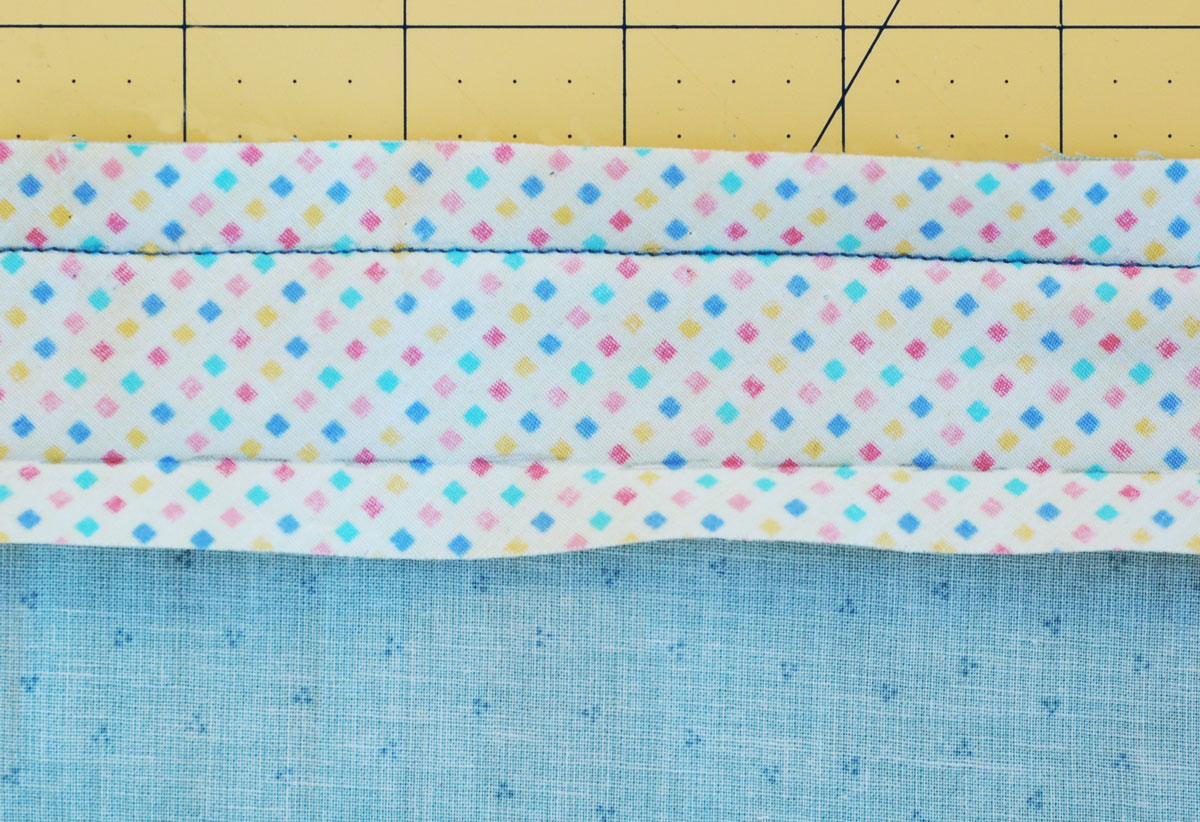
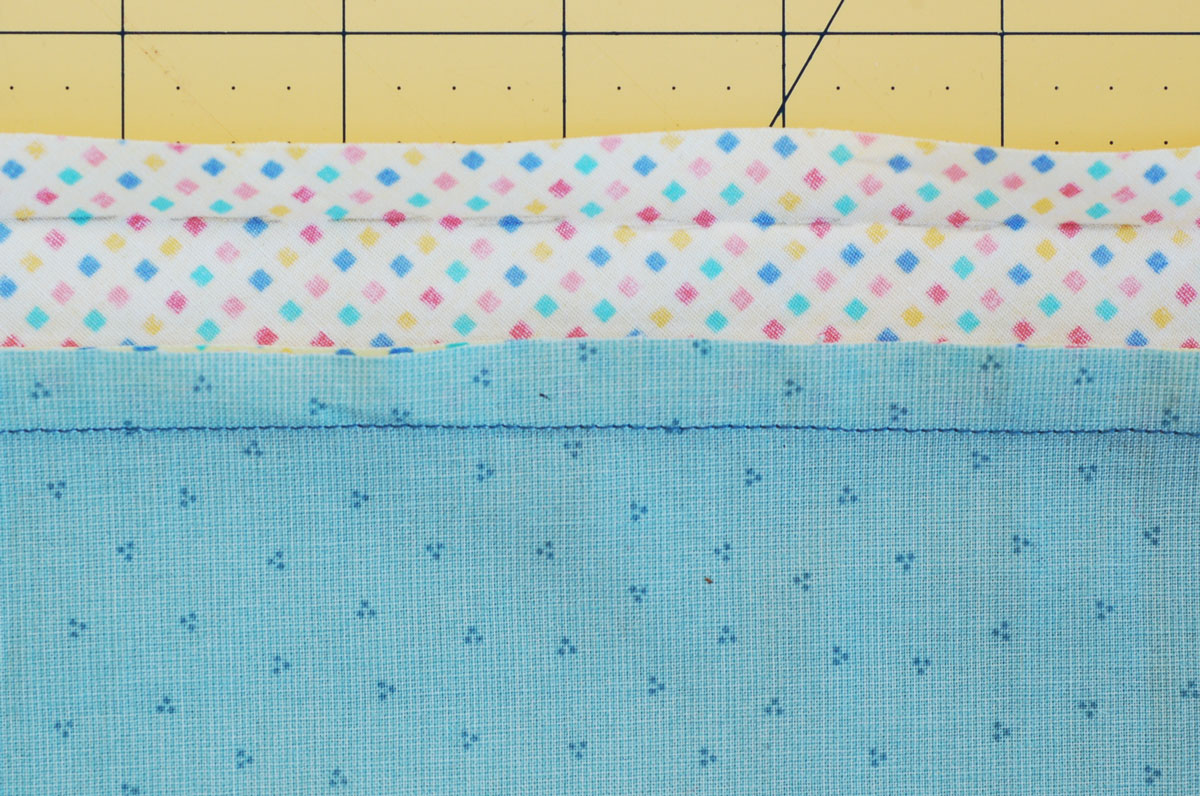
2. Re-fold the strip around the edge of the project, and turn your project to the right side (the outside). Then edgestitch the bias strip’s folded edge to the right side of the fabric, so it covers the first stitching line. This method gives a nice, clean finish to the tape on both sides of your project.

Finishing the Ends of an Applied Bias Strip
If you’re applying bias binding to an edge and need to finish the end neatly, here’s how to do it.
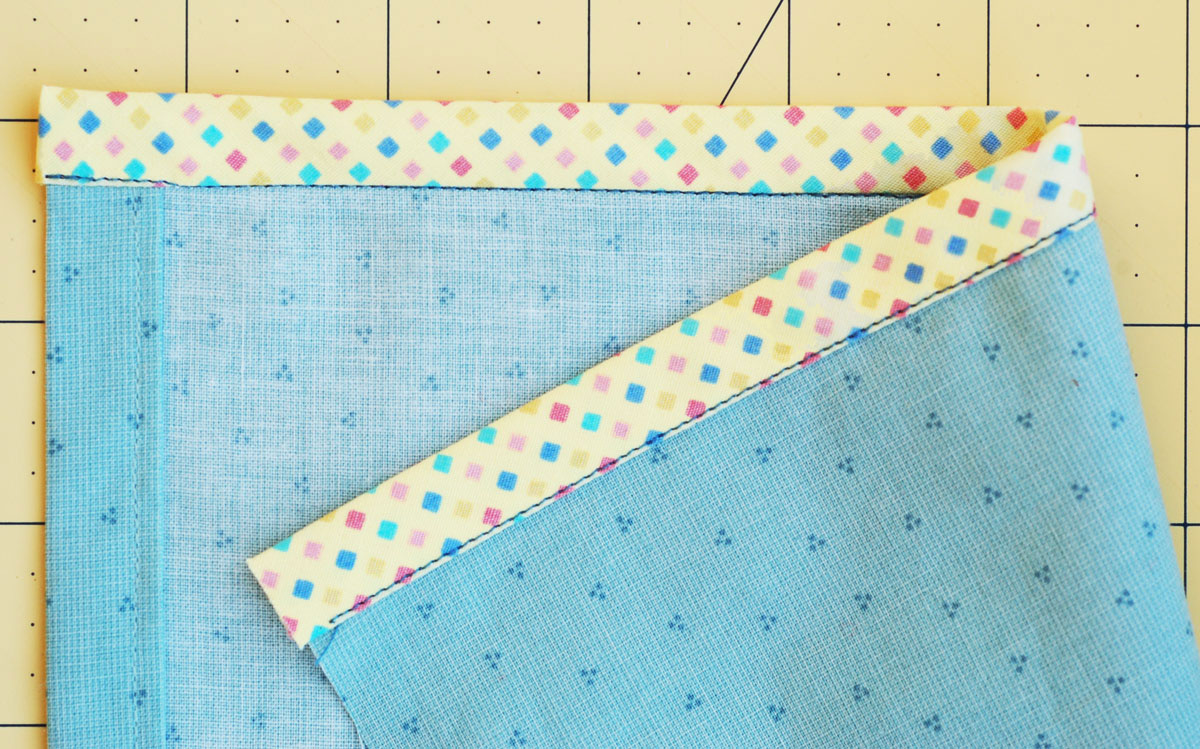
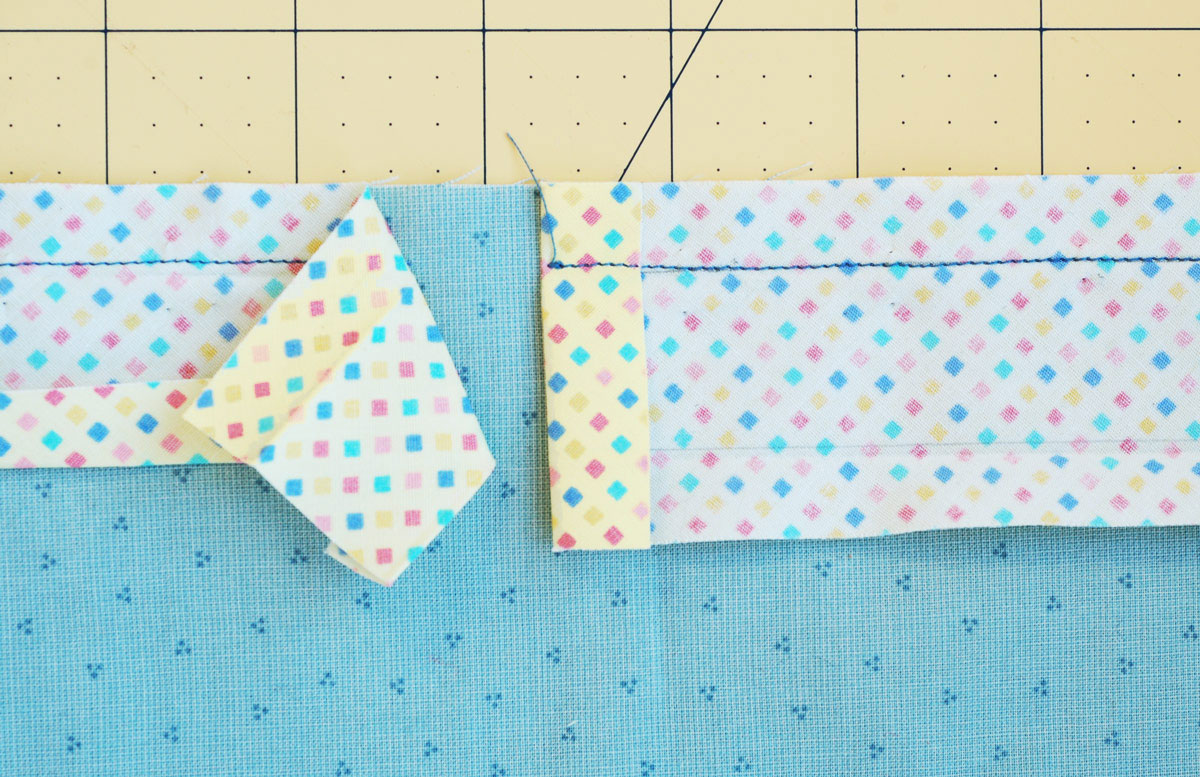
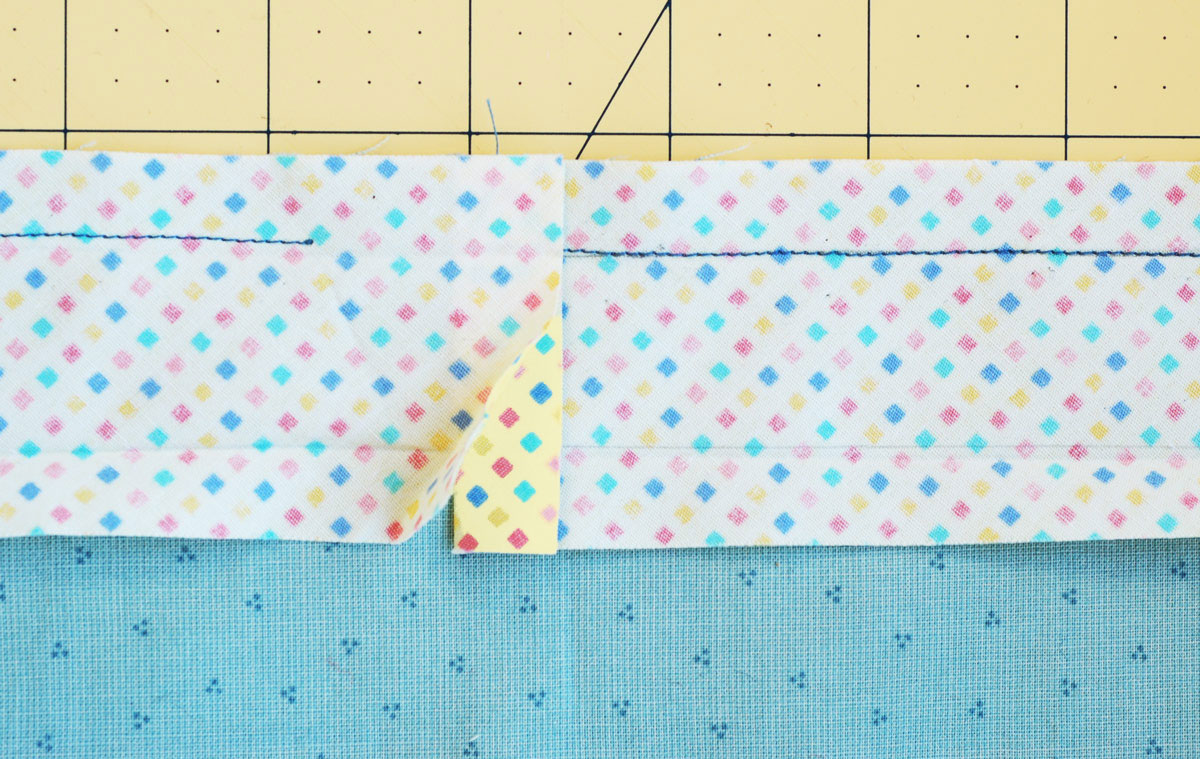
1. In your first pass of stitching (Step 1 of applying bias binding, above), pin and stitch the unfolded bias strip so that it extends 1/4″ beyond the edge to which it is being applied.
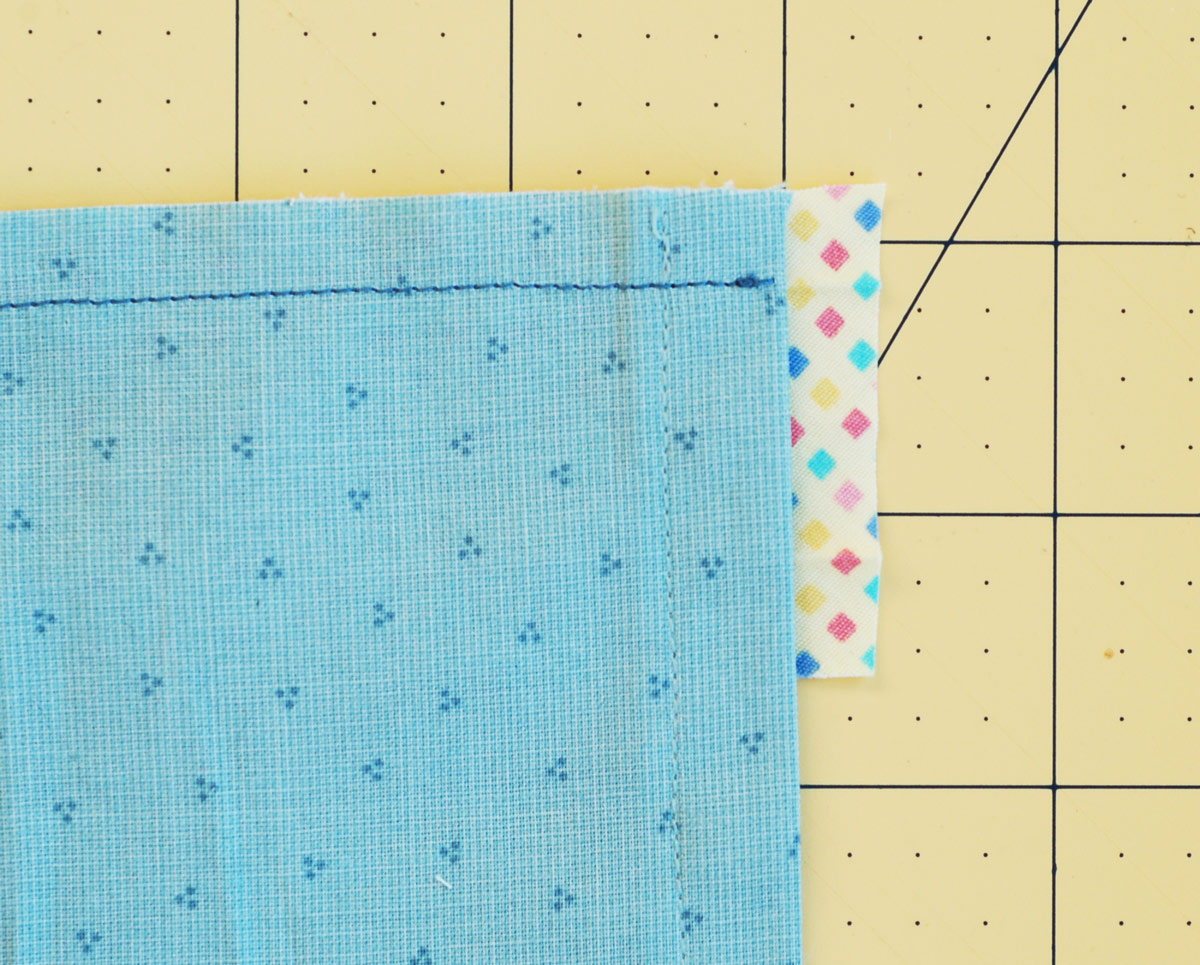
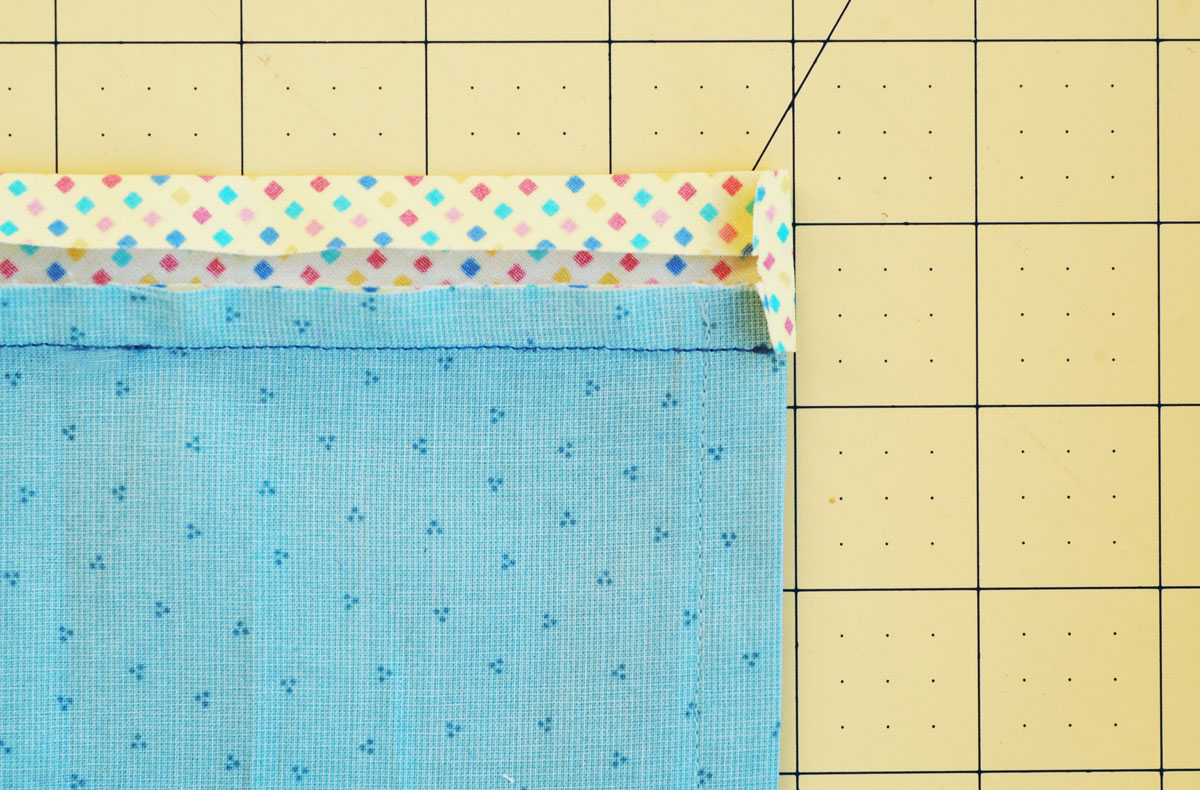
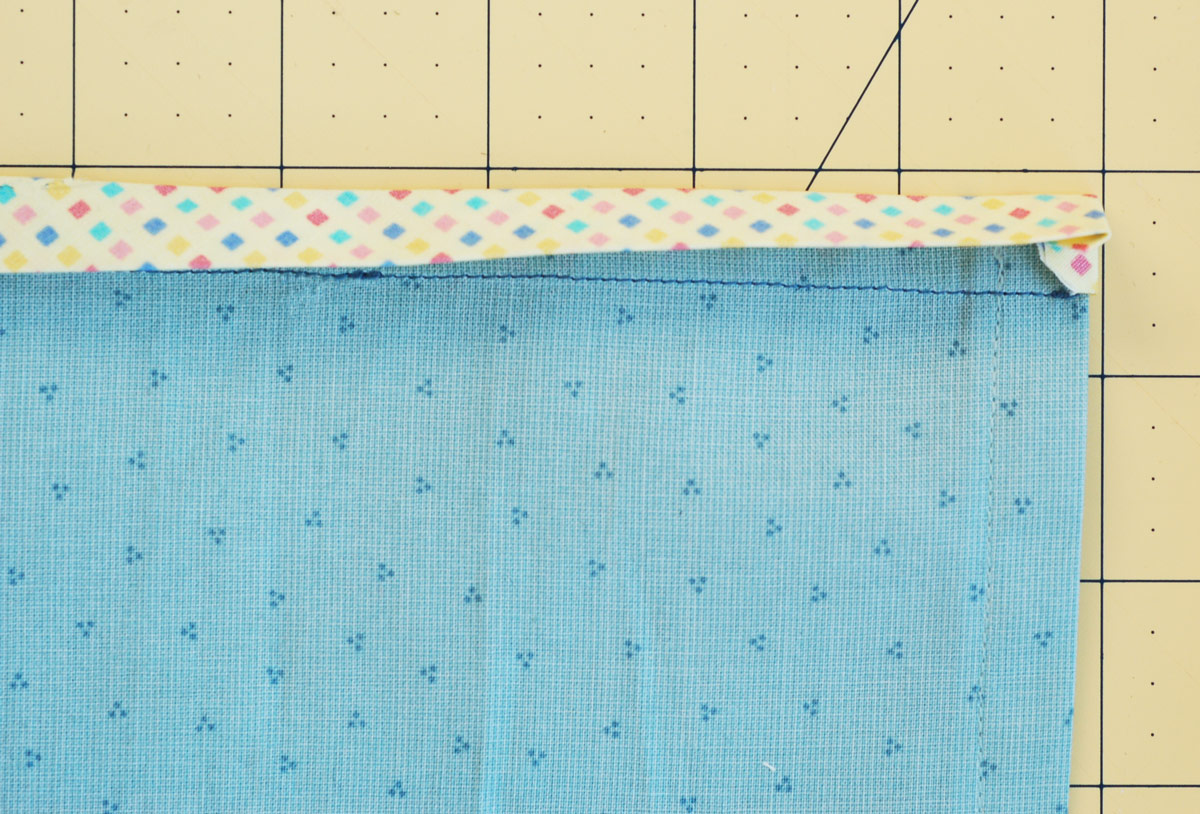
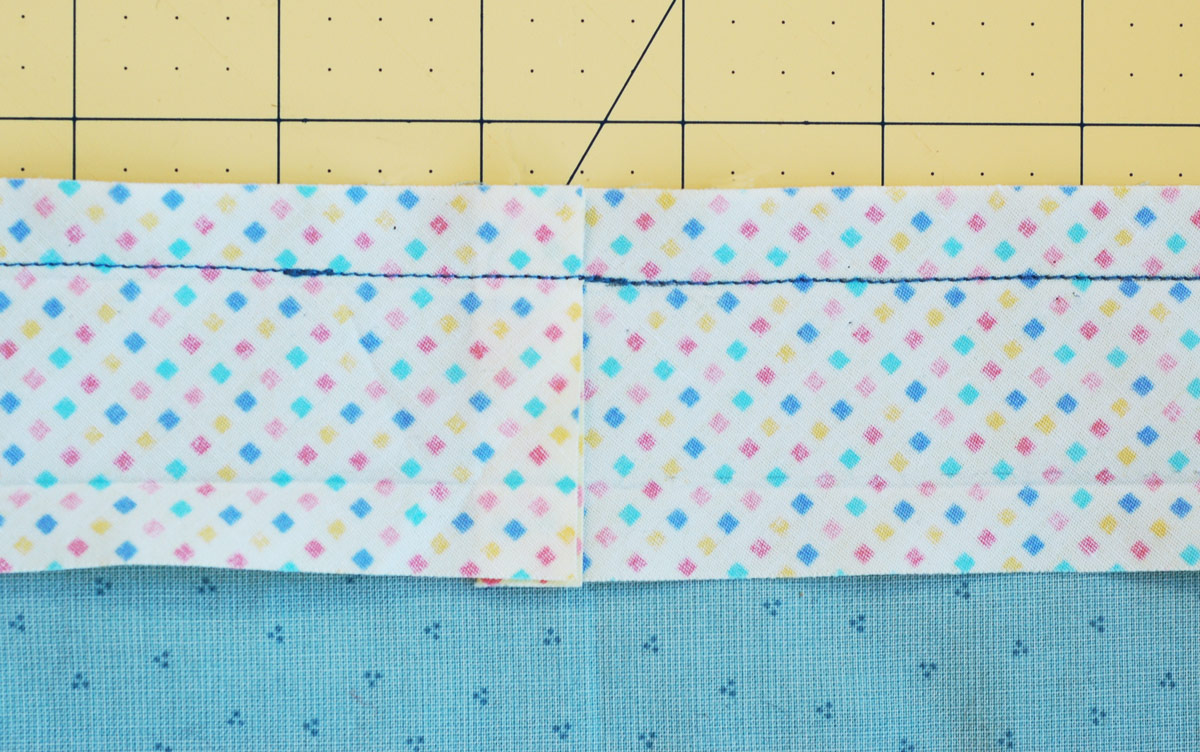
2. Trim the corner seam allowance of the edge itself at a slight diagonal to reduce bulk, and fold the trimmed end of the bias strip over that edge to the right side. Re-fold the long edge of the bias strip around the edge being covered, and edgestitch the bias strip from the right side (Step 2 from applying bias binding, above), catching the folded edge of the bias in your stitching, and backstitching or lockstitching at the beginning and end of your stitches to secure them.
Joining Two Ends
When you need to join two ends of a continuous bias strip, here is an easy way to clean-finish that join.
1. Fold and press one short end of the bias strip 1/2″ to the wrong side before you begin stitching that first end of the strip to the project’s edge. (There are fancier methods that we sometimes use in our patterns, but this is a really easy method that anyone can do.)

2. After stitching the first edge, trim the second end so that it overlaps the first end and the two raw edges end at the same spot. Then re-fold the bias strip, and edgestitch its second folded edge from the right side of the project to finish the binding, or blindstitch in place for a perfect finish. The join will be a nearly invisible fold.
Bias Hints
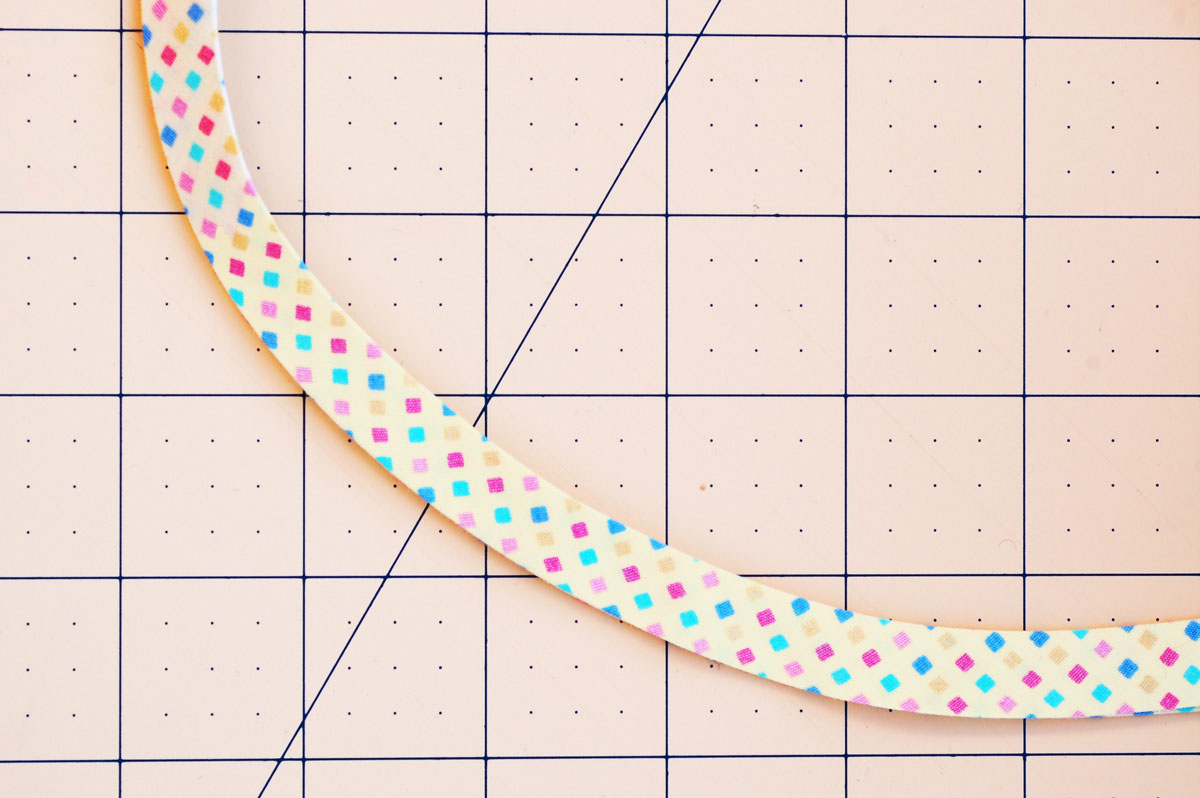
To prepare bias binding for a curved edge, fold and steam-press the folded binding into a curve as you prepare it. This will help the binding conform to the curved edge and make it easier to apply.
And one more hint, for which I don’t have a photograph: To attach bias binding to a thick fabric, like a quilt or heavy wool, stitch the first seam of the binding a little narrower than the first folded crease. The little bit of extra fabric this provides will enable the binding to comfortably wrap around the thickness of the quilt or fabric and reach the other side.
That’s it! Now you know all the ins and outs of making and sewing your own bias binding, and you can make your own bias tape to coordinate with your sewing projects. And not only can you choose your favorite fabrics for the binding; when you sew it it will also look nice inside and out!
If you enjoyed this blog post, why not sign up for our newsletter? It’s free, and you can opt to have new blog posts sent to you by email too!
Thanks for this useful tutorial!
One question remains: do you have a favorite method to sew a bias binding in a 90 degrees angle?
Yay! I always hesitate, but now I won’t!
I love sewing bias and this is a great tute!
Thank you for taking the time to make and post this tutorial: it’s so clear and practical – and the info on joining is great!…. The information will be on ‘high rotation’ in my sewing room over the next week or two as I embark on a new project… Thanks again!
By the time I finish the Little Things To Sew book I should (finally) be proficient at bias binding!
Thanks for these tips. and a well written tutorial
I also like to cheat and use 1/4″ fusible web (quilter’s iron on fusible tape) to hold the folded edge in place to sew. Saves me sewing over pins!!
Um, Lightning, the fusible web is a genius trick!!
This looks a lot easier than the way I’ve done it in the past. I will be putting it to use this weekend. Thank you for all the information you give us. The Hubs is giving me “LTTS” for my birthday, can’t wait. I want to make everything.
THANK YOU for finally having a bias tape tutorial that covers the edges. I’ve used it for quilt binding and others where you hide the edges, but not for a sweater conversion to cardigan, where I need the edges to be clean and nice. Yours is the only tutorial I’ve easily located with the proper instructions. Bless you.
i’m a new sewist and found this very interesting and easy. thank you
Your tutorial was very explained, the technique very tidy wth excellent photography, thank you.
Thanks so much! I’ve watched numerous tutorials today and this is undoubtedly the best yet.
I’m so happy I found this tutorial – I always have a hard time getting the bias tape right using traditional methods. I can’t wait to try this and am going to check out your book.
Thank you so much for this information.
Thank you for this. I was ready to give up and this saved my project.