So now you’ve got all those nice bias strips cut and assembled, using either the traditional or the continuous method. What’s next?
Folding and pressing the bias strips to make bias tape can take a long time if you’re making a lot of it. In order to make bias tape, you need to press the binding in half to find the center, then open it up and press both of the edges to meet at the middle. That’s a lot of folding and pressing. But a bias tape maker can make quick work of it without singed fingers.
Keep in mind that bias tape makers come in different sizes, so it’s important to use the right size bias tape maker for your bias strips. (I use and recommend Clover bias tape makers. I have one in each size that they make.) I tend to use 3/8″ binding for a lot of apparel sewing projects, and for bias binding that’s 3/8″ wide you’ll use the 3/4″ bias tape maker. (The width indicated on the bias tape maker package is twice the width of your finished binding, because you’ll fold the binding in half again when you apply it. So for 1/2″ binding, you’d use the 1″ tape maker and 2″ wide cut bias strips. Makes sense, right?)
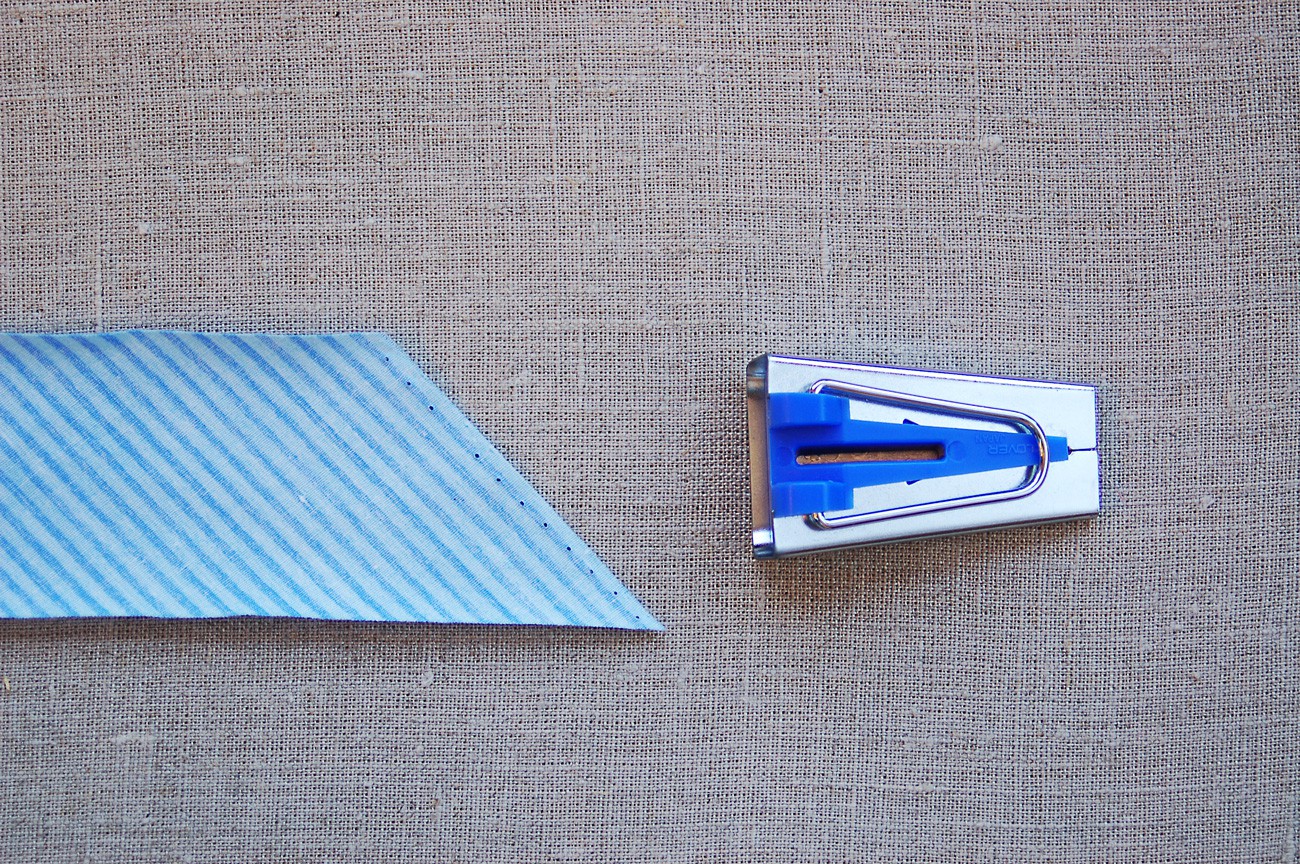
The process is very simple. Once you’ve got your strips assembled, you simply feed one end of the strip into the wide end of the tape maker. It helps if the end of the strip is cut at an angle.
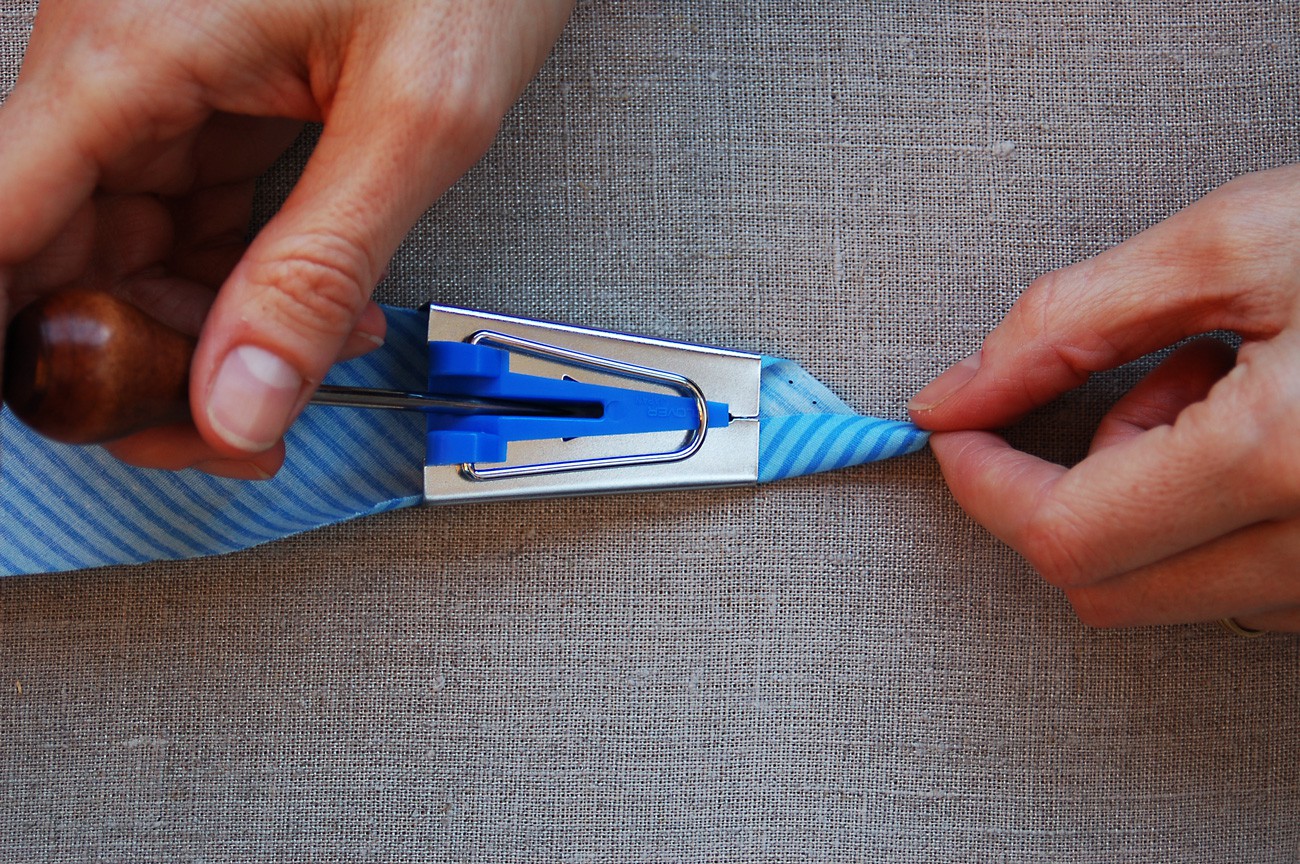
There’s a little groove down the center of the bias tape maker so you can use a pin or bodkin to pull the fabric through the tape maker if it doesn’t slide in easily. Then gently coax the strip out the narrow end of the tape maker and you’ll see that the fabric is being folded as it passes through the tape maker.
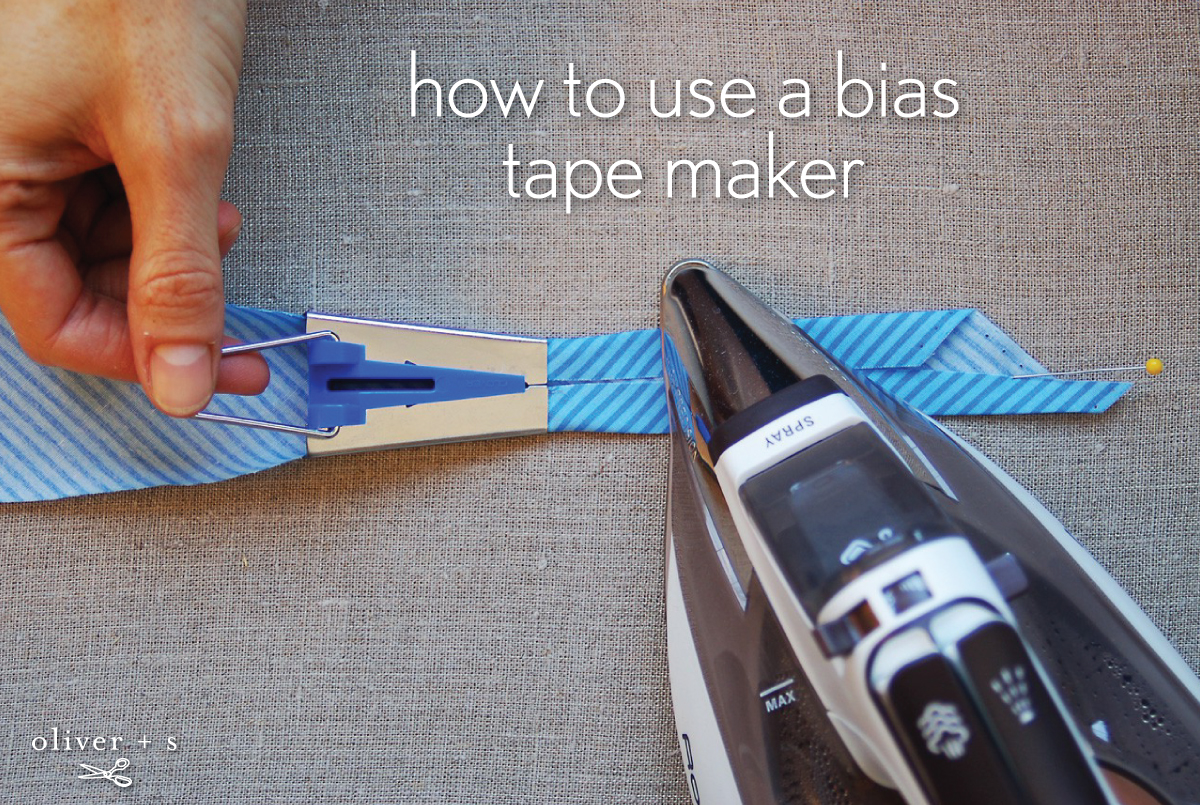
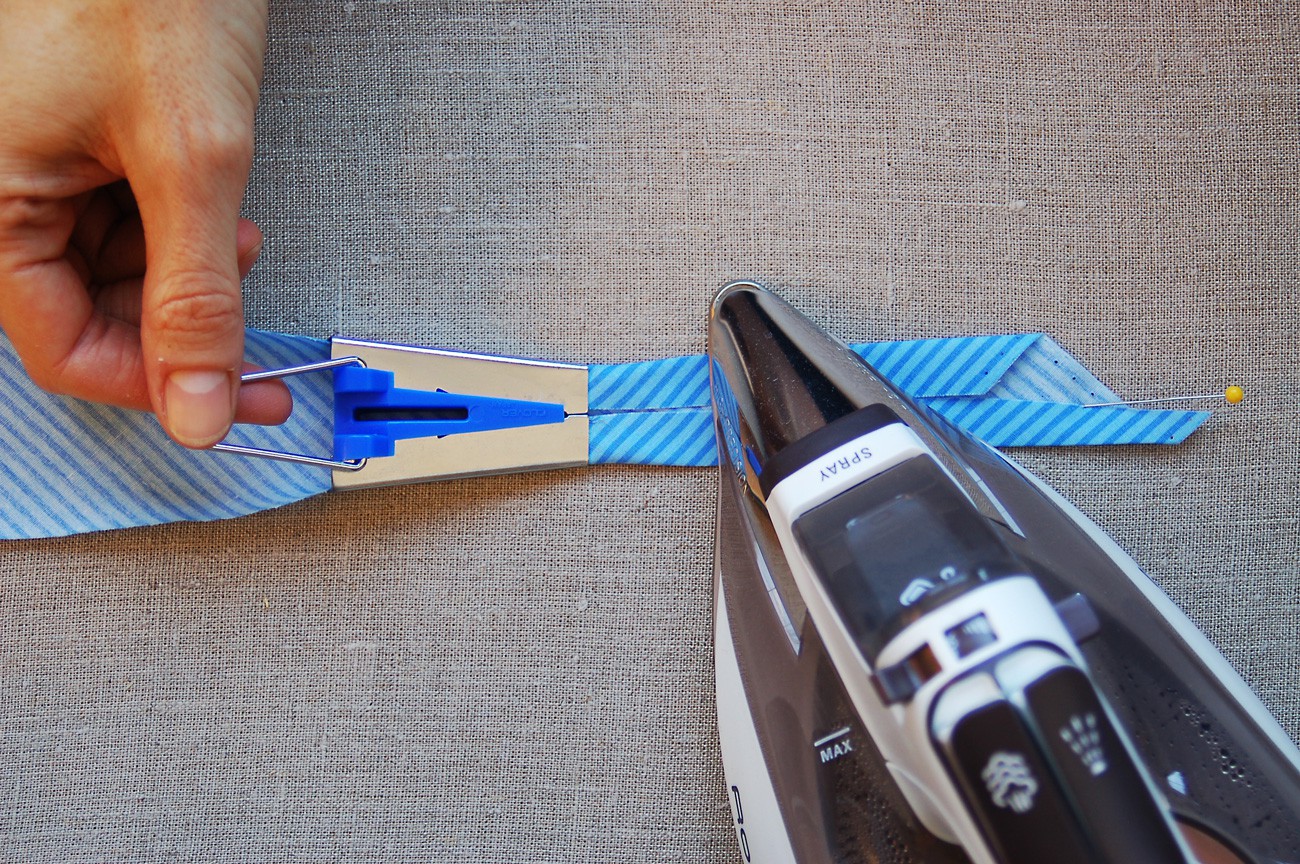
I like to pin the end of the strip to the ironing board to get started. Then slowly slide the tape maker along the bias strip, moving your hot iron along with it, just a couple of inches behind the tape maker so you’re pressing the folded bias as it emerges from the tape maker. Once you reach the end of your ironing board, simply unpin the strip and shift the binding so you can fold and press the next section. Easy, right? With practice, you’ll get really fast at this and your bias tape will be smooth and professional looking.
Continue to slide and press, and when you come to a seam, stop and coax the fabric into the tape maker carefully if it needs help. (It’s best to keep the seam allowances open so the tape will be less bulky.)
When I’m finished pressing my bias tape, I like to wind it around a piece of heavy cardstock to keep it nicely pressed and ready for use. I usually make quite a bit of binding at one time so I have extra for other projects. Like for the fabric bunting I made for S’s birthday party. If you make more than you actually need you’ll slowly build up a stash of binding for those unexpected projects.

Instructions for applying the bias tape are included in most of our patterns, as well as in my book. (I use a slightly different approach to sewing binding than most people.) And April wrote a really nice tutorial for us about bound seams, if you’re thinking about using bias tape to finish the seams on the Secret Agent Trench Coat, the Sunday Brunch Jacket, or any other projects without a lining.
Now that you know how to do it, I hope you’ll be making your own binding for some of your sewing projects!
If you enjoyed this blog post, why not sign up for our newsletter? It’s free, and you can opt to have new blog posts sent to you by email too!
Great tutorials for bias binding!!!! You are such an inspiration to new and old sewists. I love having yards of unique bias in my stash. Everyone should make bias from their scraps. Never know when you will need it. Susan VH
Thank you very much for the tutorial. its very helpful
I have not seen this bias tape maker in stores. need to buy one. thank you for the tutorial.
LOVE the bias tape presentation. I’m making a quilt that has vines that go straight up on either side of a house then curve toward each other meeting on either side of a circle with a star inside…these are to be appliqued…at the bottom of the stem (vine?) it’s about 3/4″ tapering to about 3/8″ on up….is there a way to make bias tape for needle turn applique’ that does the tapering? Also, there are about 12 – 15 leaves on either side of each vine…would you think it better to tuck those under the stem/vine? or just place them close? Thanks so much! Anna
This is probably a really silly question, but I’m a beginner sew-ist… can you use any fabric to make bias tape? I’m about to start a sewalong project using a jersey fabric and I’d like the bias binding to be the same fabric, but I’m not sure how it will go… suggestions?
Thank you!
Jesse, good question! In general, binding is best made out of light- to medium-weight woven fabrics. Heavy-weight fabrics get too thick and bulky with all the layers. Since knits are already stretchy from selvedge to selvedge, they don’t need to be cut on bias. But you can make binding from knits by cutting strips from selvedge to selvedge. You’ll probably want to use a stretchy stitch to attach them, and maybe a walking foot would help. You could also try fold-over elastic, which is great for finishing the edges of knits. I hope that helps! You can also get a lot more help and guidance on our discussion forums. I recommend checking them out!
I notice when I make my own bias tape it’s about 1/8″ smaller then the Wright bias tape even tho when unfolded they are the same size. The Wright tape has more width in the middle. Any way I can get my bias tape to fold like theirs.
TIA
Margie
Can you tell me where I can buy the tape maker is it available in the uk
Is the tape maker available in uk
Thanks for your tutorial-it’s great. I use the smaller bias tape makers for hand appliqué projects but can’t find one a little smaller than 1/4″ other than the 1/8″ which is too small. I really need 3/16″ but no luck finding it. A project which I am starting has tons of long stems that are smaller than 1/4″ and I would love to do bias tape. Do you have a suggestion?
Hi Sharon,
I found this and thought i t might help you – you could tweak the measurements and draw out your own bias tape maker to create a 3/16″ bias if you still need it.
http://scientificseamstress.blogspot.co.uk/2011/10/printable-bias-tape-maker.html
Hope this helps,
Hannah
Thank you very very much for the easy ans much simpler method of how to use the bias maker.
I am confused on how big to cut my material for each bias tape maker I never received any instructions with mine. I don’t Understand mm. Can you tell me what size material I need for each one?
The easiest way to convert mm (millimeters) to inches is to google converting millimeters to inches. The next best way is to buy a measuring tape that has inches on one side of the tape and metric (mm & cm) on the other. The metric system has 10 millimetres to every centimetre and 100 centimetres (cm) to every metre. Most seam gauges also have both systems on the same gauge.. Find the number you want to convert and compare it to the same place on the other side of the tape. I put my fingernail at the spot and turn the tape over while holding my fingernail in place – or in the case of the seam gauge, just look at the other edge.
I’m with Norma. I don’t understand how to know how wide a strip to start with for each size bias tape maker. If the bias tape maker says 25 mm (1 inch), how wide should the strips I feed into it be? I’m guessing the cut strip should be twice as wide — for a 25 mm tape maker cut the strip 50 mm wide — right?
For Norma and Rich. Regarding how wide to cut the fabric: check the article again. At the end of the second paragraph she writes, ” So for 1/2″ binding, you’d use the 1″ tape maker and 2″ wide cut bias strips. Makes sense, right?”
I am having so much trouble making bias tape. Why is my fabric puckering in the center and goes croaked after about 4 to 5 inches?
I was wondering whether you join all the strips together before you put them through the gadget or afterwards.
I bought a set of bias tape makers. The one that is 25mm or 1inch is giving me trouble. I am able to make the bias tape with the 18mm or 3/4 inch work just right so I am not sure if it is me or the tool. Has anyone else had this issue with 25mm size?
I haven’t done this in awhile, but I remember deciding I would buy nothing but a Clover bias tape maker since i had trouble with another brand and it was the larger size – probably the 1 inch.
What size would you need to handle/use a 2.5 inch wide piece of fabric?