Note: today we continue the series of seam finishing tutorials by April Henry that we started last summer.
Bias Binding is a strip of material cut on the bias for extra stretch and often doubled. It is used for binding hems, interfacings, or for edge decoration and is very useful for many sewing projects. It adds a touch of embellishment to set your garment or project apart for a more professional appearance. You can purchase ready-made bias or make your own.
Bias-making tools are helpful and efficient, but a good steam iron is the necessary tool. I personally prefer to make my own bias binding because I can customize it to my project, but some of the old-fashioned vintage unused packages can be quite fun to put to use, too. The focus of this tutorial will be set around making your own bias.
For a 1/4″-wide finished binding, you’ll need to start with 1″-wide bias strips, for a 3/8″-wide finished binding, you’ll need to start with 1 1/2″-wide bias strips, and for 1/2″-wide finished binding, you’ll need 2″-wide bias strips. The following illustrations will show how you can enclose the raw edges of your seam allowances using the regular presser foot on your sewing machine or by way of an old Singer Attachment.
I prefer a 1/4″ wide finished binding, so my illustrations will reflect using 1″-wide bias strips.
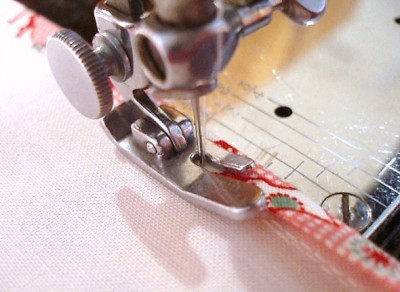
Before binding, stitch your seam allowances as directed in your pattern instructions. With Oliver + S patterns, this is a 1/2″ seam allowance. To follow with binding, trim the seam allowances to about 1/4″ [editor’s note: by trimming your seam allowances to 1/4″ the binding will finish at the seamline. To keep the bias binding further from the seamline so the bias doesn’t add bulk, leave the seam allowances untrimmed]. Fold and press one long edge of the bias strip to the wrong side by 1/4″. Pin the opposite long edge of the strip to the seam allowances with the right side of the bias strip facing the seam allowances and the raw edges aligned. Stitch the layers with a 1/4″ seam.
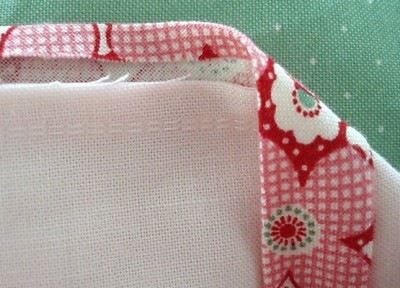
Trimming your seam allowances slightly will help to ensure that your previous stitching lines are covered within the bias as it is folded over and stitched.Wrap the bias strip around the seam allowances so the folded edge just covers the first row of stitching. I like to re-press at this point so that my bias lies flat while I stitch it in place. Then stitch the bias in place along its folded edge.
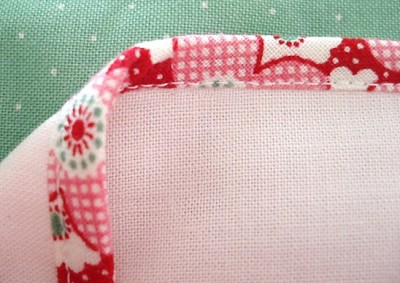
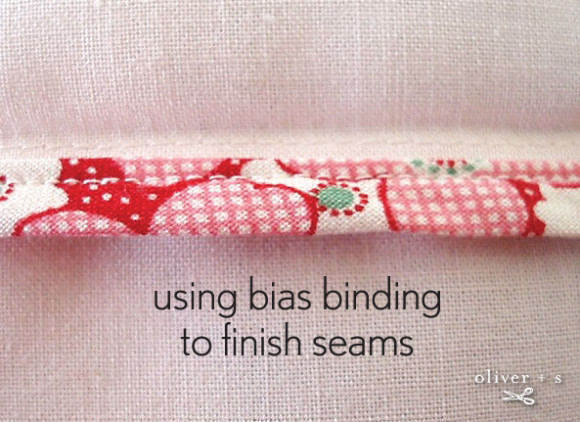
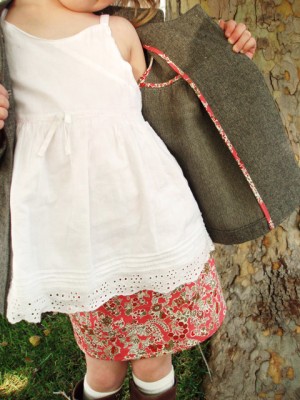
This method is particularly useful for finishing seams on heavier fabrics. (Be sure to choose a very lightweight cotton such as lawn or batiste so as not to add any unnecessary bulk at the seam allowances.) Using a contrasting fabric adds that last finished touch to the inside of a garment, such as this Sunday Brunch Jacket I made for my daughter.
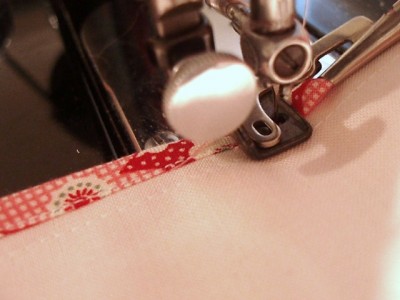
The following illustrations are shown using an old Singer Binder Attachment and 15/16″ wide bias strips. (A little bit of trivia: remember, the tutorial illustrating the Singer Hand-Crank Pinker? Using a straight-edge disk, the cutting guide was specifically designed for 15/16″ maximum width cut for this very purpose!)
A Singer Binder was included as a standard basic attachment with most vintage Singer Sewing Machines but are still useful for today. If you want to avoid the extra steps of pressing, this attachment will aid in stitching, folding, and binding the raw edges all at one time. Granted, it does take a bit of practice to get the feel and direction to hold the bias strips correctly, but there is something fun about using tools from days gone by.
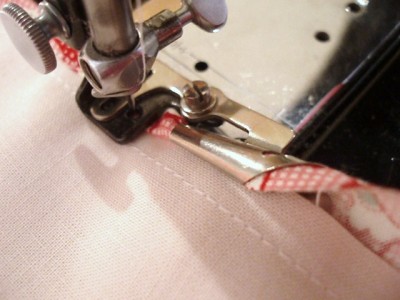
The engineering of this attachment basically allows only for traditional cotton quilting wovens to be used, but it is particularly helpful for quickly binding seams or binding the edge of a single layer piece of fabric (e.g., aprons, ties or sashes, bibs, collars, etc.) all in one pass. I only trimmed about 1/8″ from the seam allowance before applying the binding with the Singer Attachment, being extra cautious not to sew into the seam allowance itself. You will find more ideas and samples at April1930s.com.
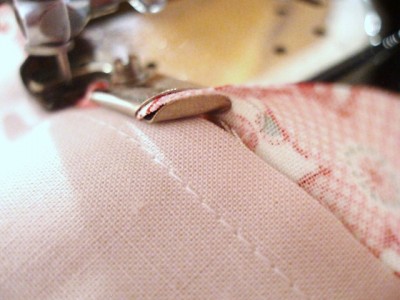
The bias strip is guided through the attachment while simultaneously being folded and stitched in place as it encloses the raw edge of the seam allowances. You can use this attachment for a variety of bias-width cuts, but the maximum width allowed through the binder is 15/16″.
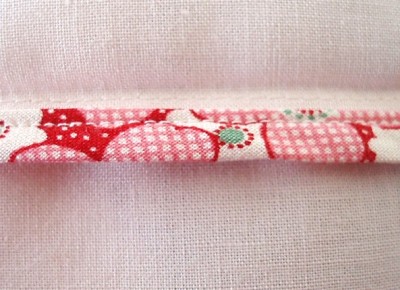
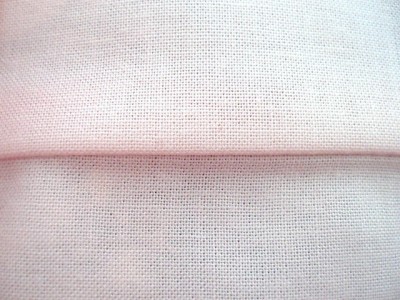
When you are finished, be sure to press the seam allowance in the proper direction as directed in your pattern instructions.
I love this… such a lovely touch!
I just got to sew with my Mom’s Singer for the first time, it was her Grandmother’s. It sews like a dream — I actually had to borrow it because my modern machine couldn’t handle the drapes I was sewing. I noticed all the little gizmos in the box — how fun!
Hi there,
Thanks for showing the Singer binder attachment! My mom gave me a box of old attachments a year ago, and they are really fun. My question is: are you showing yourself finishing an inside seam? So you are doing this instead of a French seam, for instance? So that it won’t unravel? Is there a way to use the attachment to do an outside binding, like the one on the coat? Also, have you tried to use it on anything other than a straight or rounded corner, and do you know if this is possible?
Thanks for any info you can provide. The coat you show is great, but I also love your daughter’s dress with the eyelet and the skirt that matches the coat. Very nice.
Gorgeous. You did a terrific job sharing what the process looks like. Bound seams simply finish a garment so professionally. It’s a fun way to use a cute, bright fabric on something that might not otherwise have anything exciting going on. LOve it!
So glad to have your tutorials back, April 😉
I read it before I went to bed last night and slept like a baby dreaming about seam finishings!
This maybe one of my favorite methods for seam finishing as one gets to make use of all those pretty fabrics that otherwise wouldn’t be used (and what’s not to love about pretty, and neat, seams?)
April rocks! I have this attachment, but I always thought it was for a baby roll hem (which I tend to do by hand, anyway). Brilliant!
Hi, Ann-Elise…
>>My question is: are you showing yourself finishing an inside >>seam? So you are doing this instead of a French seam, for >>instance? So that it won’t unravel?
Good questions! You are correct in your assumptions. This is just a little decorative touch you can do to make the inside look as pretty as the outside.
>>Is there a way to use the attachment to do an outside >>binding, like the one on the coat?
You can use the attachment for an outside binding, but it would be limited to projects with little to no bulk at the seams because the attachment only allows a certain thickness through to feed correctly. (e.g. apron edges, placemats, bibs, collars, etc.) I bound the inside seams on the little Sunday Brunch jacket using the first method shown.
>>Also, have you tried to use it on anything other than a >>straight or rounded corner, and do you know if this is >>possible?
There are some fun little touches you can do with this attachment and with it’s later design (The Singer Multi-Slotted Binder as shown here: http://www.april1930s.com/html/multi-slotted_binder_attachmen.html).
If you’re wanting a Bias Binder for bulky seams or quilt-binding, then I recommend the ‘new’ attachment which involves a similar functional concept, but is altogether different: http://www.april1930s.com/html/binding___bias_tape_attachment.html.
>>Thanks for any info you can provide. The coat you show is >>great, but I also love your daughter’s dress with the eyelet >>and the skirt that matches the coat. Very nice.
Thank you for your thoughtful compliments! I must give credit where credit is due – the fabric and color choice concepts for the jacket and skirt were Liesl’s idea (a cotton tweed jacket with liberty lawn for the skirt). Adding the binding was optional according to the pattern, but was something I decided to do as a little surprise to Liesl for the Sew Beautiful samples. The outfit I made for my little girl was a duplicate because I loved how she coordinated everything so well!
Thanks for the info
I have used my zipper foot when attaching bias tape.
This could be another way to place bias.
Fold it in half with the raw edges meeting.
Press.
Then match the raw bias edge to the raw garment edge sew.
Fole over to the outside of the garment and, eith er hand sew or,machine sew. This is where the zipper attachment comes in handy for your machine.