Note: The welt pocket seems intimidating if you’ve never tried to sew one before. Sometimes color photos can help decipher details and give an alternate view to the illustrations, so Kristin is here with her first Oliver + S blog post to show our technique through step-by-step photos and to demonstrate that the welt pocket is really not a difficult technique and results in a professional-looking pocket!
This tutorial uses the welt pocket pattern pieces from our Art Museum Vest + Trousers pattern, which features welt pockets on the vest and on the trousers.
The numbered steps in this post correspond to the actual instructions in the Art Museum Vest + Trouser pattern, but I’ve provided additional photos and tips along with comments and suggestions.
Ready?
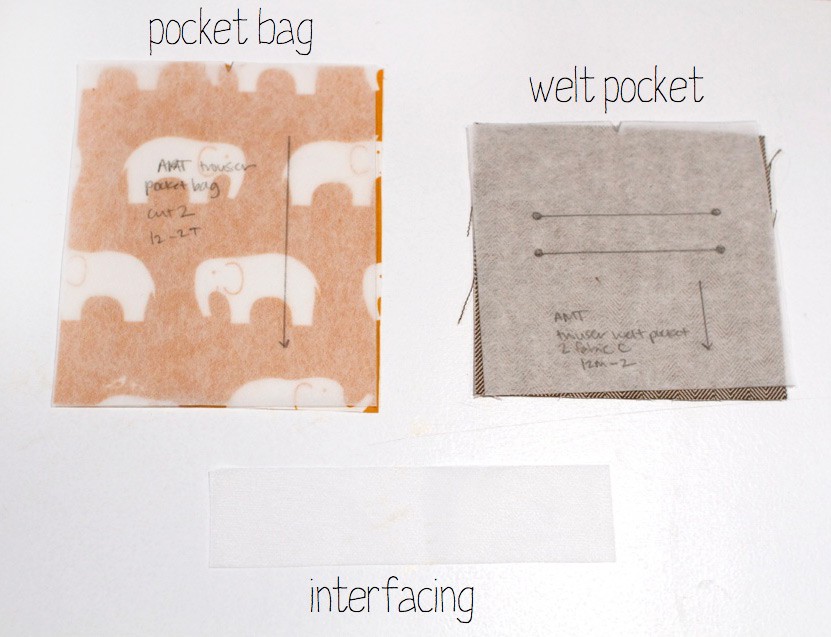
Before you start, gather the welt pocket pieces according to the pattern instructions, including the pocket bag, welt pocket, and interfacing.
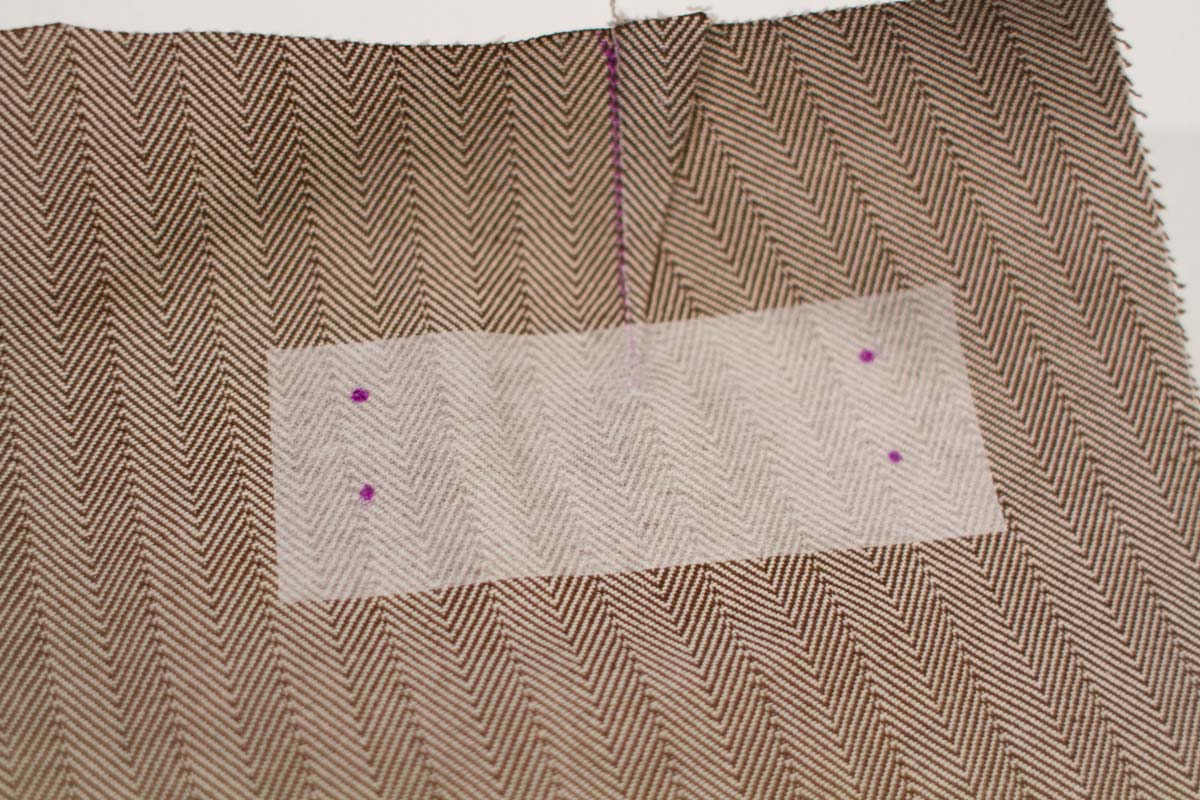
Transfer all markings from your pattern to the fabric. I use Swedish tracing paper to trace the appropriate size from the pattern, then poke holes at the dots with a sharp pencil and use the holes to mark through the tracing paper directly onto my fabric with a water-soluble marking pen or tailor’s chalk to ensure accuracy. Remember to transfer the pocket placement dots to both the right and wrong sides of the vest/trouser fabric.

Sew the darts as instructed by the pattern, and let’s get ready to sew a welt pocket!
The Art Museum Vest pattern instructions follow in normal type, with my additional tips in italics. Step numbers correspond to the step numbers in the pattern.
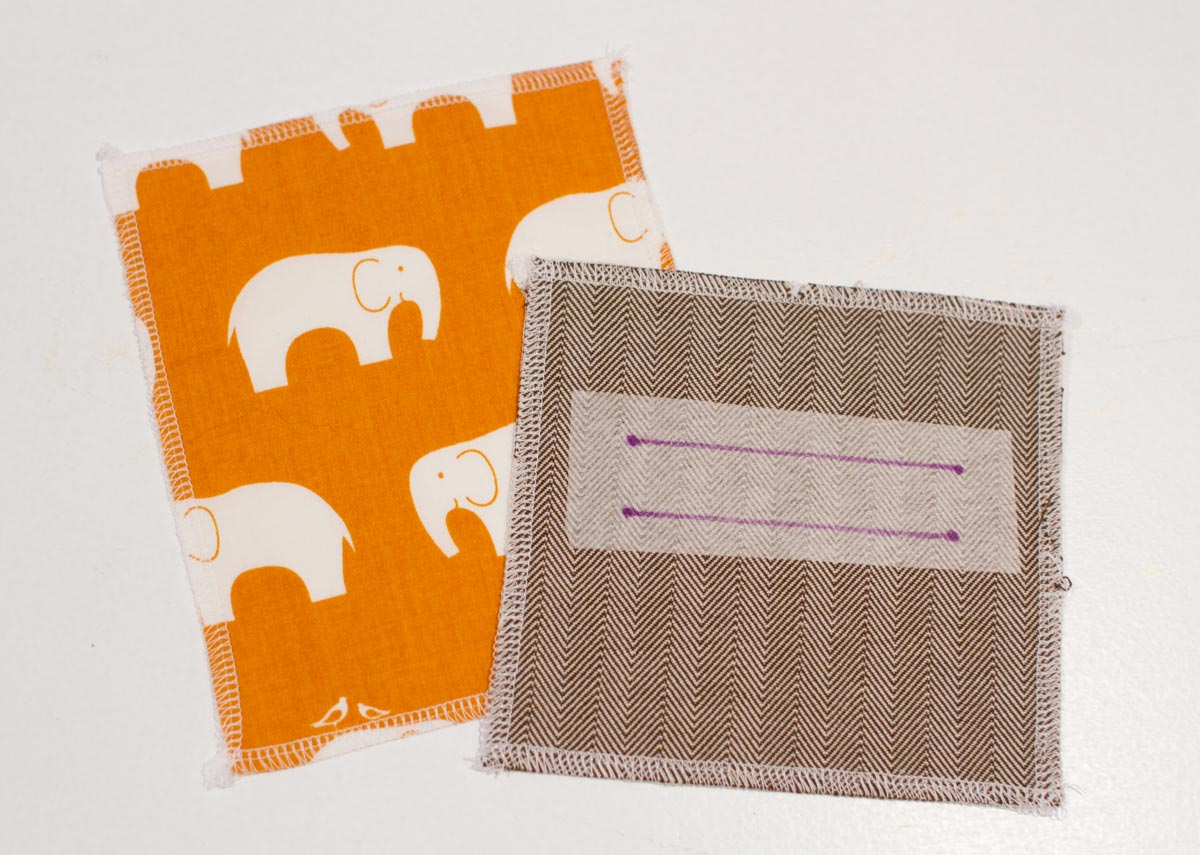
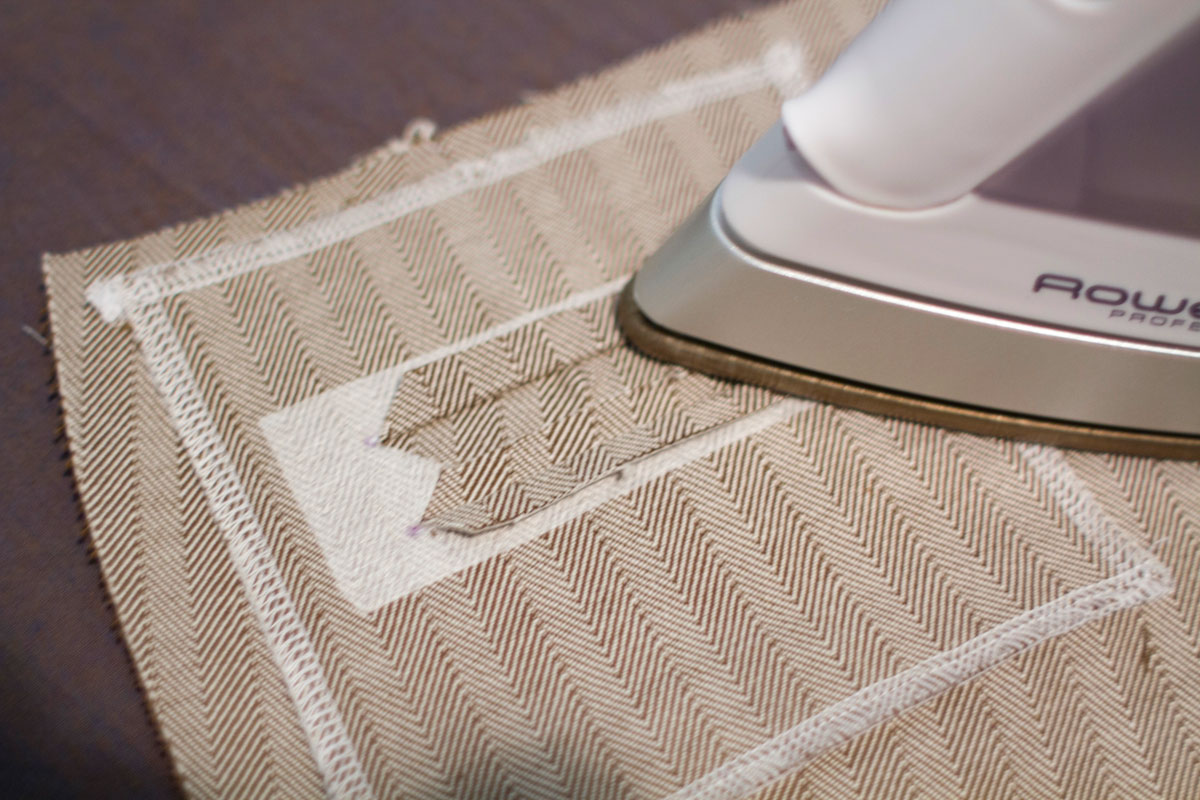
1. Trim one of the 1 1/2″ -wide strips of interfacing you set aside to be 1-2″ longer than the welt placement dots, and fuse the interfacing to the wrong side of the vest, so it covers the welt placement dots. You can use your fabric pen to re-mark the dots onto the interfacing so they show up clearly if you’d like.
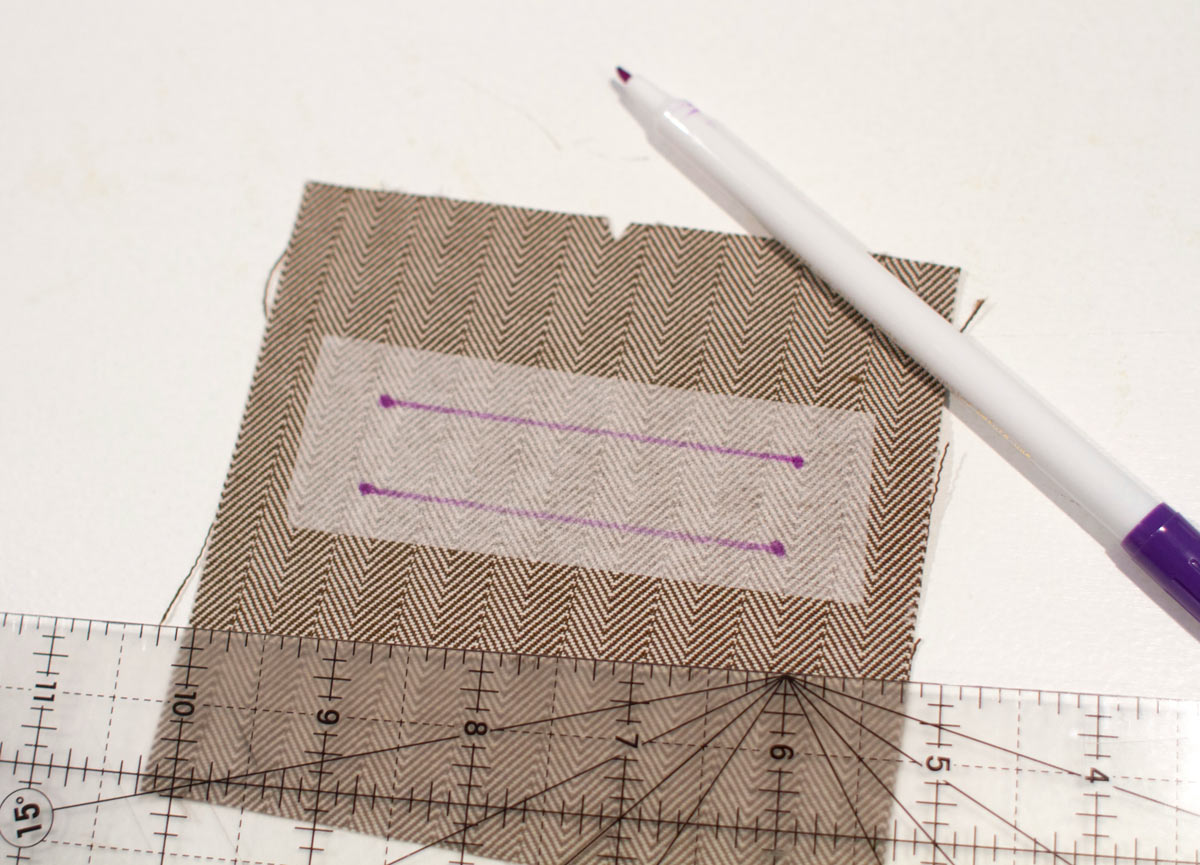
2. Trim and fuse a second strip of 1 1/2″ -wide interfacing to the wrong side of the welt pocket piece, so it covers the placement dots the same way. Using chalk, a water-soluble fabric-marking pen, or a light pencil line, connect the dots to make a rectangle. These lines will help you stitch the welt pocket, so make them as even as possible. I use a clear quilting ruler.
Finish the edges of the welt pocket and the pocket bag, using your preferred method. (If you’re using a serger, take care not to trim the edges as you finish them. You may want to lift the blade of the serger to prevent it from trimming as you serge, just to be sure).
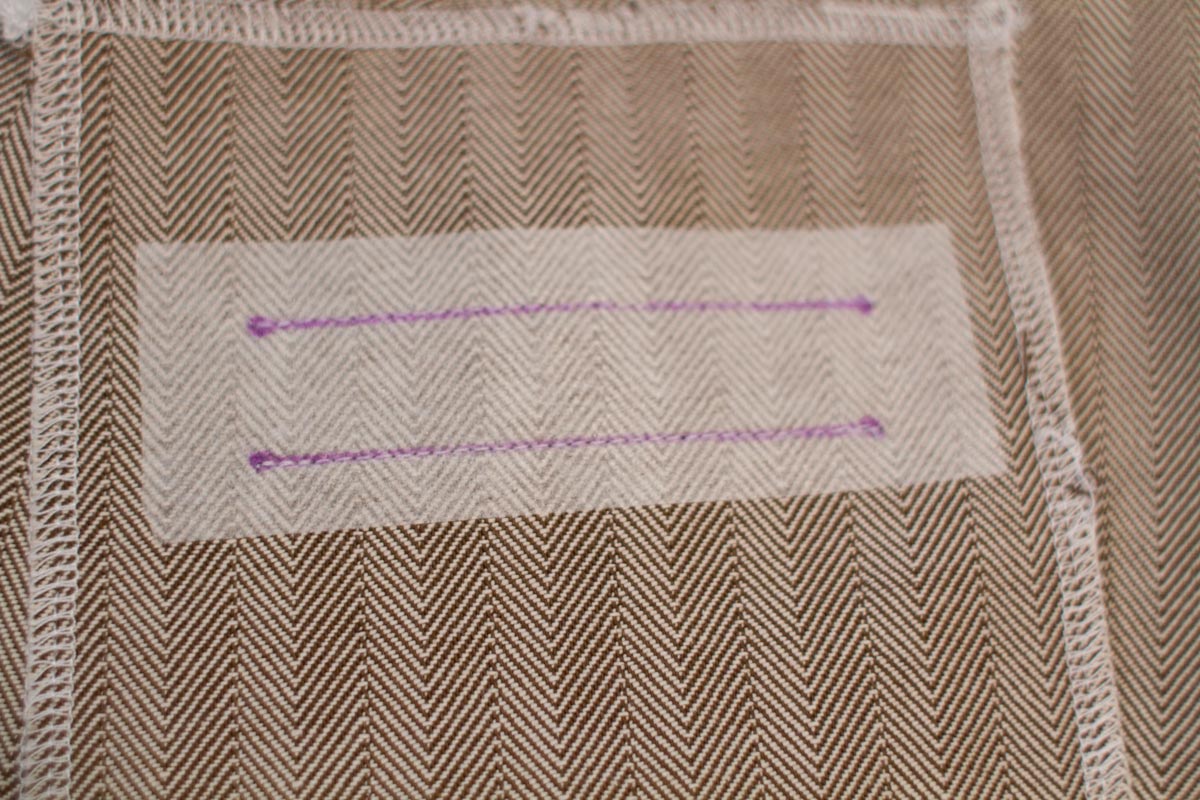
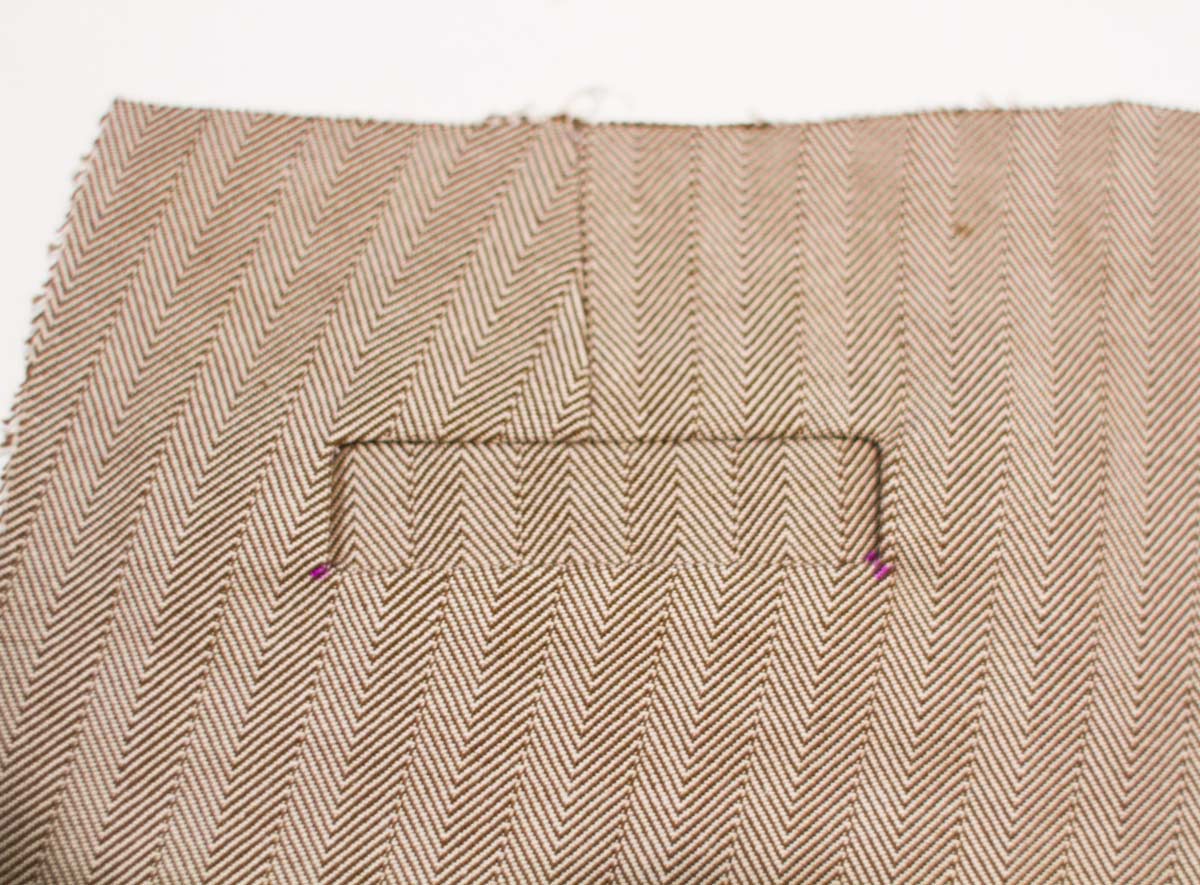
3. Pin the welt-pocket piece to the vest front, with right sides together and matching the placement dots.
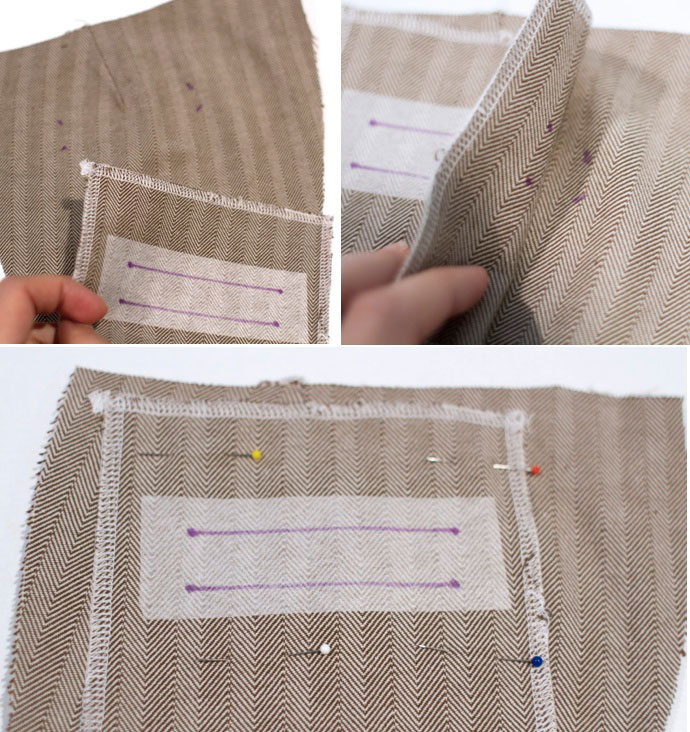
Stitch only the top and bottom lines of the rectangle, stopping and backstitching or lockstitching precisely at the side edges of the rectangle (that is, at the dots). Precision here is important to achieve a clean finish, so take care to start and stop right at those dots!
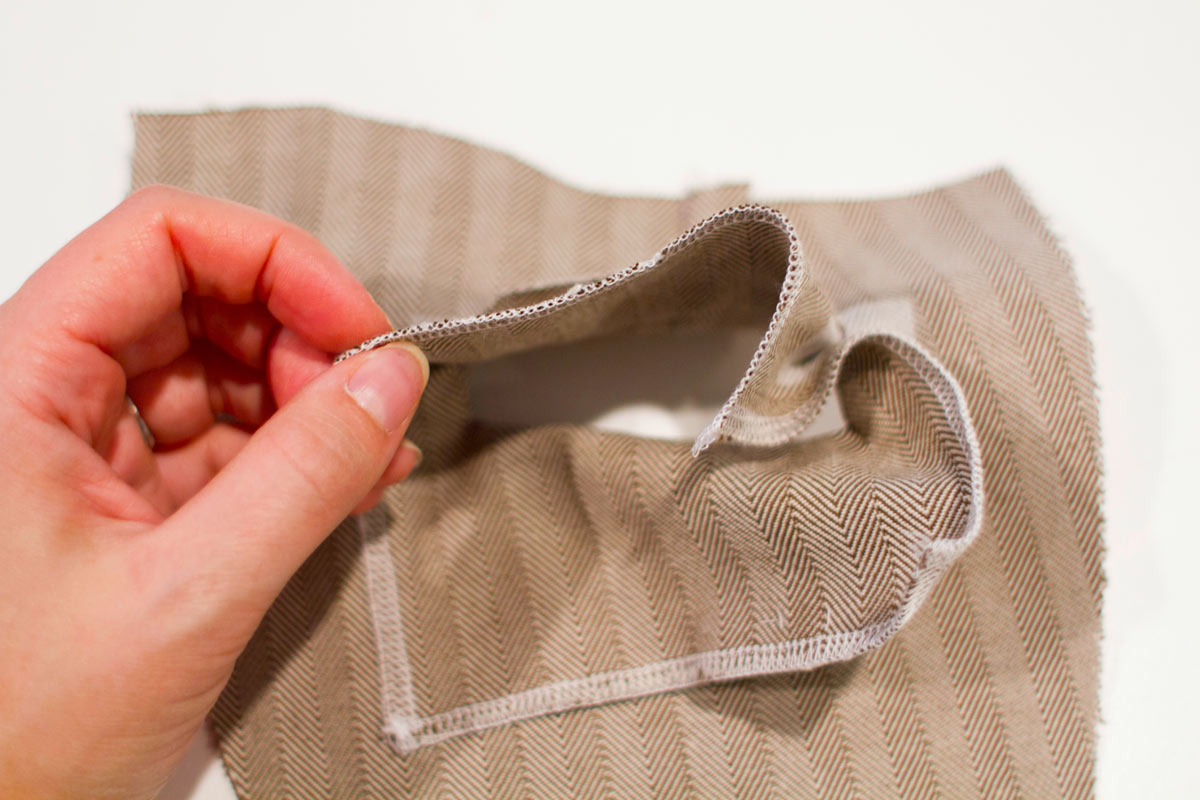
4. Cut a slit through both layers of fabric between the two stitching lines, stopping about 1/2″ from the rectangle’s short ends. A rotary cutter is helpful to start the cut line for this step – just start right in the middle and don’t cut too far. You can use your scissors to expand the cut lines out to 1/2″ from the rectangle’s short ends if you’re less comfortable with the rotary cutter.
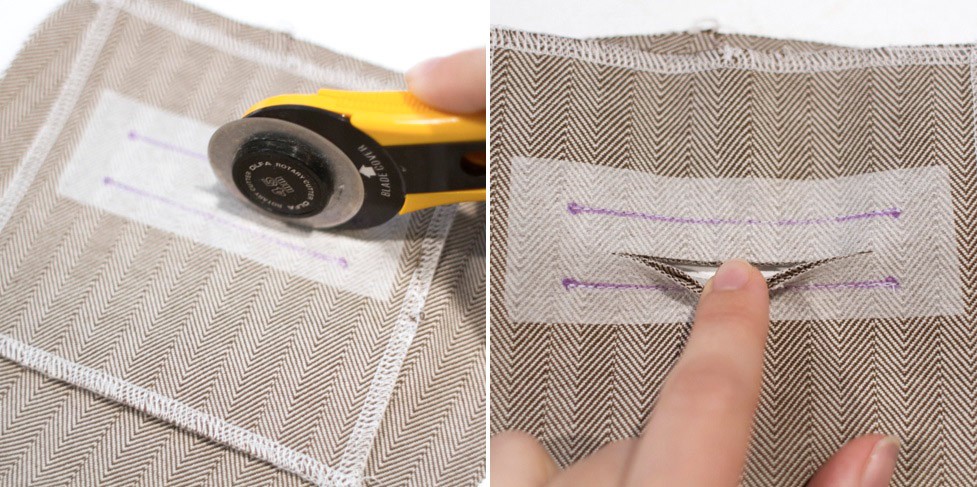
At the ends of the cut slit, clip through both layers to make a Y shape, ending the clips as close as possible to the rectangle’s stitching lines without actually cutting into the stitching.

5. Press the cut seam allowances open at the top and bottom seams of the welt, pressing a crease all the way across the rectangle to the ends of the cut Y shapes.
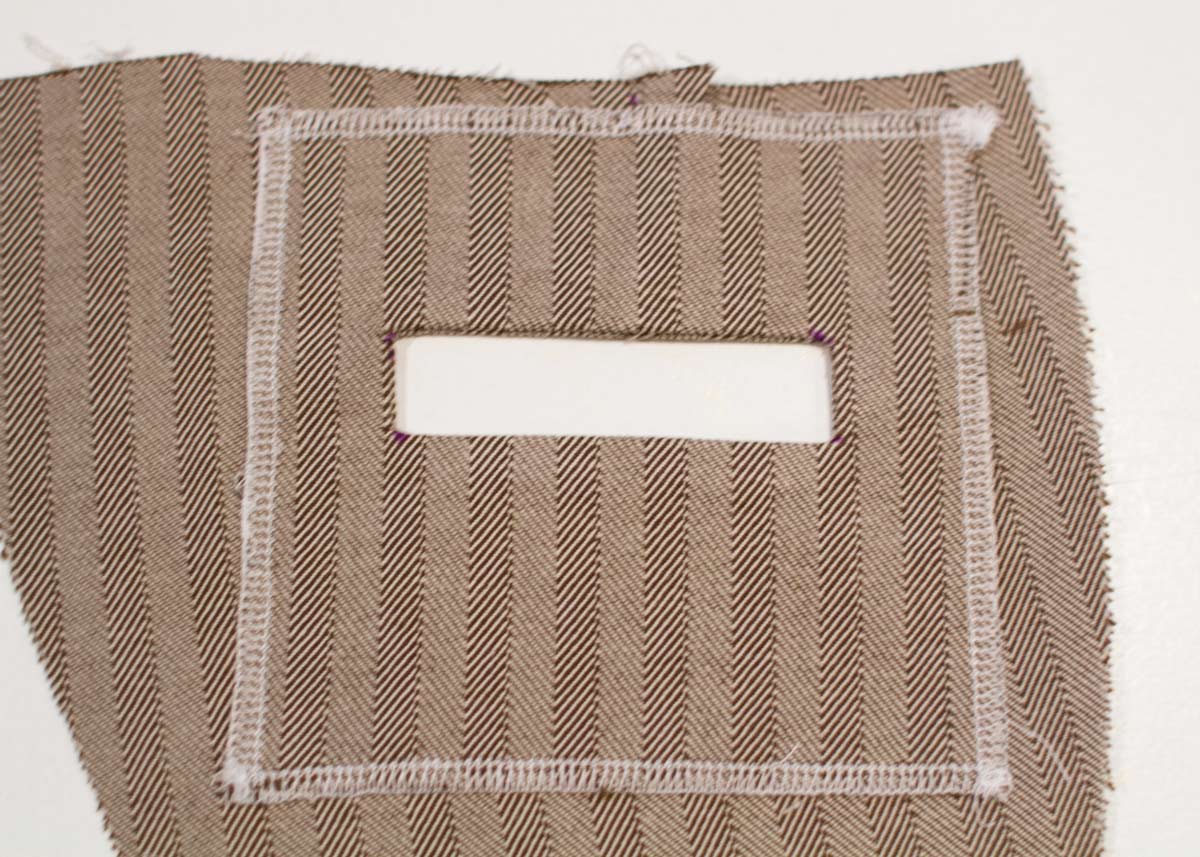
6. Turn the vest to the wrong side, and reach through the cut opening to pull the welt-pocket rectangle through the vest’s wrong side.

Press the rectangle flat, gently tugging the corners of the welt pocket fabric until it makes a nice rectangular opening. If your corners don’t look crisp, check to make sure you’ve trimmed all the way to (but not through) the backstitching at the dots as shown in step 4.
Once your cut-out rectangle has crisp corners and edges, carefully press the bottom of the welt pocket piece up as far as it will go, opening and pressing the seam allowances in the process, so the fabric has a nice crease.
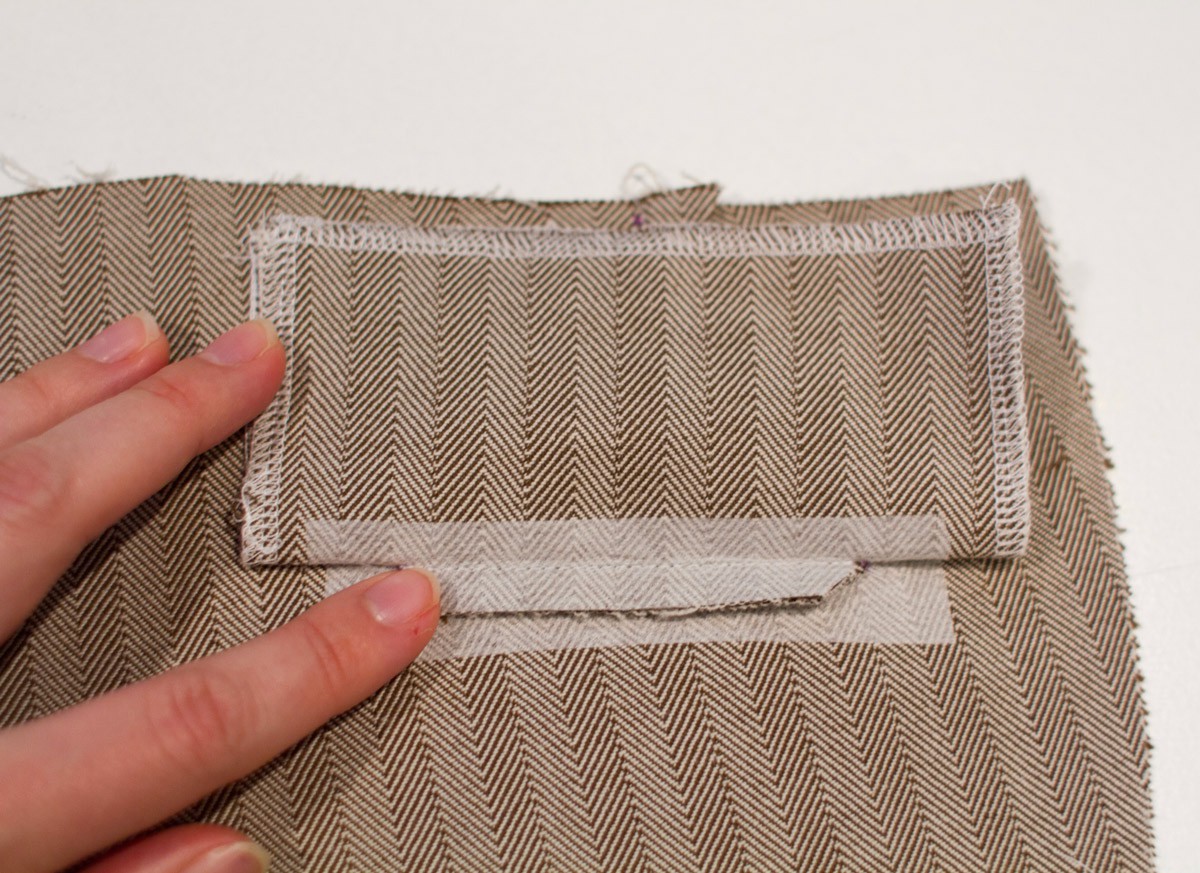
This is the first step in making the welt itself.
7. To finish making the welt, fold the welt fabric down again, making a crease at the top of the cut-out rectangle. This will be the welt of the welt pocket.
If you check it from the right side, it will look rather impressive already.
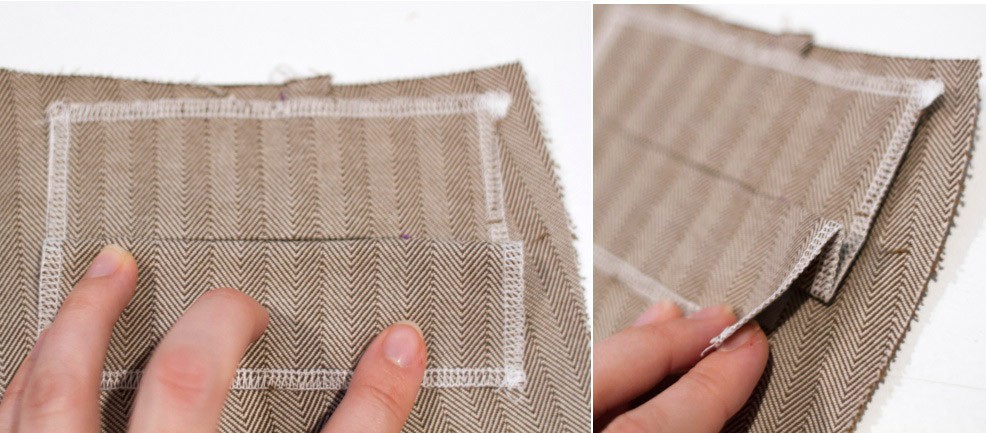
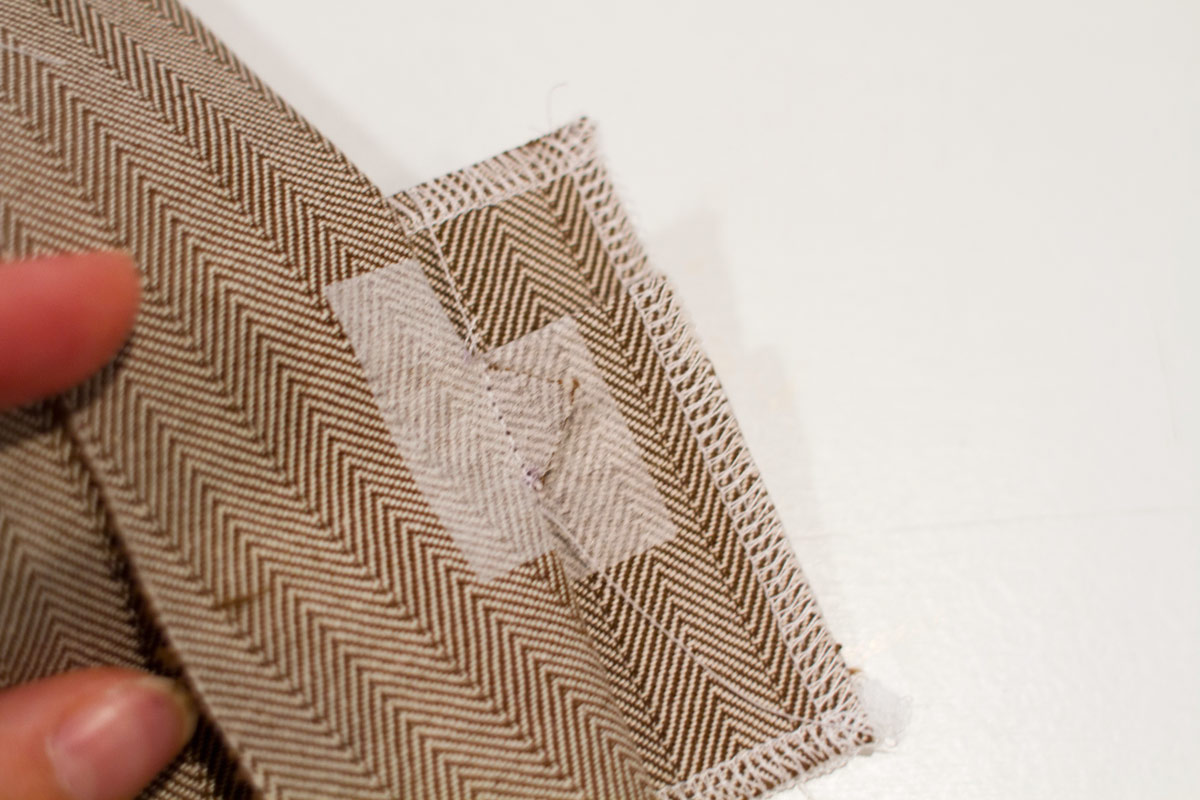
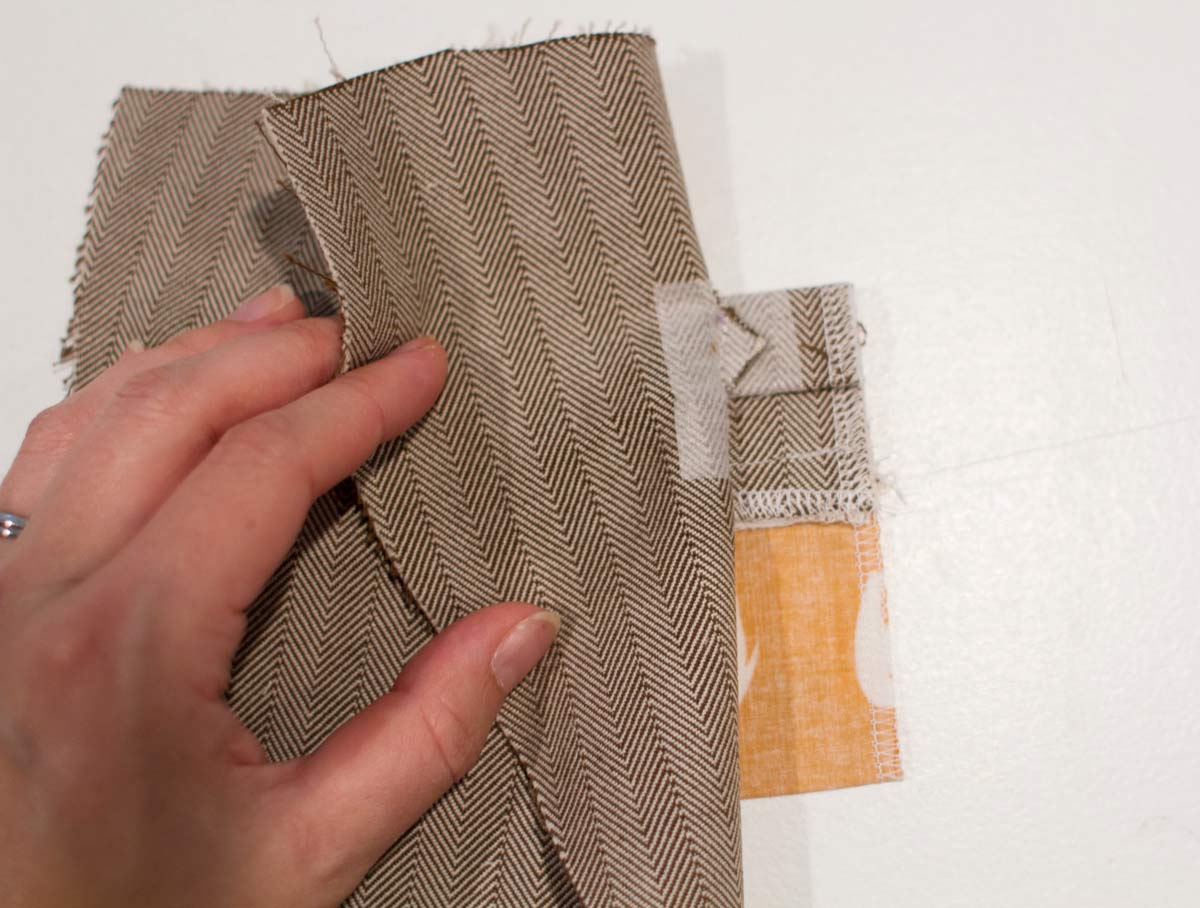
8. From the right side of the vest, fold the front vest away from one side of the welt as far as possible, exposing the welt-pocket piece and the little cut triangle at this edge of the welt.
Stitch the triangle to the welt pocket as close to the vest as possible, backstitching or lockstitching at both ends.
Check the welt from the right side of the vest and stitch the triangles a little closer to the vest front if necessary. Repeat this step on the other side of the welt pocket to to finish both ends.
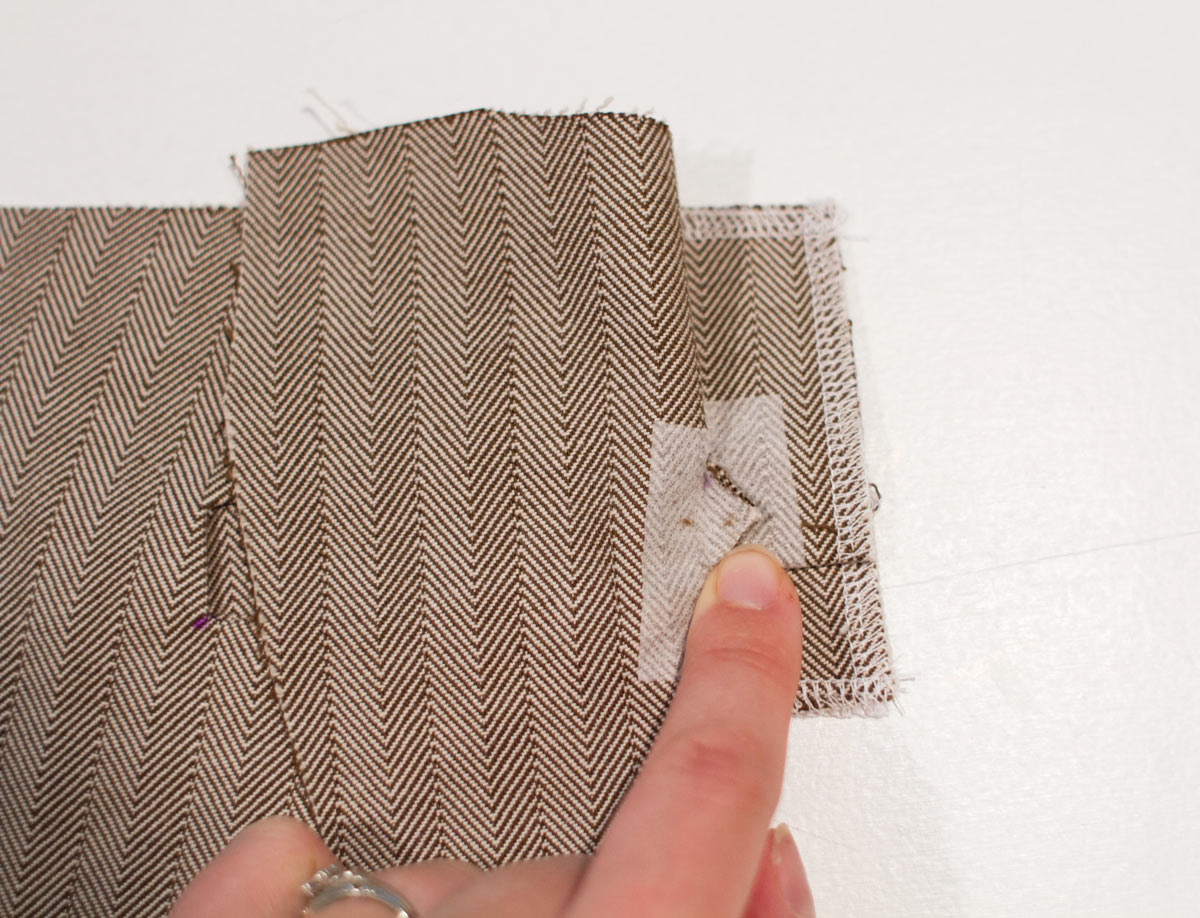
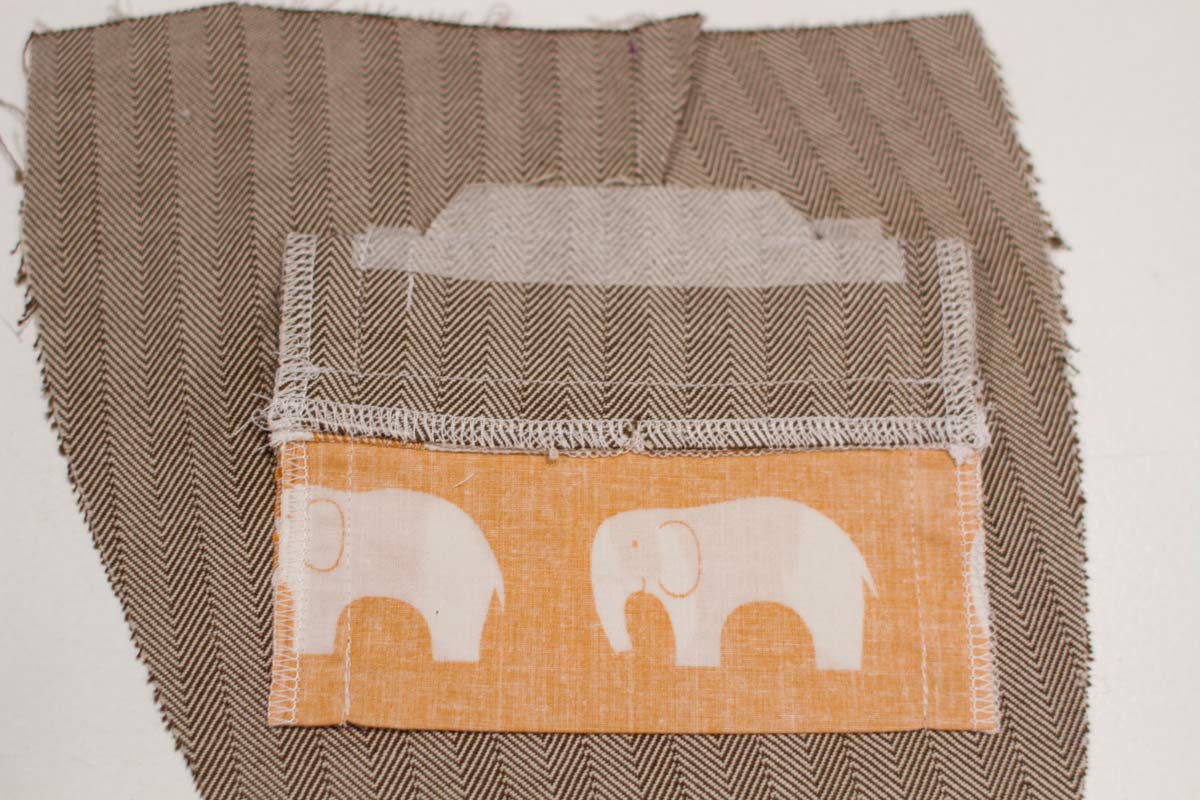
9. Fold the top of the vest out of the way and pin the top of the pocket bag to the top edge of the welt pocket fabric, with right sides together and matching the notches to each other. Stitch the two fabrics with a 1/2″ seam.
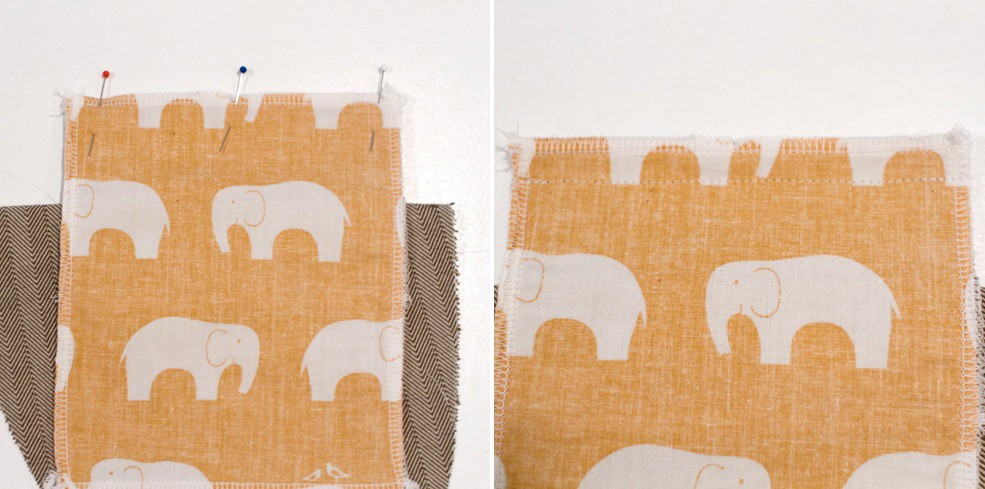
Press the seam allowances toward the pocket bag, then fold the top edge of the welt pocket down toward the bottom of the vest as far as it will go. If you check the right side of the pocket, you should see the main fabric, not the pocket bag, when you open it…the pocket bag will end up down inside the pocket when it’s finished.
Press a crease into the fold at the seam of the rectangle cut out. This fold will form the facing of the welt pocket so it will look nice when it’s opened.
If you want, you can stitch-in-the-ditch around the welt pocket at this point to help secure it.
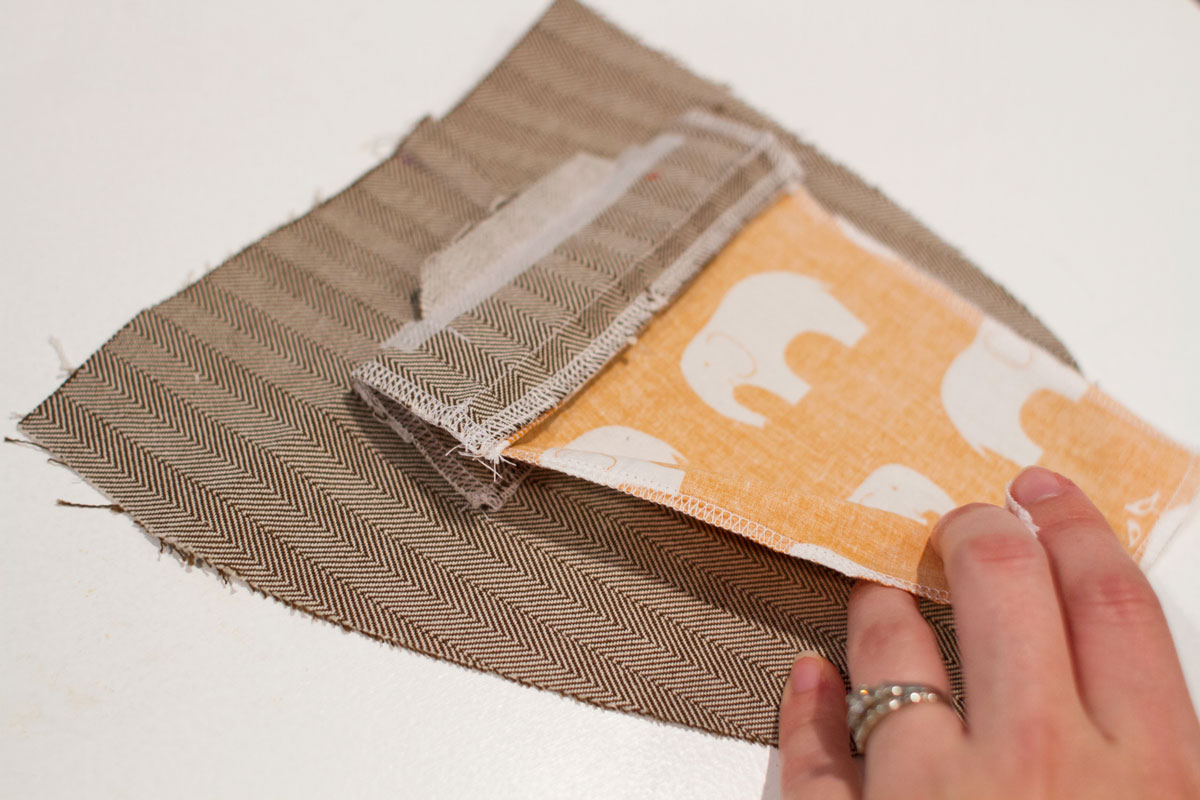
10. Pin and stitch the bottom edge of the pocket bag to the bottom edge of the welt fabric, with right sides together and the edges aligned.
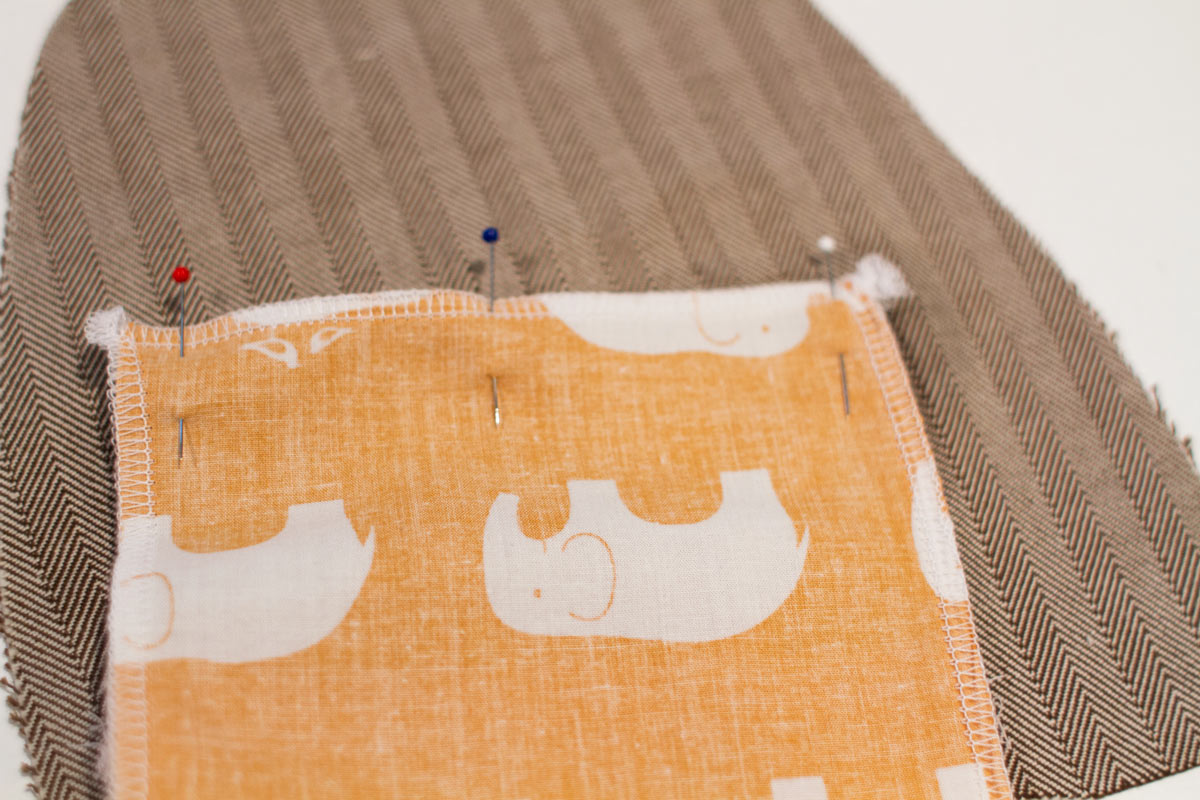
Press the seam allowances toward the pocket bag, then pull the welt fabric and the pocket bag toward the bottom of the vest as far as they will go and press a fold into the pocket bag to form the bottom of the pocket. The very bottom crease of the pocket will actually be around the middle of the pocket bag piece, as shown below right. The key here is to pull the whole thing down before pressing.
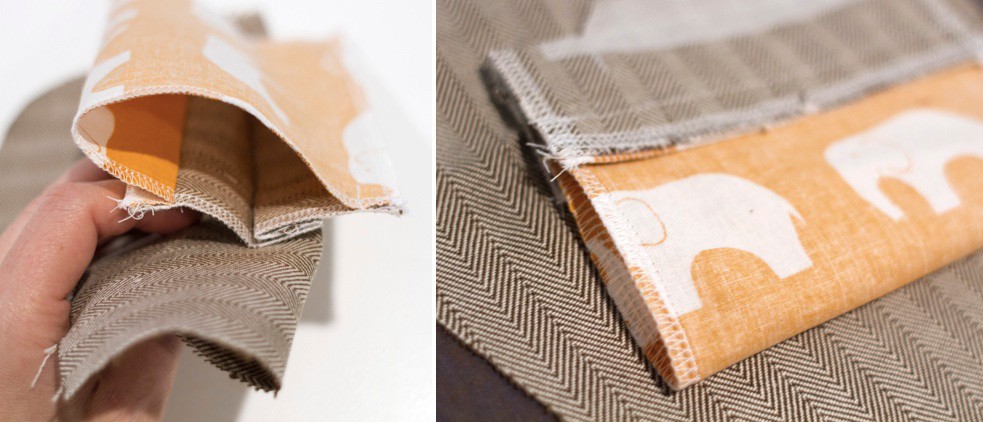
11. Check to be sure the pocket bag is smooth and pressed flat. Then fold back the front vest along the sides of the welt and stitch the sides of the pocket bag closed with at least a 1/2″ seam allowance or as close to the welt-pocket edges as you care to stitch.
You can have as much as 1″ seam allowance here, so there’s some flexibility with regard to how close you stitch.
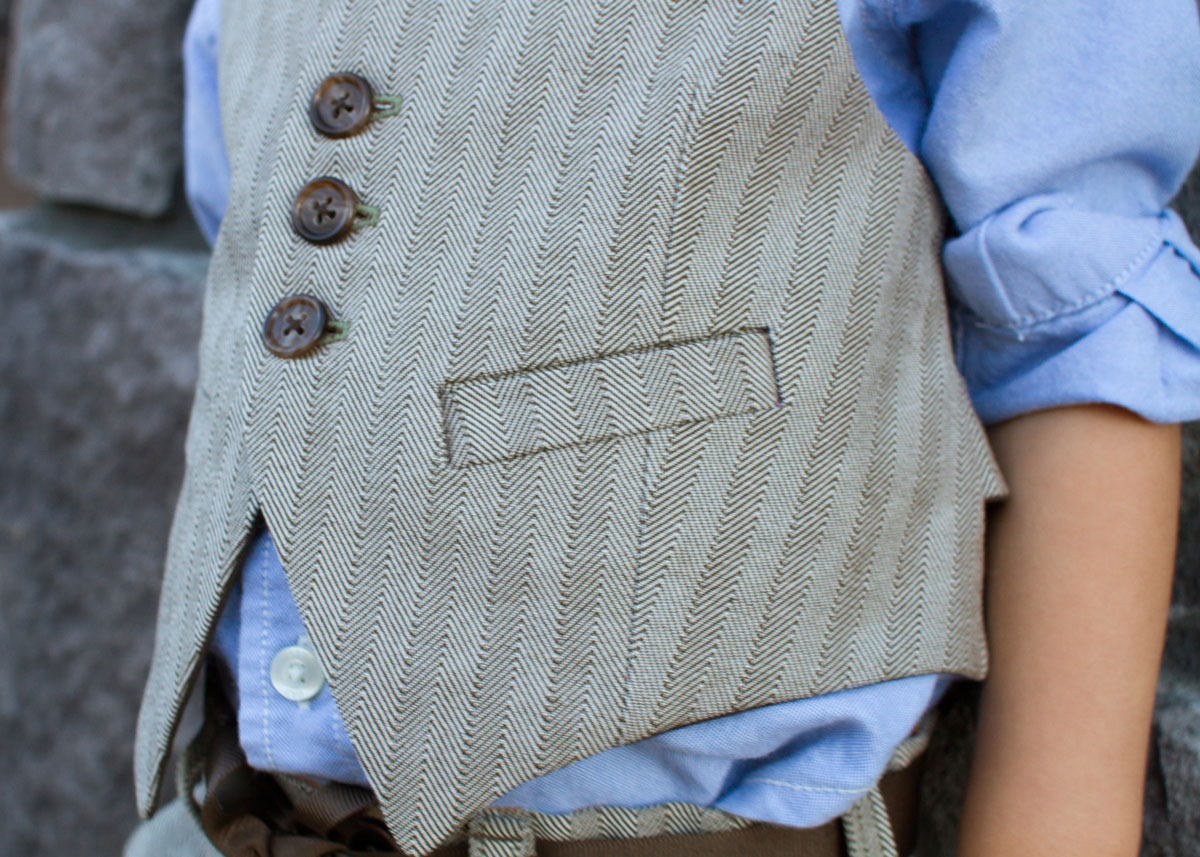
12. You’ve now finished the welt pocket! Repeat steps 1-11 to sew the welt pocket on the opposite vest-front panel (or pants panels).
The pocket bag is hidden inside…

…and from the outside, a crisp and clean welt pocket!
We hope this helps demystify the welt pocket process a bit!
If you enjoyed this blog post, why not sign up for our newsletter? It’s free, and you can opt to have new blog posts sent to you by email too!
This is great.
The only thing, I wish people with tutorials would do when using photographs, is use different fabric. Houndstooth on houndstooth is a a touch visually challenging. Using a solid red with the main fabric would make it incredibly well illustrated.
And that fabric is awesome!!
Jenny
I knew this at one time. Just one caution. It looked as if you were using a fade-away marker to make your dots. Since one also does this on the front of the garment, use care in choosing your marker. The fade-away and water soluable markers that quilters love are heat set. Any pressing will make them permanent. The Frixon pens erase with ironing.
I have an additional tip: get at least one good photo of your finished vest before it somehow sneaks into the piles of white school shirts to be washed and dried with high heat, resulting in a tiny, crumpled ball of once-gorgeous wool.
Nice clear photos!
Patricia, one thing to keep in mind with the Frixion pens is that they will reappear if the fabric gets cold/frozen, which can be a concern for those of us in colder parts of the world. The ink can also leave a light mark on fabric, which has been a real problem for me. I like the Frixion pens, but I’ve had much better results with the mark-b-gone pens, which have never left spots for me.
OOH Sarvi, I am so sorry to hear that. 🙁
Sarvi, that’s awful! So sorry.
Ah, good to know about the different types of pens.
Thanks, gals! I think the universe is telling me to make another 🙂
kristin, this was an incredibly generous use of your time! thank you.
love this tutorial! such great step-by-step action, makes it even more clear! More welt pockets, yay!!!
Awesome tute, thank you so much!
Great tutorial, Kristin!
thanks so such a great tutorial! Im really looking forward to tackling those pockets now 🙂
Jessica
Oh, what a great tutorial!! Love all of the helpful photos too!
this is going to help a lot of people make a lot of awesome welt pockets. hooray for kristin!!!
awesome tutorial, K! so clear. I love welt pockets!
Great tutorial! I now know I actually did them right!
I bow to your expertise. I learned to do these by marking with tailor tacks. How old fashioned is that!
Muito bom tutorial . Obrigada!
This is a fantastic tutorial, Kristin. I have just finished adding slanted welt pockets to a coat for the Minerva Craft Blogger Network and needed a clear explanation of how to actually sew them in place. I’ve searched the web high and low and your words and photos do a perfect job! Thanks a mil! x
This is by far the best tutorial for a welt pocket I have found so far – & I’ve been doing a lot of looking. Thank you so much for taking the time to not only write the tips & instructions, but to add the beautiful, clear pictures! I can’t wait to make one now – & before this, I was dreading it!
Thank you SO much for this – I haven’t sewn a welt pocket before but wanted to add one to the waistcoat I am making for my son.
There is no pocket on the instructions so had to search the net. Most tutorials are very hard to follow or use a separate piece for the welt which I couldn’t get my head round.
After reading yours through a couple of times, I decided to just go for it and not do a practice run (risky and against all the rules I know!!) but it worked absolutely perfectly and looks amazing.
As I was working from ‘no pattern’ I would just ensure I leave more of the welt below the opening and the fold back from the welt wasn’t as long as shown and made attaching the bottom of the pocket piece a little fiddly. I am really pleased with it.
Even @PaddyGrant would be proud (that will only make sense if you are in the UK – he’s a Saville Row tailor who judges The Great British Sewing Bee)
Thank you
Rachel
Thank you so much for taking the time to make this great tutorial! Great pictures and clear explanations. I didn’t make anything half so sophisticated as that vest, but I made a welt pocket in a denim handbag; thanks to you, it turned out exactly as I had envisioned!
Thank you for this clear and detailed tutorial. I’ve. Been reading instructions on the paper pattern and could not follow it. Your instructions are much better. If you want the welt to be wider, eg 1.5 inches, does it mean your rectangle should be 1.5 inches wide? Regards Linda
I just made a sample welt pocket, no pattern, just estimating by the sizes in your photos and following your instructions. It came out great. I’m putting these into the liner of a jacket I’m relining. Very much appreciated!
Thank you for this, gave me the confidence to try again after making a hash of it on my own…and success!!!!
Many thanks for posting these details. I have bought the exact pattern as this. I was very disappointed to see there were only fake pockets.
The 1st one took me ages, having made a practice one first. Second one was done in no time.
I have found your instructions the clearest on the internet.
it would be great to have more on matching the pattern when the welt is a diagonal.
Thank you, thank you, thank you!!! I’m actually in the process of making my husband some shorts with a back welt pocket and the directions are not the best. I hoped that you would have some information about them and alas you did!!!! Thank you again for this post and in helping me with my sewing!
Thank you so much! I’ve used this tutorial three times in the past two months, with great success.
http://osgoodfam.blogspot.com/2016/03/welt-pockets.html
This tutorial was wonderful! I used it with another pattern for a boy’s blazer and the included instructions were confusing and I had to start over…alas, but then I followed these instructions and it turned our great for a first attempt too! Thanks Liesl!
2017/10/5
I did appreciate the photo instructions. I would have liked a contrast thread where you stitched across the points, even with enlarging the photo I found it difficult to see the stitches.
I did a practice pocket for my own reference…how do I keep the top edge of my pocket from loosing structral integrity? I didn’t see any topstitching around the pocket edge in the photos (where it wouldn’t interfere wih the pocket opening).
Also how do I determine the size of the welt and opening….is there a standard size? I am adding a welt pocket to a vest/waistcoat that doesn’t have this pattern piece.
Thanks for your in depth tutorial! I’m a person who doesn’t know much about tailoring or clothes. My question is about the angle of the pattern. Take a tartan waistcoat as an example. Is it considered a sloppy work to have inclined patterns on the welt pockets as opposed to aligned patterns?
Yes, its considered sloppy to not match the pattern of the welt to the body.
If you are t matching then you can turn the fabric and use the lengthwise grain.
thank you so much for clear and comprehending instruction, I visited many sites and could not fathom the instructions as they needed a master degree in engineering to be understood, many many thanks, I have printed out the instruction and will use it dearly, great success.
ps: 72 year old retired man and in love with sewing, the sound, the smell, the feel and the challenges.
Kristin, I agree with the majority of the readers. This is the best tutorial on welt pockets I have found. Even though I have made them before, it’s one of those things that I need to review if it has been awhile.
In reading the comments since 2013, it made me laugh out loud at the SUGGESTIONS you received. Apparantly a certain kind of person, aka OCD, is more likely to want to do this precise type of work. You have to have thick skin to go to the trouble of sharing your expertise with the world. But the joy of making and wearing something so special, you have given to many. Thank you.
Very educative