Sew Alongs
Group Admins
Join us as we sew through some of your favorite Oliver + S, Liesl + Co., and Lisette patterns in the Sew Alongs group.
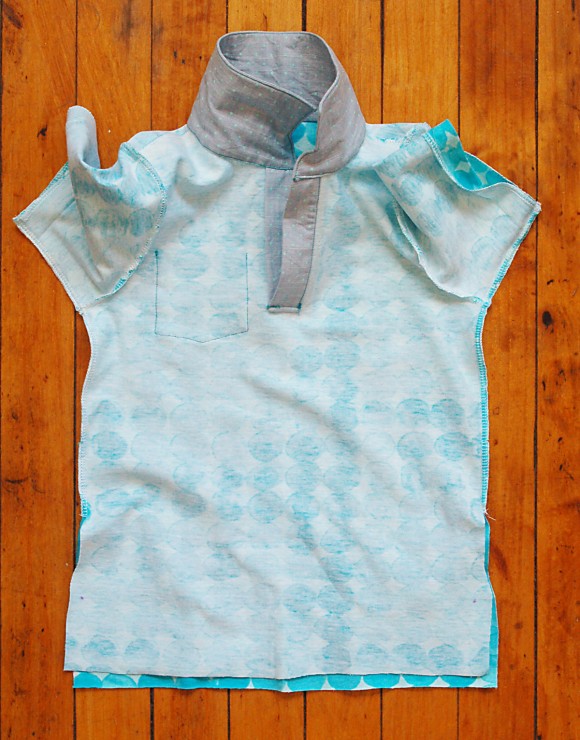
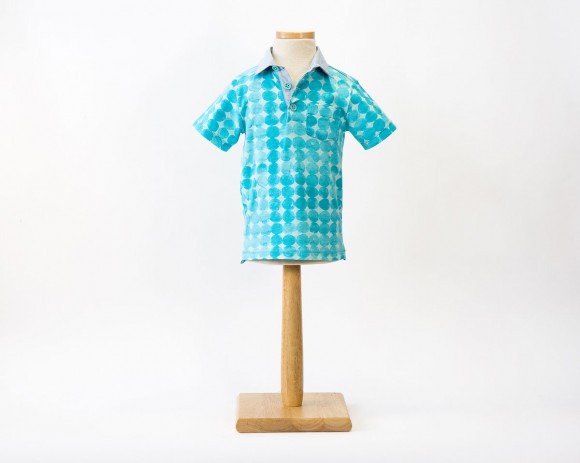
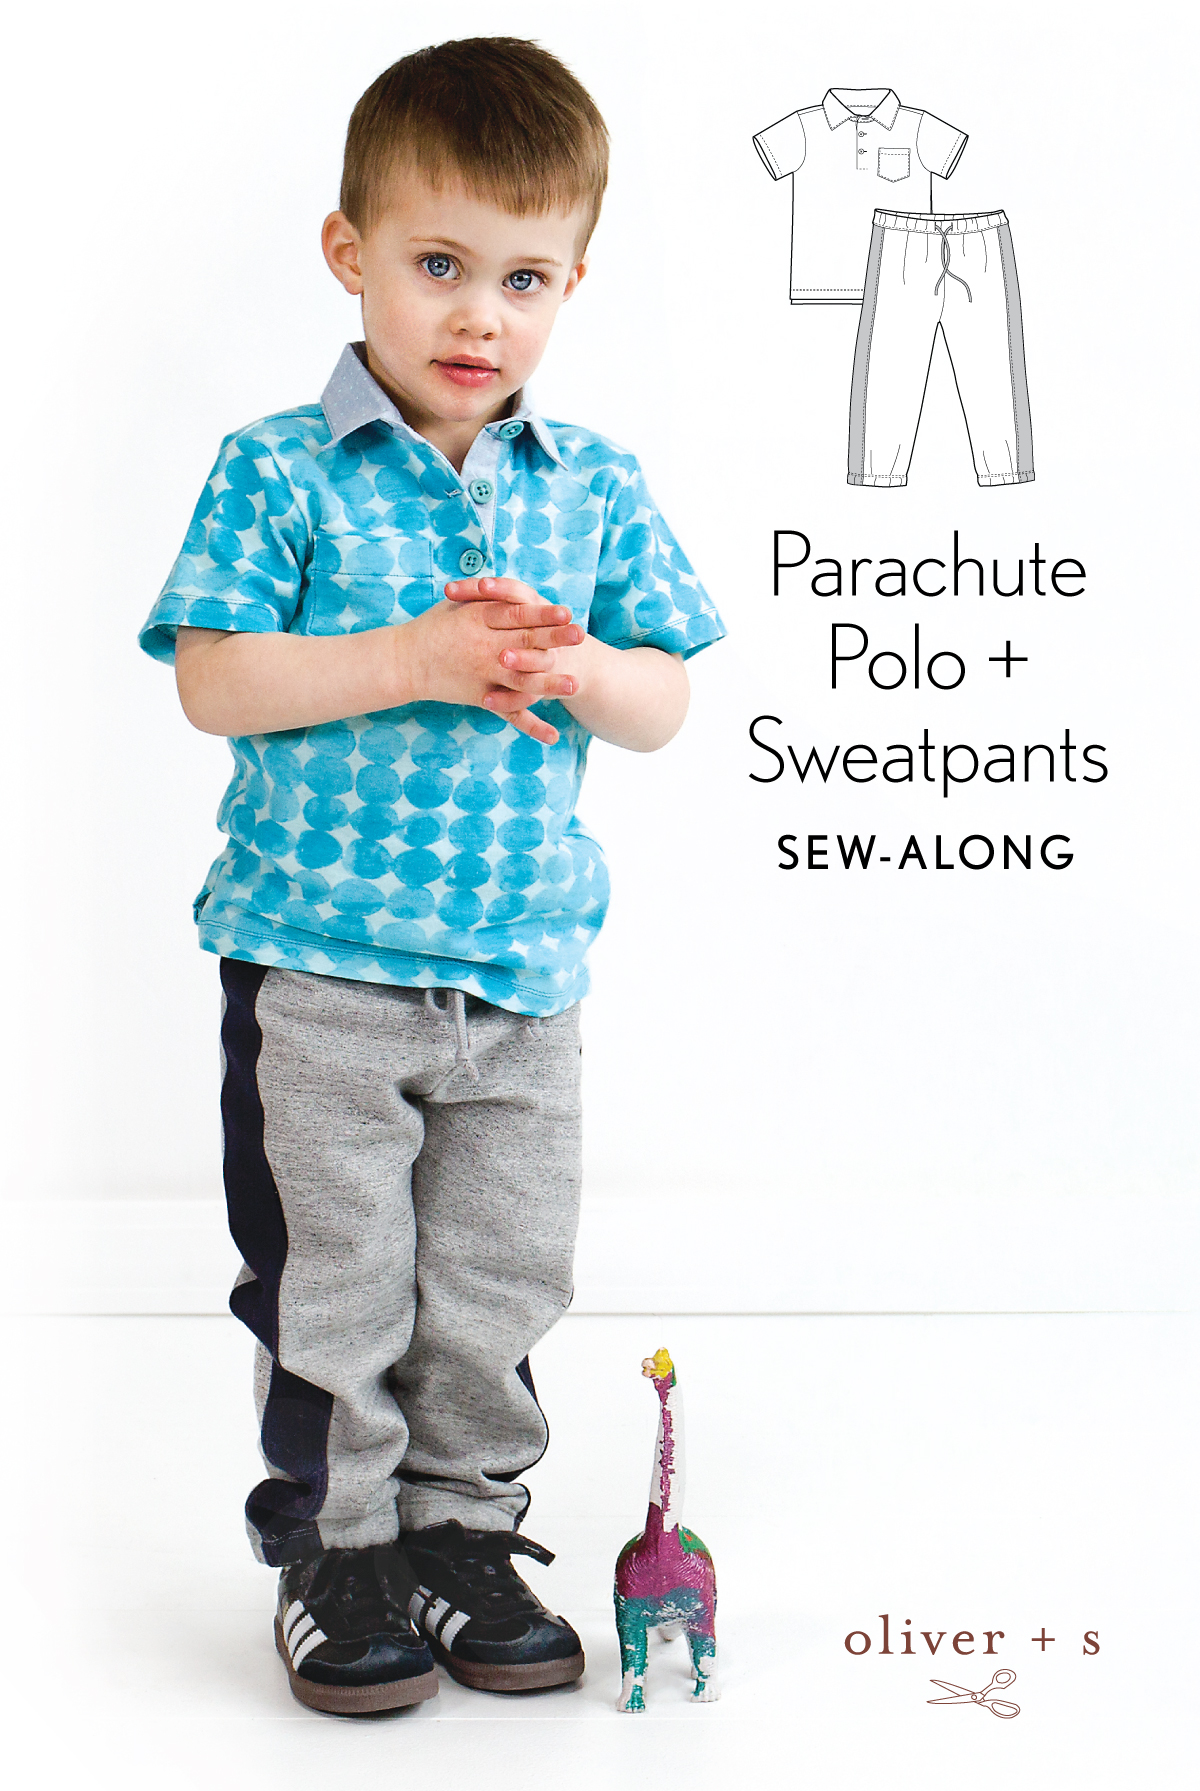
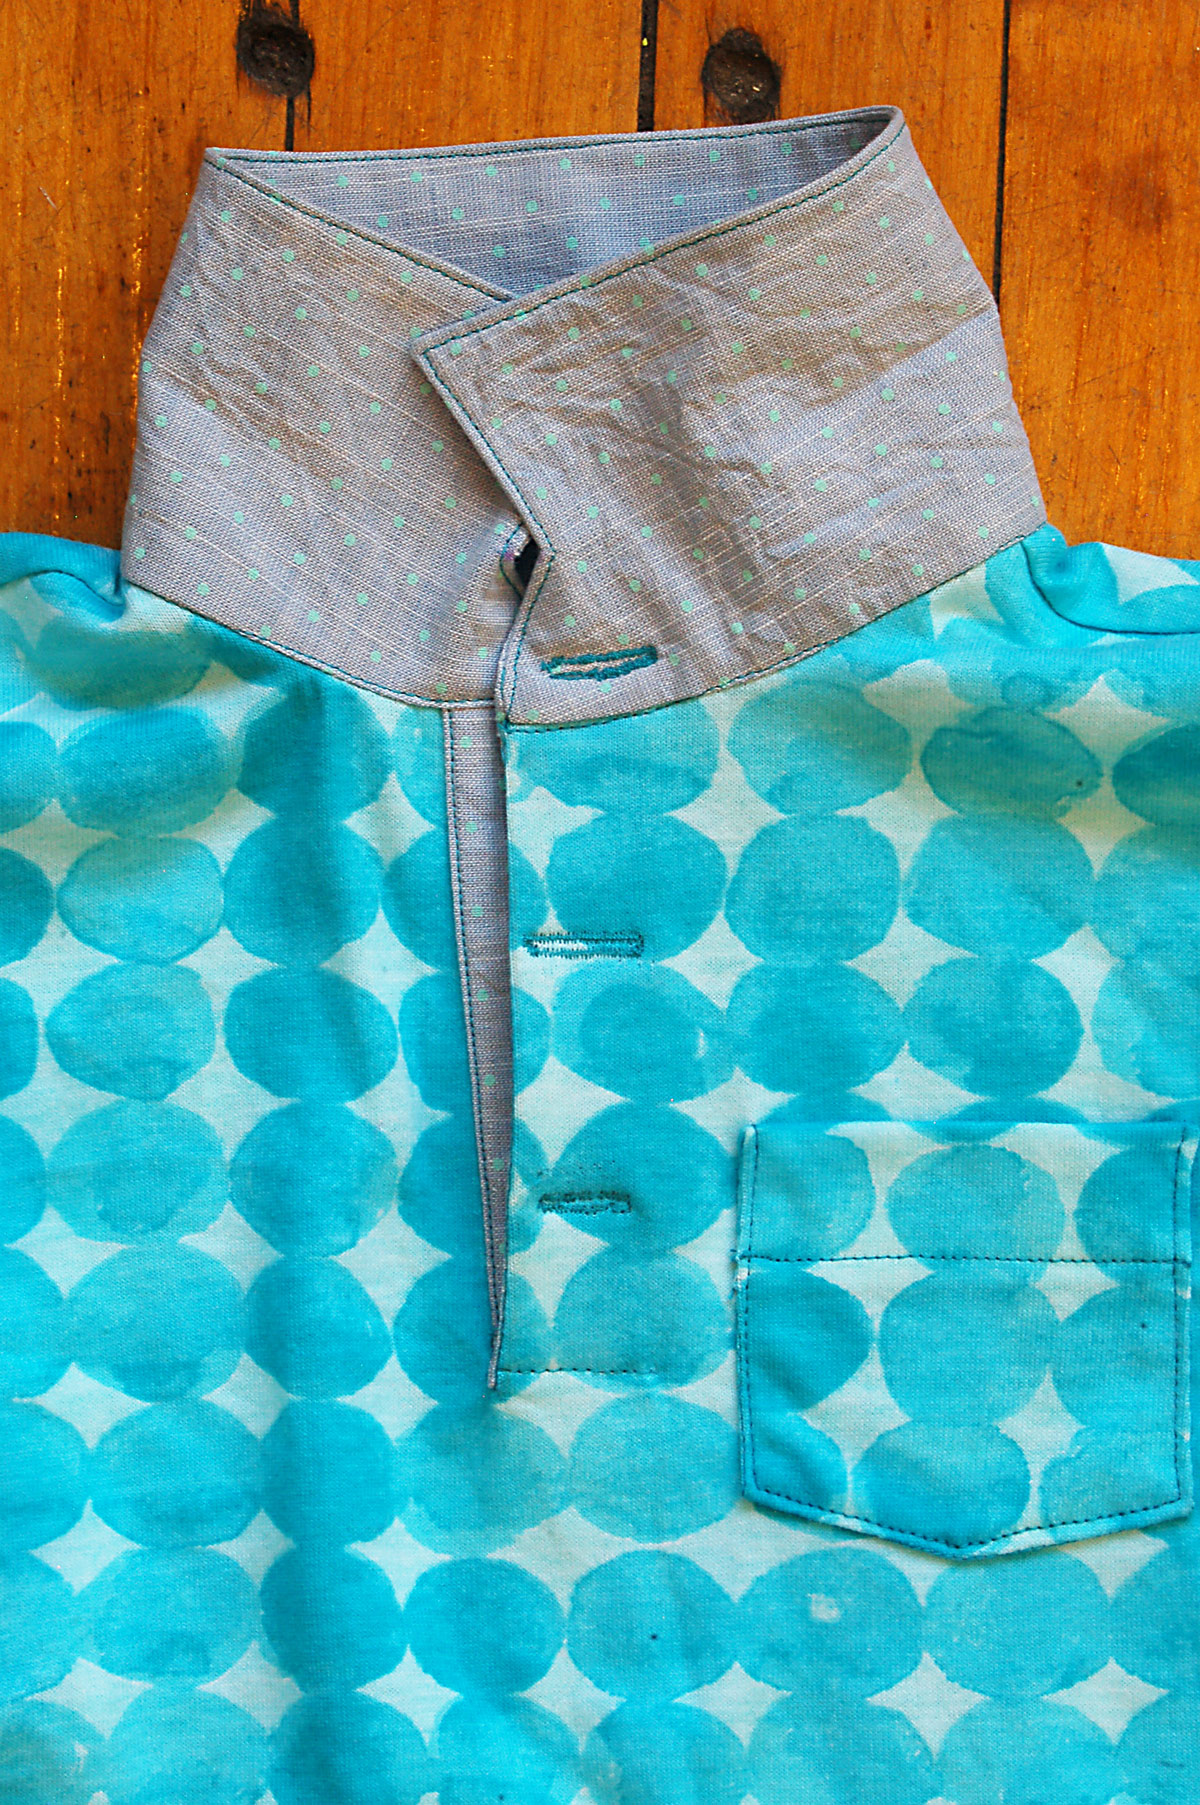
Parachute Polo Sew Along
-
9 years ago LINK
 Rachel Le Grand
@nestfullofeggs
Rachel Le Grand
@nestfullofeggs
Are you ready to begin our Parachute Polo sew-along? Thank you for joining us this week!
Here is the daily plan for this week’s Parachute Polo sew-along:
Day 1 (today): prepare the pocket (optional) and prepare the front placket
Day 2: prepare the shirt for the placket and sew the placket
Day 3: prepare the collar
Day 4: attach the collar and prepare and attach the sleeves
Day 5: stitch the hems and finish the shirtLet’s get started!
Day 1
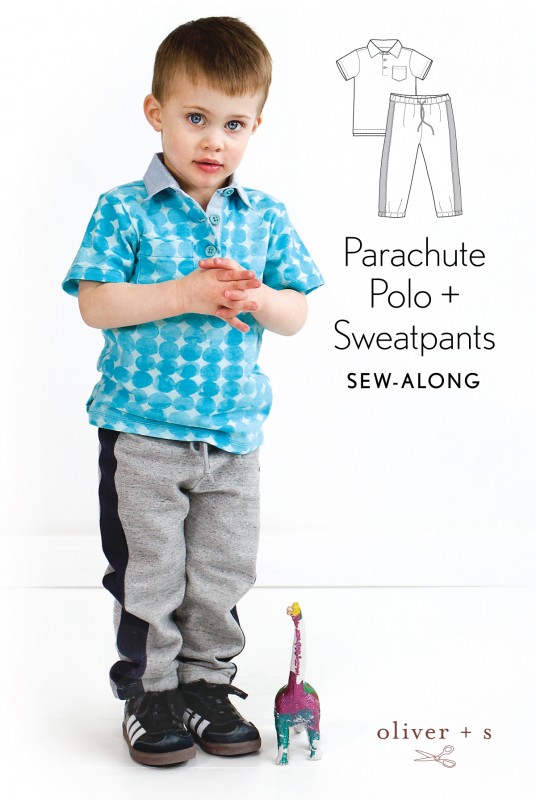
Prepare the pocket (optional)
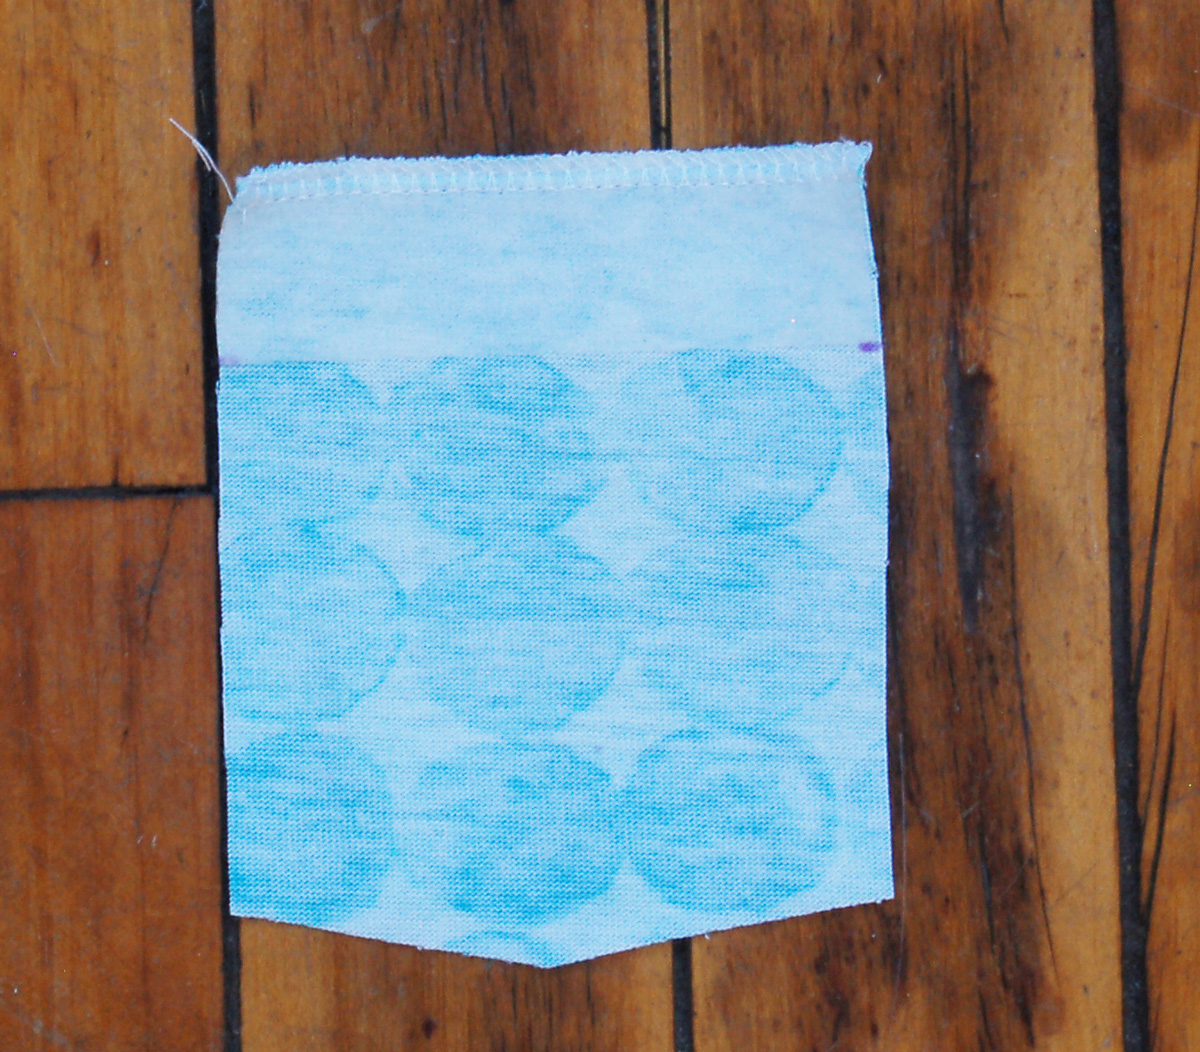
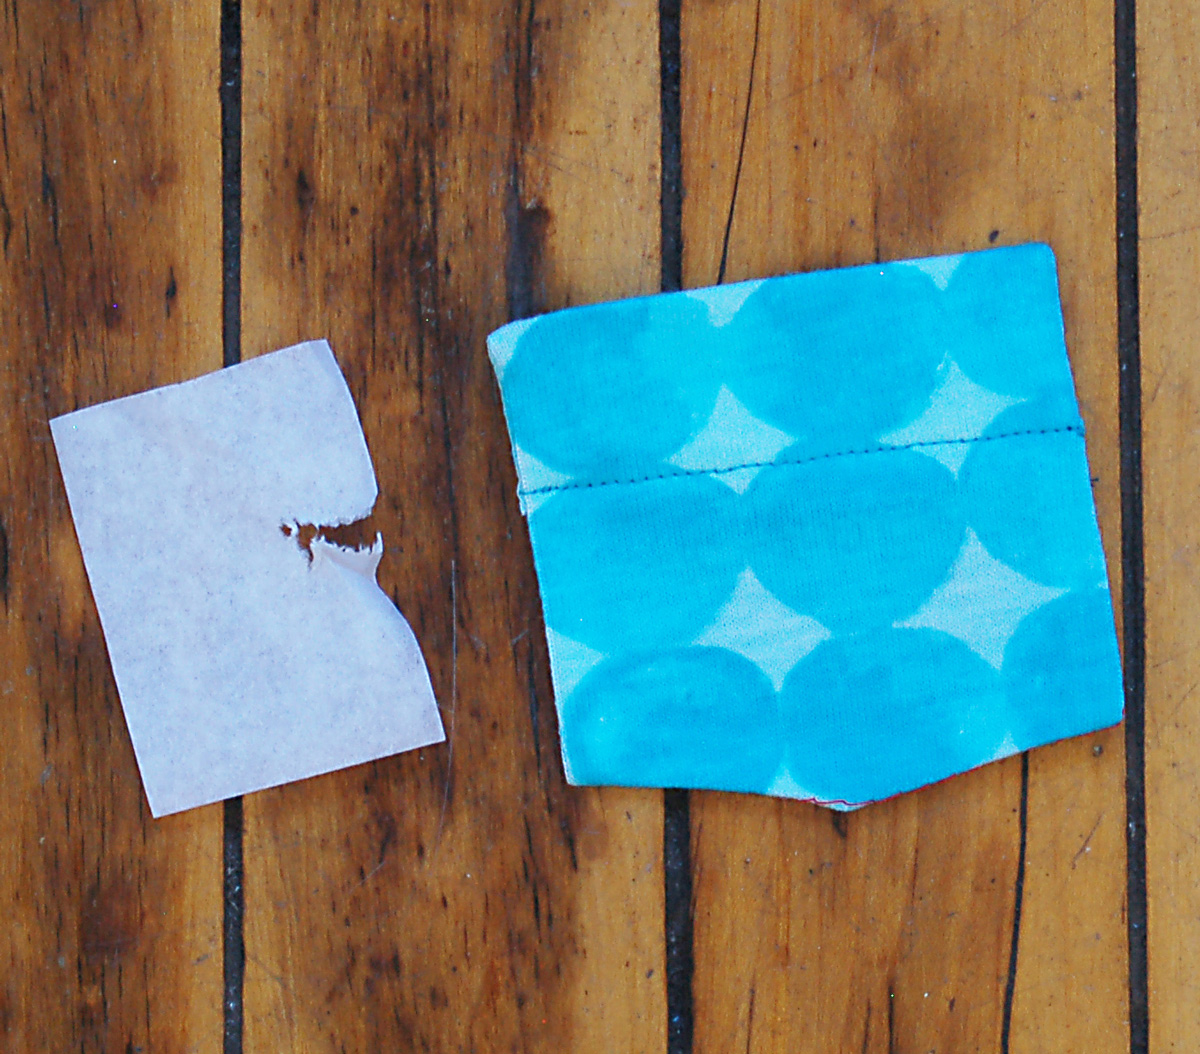
1. Fuse the 1” by 4” strip of interfacing you prepared in Step 1 of the “Prepare the Pieces” section to the wrong side of the pocket along the top edge. Trim any excess interfacing that extends beyond the edges of the fabric. This will help to stabilize the top of the pocket so it won’t stretch or distort when it’s worn. Finish the top edge of the pocket using your preferred method.
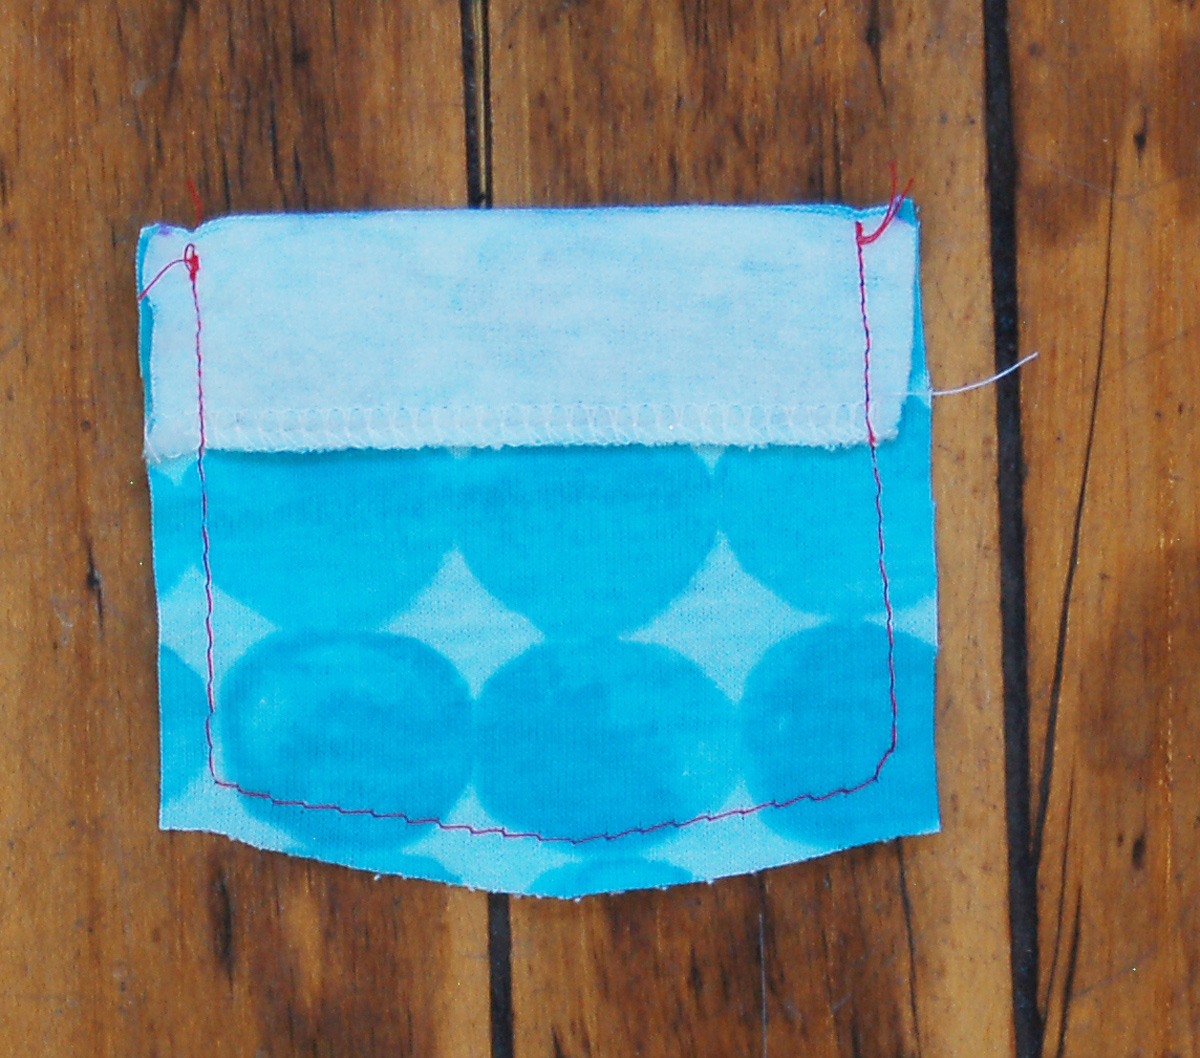
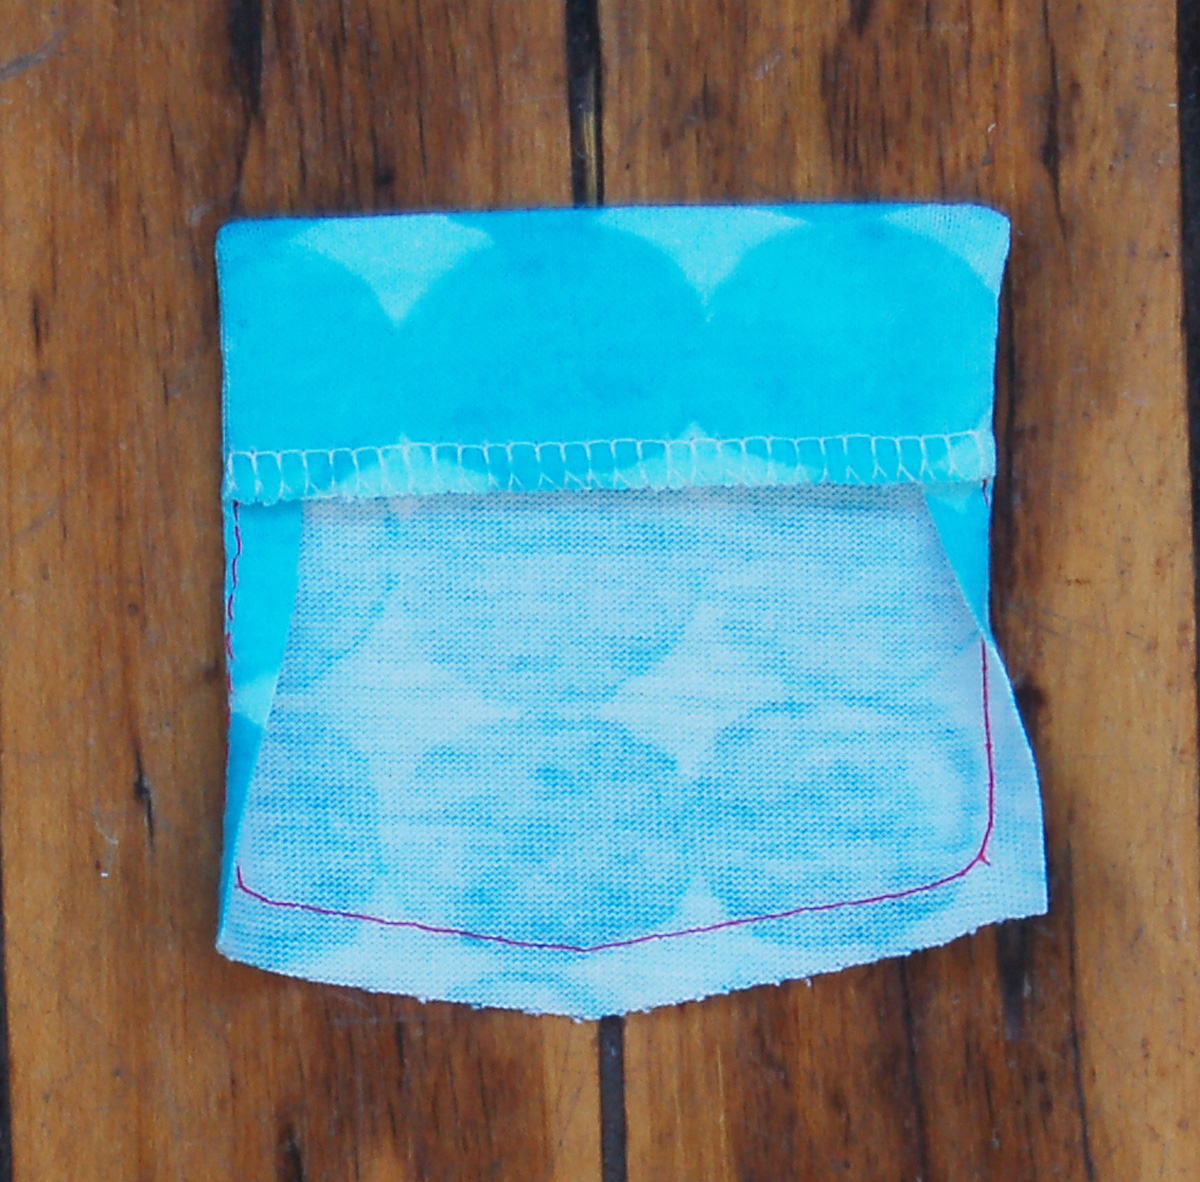
2. Fold and press the pocket’s straight upper edge to the right side by 1”, using the notches as a folding guide. Stitch the folded 1” upper portion of the pocket with a 1/4” seam, backstitching or lockstitching at both ends. If desired, baste the remaining perimeter of the pocket with a 1/4” seam to act as a folding guide for the pocket’s outer edge in the next step.

3. Turn the top of the pocket to the wrong side and use a chopstick or knitting needle to gently push out the corners. Edgestitch the innermost folded edge to finish the pocket’s hem. Fold and press the sides and bottom edges of the pocket, using the basting stitches as a guide.

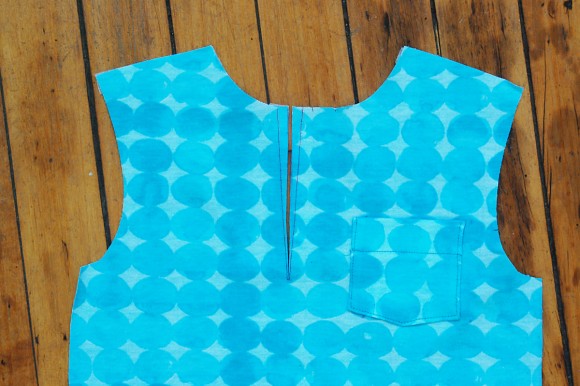
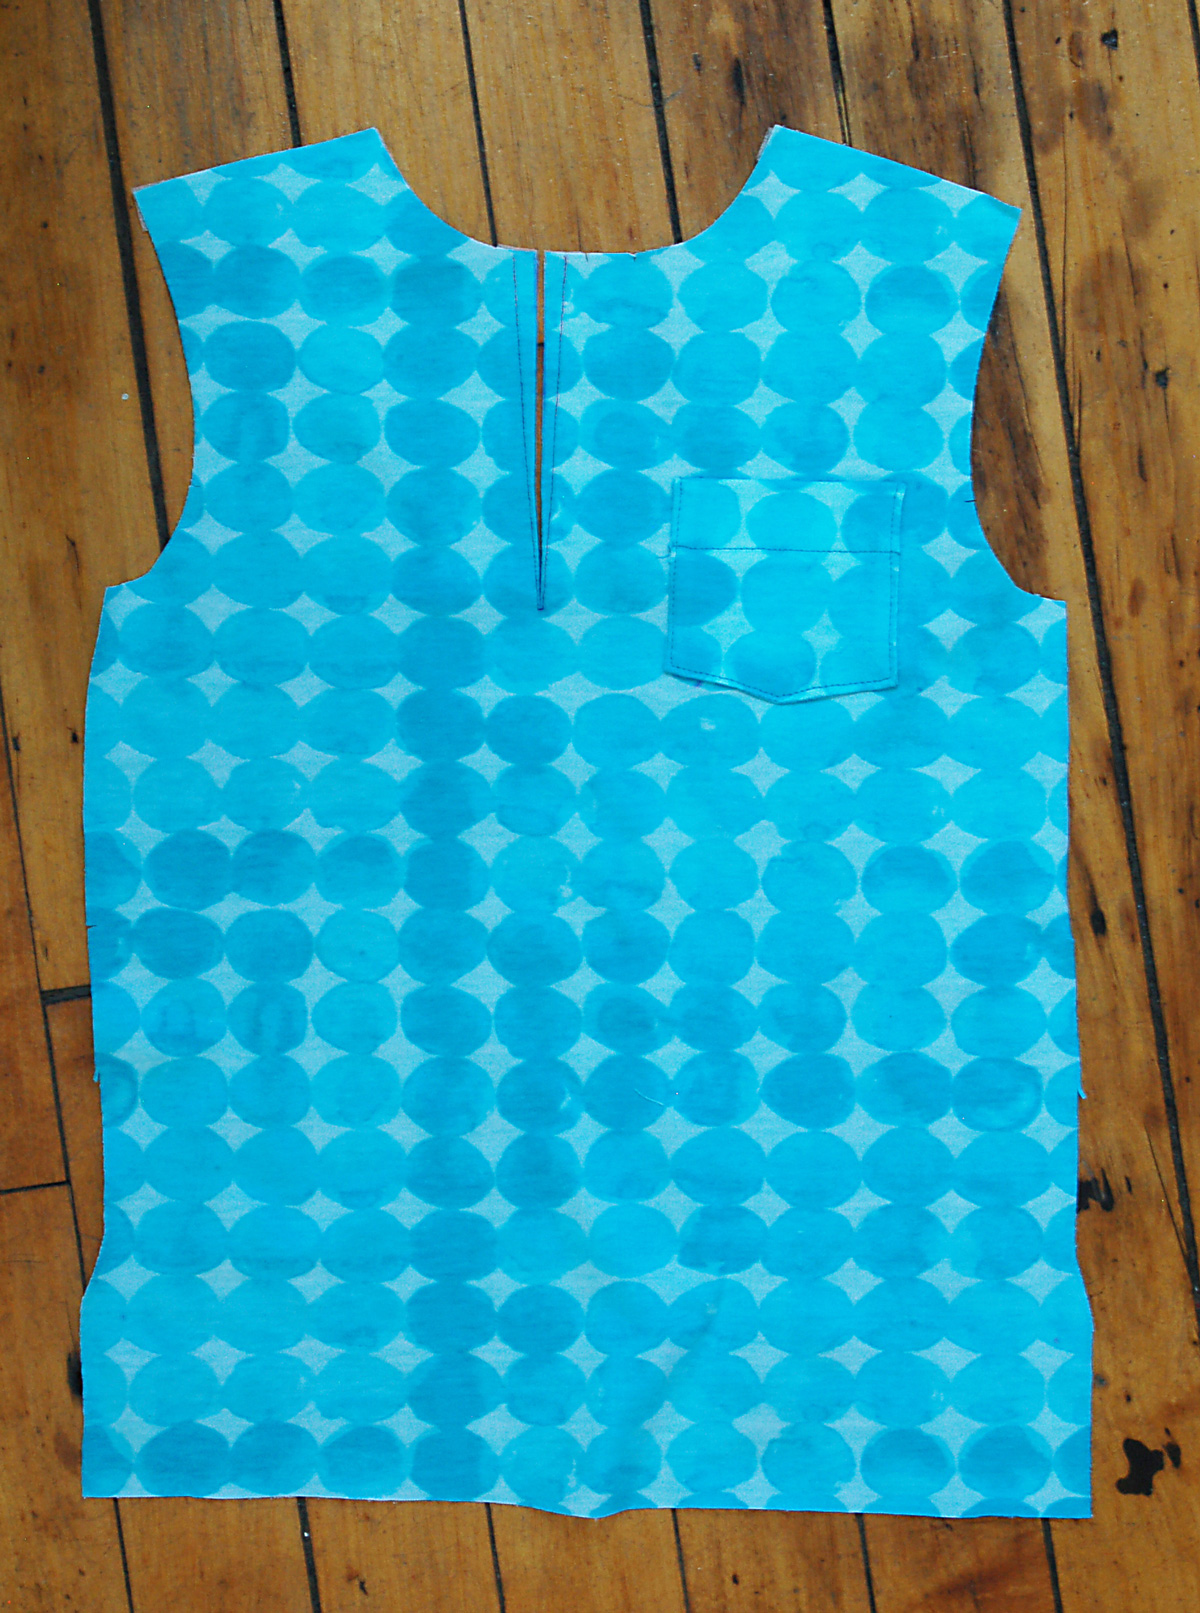
4. Using the pocket-placement dots you transferred from the pattern piece, pin the pocket to the wearer’s left chest at the pocket placement lines you transferred from the pattern piece and edge stitch the pocket’s sides and bottom edge, backstitching or lockstitching at the top edges.

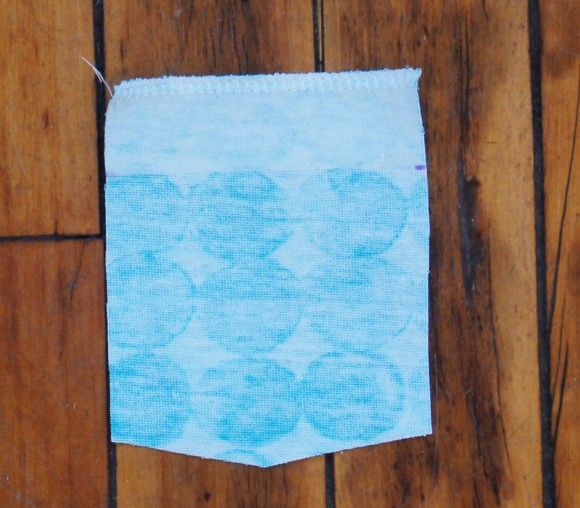
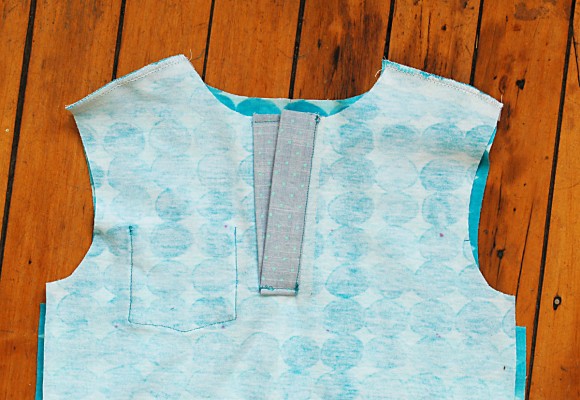
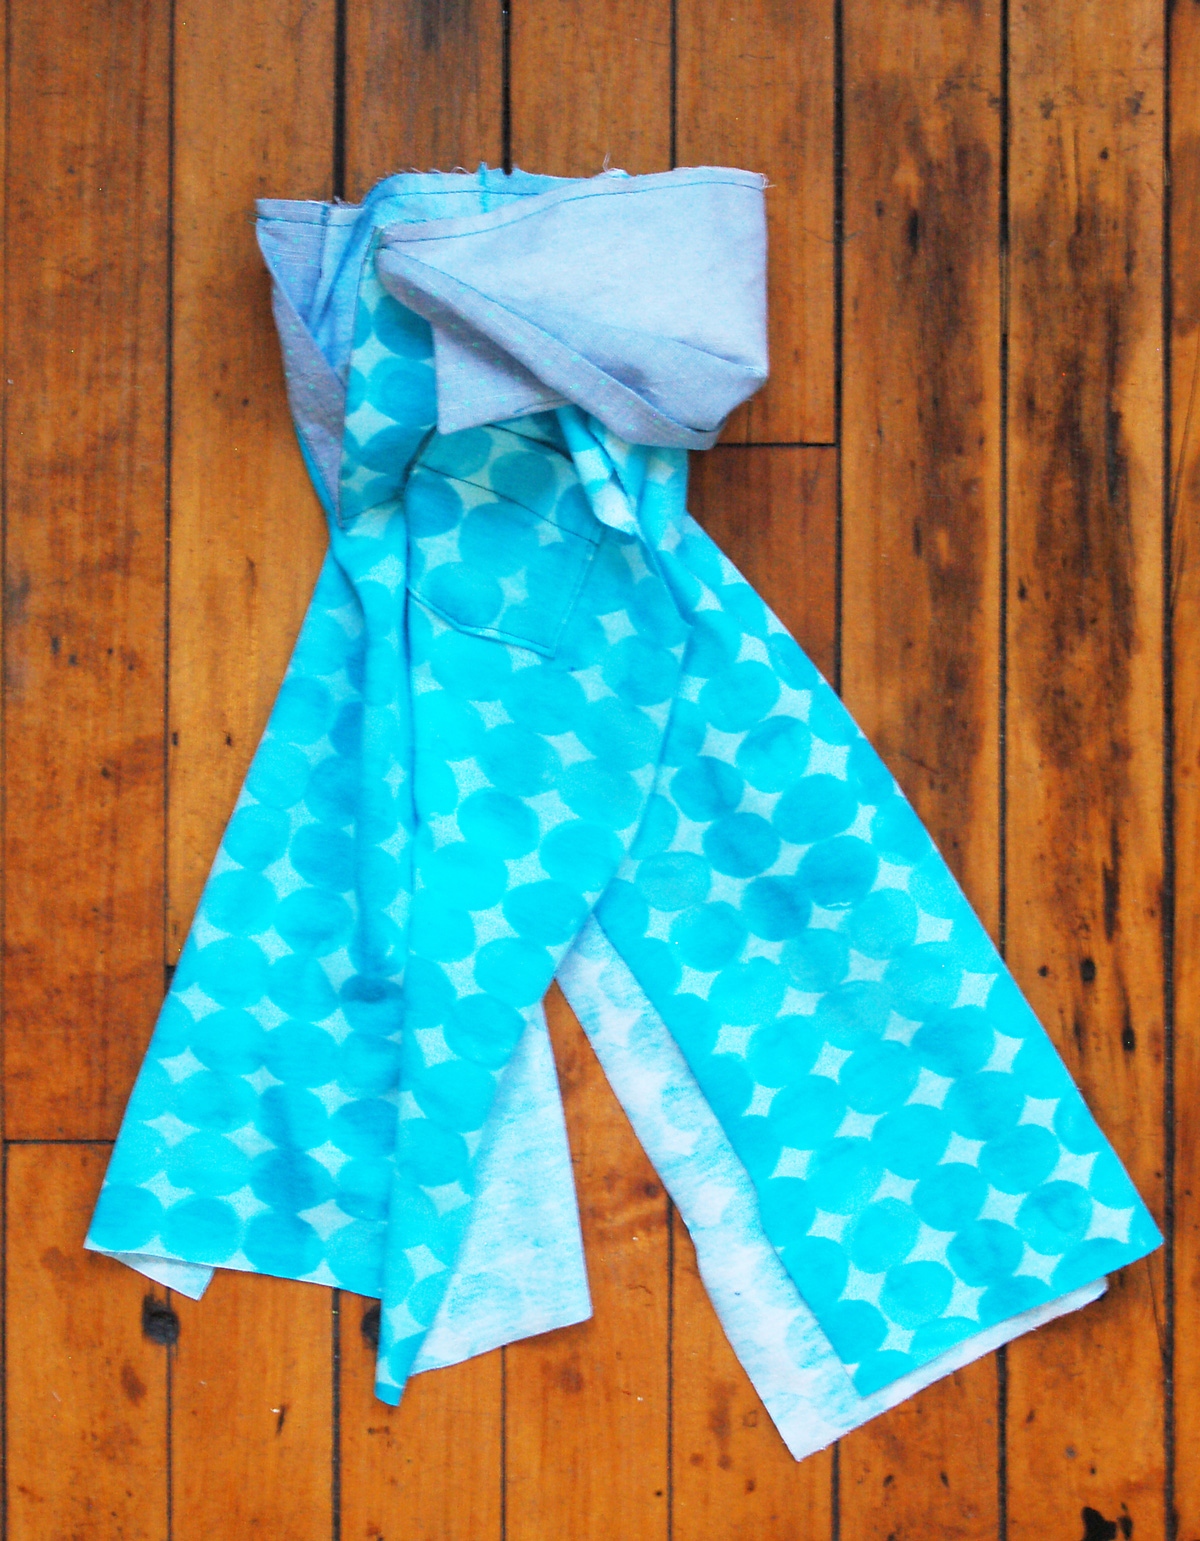
Prepare the front placket
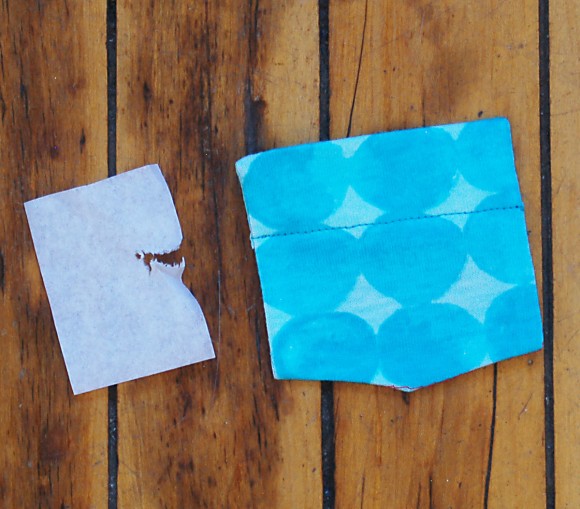
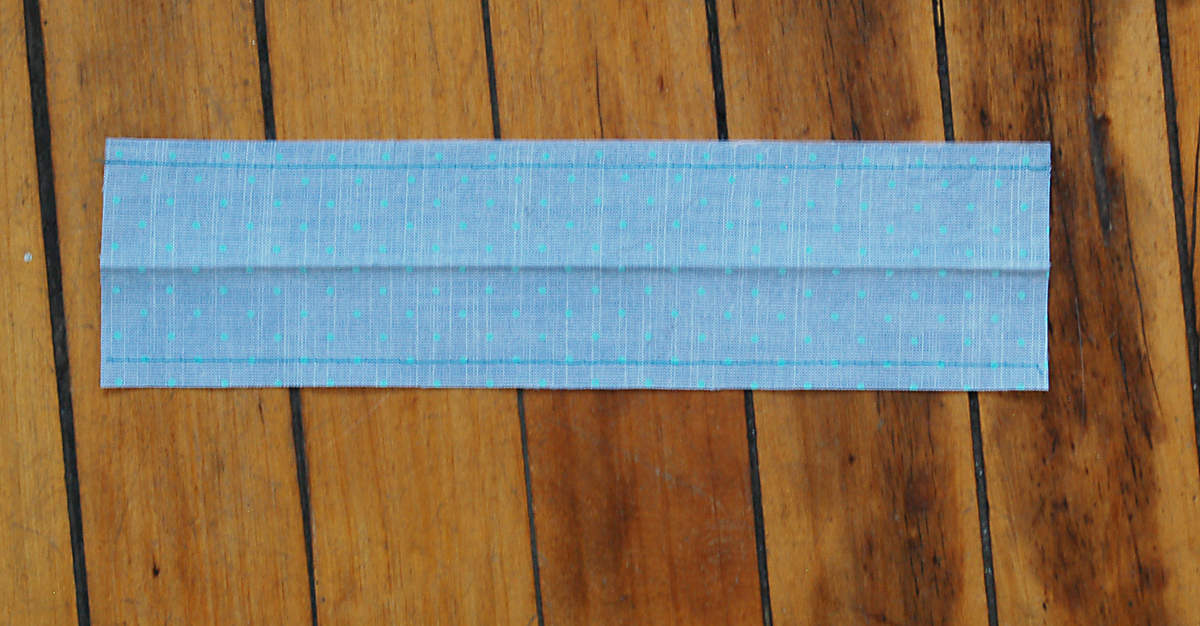
1. Stitch a row of basting stitches 1/4” from both long edges of the placket. These will serve as a folding guide for the placket. Fold and press the placket in half. Open the placket and fuse the 1” by 12” strip of interfacing you prepared in Step 1 of the “Prepare the Pieces” section to the wrong side of the placket, between one row of basting stitches and the center crease, following the manufacturer’s fusing instructions.

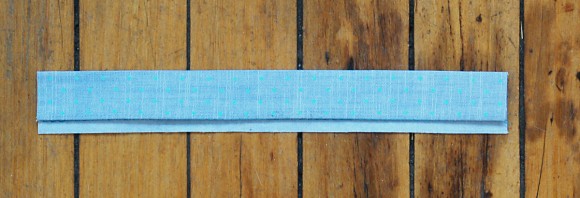
2. Fold and press the placket in half again, with wrong sides together; then unfold the placket and press the placket’s uninterfaced long edge to the wrong side by 1/4”. Set the placket aside for now.
We’ll see you back here tomorrow for day two.
Hello again and welcome to day two of the sew-along. We have quite a bit of sewing to get done today, so let’s begin!
Day 2
Prepare the shirt for the placket
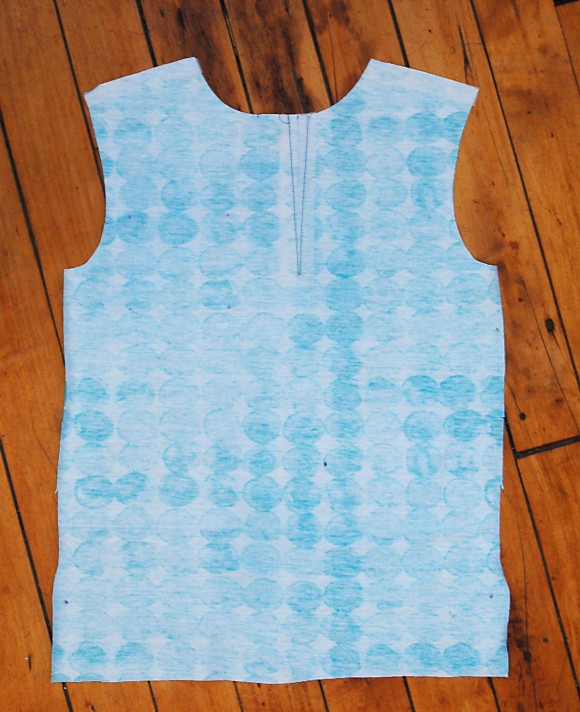
1. If you haven’t done so already, transfer the placket markings to the wrong side of the shirt-front piece. Transfer the markings to the wearer’s right side for the boy’s shirt, and transfer the markings to the wearer’s left side for the girl’s shirt. The off-center markings will result in a centered placket, and you only need the markings on the wrong side of the fabric. Fuse the 1 1/2” by 6” rectangle of interfacing you prepared in Step 1 of the “Prepare the Pieces” section to the wrong side of the fabric over the placket markings. Trim any excess interfacing that extends beyond the neck edge.
2. Working on the wrong side of the fabric and using tailor’s chalk or a water-soluble fabric-marking pen, draw a line starting 1/4” from the neck edge of the placket’s slash line and angling to the dotted point at the bottom of the slash line. Draw a second angled line starting 1/4” from the slash line on the opposite side of the placket line to form a triangle. Staystitch the triangle’s drawn lines. When you reach the dot at the bottom, pivot and take one stitch across at the tip of the triangle (parallel to the neckline), and then pivot again to staystitch up the triangle’s other side.
Hint: You may find that using a contrasting thread color for stay stitching is useful, since it will be more visible as a stitching guide when assembling the placket in the next steps.
3. Carefully cut along the slash line to the point of the staystitching, taking care not to cut into the stitching itself.
4. Gently separate the two edges of the slash line so the stay stitching forms a straight line. Folds of fabric will form at the point of the placket.

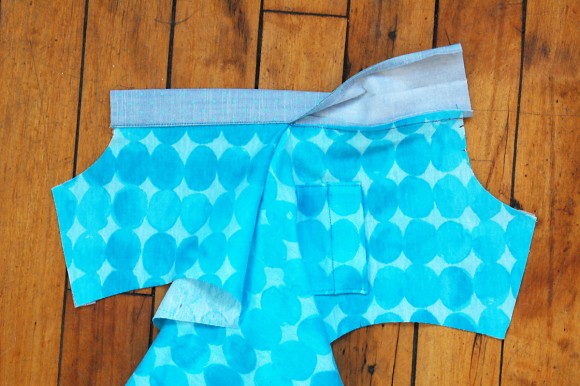
Sew the placket
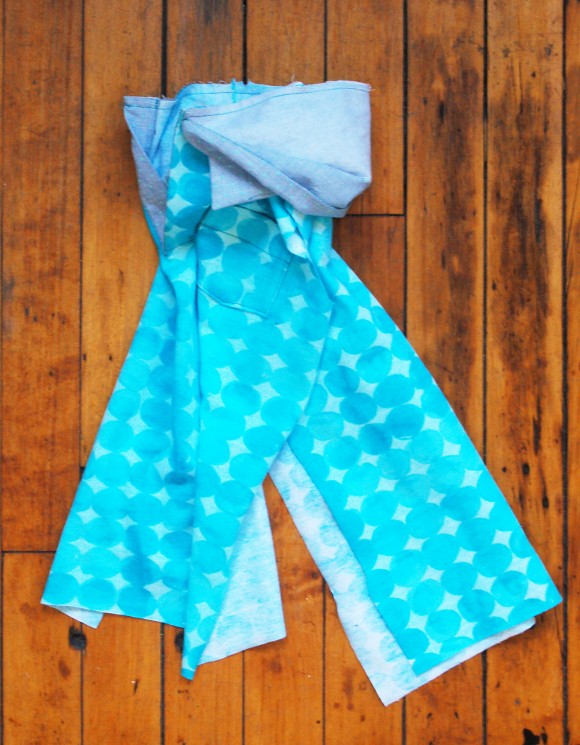
1. Unfold the placket and position it so that the interfaced section is on top. Pin the placket’s right side to the shirt front’s wrong side, starting at one end of the placket and slash line and matching the basting stitches on the placket to the staystitching of the slash line. The placket’s seam allowances and the slash line will match at the outside edges, but the slash line’s seam allowances will taper to almost nothing at the center point (or bottom) of the slash line. Use the basting stitches on the placket to keep the seam allowances on the placket uniform, despite the slash line’s disappearing seam allowances. Sew the placket to the shirt stitching directly on top of or just outside of the staystitching. (You’ll want to stitch with the shirt facing up so you can see the stay stitching line.)
Hint: This is a tricky seam, so take your time stitching it. Stitch as close to the stay stitching as you can.
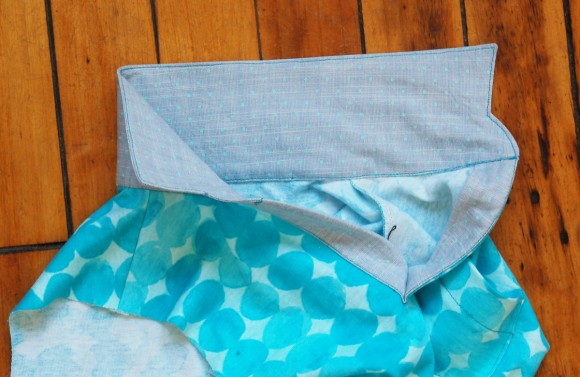
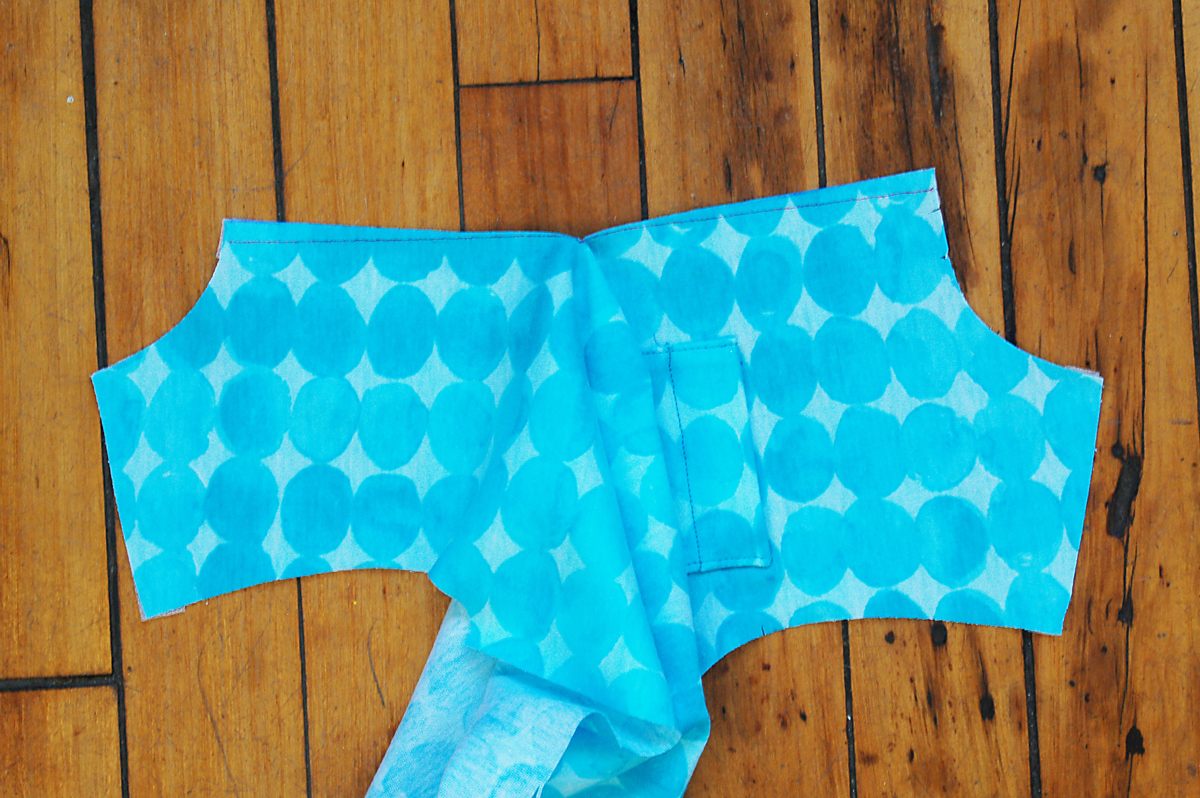
2. Press the placket and seam allowances away from the shirt. Then turn the shirt front to the right side, and refold the placket so it wraps around the slash line and so the opposite folded edge of the placket covers the stitching line. Finish the placket by edgestitching (by machine) or slipstitching (by hand) the folded edge.
3. Turn the shirt front so the wearer’s right side is facing up. For the boy’s shirt, flip the wearer’s left side down, toward the hem, so the placket is smooth. Press the placket away from the shirt of the wearer’s right side and toward the wrong side of the fabric on the wearer’s left side so the placket itself remains flat. (Reverse these instructions and flip the wearer’s right side down for the girl’s shirt.)
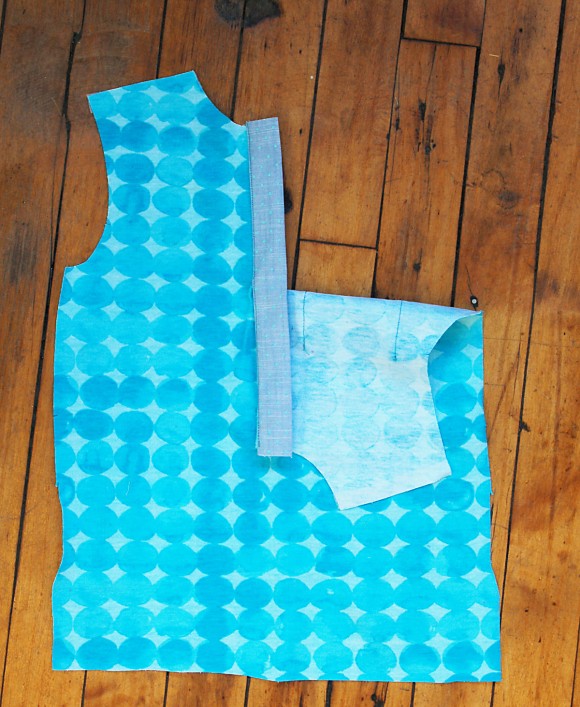
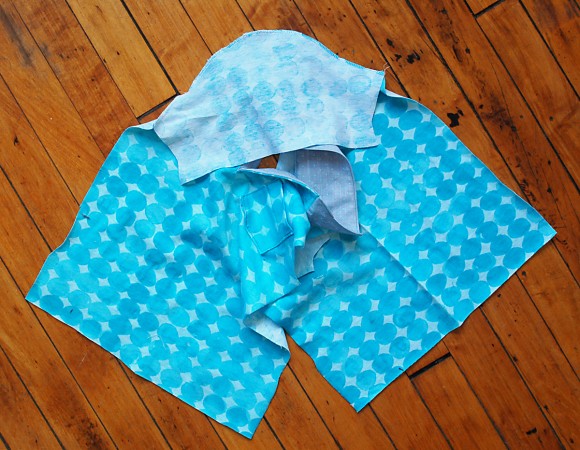
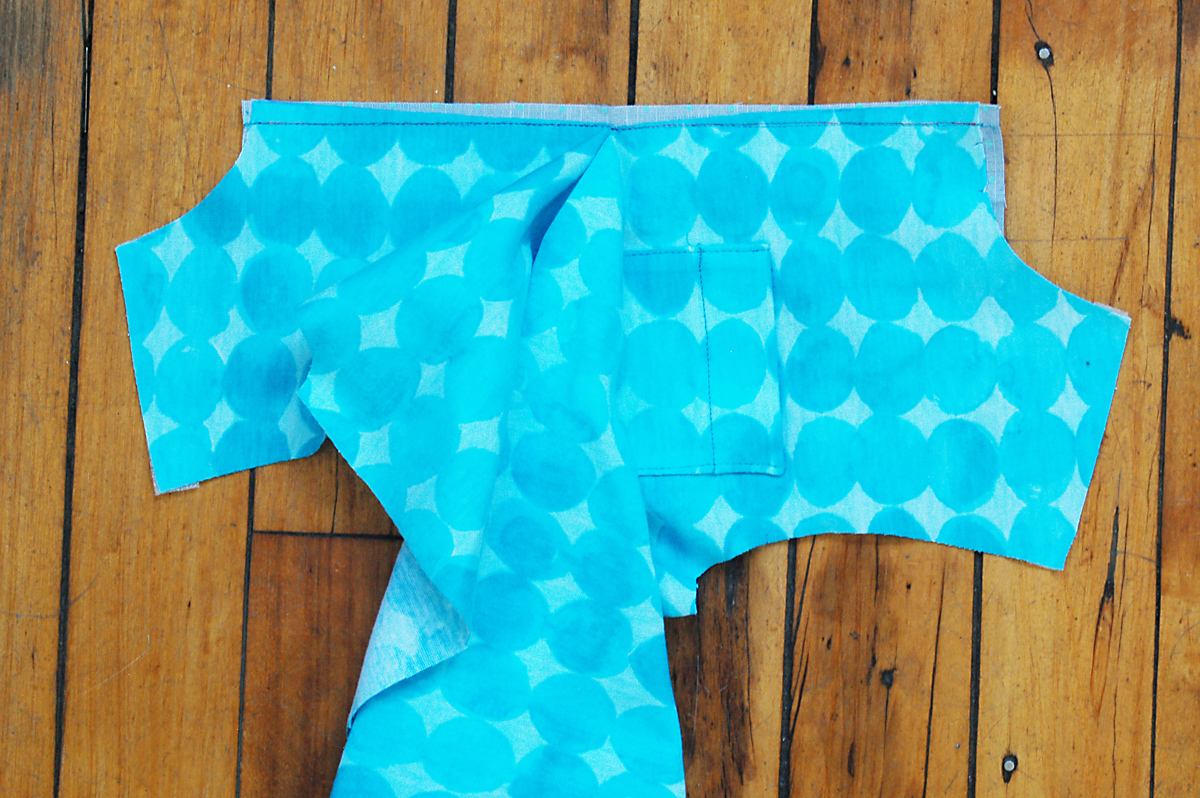
4. Flip the wearer’s left side up (wearer’s right side for the girls), folding the placket in half in the process. Baste the placket to the wearer’s left edge of the neckline with a 3/8” seam, catching the folded placket in the basting to hold it in place until you add the collar later. (For girls, baste the wearer’s right edge.) Trim any excess placket from the decline if necessary.

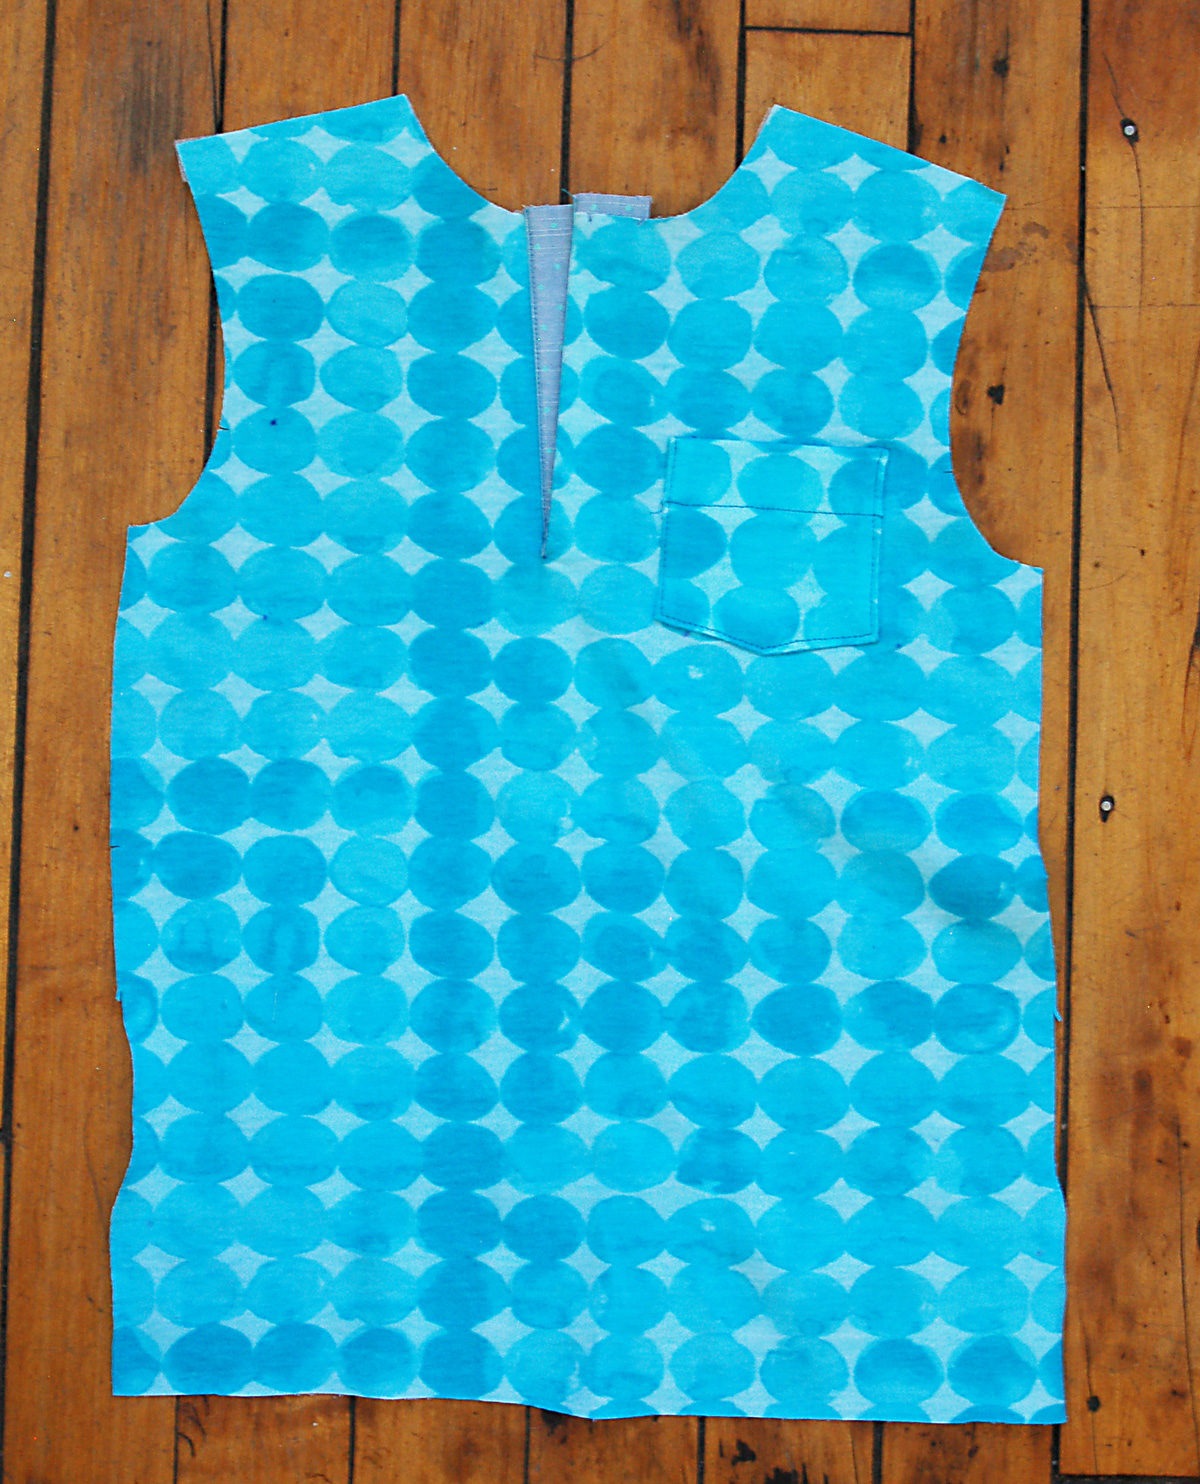
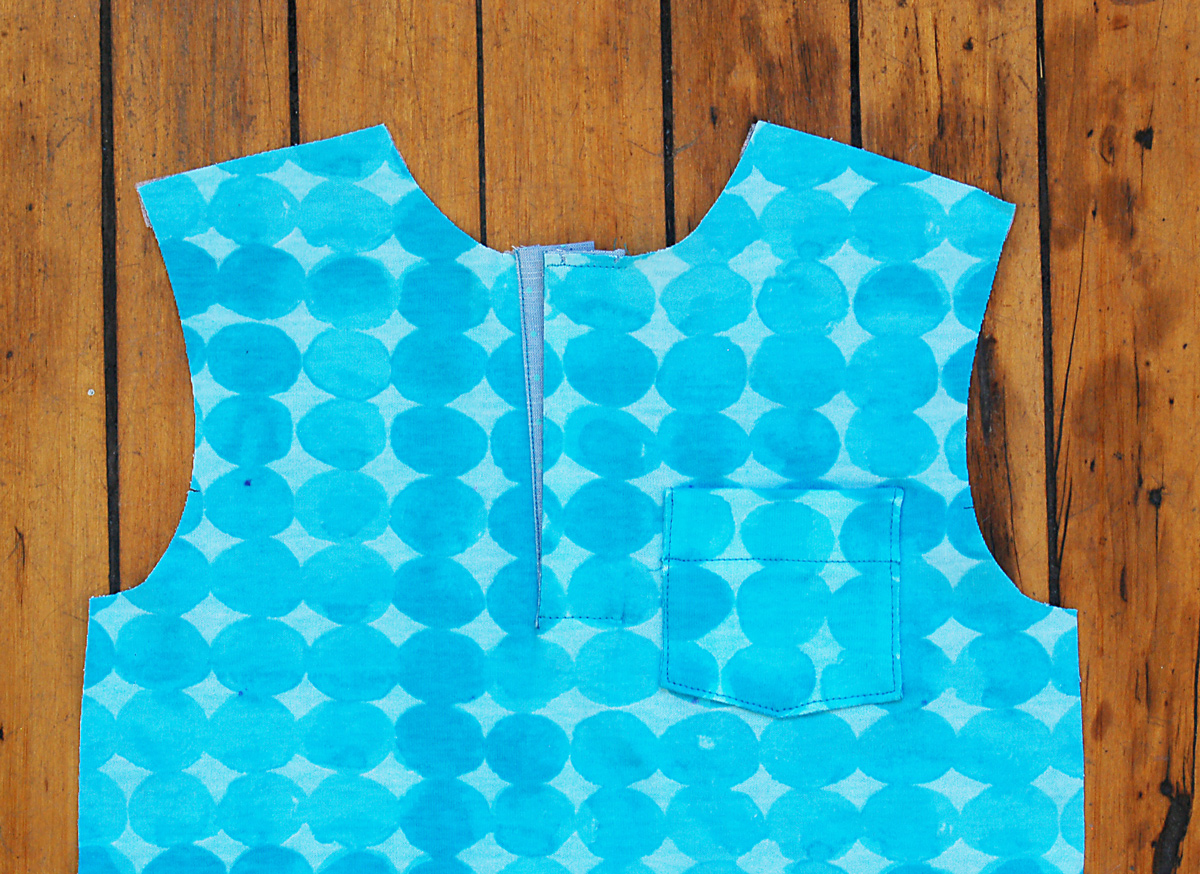
5. Topstitch the shirt front about 1/4” above the bottom fold of the placket to finish it, stitching through all layers in the process and backstitching or lockstitching at both ends. This stitching will reinforce the placket and help it lie nicely when the shirt is finished.
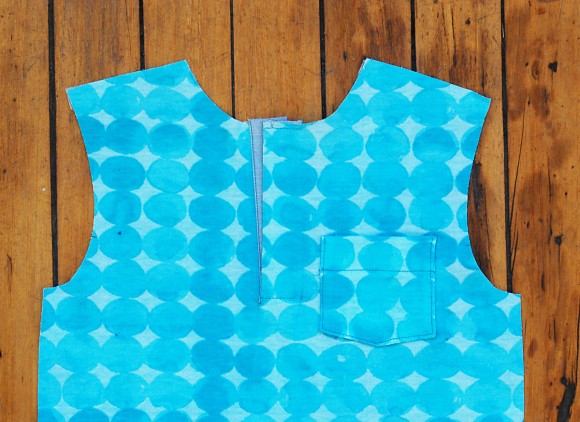
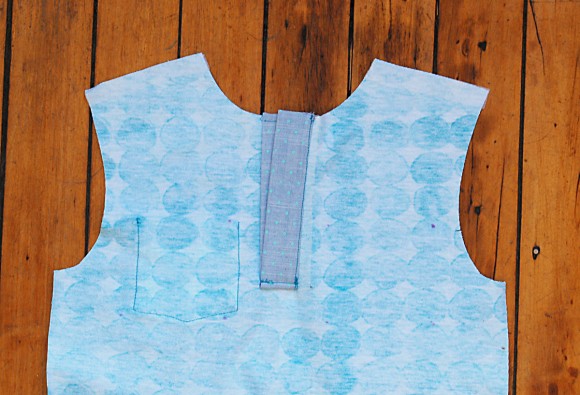
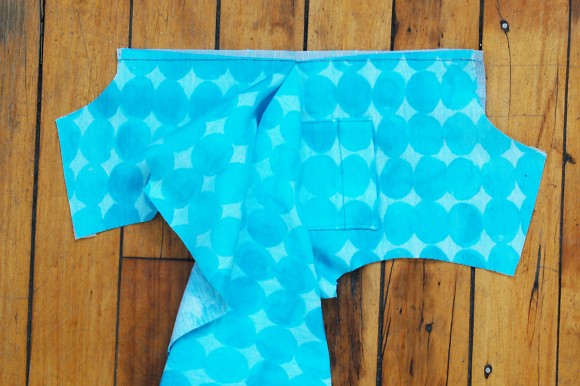
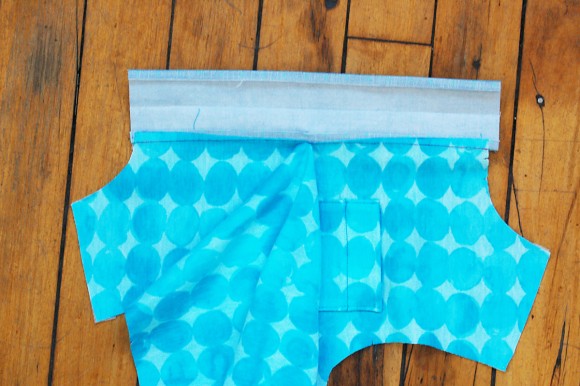
6. Pin the shirt back to the shirt front at the shoulders, with right sides together. Stitch the shoulders with a 1/4” seam, backstitching or lockstitching at both ends. Finish the seam allowances, if desired, and press the seam allowances toward the back of the shirt.
Come back here tomorrow when we’ll be preparing the collar.
Day 3
Good morning sew-alongers! These steps won’t take you very long at all. Ready?
Prepare the collar
1. Trim the 1/4” seam allowances from the color cut from interfacing that you prepared in Step 1 of the “Prepare the Pieces” section. Fuse the interfacing to the wrong side of one of the cut fabric collars. This interfaced collar piece will be referred to from here on as the under collar and the un-interfaced collar piece will be referred to as the upper collar.

2. Sew a row of basting stitches on the upper collar 1/4” from the raw edge of the neckline (the side with the notched edge).

3. Press the seam allowances to the wrong side along the basting line, which will serve as a folding guide.
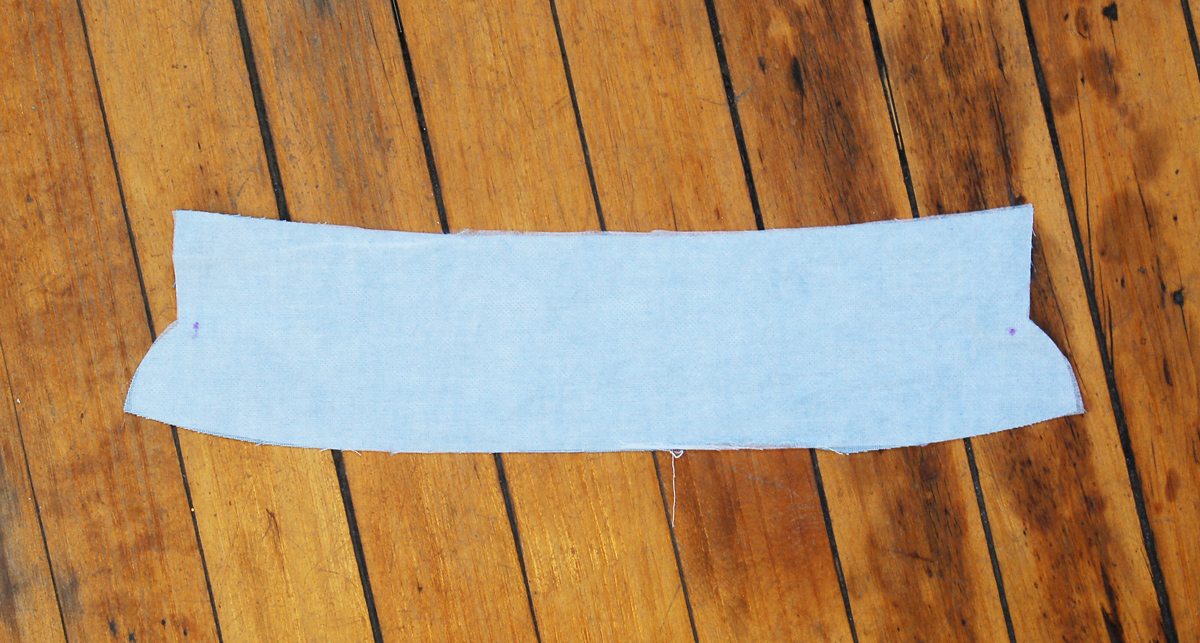
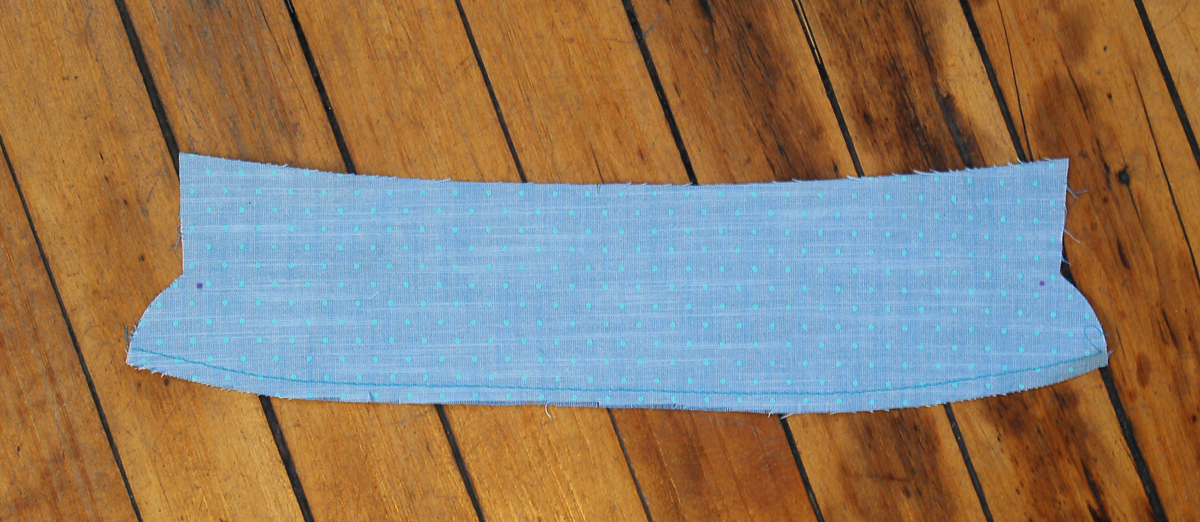
4. With right sides together, align and pin the two collar pieces. Then stitch the outside edge of the collar with a 1/4” seam, leaving only the neckline edge unsewn.

Hint: Use a water-soluble fabric-marking pen to mark the stitching line beforehand to make it easier to stitch precisely. Also note that setting your machine to a smaller stitch length will help you to achieve a smoothly sewn curve. When you reach a corner, pivot partway with needle down and take one stitch before pivoting again to sew the next side without breaking the stitching line. The single stitch you take before pivoting the second time will help produce a nice, sharply pointed corner when you turn the collar right-side out.
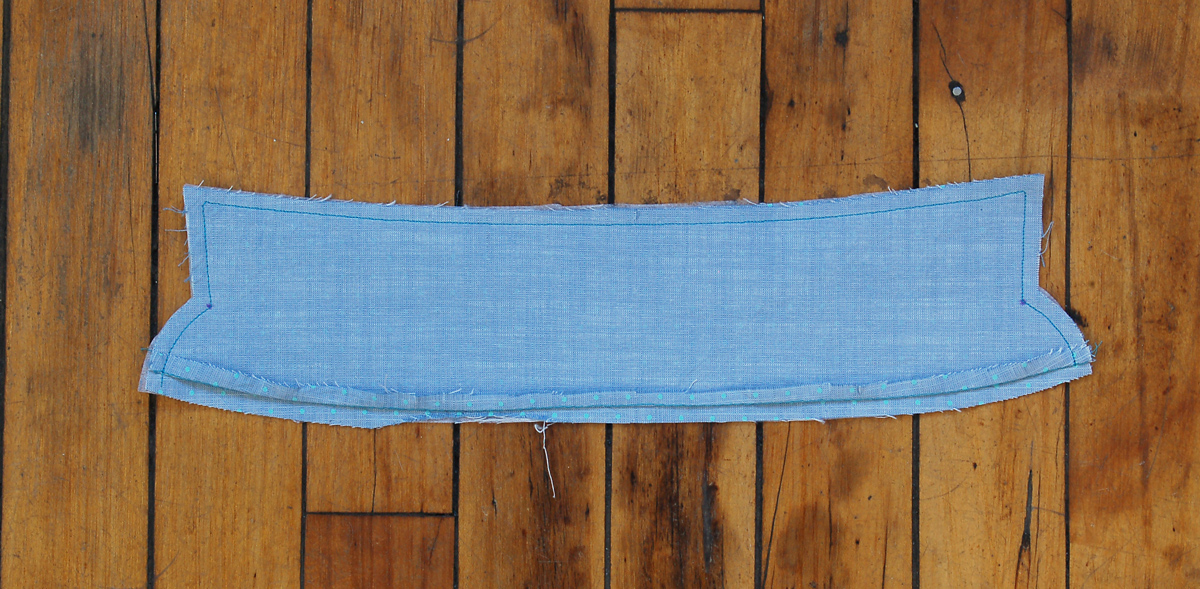
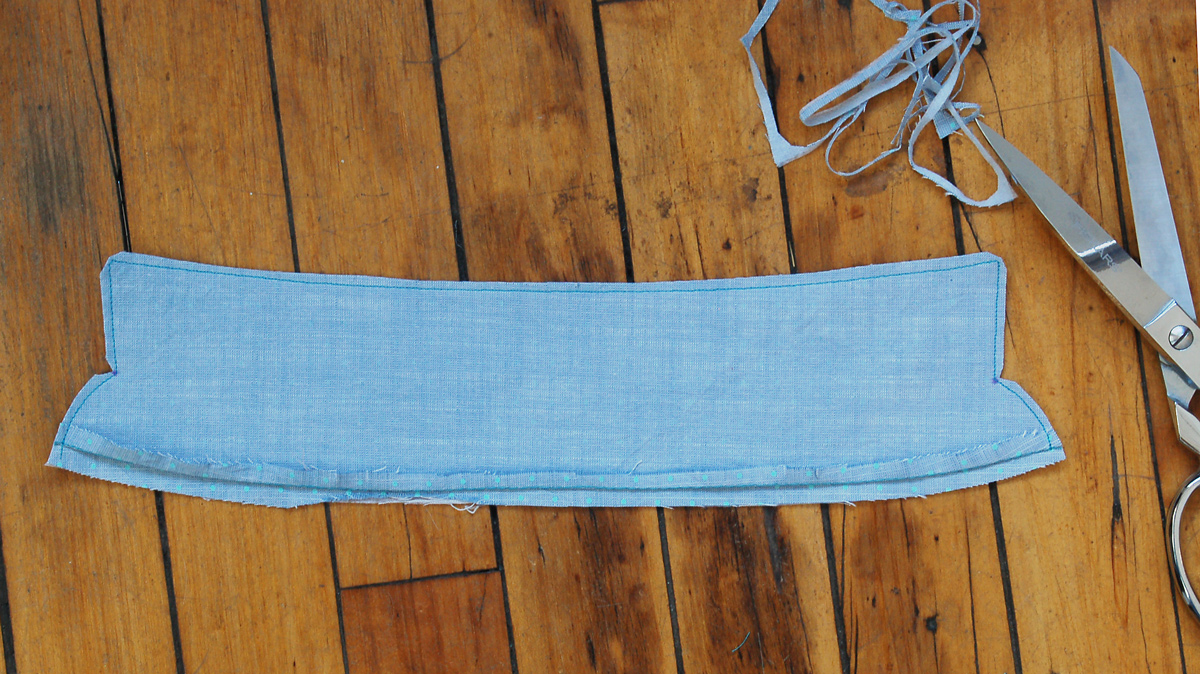
5. Trim the seam allowances to 1/8” and clip the corners. Turn the collar right-side out, using a knitting needle or point presser to carefully push out the corners. Press the collar gently rolling the seam toward the interfaced under collar so it won’t show on the finished garment. Do not edgestitch the collar yet; you’ll have an opportunity to do this after attaching the collar to the shirt.

And that’s it for today. See you tomorrow!
Day 4
Well, here we are at day four. Off we go!
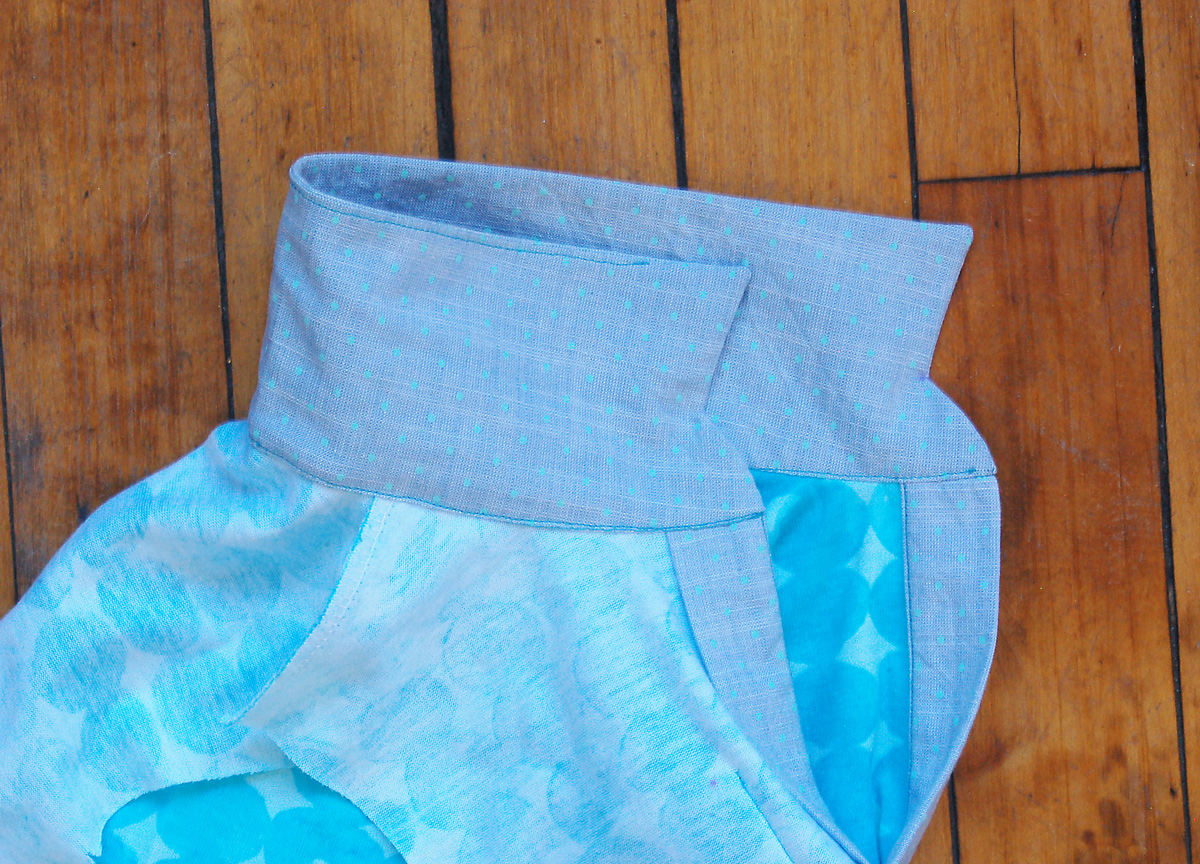
Attach the collar
1. Pin the under collar to the shirt’s neckline, with right sides together, matching the ends of the under collar to the edges of the unsewn (raw) neckline. Match the notches on the collar with the shirt’s shoulder seams and center-back notch. Stitch only the under collar to the shirt with a 1/4” seam, moving the upper collar out of the way temporarily and backstitching or lockstitching at the beginning and end of the seam. Check to be sure no pleats or puckers formed in the neckline seam, and adjust it, if necessary, by ripping the seam and re-sewing it.
Hint: It takes a little more time, but you might find it helpful to hand-baste the under collar before stitching it in place. The basting will hold the layers together more securely and allow you to focus on stitching (rather than removing pins) when you machine-stitch.
2. Press the stitched seam allowances toward the collar. Use a blindstitch or slipstitch to hand-sew the upper collar’s folded edge to the neckline, or machine-edgestitch the folded edge so it just covers the stitching at the neckline.

3. If desired, edgestitch the circumference of the collar from the right side to finish it.
Hint: As you edgestitch, slip a little scrap of tissue paper under the collar points when edgstitching to prevent the points from getting pushed down into the machine by the needle. The tissue paper can be torn away when the stitching is finished.
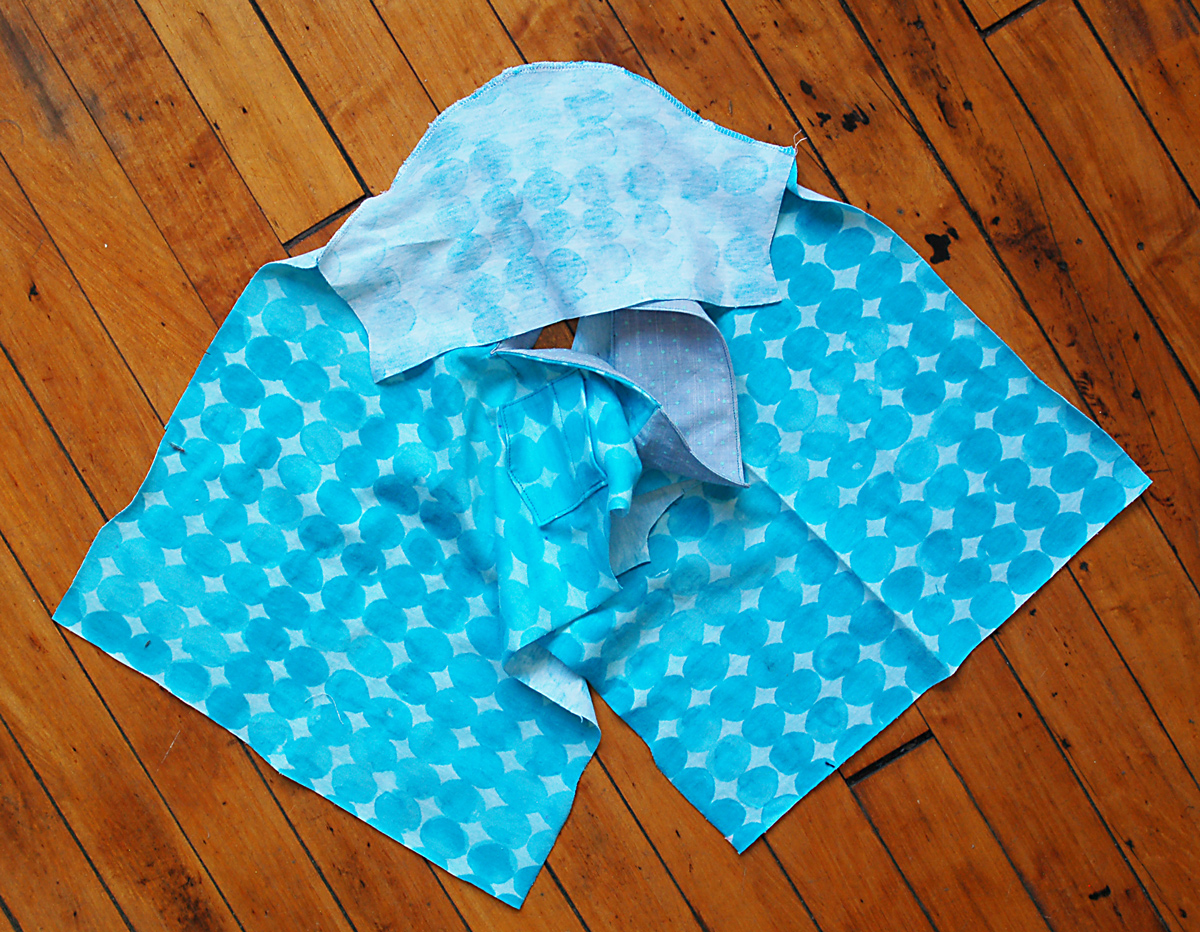
Prepare and attach the sleeves
1. To prepare each sleeve for hemming, finish the raw edges of the sleeves with a zigzag stitch or with a serger (disengage the serger’s knife, or serge the edge without trimming it). Fold and press the sleeve’s finished hem edge to the wrong side by 3/4”. Unfold the hem, keeping the crease in place for finishing the sleeve hem later.
2. Unfold the shirt and back at the shoulder seams, making sure the seam allowances stay pressed toward the back of the shirt. With right sides together, start pinning the sleeve to the armhole, beginning at the underarm and working your way toward the top of the sleeve. Once you’ve pinned from the underarm up to the first notch on both sides of the sleeve, the rest of the sleeve can be pinned into place. Pin the notch at the top of the sleeve to the shoulder seam and distribute andy excess fabric in the sleeve evenly across the shoulder of the armhole. You may need to stretch the armhole a bit while pinning the top of the sleeve to ease in the excess fabric. Stitch the sleeve to the armhole with a 1/4” seam, stretching at the shoulder as needed to fit the sleeve smoothly. Press the seam allowances toward the sleeves and finish using your preferred method. Repeat to attach the second sleeve to the other armhole.
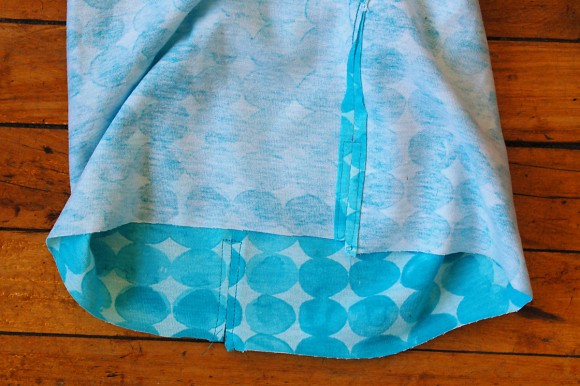
3. With right sides together, pin the front and back of the shirt together along the underarm and side edges. Stitch the underarm and sides with one continuous 1/4” seam, beginning about 1” above the dots and continuing at the hem edge of the sleeves, backstitching or lockstitching at both ends. Note that the back hem is longer than the front hem, so the hem edges won’t match as you pin the side seams. Finish the seam allowances together, but leave the remaining side seam unsewn and unfinished for the time being. Press the finished seam allowances toward the back.
We’re almost done. See you tomorrow when we’ll be finishing the polo.
Day 5
Happy Friday everyone! Today we are finishing the shirt. Don’t forget to show us your finished polo to be entered in the contest. See the very end for details.
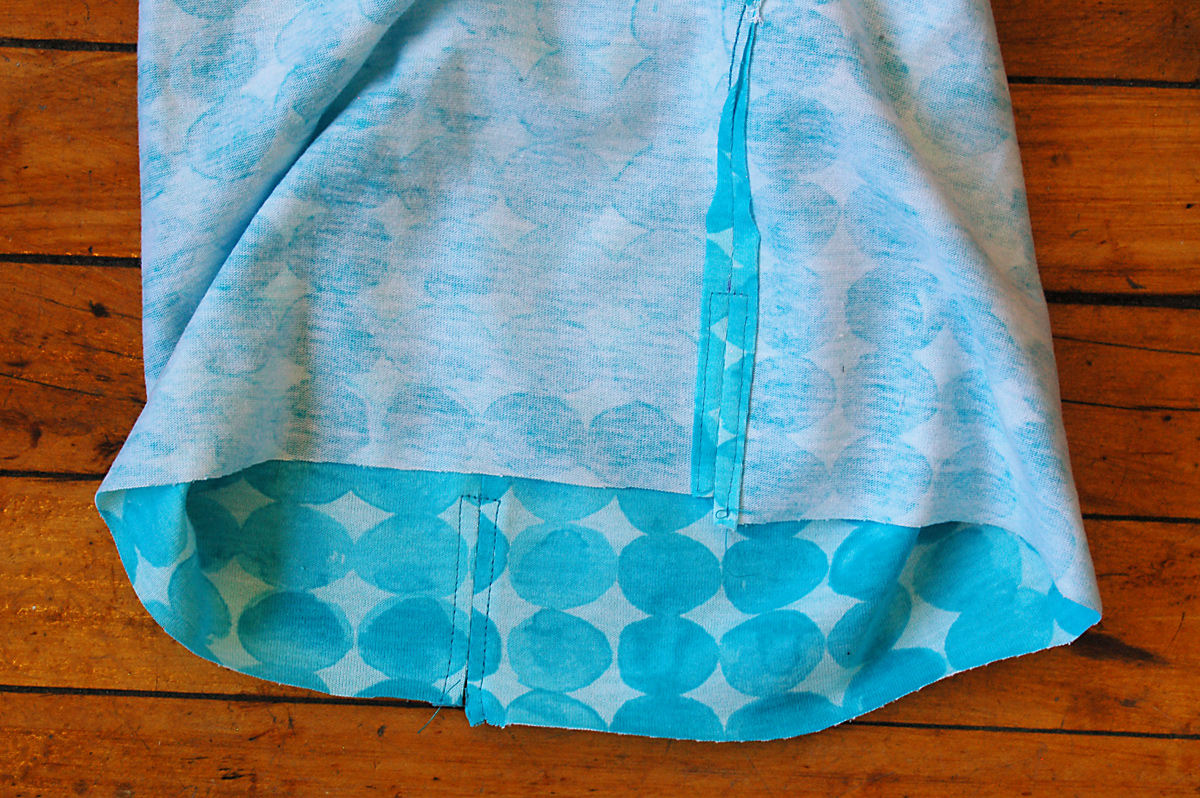
Stitch the hems and finish the shirt
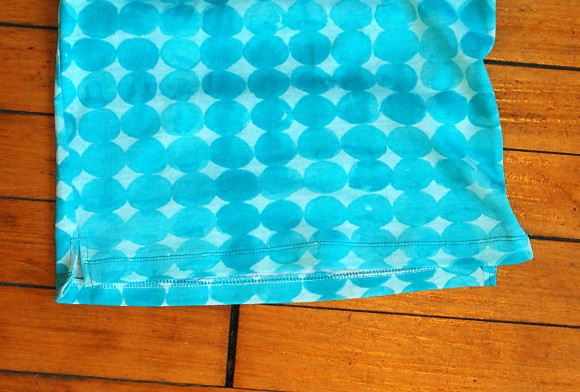
1. Finish the raw edges of the bottom edge of the shirt with a zigzag stitch or with the serger (disengage the serger’s knife, or serge the edge without trimming it). Then press the finished edge to the wrong side by 3/4” and pin it in place. To hem the shirt, stitch close to the finished raw edge of the folded hem with a narrow zigzag stitch or with a double needle for a really professional look. (If you have a coverstitch machine, you’ll want to use it here.)
2. To finish the vents, stitch the remaining 1” unsewn section of each side seam to its corresponding dot using a stretch stitch (not a serger if you’ve been using a serger for the rest of the shirt). Using a basting stitch, sew the vent closed temporarily from the dot to the hem edge.
3. Press the vent seam allowances open. Then press under the raw edges of the vent seam allowances to meet the basting line so the raw edge of the vent is hidden.
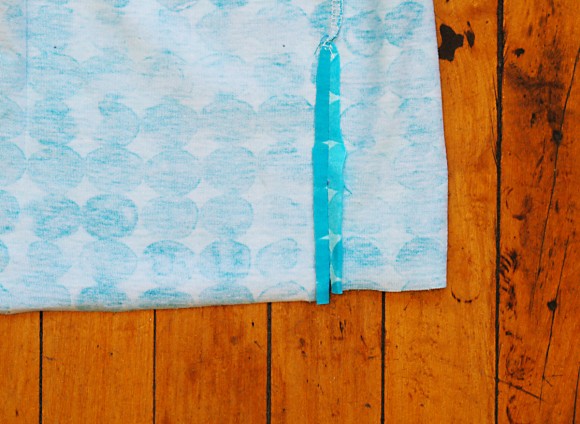
4. Edgestitch the vent seam allowances, pivoting across at the dot before pivoting again to edgestitch the opposite side to finish the vent. Remove the basting stitches to open the vent.
5. Refold each sleeve along the previously folded creases before stitching close to the finished raw edge of the folded hem with a narrow zigzag stitch or with a double needle for a really professional look. (If you have a coverstitch machine, you’ll want to use it here.)
6. Stitch the buttonholes and buttons at the markings you transferred from the pattern template.

You are done!
Enter to win a prize of two Oliver + S PDF patterns! When you have completed your Parachute polo, post a photo somewhere on social media: Flickr, Instagram, or your blog. Then link to it here in the comments section. All polos made can be entered. One will be chosen at random. All entries must be submitted by Friday June 12th at 9:00 AM ET.
-
This topic was modified 9 years ago by
 Rachel Le Grand.
-
This topic was modified 9 years ago by Rachel Le Grand.
-
This topic was modified 9 years ago by Rachel Le Grand.
-
This topic was modified 9 years ago by Rachel Le Grand.
-
This topic was modified 9 years ago by Rachel Le Grand.
9 years ago LINK dubhels2003
@dubhels2003
dubhels2003
@dubhels2003
I’m going to have a go at this and i’m looking to use fabric from my stash but i’m not sure whether it will be ok as I don’t really ‘understand’ Jersey fabric. I have some really stretch stuff, about 8% elastine which I’ve discarded as it feels too stretchy and would be better for leggings. I have some very soft slightly thicker 100% cotton Jersey which i’m leaning towards but i’m worried about it losing shape? What do you think?
It’s pretty hard to advise as you can’t touch the fabric!
9 years ago LINKI think cotton jersey is great for polos and T-shirts, and I’m sure it will be fine here. This pattern doesn’t need a ton of stretch, especially with the woven details. So glad you’re joining us!
9 years ago LINKRachel Le Grand
@nestfullofeggs
If you’re sewing along with us this week, day two is now up!
9 years ago LINKRachel Le Grand
@nestfullofeggs
Day three of the sew-along is now up 🙂
9 years ago LINKRachel Le Grand
@nestfullofeggs
Day four of the sew-along has now been added.
9 years ago LINKRachel Le Grand
@nestfullofeggs
The fifth and final day of the sew-along has been added. Don’t forget to share a link to your completed polo here in the comments section (by June 12th, 9AM ET) to be entered in the contest!
9 years ago LINKwith love Heidi @with love Heidi
If I made the Polo before the sew along is it still eligible?
9 years ago LINK Brittney
@georgeandizzy
Brittney
@georgeandizzy

I made a dress, well, two but I need to add buttons to twin #2’s so no pics yet.
9 years ago LINKRachel Le Grand
@nestfullofeggs
@with-love-heidi, all Polos made can be entered, so please share what you made.
-
This reply was modified 9 years ago by Rachel Le Grand.
9 years ago LINKThanks Rachel 🙂
Here’s the dress I made.

-
This reply was modified 9 years ago by
with love Heidi.
9 years ago LINKBrittney
@georgeandizzy

My little guy in his Polo. (and Lullaby Layette pants!)
-
This reply was modified 9 years ago by
 Brittney.
9 years ago LINK cybele727
@cybele727
cybele727
@cybele727
So I am hoping for some help here.
When I was attaching the collar, I sewed both the front (button hole) placket and the back (button) placket folded back. That worked for the front, but obviously not the button one which needs to be NOT folded back behind the main fabric.
As I was pinning, I remembered thinking wow, the neckline is much too long for the collar, this back/button placket must go back. Starting at the buttonhole/front placket, the notch and side seam were barely off, and the center notches matched. It was the 1/3 of the collar starting just before the second side seam and to the end where I had extra. About the 1 inch that was the placket. (which is why I folded it back thinking this must be it.)
I can’t imagine that I stretched the neckline out before sewing the collar. I am really gentle with knits, do my stay stitching, don’t pull when I sew, etc.
Well, it was wrong. I gently ripped it out. I obviously did stretch the neck line a bit. I don’t think I stretched it much. The reason I say this is because it isn’t fitting in the same way as before. It lines up for about 2/3s and then I have an extra inch plus some more (from the stretch from the rip.)
Is there a fix, or do I have to start over again?
9 years ago LINKMy collar was a bit funny, I had to remove it because I had both packets folded out. I seem to remember fudging it slightly and relying on the stretch of the knit to make it work. Sorry I can’t be more specific 🙁
9 years ago LINKBrittney
@georgeandizzy
I messed up on my first one too and had to unpick:) I threw mine through the wash and steamed the neck with an iron. It seemed to help. On both sizes I made, I clipped the collar just a bit in the front to help ease it in.
-
This topic was modified 9 years ago by


You must be logged in to reply to this topic.
copyright
Unless otherwise credited, all work on this blog is © Liesl + Co., Inc, 2008-2024. You are welcome to link to this blog, but please ask permission before using any text or images.