Oliver + S

Heirloom Sewing and Embroidery

adding embroidery details to garments

Viewing 6 posts - 1 through 6 (of 6 total)
  • LINK
    Ava @fitdoc

    I’m new to embroidery but would like to add some embroidery detail to the hide and seek dress. I’m wondering if any type of additional stabilizer is needed to be “put behind” once the embroidery was finished so the threads don’t catch? I have a beautiful linen that I was thinking maybe to outline some of the florals for an extra pop. Any suggestions or pictures of how to do this for garments

    LINK
    Tamara @justsewit

    Hi Ava (@fitdoc)

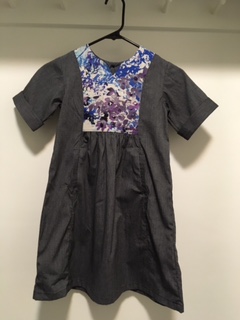
    I have this pattern and even though I haven’t actually finished one, it is a perfect pattern to use embroidery with. I am fairly experienced when it comes to embroidery, having just brought out some smocked dresses to fit my youngest daughter that I made my eldest daughter twelve years ago.

    So, with this in mind, let me share some simple tips for you to remember when you go about making this lovely little dress a d using embroidery.

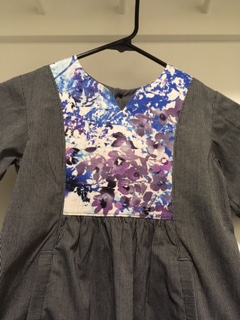
    Firstly, I would cut a square of your fabric a little larger than the size of the front centre piece and I would use iron on interfacing to fuse behind it and give it some stability.

    I would then trace the front piece out onto the square with a fabric pen,pencil, chalk, anything that you would have for marking your fabric. Next I would use a longer than normal straight stitch (like a basting stitch) to sew a stitched line over where you’ve marked (this way if the fabric marker fades you still have your markings). I would then mark out my embroidery design, keeping in mind the seam allowances and making sure that everything is centered.

    I would then embroider my design onto the front piece which is currently a square. Once the embroidery has been complete, I would rinse it to get rid of any dirt and fabric marker that isn’t required (because you’d be doing a bit of pressing and the heat from the iron will make the marker not come out.

    After it is dry, I would press the back of the square and then cut the piece to it’s final shape. Then I woukd carry on sewing this pretty dress as per the pattern instructions.

    Doing this method, allows for the embroidery to be hidden behind the front centre piece lining and therefore eliminates a need for further pieces to hide the back of your work.

    I hope this help, sorry it is long, but I hope it is thorough enough for you to complete this dress with success.

    Good luck
    Tamara

    LINK
    Ava @fitdoc

    Thanks Tamara for the detailed tips. So this particular pattern will have a lining however what if I was to embroider some of the skirt part (like outline a design of the fabric) or for any other skirt part that doesn’t have a lining. Is it necessary to put interfacing on that few inches where I”m outlining the design or is it necessary to put interfacing over the back threads once I’ve embroidered?

    LINK
    Tamara @justsewit

    Hi Ava, very good questions. There is a stabiliser you can get that washes away. I would use this on the smaller and unlined portions just to stabilise the fabric whilst you embroider – it helps the fabric to not stretch or crinkle to the point of distortion. I think it comes in sheats so you would be able to cut it and baste stitch it under where you would like to work and then when you go to rinse it it will wash completely away, leaving behind your beautiful embroidery.

    On dresses such as the Carousel for instance, if you were to embroider the border of the straighter viewed hem, you could do the same as per your intention for the bodice of the hide and seek. If it is just a small portion however, it isn’t really necessary to line it at all.

    I would be mindful of how you end off your threads. Try to make the finishing as inconspicuous and as sturdy as you can. You can do this by following your ends back through the embroidery (for example if you were doing a fly stitch you could follow the ends back through a good way and then there would be no need to knot. It shouldn’t come undone if you use a good length of tail to secure it.

    Hope this makes sense.
    Tamara

    LINK
    Ava @fitdoc

    tamara,
    I didn’t end up doing the embroidery, thought it would get too busy. But thank you so much for your detailed explanation. Will definitely use on next one.

    Ava

    LINK
    Liesl Gibson
    Keymaster
    @liesl
Viewing 6 posts - 1 through 6 (of 6 total)

You must be logged in to reply to this topic.

copyright

Unless otherwise credited, all work on this blog is © Liesl + Co., Inc, 2008-2024. You are welcome to link to this blog, but please ask permission before using any text or images.