Hello! I am Lyndsey Stanfill, a member of the Advisors Circle. The most valuable advice I ever received when learning to fit sewing patterns was that I am the director. The pattern is just a blue print, and I can change anything I want. Today I’m going to share a useful alteration that can tweak the fit of almost any blouse.
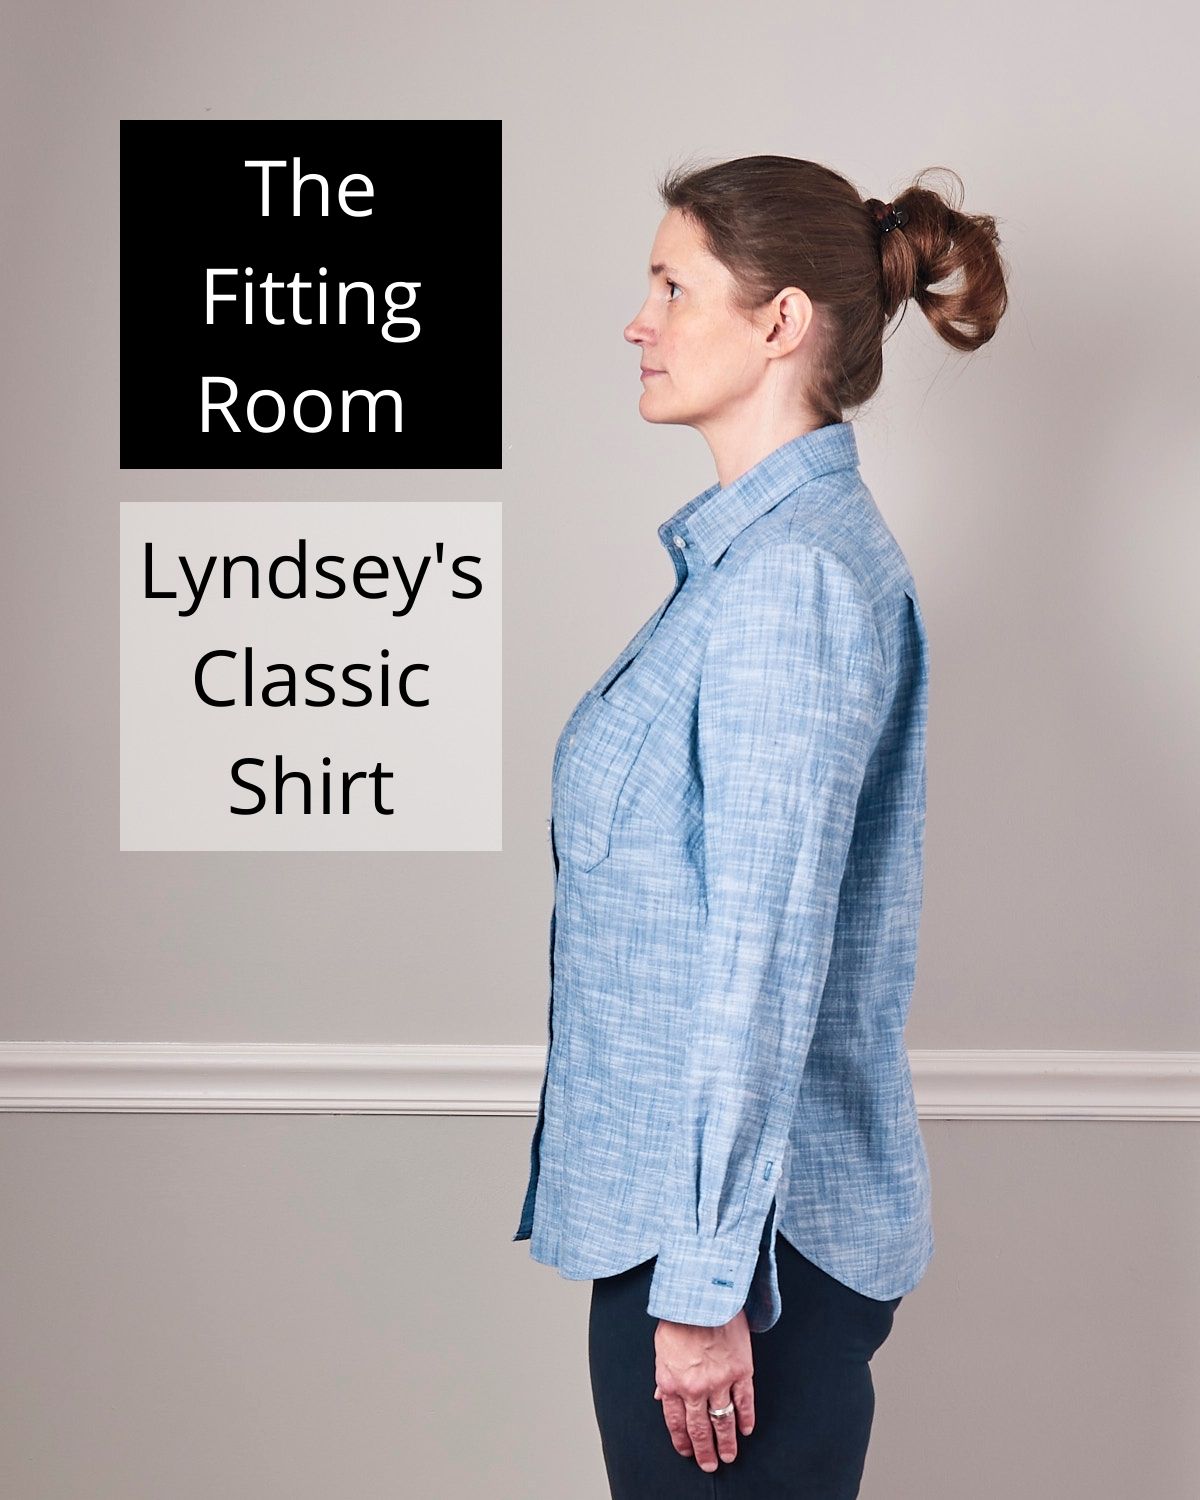
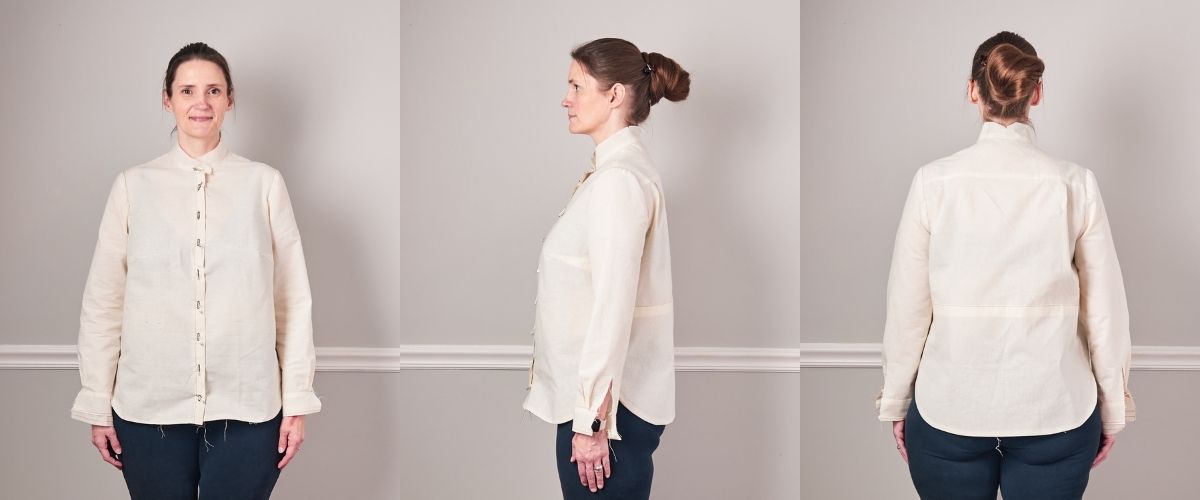
This spring I sewed the Classic Shirt pattern for the first time. I selected a 12D based on my upper bust measurement and applied all of my normal fitting adjustments. I sewed a muslin of the pattern to check the fit, and it fit in all the right places. However, in checking the muslin I wondered if the shirt was too boxy on my frame because of my large bust size.
Adding contouring
Since the shirt fit everywhere else, I wanted to try some vertical darts. This technique adds an additional dart that was not included on the pattern. Adding vertical darts to a shirt or blouse provides additional contouring to the shape. You can see in the picture below that we are going to add dart control by “removing” a triangle of fabric. One of the reasons vertical darts are so useful is that you can add them to a blouse that has already been sewn. You can also add vertical darts to a ready-to-wear blouse that is too boxy on your frame!
Start by pinching the fabric to create the shape you have in mind. You are the director, play with the fabric until you find the right shape.
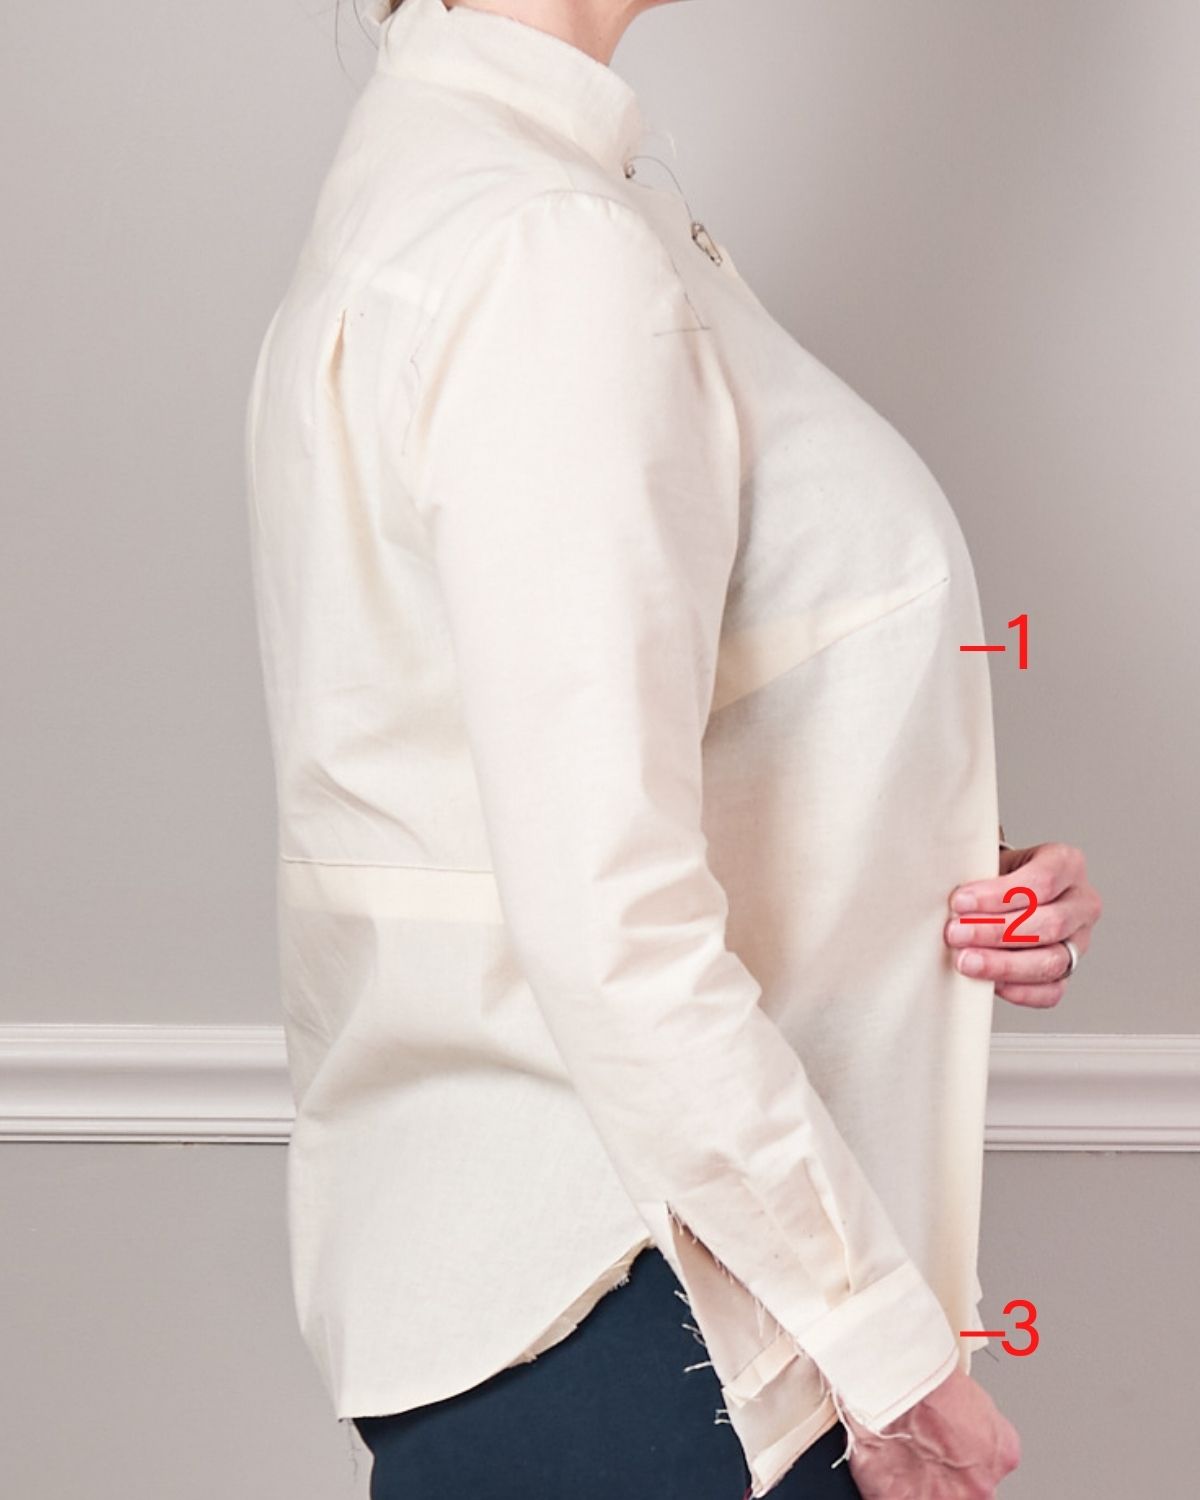
Fitting dart points
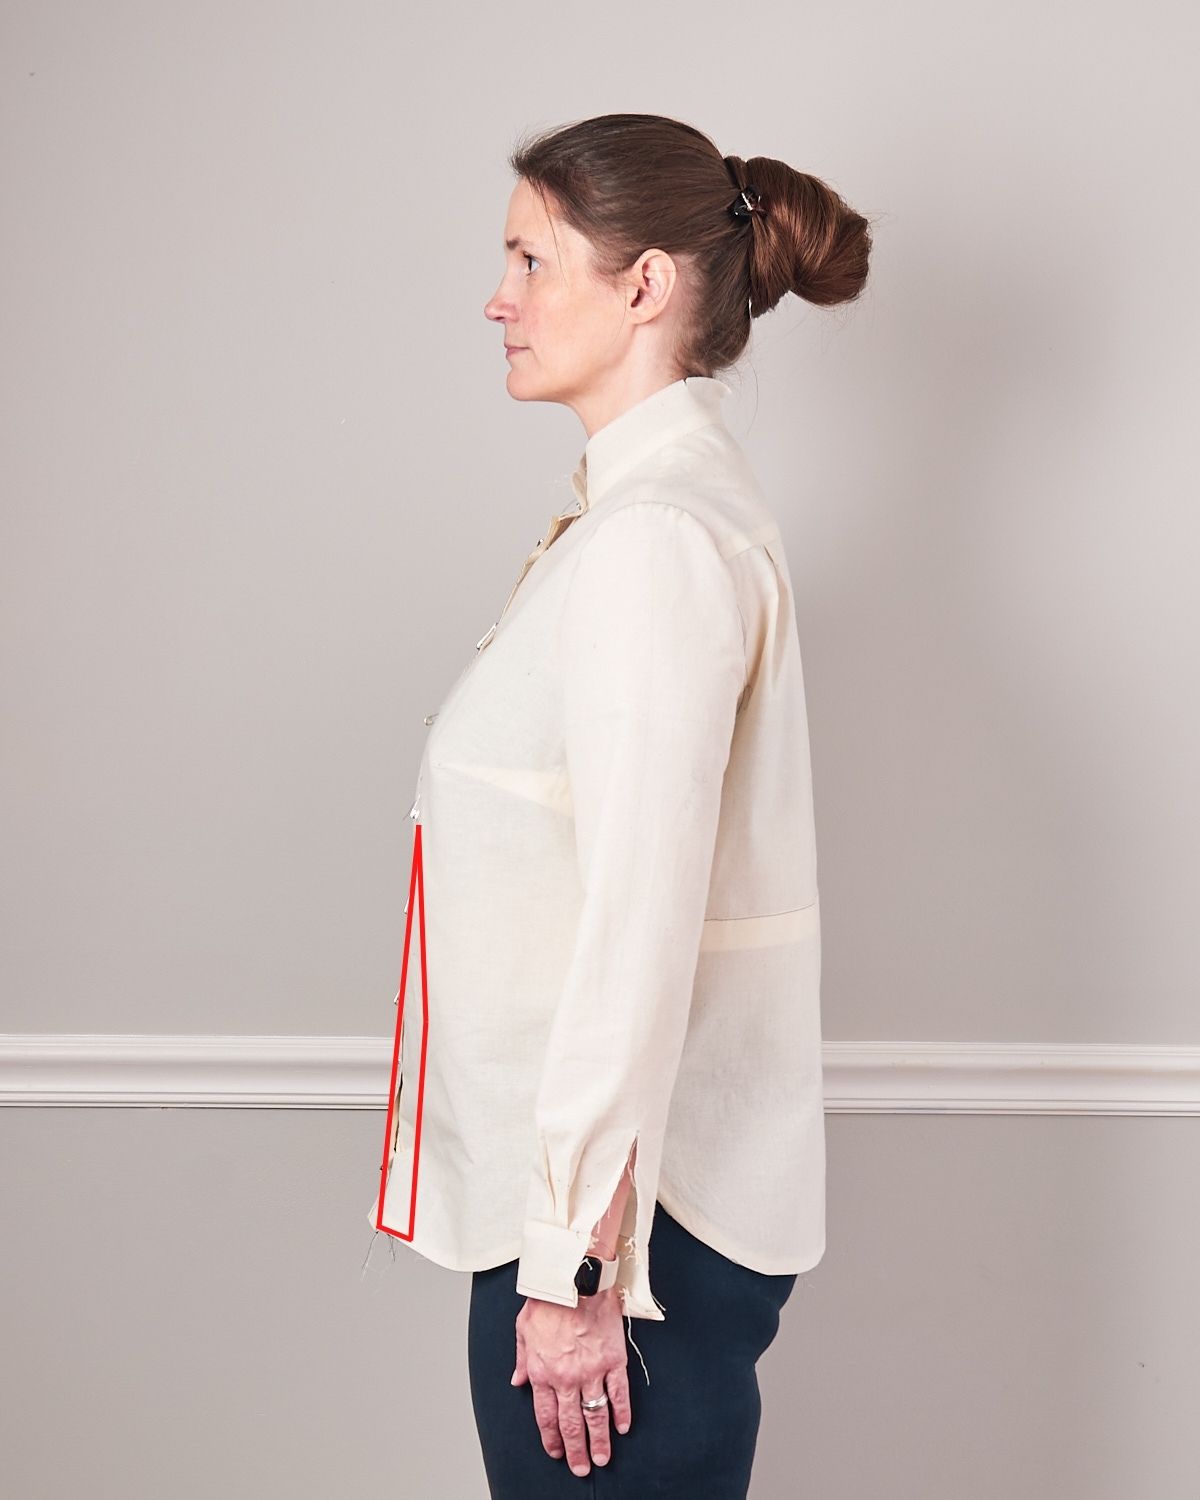
One method for contouring a vertical dart is to pin the dart, using the pins like stitches, from the top of the dart to the bottom of the dart. I’ve always found this method difficult to do by myself and difficult to make the darts identical. Instead, I make three marks. I mark the point on my bust where I want the dart to end. This point will be approximately the same distance from your apex as your bust dart. The second mark is approximately in the middle. You can see in my picture that the contouring was the most pleasing with the second point a little higher than the middle. Mark this point and measure how deep you are pinching the fabric. My pinch was ½” deep. The third mark is all the way to the hemline, but you need to measure how deep you are pinching the fabric. At the hem my pinch was ¼” deep.
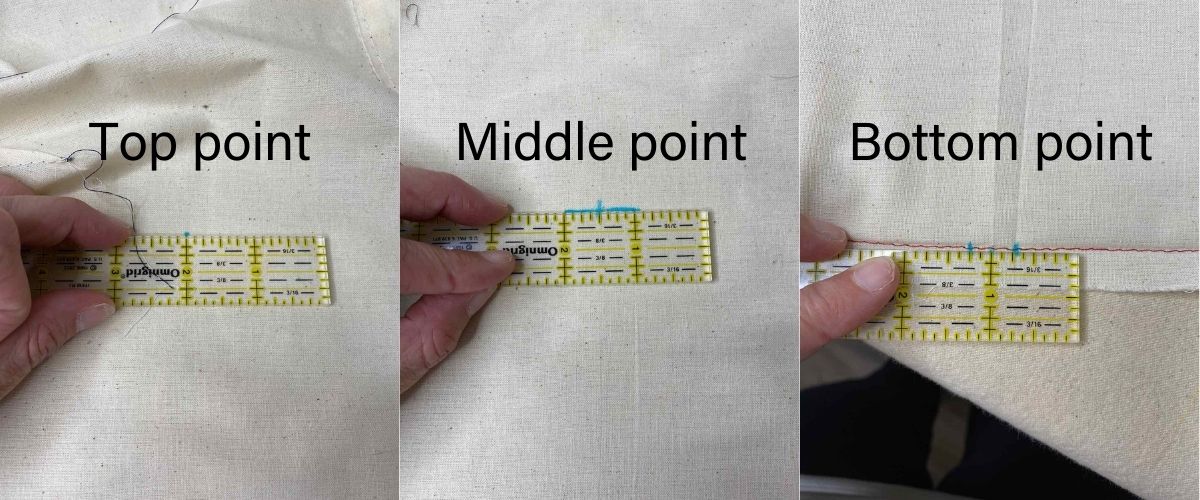
Mark the dart points
Take off the blouse and lay it flat on a surface to create your dart points. The top point was marked on your body and does need any additional steps. On the second point you will mark the width you had pinched in your fabric. I have marked ½” to the left and the right of the middle point. For the bottom point, you have to open up the hem allowance. If you are using this method on a ready-to-wear or completed garment, you want to rip out a couple of inches before and after the dart to give yourself plenty of room to sew. Now mark the width you had pinched the fabric at the hemline. I had pinched ¼” so I marked ¼” to the left and the right of the bottom point.
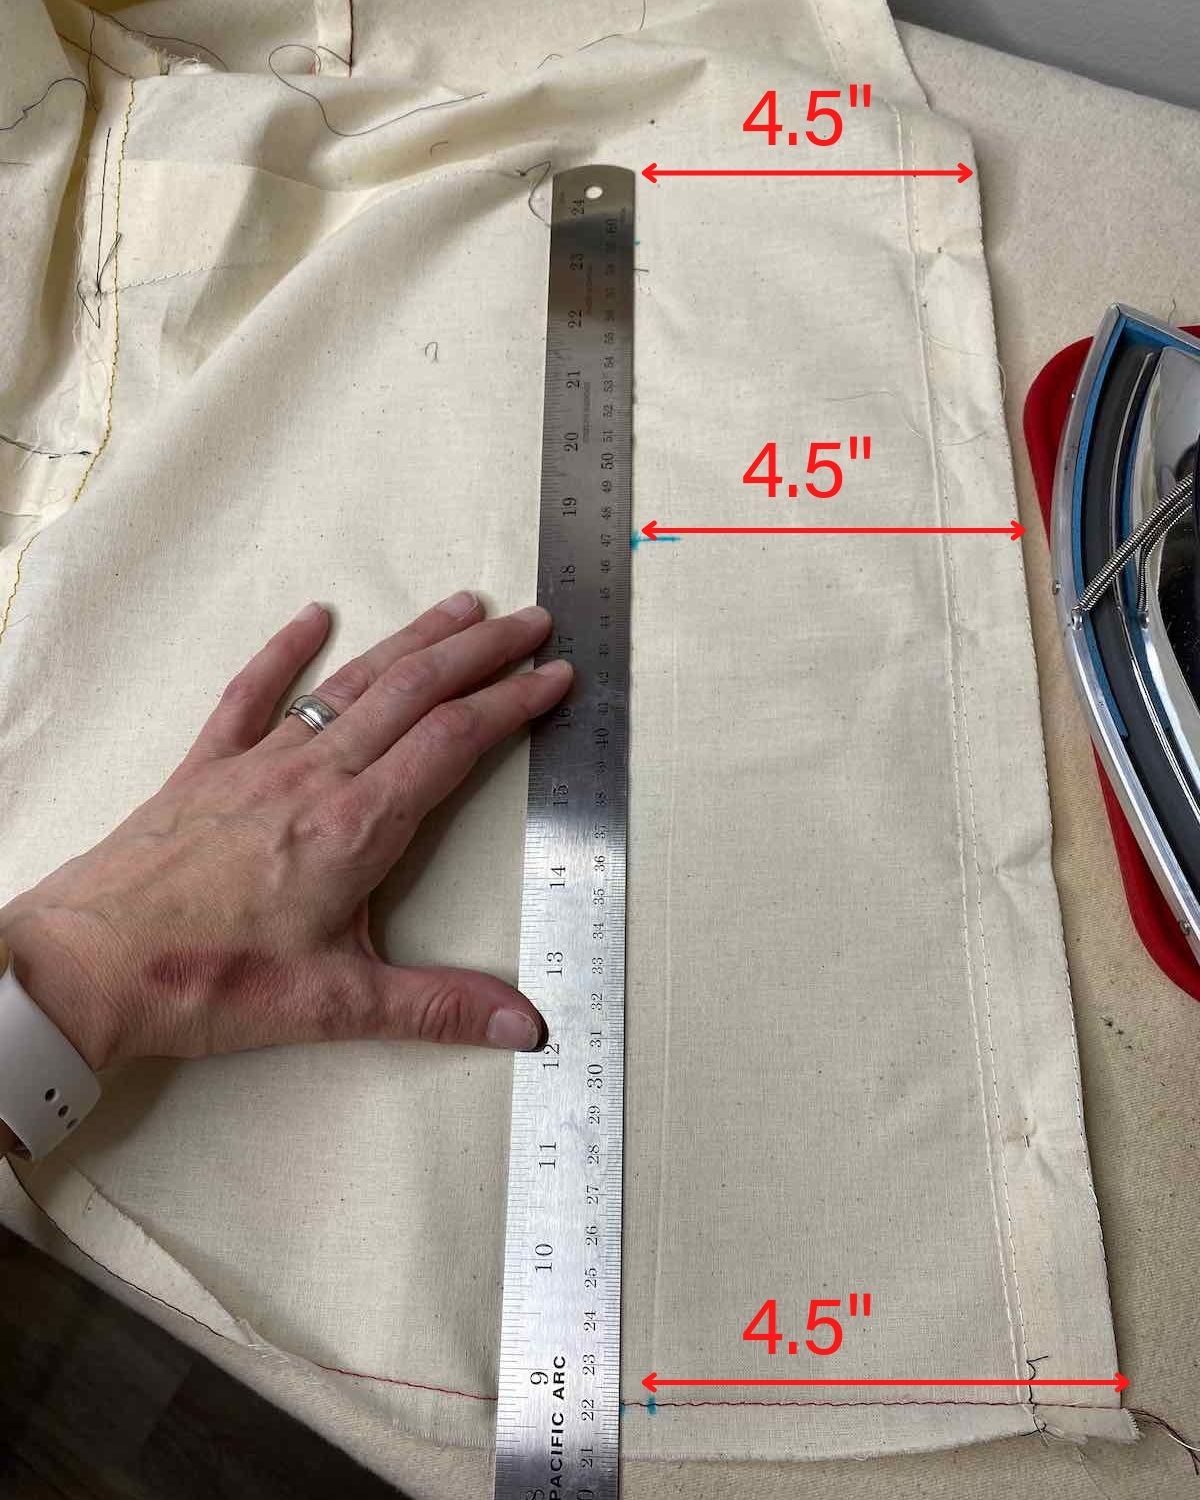
Draw the dart lines
Before you draw your dart lines, you need to make sure that the vertical line from the top point to the bottom point is on grain. The points I made during the fitting where slightly off grain, so I marked new points equidistant from the edge of the button placket.
Next fold the shirt from the top point to the bottom point and press the fabric along the crease. Then draw dart lines from the top point to the middle point and from the middle point to the bottom point.

Finally sew the darts using your normal technique, pivoting at the middle point. Repeat the process on the other side of the blouse. Press the darts toward the center front and check your work.
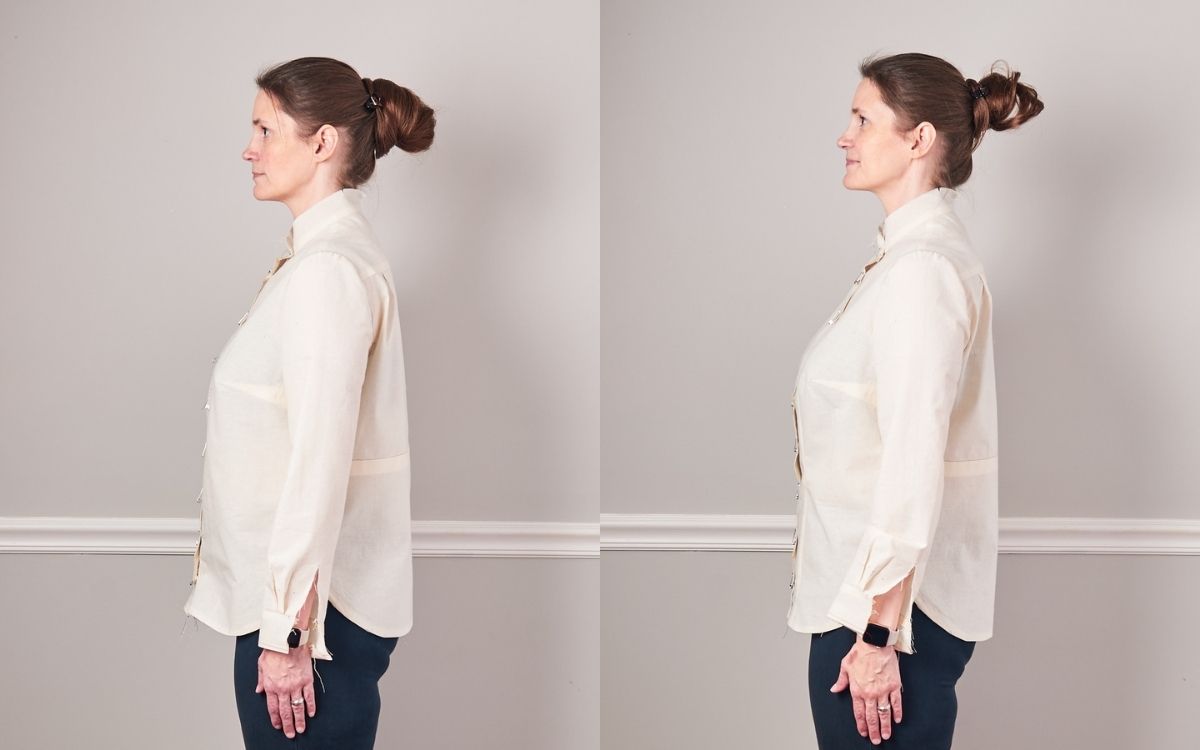
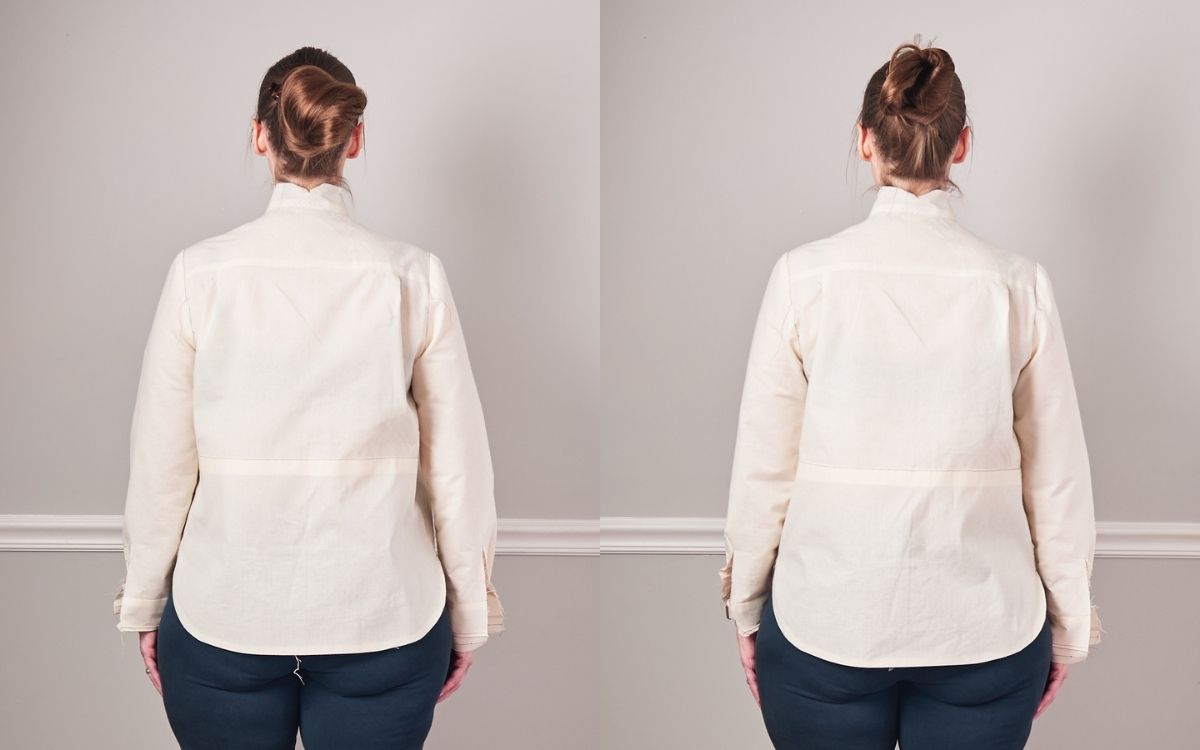
Before and After
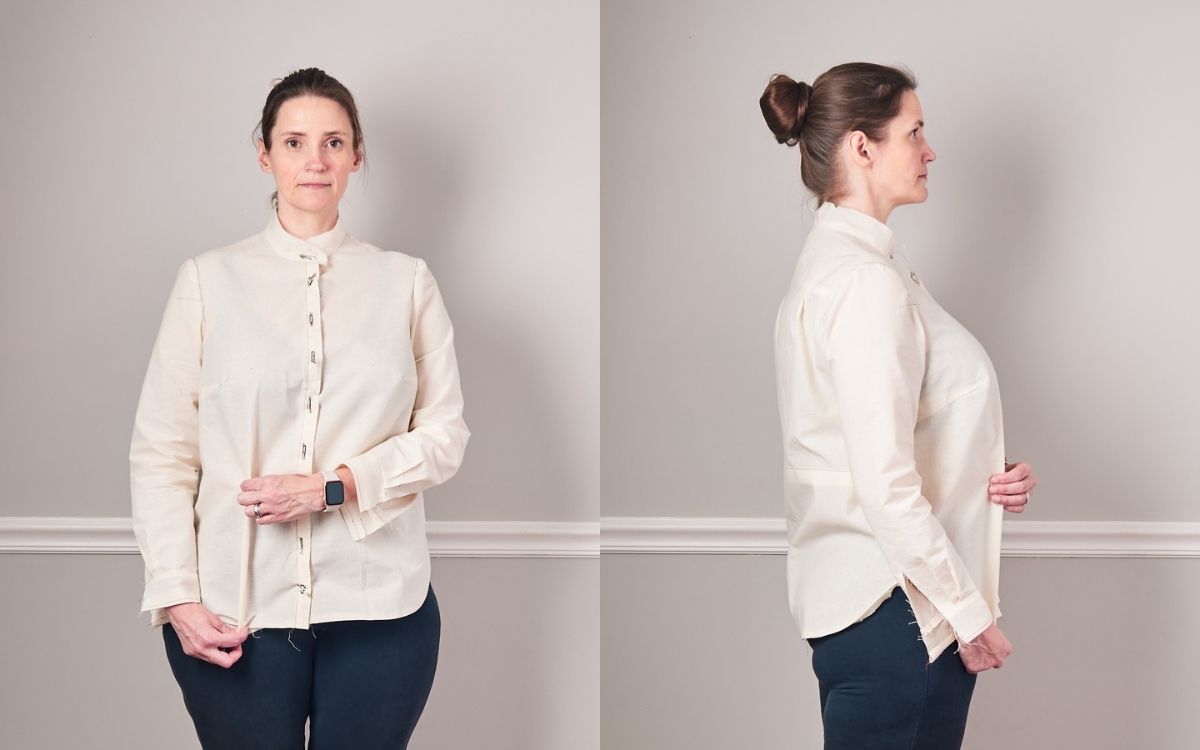
You can see that the change I made is subtle but does add just a little bit of contouring to the shirt front. If I had pinched a deeper dart in the middle, the contouring would have been more pronounced.
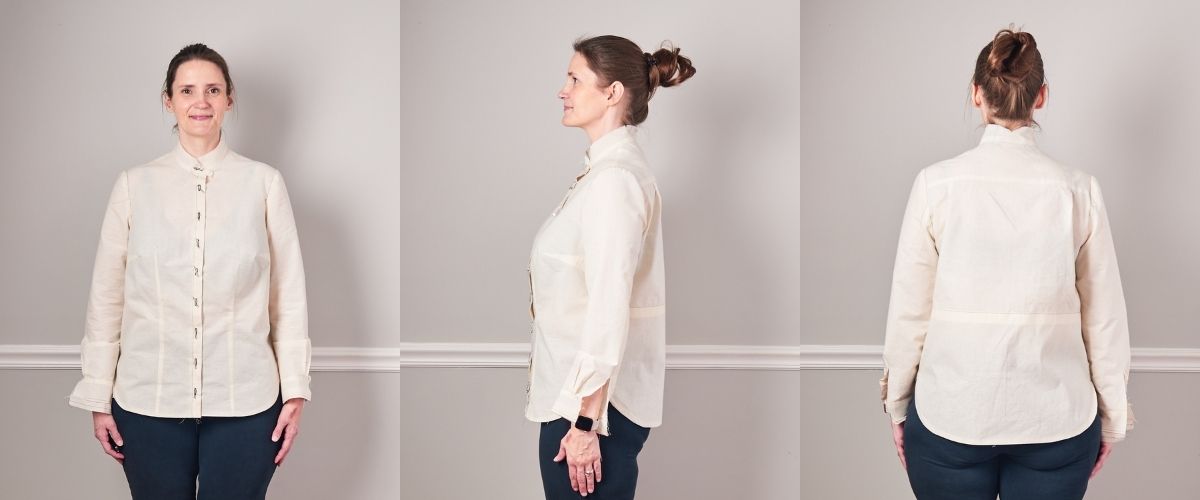
Comparing the before and after photos shows the difference. The rest of the fit didn’t change, the only place that changed was the bottom of the shirt front. The shoulders and back fit the same.

To demonstrate how this technique would work on a ready-to-wear blouse, I’m going to baste vertical darts on my recently completed chambray Classic Shirt. Even though I had tested the vertical darts on my muslin, I had decided on a more relaxed look and didn’t end up adding the darts to the final shirt. For this example, I marked the dart points exactly the same as I did on the muslin. You can see here that I didn’t remove the pockets or pick out stitches on the hem for the demonstration. If I were going to keep these darts I would remove the pockets, sew the darts, and then reapply the pockets.
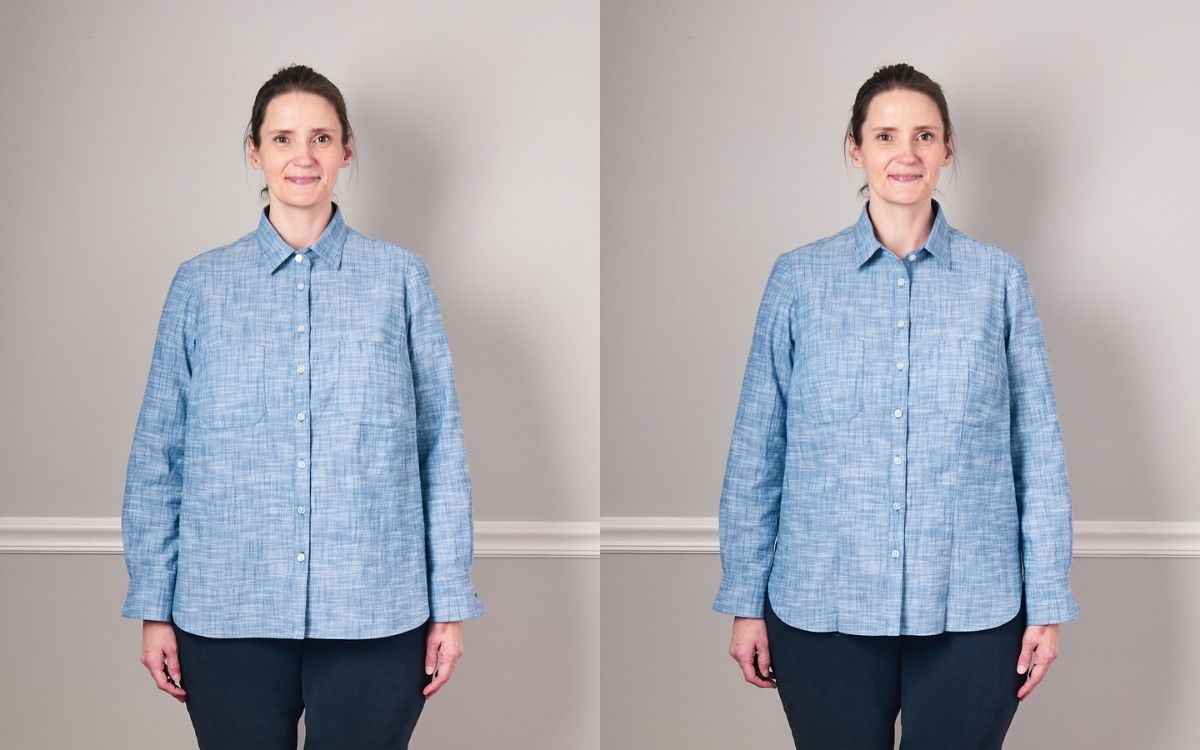
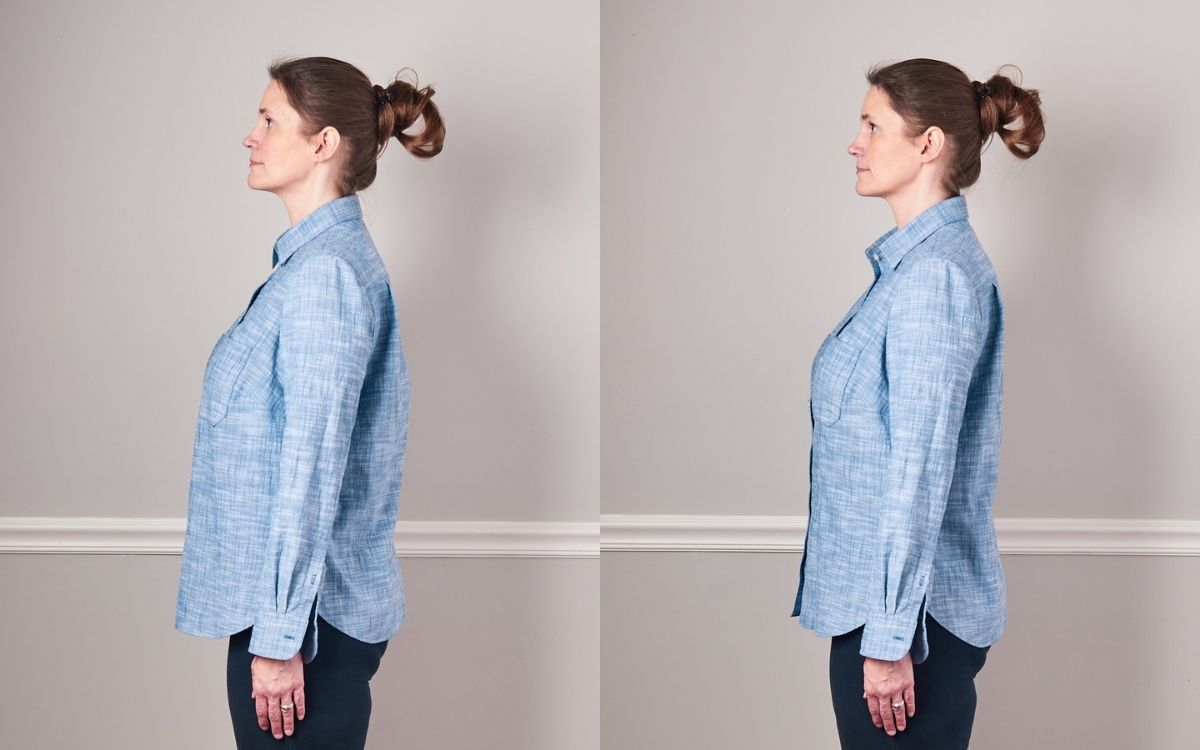

The only time I have a problem with this technique is when I don’t have enough ease in the hips. When you pinch the fabric at the bottom point, you are removing width from the hem circumference. Since I am already pear shaped, I usually add the minimal amount of ease I can to the hem line. In a muslin I can let the side seam out a little if I have enough seam allowance. On ready-to-wear, however, the side seams are usually overlocked and have a small seam allowance. But if you have enough ease in the hips to you allow vertical darts, this technique is a great way to add shape to a boxy ready-to-wear blouse. You can’t add bust darts to a finished shirt because adding a bust dart would shorten the length of the shirt front but not the shirt back. So, try adding vertical darts instead!
This is a great tutorial! I’m kind of busty for my size and this is often an issue for me. I need the room across the bust but then the lower half of the shirt looks too big. Those before and after pics really show how well this works. Thanks!
Great! Yes, it is a subtle but powerful change. Try it out!
This is a great tip! Very polished tutorial, too. Thanks!
Glad it is helpful!
Your instructions are so clear, as is the improvement seen in the before and after pictures. Thank you, Lyndsey, for sharing!
Before and after pictures are so helpful!
Love the tutorial. Very educational and instructive. Easy to follow.
Fantastic! Thanks for sharing, Mar!
Great tutorial. I have done it to tee shirts because I have small bust and it gives me a better shape. Will now do to RTW woven shirts Thanks
I have not done this to t-shirts! I may try that, too.