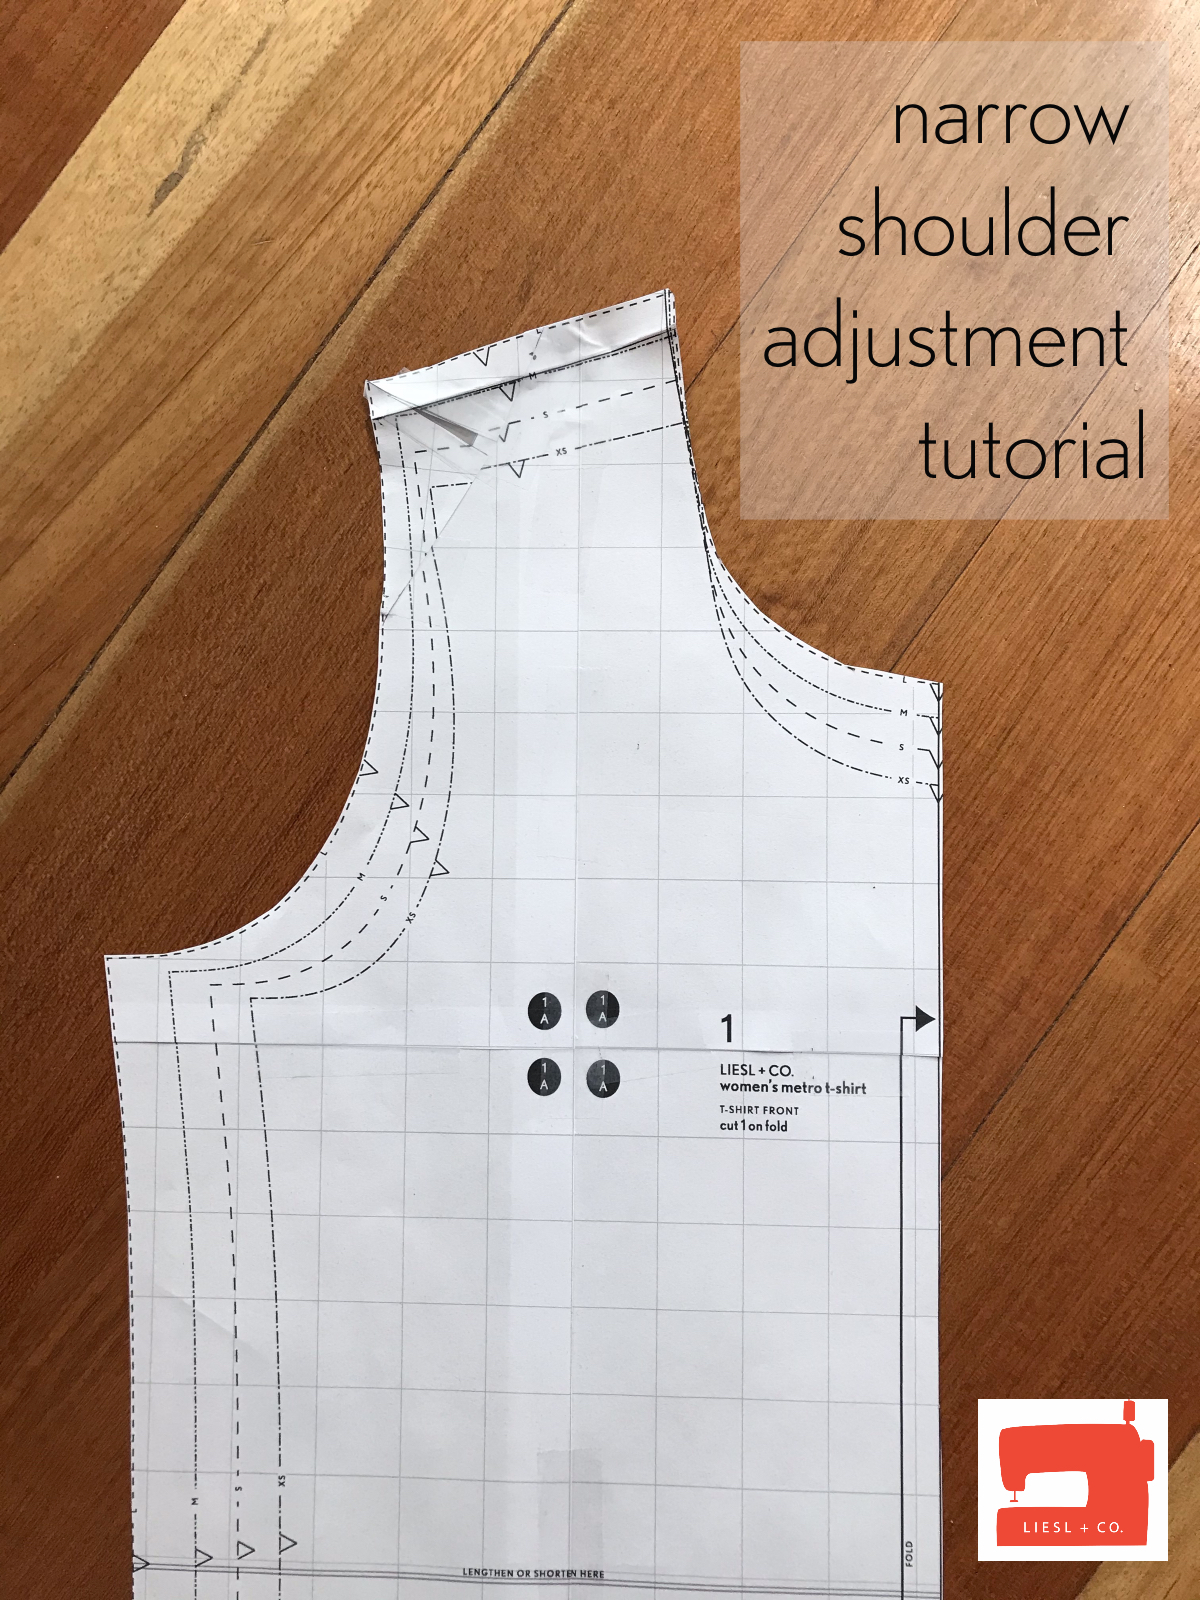
Do you find that the shoulders on your makes are a little too wide? A garment that is too wide in the shoulders can look sloppy, but a narrow shoulder adjustment is an easy fix that goes a long way in customizing a pattern to your shape.
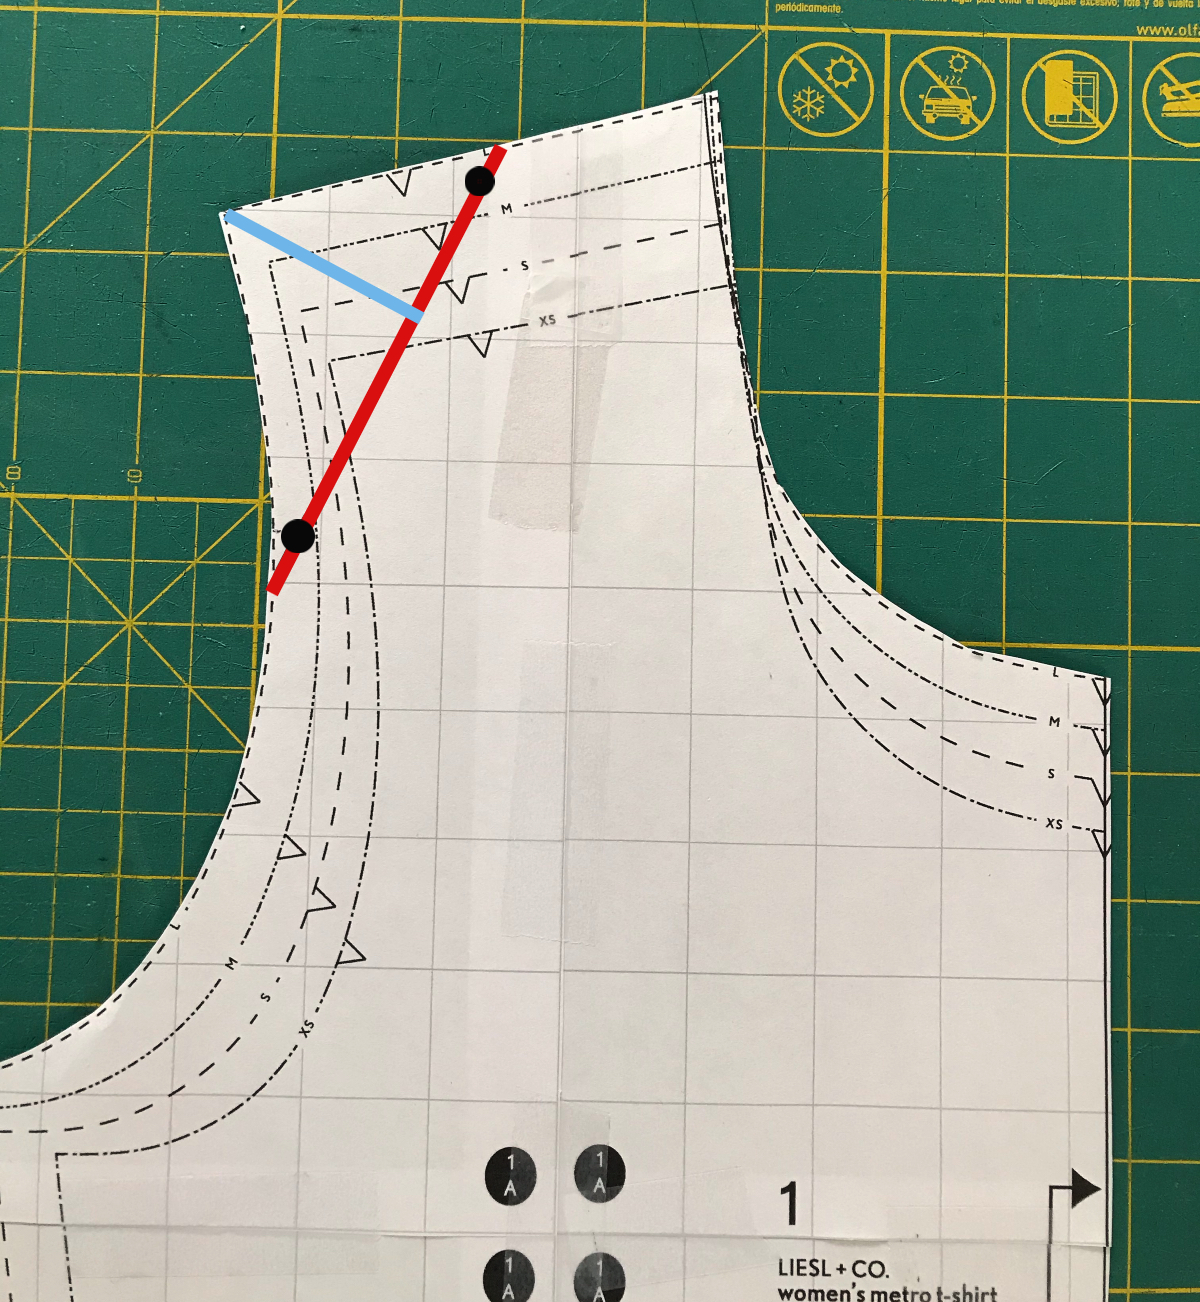
Step 1: Prepare your front bodice piece for cutting. To do this, mark the center point of the shoulder seam with a dot on the seam line. (On this pattern, my seam allowance is 1/4″, so I marked the center point 1/4″ from the edge as indicated by the upper black dot below.) Make another dot on the seam line about 1/3 of the way down the armscye. Draw a line along the dots from one edge to the other (indicated by the red line below). Draw another line from the corner to the line you just drew (indicated by the blue line below).
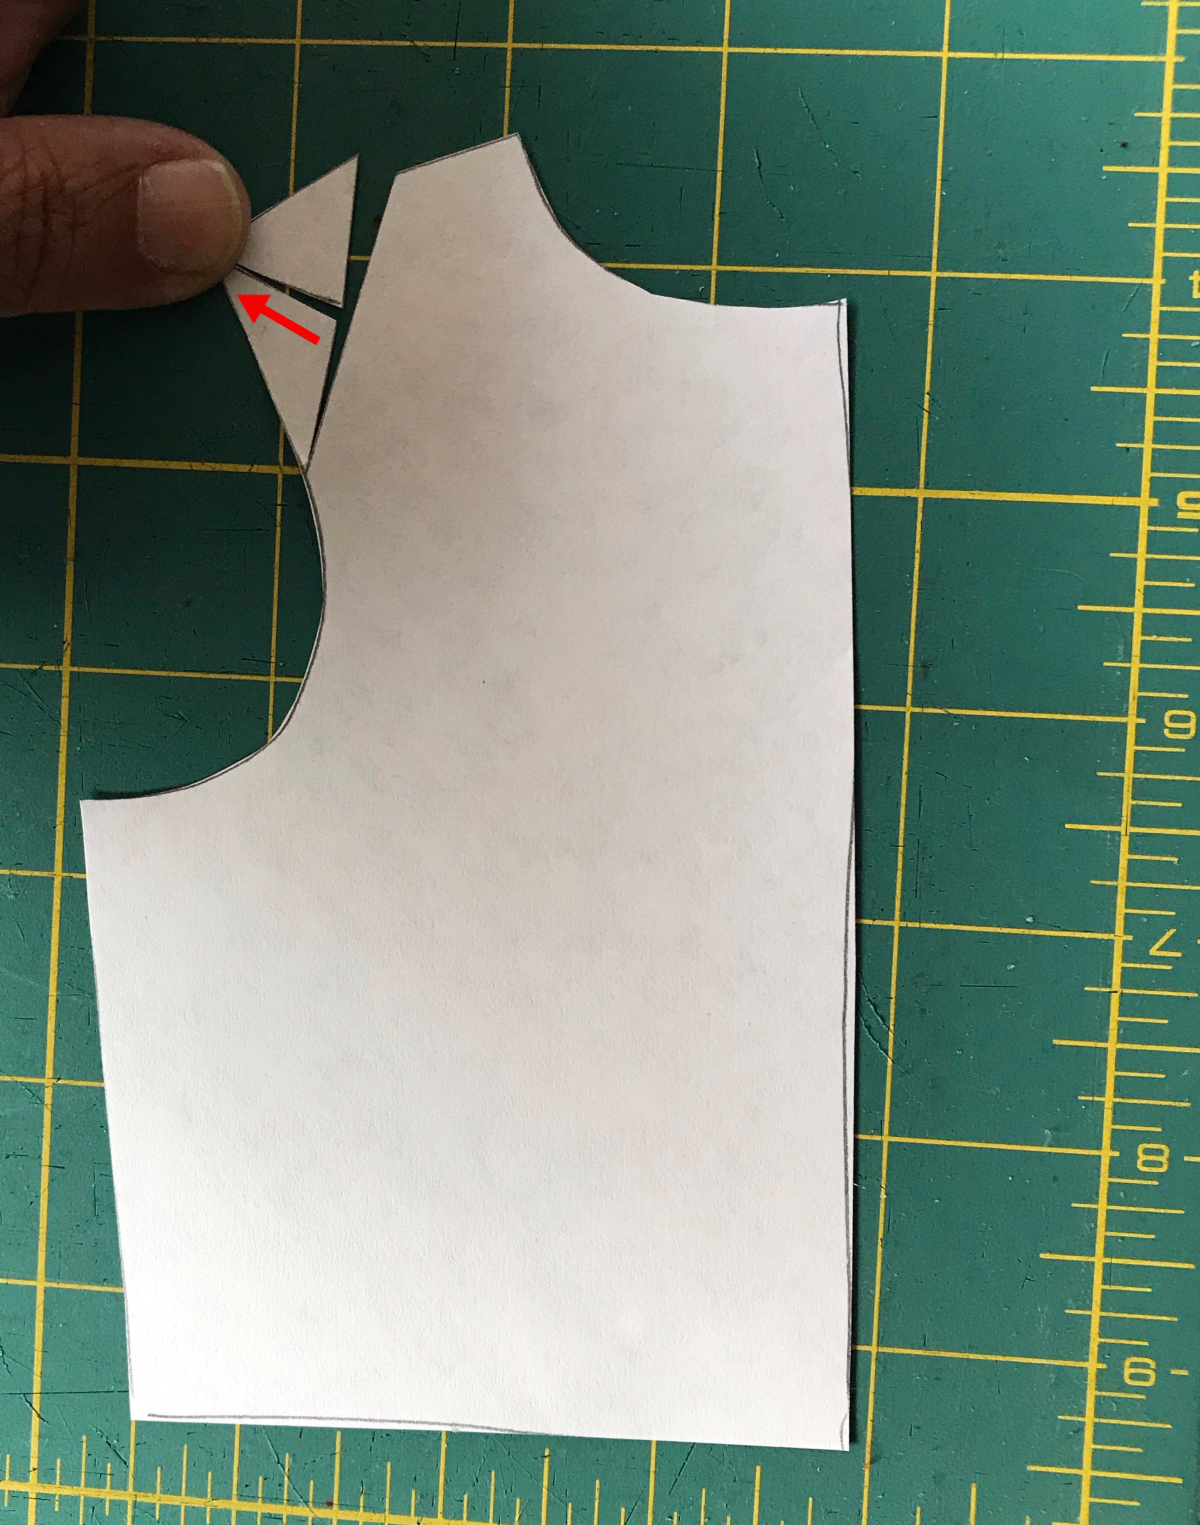
Step 2: Next, cut along the red line, starting from the shoulder seam and cutting to, but not through, the armscye. Leave a small paper “hinge” so that you can pivot the pattern in the next step.

Step 3: Next, cut along the blue line, starting from the cut you just made and ending at the outer corner of the shoulder seam. Cut to, but not through, the outer corner, again leaving a paper hinge.
Step 4: Take the amount you want to narrow the shoulder (in my case, 1/4″) and draw another dot on the shoulder seam line that distance from your center point. I drew my dot on the seam line, 1/4″ away from my first dot, shifted over toward the neckline of the top.
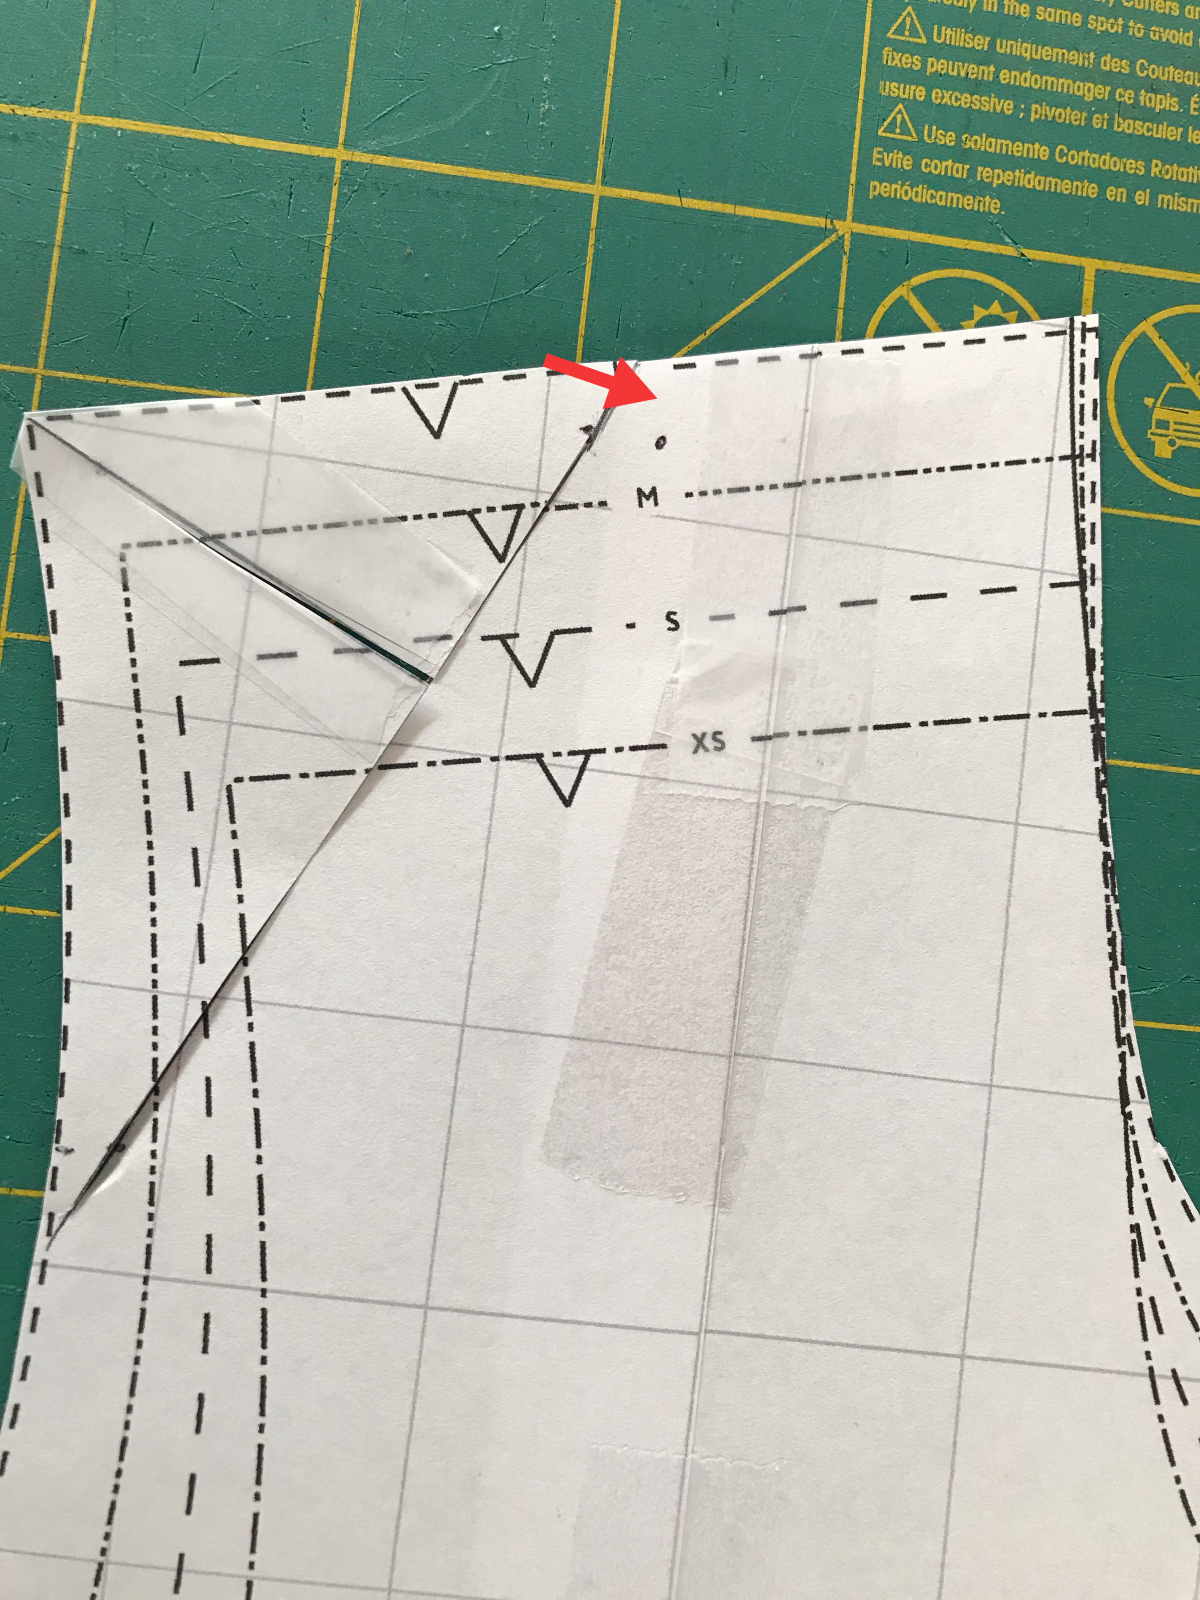
Step 5: Connect the dots. Move the slashed pieces towards the neckline, narrowing the shoulder, until your original center dot meets your new dot and the shoulder edge makes a straight line. The slash in the corner of the shoulder will spread a bit, as the other pieces of paper will overlap. This narrows your shoulder seam while keeping the armscye length intact so you don’t have to adjust your sleeve.
Tape the pieces in place. Now repeat this procedure on the back bodice, and you’re done!

And if you have the opposite fitting issue, you can find our tutorial for a broad shoulder adjustment here.
And that’s all there is to it! Do you do shoulder adjustments on your makes? Are there any other pattern adjustment techniques you’d like to learn? Leave a comment and let us know!
God, here I thought all you needed to do would be to draw it a bit narrower! Clearly I have lots to learn still! Thanks so much, these tips are invaluable.
Would love to see a tutorial on how to make an adjustment to a tank style shirt or dress. I always have issues with the pattern gaping under my arm and showing a lot of bra. Thanks!
This is a problem I often have too! I will add it to my list.
How can you tell that you need a narrow shoulder adjustment versus making the next size down?
Hi Kathy! Good question. I think a lot of the time this will come down to a combination of personal preference and trial-and-error. If you have excess fabric in the area between your bust and your shoulder seam, especially if it pools or wrinkles, you might benefit from this adjustment. If the shoulder seam hangs off your shoulder, you might need this adjustment. My shoulders are narrow for my bust circumference, but I generally find that the answer is to go down two sizes and perform an FBA. However, I have also found that on a casual knit t-shirt, I can skip the FBA in favor of a narrow shoulder adjustment (you can see a post I wrote on this very topic on my personal blog here.
This is terrific. Deciding to sew my own clothing has forced me to get in touch with something I’d rather not have: knowing my measurements and “issues.” I have extremely square and narrow shoulders compared to the rest of me. So where do you adjust? Shoulders, bust or hips, bc I am three drastically different sizes — and just widening or narrow lines does not help, it just makes everything distorted.
Hi Gloria! I tend to think of pattern adjustments as upper adjustments and lower adjustments. So, leaving aside the hips for now, let’s look at the bust and shoulders. Your high bust measurement is relevant here, too. If there is more than a 2 1/2″ difference between your high bust and full bust measurements, you will want to do a full bust adjustment using the size that corresponds with your high bust. This means you’ll be cutting a size that already has a narrower shoulder, and in many cases, that should be enough. For more information on choosing your pattern size in this way, check out this post Liesl wrote a few years ago on this exact topic.
Using myself as an example, I have a 36″ high bust and a 40″ full bust. My shoulders are also narrow, so I feel you. I usually end up starting with a bodice pattern that corresponds with my high bust measurement. That tends to be two pattern sizes below the size I would use for my full bust. I do an FBA (we have tutorials on this on the blog as well) to increase the full bust circumference to the measurement I need. On some occasions, I find that the shoulder is still a little too wide for me, and in that case I will do a narrow shoulder adjustment as well. It sounds time-consuming to do all these alterations, but it really doesn’t take that long. Here is a post where I walked through all the alterations I made on a Gelato blouse.
Once you’ve sorted out the bodice pattern, you should be able to grade to your hip size from there. I hope this has been helpful!
Thanks for the tute but I am a little confused. You say to cut the blue line from the outer corner in, but in the next pictures it looks as though the blue line has been cut from the inside outwards to allow pivoting at the outer corner. Can you please clear this up for me as this is an issue I have with patterns for myself, Thank you
Thanks Caroline! You are correct, I did this adjustment incorrectly the first time around, and reshot the tutorial … but then managed to use the wrong photo anyway. It’s been fixed now.
Thank you, makes sense now 🙂
Brilliant! I would love if you bundled your alteration instructions into a book. I know I’d buy it.
Thank you so much for this. I have this problem often.
Hi
Not sure if you are aware, I just wanted to bring your attention to steps 3, 4 and 5. Step 3 says and shows, to cut in from the outer edge of the shoulder, on the blue line, towards the red line drawn from the shoulder seam to the armscye in step 1, (then cut in step 2), leaving a hinge on the blue line, at the end closest to the red line. However, the pictures in steps 4 and 5 show the end of the blue line, which is closest to the red line, being open and gaping, without the hinge as pictured in step 3.
Hope this makes sense, I am confused. Could you clear this up for me please?
Thanks
You are correct! I did this adjustment incorrectly the first time, and then I fixed it and reshot the photos … but used the wrong ones. I have fixed it now. I hope it makes sense! Thanks for pointing out the error.
Hi Masha. Thanks for all your work in fixing this. It is all very clear now.
This is a new way to narrow shoulders. Since I always need this adjustment I’ll give it a try as it appears much easier than what I normally do which is more of a straight cut from the top of the shoulder seam down to mid armhole (a horizontal cut line). Then shifting that cut section to overlap the desired correction. This requires you to true the armhole seam. Hard to explain but your method looks so much easier. Thanks!
Yes, the benefit of this method is that it leaves the armhole length intact!
Thanks for the excellent tutorial. I’d also very much also like to know how to assess and change patterns to fit a narrow high bust. I know about removing fabric from the CFand/orCB but what else? There is often too much fabric above the bust causing gaping and ‘blousing’. I have a HB of 30″ and B 32″ and usually start with the smallest size for my shoulders and grade up to the bust and below.
I’ve just traced the Bistro Dress and I’m going to make a muslin and try to work out things on that as this fit issue is holding back sewing progress. Thanks for so many great patterns and tutorials, I’m bingeing on the Lullaby Layette atm making things for refugee babies 🙂
Hi Lyn! Looking at the bistro dress size chart, the size 0 *should* fit your bust and shoulders without any grading. (Of course, that’s just a starting point; there may be other alterations needed.) What size would you grade the full bust to? Without seeing photos to really understand the fit issue, one possible explanation that comes to mind is that there might be too much length in the armhole for you. There are a few different fixes for this – one could be to shorten the pattern above the bust. Another could be to change the slope of the shoulder. It kind of depends on what is causing the problem.
Thanks, yes on the Bistro I traced a size 0 for the bust/shoulders and a 2 for the waist and hip, I’m hoping when I sew it the fit will be perfect 🙂 I’m not in need of a dress like this but I bought the pattern as (I think) Liesl suggested it as a good pattern for a basic bodice (ie Building Block) to work from. I also bought the Butterick patterns she mentioned way back.
re photos I don’t have any current projects but I have some abandoned muslins with this problem. I switched to sewing pants, culottes and charity items until I psyche up to finally solving this.
Shortening the length above the bust sounds like a good idea but as I would only make tops or dresses with sleeves this sounds fraught with sleeve insertion challenges, eek.
Adding in my voice to the requests to understand a bit more about how you might be able to tell what kind of adjustment might be worth trying! Perhaps there could be example photos of what it looks like when it is wrong, with clear ‘symptoms’ that would help us diagnose the problem in our own makes? A series on that sort of identification would be really useful to many, I am sure.
I would love to do something like this. The trick is to find photos of different fit issues. Maybe I can start collecting them when I see them.
Brilliant! I was making things way too difficult for myself. Not having to alter the armscye is a game-changer, thank you!
I have a very wide back so always have needed to add a pleat into the back of shirts, so that I can move my arms forward. Is there a way to broaden the back of a shirt without changing the armscye ?
May we please have instructions about a forward shoulder adjustment?
This is simply brilliant. I have woefully narrow shoulders, and often struggle to choose a pattern size. I was taught to buy a pattern to fit the shoulders, but that leaves me making adjustments in many other places. I can’t wait to try this method, and I am so thankful that your shared it!