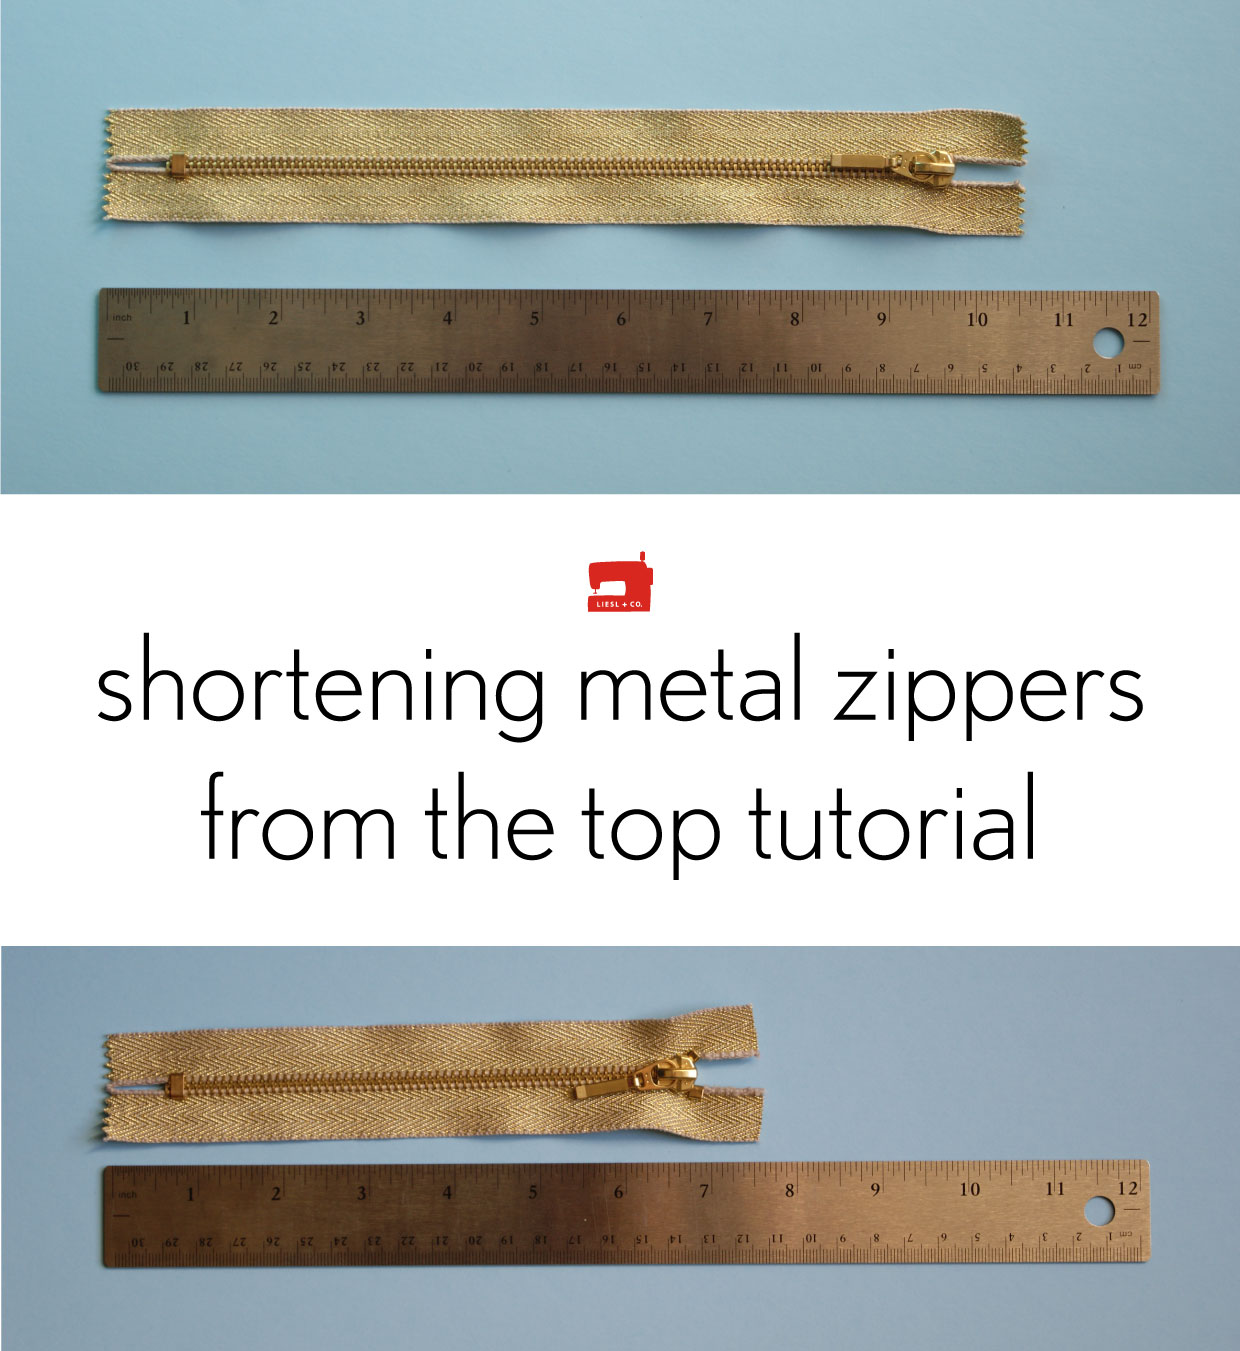
For when you can’t get a short enough metal zipper for a project that you’re working on, don’t despair. Here’s how you can shorten a zipper. You might find this handy for a project like the Exposed Zippers on Welt Pockets or maybe for a Zipper Fly.
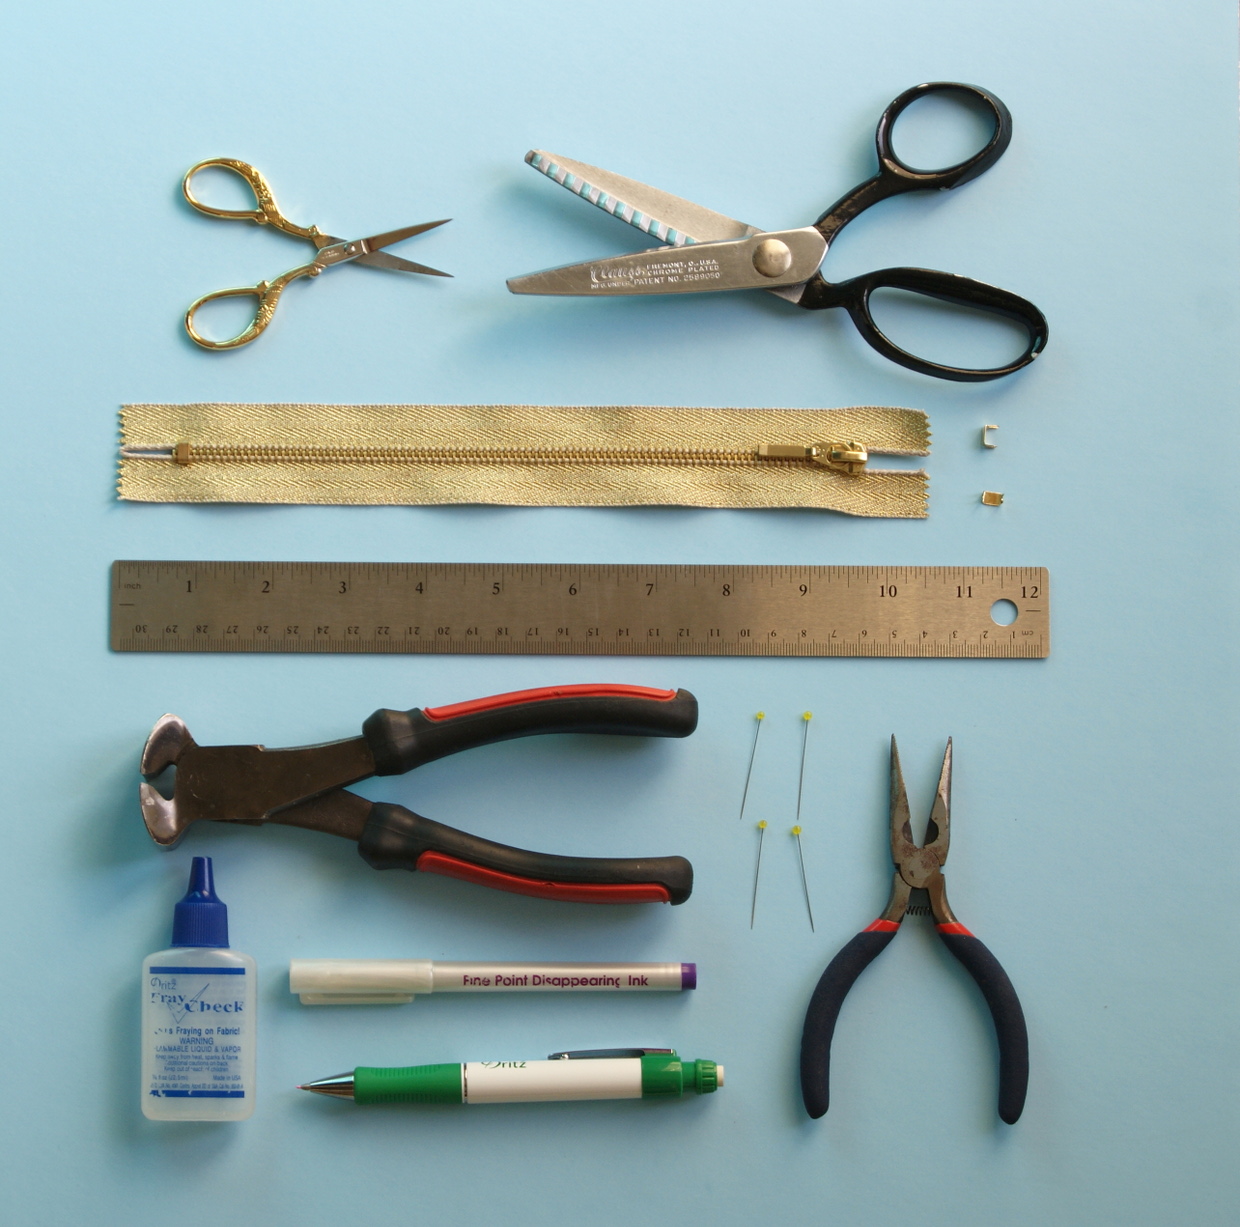
Here are the supplies that are needed to shorten a zipper: metal zipper, two top stops (from a clothing zipper repair kit), diagonal cutter pliers or wire cutter, long nose pliers, ruler, marking tool (like a disappearing ink marker or some pins), scissors or pinking shears, and liquid seam sealant (optional).
Now, let’s get started. Starting from the bottom stop, measure the desired length of the zipper, then mark it.
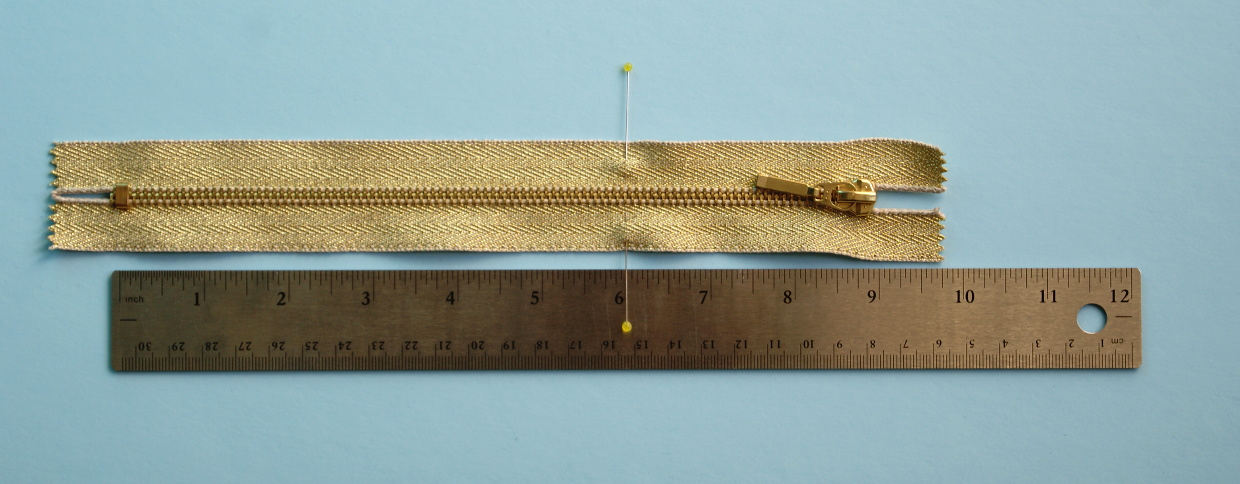
Measure one inch above that and mark it.

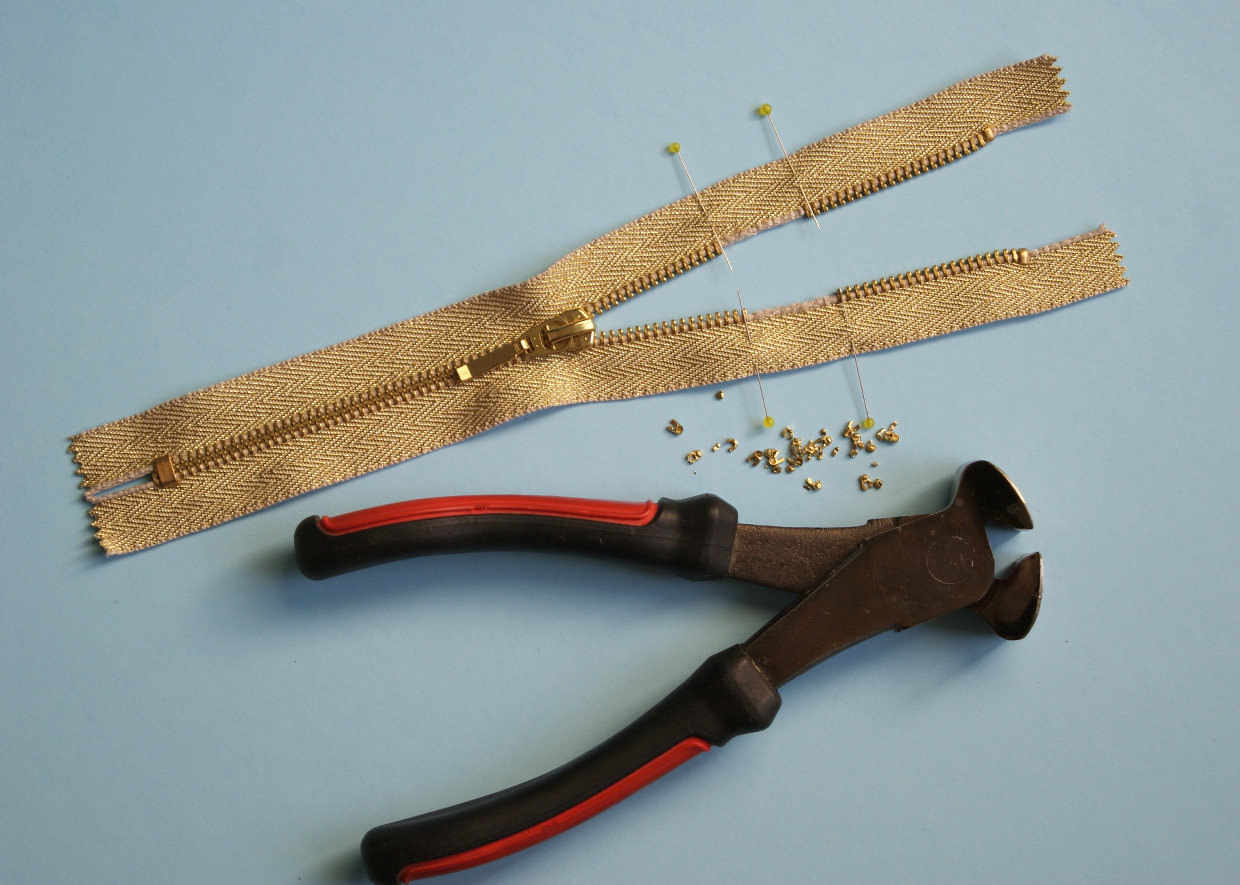
Remove the zipper teeth between those two marks by using a diagonal cutter pliers (or wire cutter) to cut and/or pull each tooth. Note that these metal zipper teeth can be difficult to cut.
Place a top stop above the highest zipper tooth. Using the long nose pliers, pinch the top stop together so that it is secure. Repeat this for the other side of the zipper.
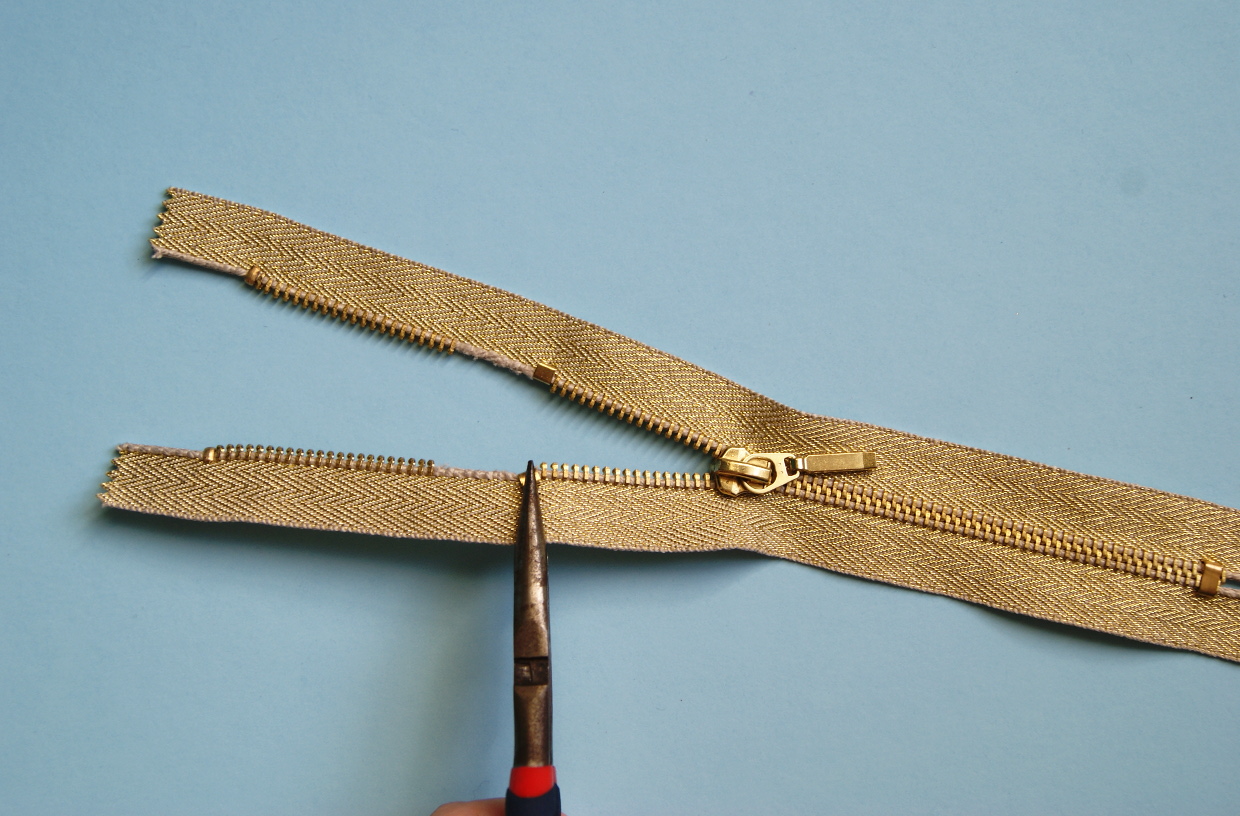
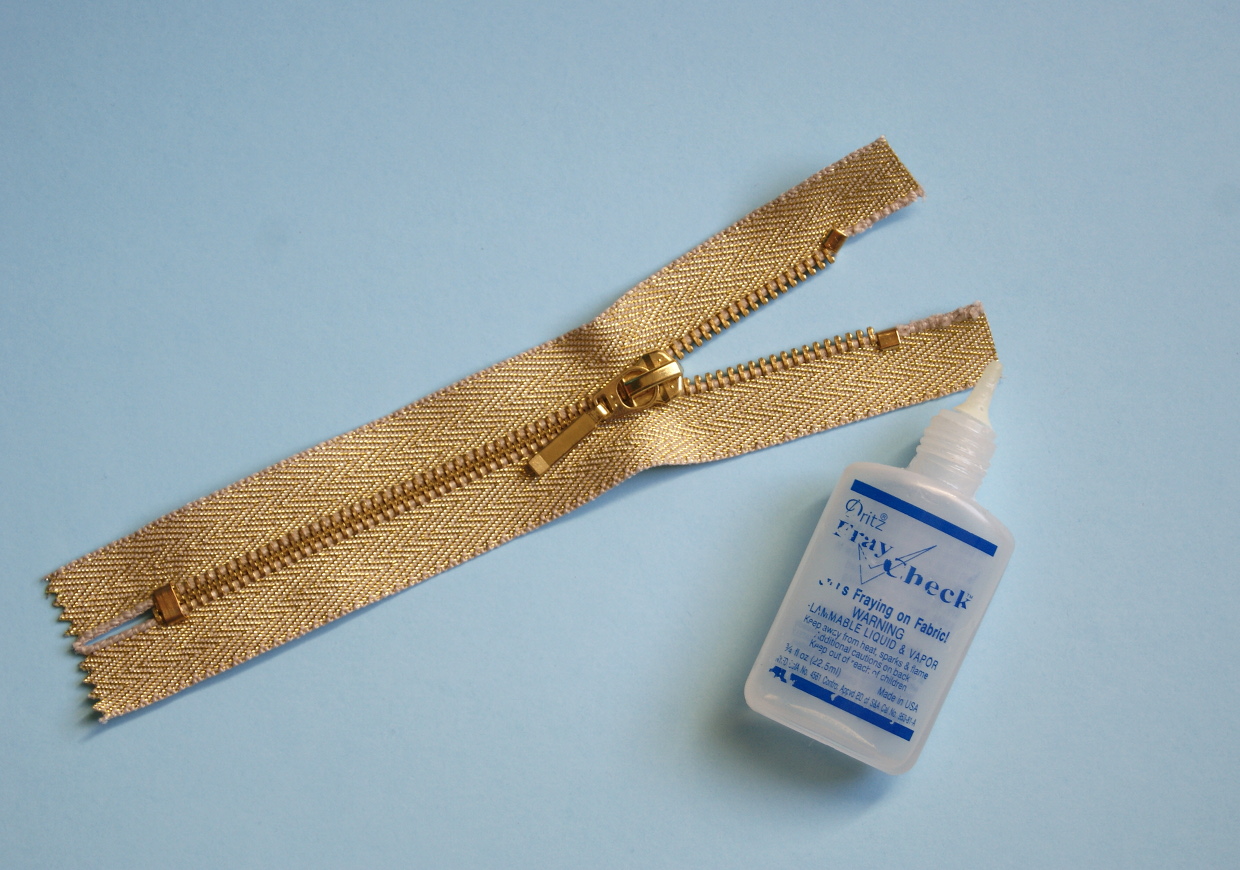
With a scissors, cut off the excess zipper tape at the second mark that you made.

Apply a small amount of liquid seam sealant to the cut edges. This will prevent the fabric from fraying. Or, with a pinking shears, cut off the excess zipper tape and then no liquid seam sealant is needed.
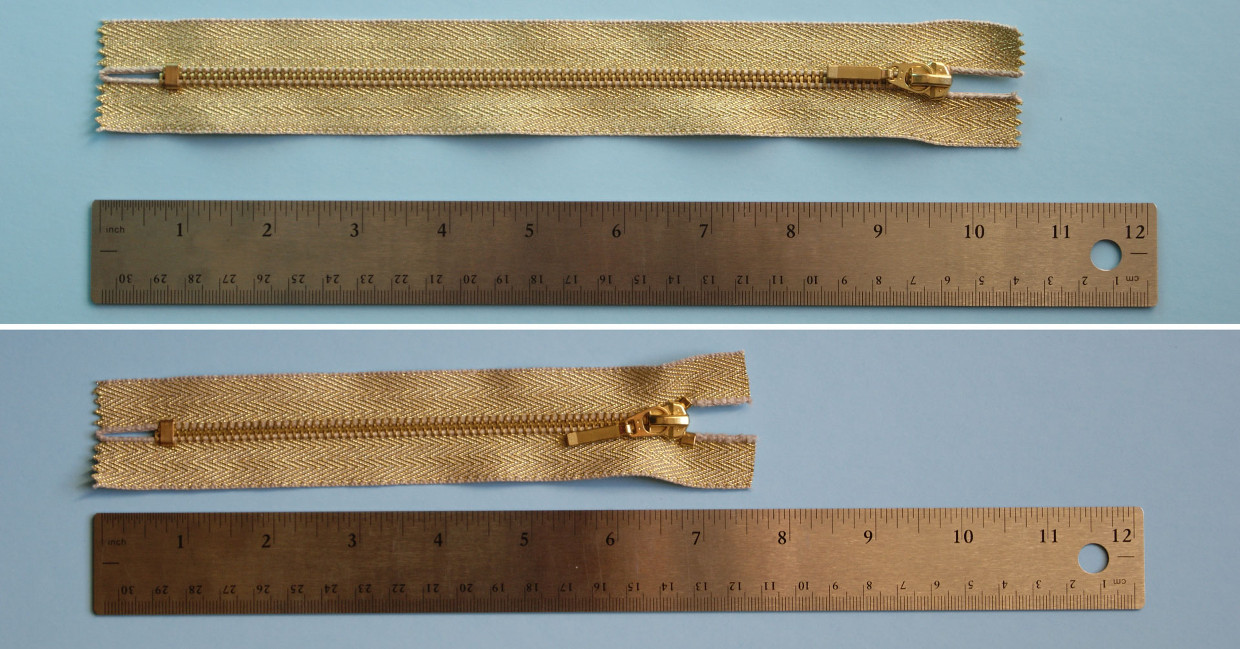
Voilà! Now you can use your new shortened metal zipper.
No Comments yet.