Shelley, our regular contributor from Down Under, is back on the blog today to show us her color blocked dress sewn using the Gelato Blouse and Dress pattern. Here she is with her photo-illustrated tutorial on how to color block this (or any) pattern.
I always love to read Liesl’s Weekend Links posts here on the Oliver + S blog. Most of the time I just dream about being able to bake that pie, or decorate my mantle like that for the holiday. But when Liesl inspires me with a dress I really (really) like, I don’t just dream about it. I make it!
Do you remember the color blocked dress Liesl showed us back at the start of summer?
I fell hard for that dress, and I could see, with the Gelato pattern, how easy it would be.
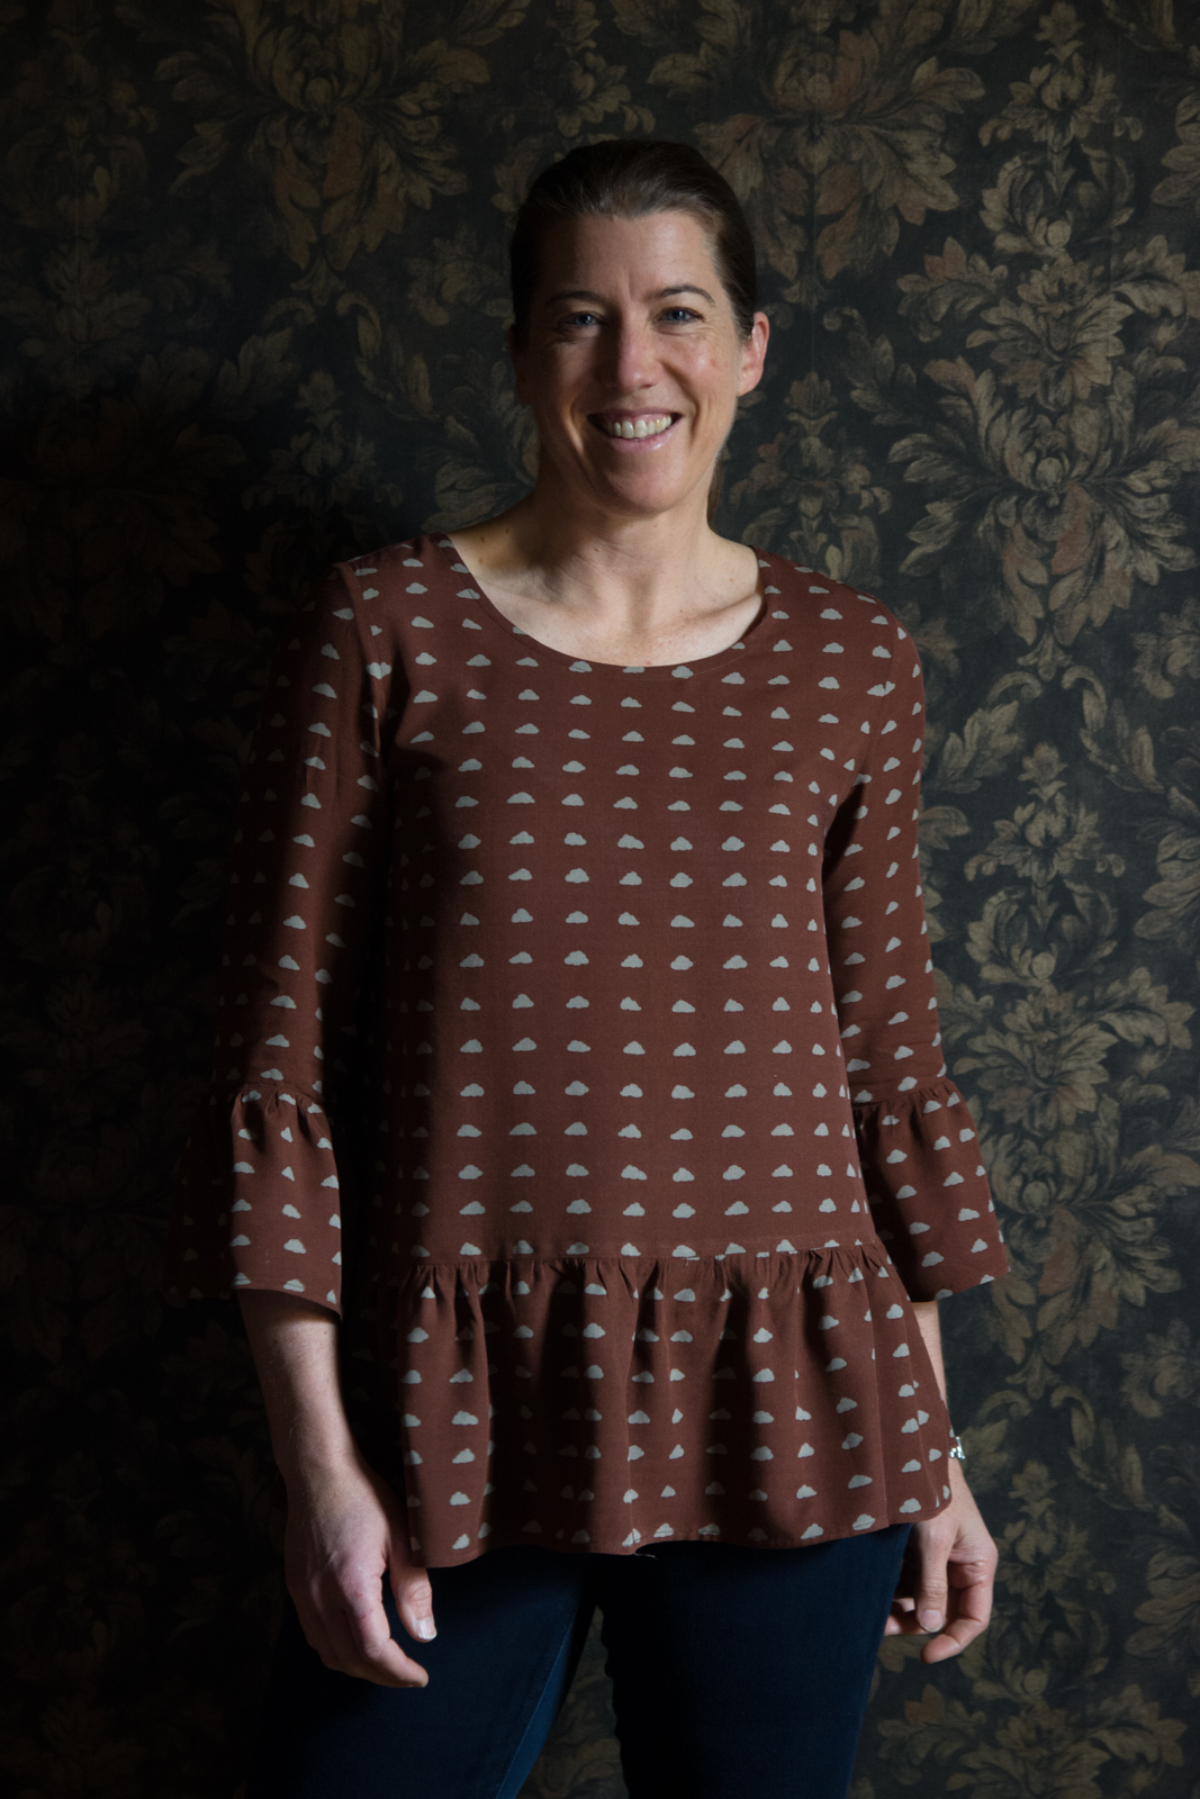
First up, I made the Gelato blouse to check the fit. I wasn’t sure that the top with its ruffles would be my style, but I have found I love wearing this top. Made up in a drapey rayon, it feels fantastic and isn’t the frilly top I’d feared. I fell between sizes but went down to the lower size as I wanted it fitted through the shoulders and bust to make up for the looseness below.
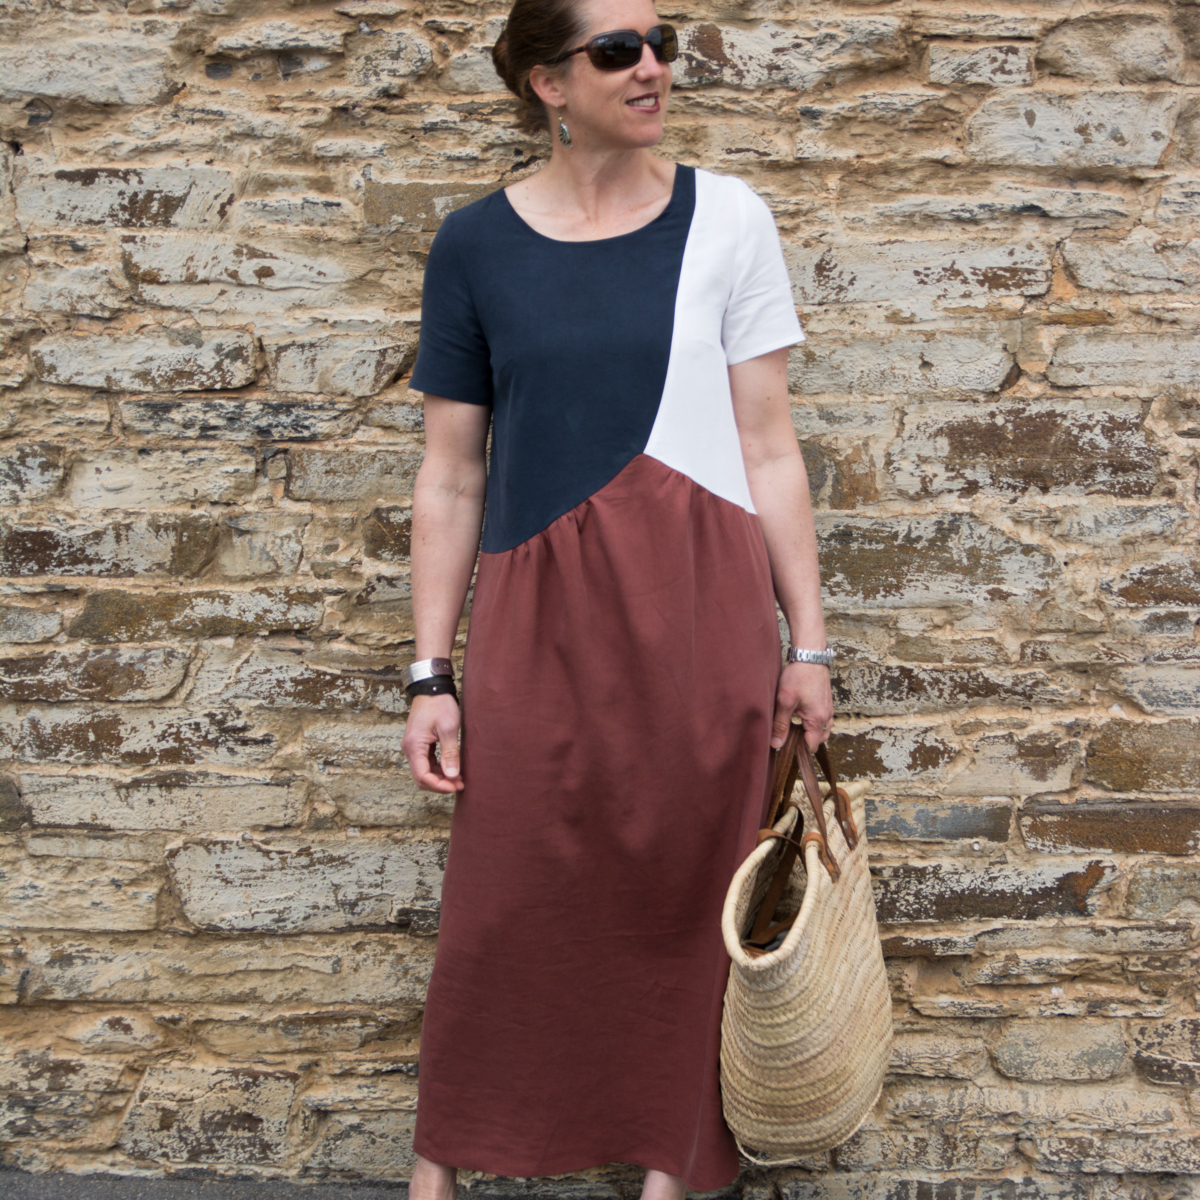
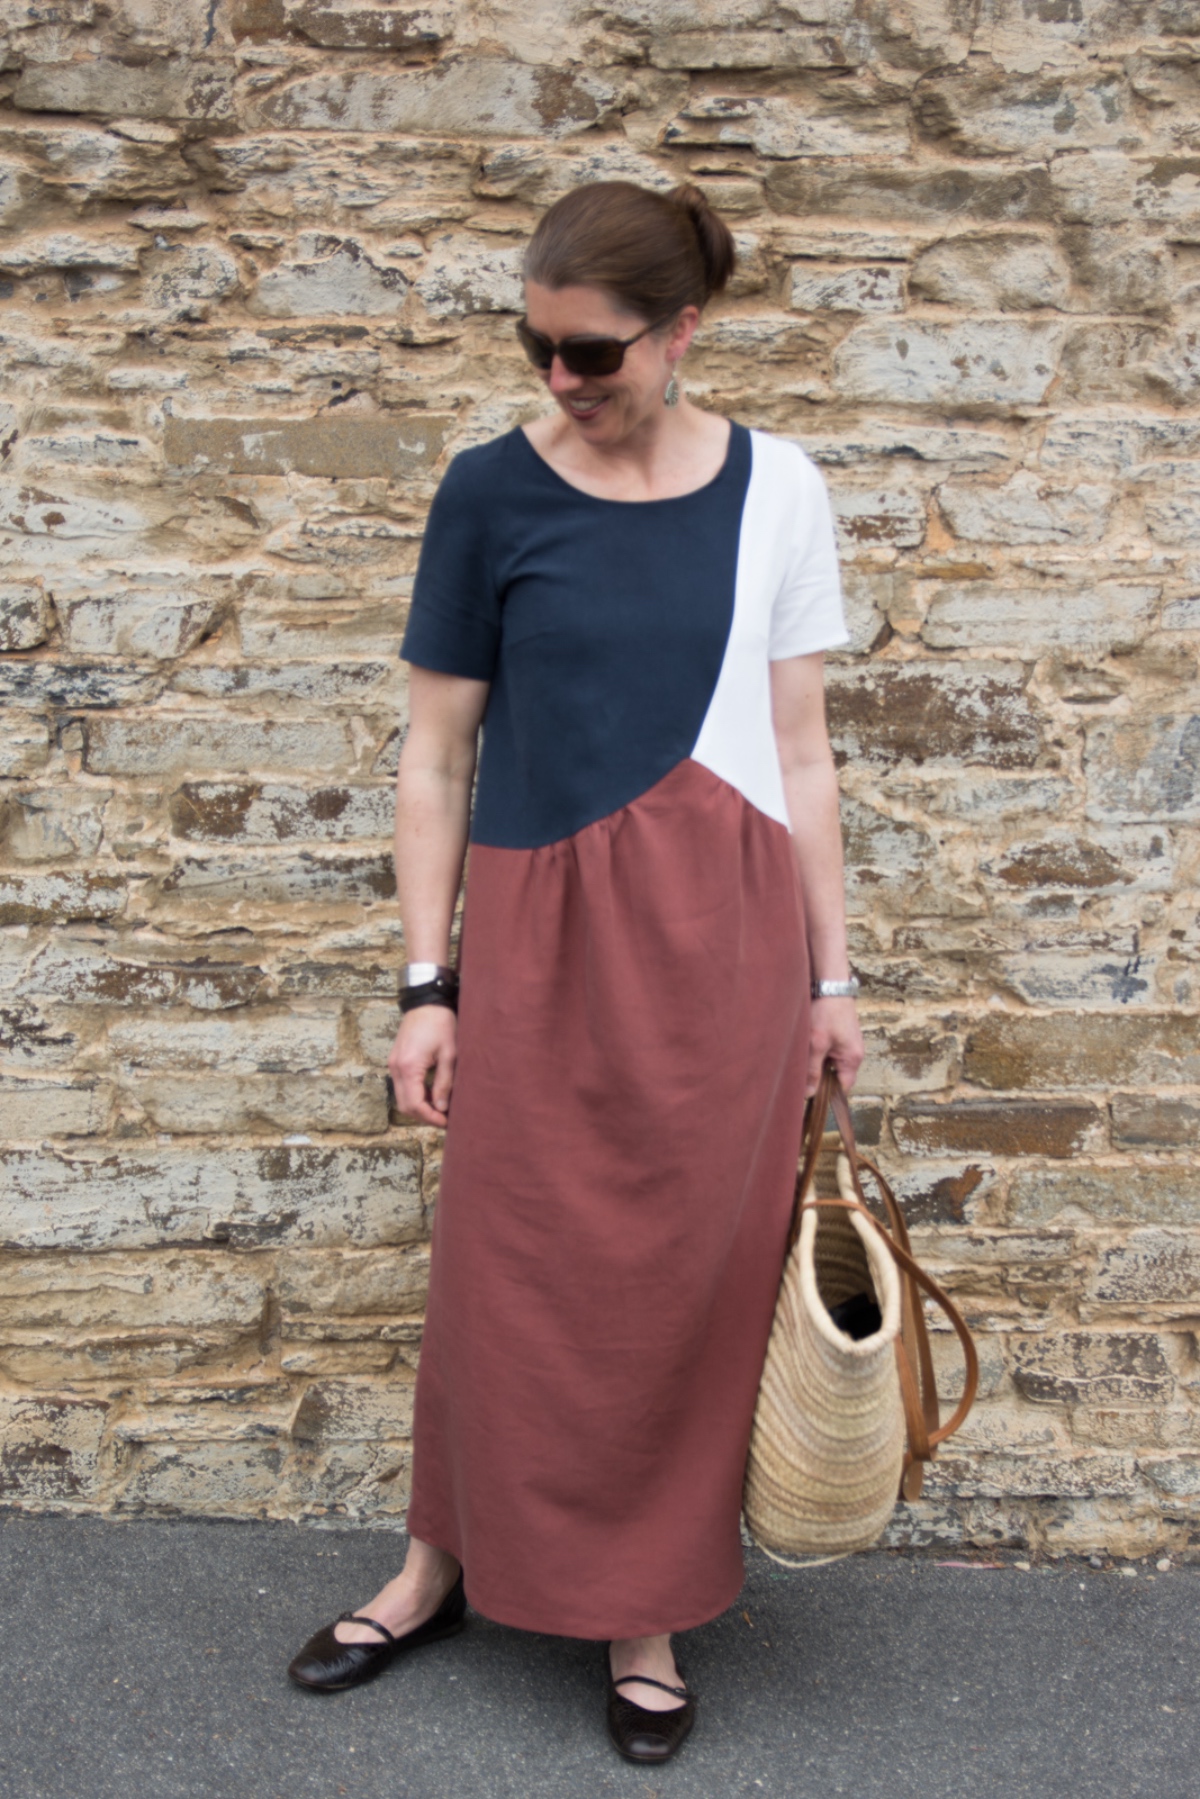
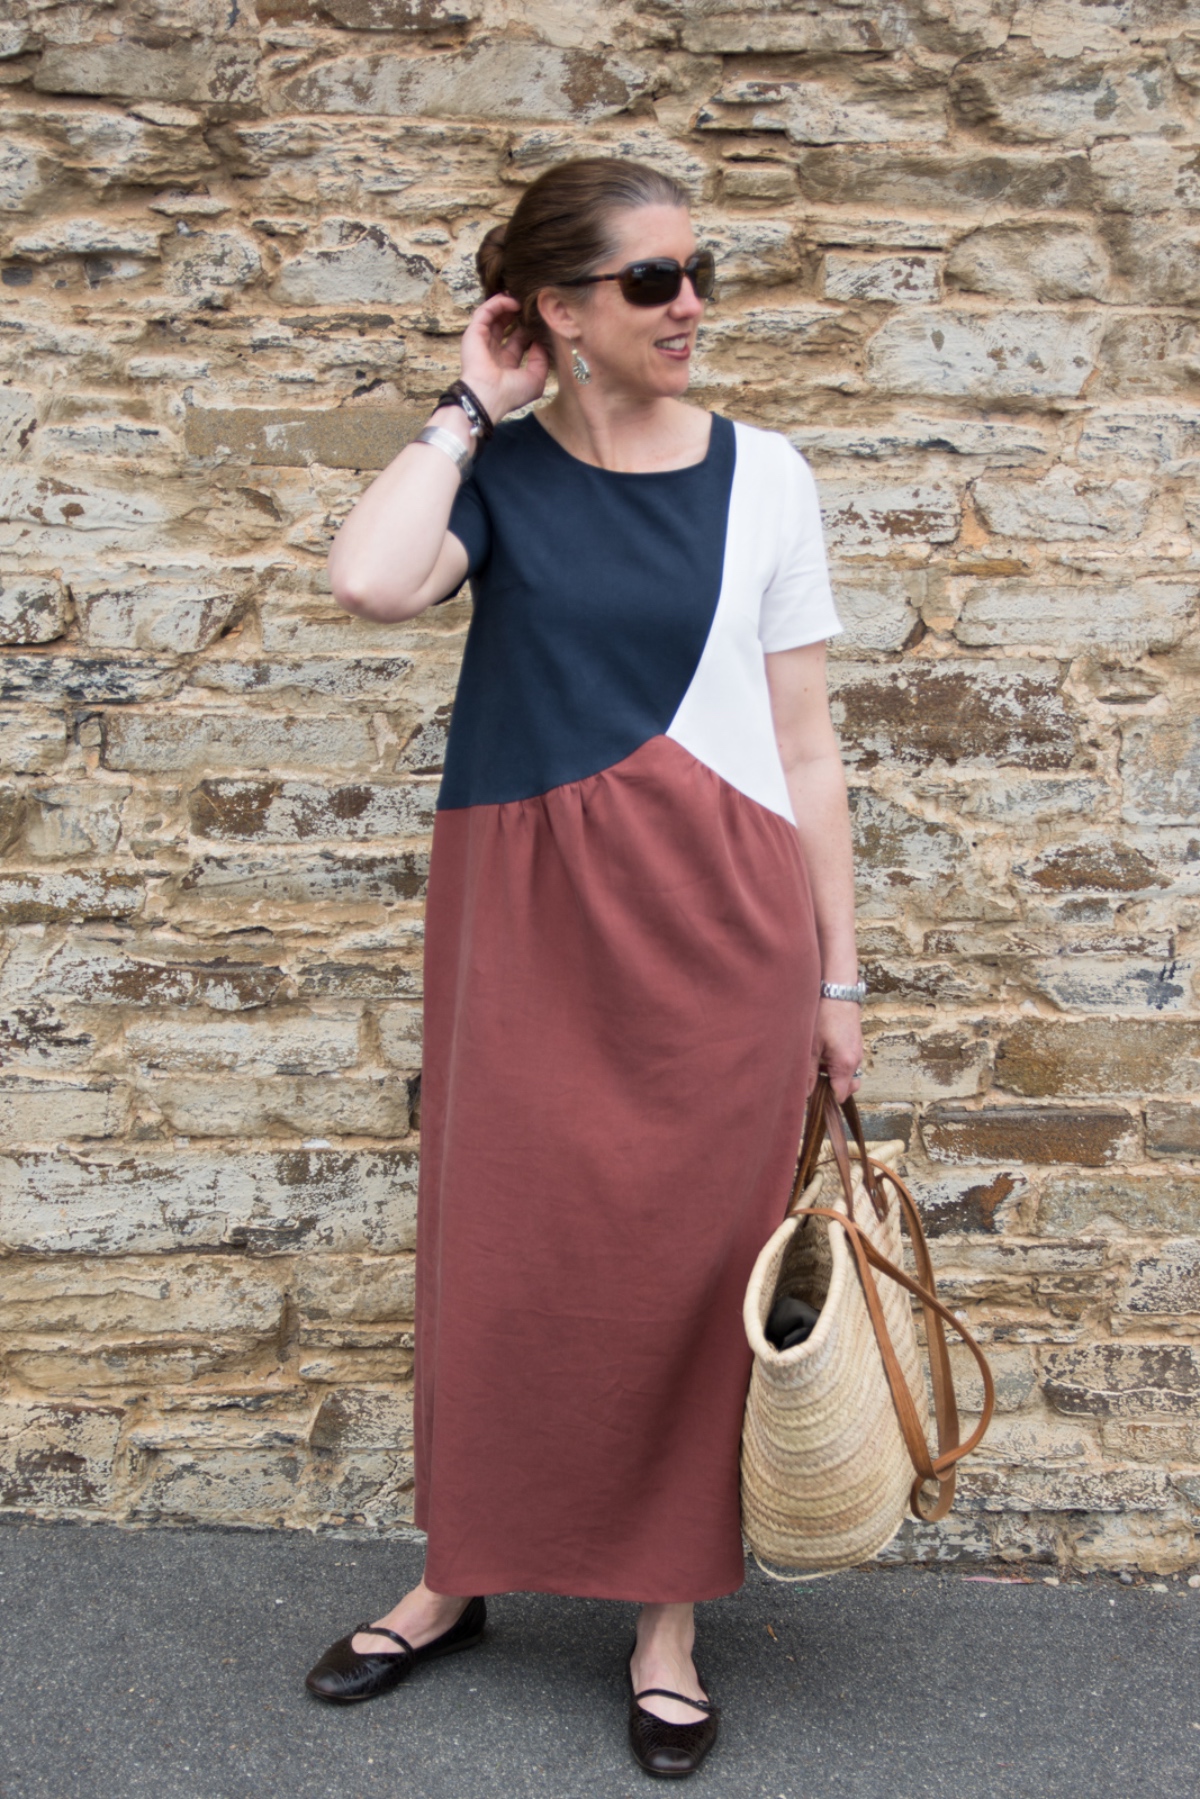
For the dress, I found a fabric that was new to me: Tencel linen. What a find! It combines everything that’s great about linen without the wrinkles and stiffness. Plus, you get all the lovely drape and slight suede hand of the Tencel without that ’80s fluid jeans look! My fabric shop had the white and the gorgeous rust brown colors in stock, and once I showed them my inspiration picture they hunted down the steel blue just for me!
So how did the Gelato Dress pattern become this dress?
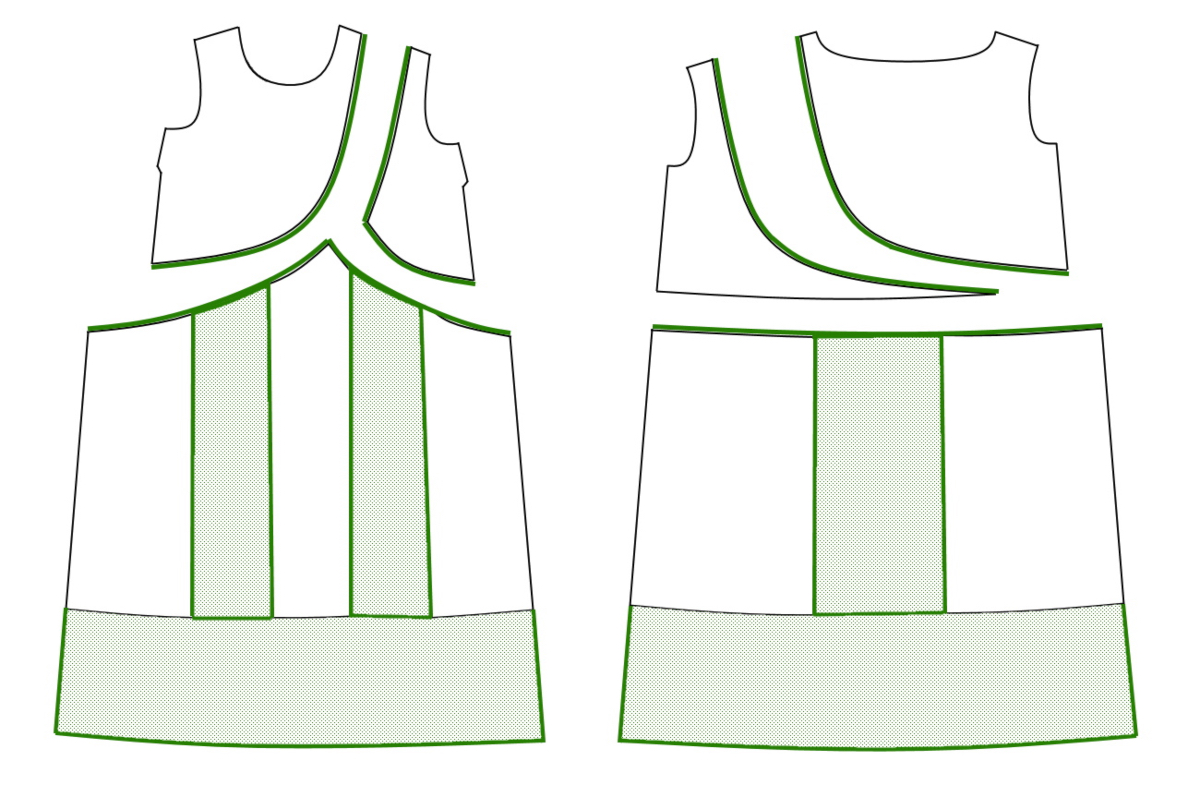
It’s all down to some very simple pattern manipulation in the style of the Building Block Dress Book.
I started by tracing off my front and back pattern pieces so that they were flat, rather than cut on the fold. This was easy to do with the back pattern piece too, as it has a clearly marked center back line.

I used the cutting line for the blouse pattern to be the dropped waist for my skirt at the back. Using the same reference line on the front pattern piece, I drew the pattern cutting lines to give me an off-center, above-the-waist apex where the three fabrics would meet.

Then I could simply chop my pattern into pieces. I needed to slow down and have a good think at this point in order to make sure that I would know which piece was the left and which the right and front versus back.… I labelled all the pattern pieces so that I could cut them from a single layer of fabric right side up.
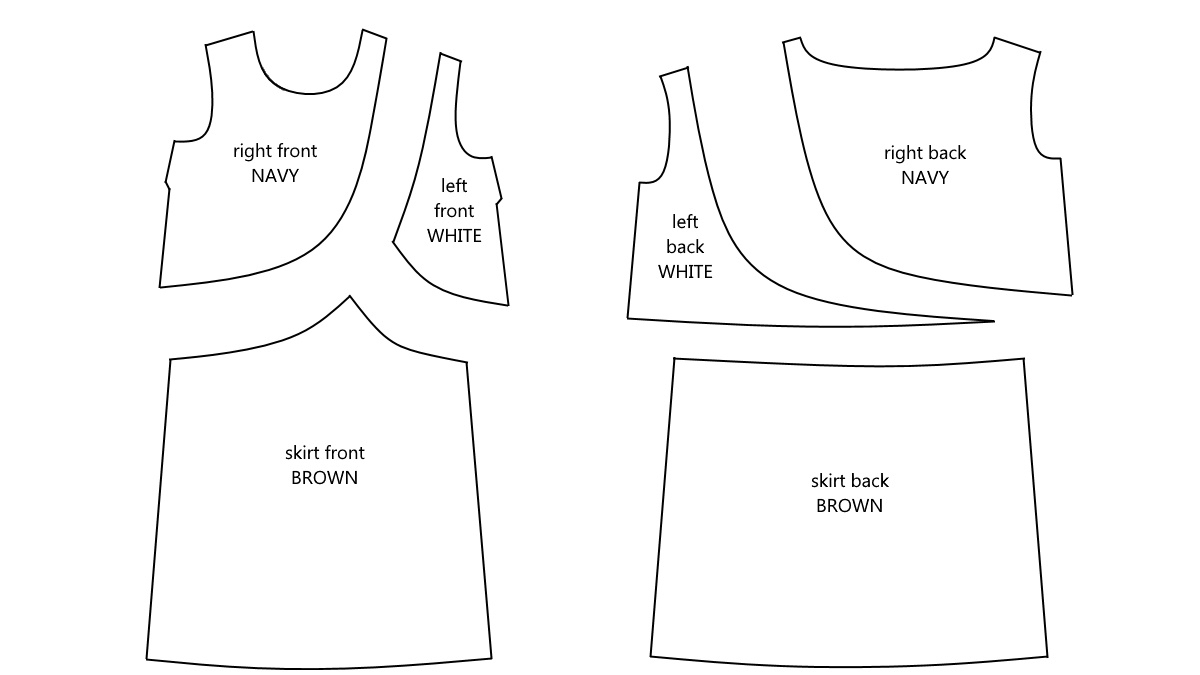
When I went to cut the fabric, I needed to add my ½” seam allowance along all the edges where my pattern had been separated. I also used the full width of my fabric and gave my skirt pieces some gathering, and I added lots of length at the hem just by continuing the skirt’s side lines to be ankle length.
The inspiration dress has a much fuller skirt than my dress, but with the A-line shape of the top part of the Gelato Dress I was already getting lots of volume and didn’t think I’d need much more. Plus, I’d only bought myself one skirt length of the rust brown fabric.
To construct the dress, I simply needed to sew the bodice pieces together, and then follow the pattern’s instructions.
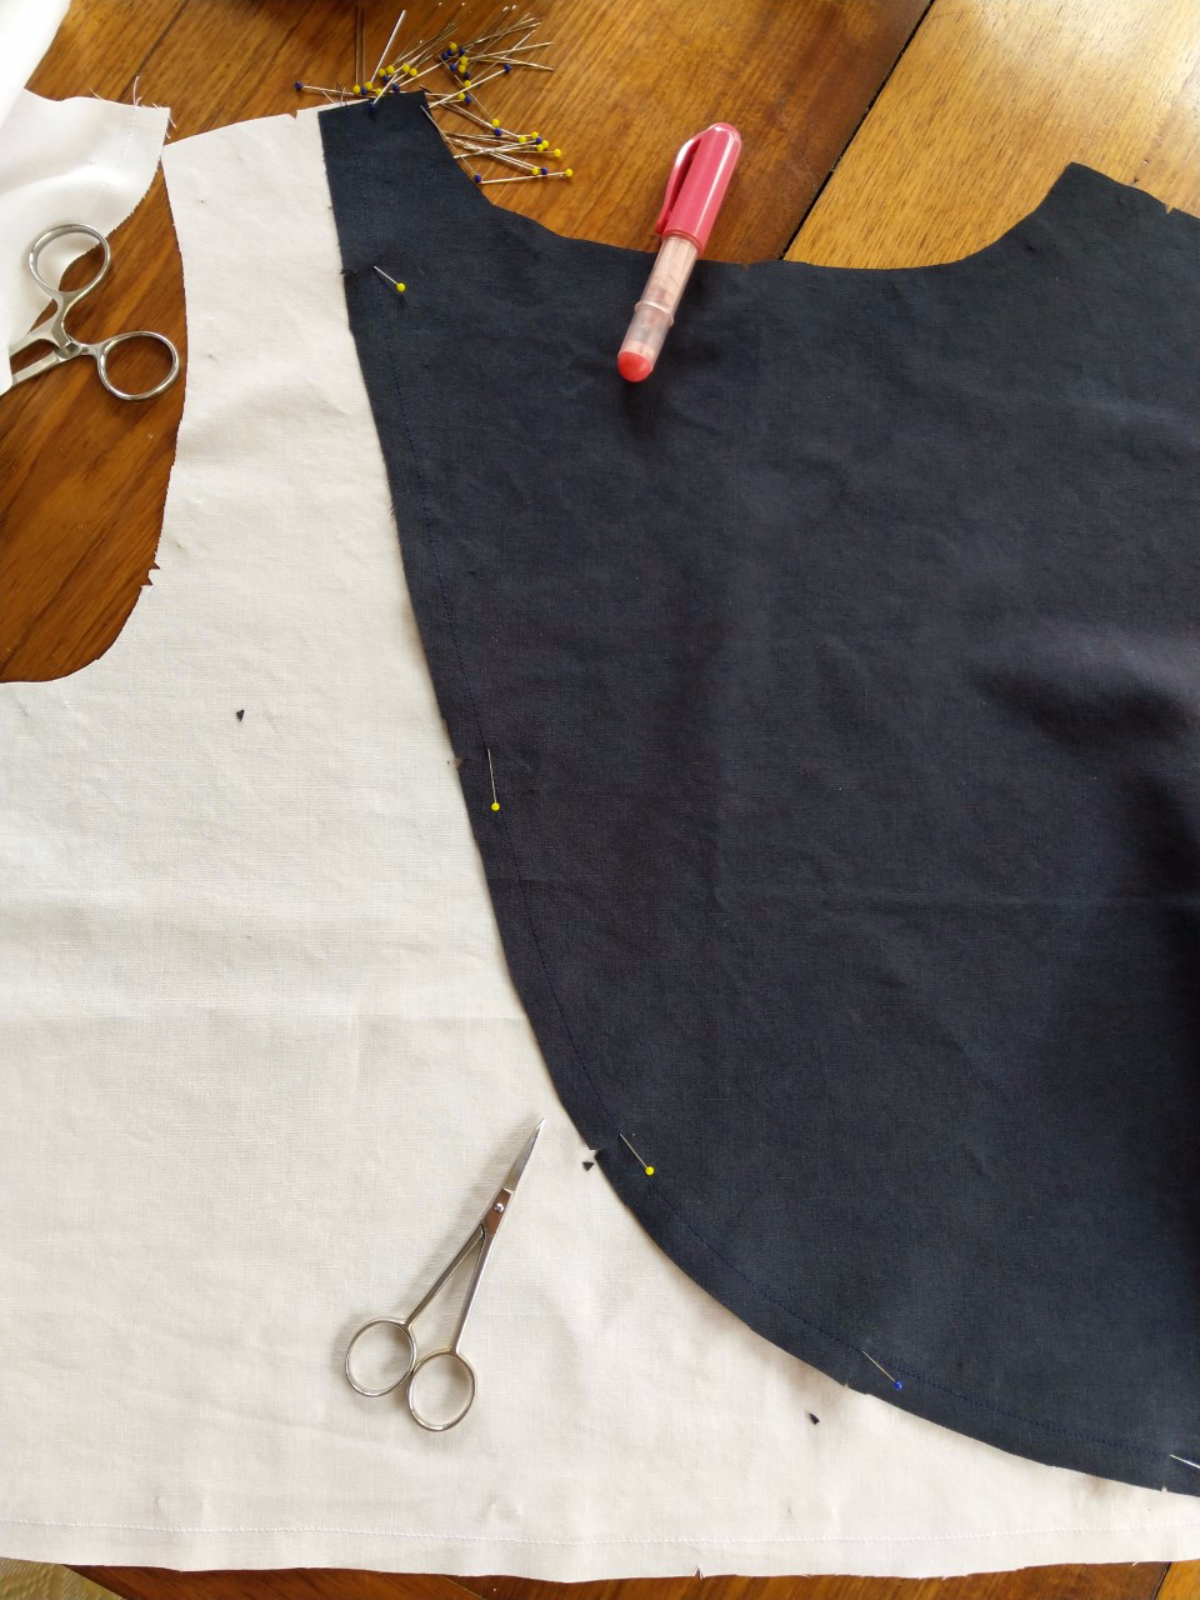
To help sew the curves of the bodice pieces, I stay-stitched just inside the ½” seam allowance. Then, by laying the pattern pieces flat with the stitching of the left and right sides overlapping, I could cut myself some notches in the seam allowances. That way, once I turned the fabrics right sides together, the opposing curves would have some points where I knew they needed to line up.
Once the bodice was constructed, I sewed the skirt’s sides seams and then gathered it to fit the bodice. I kept the front gathering away from the center section to try and avoid giving the skirt a ballooning look over my belly!
Liesl’s inspiration post was back at the start of the northern hemisphere summer. I’ve just finished my dress before the Australian summer kicks off, and I think it’s going to get lots of wear.

Thanks for that tutorial, Shelley! And how do you feel about color blocking? Are there any patterns you’d like to try the technique on?
What a lovely dress. Thank you so much for the tutorial. It’s cold here in Seattle, but with a warm weather vacation coming up, I’m tempted to make myself a similar dress. Enjoy your summer!
Thanks Lisa, you know what I thought would be lovely for winter: a rush hour dress blocked with a Prince of Wales type plaid of different scale. Of course now I need to track down two or three complimentary grey plaids…. 🙂
Wow I LOVE this!!! Thank you for sharing!
Thanks Kari. I love it when Liesl pins beautiful ideas and I can nibble at the style crumbs she leaves behind! 🙂
Great dress! I love seeing your inspiration and your vision of that first dress. That’s a fantastic recreation! I use colour blocking in order to use up my scrap fabric so I would love to use this approach for the Gelato Dress but also the Breezy Blouse, the Everyday Skirt and perhaps the Cinema Dress. Love the tutorial, thanks!
Absolutely! And if you happen to have kids you can use the even littler scraps and apply the same technique to some Oliver+ S patterns.
Shelley, you are some sort of genius! What a fantastic tutorial. Love the original inspiration photo, and your version is a beautiful recreation. Love the tip to add notches with the curved pattern pieces lined up . . . so helpful! I recently purchased this pattern but haven’t sewn it up yet (you know my patterns like to live in my stash for awhile:), but this is inspiration to get at it sooner than later! Thanks for sharing this:)
Fantastic. What an eye!