Hello and welcome! We hope you’re inspired and ready to start sewing your Liesl + Co. Afternoon Tea Blouse. We’re glad you’re joining us for the sew-along. If you aren’t ready to get started yet, rest assured the sew-along will still be here for you when you’re ready to get going!
Afternoon Tea Blouse Pattern Details
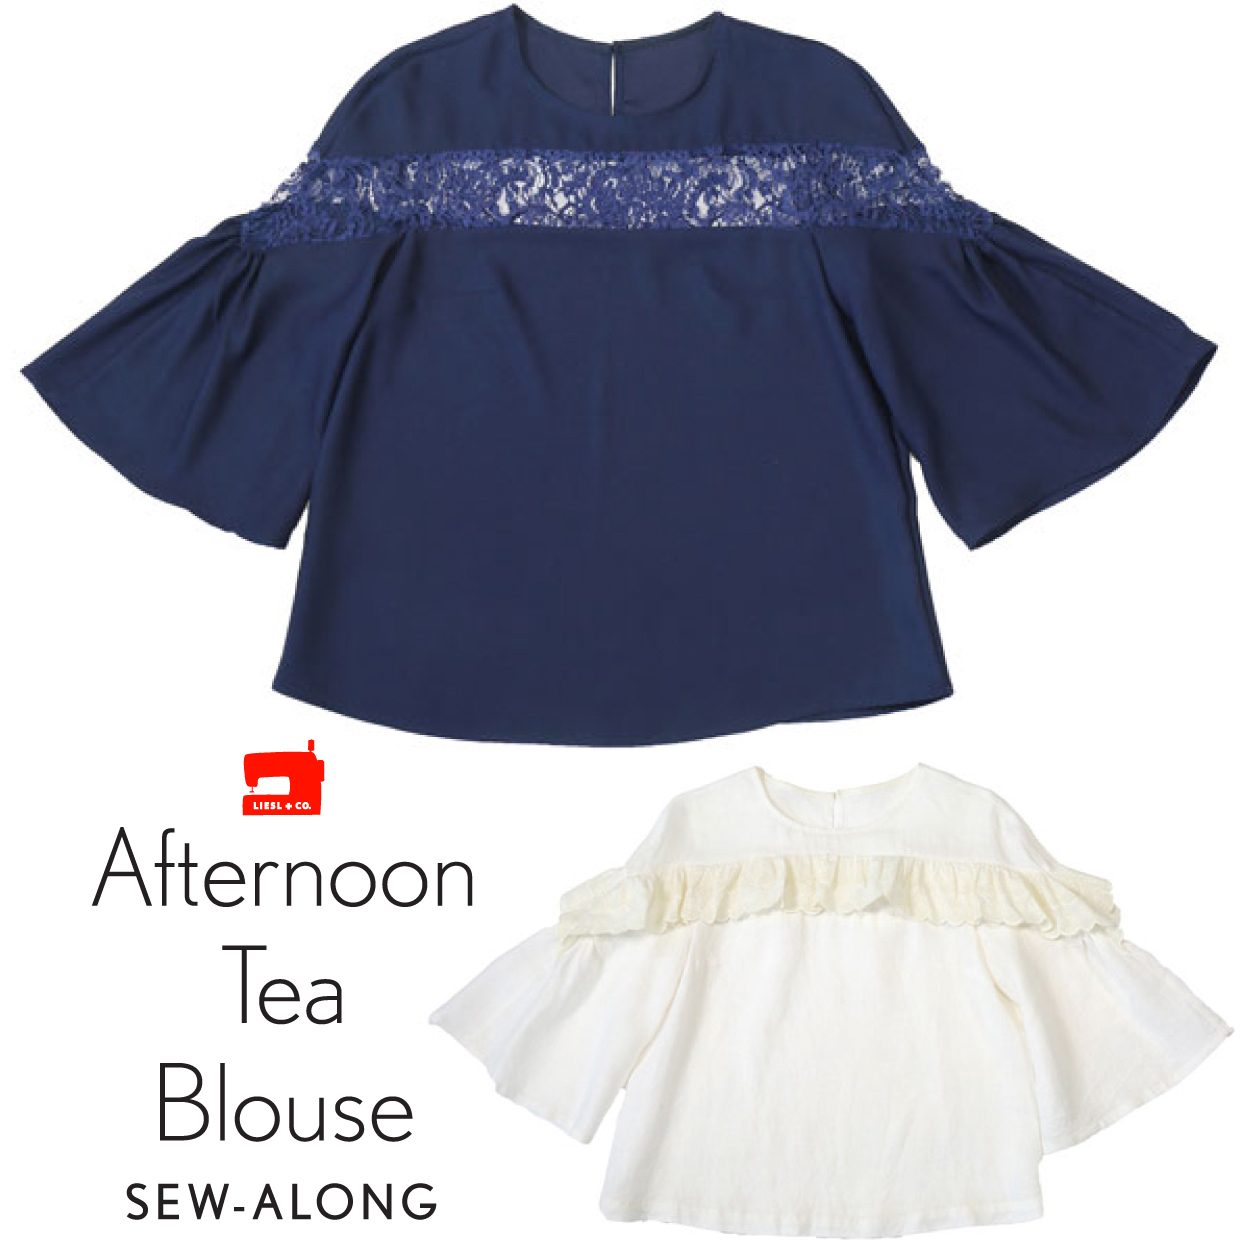
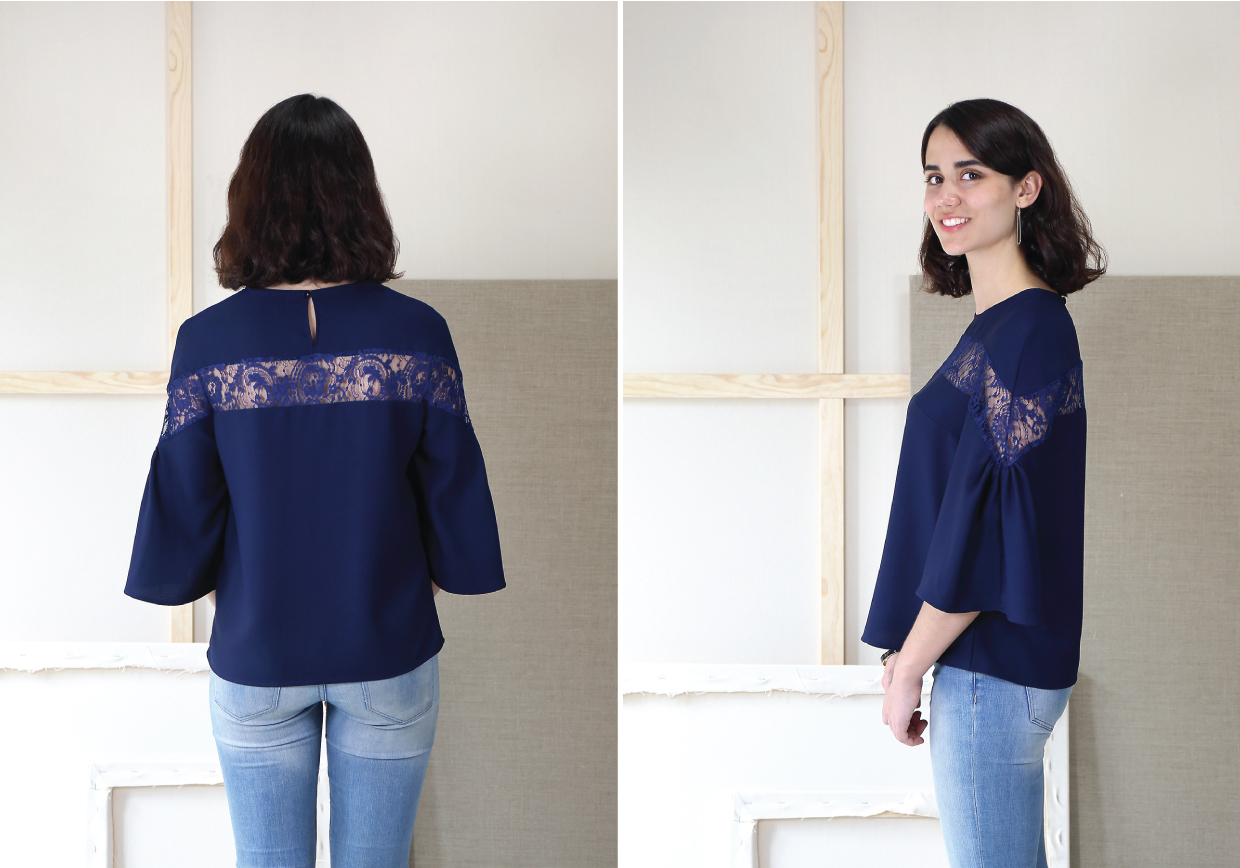
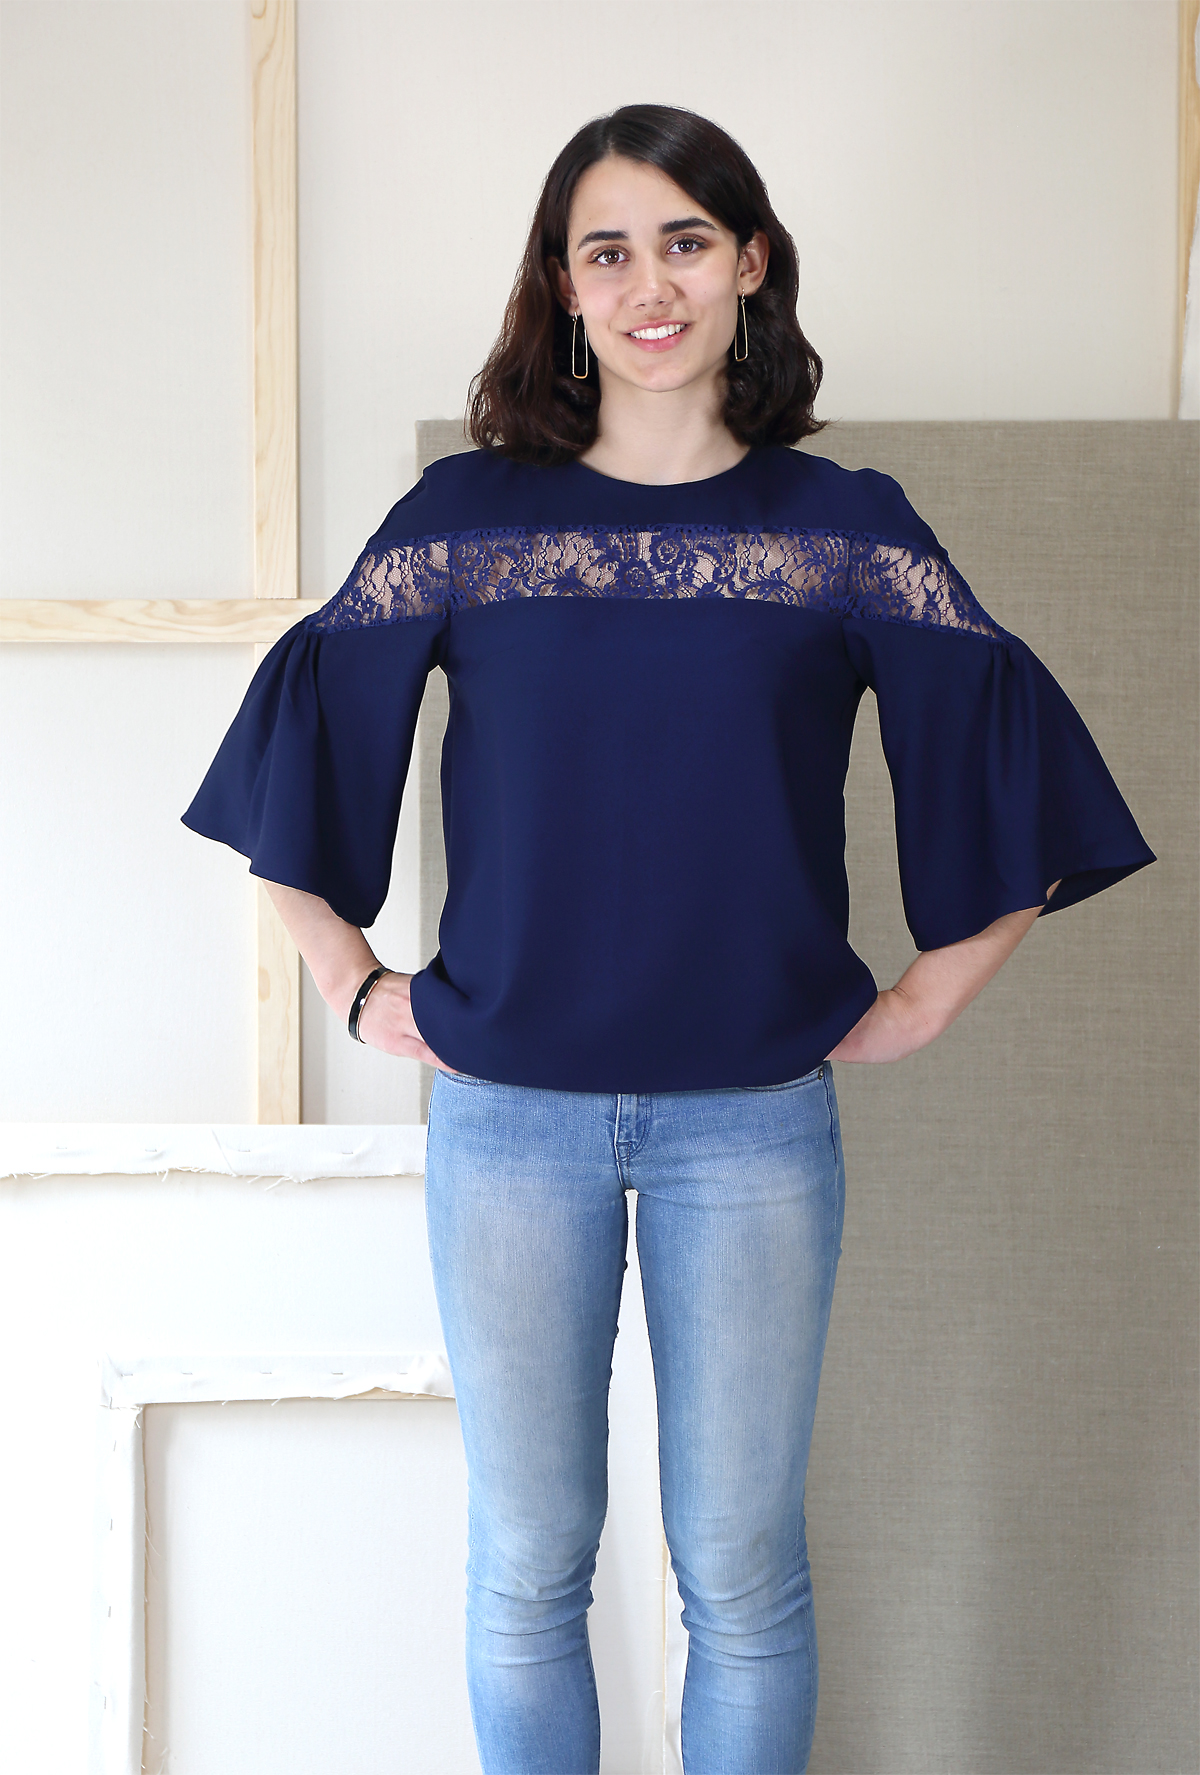
Description: Perfect for an afternoon out with friends or a day at the office, this semifitted blouse features a fun chest detail that makes it extra special. Sew the blouse with contrasting fabrics for a color-blocked detail or choose lace or a sheer fabric for the inset stripe. This contemporary take on a vintage blouse eliminates the shoulder seam so the sleeves are easy and fun to sew. The inset panel forms a pretty chevron over the bracelet-length flounce sleeves, and the back features an easy keyhole opening with a button-and-loop closure. This pattern includes separate pieces for A/B, C, and D cups for ease of fitting.
Sewing Level: Advanced beginner: this pattern is suitable for someone who has sewn from a pattern before or has taken a few classes and completed several projects.
Suggested Fabrics: Suitable for drapey fabrics like crepe, rayon challis, charmeuse, georgette, lawn, and linen. For Fabric B, use a contrasting color, lace, or chiffon.
Notions: Coordinating thread, one 3/8″ or 1/2″ button or hook and eye closure for the back.
Get the Pattern: It’s available in both paper and digital formats.
Sew-Along Schedule
We’ve broken down the planning and sewing process into several easy steps. Here’s how we’ll be working through the process of creating your new blouse together.
| Preparation Steps | Sewing Steps | ||
 |
1. Gather Your Materials Choosing fabric, gathering notions, deciding on customizations, and purchasing your pattern. |
 |
1. Prepare the Front and Back We begin by assembling the front and back of the blouse. |
 |
2. Select Your Size Deciding on the size you will sew. |
 |
2. Prepare the Sleeves We assemble the sleeves. |
 |
3. Pattern Adjustments Deciding if there are any adjustments you need to make to the pattern. |
 |
3. Attach Sleeves and Yokes We attach the sleeves and sew the yokes. |
 |
4. Cutting Fabric Some hints and tips to keep in mind when cutting out your fabric. |
 |
4. Assemble the Blouse and Finish the Neckline We put the blouse together and finish the neckline. |
 |
5. Hem the Blouse and Sleeves The final steps to finish sewing your new blouse. |
||
Gather Your Materials
Choosing Your Fabric
Since this pattern calls for two different fabrics, you have lots of options. You can color-block it like Elisabeth (@sewscrummy) did, or you can choose something special like lace, mesh, or chiffon/organza for the contrast.
For your main fabric, we recommend fabric with a little bit of drape for this pattern. The envelope calls for crepe, rayon challis, charmeuse, georgette, lawn, and linen. The photo on the cover of the envelope used crepe, which has lovely drape, and I’ve really liked my handkerchief linen versions which have a little more body but are still relatively relaxed. Lawn will be a little less drapey and more floaty, if that makes any sense to you.
But of course the fabric suggestions are just that–suggestions to help you get a sense for what type of fabric would be appropriate. We can’t possibly list every valid option, so use what is listed as your starting point. Basically, see what attracts you when you’re shopping (in the store or in your own stash) and look for fabrics that have a bit of drape. A lightweight sateen would be lovely, as would a twill or herringbone shirting as long as it’s not too stiff.
I’m curious what this pattern would look like in a knit, if anyone wants to try it. I’d suggest using a lightweight woven fabric for the neck facing, and you might want to size down a bit but otherwise I think it might work.
For your contrast fabric, choose something with a similar or lighter weight and drape to your main fabric. I’ve been looking for power mesh, which I think would be fun try try here. Organza and chiffon would also be great, and of course all sorts of lace would be wonderful. You can buy lace in narrow widths, as well, so keep that in mind. Since the pieces are quite narrow you might be able to use a lace trim instead of lace yardage.
Choosing Your Notions
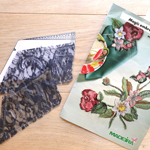
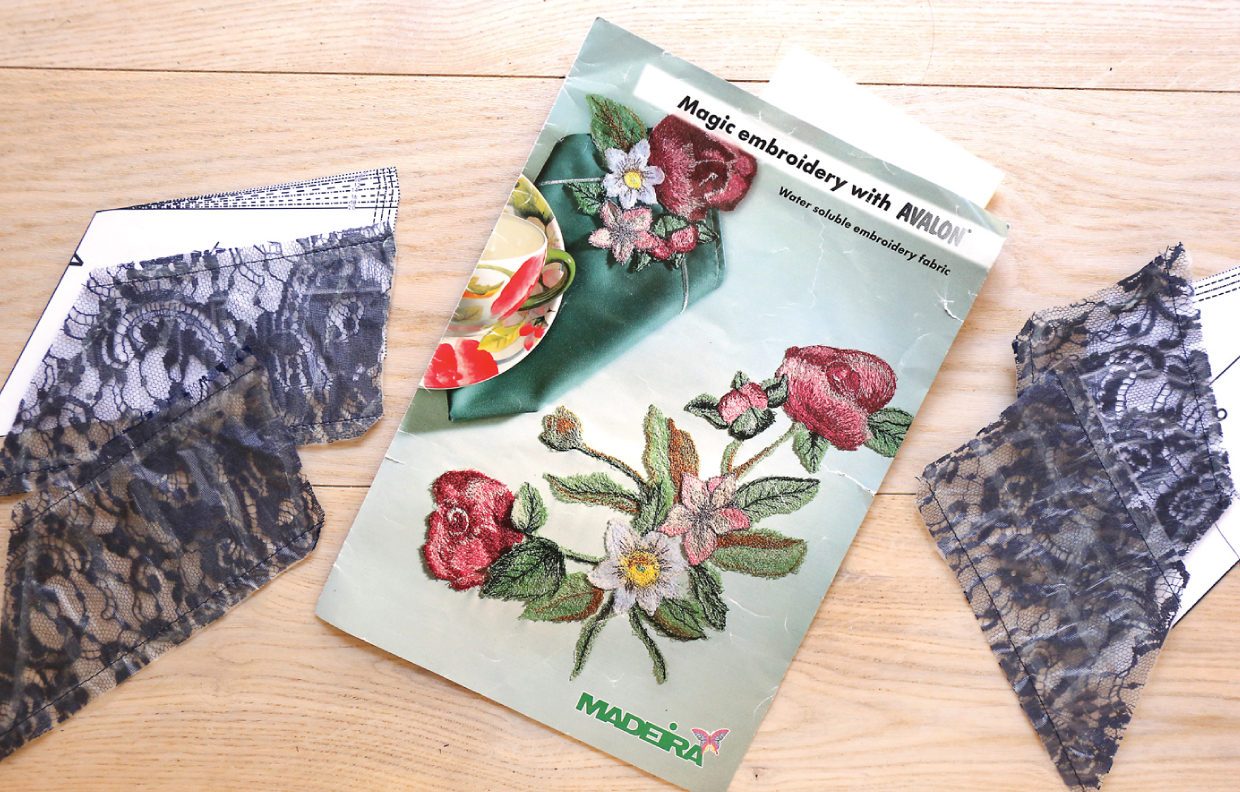
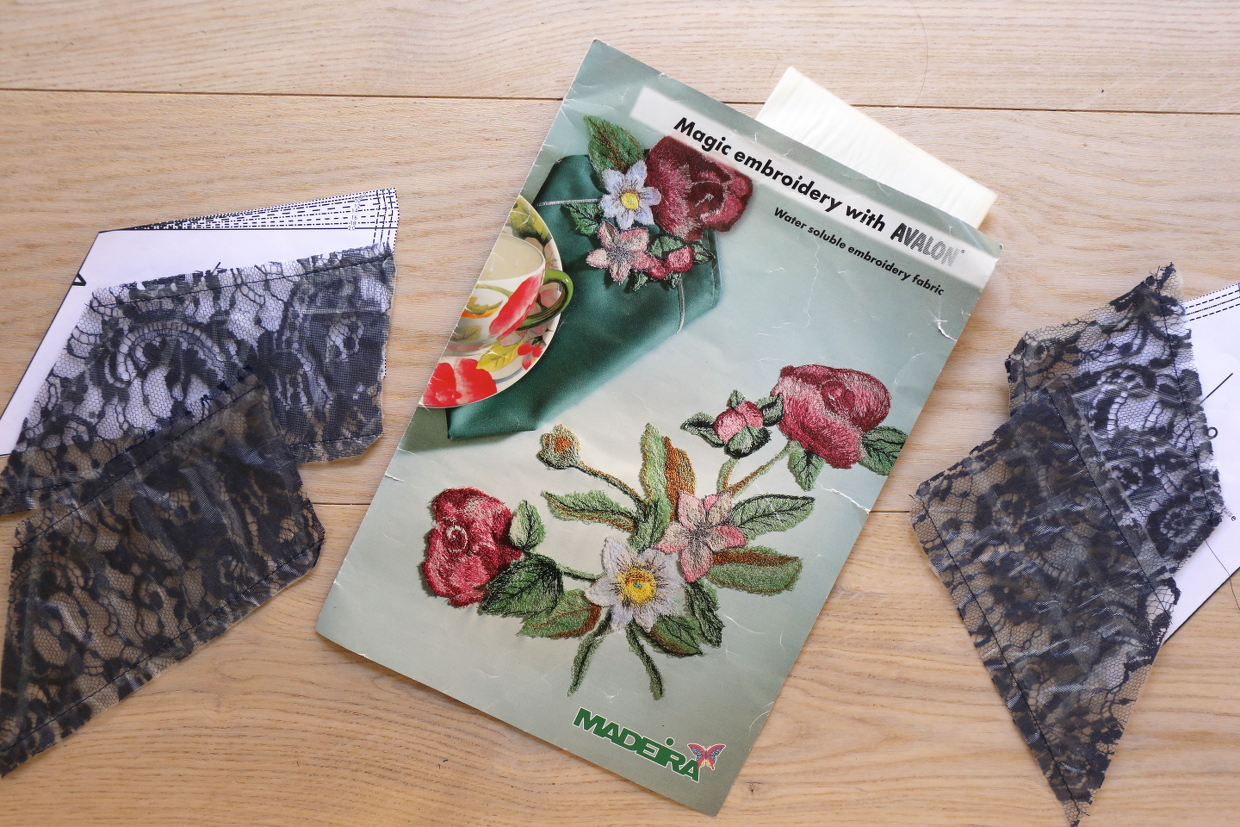
If you’re using lace it might be a good idea to choose a stabilizer to help with sewing it. Stabilizer will hold the fabric stable (thus the name) and give you a more solid surface to sew with. When you’re done, you simply remove the stabilizer, leaving your chosen fabric behind. I much prefer to use a wash-away stabilizer so I don’t need to tear it away afterwards, but you can use whatever you’re comfortable with. (In my experience it can be difficult to remove tear-away stabilizer, so test it beforehand if you choose to use it.)
Here’s what else you’ll need to assemble:
- Thread, of course. All-purpose thread works great for most fabrics, but choose your thread according to your fabric.
- Any special sewing needle, depending on your fabric choices.
- A coordinating 3/8″ or 1/2″ button or a hook and eye closure. Lately when I shop I’ve been seeing more button-loops sewn on the inside of the garment for a more discrete closure, so you might keep that in mind as well. It’s a nice detail and isn’t any more work.
Other tools you’ll need:
- Sewing sheers or a rotary cutter and self-healing cutting mat.
- Thread snips or a small scissors, which are nice to keep by your sewing machine so you can keep your sewing cleaned up while you’re progressing.
- I like to have a good straight-edge handy. My preference is a 6″ x 24″ quilting straight edge, which is also really convenient when cutting out.
- A small ruler. I like the 1″ x 6″ rulers we carry in our shop and keep at least half a dozen around at all times since I’m forever misplacing them under a pattern piece or something.
- Tailor’s chalk or a water-soluble fabric marking pen.
- A seam ripper (always important to have on hand).
- A measuring tape to determine your size and to help if you want to make any alterations.
- Pins (or pattern weights and fabric clips if you prefer).
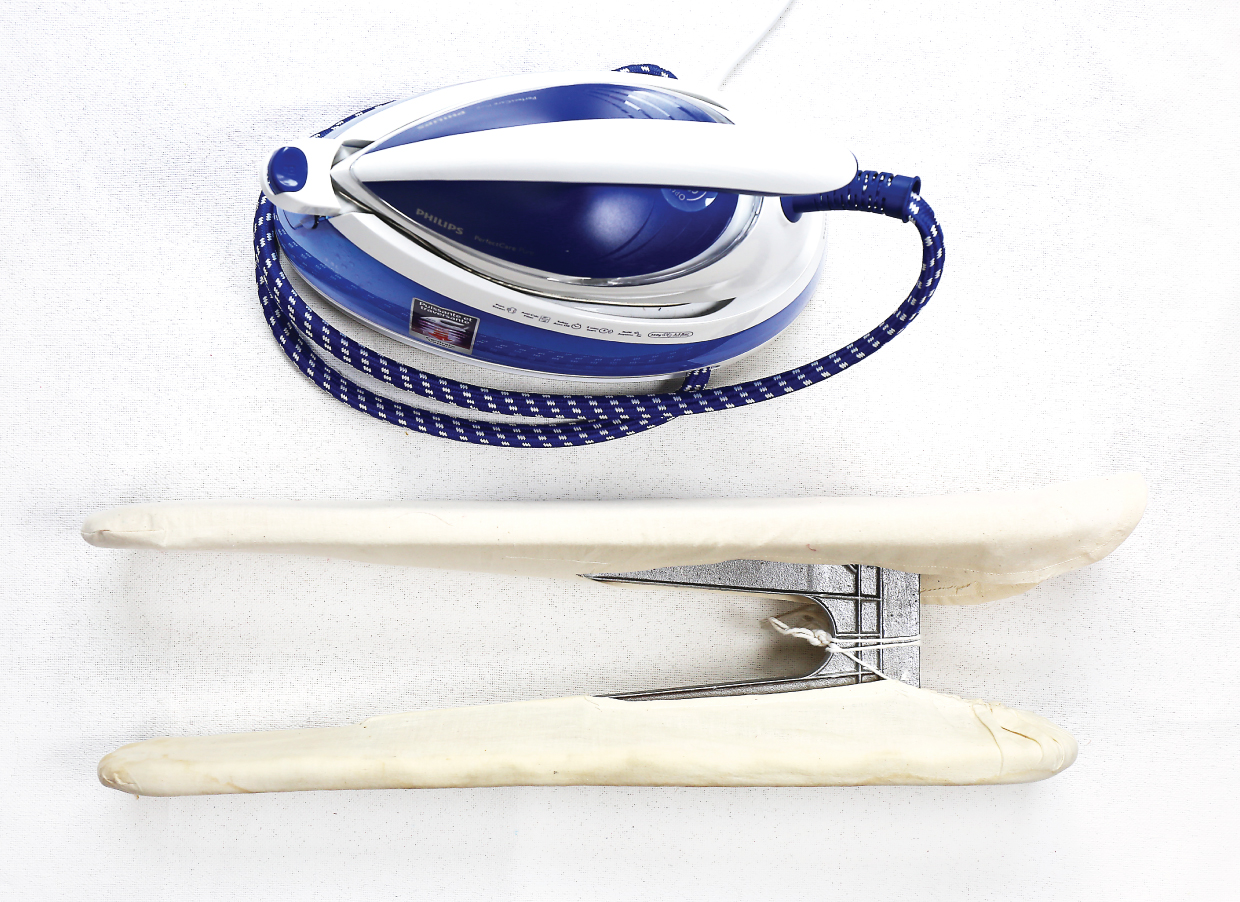
Obviously you’ll want access to a good iron (your second-most important tool after your sewing machine) and an ironing board. I make use of my sleeve board a lot, too.
Deciding on Customizations
We’ve already written quite a few blog posts and tutorials for this style. You can see them all on this page. Maybe you want to consider sewing your blouse with beautiful heirloom techniques like Lisa did, or you can fake them like I did. Don’t miss Camelia’s stunning lace yoke and Meredith’s elastic cuff tutorial.
And here’s the original blog post where I introduced the pattern and offered some sewing and styling inspiration. You might find some fabric ideas there as well.
Purchasing Your Pattern
And of course you’ll need a copy of the pattern, which you can purchase in paper format or as a digital PDF.
Select Your Size
Here’s my biggest piece of advice regarding the sizing for this pattern: Don’t over-fit this style! It might be tempting to make it very close fitting, but you need some wearing ease so you have room to move and to raise your arms, especially since this isn’t a traditional set-in sleeve style. If you’re full-busted you may also want room through the contrast stripe for your upper bust, depending on where your bust sits. So choose your size wisely.
We’ve already done the full-bust adjustment for you (that’s why the pattern comes with separate pieces for different cup sizes), so I recommend that you follow my usual sizing advice with regard to selecting your size. Start by taking two measurements: your upper bust measurement and your full bust measurement. (You’ll need to do this anyway to select the correct cup size to use for the pattern.)
First take your full bust measurement. This measurement will be taken across the fullest part of your bust. Then take your upper bust measurement. This measurement is taken just under your arms, across the upper part of your chest, like in this photo.
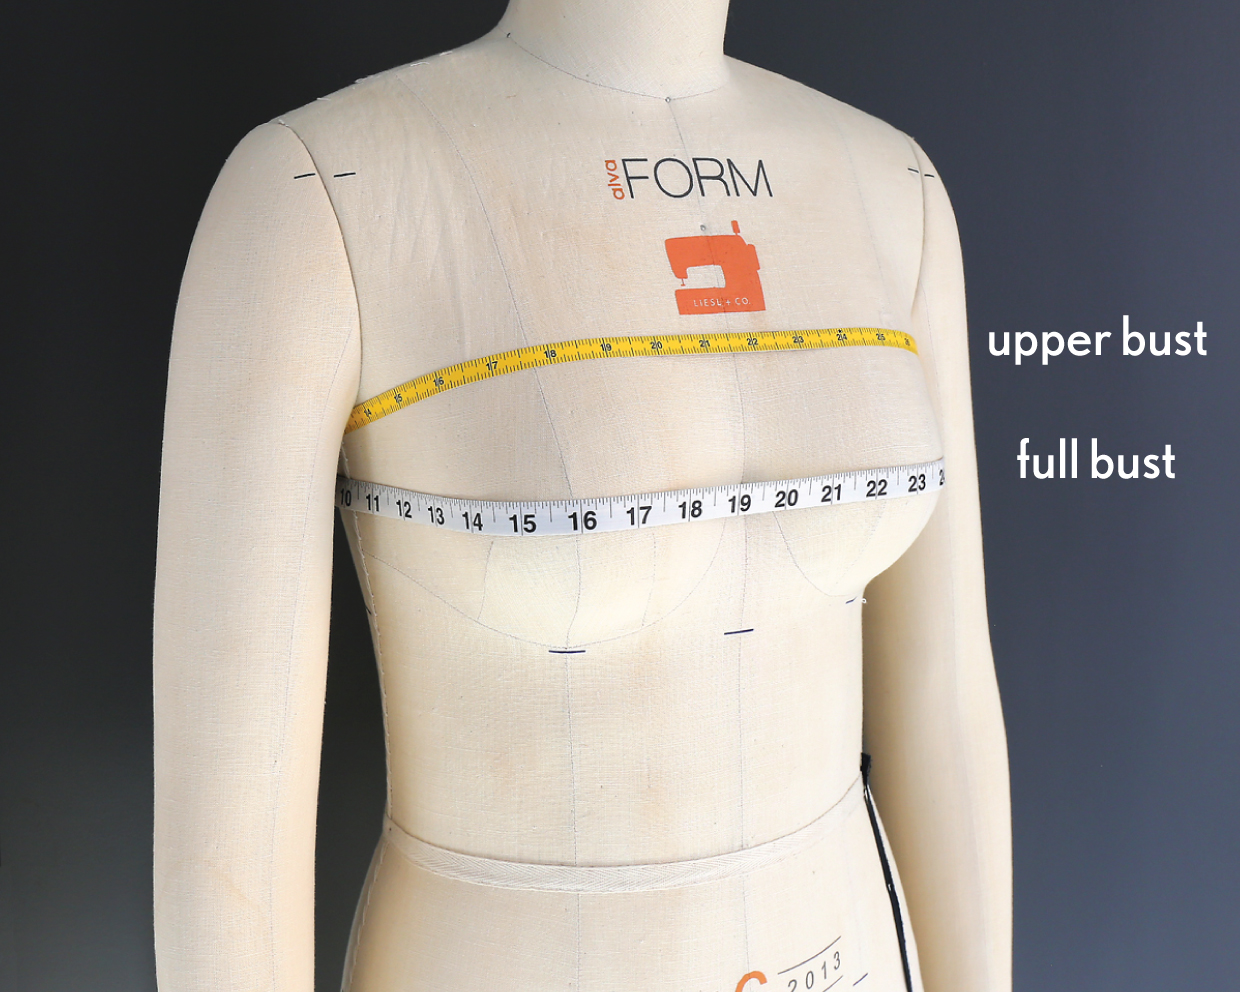
OK, now some quick and easy math:
full bust measurement – upper bust measurement = x
If x is more than 2 1/2″, use your upper bust measurement instead of your full bust measurement when looking at the measurement chart. If x is less than or equal to 2 1/2″, use your full bust measurement. I’ll tell you why in a minute. Now, choose your size by looking at the bust measurements on the size chart and using either your upper bust measurement or your full bust measurement, depending on your results from the math problem above. (You will also use the results of this exercise to determine which cup size to use for this pattern.)
| Pattern Size |
Bust (in.) |
Natural Waist (in.) |
Dropped Waist (in.) * |
Hips (in.) |
| 0 | 32 1/2″ | 25″ | 27″ | 35″ |
| 2 | 33 1/2″ | 26″ | 28″ | 36″ |
| 4 | 34 1/2″ | 27″ | 29″ | 37″ |
| 6 | 35 1/2″ | 28″ | 30″ | 38″ |
| 8 | 36 1/2″ | 29″ | 31″ | 39″ |
| 10 | 37 1/2″ | 30″ | 32″ | 40″ |
| 12 | 39″ | 31 1/2″ | 33 1/2″ | 41 1/2″ |
| 14 | 40 1/2″ | 33″ | 35″ | 43″ |
| 16 | 42″ | 34 1/2″ | 36 1/2″ | 44 1/2″ |
| 18 | 44″ | 36 1/2″ | 38 1/2″ | 46 1/2″ |
| 20 | 46″ | 38 1/2″ | 40 1/2″ | 48 1/2″ |
* 1 1/2″ below natural waist
I wrote a lengthy blog post about finding your correct pattern size a few years ago. You might want to refer to that.
To summarize, basically we want to get a good fit through the upper chest and shoulders, so if your bust differential is more than 2 1/2″ you’ll probably get a better fit through the shoulders by using your upper bust measurement instead of your full bust measurement when you look at the measurement chart. If you chose your size based on your full bust measurement, you would end up with a blouse that’s very oversized and too big through the neck and shoulders, which generally looks sloppy and not nice at all. (And when you shop in stores you often have to purchase this way because you can’t do a full bust adjustment, so there’s the advantage of sewing for yourself!)
And keep in mind that this math is only intended to give you a size approximation. Your shoulders might be broader or narrower than average, in which case you may find that you want a larger or smaller size. That’s why it’s always a good idea to make a muslin first. Also, under the arm you’ll want several inches of ease through the bust, so keep that in mind as you evaluate your muslin.
OK? Next we’ll be talking about any adjustments you might want to make to your pattern.
Pattern Adjustments
Since we’ve already done the full bust adjustment for you on this pattern, you probably won’t need to do it yourself. The rest of the pattern is relatively loose fitting, so you probably won’t need to make a lot of adjustment. Maybe you’ll want to raise or lower the dart, which I’ve covered here.
The only adjustment you might need to make is for the slope of the shoulders, and don’t go too crazy here. If your shoulders are very slopey or very square, this might be useful for you, but for most people this change is unnecessary.
If you do need to adjust the shoulder slope, it’s really easy because the shoulder seam extends all the way down to the stripe in one continuous piece on the yoke. So if you have very slopey shoulders you might need to pin out a little extra fabric in the shoulder seam. If your shoulders are more square, you could add a little to the shoulders of the yoke to give yourself more room. You’ll be able to see when you make a muslin. And be careful not to make the shoulders too tight or you won’t be able to move! I fear that, by mentioning this, you’re all going to go crazy adjusting your shoulders. Please don’t! This is only for people who usually need to adjust the shoulder slope on a pattern.

That’s the most common adjustment I can think of for this pattern.
Cutting Fabric
We’ve now arrived at the cutting out stage. You’ll now have your pattern pieces ready, with any necessary alterations made. And I hope you’ve found some fabric you love!
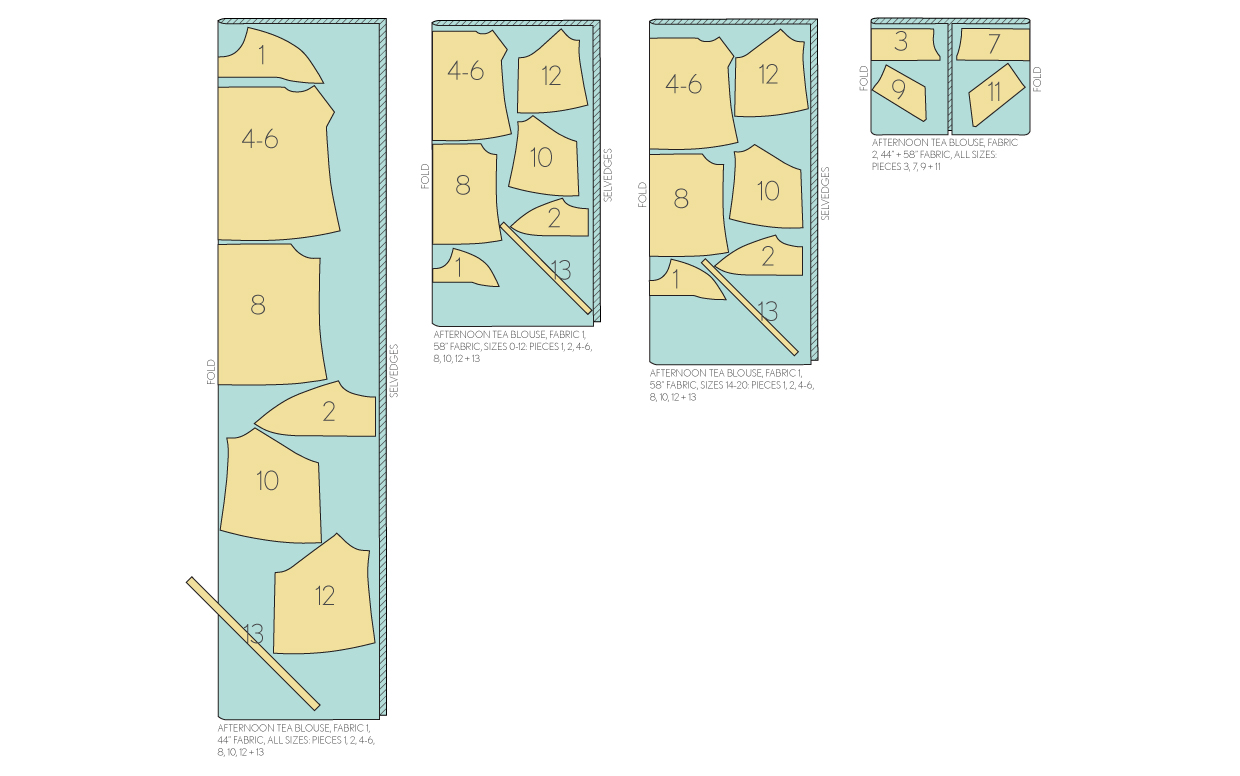
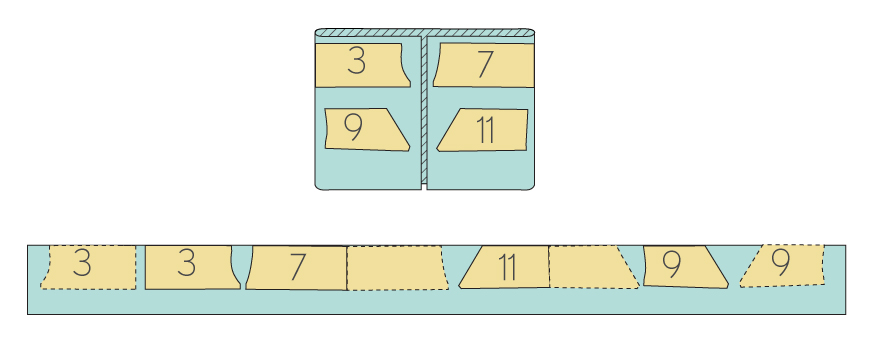
One important point to make with regard to lace or tulle, power mesh, etc. Feel free to rotate the Fabric 2 pattern pieces as needed. For lace I prefer to cut them on the straight grain like the first layout, below. If you’re using narrow lace, your cutting layout may look more like the second layout. This will enable you to match the pattern on the lace a bit better in order to make the stripe more continuous.
For delicate fabrics you may prefer to use very fine silk pins or weights. I’m a sucker for my glass-headed pins, but they’re useless when it comes to fittings and things where you need a sturdier pin.
Once you’ve got your lace cut out you can get busy basting it to the stabilizer. I like to sandwich my lace between two layers of stabilizer, but read the recommendations on the package and experiment a bit to see what you prefer.
OK, let’s dive into the sewing now.
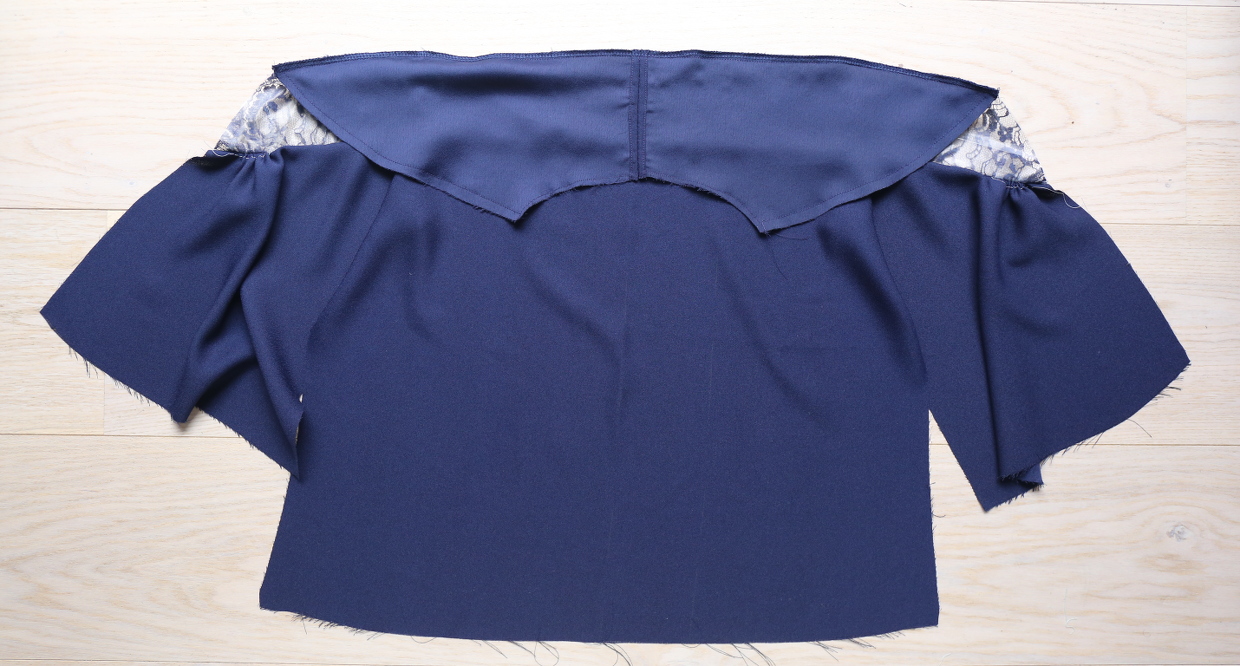
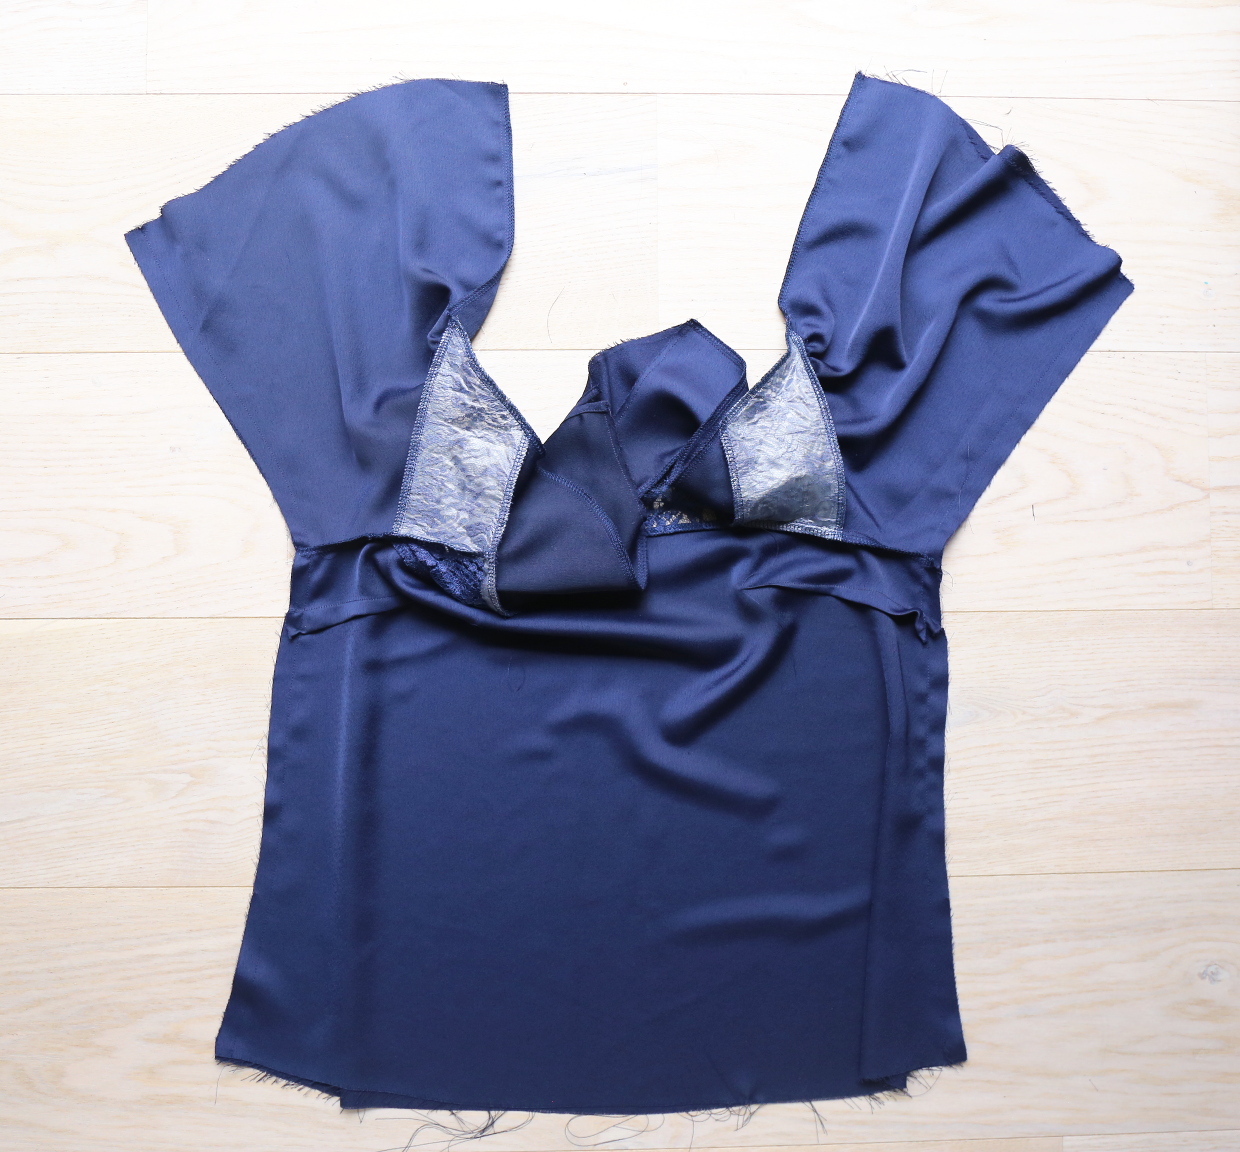
Prepare the Front and Back
Note: Because the front and back blouse pieces for this pattern are very similar, it’s really important to mark them and keep track of which pieces are which. We suggest keeping the cut fabric pieces pinned to their corresponding pattern pieces until you’re ready to use them and keeping front and back pieces separate from each other until the blouse is ready to be assembled.
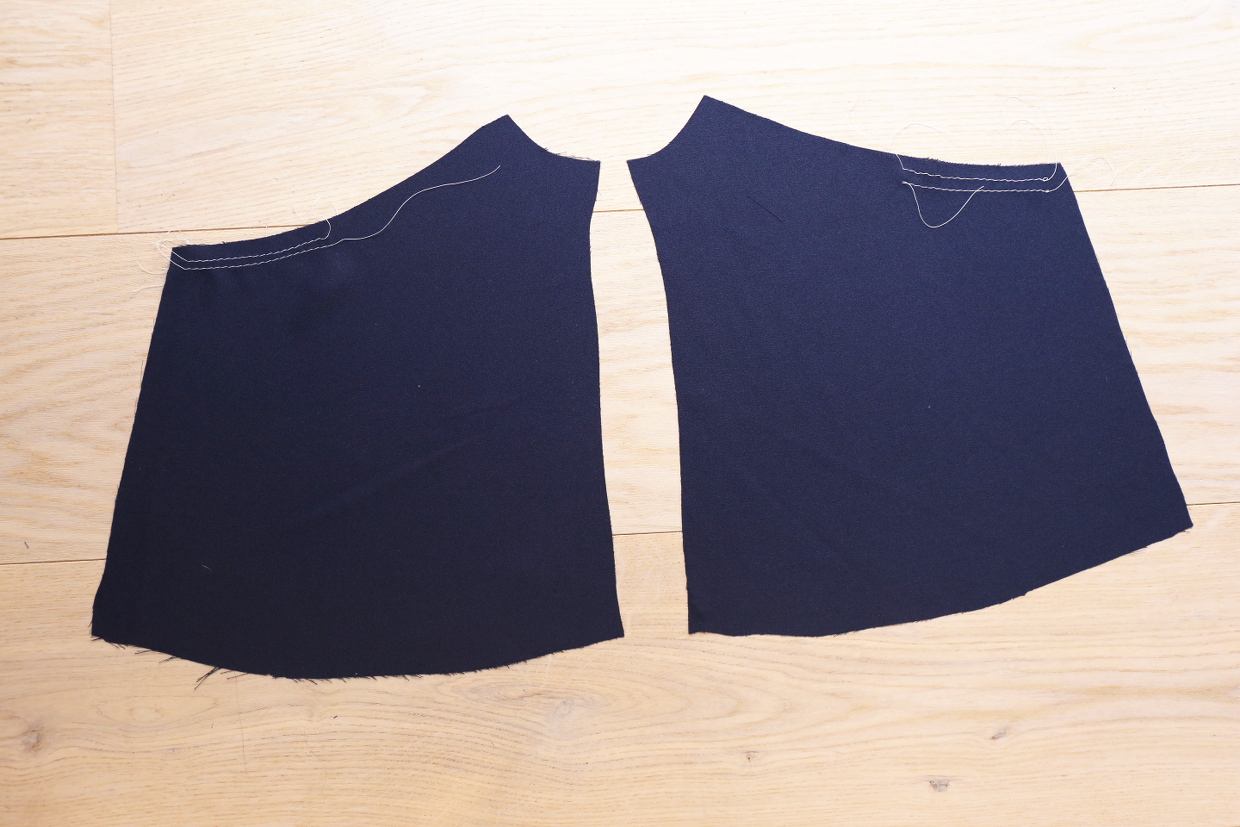
1) Transfer the dart markings and the dots from the pattern pieces to the wrong side of the cut fabric pieces.
2) To close the darts on the blouse front, fold one dart along the dart’s center, with the fabric’s right sides together and the marked dart legs aligned. Pin and stitch along the aligned dart markings, backstitching at the widest part of the dart but not at its tip. Instead, at the dart’s point, leave thread tails several inches long and knot the thread tails together a couple of times to secure the thread. This will reduce bulk at the tip of the dart and prevent the dart from puckering. Press the dart flat to set the stitches, press it toward the hem, and baste the dart at the side of the blouse front with a 3/8” seam. Repeat with the second dart.
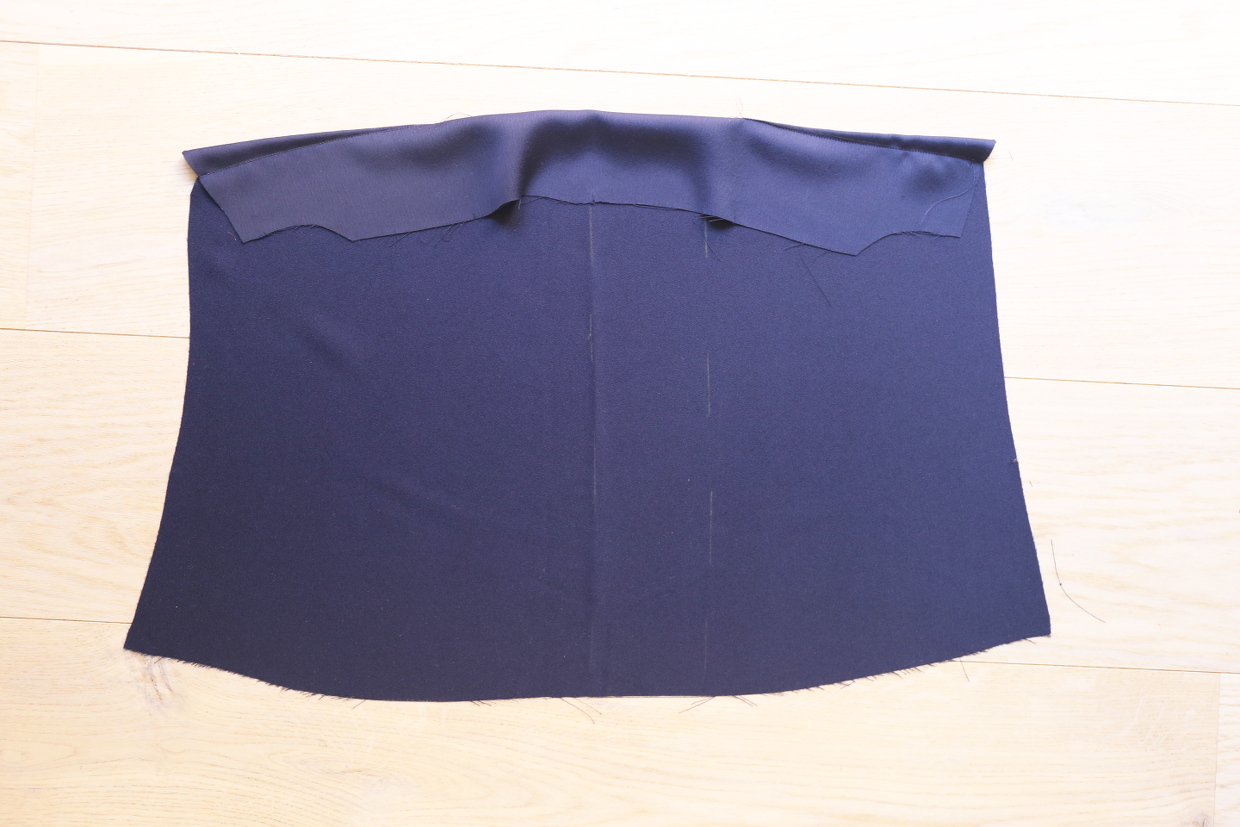

3) Pin the front blouse-stripe pieces to the blouse front with right sides together, matching the edges and the center notches. Stitch the front stripe to the blouse with a 1/2” seam, backstitching or lockstitching at both ends. Trim the seam allowances to 1/4” and finish them together using your preferred method. Press the finished seam allowances toward the blouse-front piece.
From Liesl: I wrote the instructions so you’re pressing the seam allowances away from the stripe in the blouse, since that piece is more likely to be sheer, and visible seam allowances wouldn’t be very attractive if they showed. Obviously if you’re working with sheer fabric in a different location (the yoke, for example) you’ll want to change the direction you press your seam allowances.
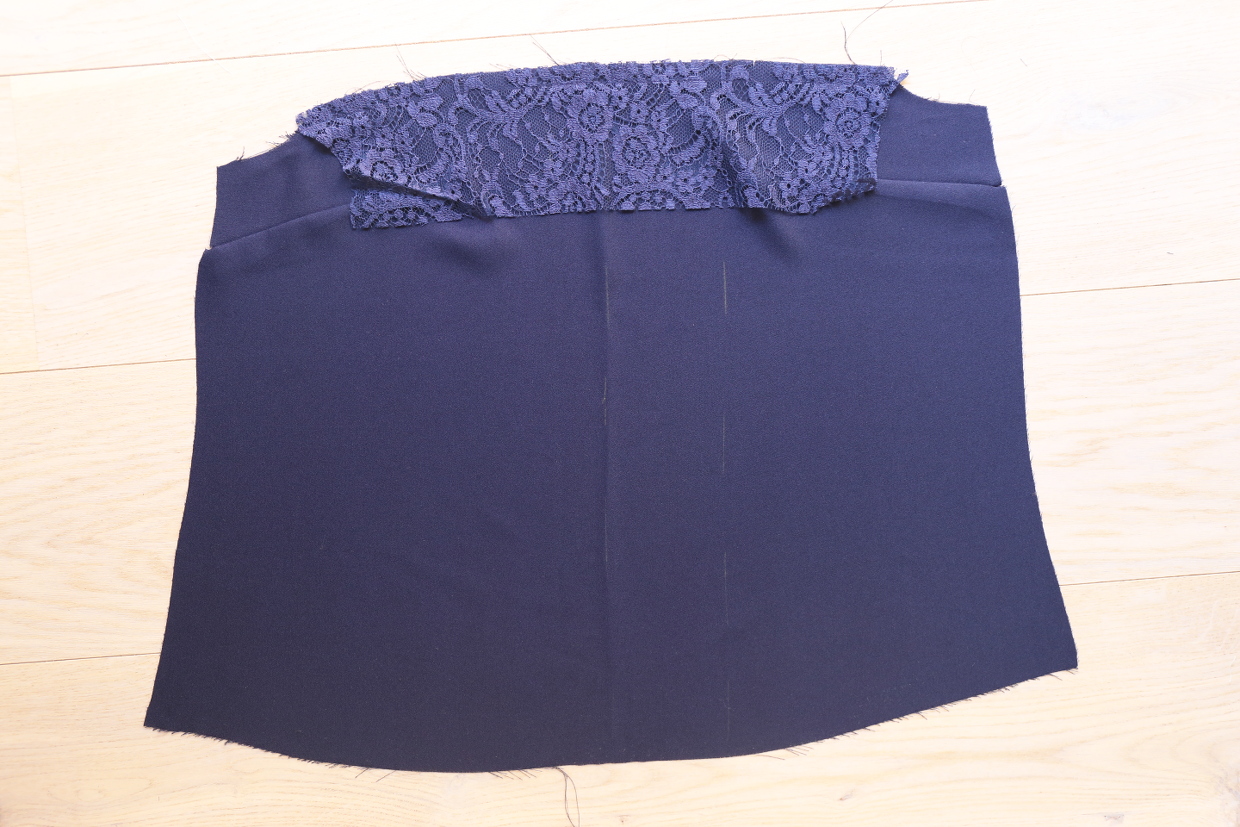
4) As with the blouse front, pin the back blouse-stripe piece to the blouse back with right sides together, matching the edges and the center notches. Stitch the back stripe to the blouse with a 1/2” seam, backstitching or lockstitching at both ends. Trim the seam allowances to 1/4” and finish them together using your preferred method. Press the finished seam allowances toward the blouse-back piece.
Prepare the Sleeves
1) Staystitch the top and bottom edges of each sleeve-stripe front piece with a 3/8” seam. This stay stitching will prevent the bias-cut edges of the sleeve stripes from stretching and distorting when you sew them.
From Liesl: I already mentioned this next hint when we were cutting out our fabric, but it’s good to keep in mind again now in case you missed it.
HINT: If you’re working with lace or other unstable fabrics you might want to baste the pieces to tissue paper or a wash-away stabilizer to help them keep their shape while you’re working with them. The tissue/stabilizer can be removed when you’re finished.
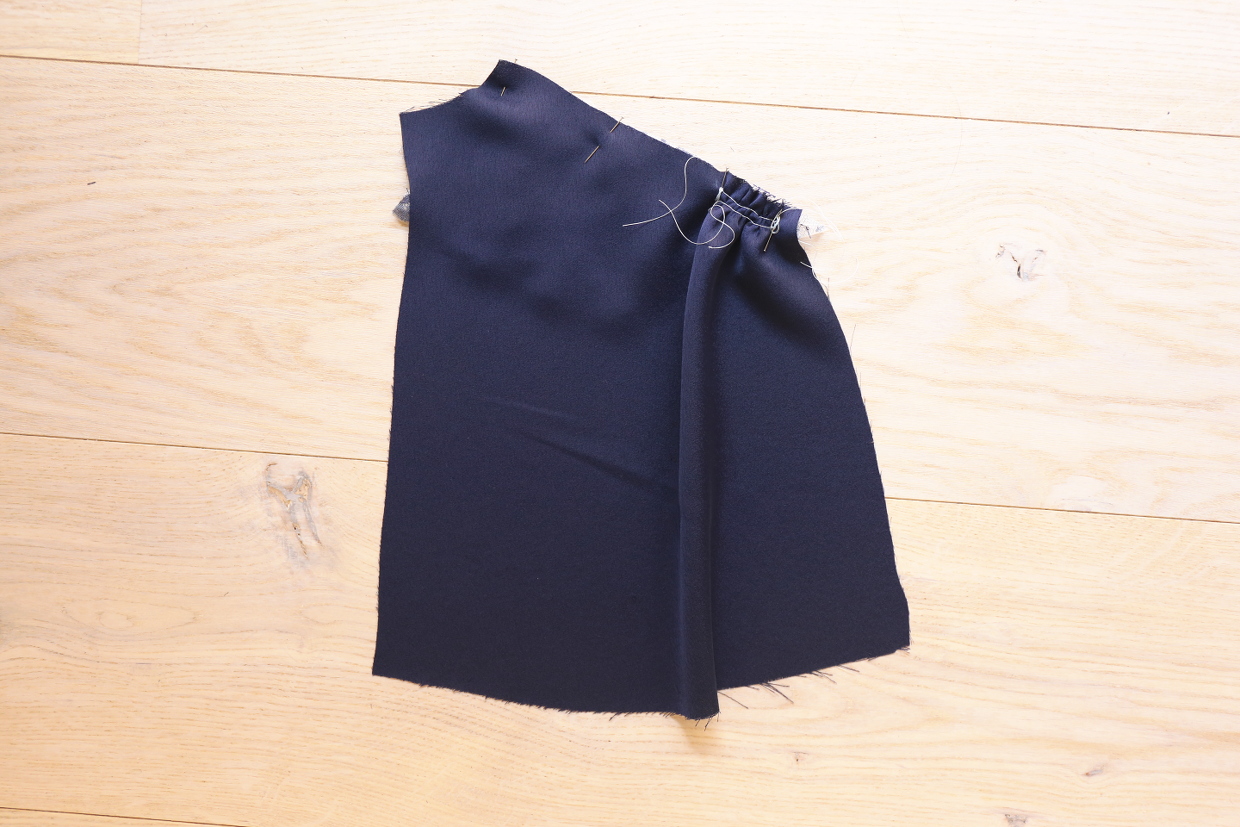
2) Stitch two rows of gathering stitches along the top edge of each sleeve-flounce front piece starting at the dot and ending 1/2” from the outer edge of the sleeve. Sew the first row of stitched 3/8” from the raw edge and sew the second row of stitches 1/4” below the first row (5/8” from the raw edge), leaving thread tails several inches long on each end for pulling.
3) With right sides together, pin one sleeve-stripe front to its corresponding sleeve-flounce front, matching the edges and the notches. Pull on the tails of the gathering threads to make the flounce fit the stripe and distribute the gathers evenly across the top of the flounce. Stitch the stripe to the flounce with a 1/2” seam, backstitching or lockstitching at both ends. Trim the seam allowances to 1/4” and finish them together using your preferred method, then press the finished seam allowances toward the flounce. Going forward we’ll refer to this piece as the sleeve front. Assemble the other sleeve front in the same way.
From Liesl: The idea here is to keep the gathering near the edge of the piece but not in the seam allowances which wouldn’t be helpful and would just add bulk. The stabilizer you might have added to the lace will help to keep the shape of the pattern piece so it doesn’t get distorted as you’re working with it.
4) Using the sleeve-stripe back and sleeve-flounce back pieces, repeat steps 1-3 to assemble the sleeve backs in the same way as the sleeve fronts.
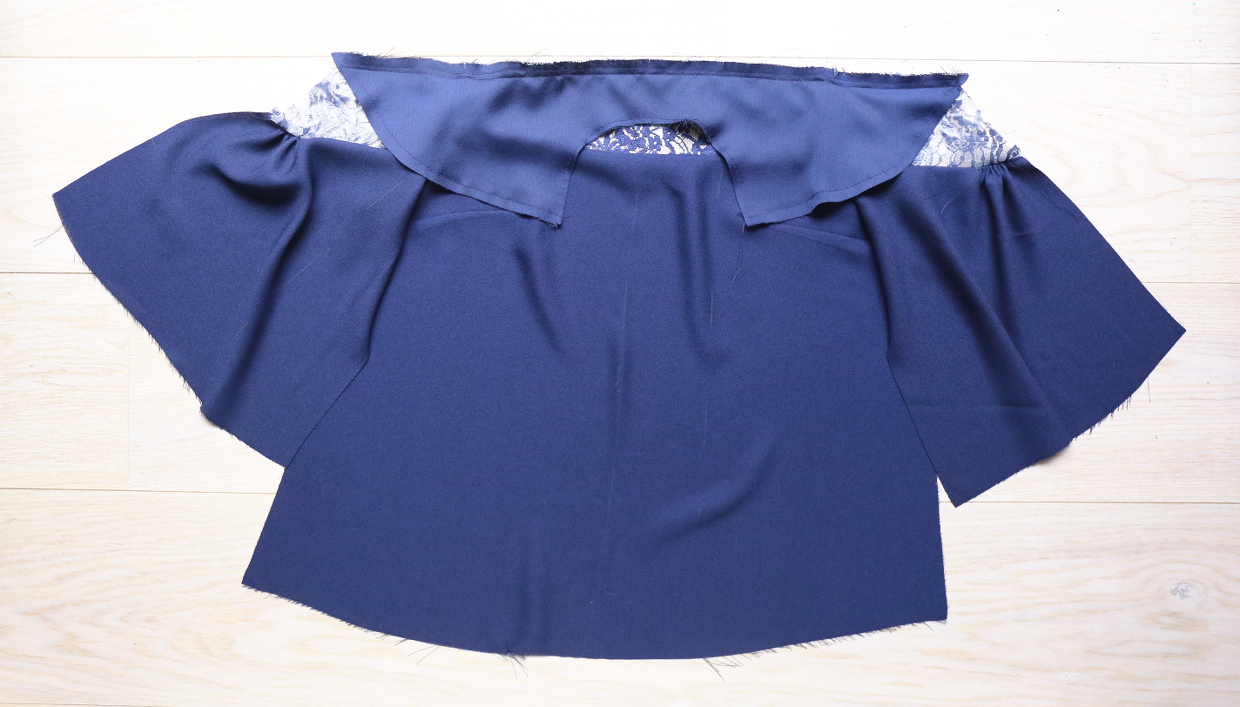
Attach Sleeves and Yokes
Attach the Sleeves
1) Pin one sleeve front to the blouse front, matching the edges and the seams. Pay special attention while pinning the stripe seams so they match across the sleeve and the blouse front. To help with matching the seams, place a pin at the point where the 1/2” seam line meets the stripe so it’s easier to match the two spots, and pin directly through that spot when you pin the pieces together. Stitch the sleeve to the blouse with a 1/2” seam, backstitching or lockstitching at both ends. Check to be sure the stripe seams match and adjust if necessary. Trim the stitched seam allowances to 1/4” and finish them together, using your preferred method and pressing the finished seam allowances toward the sleeve. Repeat to attach the second sleeve front to the other side of the blouse.
2) Repeat step 1 to stitch the sleeve backs to the blouse back.
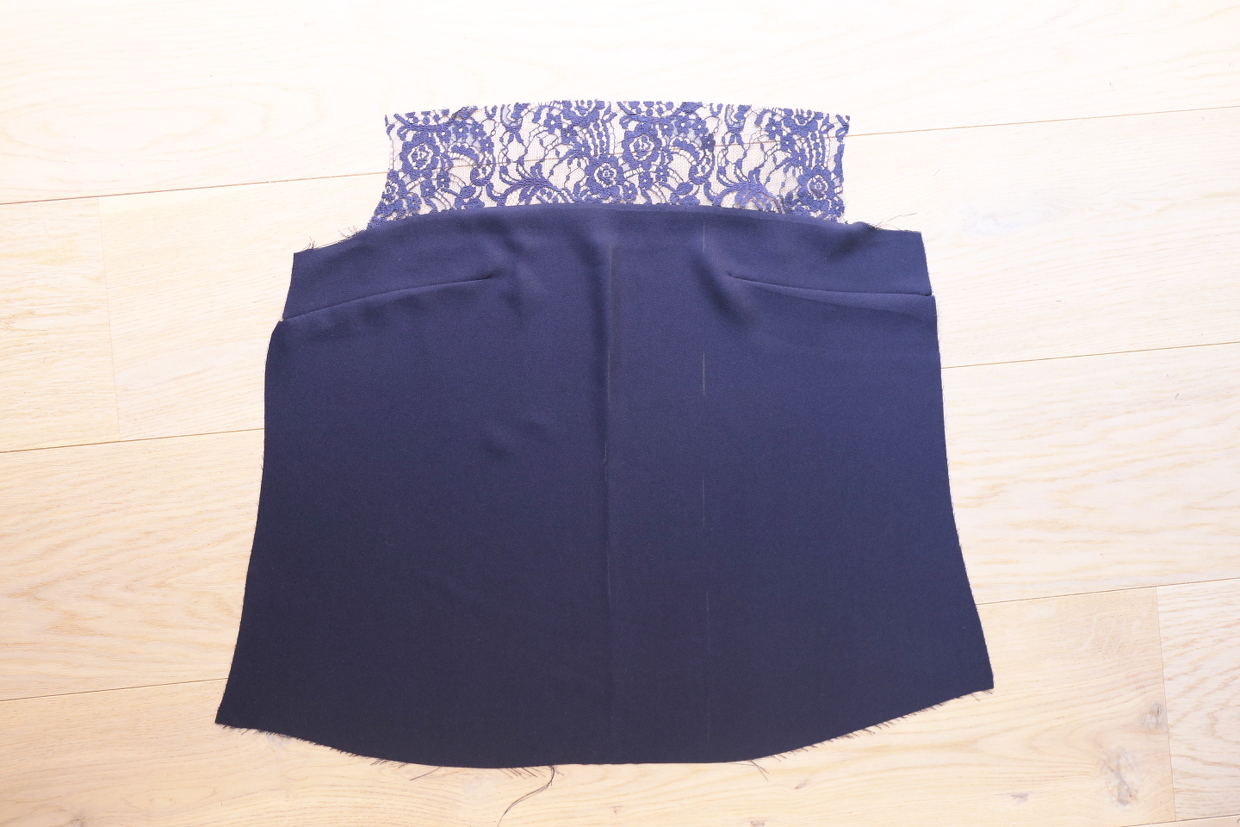
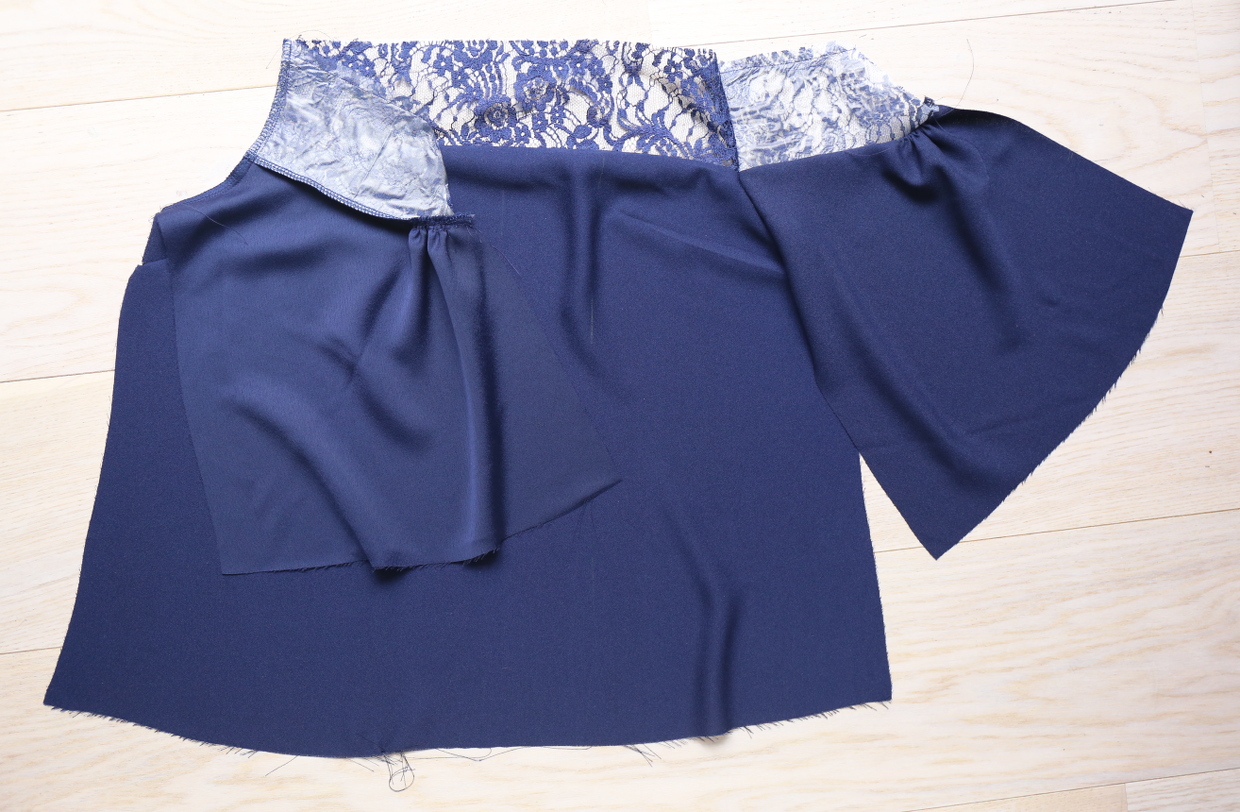
Prepare and Attach the Yokes
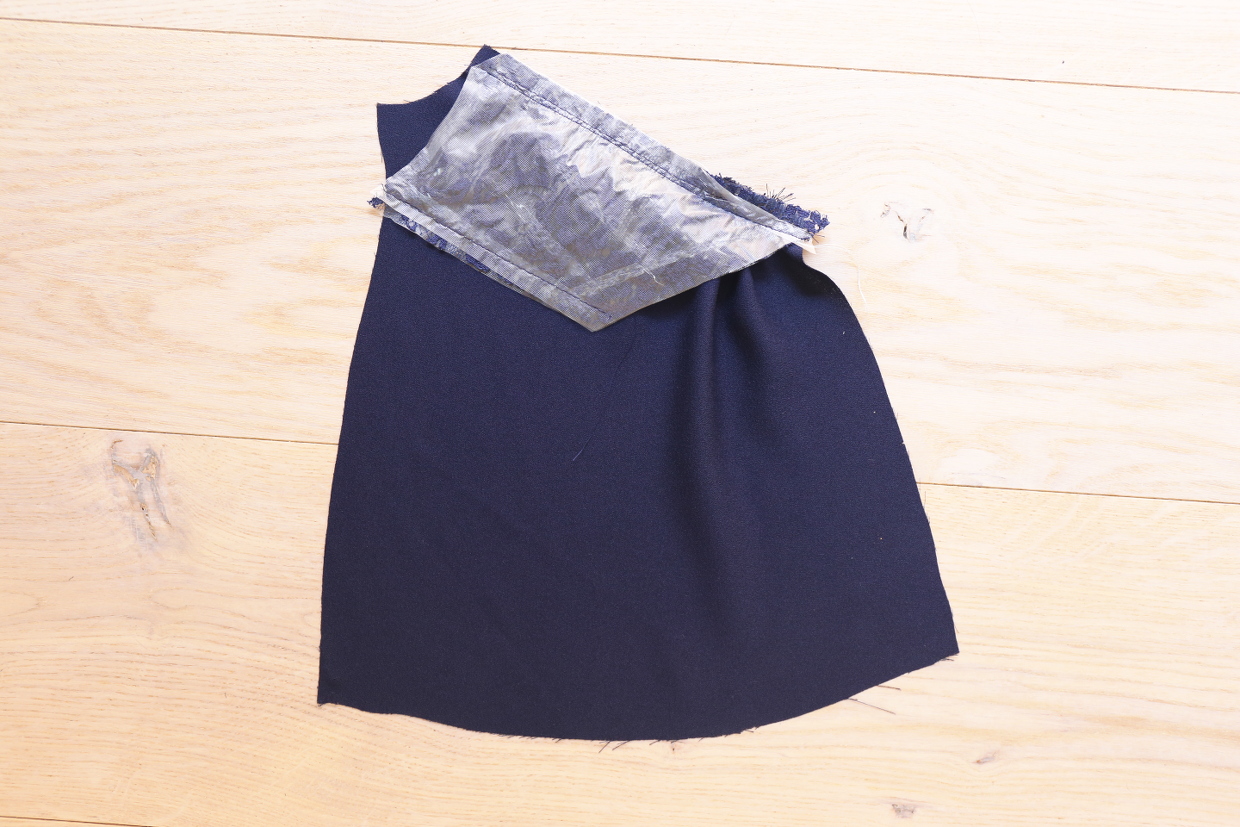
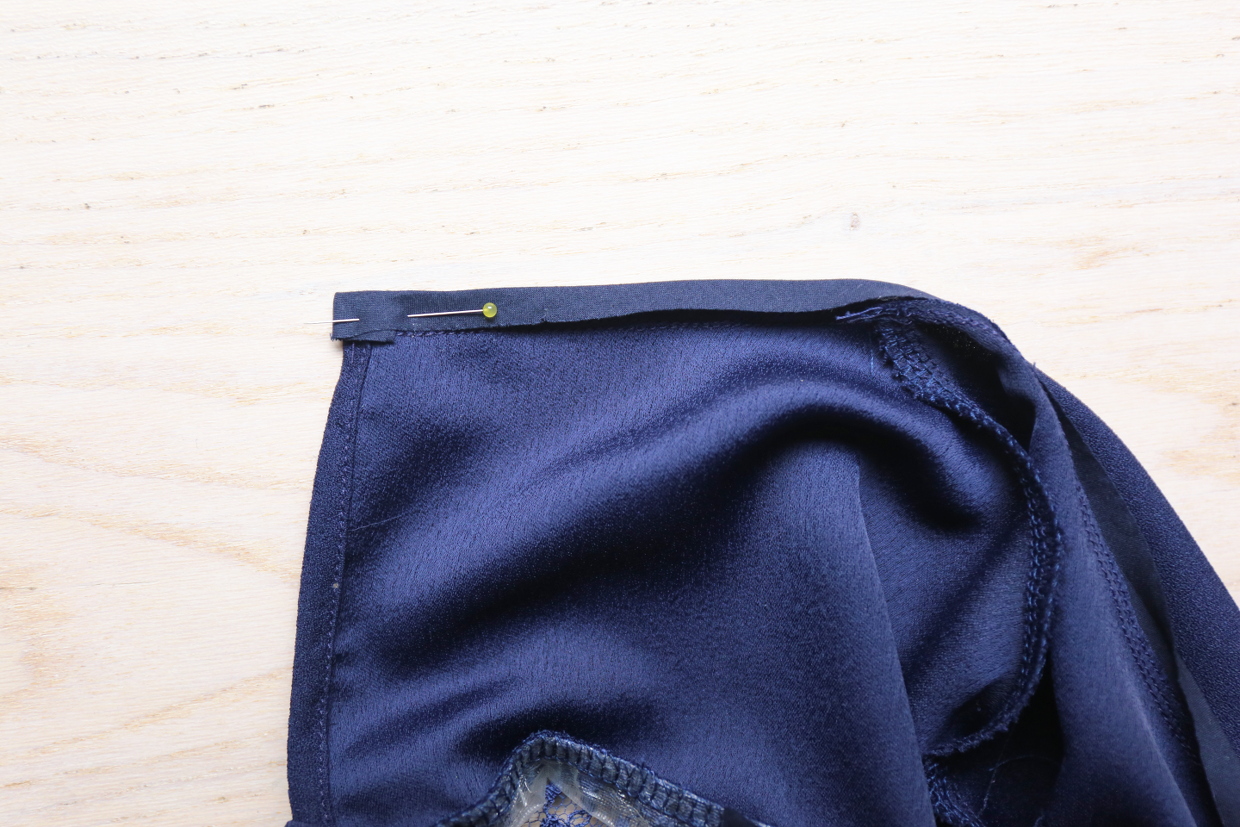
1) Staystitch the neckline with a scant 1/4” seam and staystitch the shoulder and bottom edges of the yoke front and yoke back with a 3/8” seam, following the directions of the arrows (from the written instructions). This will prevent the pieces from stretching or distorting as the blouse is sewn.

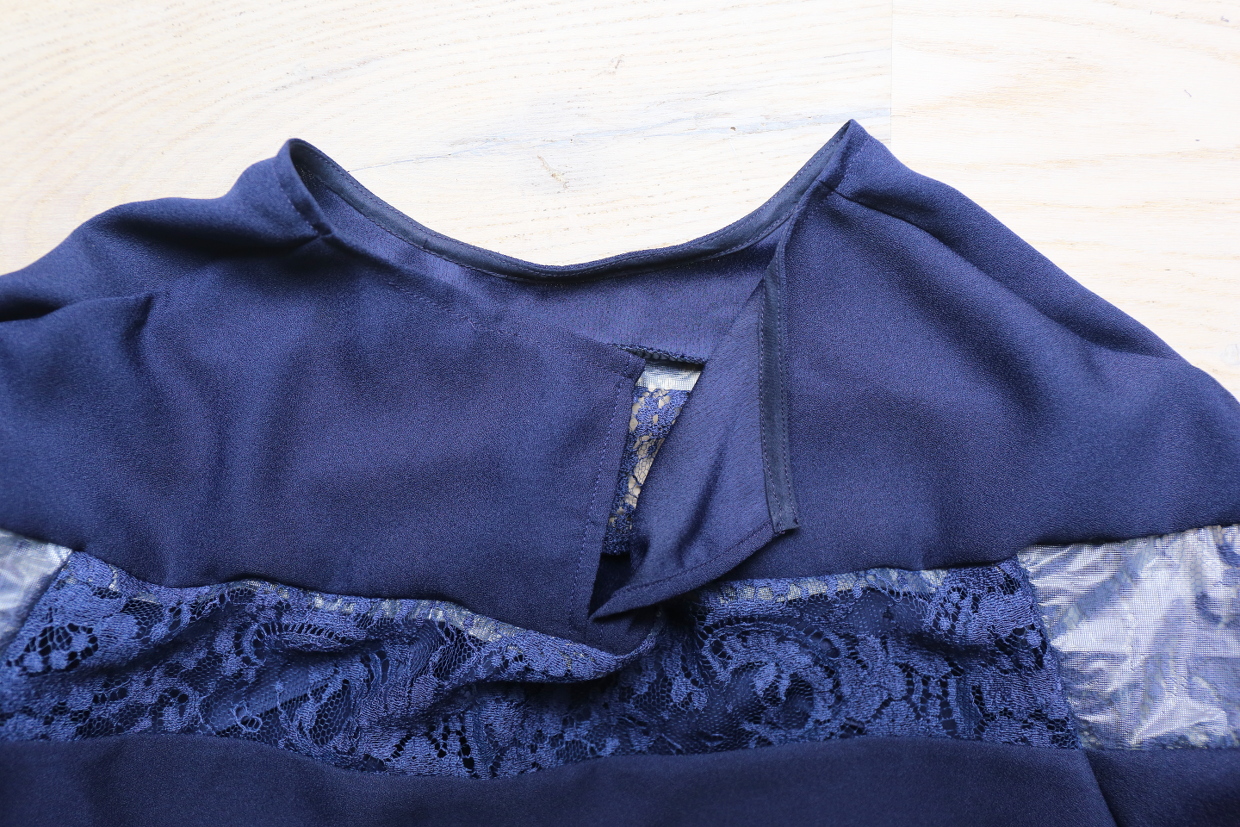
2) Pin the two yoke-back pieces with right sides together, matching the center-back edges. Baste the center-back with a 1/2” seam starting at the neck edge and then backstitching or lockstitching when you reach the dot. At the dot, switch to a regular stitch length and continue stitching until you reach the bottom edge of the yoke. Backstitch or lockstitch at the lower edge to finish the seam.
From Liesl: Sorry it’s hard to see the stitching on my fabric. I take these photos when I’m sewing for the photoshoot, so you’re at the mercy of my choices here. However, the illustations are very clear here.
3) Press the basted/stitched center-back seam open, then fold each seam allowance under so the cut edge of the seam allowance meets the stitched seam. Edgestitch the innermost folded edge of each seam allowance to finish the opening.

4) Pin the yoke back to the blouse back with right sides together, matching the center-back notch of the blouse-stripe to the center-back seam of the yoke and matching the edges and notches. Stitch the yoke back to the blouse back with a 1/2” seam, backstitching of lockstitching at both ends. Trim the stitched seam allowances to 1/4” and finish them together using your preferred method. Press the finished seam allowances toward the yoke.
5) Stitch the yoke front to the blouse front in the same way you stitched the yoke back to the blouse back in Step 4.
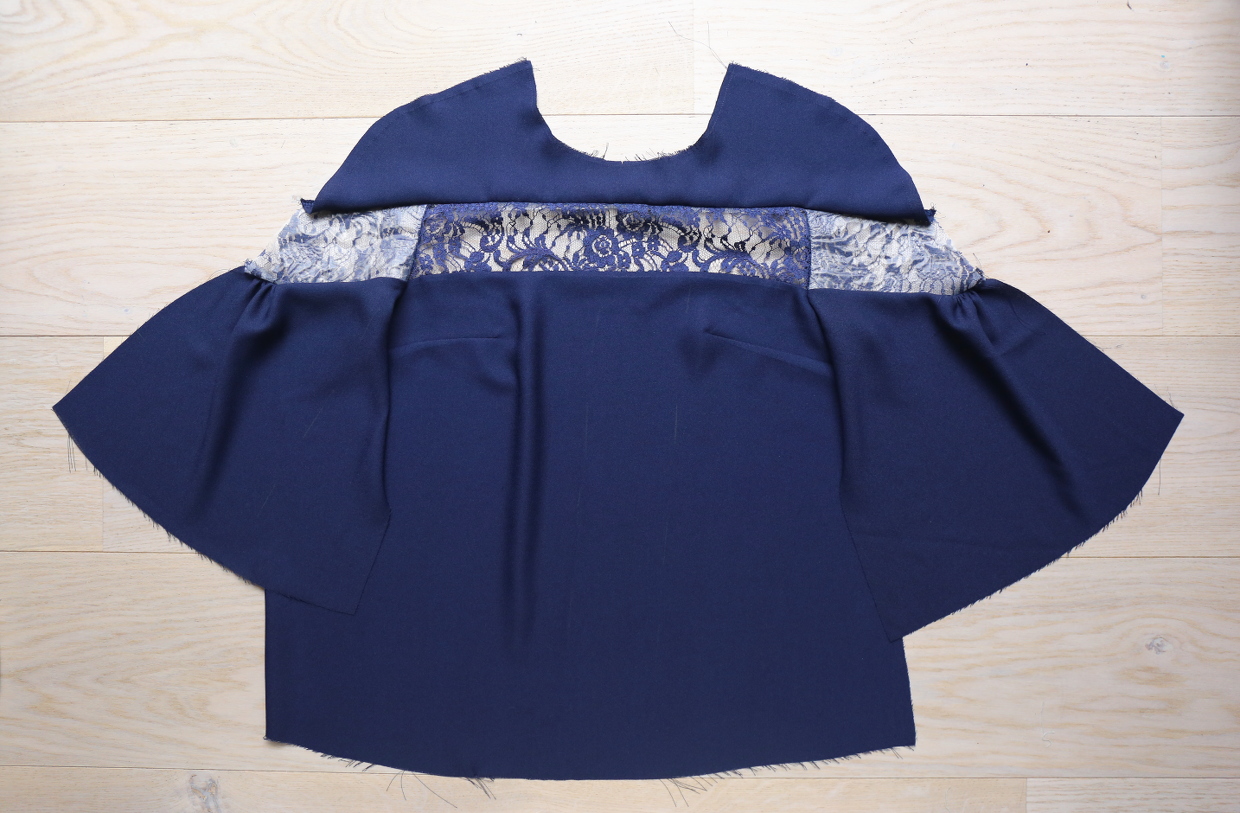
From Liesl: You can see the gleam of the stabilizer in these photos. I won’t wash away the stabilizer until the blouse is completely constructed. And if you’ve never used wash-away stabilizer, it’s pretty fun to see how it just dissolves!
Assemble the Blouse and Finish the Neckline
Assemble the Blouse
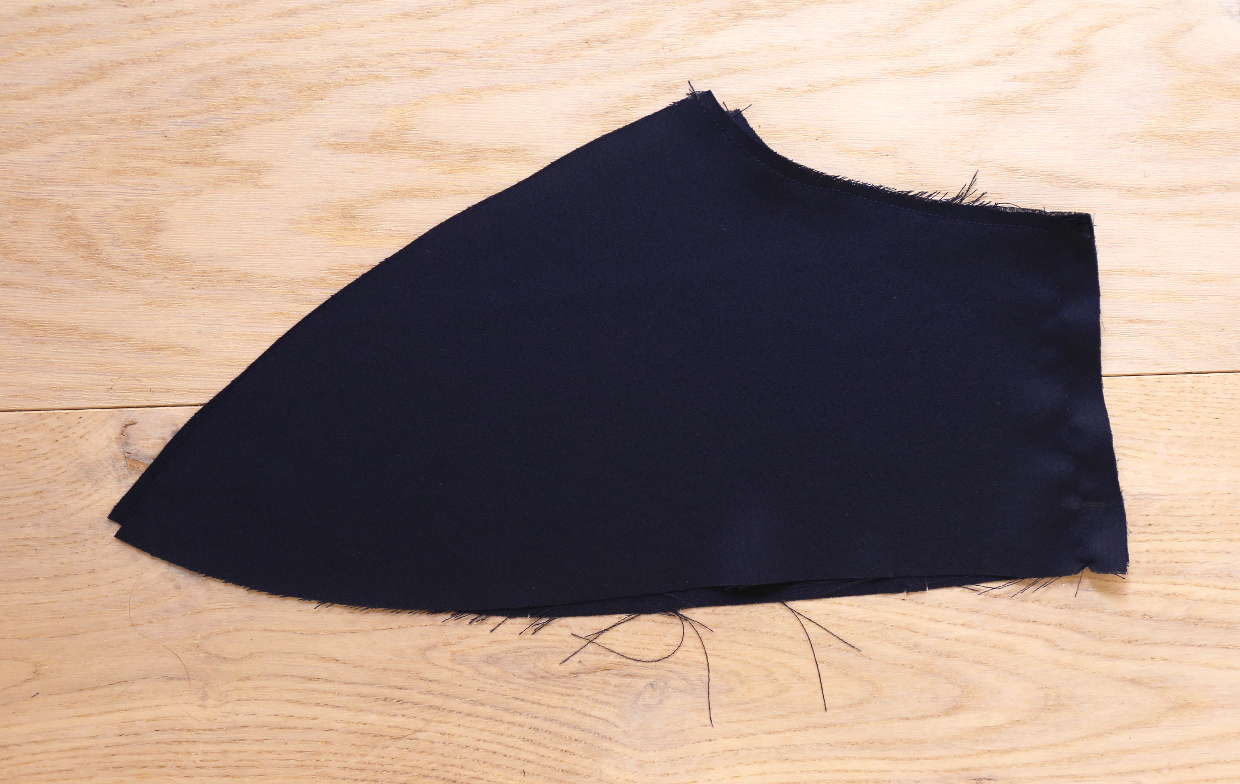
1) Align and pin the blouse back to the blouse front with right sides together, matching the edges, notches, and seams. Pay special attention while matching the seams on the front and back blouse so you’ll have nice points along the seam. On each side of the blouse, stitch from the shoulder to the sleeve in a continuous 1/2” seam, backstitching or lockstitching at both ends. Trim the stitched seam allowances to 1/4” and finish the seam allowances together using your preferred method. Press the seam allowances toward the back of the blouse.
From Liesl: Since those chevron points along the sleeve are, at least to me, a key feature of the blouse, I’m really particular about matching them. If you’re nervous, baste that portion of the blouse so you don’t have to rip out tiny stitches to correct it.
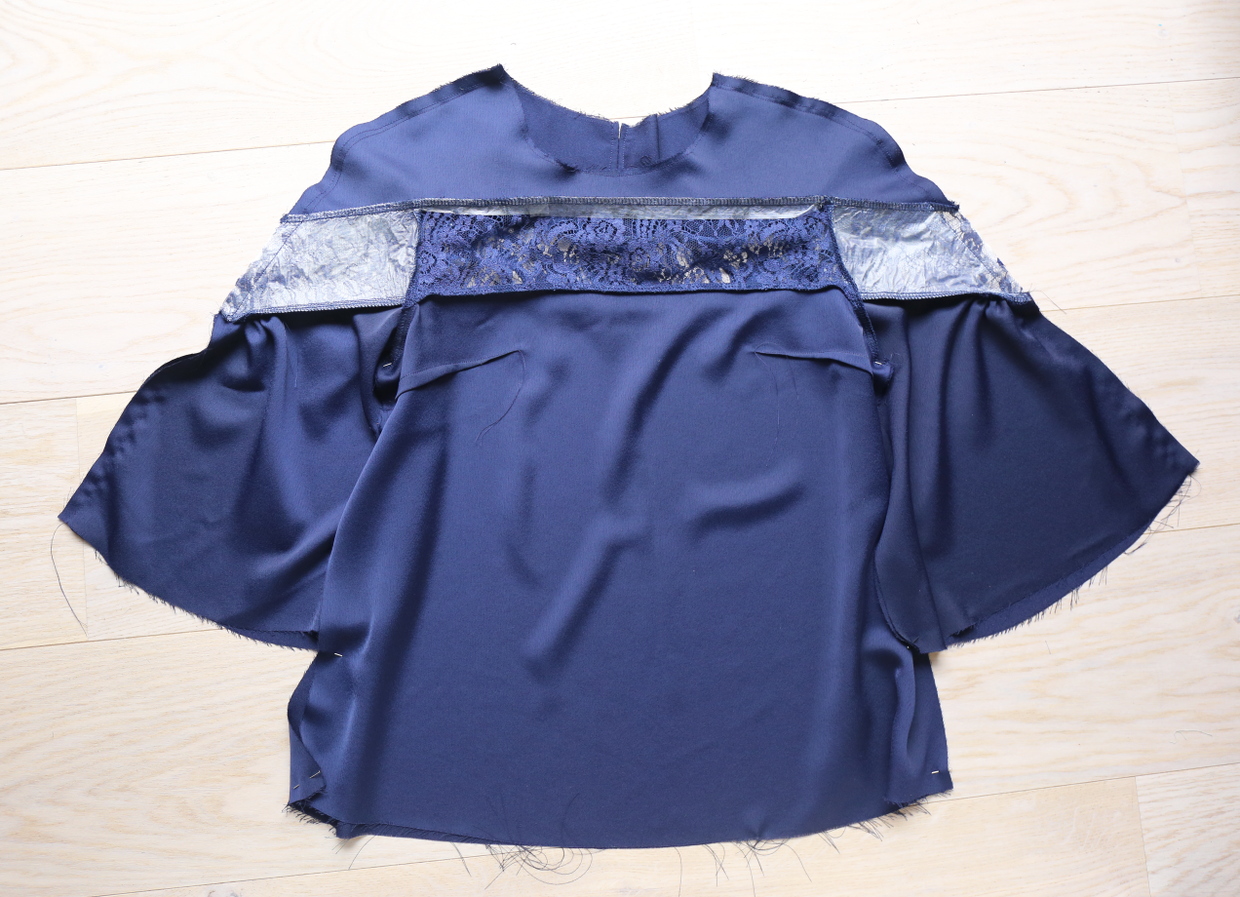
HINT: You can customize the fit to your own shoulders by basting at this step and trying on once you’ve sewn the underarm seams in the next step. Then you can adjust as necessary to suit your own shoulder slope and width.
From Liesl: But again, don’t go crazy here! The hint above is only for people with very square or very slopey shoulders.
2) Starting at the bottom of the blouse and sewing up toward the sleeve, stitch each side seam and underarm seam in a continuous 1/2” seam, backstitching or lockstitching at both ends. Trim the stitched seam allowances to 1/4” and finish the seam allowances together using your preferred method. Press the seam allowances toward the back of the blouse.
Finish the Neckline
1) Use a seam ripper to open up the basting stitches at the center-back yoke seam, leaving the center-back stitched at and below the dot. Pin the right side of the bias neck facing to the ride side of the neckline, matching the center-front notches on both pieces, then matching the next set of notches on the facing to the shoulder seams, and finally matching the last set of notches on the facing to the center-back edge of the blouse. Pin the facing evenly around the neckline, taking care not to stretch the neck facing. Stitch the facing to the neckline with a 1/4” seam, backstitching or lockstitching at both center-back edges.

2) Press the stitched seam allowances toward the neck facing, away from the neckline, and understitch (or edgestitch) the neck facing as close as you can manage (1/16” is ideal, but a narrow 1/8” is OK too). Try to sew as evenly as possible so the inside of the neckline will look neat. Trim the stitched neckline seam allowances very close to the understitching, then fold and press the short ends of the neck facing to the wrong side along the center-back neckline edge. Trim the folded short ends of the neck facing to about 1/2” to reduce bulk when the facing is folded and finished in the next steps.
From Liesl: Don’t miss that last little bit: the ends of the bias need to be folded back here to give them a clean finish.

3) Fold and press the unsewn long edge of the facing to meet the neckline seam on the inside of the neckline.
From Liesl: If you feel like the bias is getting too narrow, feel free to fold it to meet the trimmed edge of the neckline instead. You have some flexibility here, and some fabrics seem to get narrower than others at this stage.
4) Fold and press the facing again, this time turning the entire facing to the inside of the blouse and rolling the seam slightly to the inside of the neckline so it won’t show when the blouse is worn. Baste the innermost folded edge of the facing to the blouse, stitching as close as possible to the fold. From the outside of the blouse, topstitch the neckline to finish it, using the basting stitches as a stitching guide. Once you’ve topstitched you can remove the basting stitches.
Hem the Blouse and Sleeves
From Liesl: Well, it looks like I was too eager to finish the blouse to take the remaining photos, so we’re stuck with photos from a different blouse for these steps. But we’re almost done!
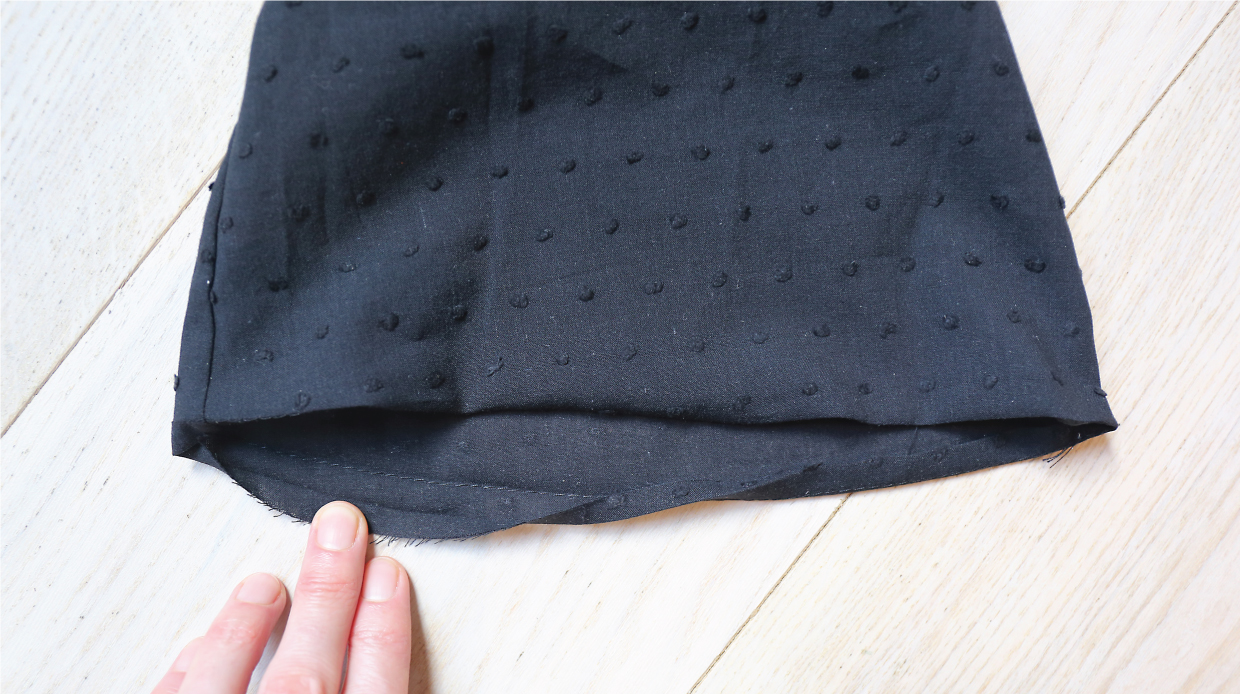
1) To hem the blouse, sew a line of basting stitches 5/8” from the blouse’s raw bottom edge. Use the basting stitches as a folding guide. First press the raw edge of the fabric to meet the basting stitches, then fold and press again along the basting stitches so the raw edges are enclosed. Edgestitch the second, innermost fold to finish the hem.
2) Hem the blouse sleeves in the same manner, sewing a 5/8” basting stitch and then using the basting stitches as a folding guide before edgestitching the innermost edge to finish the sleeves. Once you’ve finished hemming you can remove the basting stitches.

3) Stitch a button and a thread chain loop at the back edge of the neckline so the two back edges will “kiss” when bottomed.
From Liesl: One of these days I’ll film a video of the thread chain for you. It’s a lot like crocheting once you get the hang of it.
4) Remove any visible basting stitches and you’ve finished!
Congratulations! Don’t forget to take a photo and show us how it turned out! Tag your photos #lieslandco and #afternoonteablouse on Instagram so we can find them.
Thanks for sewing along, and please do let us know if you participated by leaving a comment below. It’s helpful to know how much participation we have for these sew-alongs so we can decide whether to do more of them in the future.
I’m so excited about starting this sew-along! But I’m a bit uncertain about my correct sizing. My upper bust is 36″ and my full bust is around 40 (depending on which bra I’m wearing, I think). This puts me between a 6 and an 8 with a D cup.
Additional information: I have a relatively small frame but menopause and back surgeries have put on a lot pounds – my tummy starts immediately below my bra and my “waist” is 37″ – my hips are 44″. So I’m thinking an 8 rather than a 6 – do you agree? Will I need to grade the pattern out starting below the sleeves for additional ease around my tummy and hips?
Of course I’ll be watching for tomorrow’s information on pattern adjustments but I suspect my question is too specific. 😉 Thank you for any guidance you can give so I get started from the right place!
It’s so difficult to say! I’d probably suggest the 8, but it’s always, always a good idea to make a muslin to check. I guess that with this pattern you could always take it in a bit if needed…
Thank you, LIesl! I’m planning on making a “wearable muslin” out of inexpensive fabric; I think I’ll cut the body with extra-wide seam allowances to be safe.
Hi Liesl,
Thank you so much for doing this sew-along! Altho life happened and I feel behind at the end, it’s been a great, confidence-building experience!!
As we discussed above I cut out the Size 8 for my wearable muslin but am finding that it is uncomfortably tight along the sleeve “stripe” inset; the “pull” seems centered at the top seam of the inset. I’ve double-checked against that pattern and it’s “dead on” so I”m wondering if anybody else has had this issue. It fits well thru the shoulders after adjusting for slope, I narrowed the underarm seam allowance to free up some tightness there, and I graded out for tummy room – is going up a size my best option for the real blouse?
Thank you again for your help and I’m already looking at past sew-alongs!