Hello and welcome! We hope you’ve been inspired and gathered your supplies to sew your Liesl + Co. Hollywood Trousers. We’re glad you’re joining us for the sew-along. If you aren’t ready to get started yet, rest assured the sew-along will still be here for you when you’re ready to get going!

We’ll be working through the pattern over the next three days. Here’s our schedule:
Day 1: Getting Started, Sew the Front Pockets and Zipper Fly
Day 2: Sew the Back Darts, Assemble the Trousers and Lining
Day 3: Sew the Waistband and Finish the Trousers
Over the next couple of days, we will be updating this post by adding the steps for additional days as they arrive. So be sure to check back here if you are sewing with us day-by-day instead of looking for a new post each day.
Let’s begin, shall we?
Getting started
As with any trouser pattern, we highly recommend that you make a muslin to test the fit before you begin. These trousers are very fitted through the waist and hips, so it’s important to adjust the fit to your own body and preferences before you begin. For more tips about making a muslin take a look at Liesl’s preparation post for this sew-along as well as our general tips about making a muslin.
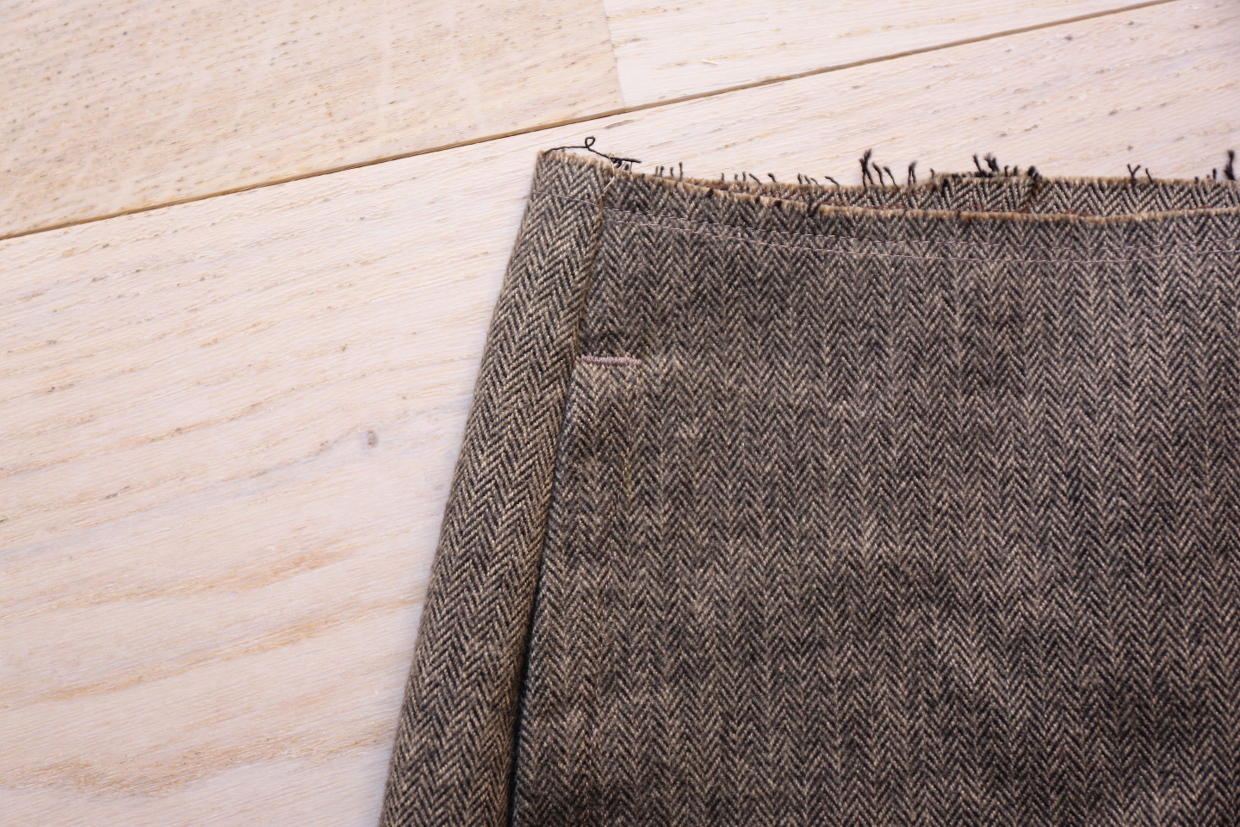
1) If desired, you can finish the seam allowances of the trouser front and back pieces at the inseam, the outseams (the side seams), and the rise before you begin. Use your preferred method for finishing the seam allowances: zigzag, mock serger, or serger stitch. If you’re using a serger, be careful not to trim the seam allowances as you finish them. Finishing the seam allowances in advance makes the construction especially easy and quick since you don’t need to worry about finishing them as you progress.
Sew the front pockets (optional)
Liesl’s tip: be sure you’ve checked the fit before you sew the pockets because it’s difficult to change the side seams once the pockets are finished.
1) Align and pin one pocket facing to its coordinating pocket stay, with right sides together and notches aligned, and stitch with a 1/2” seam, backstitching or lockstitching at both ends. Press the seam allowances toward the pocket stay and finish them together using your preferred method. Finish the opposite edge of the pocket facing as well. Edgestitch the pocket facing along the seam line, if desired, to keep it in place. Repeat to prepare the second set of pocket facing/pocket stay pieces.

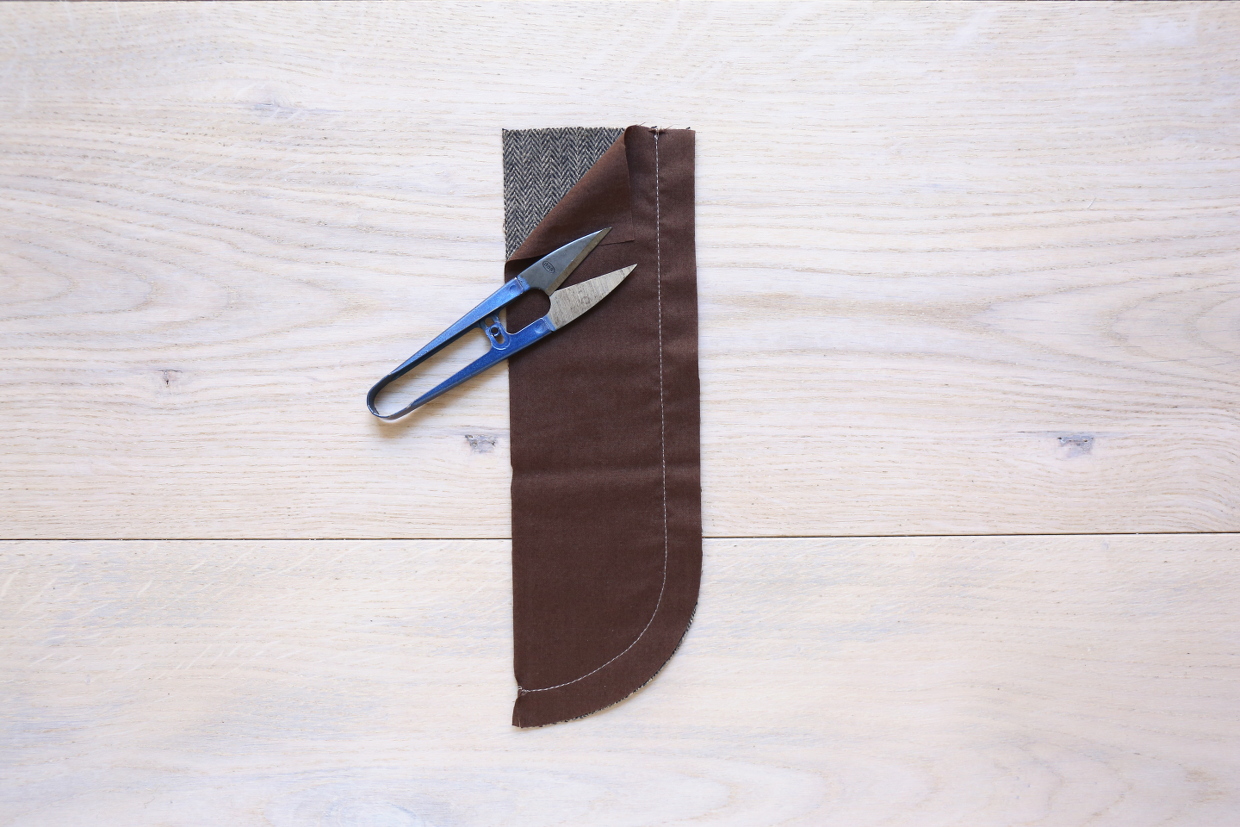
2) Finish the innermost edge of the pocket bag using your preferred method, being careful not to trim the edges if you’re using a serger. Pin the pocket bag to a trouser-front piece, with right sides together and matching the edges and the dots. Stitch the pocket opening by starting at the cut edge of the fabric (backstitch or lockstitch to get started) and stitching to the dot. Pivot at the dot, then stitch to the next dot with a 1/2” seam. Pivot again when you reach the second dot, then finish by stitching out to the edge of the fabric and backstitching or lockstitching once again.
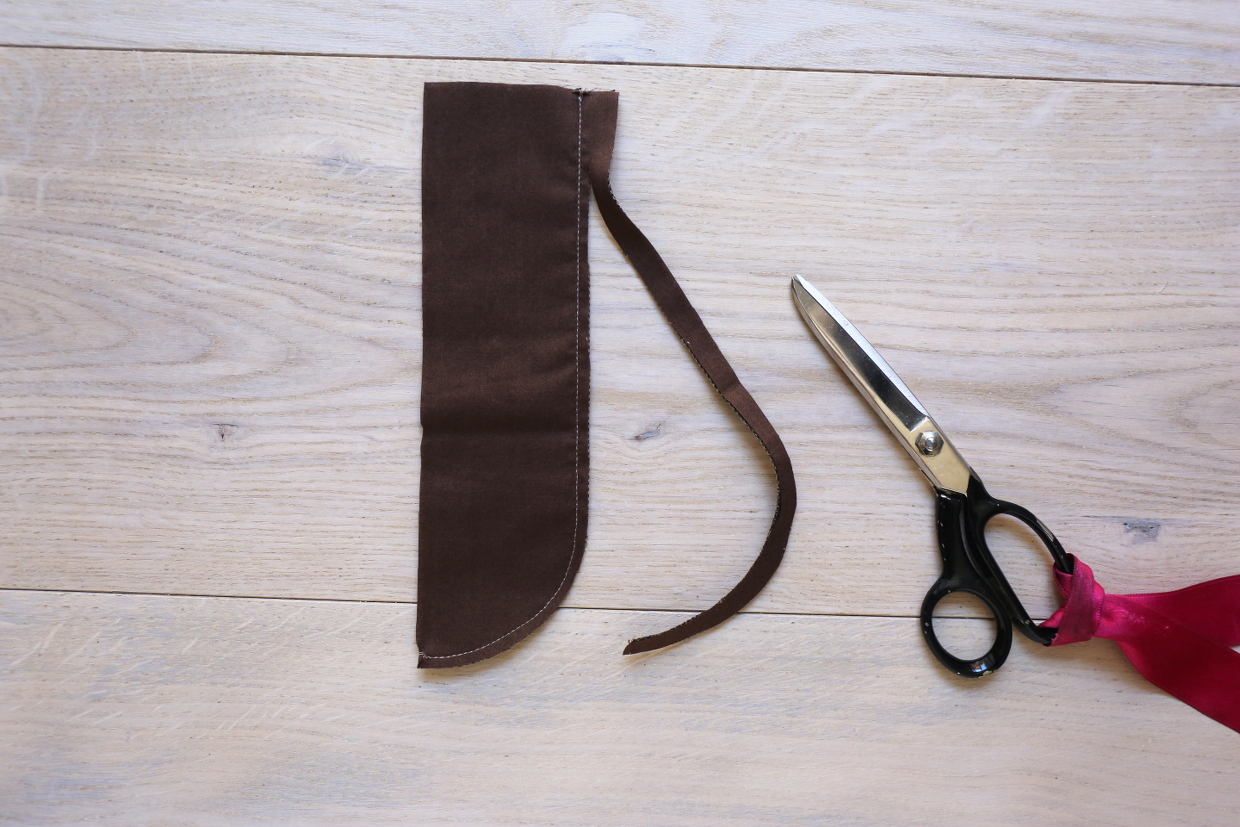
3) Clip into the stitched corners at a 45-degree angle, clipping as close to the stitching as you can at the dot without cutting the stitches themselves. Turn the pocket bag to the wrong side of the trouser-front piece, pressing the stitched pocket edge and rolling the seam slightly to the wrong side of the trouser-front piece so it won’t show when the trousers are worn. When you’re finished you’ll have a neat inside corner at either end of the pocket edge.
4) Topstitch the pocket opening, starting and ending precisely at the corners and pivoting to stitch 1/4” from the sewn edge before pivoting again to end at the second corner. (You might want to lengthen your stitches a bit for this step because it often looks nicer for topstitching.)
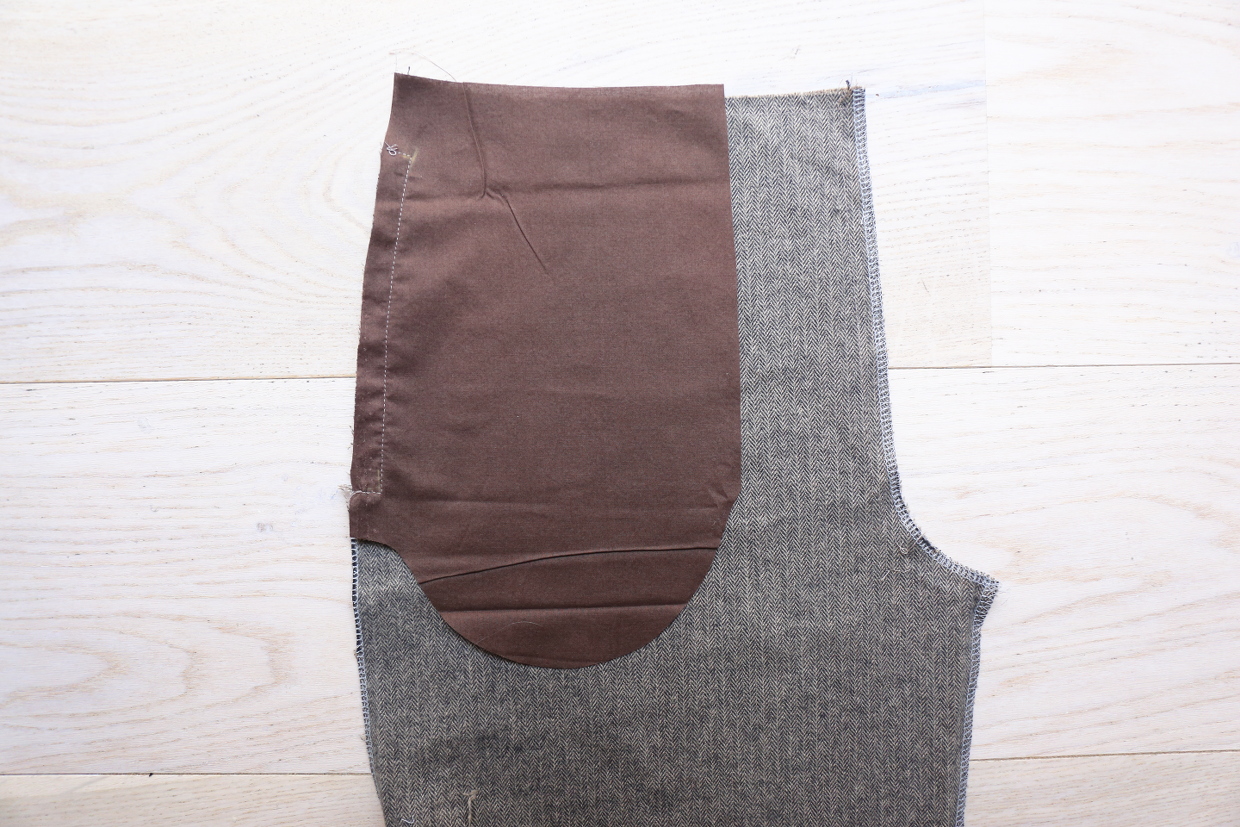
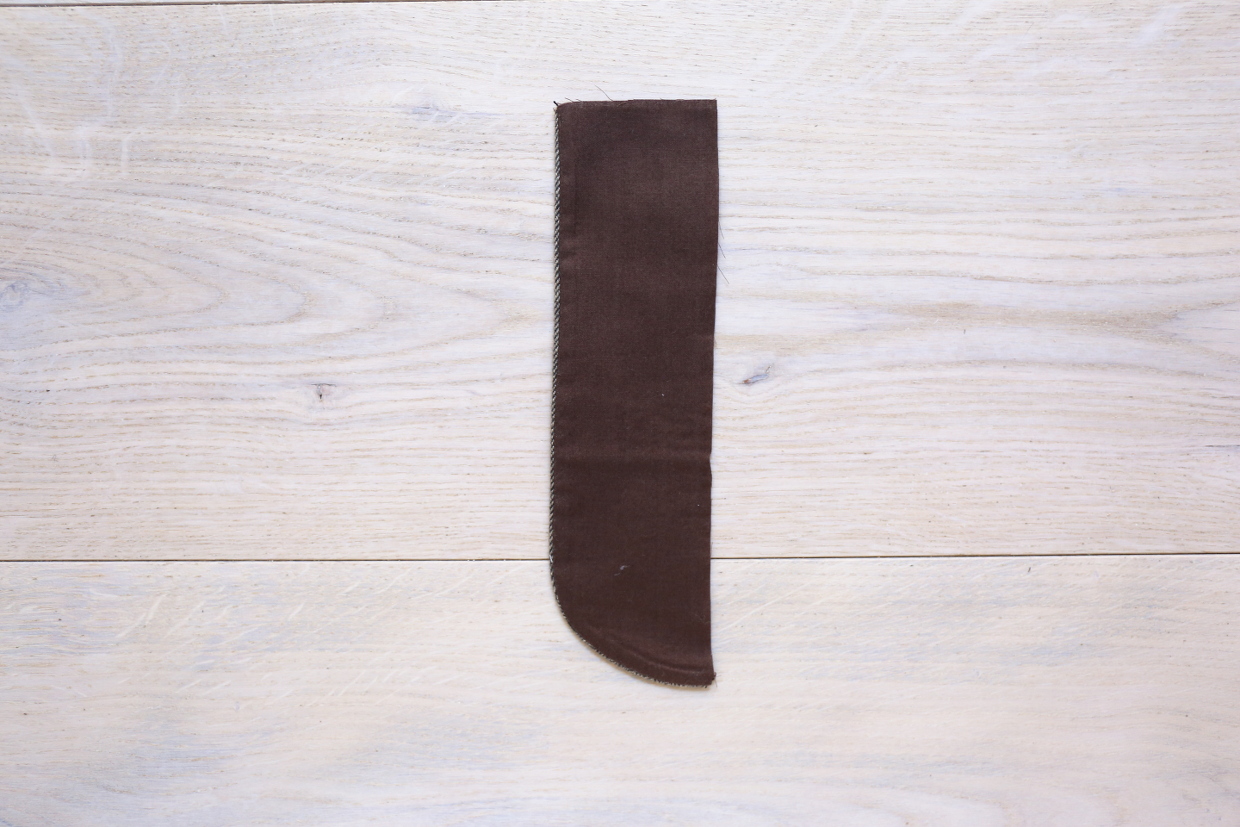
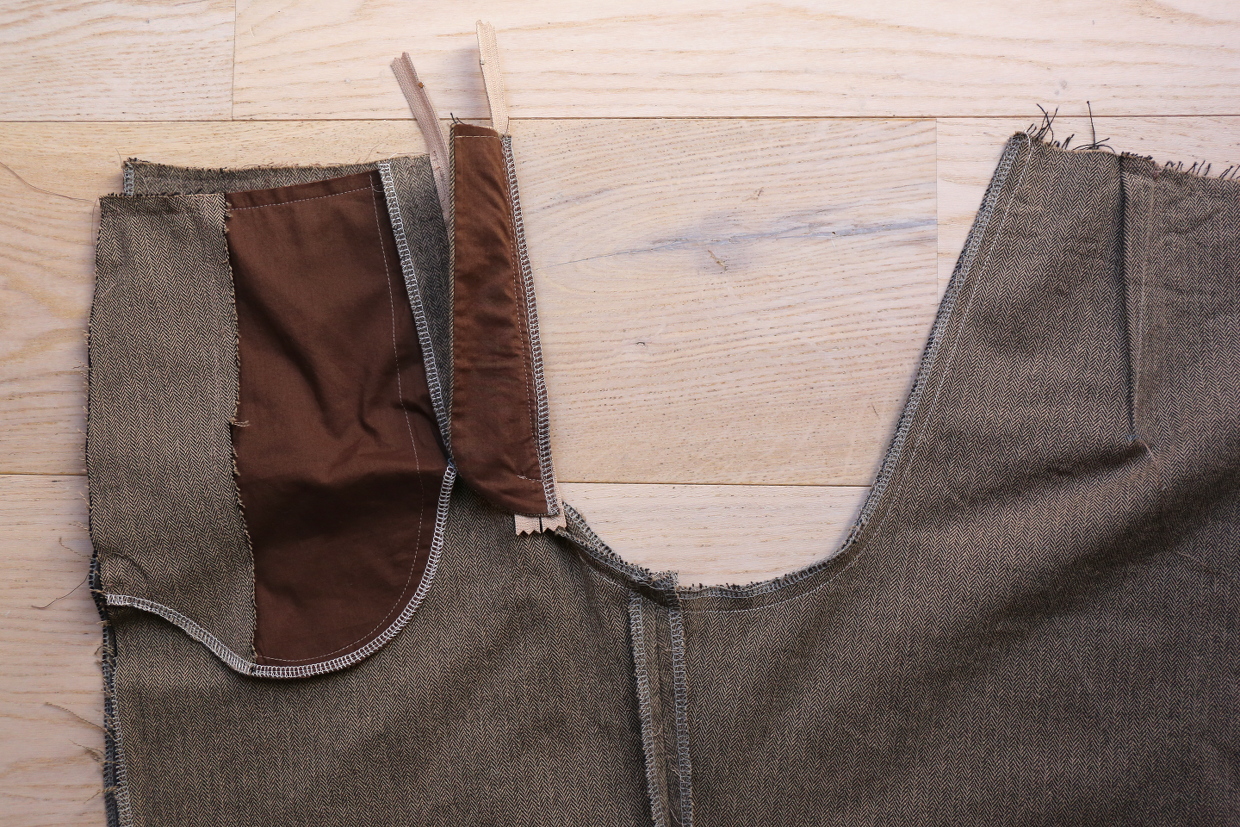
5) Turn the trouser-front piece to the wrong side and pin the prepared pocket facing and pocket stay to the pocket bag with right side down, matching the outside and top edges of the pocket facing to the trousers. Smooth the pocket facing/stay over the pocket bag, matching the notches, and pin the bottom edges (don’t pin the trousers). Lift the pocket bag and pocket stay so you can also pin the inside edge of the pocket bag to the pocket stay. Stitch the inside edge of the pocket bag to the pocket stay with as little as 1/2” seam or as much as 1 1/2” (we’ve provided a stitch line on the pattern piece, but stitch wherever is convenient within these parameters), then pivot to stitch the curved bottom edge of the pocket with a 1/2” seam, backstitching or lockstitching at the side seam. Finish the curved bottom edge of the pocket bag and pocket facing together using your preferred method.
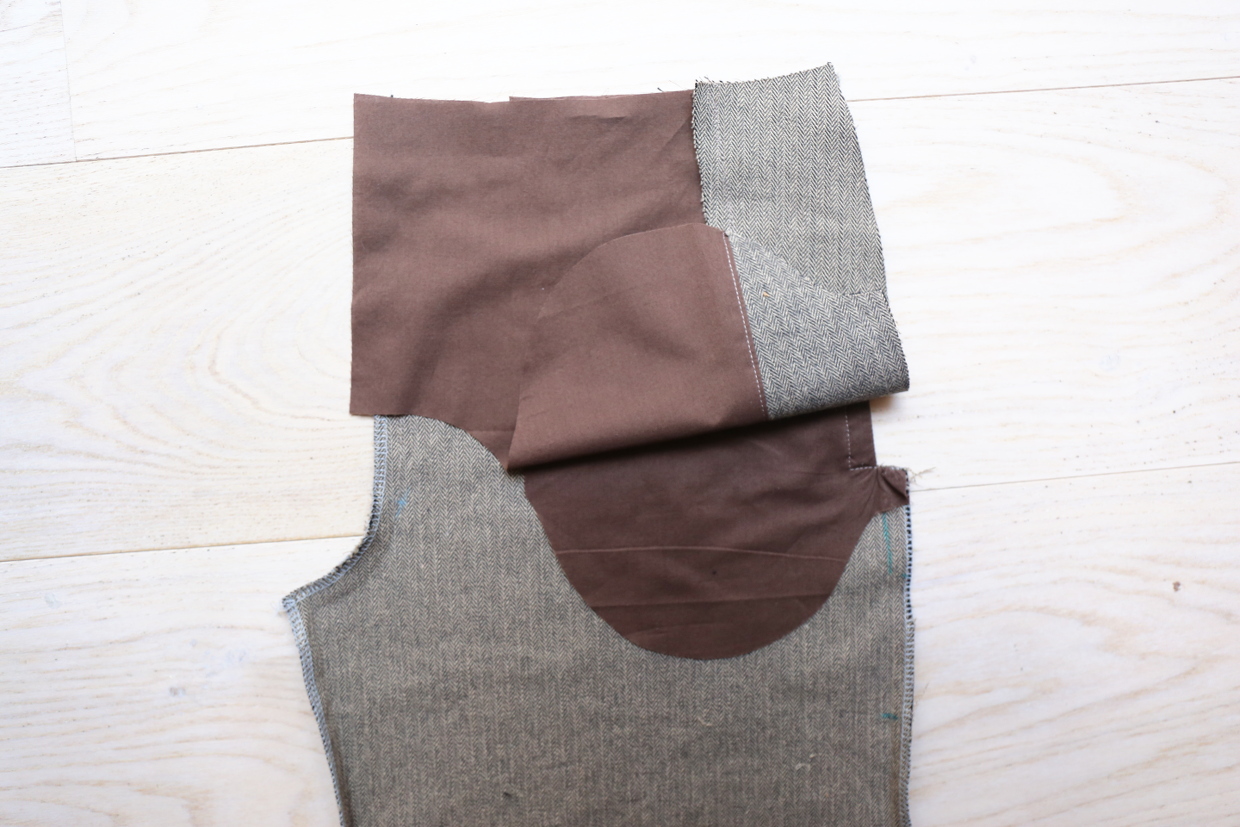

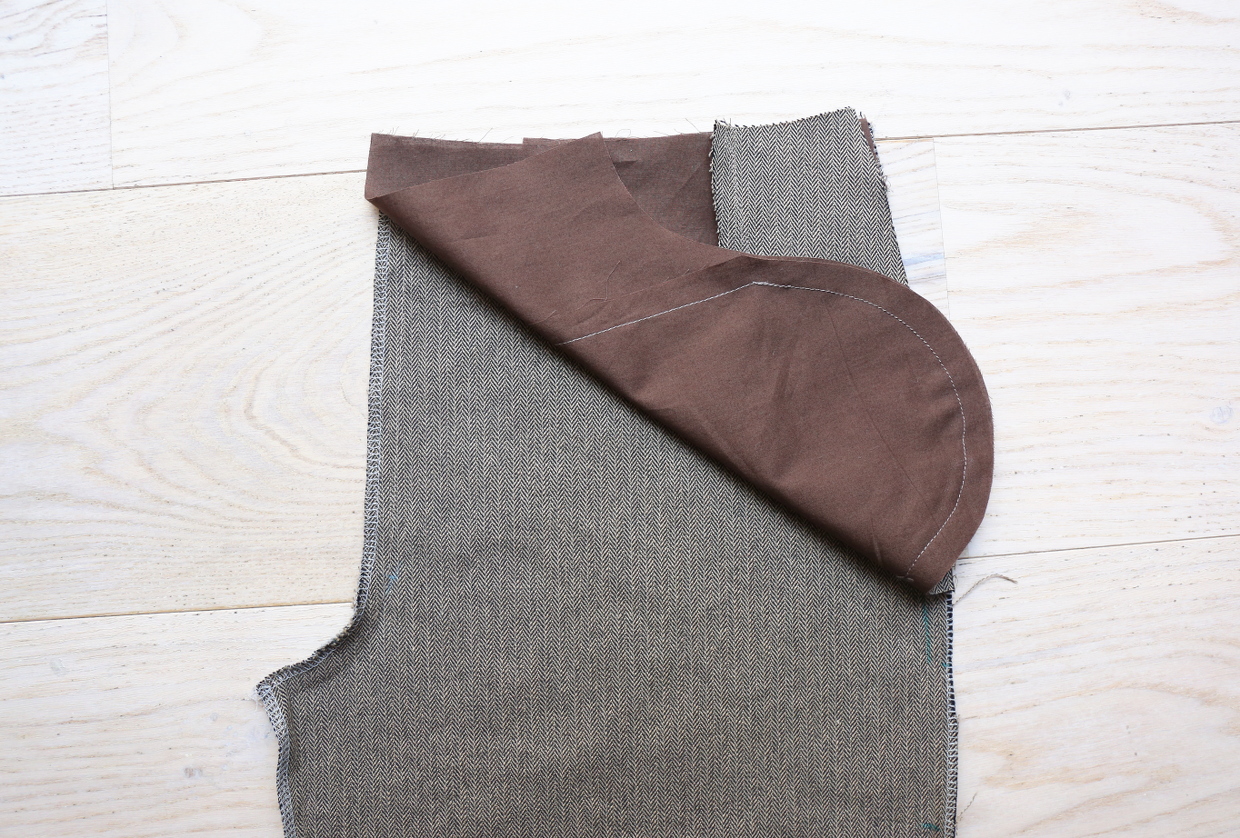
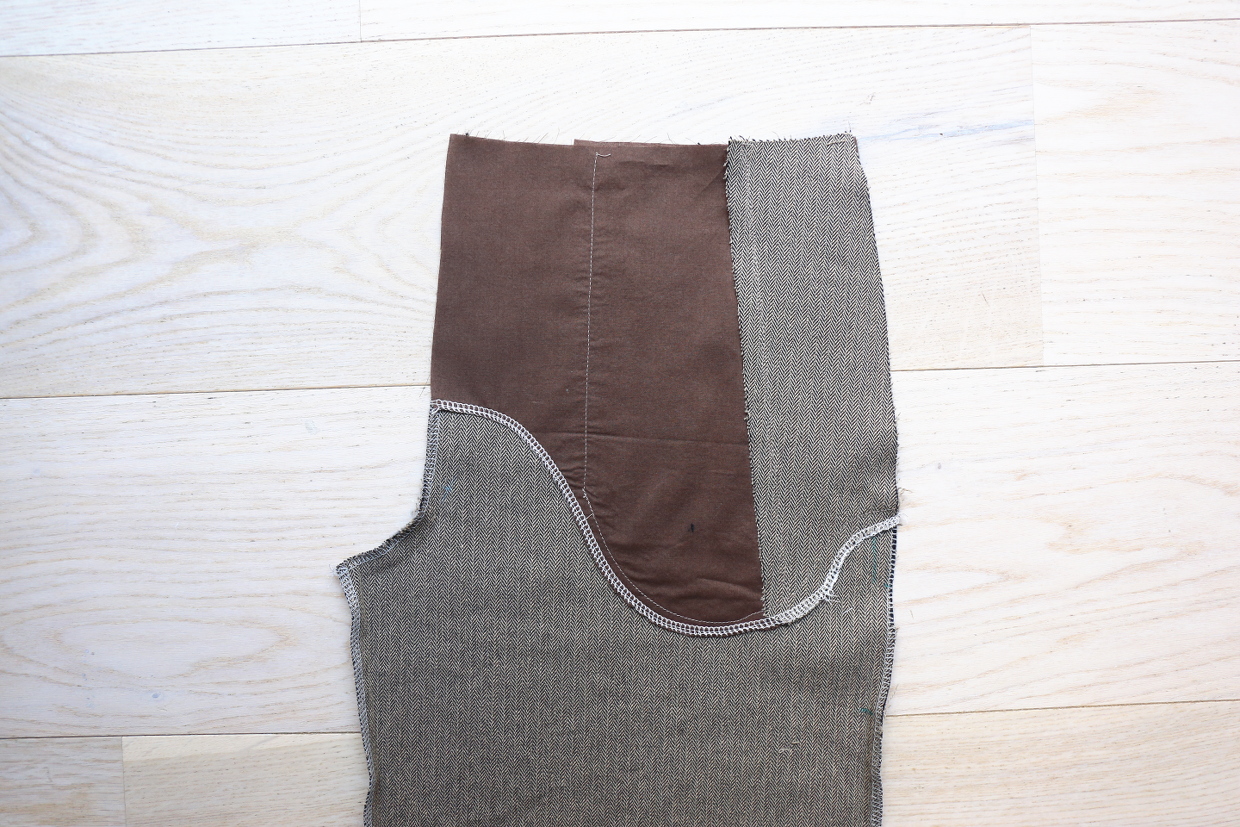
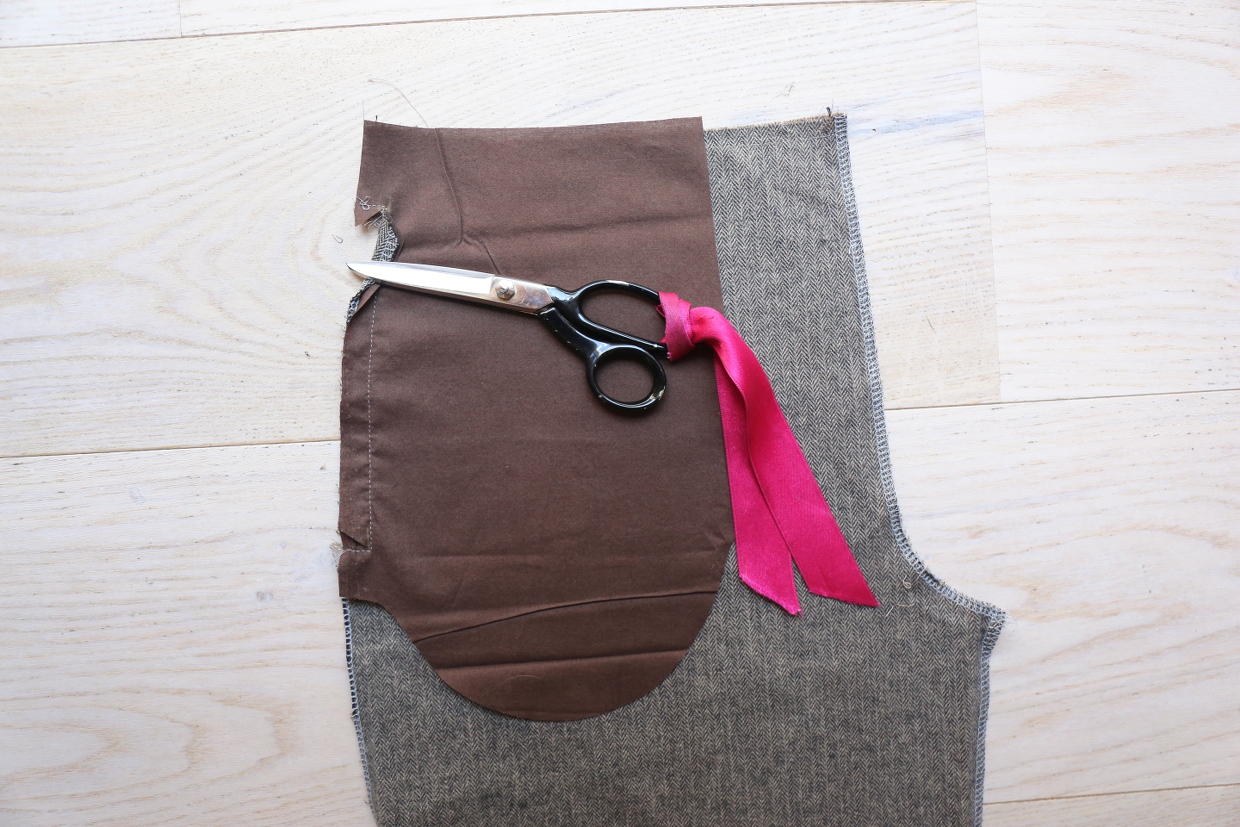
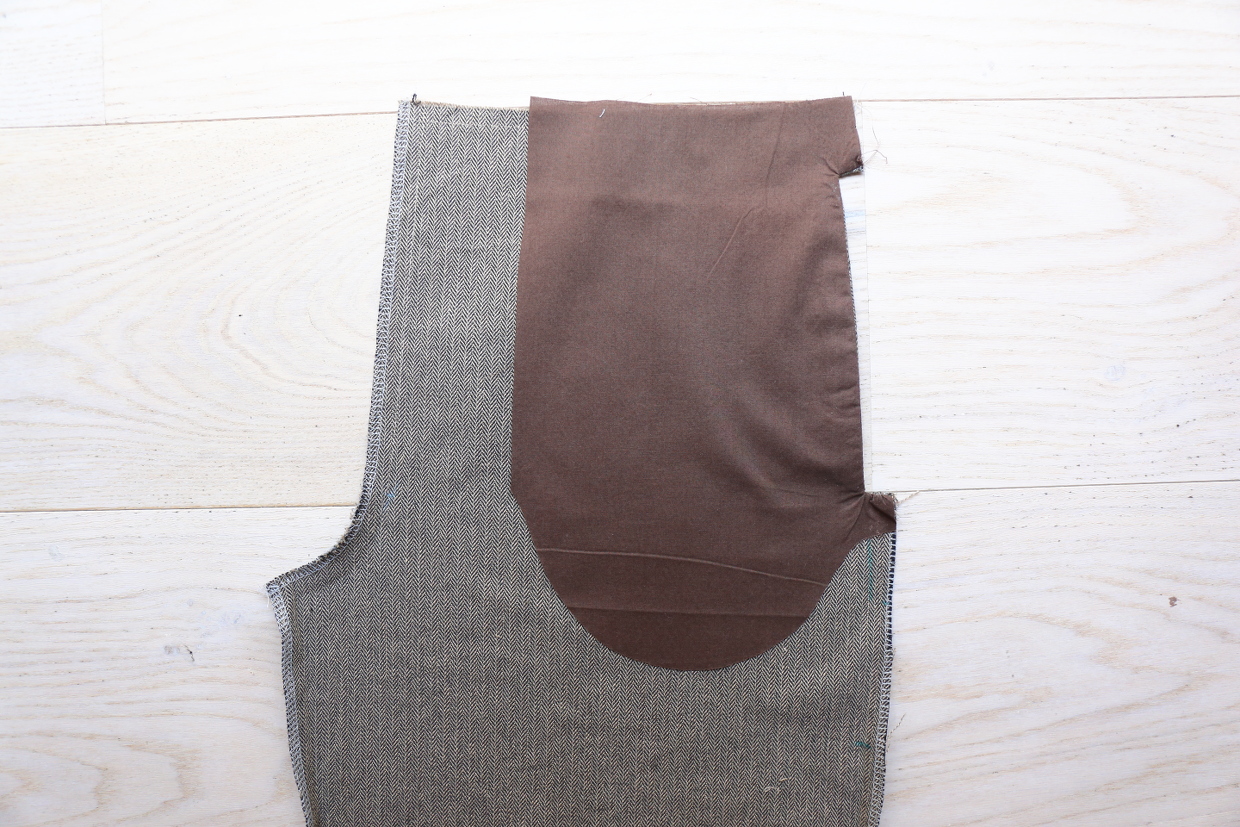
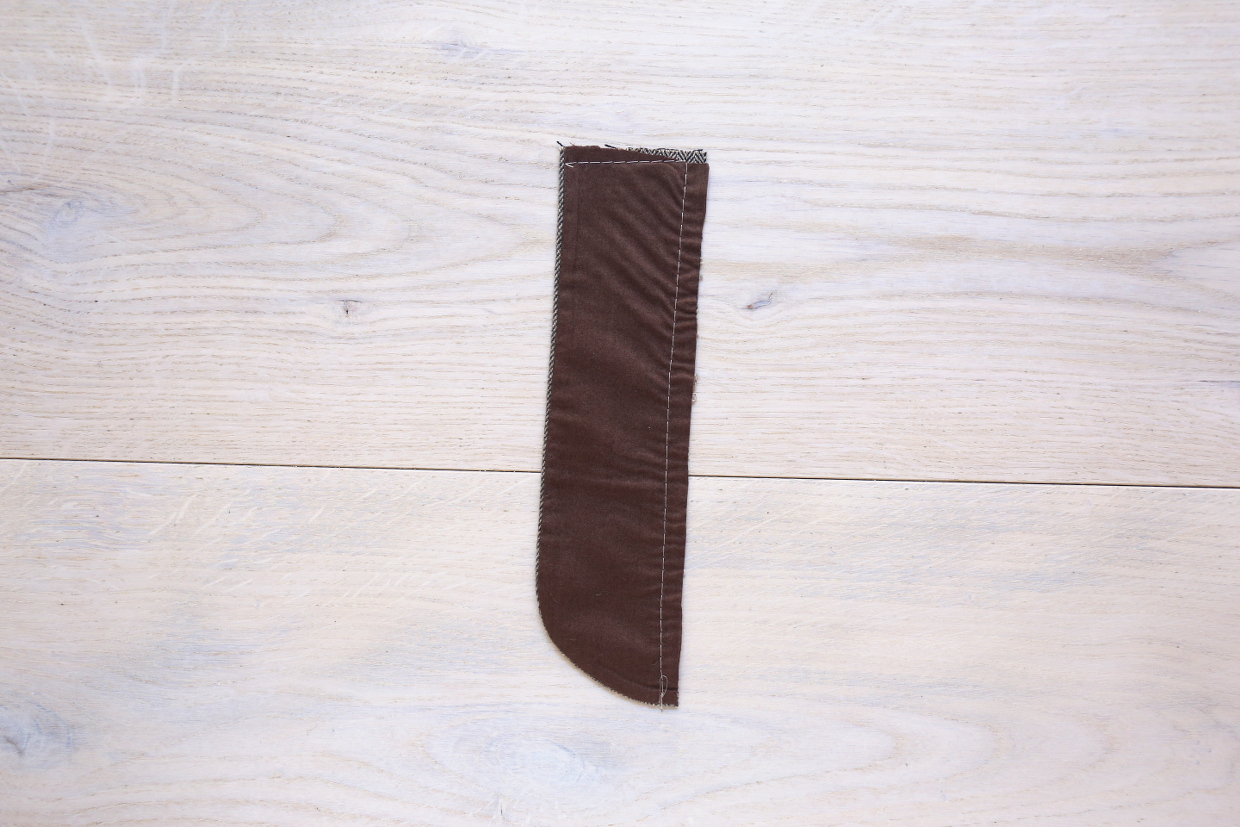
6) Pin the finished pocket to the trouser front, aligning it with the edges of the trouser and smoothing it to lie flat. Staystitch the waist edge of the trousers with a 3/8” seam, catching the pockets in the stitching. Baste the pocket bag and facing to the side seam of the trouser with a 1/2” seam, taking care to stitch precisely at the corners of the pocket. This will make it easier to stitch the side seam later. Baste the pocket stay to the rise of the trousers with a 1/4” seam. (We’ll use this 1/4” basting later.) If the pocket stay extends beyond the center-front edge of the trouser fabric, trim it to be even.
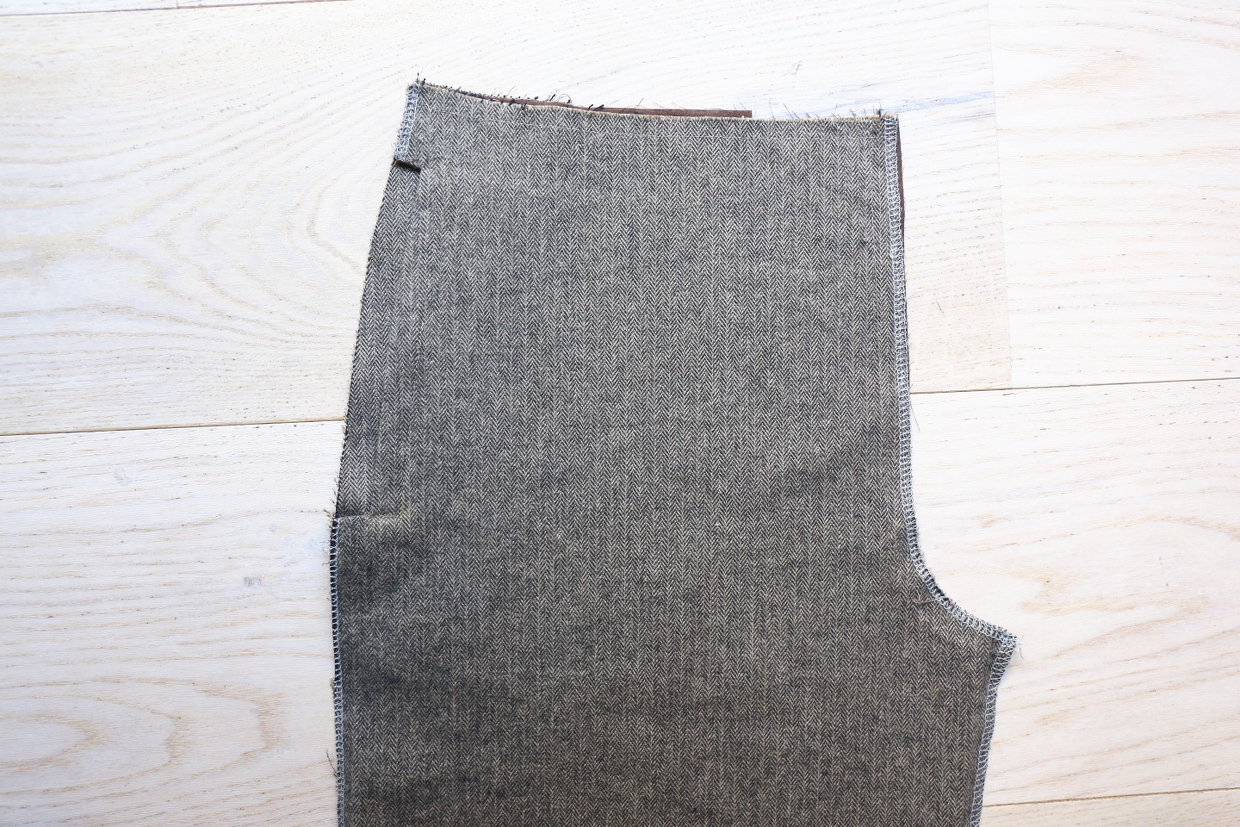
7) Repeat steps 2-6 to attach the second pocket to the other trouser-front panel.
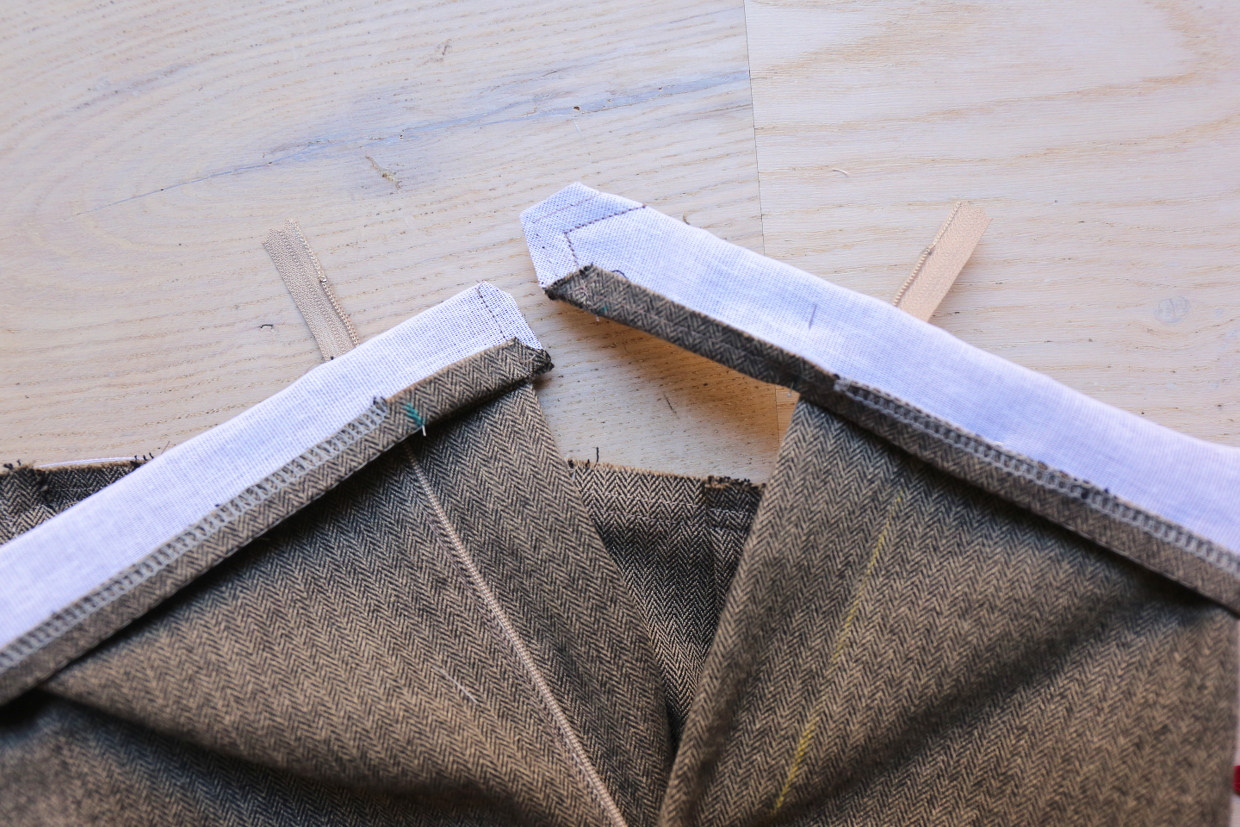
Sew the zipper fly
Liesl’s tip: Keep careful track of your fly pieces here. It’s easy to get them confused or to mistake right side and wrong side.
1) Follow the manufacturer’s instructions to fuse the fly facing cut from the interfacing to the wrong side of the fly facing.
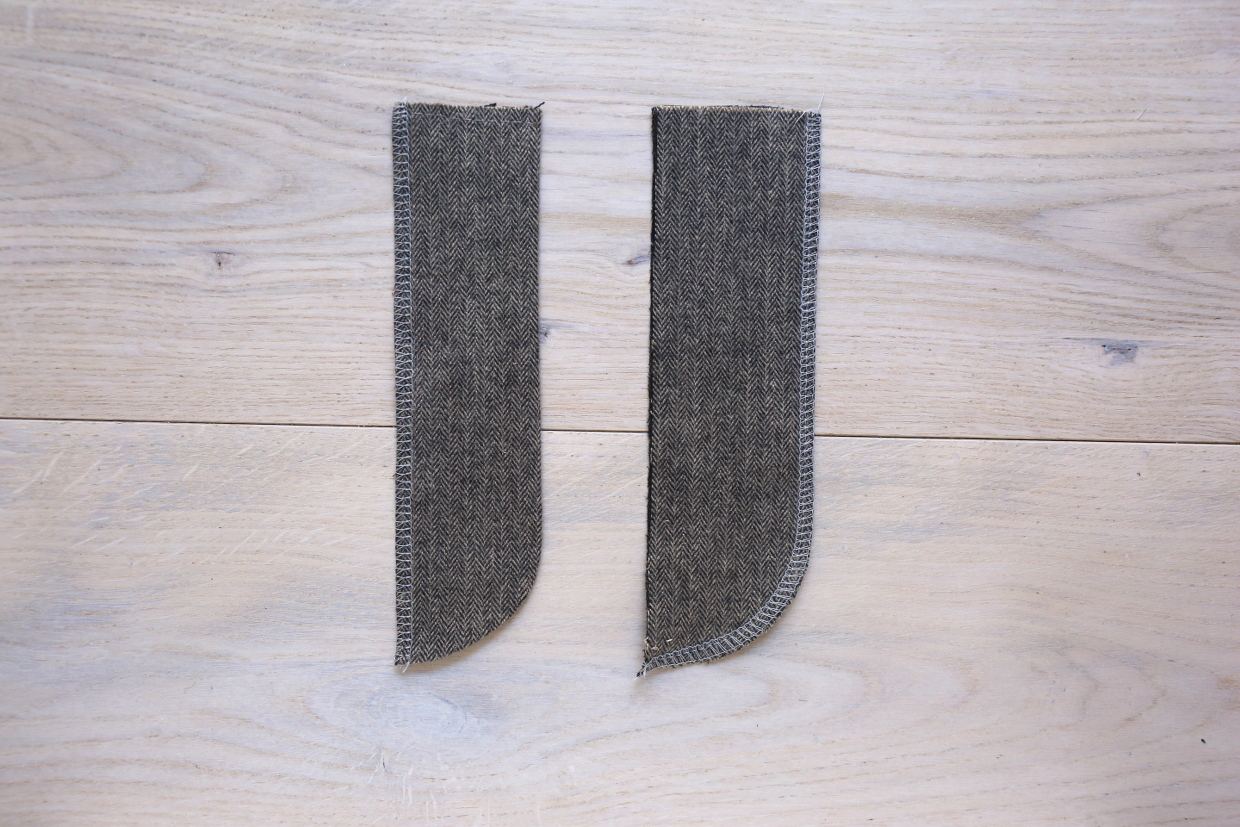
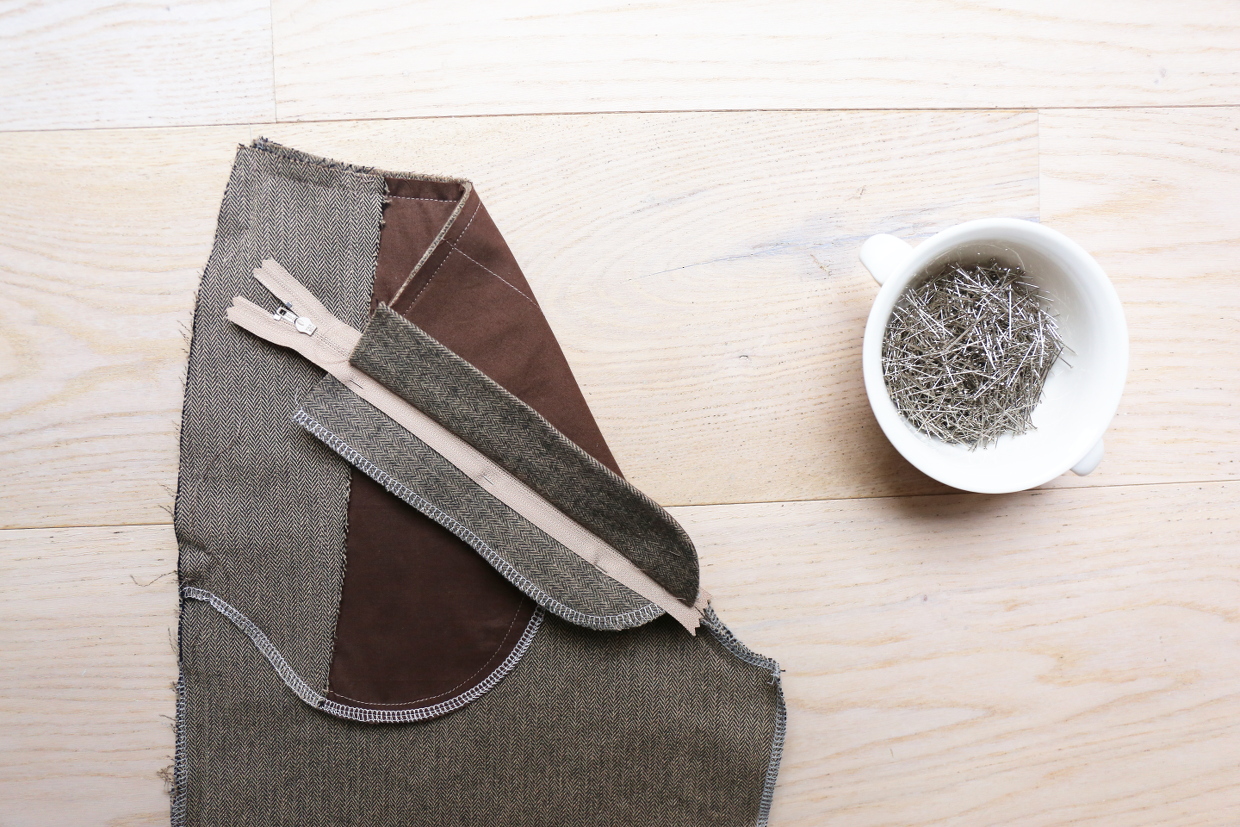
2) Pin the fly shield cut from the lining to the fly shield cut from the fabric, with right sides together. Stitch the curved edge with a 1/2” seam, backstitching or lockstitching at both ends. Trim the stitched seam allowances to 1/8” and turn the fly shield right-side out. Press the stitch curve, rolling the seam toward the lining side so it doesn’t show from the right side. Baste the unfinished straight edges with a 1/4” seam.
3) If you haven’t done so already, finish the trouser front and back rise seam allowances using your preferred method. Take this opportunity to also finish the curved edge of the fly facing and the long straight edge of the fly shield. If you’re using a serger, be careful not to trim the edges a you finish them.
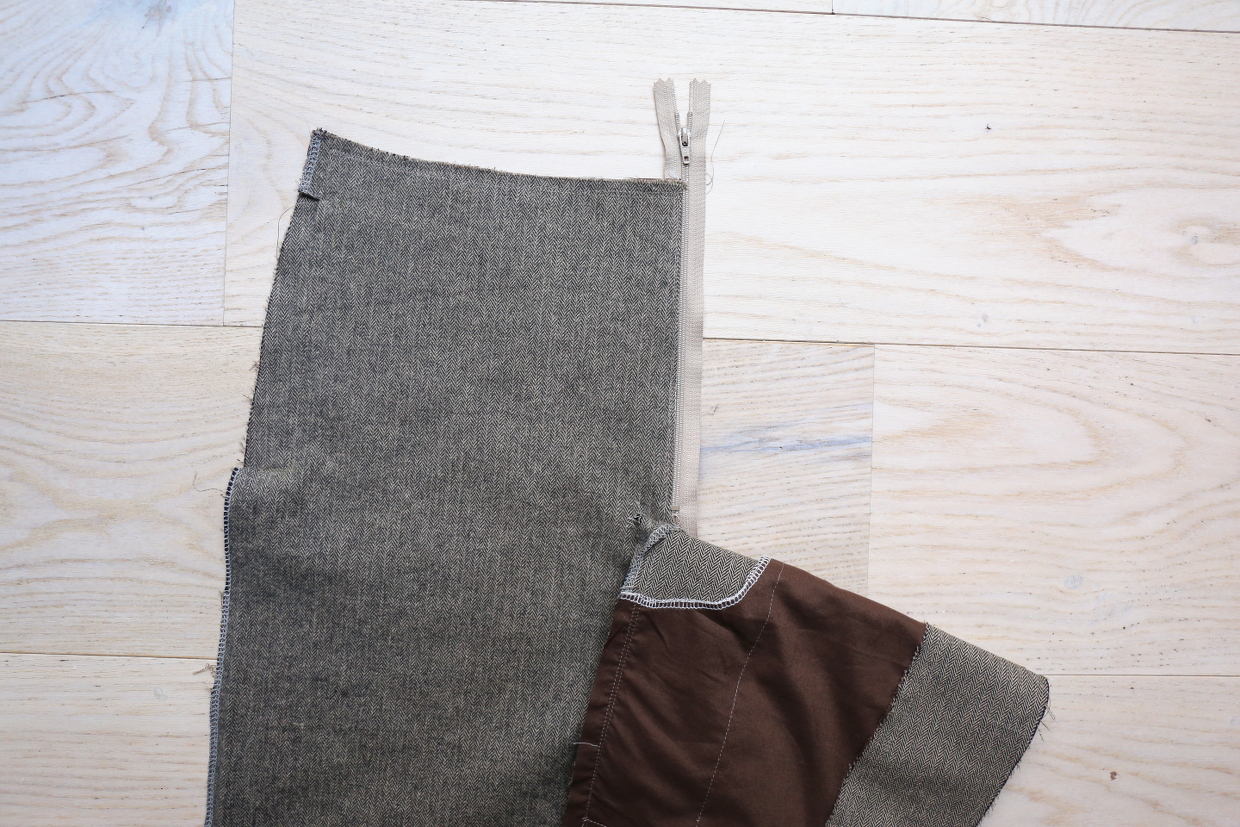
4) Pin the two trouser-front pieces with right sides together and stitch from the dot on the front rise to the dot near the edge of the inseam/rise with a 1/2” seam, backstitching or lockstitching at both ends.
5) Separate the trouser-front pieces above the stitching, folding the wearer’s right front out of the way so you can work with the wearer’s left. On the wearer’s left trouser-front piece, pin the prepared fly facing to the front rise, matching the dots you transferred from the pattern pieces. Stitch the fly facing to the left front trouser with a 1/2” seam, beginning at the top edge and ending at the dot, or as close to the dot as you can stitch, backstitching or lockstitching at both ends.
6) Switch over to the wearer’s right trouser front, folding the wearer’s left front out of the way for the time being. We’ll use the 1/4” basting stitch from when we basted the pocket stays to the center front as a folding guide in the next step.
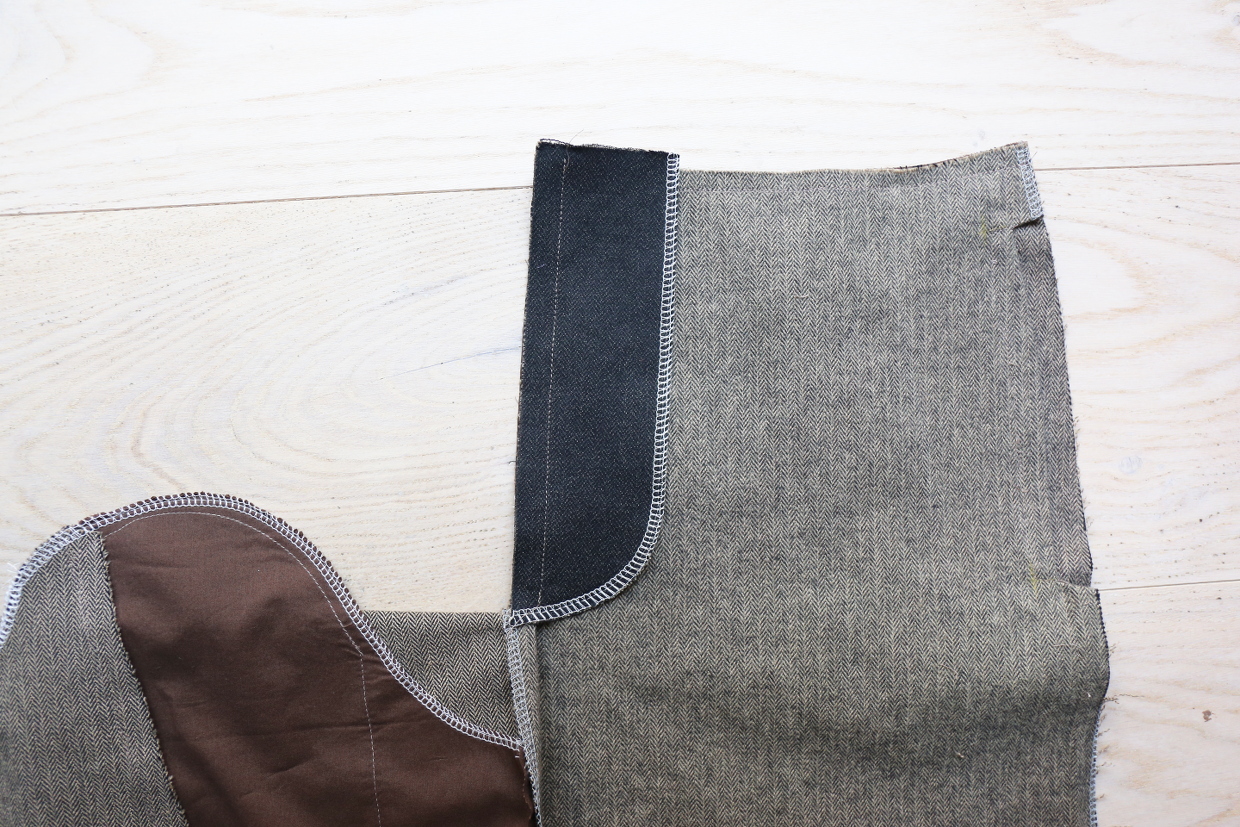
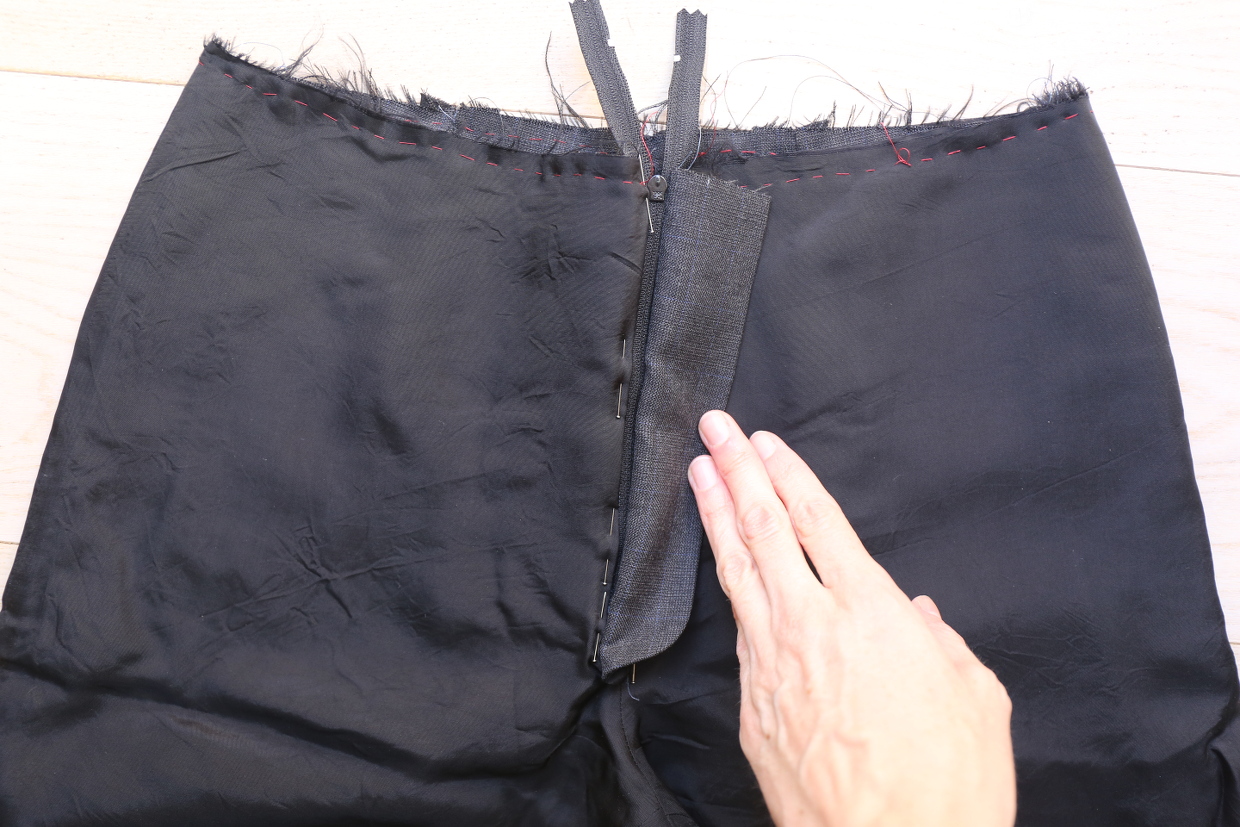
7) Fold the wearer’s right front rise along the 1/4” basting stitch and pin or glue the folded edge of the rise to the zipper so the zipper stop (the metal piece at the bottom of the zipper) ends slightly (1/4”) above the dot and the folded edge of the rise meets the zipper coils. The top of the zipper will extend above the waist edge of the trousers. Baste the zipper to the trousers with a 1/8” seam. Then pin the fly shield right-side up, under the zipper, matching the dots and positioning the finished edge of the fly shield to match the innermost edge of the zipper tape. Edgestitch through the fly shield, the zipper tape, and the trousers 1/8” from the edge of the rise, backstitching or lockstitching at both ends. You’ll be stitching over or right next to the basting stitches here. (You may want to use your zipper foot for this.)
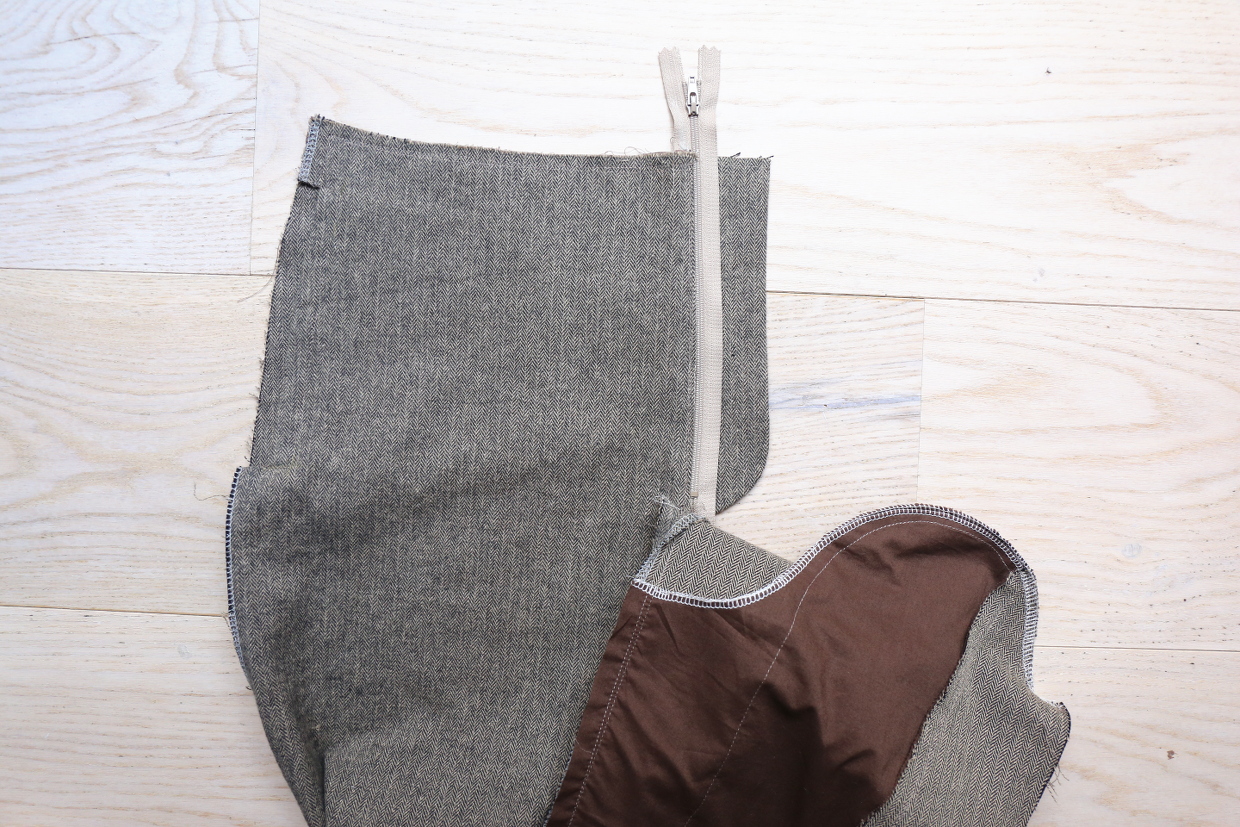
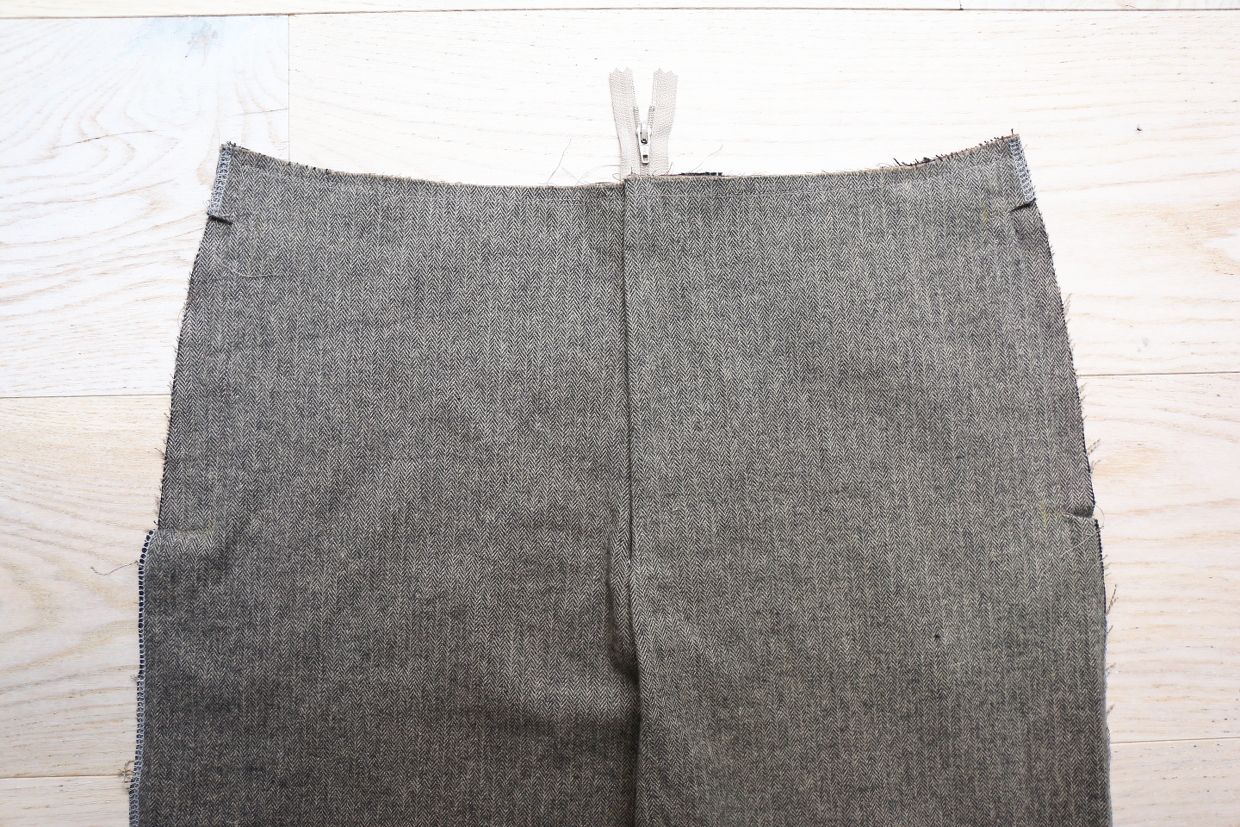
8) Turn the fly facing to the inside of the wearer’s left trousers and press the seam, rolling it slightly to the inside so it doesn’t show when the trousers are finished. Position the wearer’s left trousers over the right trousers so the zipper and topstitching are covered by about 1/4”. Because the zipper is offset from the center by 1/4”, the seam can overlap the zipper by the same amount. Pin the overlapping left trouser front to the right front to hold it in place temporarily, then flip the left trouser front over the right trouser front to expose the zipper and the fly facing. Flip the fly shield out of the way as well so you can stitch the remaining edge of the zipper to just the fly facing.
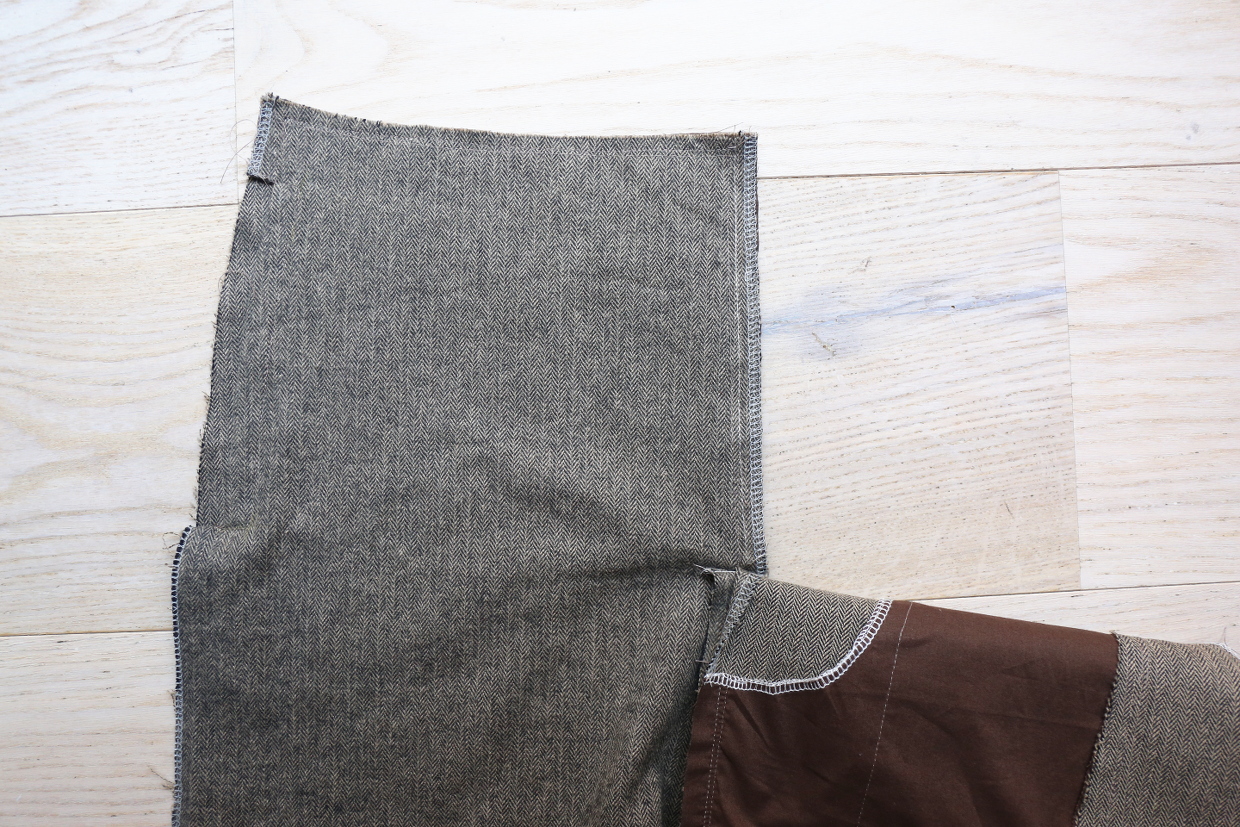
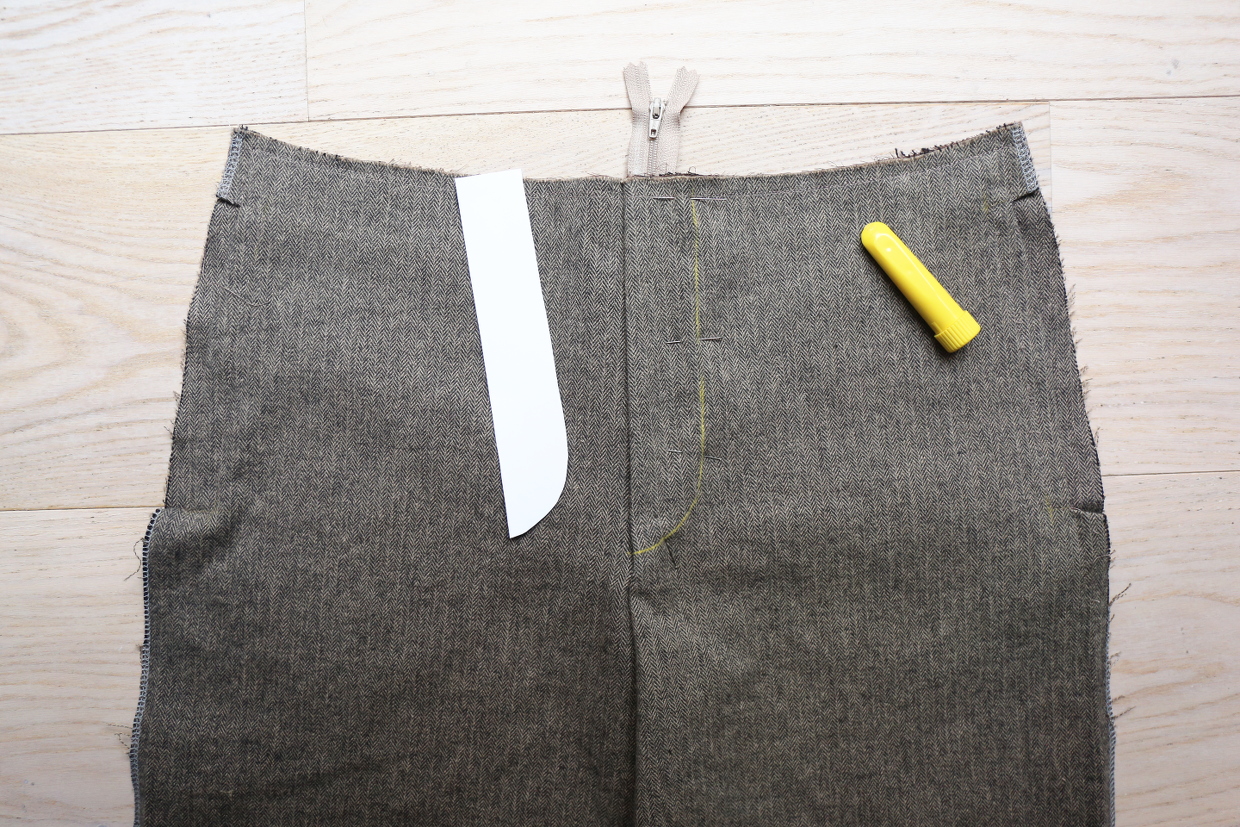
9) If you haven’t done so already, cut out the fly stitching template (or you might prefer to trace it onto tissue paper so it’s easier to handle). Pin it into place at the trouser front so the straight edge aligns with the front rise and the curve is positioned over the wearer’s left side. Take note of the zipper stop at the bottom of the zipper to be sure the topstitching line safely clears the metal so you don’t break your needle. (The fly topstitching should end below the metal stopper, so shift the template a bit if necessary). If you prefer, use a water-soluble fabric-marking pen to trace the curved edge onto the fabric so you can remove the template. Then pin the wearer’s left trouser front to the fly facing to hold them in place, unzip the zipper, and push the fly facing out of the way. Topstitch the traced stitching guide, following the line of the template. Backstitch or lockstitch when you reach the dot/rise seam. In this step you won’t be stitching the wearer’s right side of the trousers or the fly shield at all.
And with that, we’re wrapping up Day 1 of the sew-along. Now, when you’re ready, it’s on to Day 2.
Welcome to Day 2 of the Hollywood Trousers sew-along. Today we’re going to work together to sew the back darts and assemble the trousers and the optional lining.
Sew the back darts
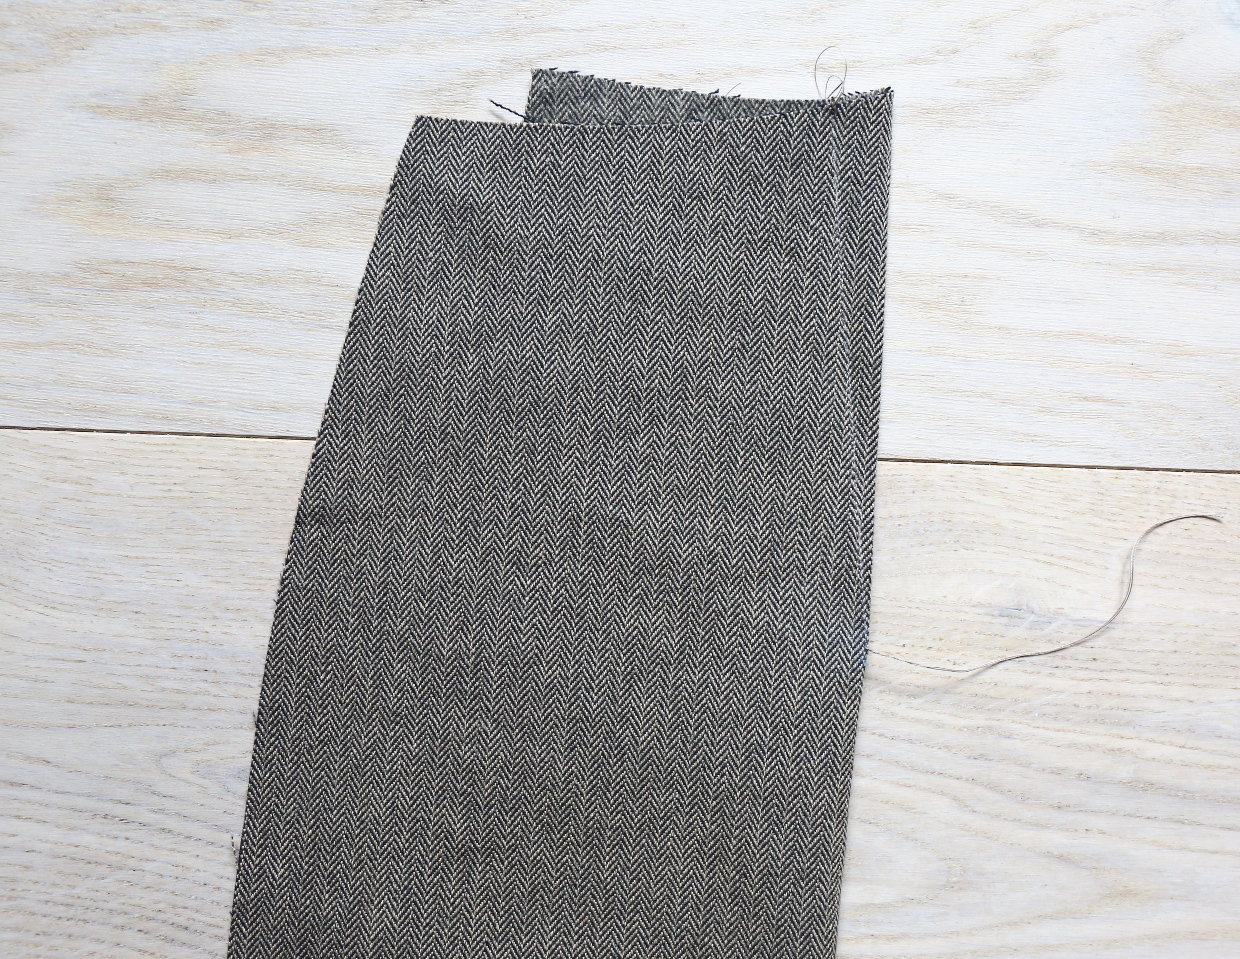
1) If you have not done so already, transfer the dart markings from the trouser-back pattern piece to the wrong side of the corresponding cut fabric pieces using tailor’s chalk or a water-soluble fabric-marking pen. To close the darts, fold the trouser back along the dart’s center, with the fabric’s right sides together and the marked dart lets aligned; then pin and stitch along the aligned dart markings, backstitching at the widest part of the dart but not at its tip. Instead, at the dart’s point, leave thread tails several inches long and knot the thread tails together a couple times to secure the thread. This will reduce bulk at the tip of the dart and prevent the dart from puckering. Press the dart flat to set the stitches; then press it toward the back rise.
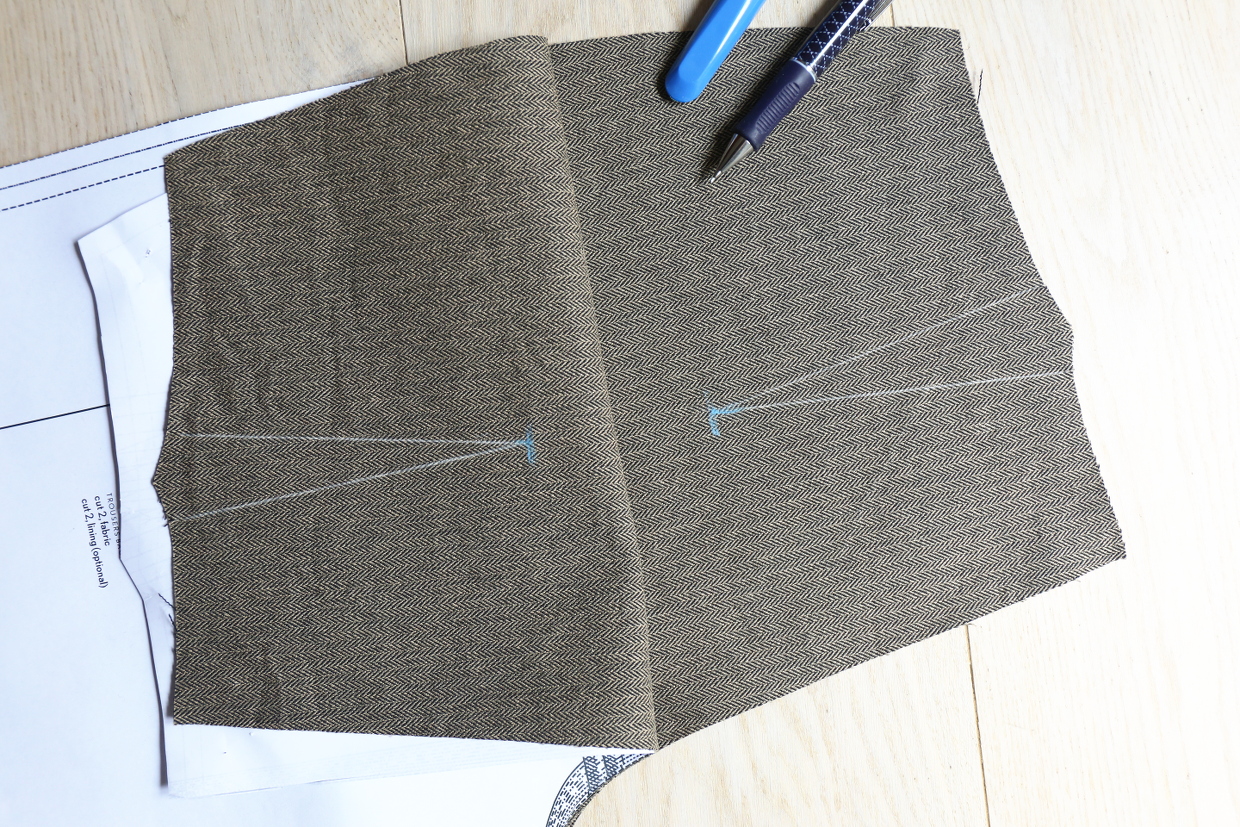
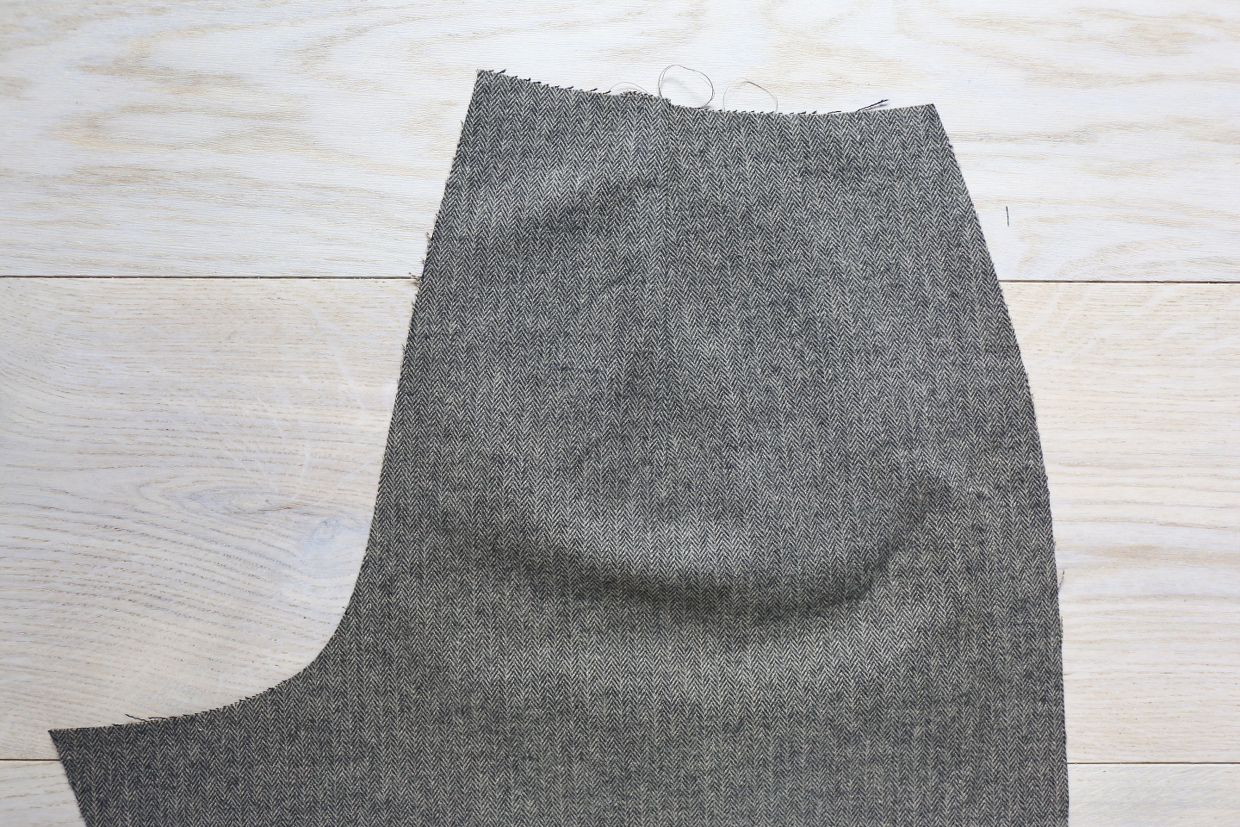
2) Repeat with the dart on the second trouser-back piece. Staystitch the waist edge of each trouser back piece 3/8” from the cut edge.
Assemble the trousers
Liesl’s tip: I prefer to sew the inseams before completing the rise, especially since these trousers have a bit of negative ease built into the back inseam for a better fit. As a result, this is a slightly different construction order than usual.
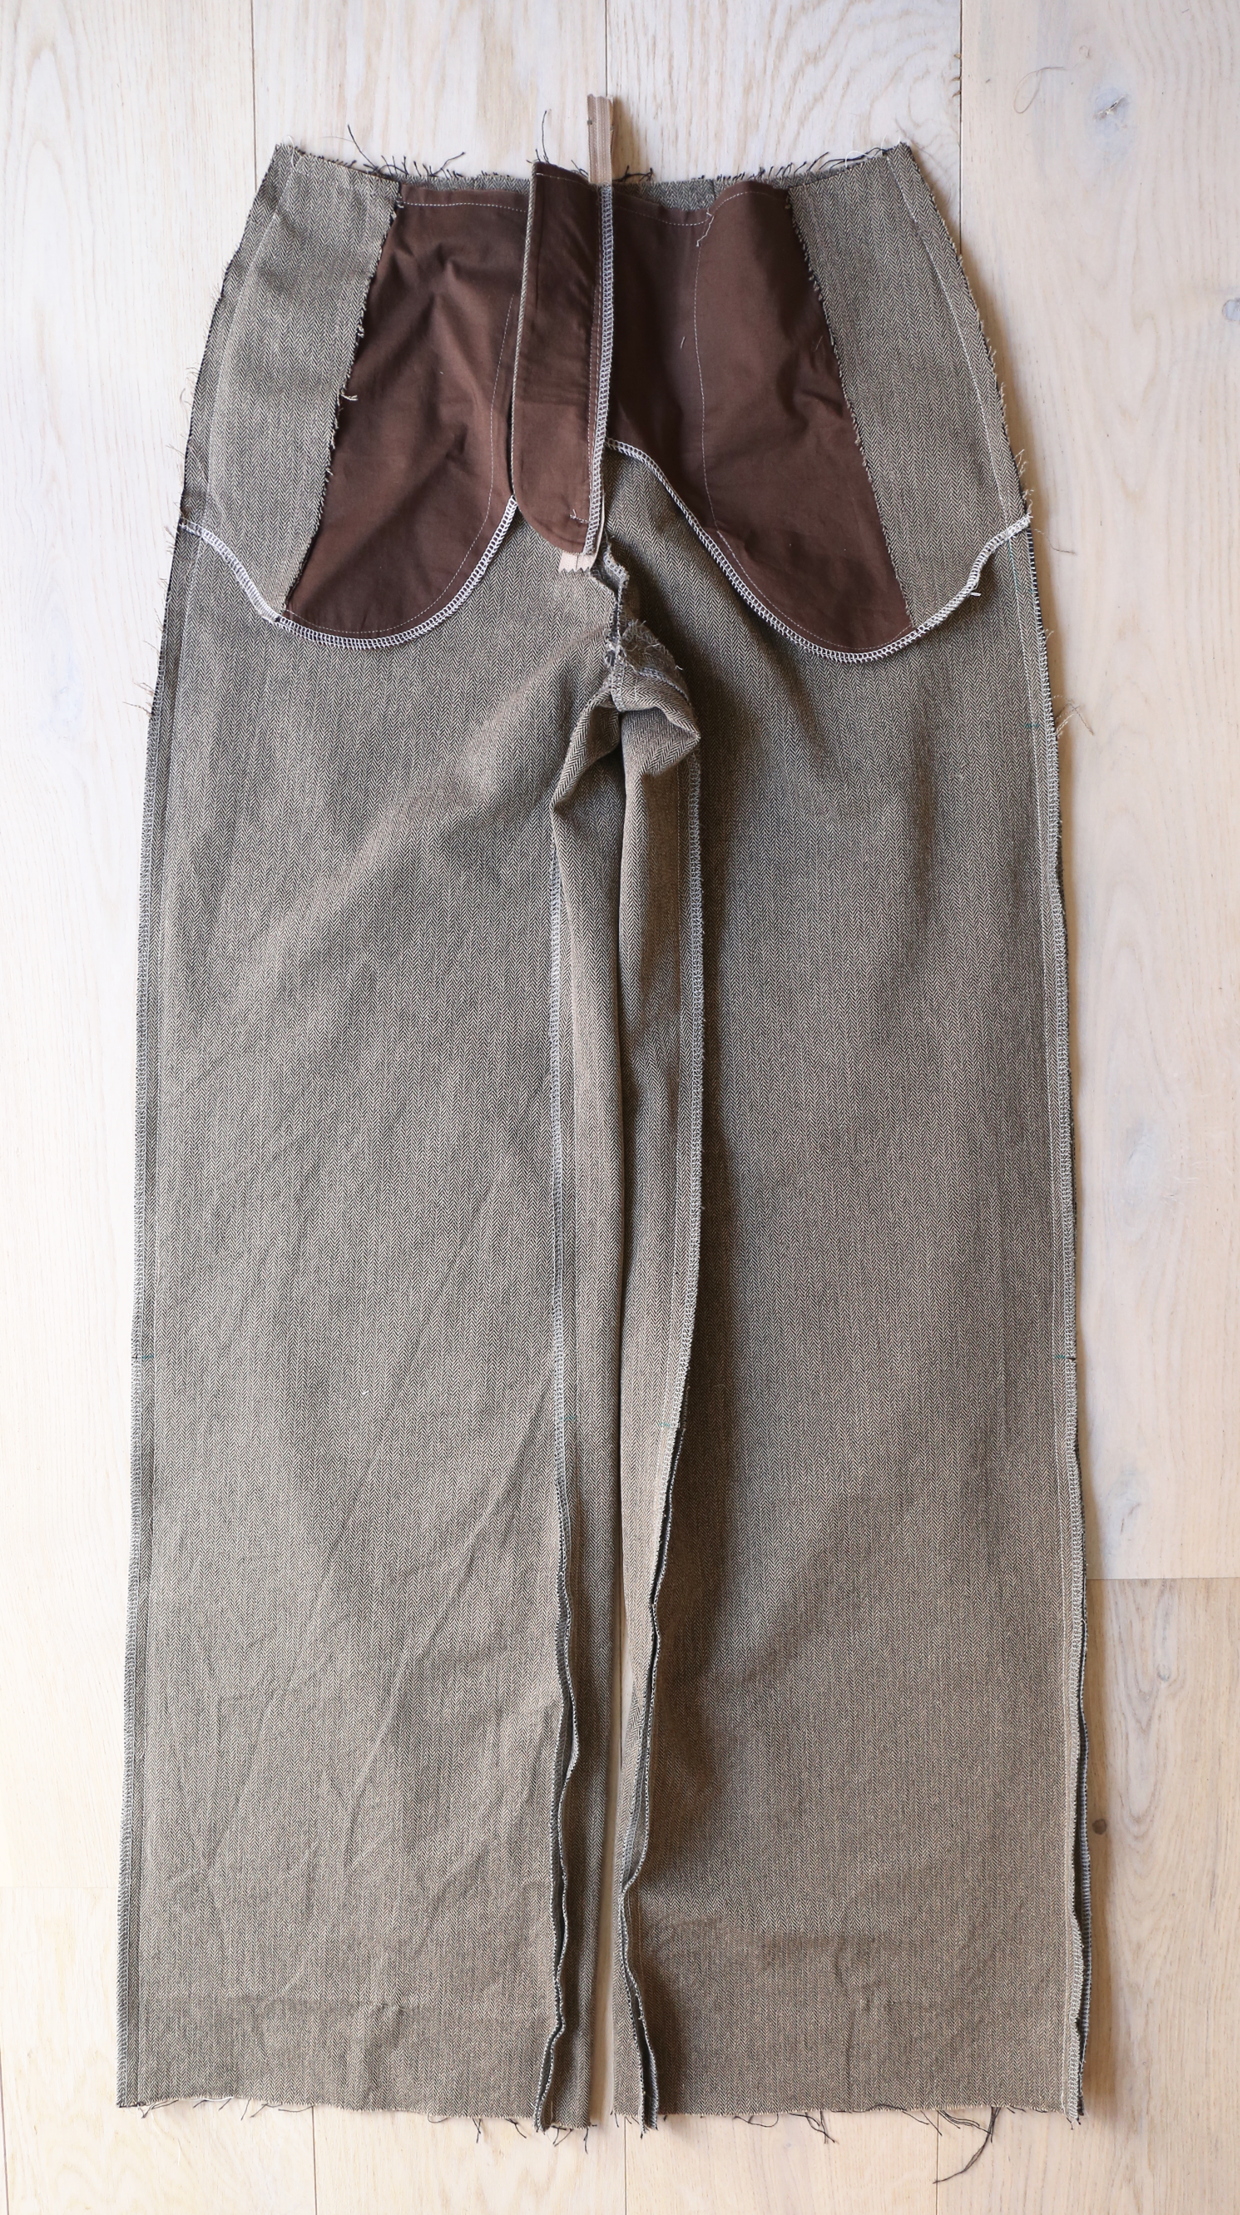
1) Sew the inseam: Starting with one trouser-back piece, pin it to the coordinating trouser-front inseam with the right sides together, matching the rise (crotch) and hem edges as well as the notches. You’ll notice that the back inseam between the rise and the notch is a bit shorter than the front inseam. To sew the inseams, stitch with the back rise on top, closest to your presser foot. On one side of the trousers this will mean that you’re sewing from the hem to the rise and on the other half of the trousers you’ll sew from the rise to the hem. For each side, when you reach the section between the rise and the notch, hold the two fabrics taut so they are the same length, place a few pins along the length, and then sew each section between the pins so you can hold the fabric taut as you go. The section between the notch and the hem will be equal lengths and can be sewn normally. It’s easiest to sew this part with the back rise on top so your presser foot will stretch the fabric a bit, making it easier to sew.
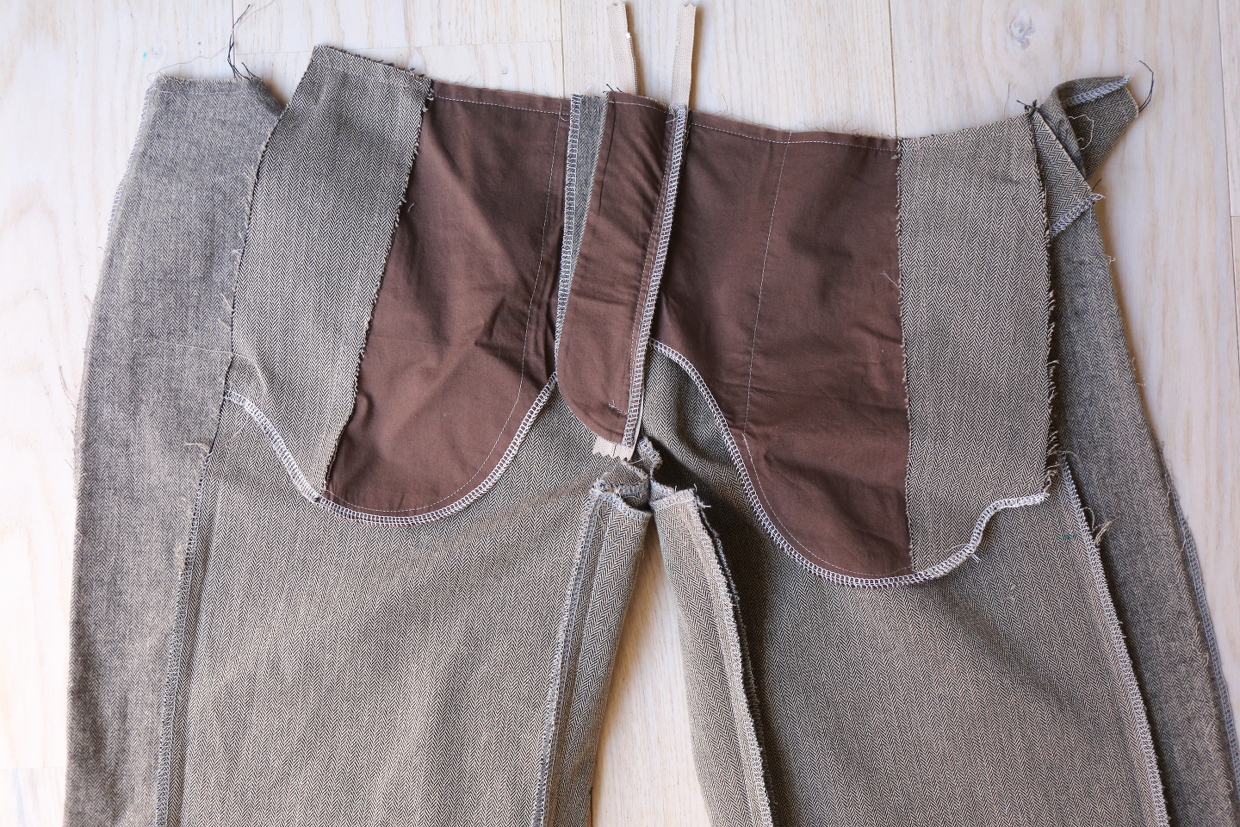
2) Sew the rise: Finish the seam allowances separately using your preferred method, if you haven’t done so already, and press them open. Then sew the remainder of the rise, starting from where you left off at the front rise and pinning the remainder of the front rise with right sides together. Pin the back trousers with right sides together, matching the edges, seams, and notches. Stitch the rise with a 1/2” seam, backstitching or lockstitching where you left off at the front seam, near the inseam, and continuing all the way to the back waist. If desired, stitch the rise a second time, stitching just inside the first line of stitching in the seam allowance to strengthen the rise seam. (It’s always a good idea to be safe.)
3) Press the rise seam allowances open and finish them using your preferred method if you haven’t done so already. Then pin the front side seams to the back side seams with right sides together. Stitch the side seams with a 1/2” seam, backstitching or lockstitching at both ends. As you stitch, pay attention to the front pockets so you can carefully stitch directly over the corners of the pocket opening to create a perfect pocket. Make sure you’re not stitching the pocket closed. Once you’ve reached the pocket opening, take care to pull the pocket edge out of the way a bit so it doesn’t get stitched into the seam. Stitch the opposite side seam in the same manner. Press the seam allowances open and finish them separately or finish them together and press them toward the back.
4) Optional: Set your sewing machine to a short, wide zigzag stitch so the stitches are very close together. This will serve as a bartack for the pocket opening. (Try a stitch width of 2.0mm and a stitch length of 0.4mm and adjust the settings as needed.) Use the zigzag bartacks to stitch the ends of the pocket openings at the location where the topstitching ends to strengthen the corners. This strengthens the pocket at the join and covers the topstitching. (It can also mask a little irregularity if you sewing wasn’t perfect at the pocket corners.)
Assemble the lining (optional)
1) To assemble the lining, pre-finish the seam allowances and stitch the back darts of the back lining in the same way you stitched the back darts of the trouser fabric (see “Sew the Back Darts”). Next align and pin one trouser front to one trouser back with right sides facing and notches aligned. Sew the inseam first and then the outset (side seam) with a 1/2” seam. Assemble the second trouser leg in the same way.
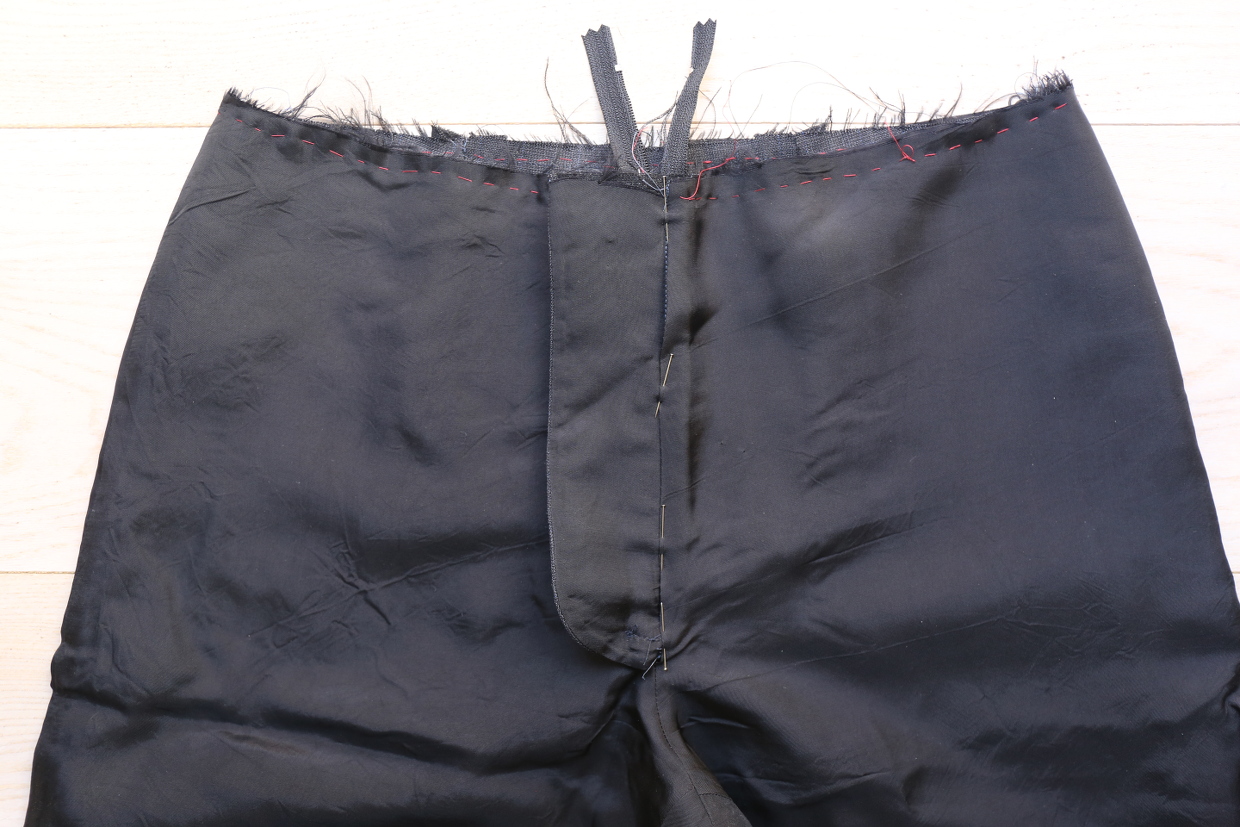
2) Turn the trouser leg right-side out and the other leg wrong-side out. Slip the right-side out leg into the wrong-side-out leg so the two legs are together with right sides facing. Pin the rise, matching the edges, notches, and the dot. Stitch the rise with a 1/2” seam, backstitching or lockstitching at the center back waist edge and at the fly dot. Backstitch or lockstitch when you reach the dot, then switch over to a basting stitch and sew all the way to the center-front edge. Press the seam allowances open, then remove the basting stitches from the dot to the front fly area but preserve the pressed seam allowances.
3) Turn the trousers inside-out and turn the lining inside-out (so the right side is facing out). Slip the trousers inside the lining so the wrong sides are together. Then pin the lining to the trousers at the waist edge, matching the seams and back darts. At the fly, pin the pressed edge of the lining to match the edges of the fly opening so the lining covers the stitching around the fly. On the wearer’s left side (the side without the fly shield) you’ll probably need to refold the lining’s front seam allowance to be about 3/8-1/2” deeper to match the stitching at the zipper tape. Once the lining is pinned around the fly opening, hand stitch it to the trousers with a slipstitch. Baste the lining to the trousers at the waistline with a 3/8” seam.
And that wraps up Day 2 of the sew-along. You’re making great progress! Now it’s on to Day 3.
Welcome to Day 3 of the Hollywood Trousers sew-along. You’re almost done and ready to wear your new trousers. Today we’re going to complete them by sewing the waistband and adding the finishing details.
Sew the waistband
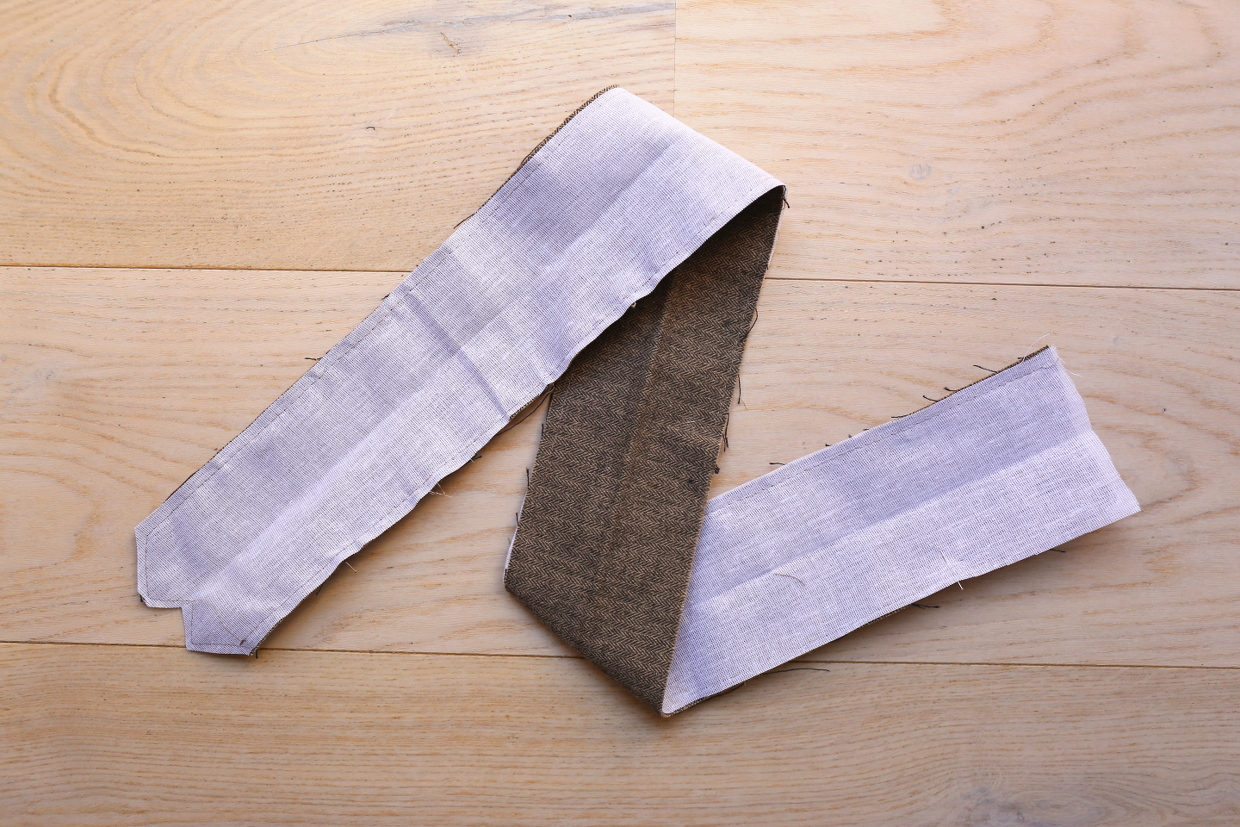
1) Following the manufacturer’s instructions, fuse the waistband cut from the interfacing to the wrong side of the waistband.
2) Fold the waistband in half with wrong sides together and press a crease into the center of the waistband. This will help with finishing the waistband later.
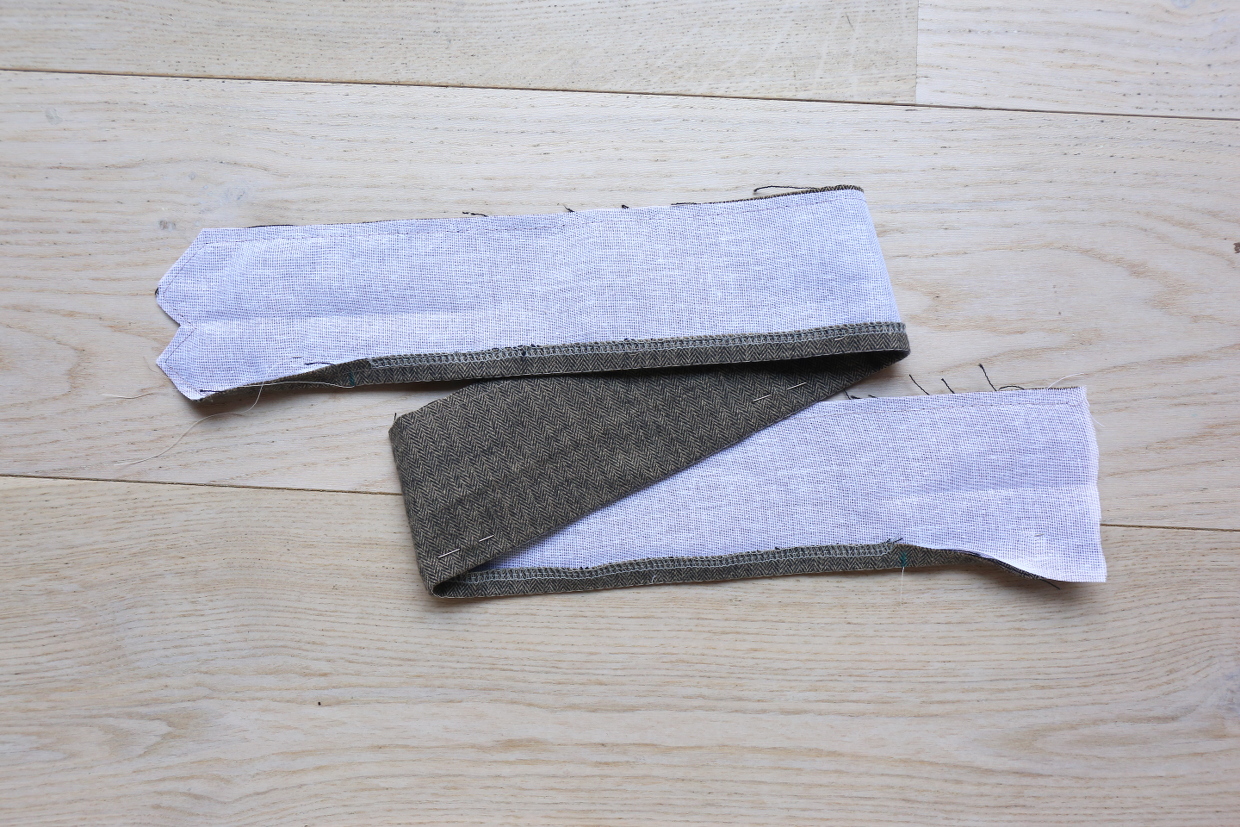
3) Unfold the waistband and baste the inside long edge of the waistband 1/2” from the cut edge. (Be sure you’re working with the correct long edge.) Then finish the basted edge of the waistband using your preferred method, starting and stopping at the center-front notches on both ends of the waistband. We recommend that you zigzag the edge or serge 1/4”. (Don’t trim if you’re using a serger.)

4) Fold and press the finished edge of the waistband to the wrong side by 1/4” and edgestitch to finish, stopping 2-3” short of the notched center-front ends of the waistband extension. (The unfinished ends of the waistband will be finished after we attach the waistband to the trousers.)
5) Unzip the zipper and pin the unfinished long edge of the waistband to the waist edge of the trousers with right sides together and matching the notches to the center front, side seams, and center back seam. The straight short end of the waistband should extend 1/2” (or more) beyond the edge of the fly shield and the pointed end of the waistband will extend beyond the wearer’s left front edge of the trousers. Stitch the waistband to the trousers with a 1/2” seam, backstitching or lockstitching at both ends. Once you’ve stitched the waistband you can use paper scissors to trim the excess zipper tape from above the waistband.
6) If desired, stabilize the waistband seam (to prevent it from stretching during wear) by sewing a length of 1/4” twill tape to the seam allowances on the facing side of the waistband. Align the edge of the twill tape with the waistband stitching and sew the tape to the seam allowances with a straight stitch or a zigzag stitch just inside the waistband stitching line.
Note from Liesl: I didn’t include twill tape on these trousers because the fabric is very firm and thick, but if your fabric is lightweight or loosely woven it’s a good idea to add a stabilizing tape.
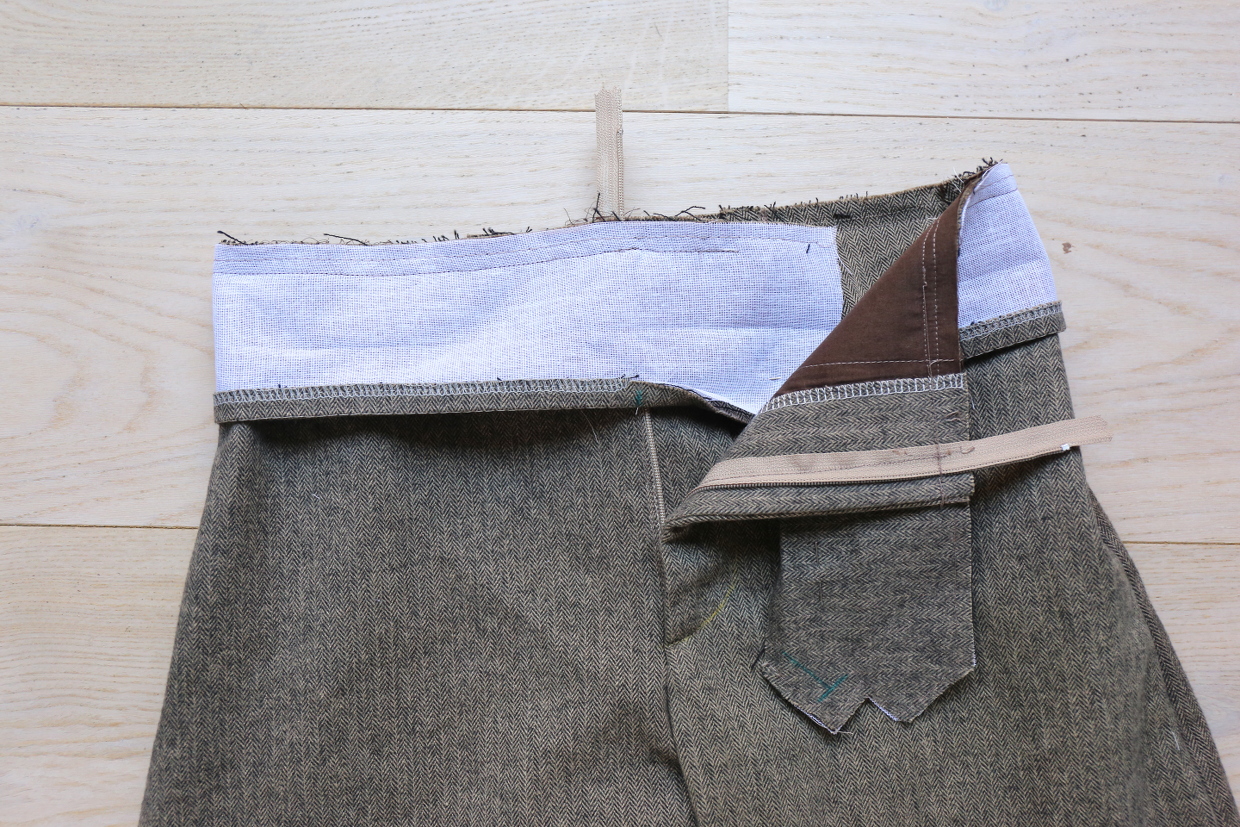
7) Press the waistband and stitched seam allowances away from the trousers and trim the stitched seam allowances slightly, if desired. Then fold the waistband ends in half with right sides together, matching the basting stitches on the inside waistband to the stitched waistband seam, folding backwards along the previously formed waistband crease. Fold the 1/2” seam allowances back so you can stitch the ends of the waistband: On the wearer’s right side of the trousers, stitch precisely next to the fly shield so the finished end of the waistband will match the edge of the fly shield. (There may be extra seam allowance here, but we’ll trim that off next.) On the wearer’s left side, stitch the end of the waistband in a V shape, matching the cut end of the waistband and pivoting at the dot you transferred from the pattern piece.
8) Trim the stitched ends of the waistband and turn the waistband right-side out, using a chopstick or knitting needle to gently push out the corners. Fold the waistband in half along the previously formed crease, with wrong sides together, and pin the inside of the waistband to the top of the trousers so the basting stitches match the waist seam. The finished edge of the inside waistband will extend below the waist seam, covering the inside of the waistband. Edgestitch all the way around the waistband, catching the open edge of the inside waistband in the stitching line back to your starting point. (If you prefer, you can stitch in the ditch of the waistband seam to finish the waistband instead, closing the waistband extensions by hand with a blindstitch or whipstitch.)

Finish the trousers
1) Use the buttonhole template to mark the position of the buttonhole on the waistband extension. Once you’ve sewn and opened the buttonhole, try on the trousers and close the zipper. Mark the desired position of the button and the hook and eye on the waistband. Sew on the button and hook and eye by hand.
From Liesl: Since I neglected to take these photos for the sew-along, here is another pair of Hollywood Trousers to show you these steps.

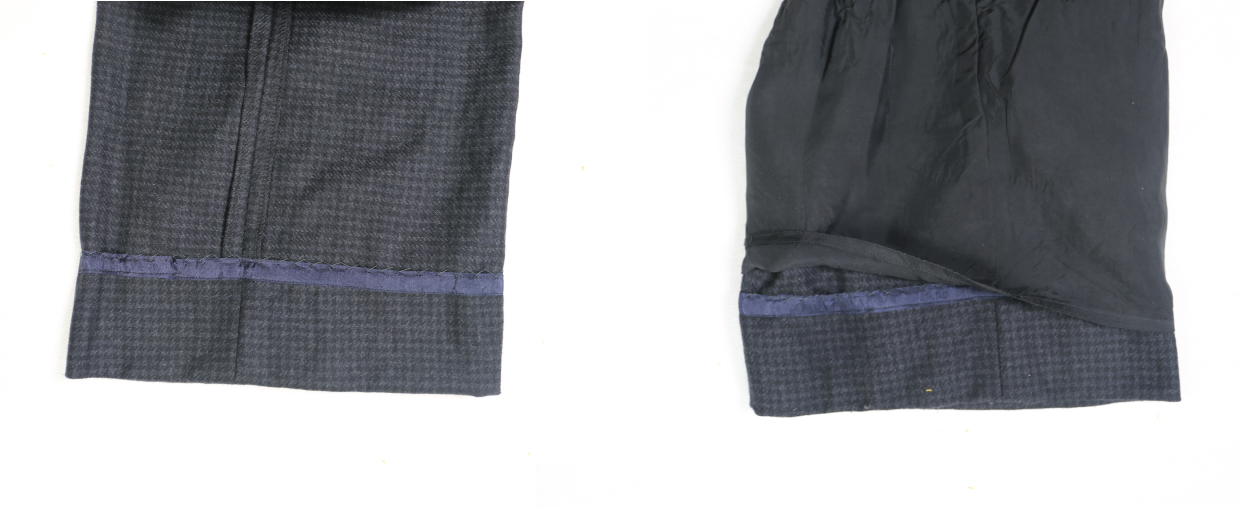
2) Try on the trousers with the shoes you plan to wear and, using a water-soluble fabric-marking pen or tailor’s chalk, mark the desired hem. Add 2” to the marked length and trim any excess from the length. If you’re including the lining, cut the lining to be 2 3/4” shorter than the trimmed trouser length. To prepare the trousers for hemming, pin a piece of hem tape or seam binding to the right-side edge of the trouser fabric so it overlaps the edge of the trimmed fabric by approximately 1/4”. This gives the edge of the fabric a nice finish without adding bulk. Edgestitch the hem tape to the trouser fabric edge, folding and tucking the end underneath when you reach the point where you started.
HINT: Ideally, with wide-legged trousers like these, the hem should almost reach the floor. If you plan to wear these with high heels you may find that you use the full length of the trouser leg, but if you’re going to wear them with flatter shoes you’ll be trimming more from the hem. (Of course this also depends on your height.)
 3) Fold and press the trouser hem to the wrong side along the marked hemline and pin the hem in place. Press the trouser hem gently, then hand-stitch the hem along the hem tape or seam binding with a catchstitch. If you’re including the lining, fold and press the trouser lining hem to the wrong side by 1/2” twice, then edge stitch the innermost fold to the hem lining.
And, with that, you’re got a movie-star quality pair of trousers to wear! Here’s to hoping you feel glamorous every time you put them on.
You make it look so easy!! Thank you!
Cannot wait to make these! I couldn’t sew along in real time but will definitely reference this!