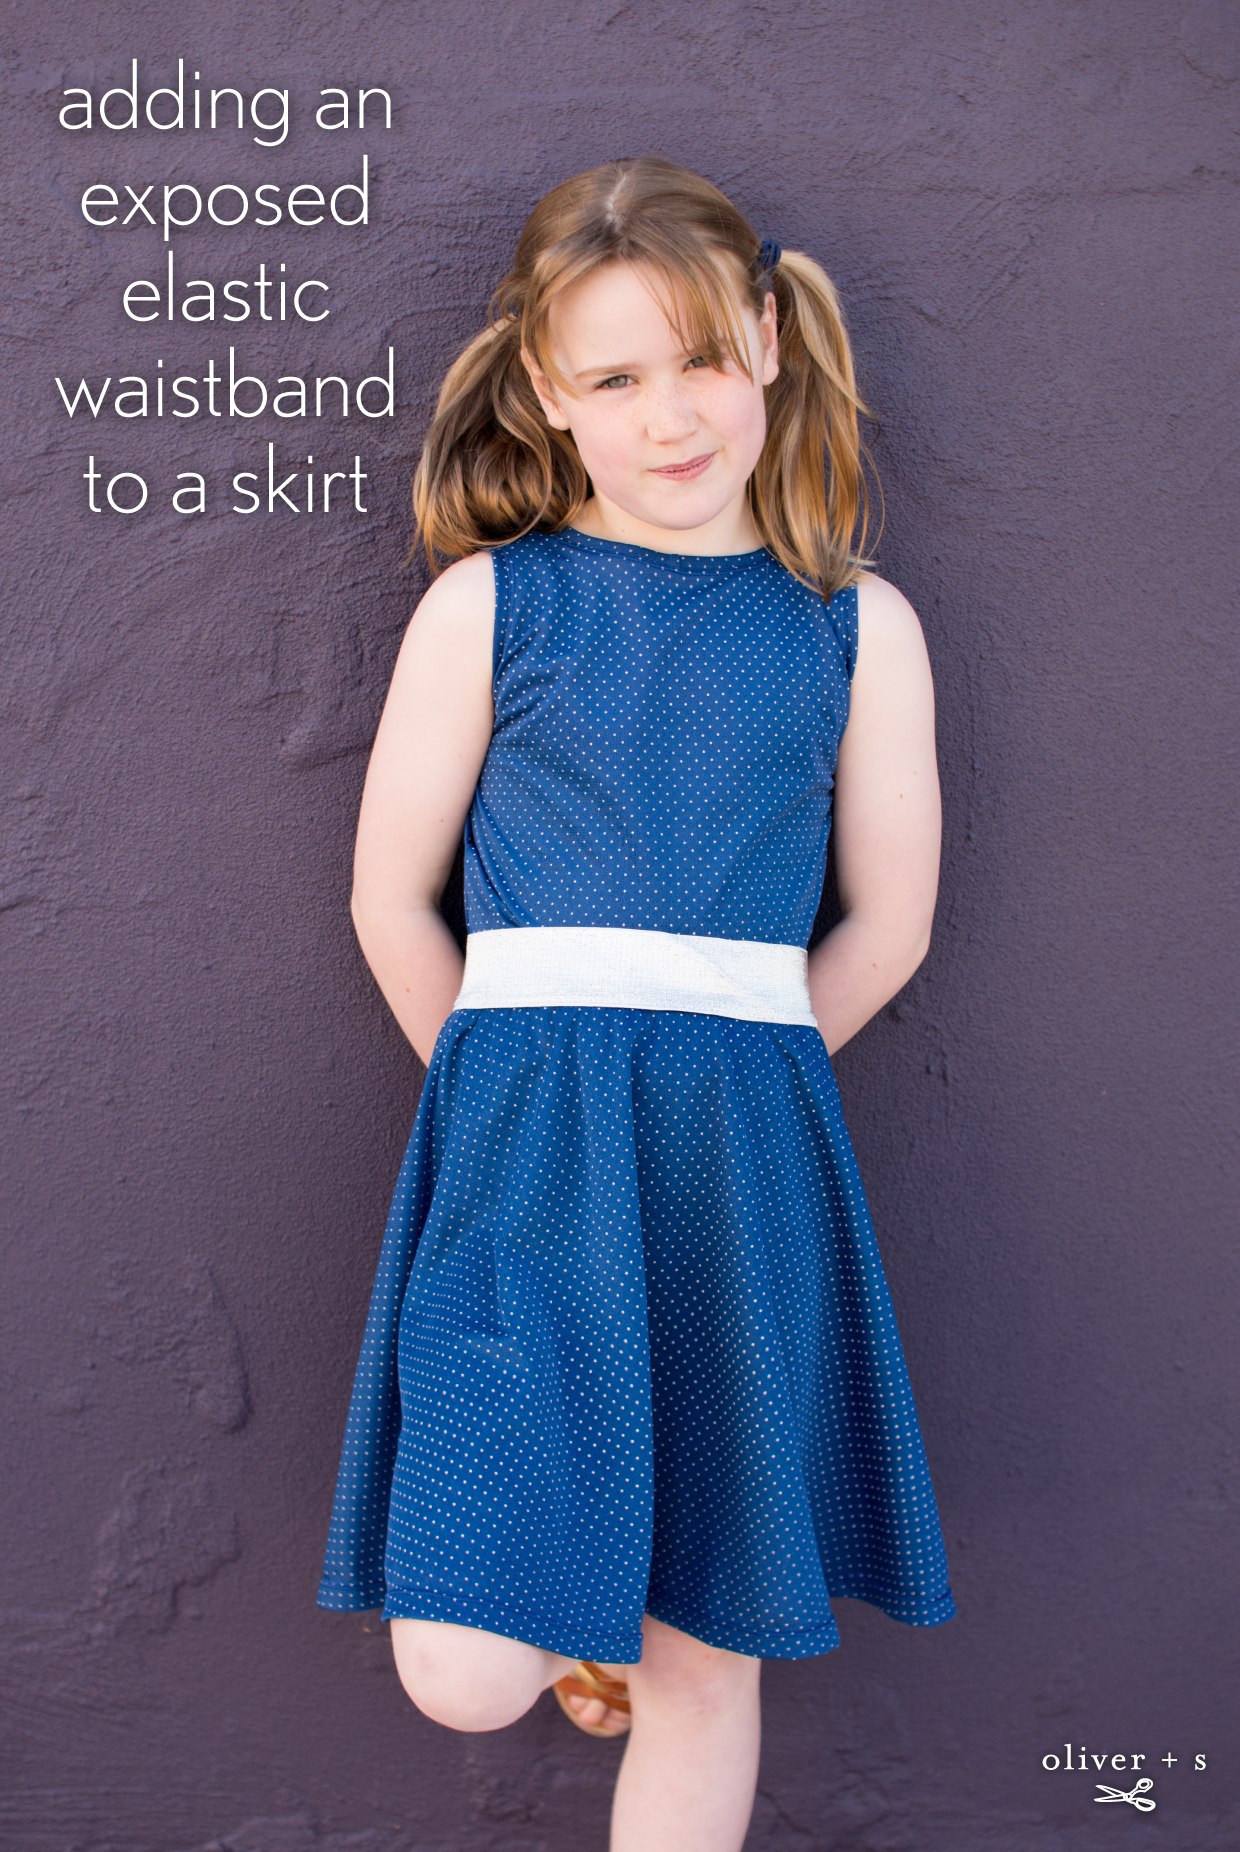
Shelley is back with us on the blog today to share a fun tutorial. It is a micro hack using the Building Block Dress book. Thanks so much for this fantastic tutorial Shelley!
Hello, I’ve got a super easy and quick tutorial for you today. We’ll be using wide elastic to create an exposed, elastic waistband for a skirt.
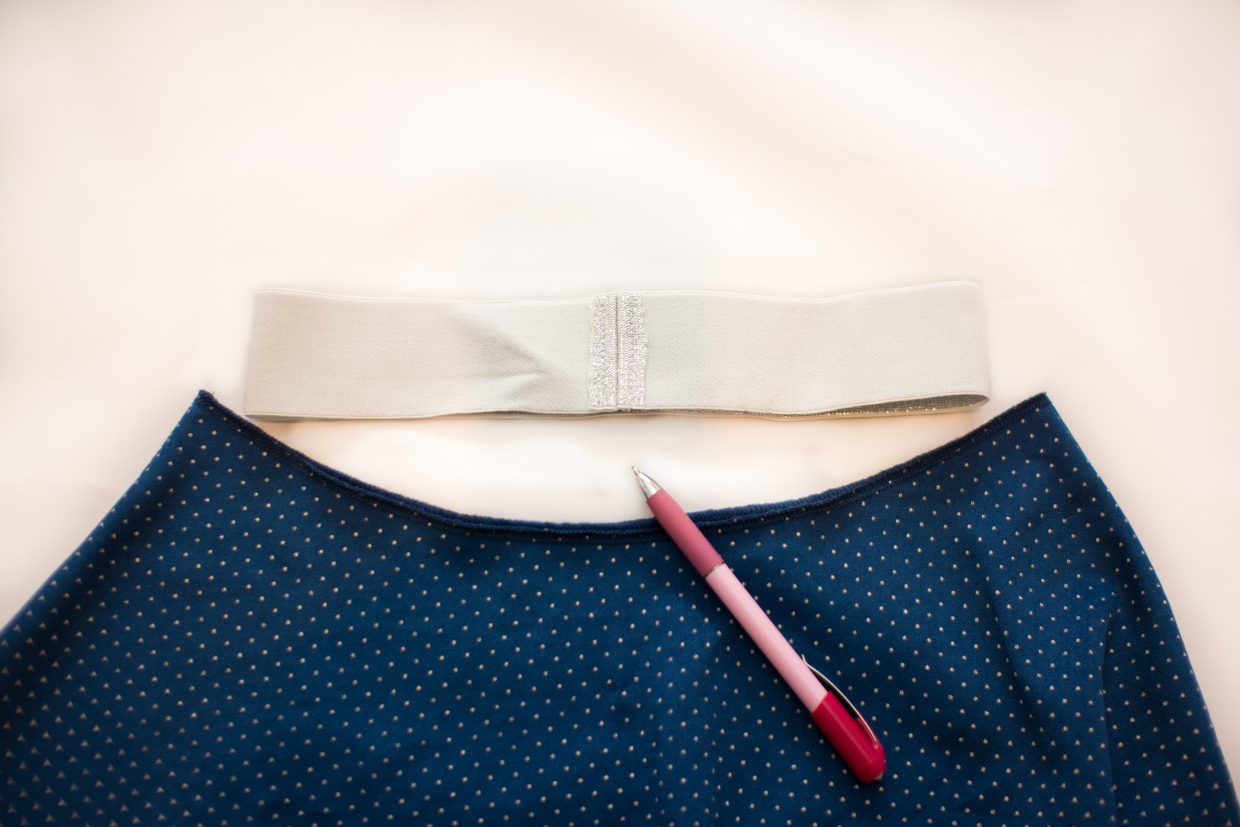
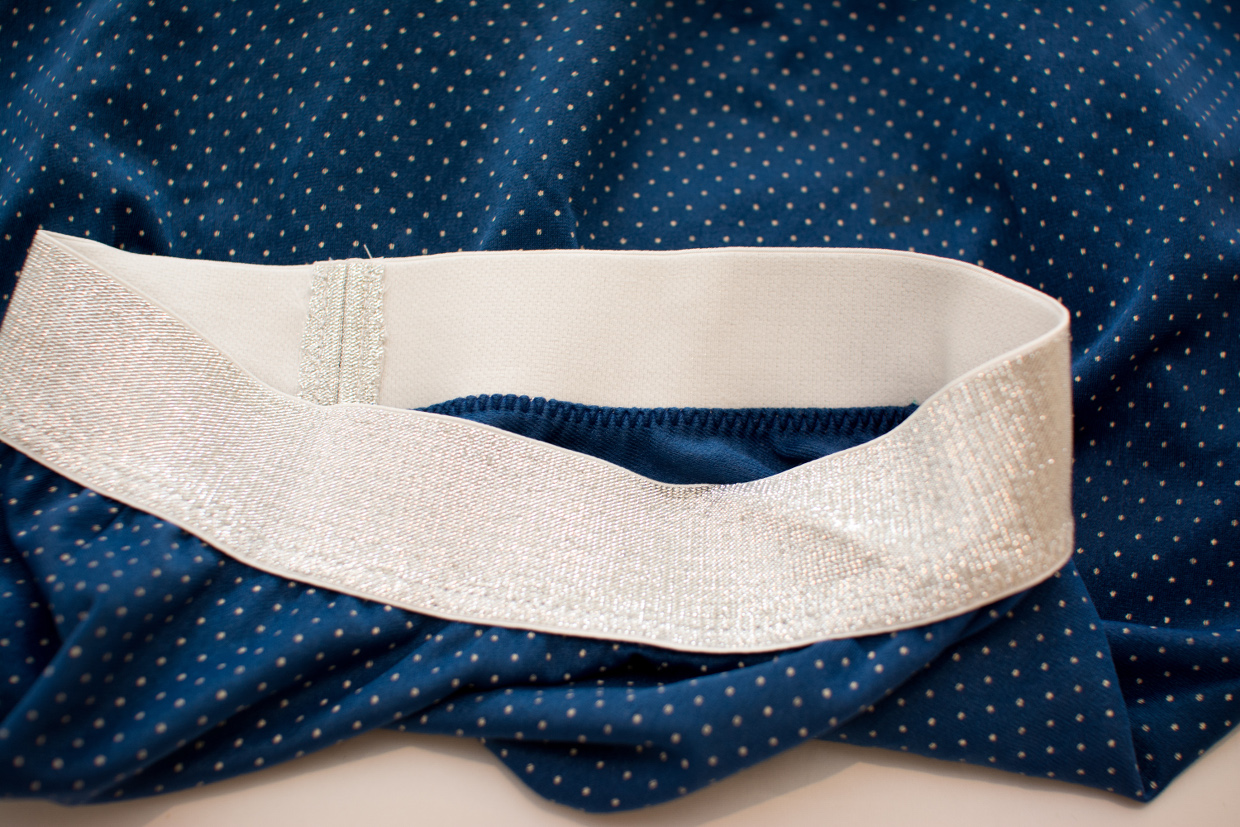
For the elastic we want to use something pretty to look at and nice and wide for comfort. I’ve used a silver metallic 2” wide elastic that has a lovely plush feel on the inside. You’ll need at least the kid’s waistband measurement in length, or a 1 yard cut of elastic.
I had my daughter handy to measure and she insisted on the elastic being long enough for the skirt waistband to sit quite low. If you can’t try the elastic on for length, go for the natural waist measurement minus 1″.
Finish the cut edges of the elastic with a zig zag or overcast type stitch, then join the elastic ends with right side together with a ½” seam. Fold the seam allowances away from each other and stitch them down with a ¼” edgestitch on each side.

Construct your skirt by sewing the side or center back seams (depending on what kind of skirt pattern you’re using). If you like you can finish the top edge of the skirt but it’s not necessary as the raw edge will be enclosed when we attach the waistband. Hem the lower edge of the skirt.
Here I’ve used the circle skirt pattern piece of the Building Block Dress Book. I’ve sewn it in a knit fabric and omitted the center back seam by cutting on the fold. You can have your skirt as gathered or as smooth as you like. All you need to ensure is that the skirt, at its most open waist measurement will fit over the kid’s hips.
Mark the elastic waistband into four equal parts. Start by finding the point opposite the seam and marking that to divide the waistband into halves. Then bring the seam and the marked point together to find the quarter points and mark them. Do the same for the skirt using either the side or center back seams.
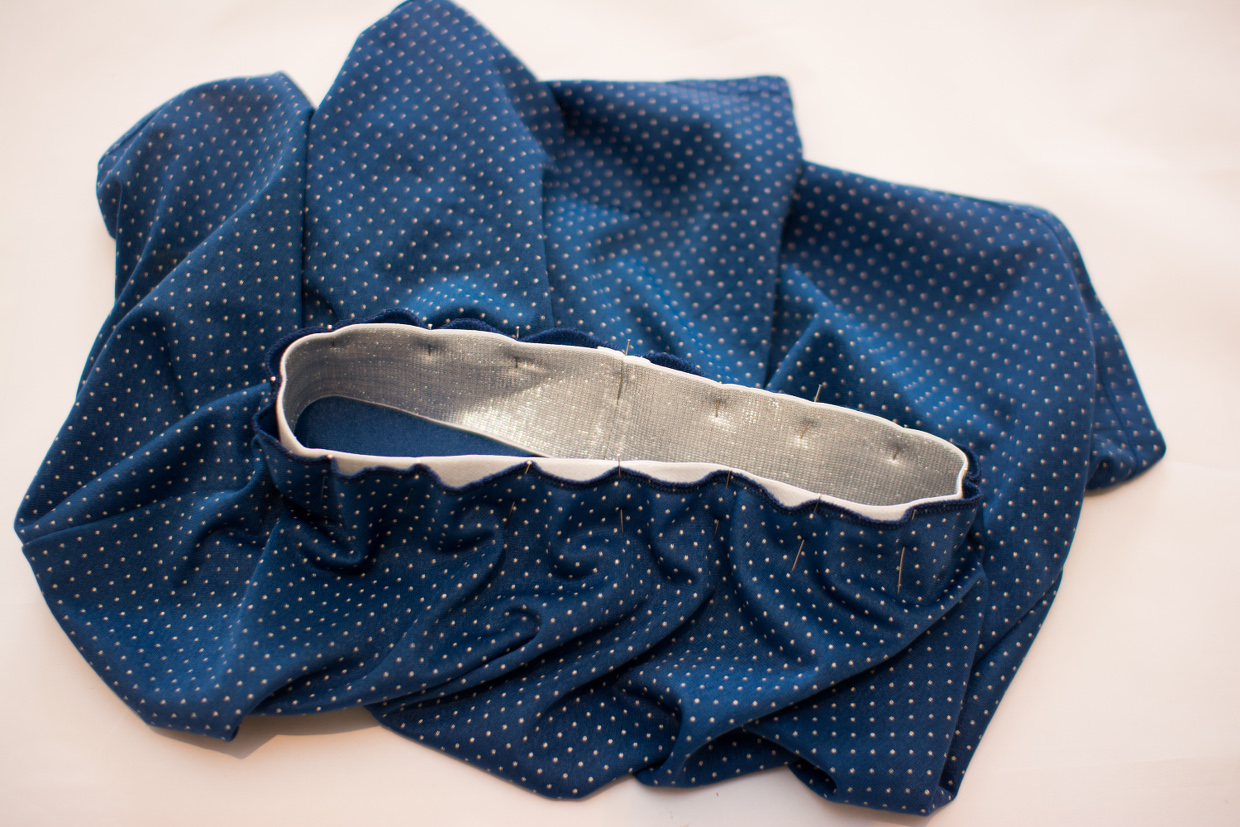
Pin the elastic waistband circle to the skirt waist with wrong sides together. I’ve positioned the elastic seam at the center back, but you can put it at a side seam if you like. Whatever system works for you and your kid (NB: In editing my photos I’ve just realized my daughter is wearing her matching singlet top back to front, so center back seams aren’t that self-explanatory after all!)
Position the raw edge of the skirt fabric about 1/8” below the edge of the elastic. This will prevent it from peeking out once the elastic is flipped up.
The stitching that we do next will be visible on the finished skirt, so ensure your thread matches the elastic well so that it blends in.
Using a long, straight stitch, sew the skirt to the elastic ½” in from the edge of the elastic. Use both hands to stretch the elastic in front and behind the machine as you sew. Here I’ve sewn with my skirt fabric side up and with the bobbin thread matching the elastic.
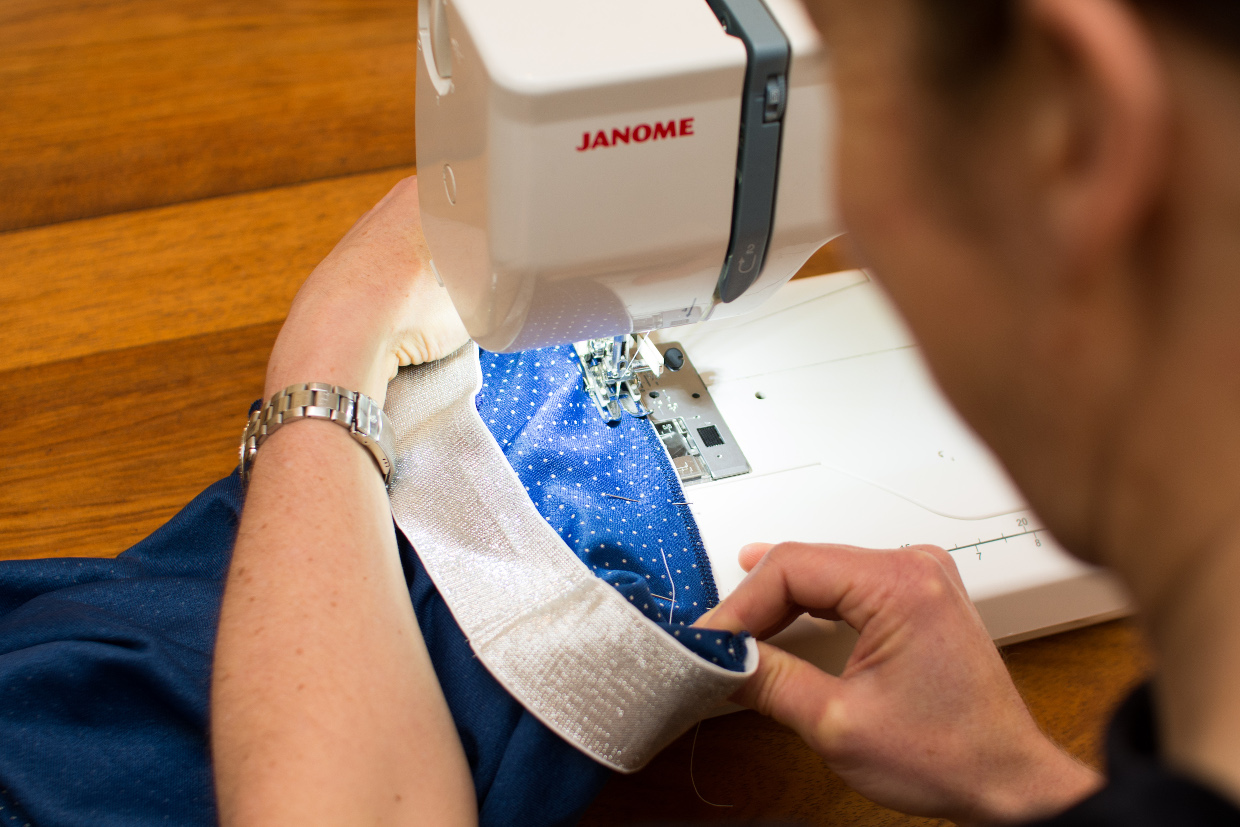
Now flip the elastic up, away from the skirt. For this next step, be sure to have your needle thread matching the elastic and you can change your bobbin thread to match the skirt fabric if you like. Using a narrow zig zag stitch, sew around the lower edge of the elastic stretching the elastic in front and behind as you did previously.
You’ll find you have a lovely neat finish on the inside with the raw edge of the skirt fabric trapped inside your seam.
Such an easy skirt to sew, and super easy to wear. I’m more than a bit tempted to make one for myself.
By the way, this can be done using almost any of the Oliver + S skirt patterns. A great starting point might be the free Lazy Days Skirt, or perhaps the over tulle style skirt of the Onstage Tutu Skirt. You could also use a much-loved dress that is getting too short and give it a new lease of life by taking the skirt portion off and creating a new waistband with elastic.
Ah, brilliant Shelly! Now all I need to do is find the appropriate elastic.
Yep, that’s the tricky bit alright. I’ve no idea in India where to look but I got this elastic at Strapcrafts.com and postage was very reasonable.
Is the elastic attached to the top also, or just a matching top tucked in?
Just a matching top tucked in. I had just a little bit of left over fabric. Not enough for a t-shirt so I modified the armscye of the School Bus t-shirt and then added a narrow band like the neckband to finish it. I didn’t quite get the shape right but it’s not helped here by her wearing it backwards!
I just finished making a couple of skirts like this for Miss 4, and came to the same method! Simple enough that she could help sew it. I made it even simpler by using a ribbon to “hem” the bottom. And got the elastic from “Boo Designs” in Brisbane. Lots of fun, glittery choice! I do love the circle skirt though, mine were gathered. Looks like there will be another in the cupboard before too long!
So is the goal measurement of the elastic circle exactly the waist measurement?
I’m afraid there’s no hard and fast rule as different elastics vary as to their stretchiness.
If you don’t have the kid to try it on, then waist measurement minus one inch can be a good guesstimate.
Thanks so much for this. Just transformed a vintage polyester pleated dress into a very fun skirt 🙂