Who’s sewing the Girl on the Go pattern with us today and tomorrow? If you’d like some fabric inspiration for this project, have a peek at the fabric ideas post and get some ideas from out tester photos post.
We’ll be working through the pattern over the next two days. Here’s our schedule, and each day is pretty easy!
Day 1: Before you start, finish the neckline
Day 2: Sew the sleeves, ties and side seams; finish the dress
Let’s begin, shall we?
From Liesl:
Hello friends! I hope you’re excited about our Girl on the Go patterns and this week’s sew-along! We’ll have some fun ideas for you this week, since some of the Advisors Circle members will be stopping by to show you what they did with the pattern. I hope you’ll enjoy it and get lots of inspiration.
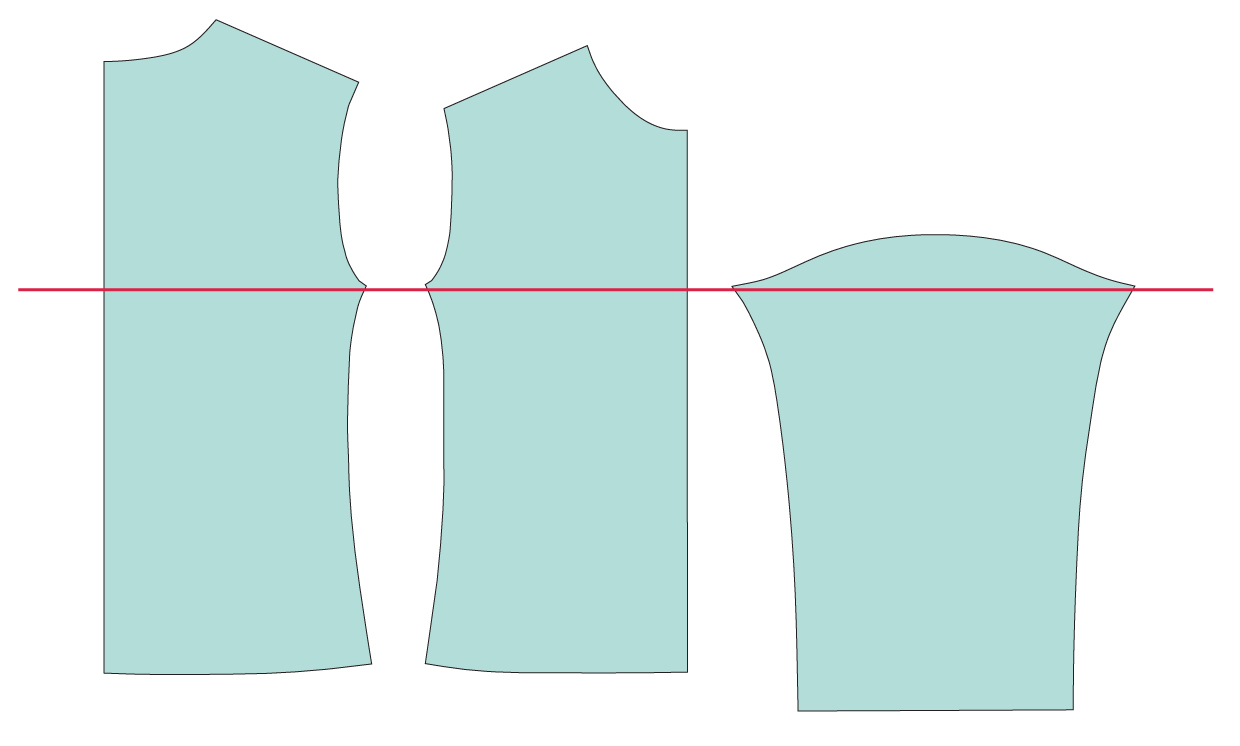
Before we get started, I wanted to talk to you about stripes and the forward shoulder seam on this pattern. I very much prefer a forward should seam because I think it’s more comfortable to wear. It prevents the neckline from riding back so the shirt or dress stays where it belongs, which also looks better. The Girl on the Go pattern, like our Liesl + Co Maritime Top, has forward shoulder seams. This means that stripes won’t necessarily line up at the shoulder seam, but that’s OK! If you’re working with stripes for this pattern, concentrate on matching the stripes at the side seams. When you’re laying out the pattern to cut it, make sure the stripes meet at the same place at the underarms and below. Concentrate on making the two sides of both pieces symmetrical. I like to draw the stripes directly onto my pattern pieces so I can make sure they’re the same on both sides of the fabric. I also cut out the fabric in a single layer so I can flip the pattern piece to be sure the stripes are the same on both sides. If you use chalk to trace around the pattern piece you can flip it to trace the other side before cutting it out, which is safest.
Before you start
1) Cut two 1/2” by 6” strips of lightweight fusible knit or nonwoven interfacing. Following the manufacturer’s directions, fuse each strip of interfacing to the wrong side of the cut dress front piece at the shoulders. Trim any excess interfacing that extends beyond the edges of the fabric. This will stabilize the shoulders while still allowing them to stretch.

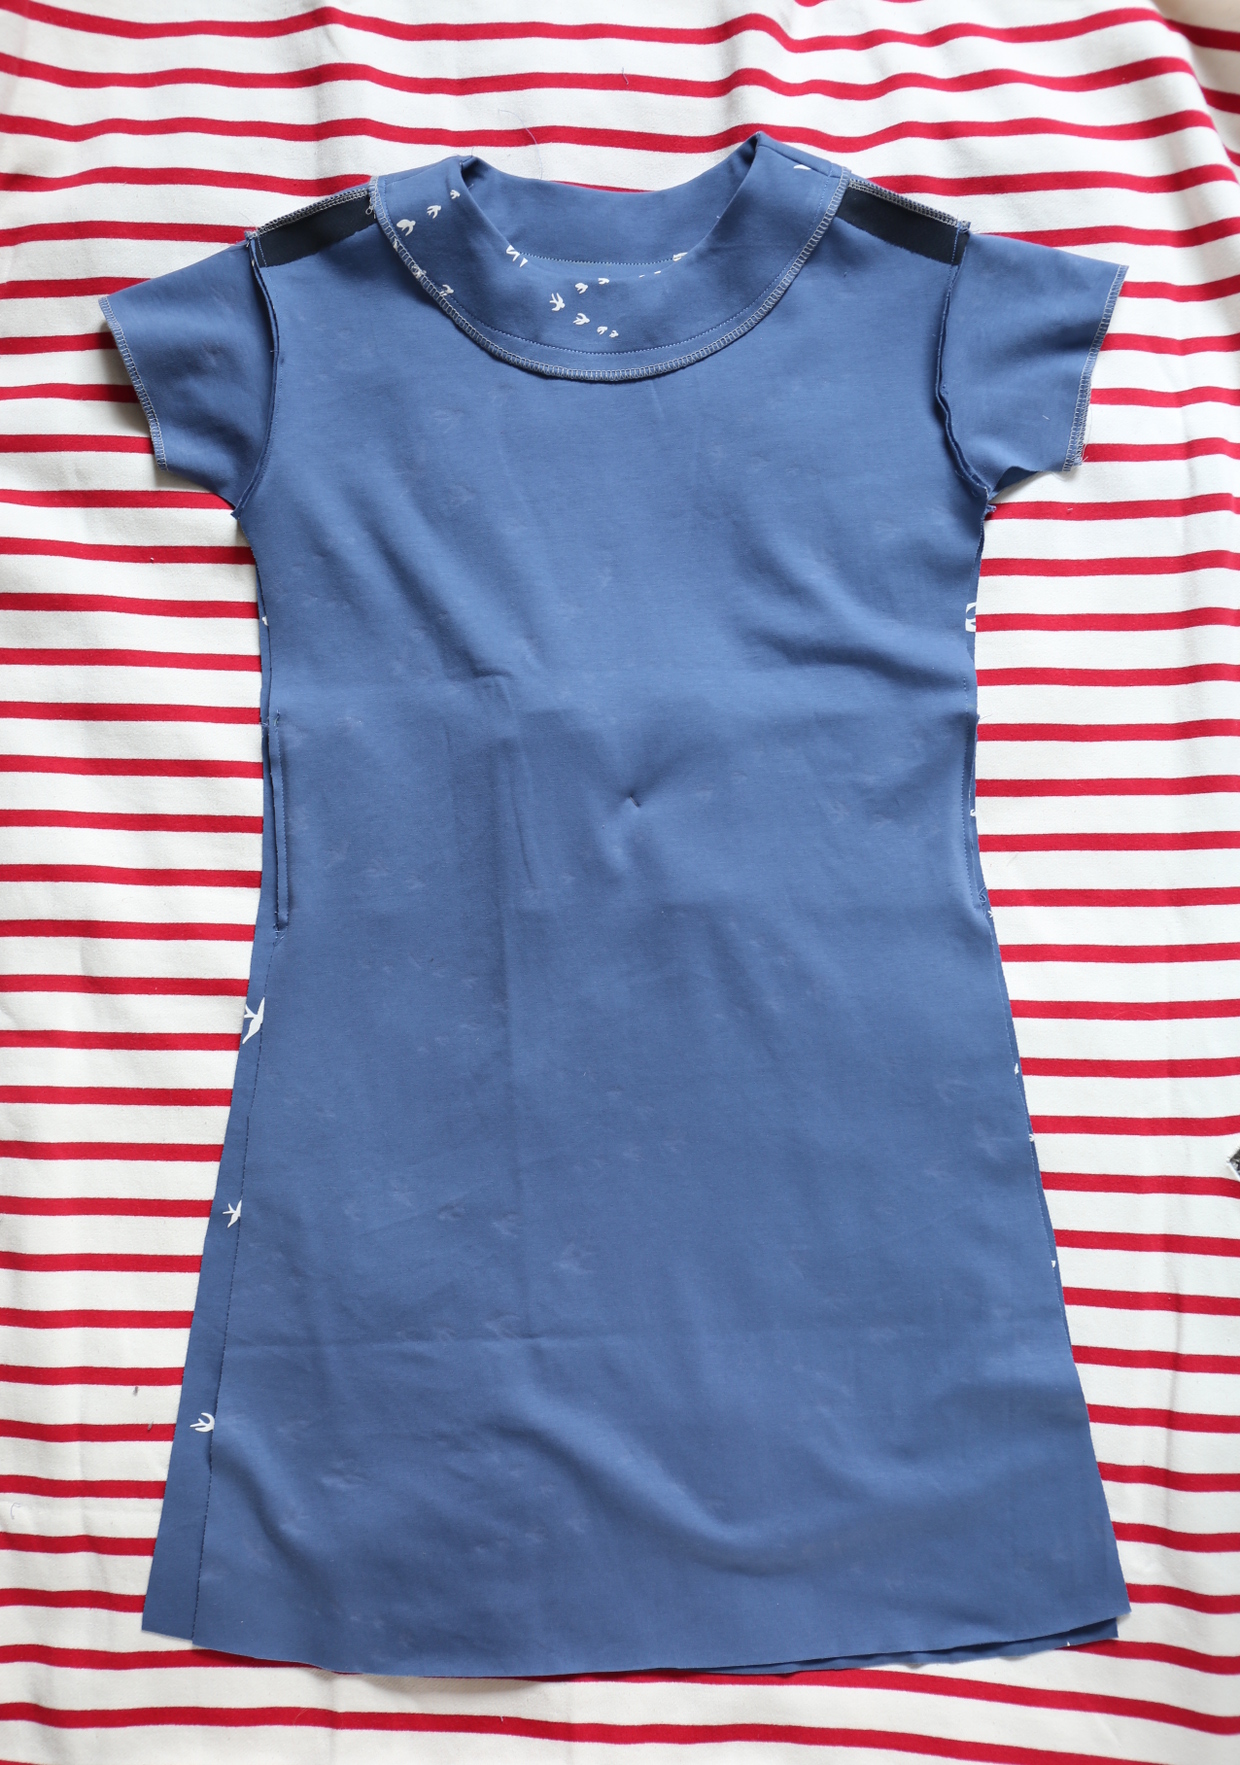
Finish the neckline
1) Pin the from neck facing to the back neck facing at the shoulders, with right sides together and raw edges and notches aligned. Stitch the shoulders with a 1/4” seam, backstitching or lockstitching at both ends. Press the seam allowances open or toward the front facing. Finish the outside edge of the facing using a zigzag stitch or serger stitch. (Don’t trim the edge if you’re using a serger.)
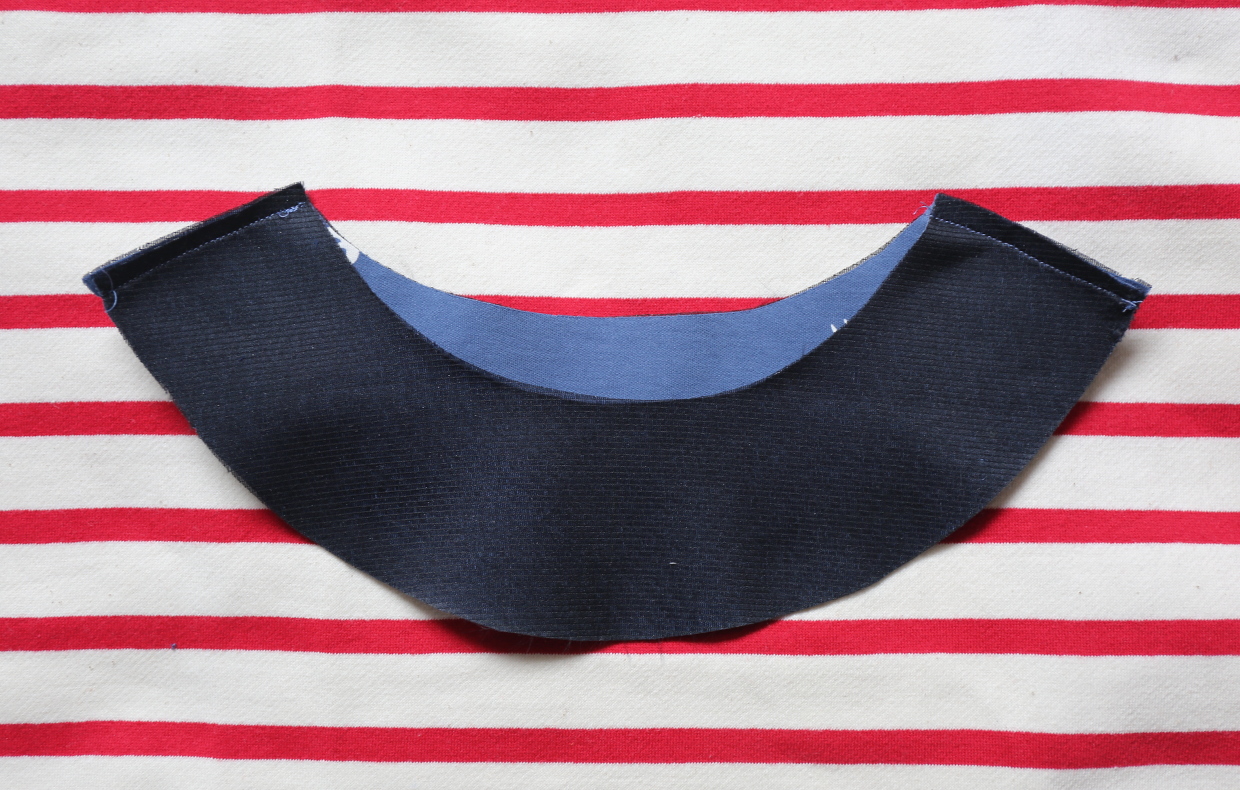
HINT: If you are using a very lightweight fabric with a tendency to curl, you might want to fuse a lightweight tricot interfacing to the wrong side of the facings to help stabilize them.
2) Pin the dress-front and dress-back pieces at the shoulder, with right sides together and raw edges aligned. Stitch just the shoulders with a 1/4” seam, backstitching or lockstitching at both ends of the seam. Finish the seam allowances together and press them toward the back. If desired, edgestitch the shoulder seam to finish them.
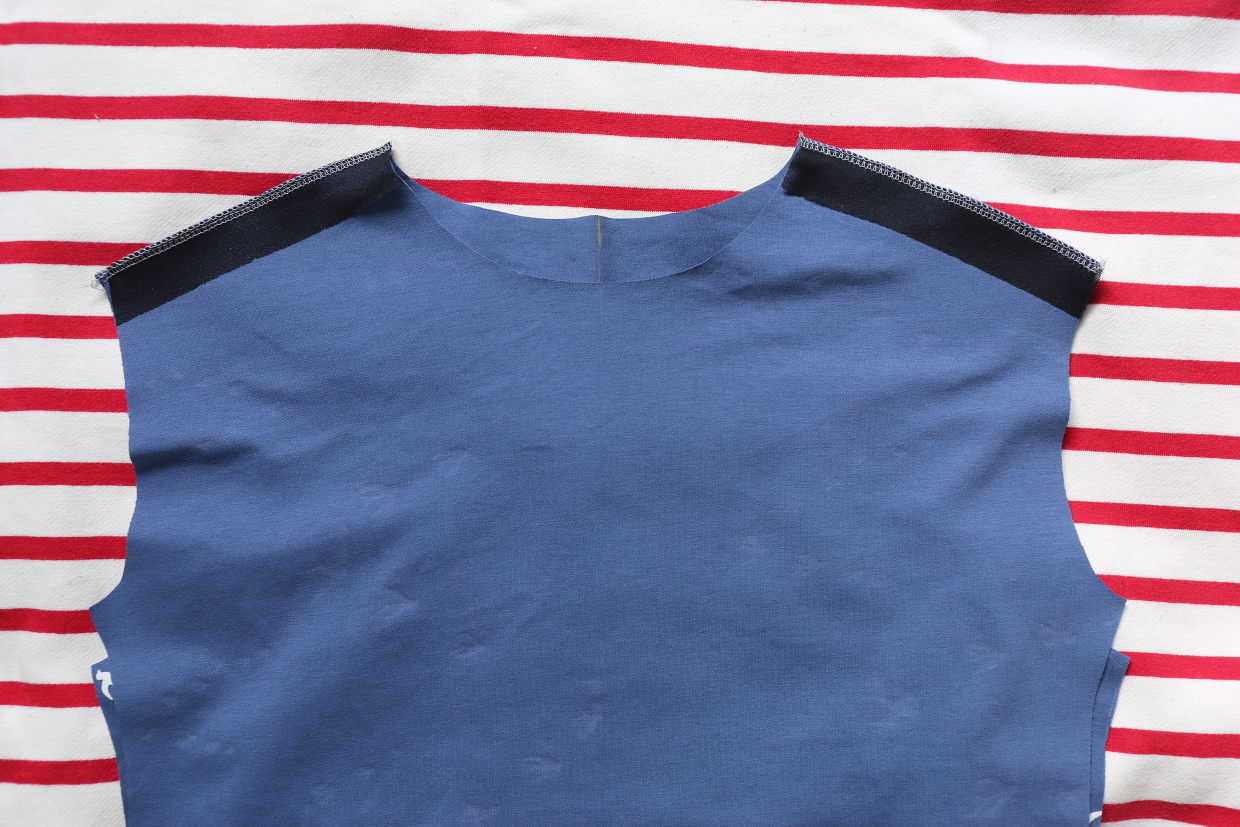
NOTE: Because of the forward shoulder seam, the armholes and side seam edges will not match when you’re pinning and stitching the shoulders.
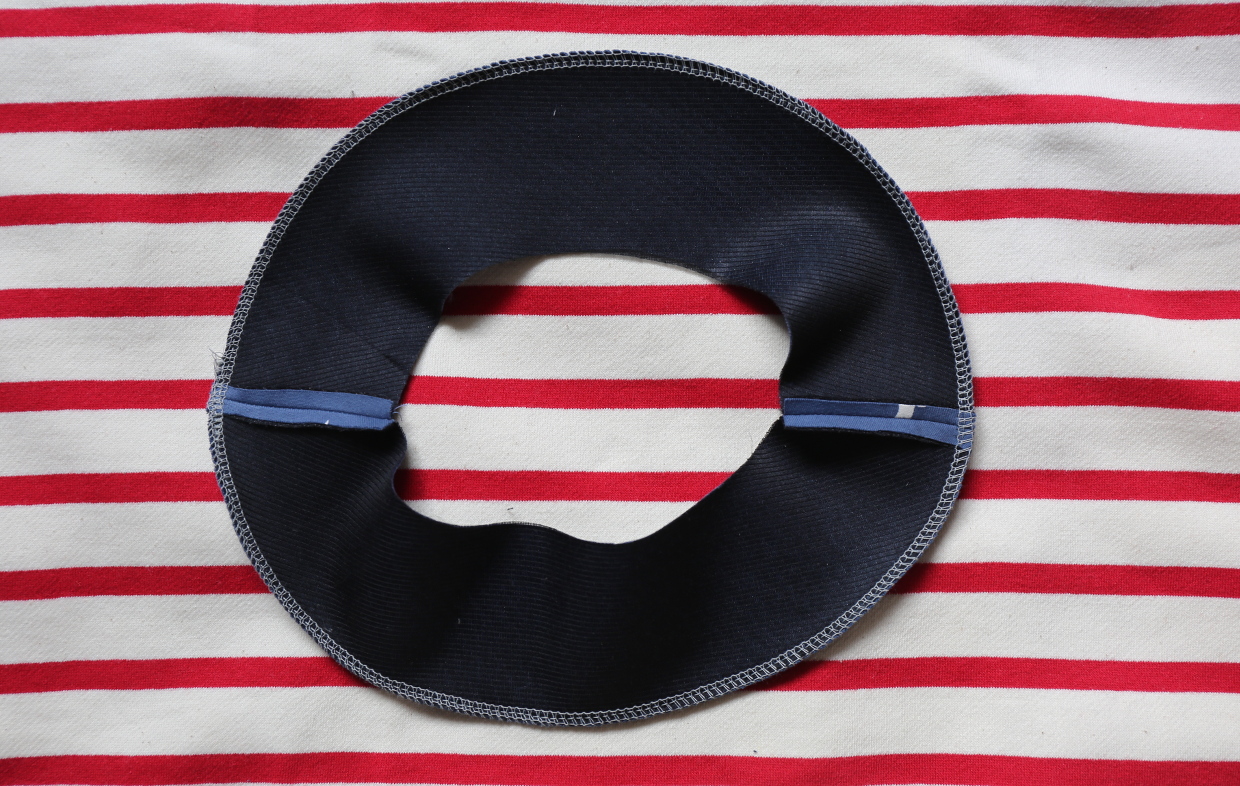
3) With right sides together, pin the assembled neck facing to the dress at the neckline, matching the shoulder seams and the notches. Stitch the neckline with a 1/4” seam, backstitching or lockstitching at the end of the seam. Be sure to use your machine’s stretch stitch or a narrow zigzag stitch here so the neck can fit over the wearer’s head!
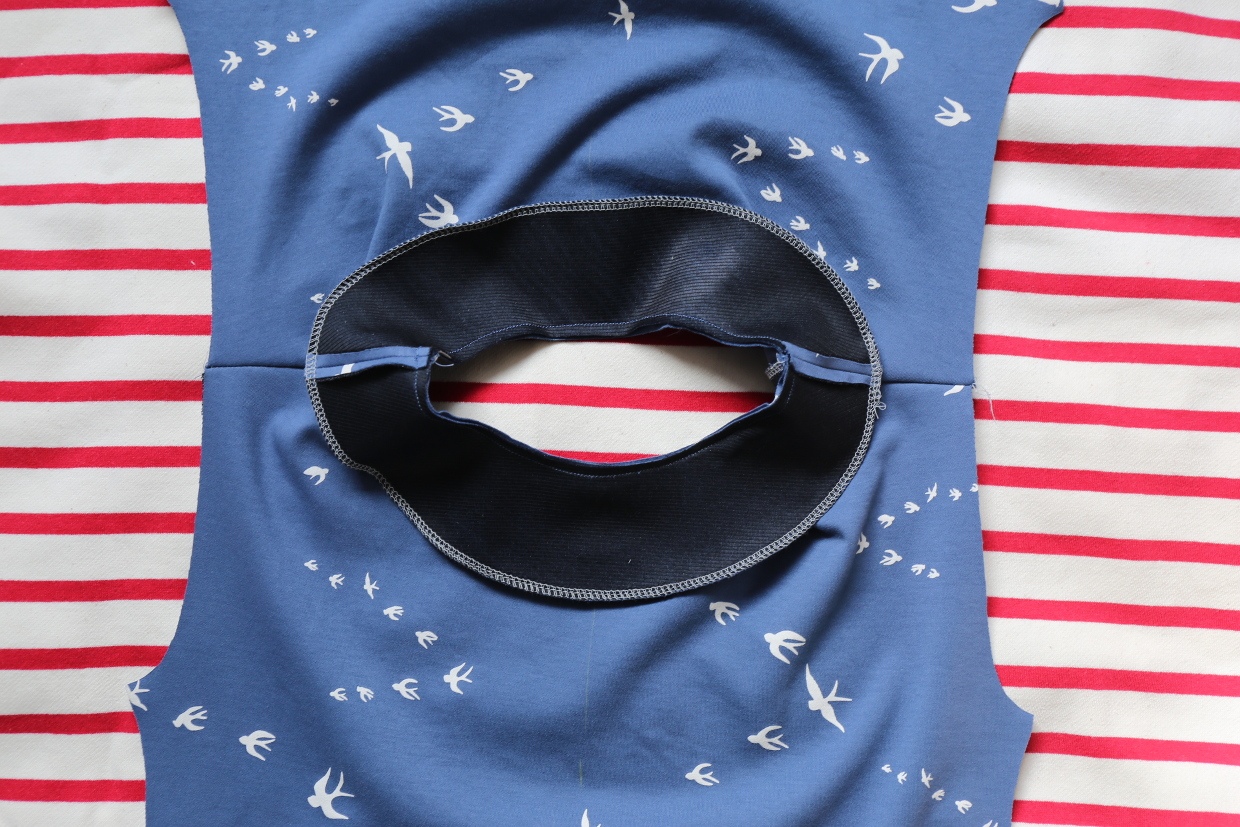
4) Turn the facing to the inside of the dress and press it. rolling the seam slightly toward the inside so it won’t show when the dress is worn. Pin the facing to the dress, smoothing the fabrics as you pin.
5) Transfer the pins to the facing side (inside) of the dress and working from the facing side, stitch the facing to the dress 1/4” from the finished edge of the facing (about 2” from the neckline edge), using the edge of the facing as a stitching guide to keep your topstitching even and smooth. Stitch just inside the edge of the facing (1/8”-1/4”) to secure it and topstitch an even distance from the neckline edges. A stretch stitch is not technically necessary here buy might be a good idea to prevent broken stitches. If you have a walking foot, it might also be useful for this step.

We’ll see you back here tomorrow when we finish up the dress.
Sew the sleeves
1) Finish the raw edge of each sleeve hem with a zigzag stitch, mock serger stitch, or with the serger. (Disengage the serger’s knife or serge the edge without trimming it.)
HINT: If you would like to pre-crease your sleeves in preparation for hemming them later, fold and press each sleeve hem edge to the wrong side by 1”. Unfold it for the next steps keeping the crease for later.
2) Unfold the dress/top front and back at the shoulder seams, making sure the seam allowances stay pressed toward the back of the game. With right sides together, start pinning the sleeve to the armhole, beginning at the underarm and working your way toward the top of the sleeve. First pin from the underarm up to the notches on both underarm sides of the sleeve. Next pin the notch at the top of the sleeve to the shoulder seam and distribute any excess fabric in the sleeve evenly across the shoulder of the armhole. You may need to stretch the armhole a bit while pinning the top of the sleeve to ease in the excess fabric. Stitch the sleeve to the armhole with a 1/4” seam, stretching a bit as needed to fir the sleeve smoothly. Press the seam allowances toward the sleeve and finish using your preferred method. Repeat to attach the second sleeve to the other armhole.

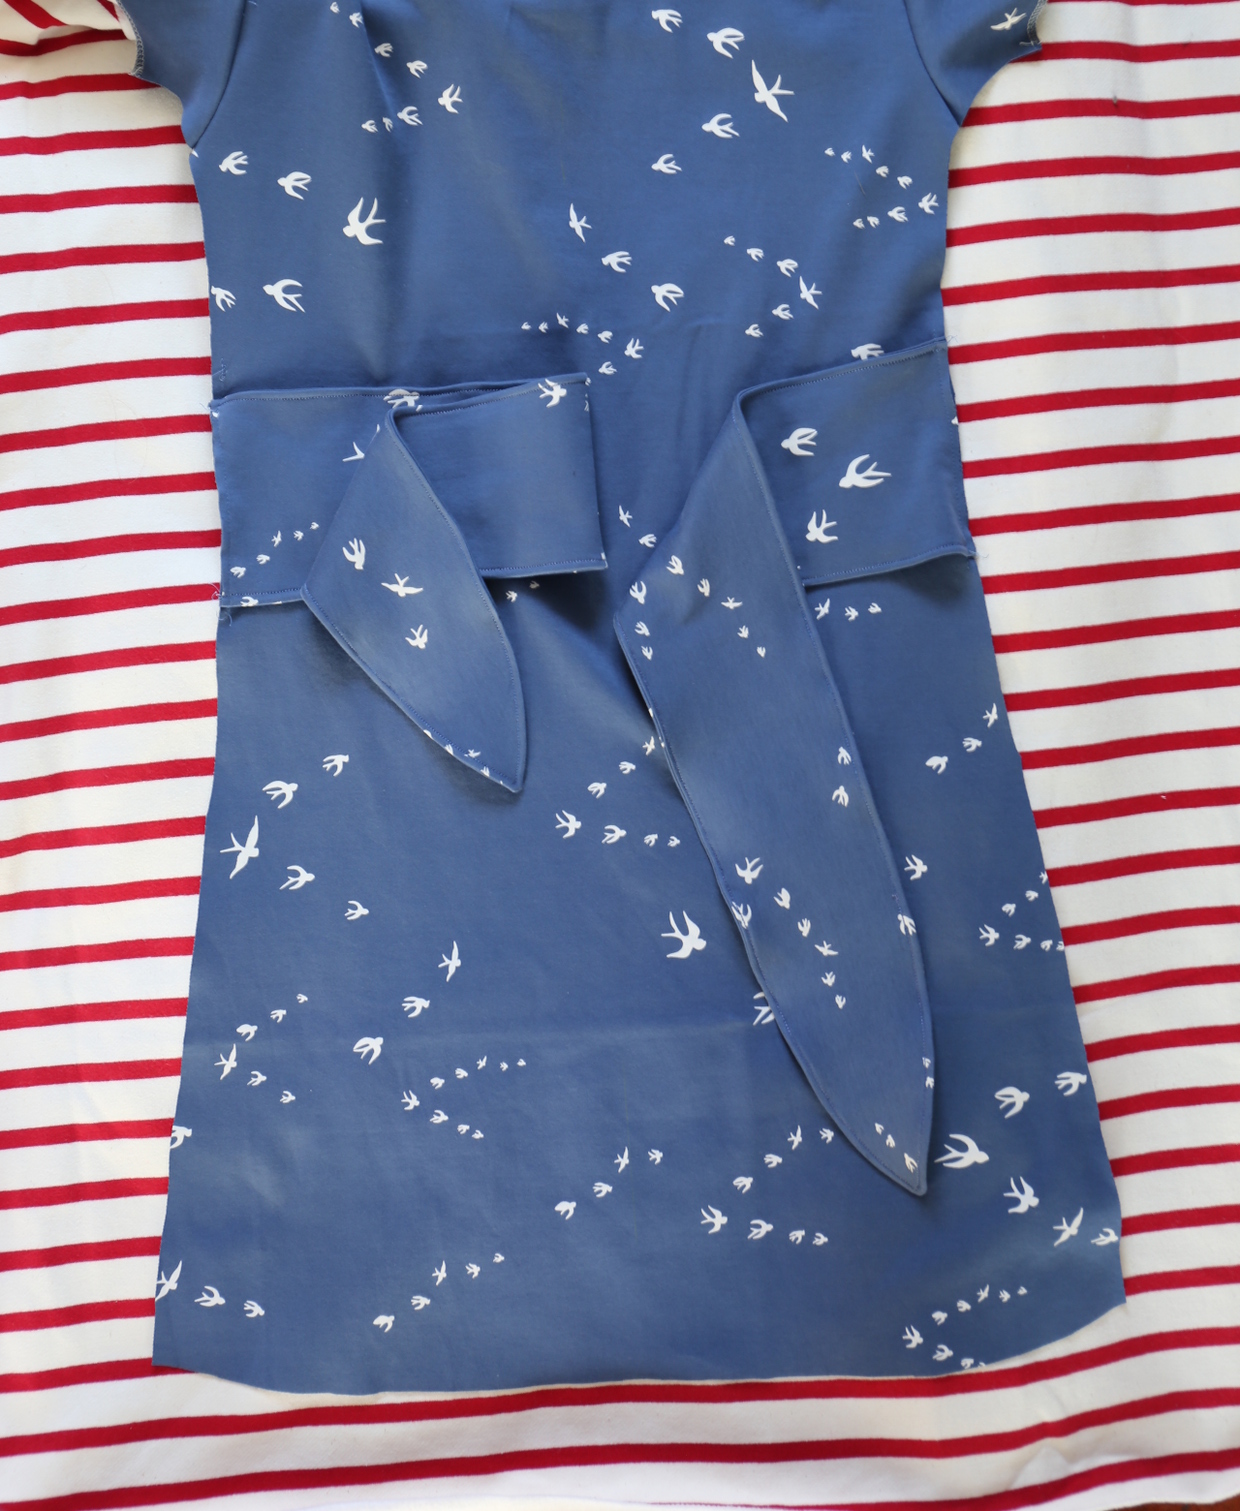
Sew the ties
1) Align and pin two of the tie pieces together, with right sides facing, and stitch the curved edges with a 1/4” seam. When you reach the dot at the tip, pivot and take one stitch across an then pivot again to stitch the tie’s other side, backstitching or lockstitching at both ends. Trim the excess fabric from the tip so it will make a nice point when the tie is turned right-side out. Repeat to sew the second tie.
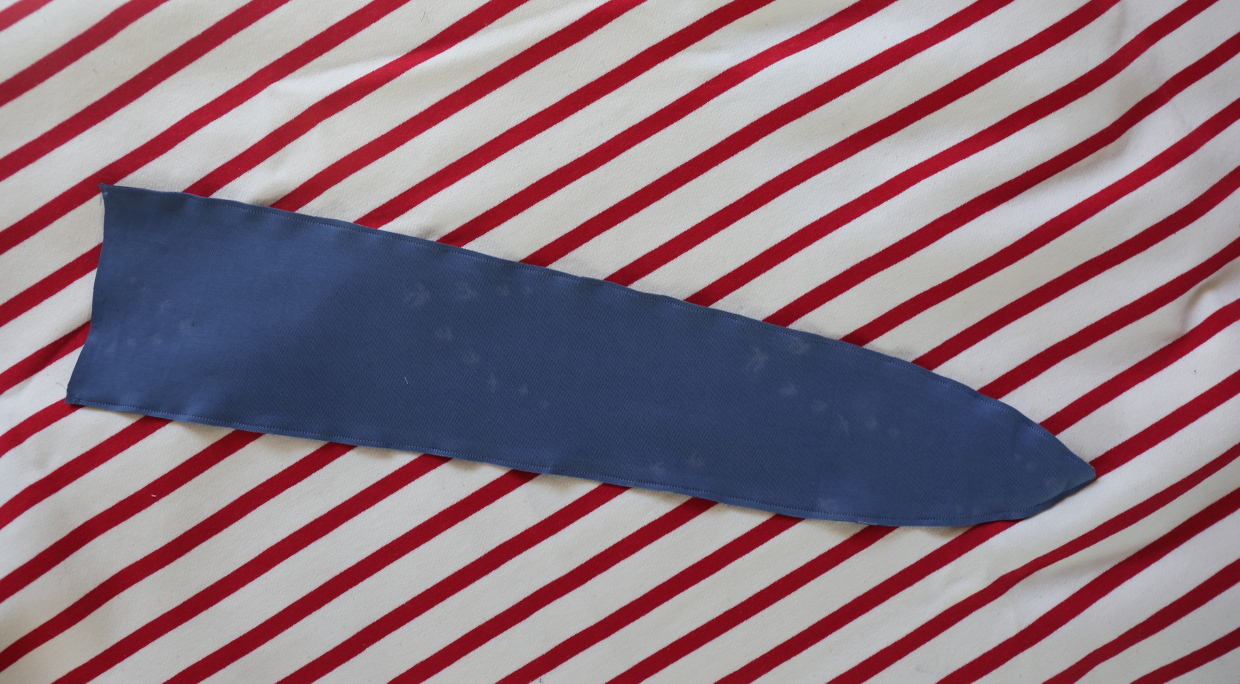
2) Turn each of the ties right-side out and use a chopstick or knitting needle to gently push out the corners. Press the stitched edges to get a nice curve and pointed tip. Edgestitch the ties, using a stretch stitch so the stitches won’t break when the tie is stretched. (The triple stretch stitch looks especially nice for this step if your sewing machine includes it. If you don’t know what triple stretch is or if your machine doesn’t have it, a small zigzag also works well.) Repeat to finish the second tie.
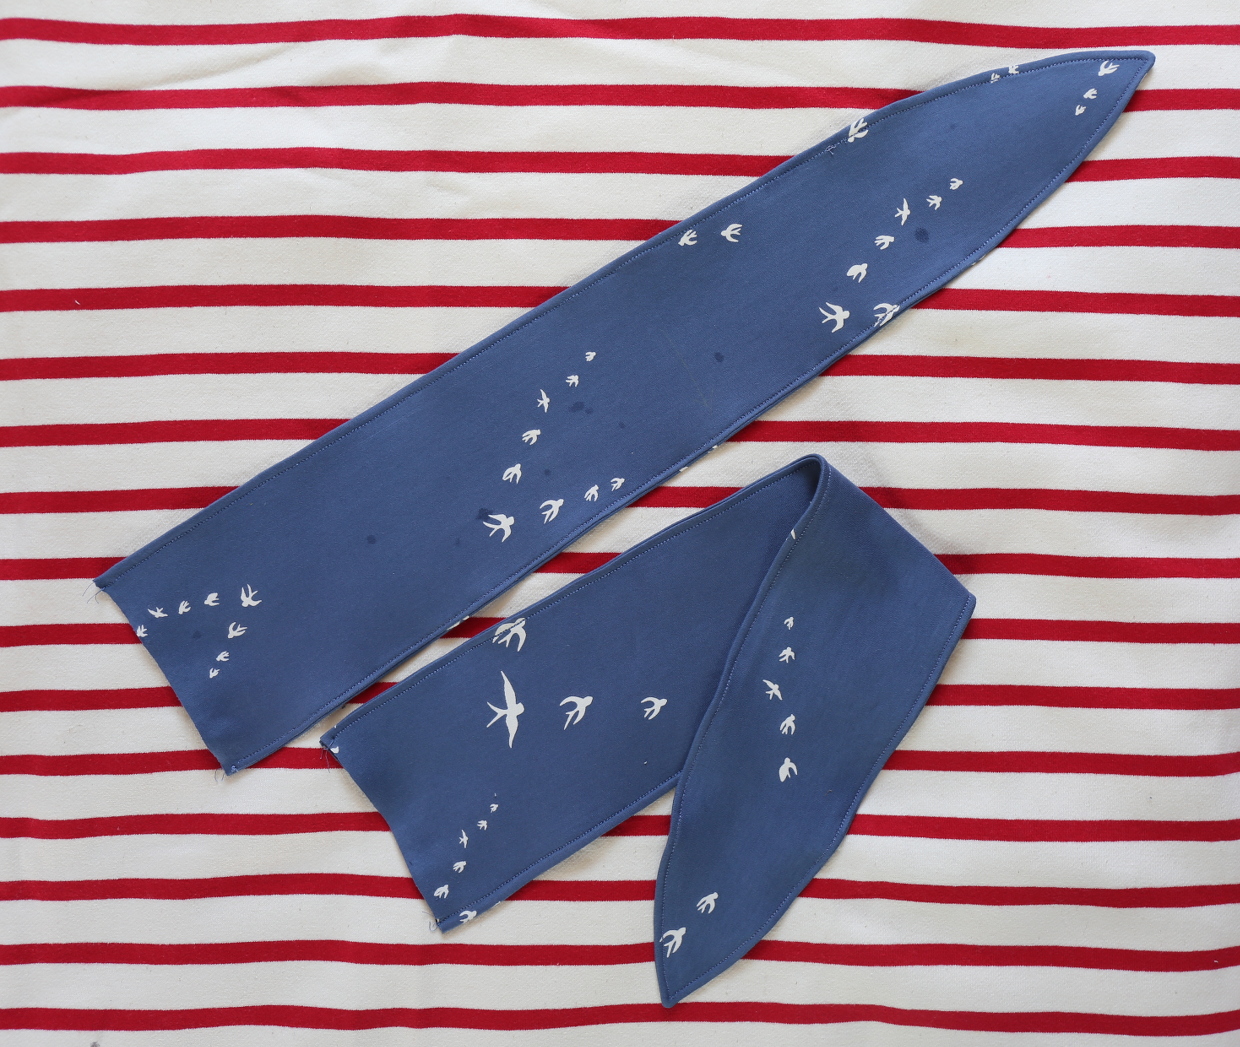
3) Pin one tie to the dress front, matching the short end of the tie to the edge of the dress and positioning the tie between the dots you transferred from the pattern piece. Baste the tie to the dress with a scant 1/4” seam. Repeat to baste the second tie to the opposite edge of the dress front.
Sew the side seams
1) Fold and pin the ties to the dress front to keep them out of the way so you can sew the side seams. Fold the dress/top, with right sides together, along the shoulders so you can pin the sleeve edges and side edges together, matching the notches and the underarm seams. Stitch from the bottom edge of the garment to the sleeve edge with a s 1/4” seam, backstitching or lockstitching at both ends. If desired, finish the seam allowances using your preferred method. Then press the seam allowances toward the back.
Finish the dress
1) Finish the raw edges on the bottom of the dress/top with a zigzag stitch, mock serger stitch, or with the serger. (Disengage the serger’s knife or serge the edge without trimming it. ) Using tailor’s chalk or a water-soluble fabric-marking pen, mark a line for the dress/top’s hem 1” from the finished edge and press the fabric to the wrong side along this drawn line. Repeat this same process for each sleeve. Then stitch the hem with a stretch stitch or small zigzag stitch to finish it. If preferred, you can also use a twin needle for a professional-looking finish. See our How to Hem Everything: Knit Fabrics post for details about hemming knits.

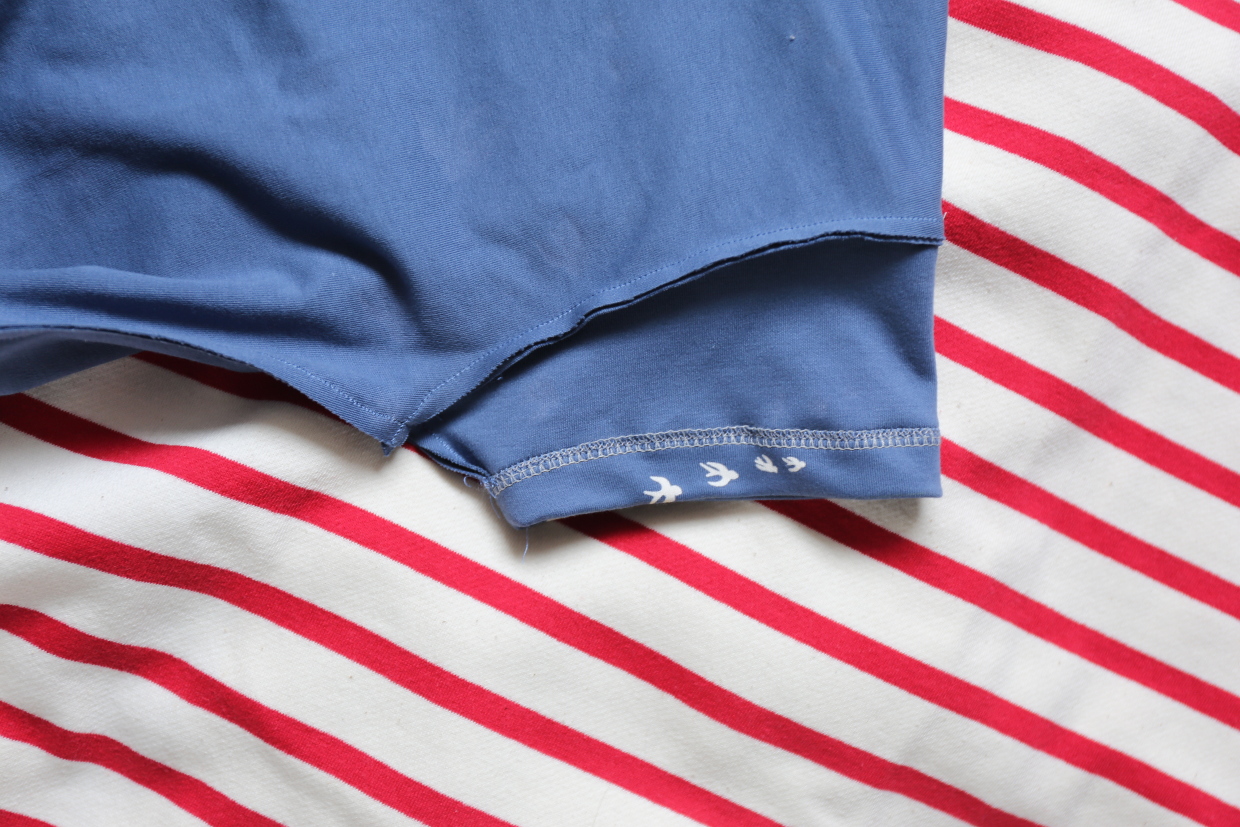
HINT: Try to not stretch the hems as you sew them to prevent them from getting wavy. Give them a light press with plenty of steam when you’re finished, too.
Now, why don’t you show everyone what you made! Tag your in process photos of your Girl on the Go dresses and tops with #oliverands and #osgirlonthego on Instagram. When you have completed your Girl on the Go dress or top, post it somewhere and then add a link to it using the button below.
I really appreciate these tips on matching stripes!