When I’m working on one of our Oliver + S or Liesl + Co. sewing patterns, the process from start to finish takes about six months. Of course I’m not working exclusively on that pattern for six months. In between steps I’m also writing blog posts, responding to the astonishing quantity of email that running a business entails, working with our business partners on various projects, etc. But it’s about six months from start to finish, and then I start the process again. (Usually there are several six-month processes happening simultaneously, but you get the general idea….)
But of course writing a book happens on a completely different time frame. It’s a long process and a solitary job that makes it easy to get lonely, feel lost in the middle, and lose focus. I was really lucky with this book, however. It all started a few years ago with an invitation to teach some workshops for the annual convention of SAGA, the Smocking Arts Guild of America. This invitation gave me the opportunity to test out the book concept and to receive feedback from the members of the guild, who are extremely accomplished sewists. I felt like if I passed muster with this group, I really had something to offer all of you.
The feedback from those workshops was so strong and positive that it also served a second, unexpected purpose of feeding me and giving me drive to work on the book for many months after the SAGA convention ended. I had a little extra incentive and inspiration to push my writing because of the enthusiasm of the workshop attendees.
But of course then we moved to a different country and I had to learn another language and help S to settle in, as well as finding new sources for all the services and materials that are required to run our business. It took a while to find a large-format printer for our pattern proofs, learn where to buy muslin and patternmaking paper (not to mention how to ask for them), finish writing some really challenging sections (the lining sections with zipper and button options were particularly challenging to consider all the possibilities), finish sewing dresses, schedule and style photo shoots, etc. Near the end of the process I started to feel really beat down, like I was trying to run in waist-deep water. Everything seemed to take forever, and I was starting to feel discouraged and a little bit like the book would never be finished.
So it was a tremendous relief when I finally sent out the manuscript and pattern to my wonderful testers. They each signed up to test a variety of elements from the book before they had even seen it. And wow, did they ever come through! Their responses were so encouraging and positive that it gave me a renewed energy to finish the book.
But then, to make it even better, they just kept on sewing after the testing was finished. They got so excited about the possibilities offered in the book, they just kept on making more dresses. It was astonishing to me to see how much fun they were having, and how many different ideas they had. So I thought I’d show you a few of their designs to help you get inspired to start planning and sewing dresses, too!
First up, Allison sewed two darling, similar-but-not-matching dresses for her daughters from the book. Isn’t it fun how each girl got her own style, but they still match? Allison’s older daughter got pedal sleeves, bias-bound neckline, a gathered skirt, and gathered-edge pockets.
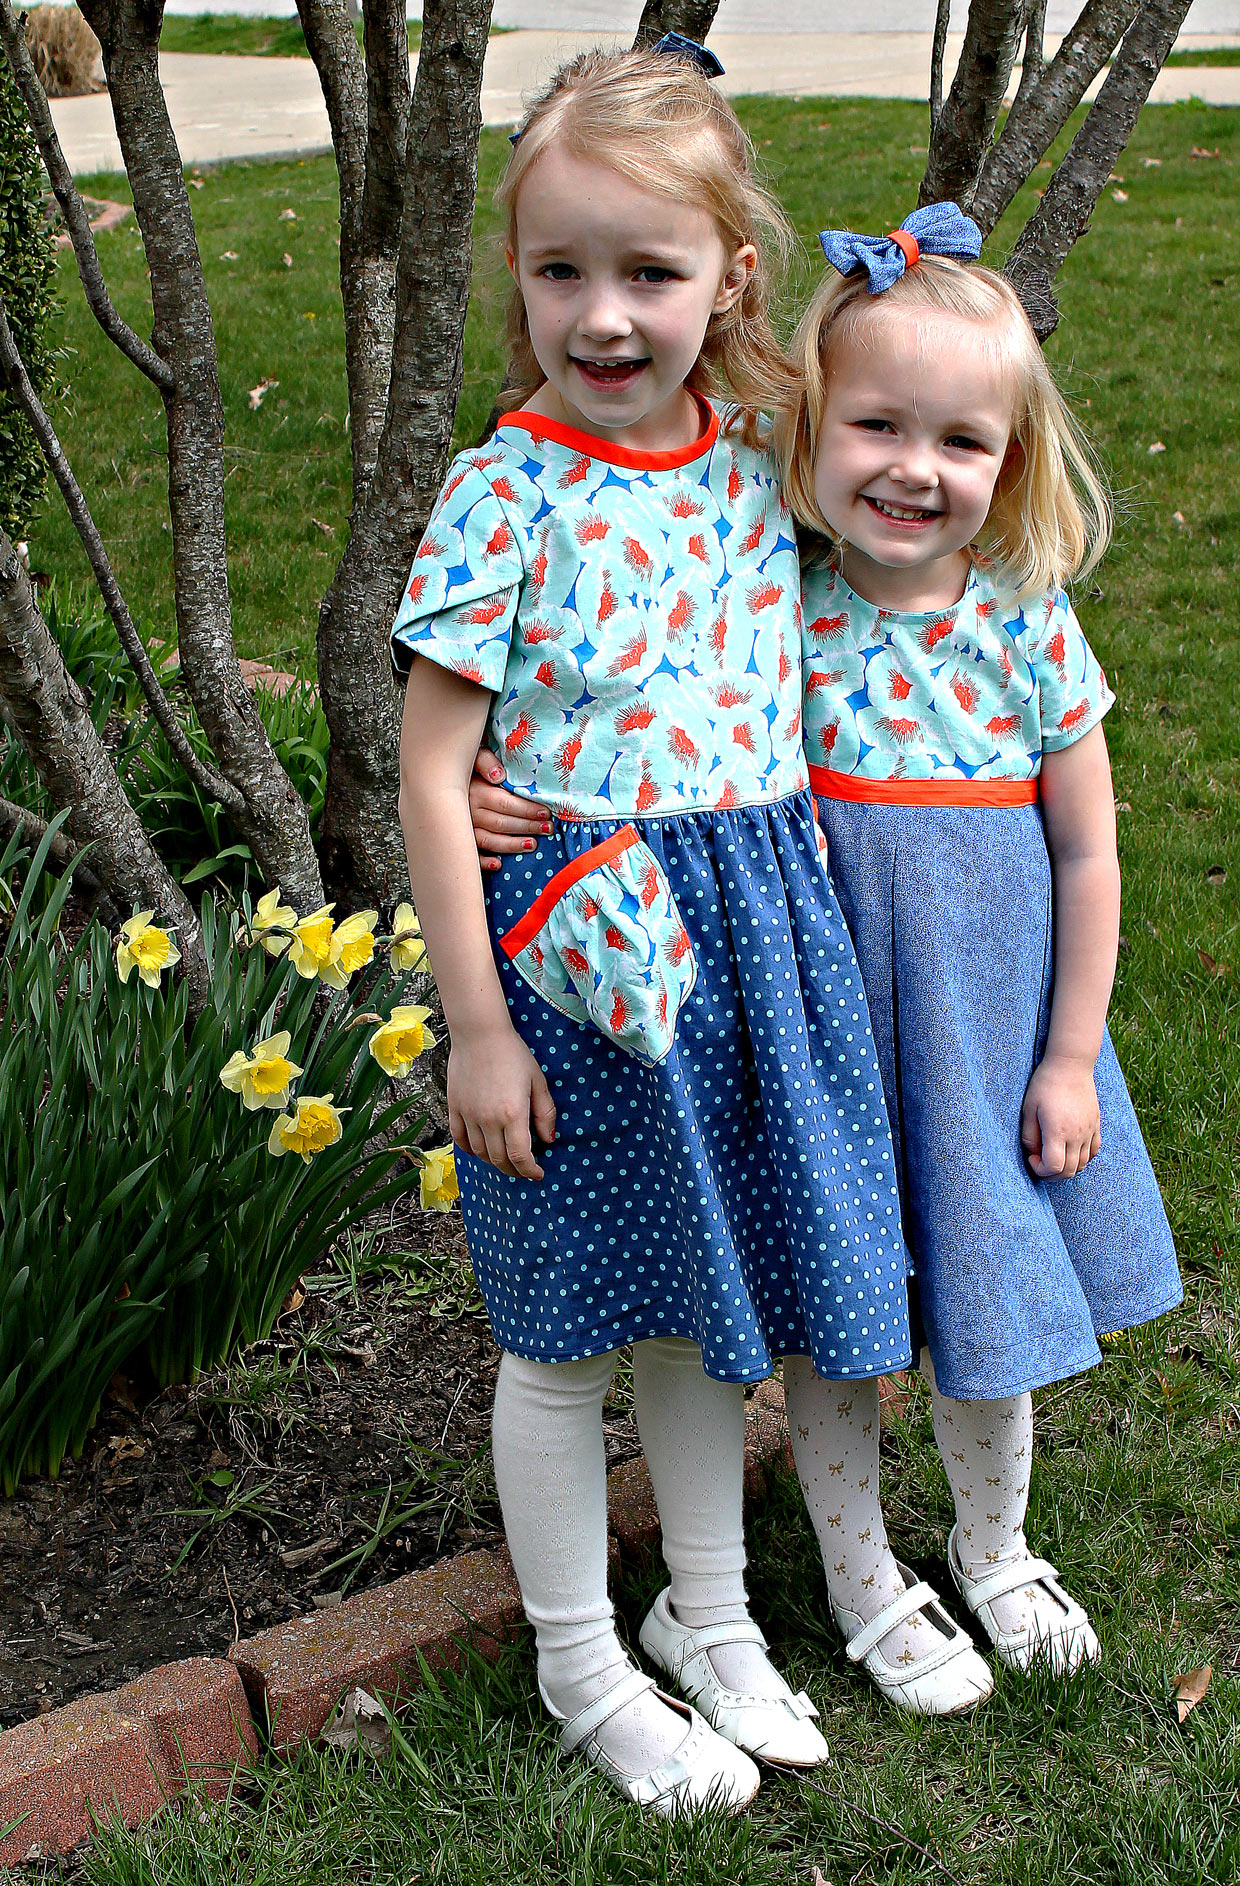
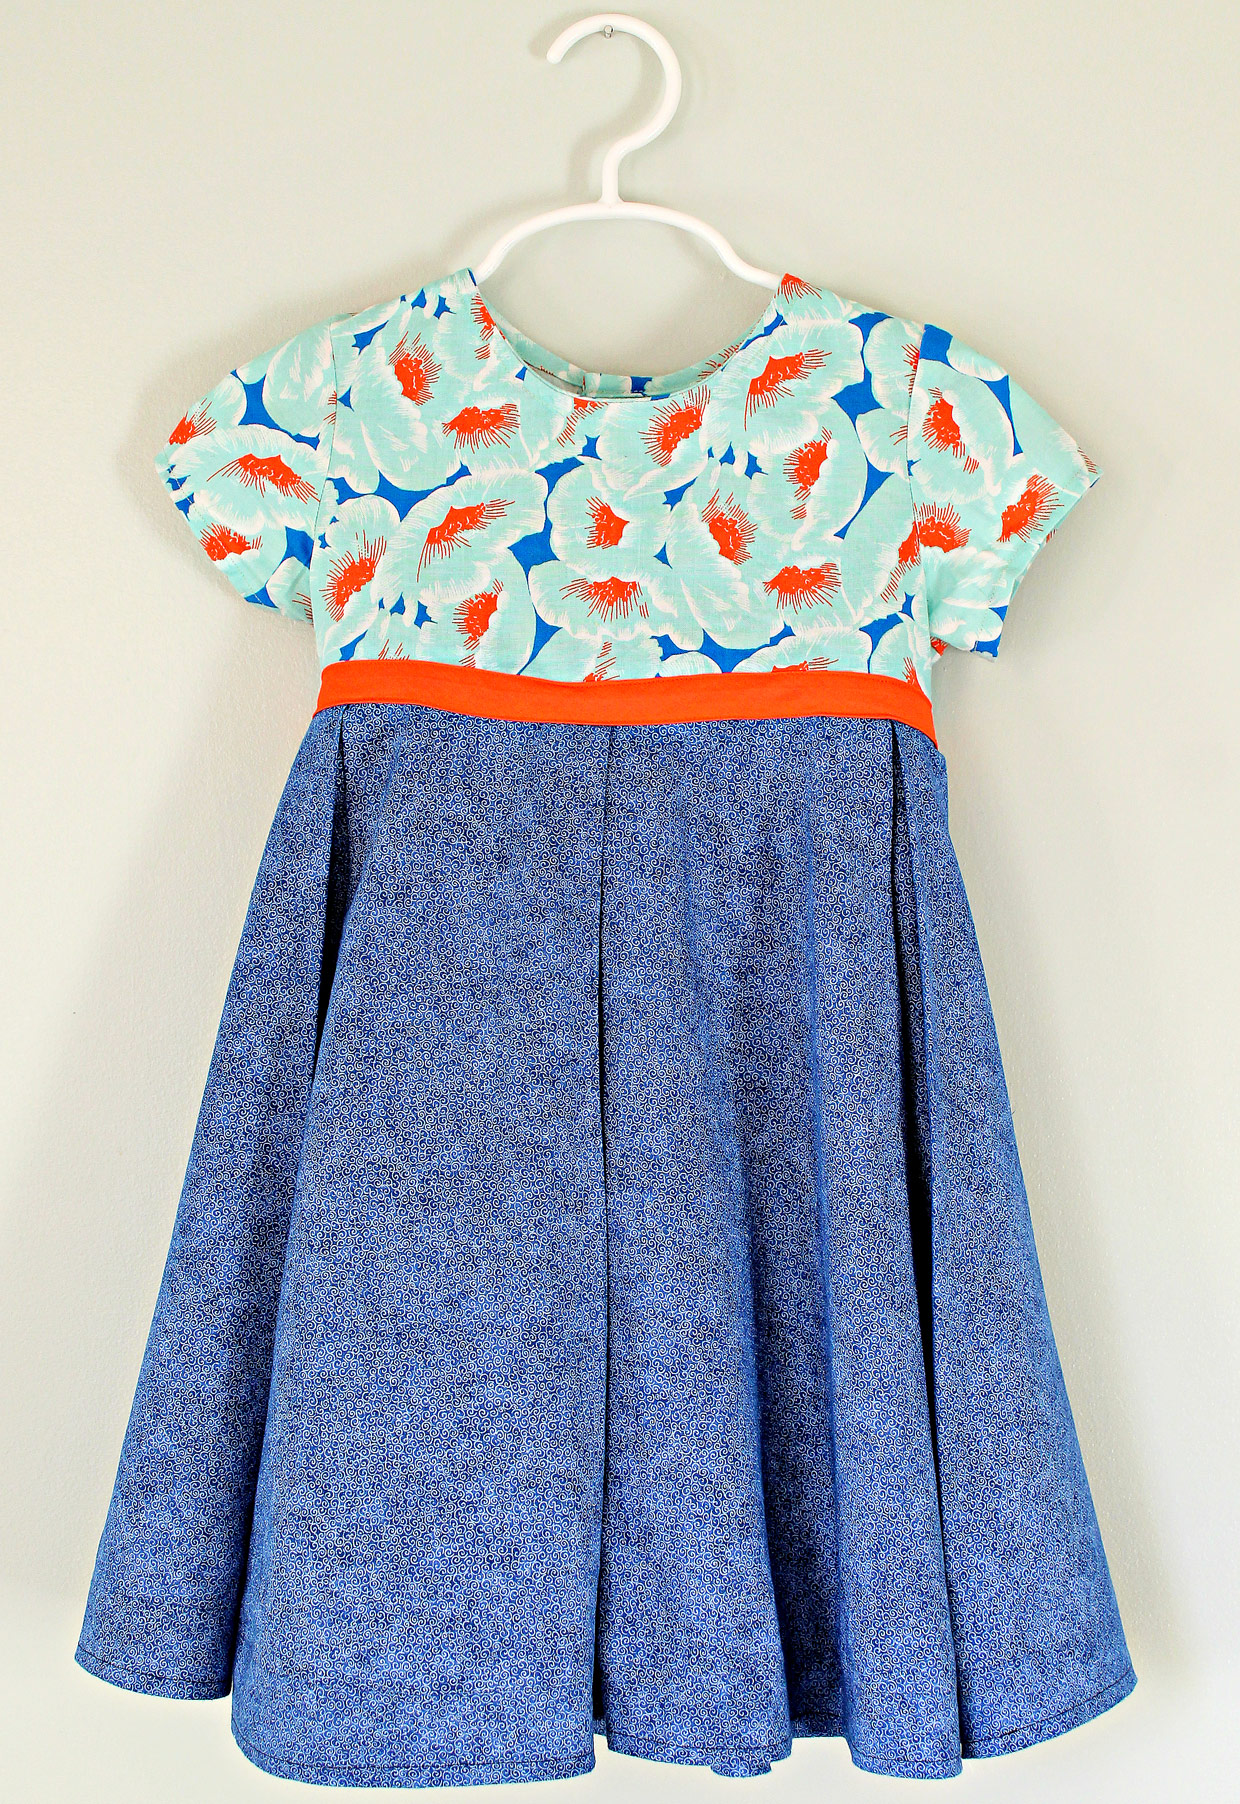
Allison’s younger daughter got an empire waist dress with box-pleated skirt and cap sleeves.
Jane tested the puffed sleeves and the external facing. I love how proud her daughter looks in her new dress!
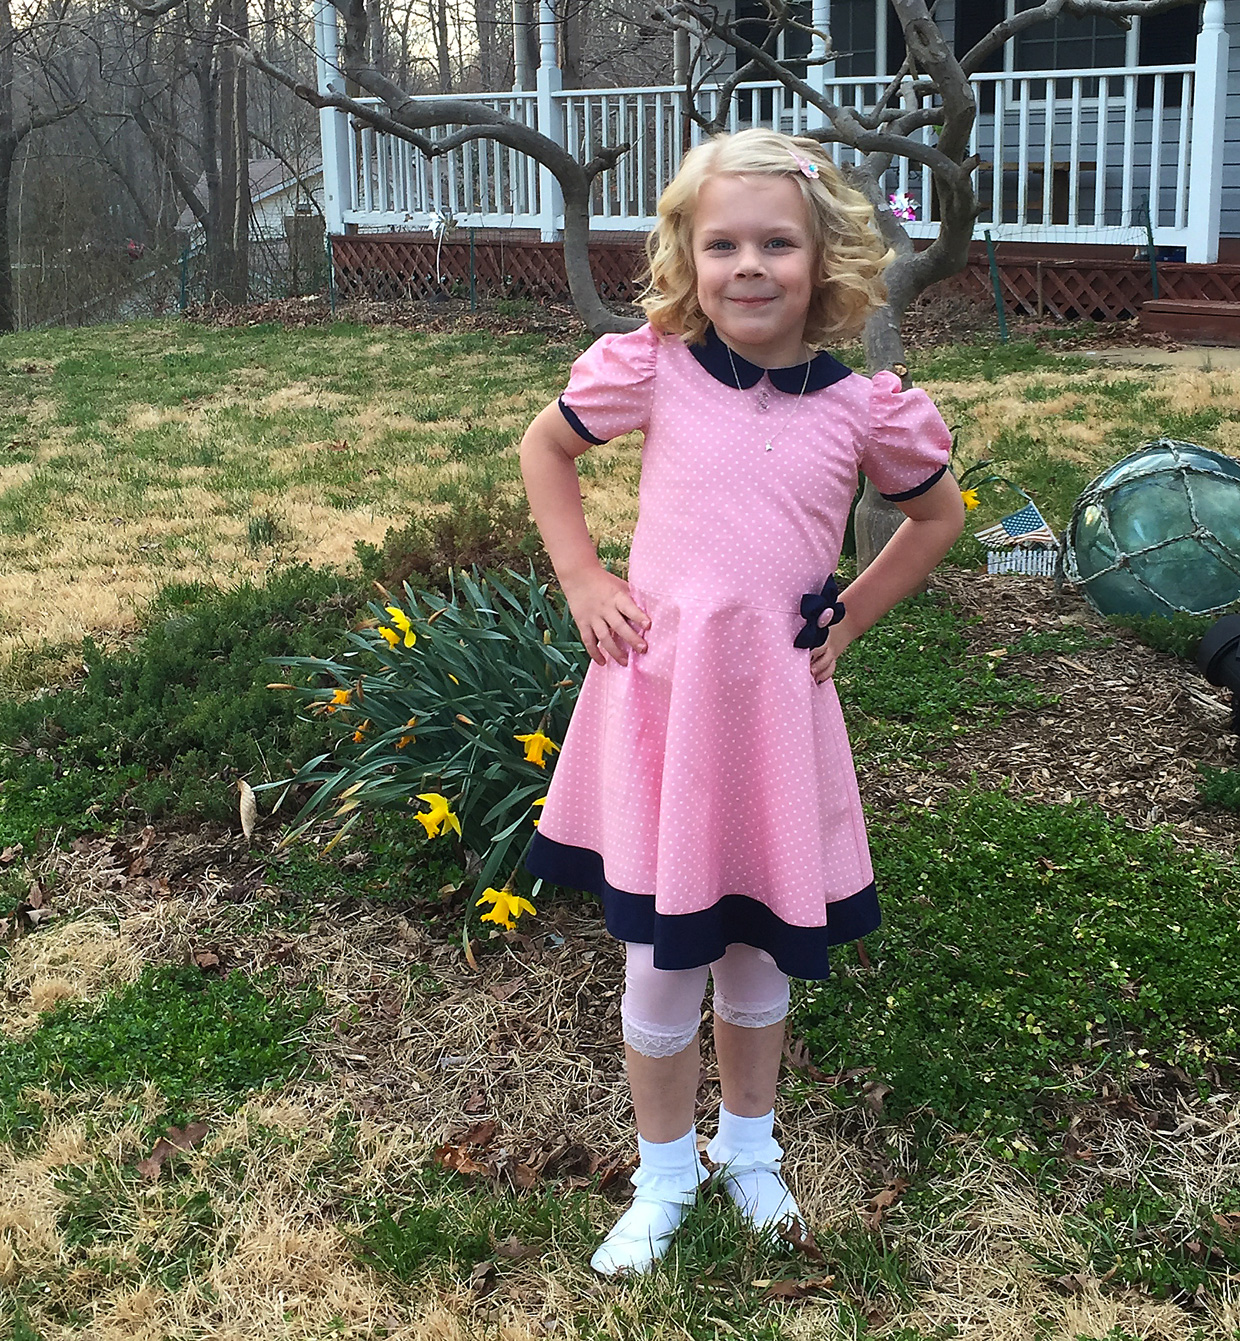
Jane also tested the option to move the button placket to the front of the dress, which I think offers lots of design possibilities.

Jeanne sewed the sleeveless version of the dress for her daughter H. (Hasn’t H grown up a lot since we modeled one of our paper dolls after her?)

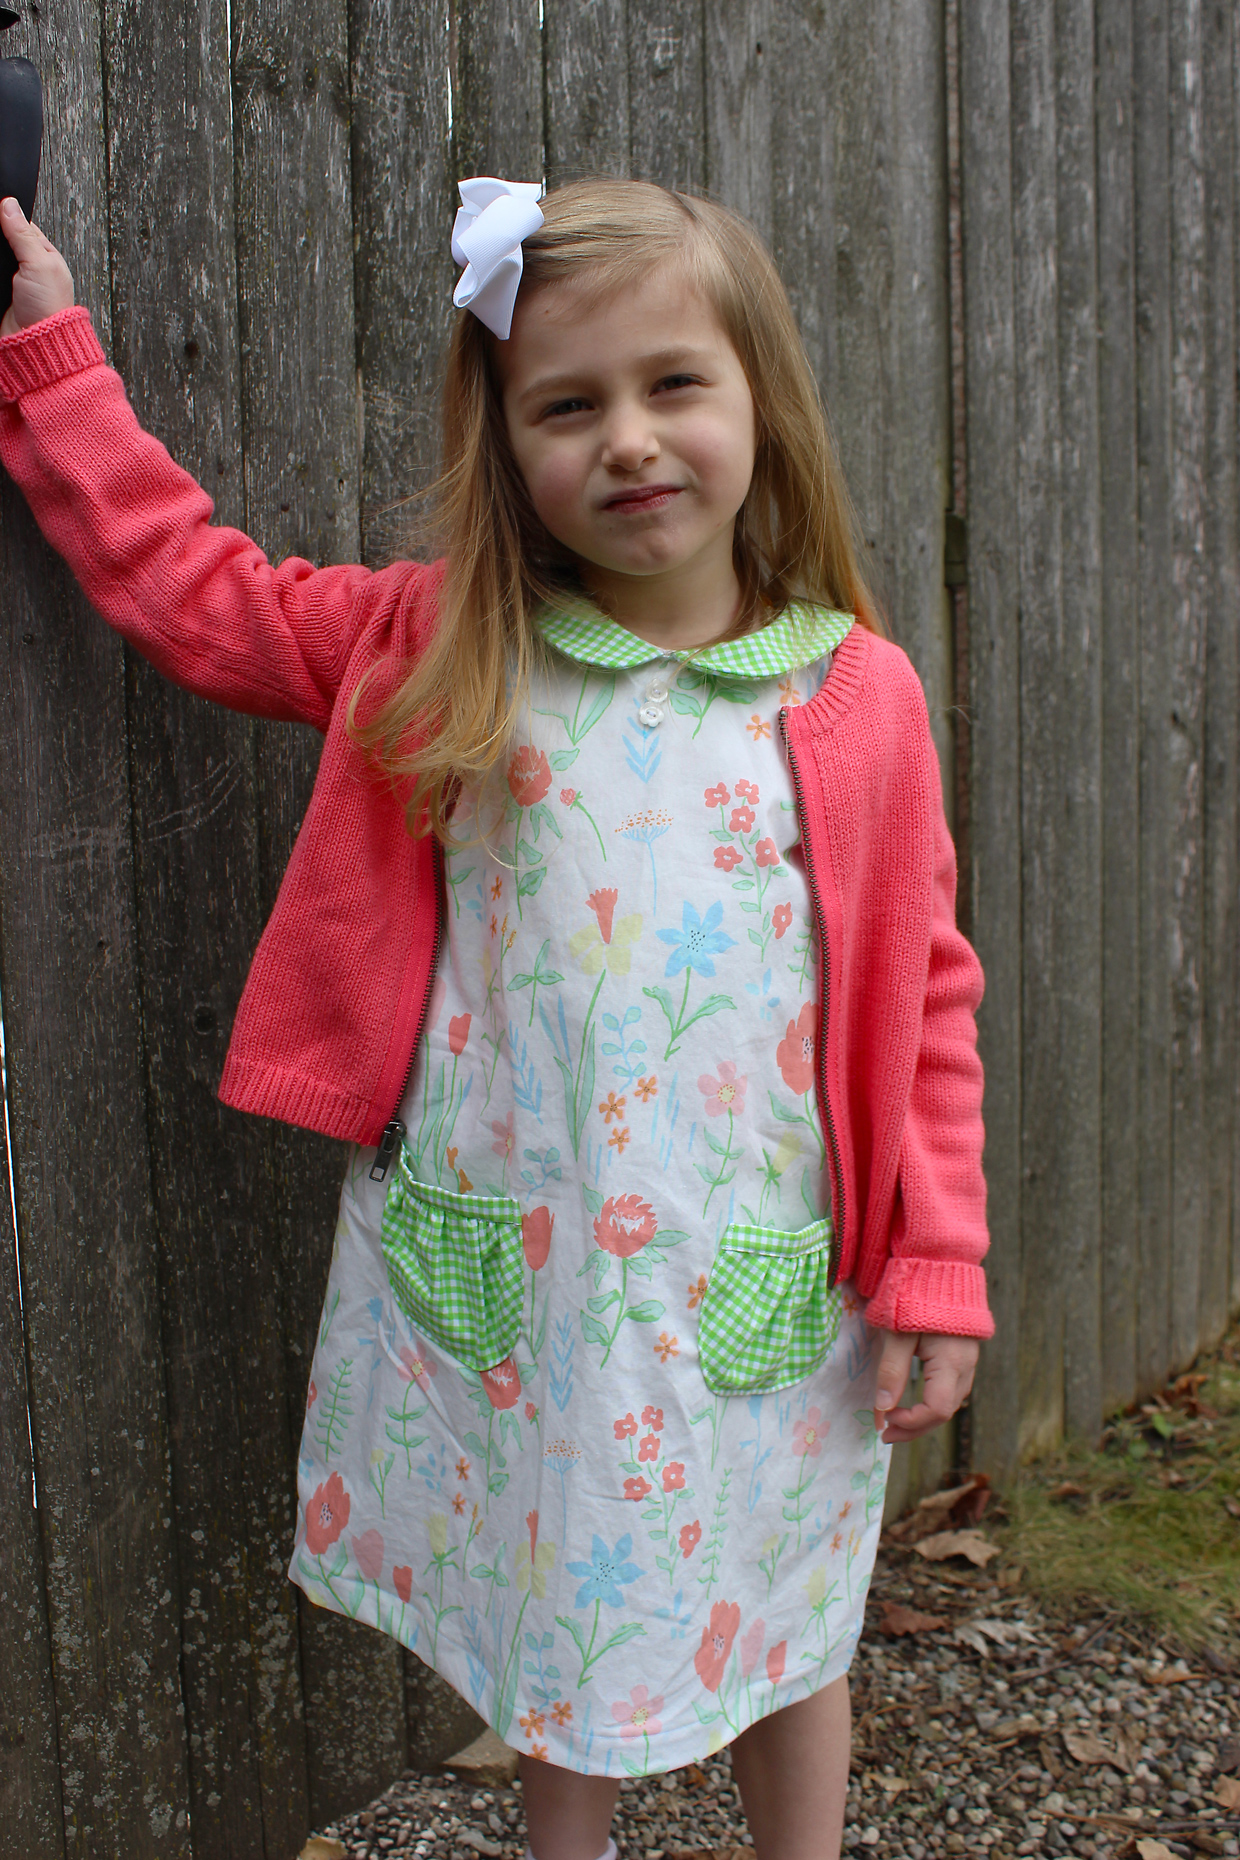
Laura tested the A-line dress and the gathered-edge pockets.
Miren sewed a sleeveless dress for her daughter. I love the contrast piping she used. (She blogged about the book today, too.)
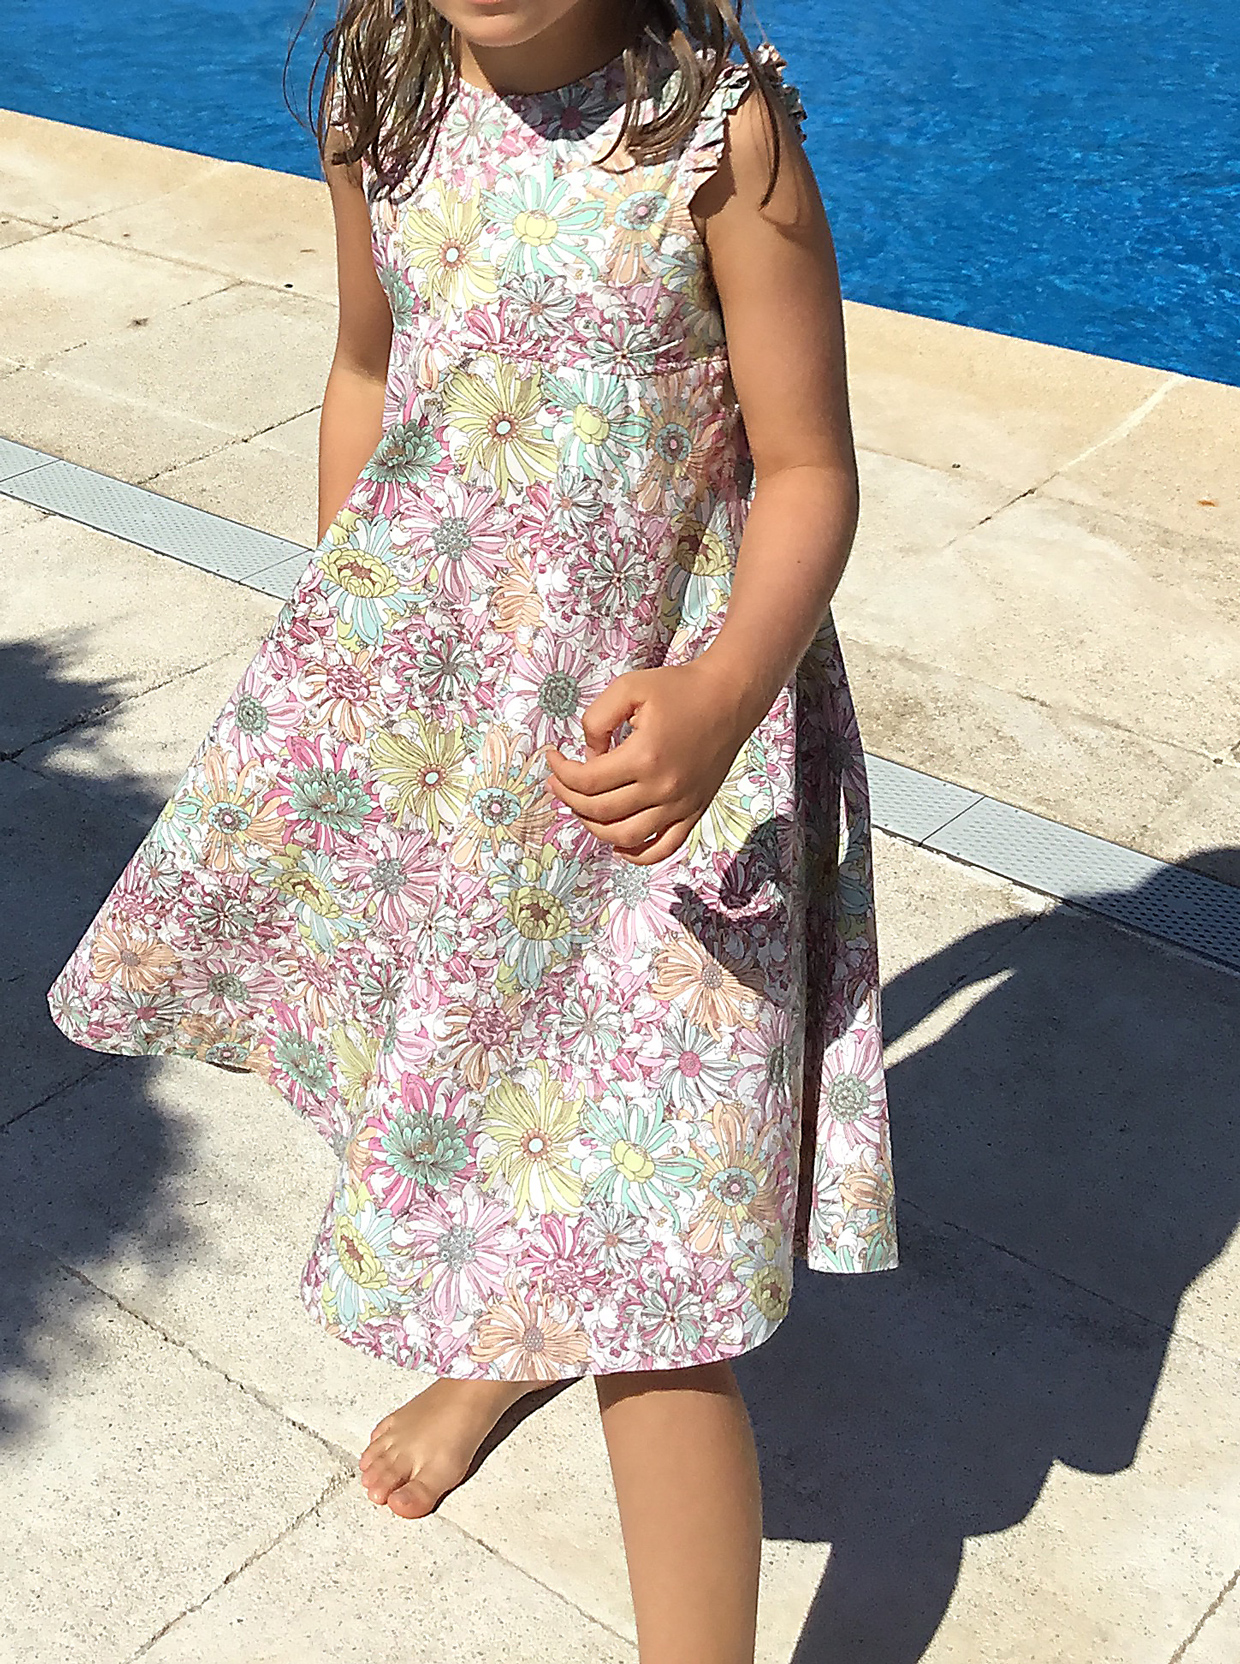
And I love Miriam’s empire-waisted, ruffle-sleeve version.
Miriam also tried the front pockets with fold detail, which lets you play with contrast fabrics as a design element. I think it would be fun to try different shapes in the fold-over detail, too. Scallops, anyone?

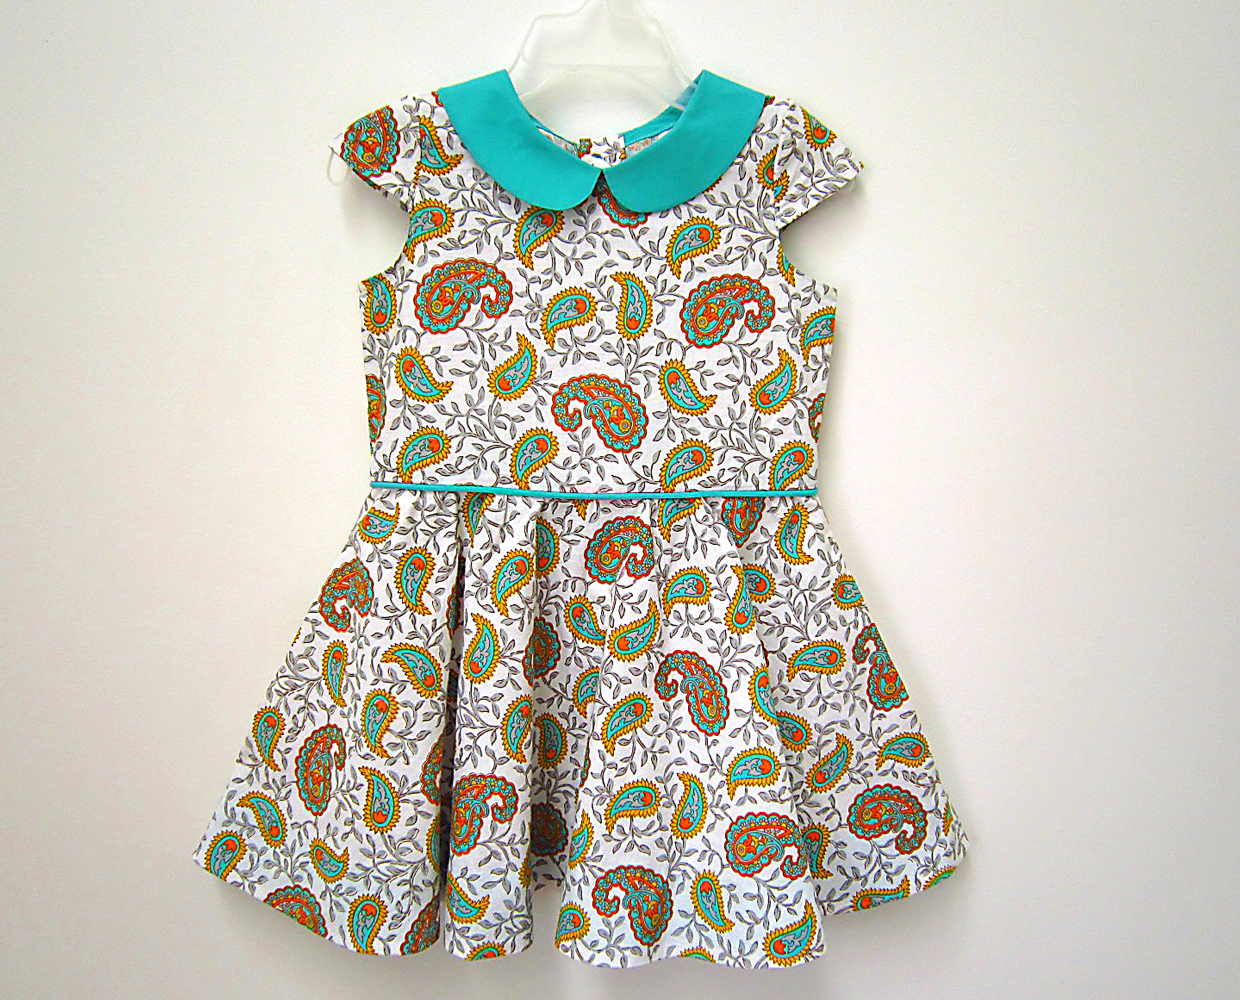
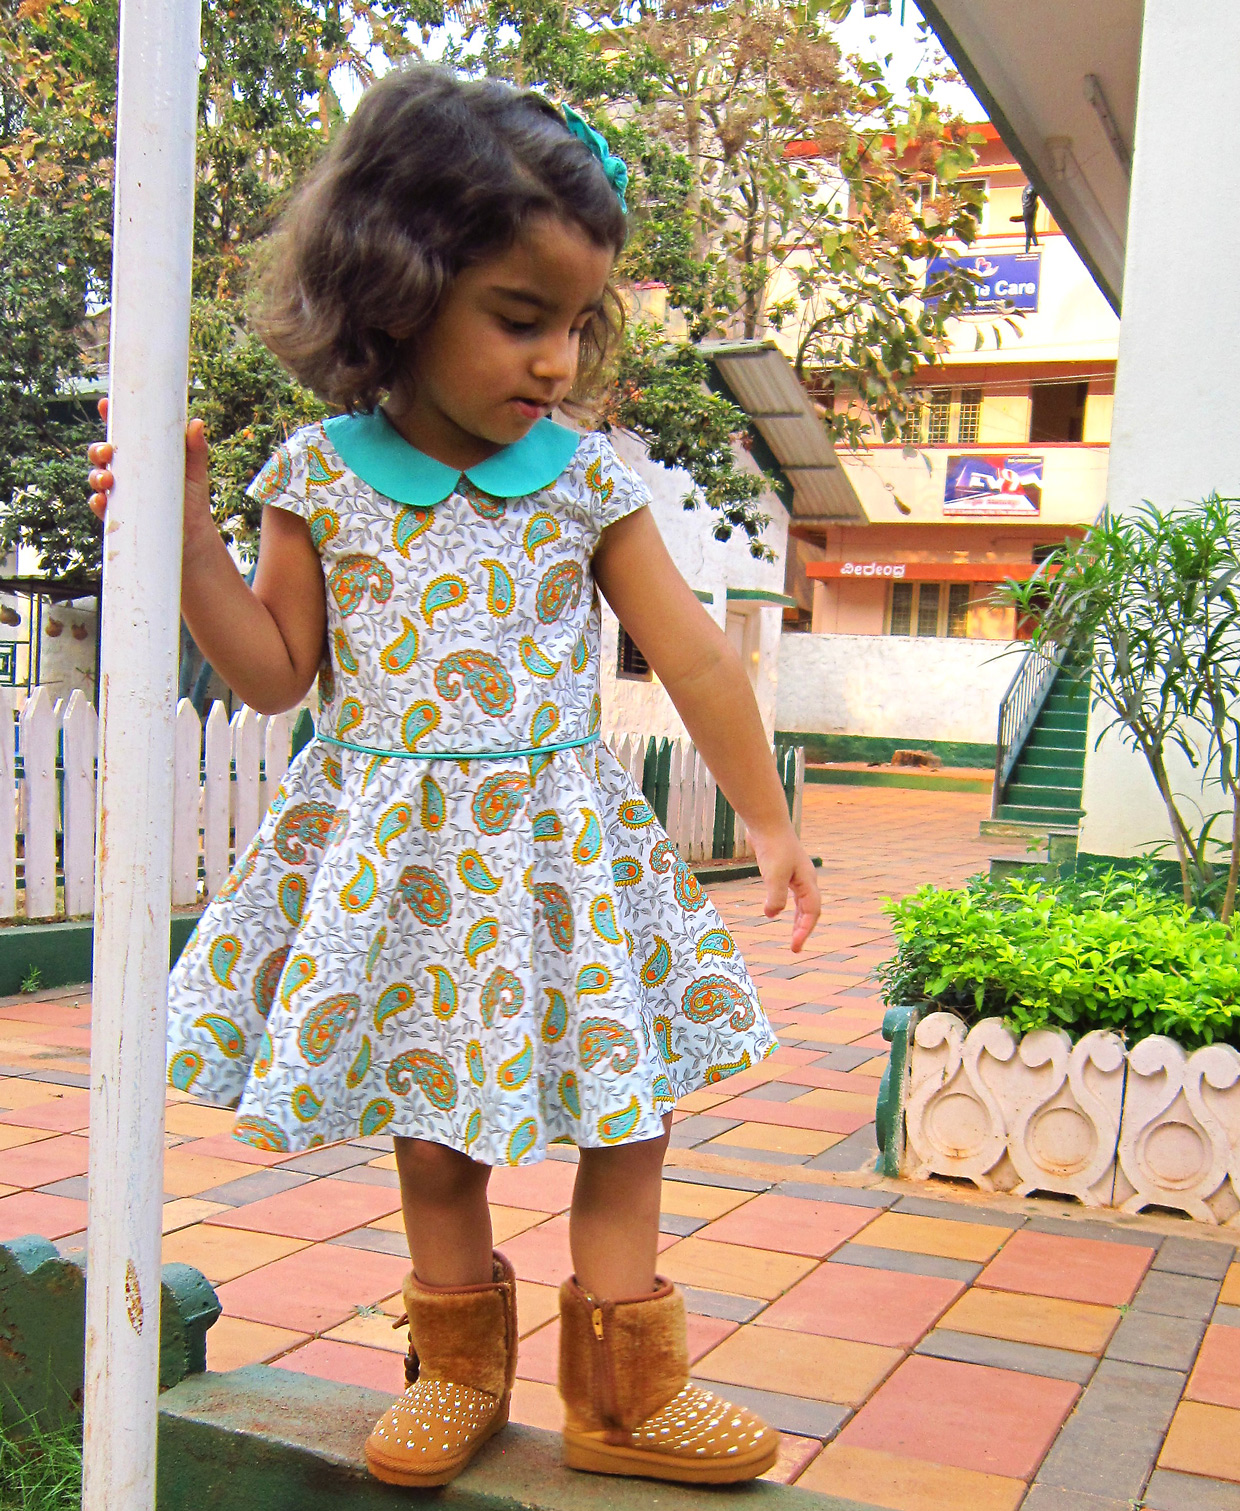
Rhythm tackled the partial cap sleeve as well as the flared gathered A-line skirt option. Aren’t the turquoise accents on this dress pretty?
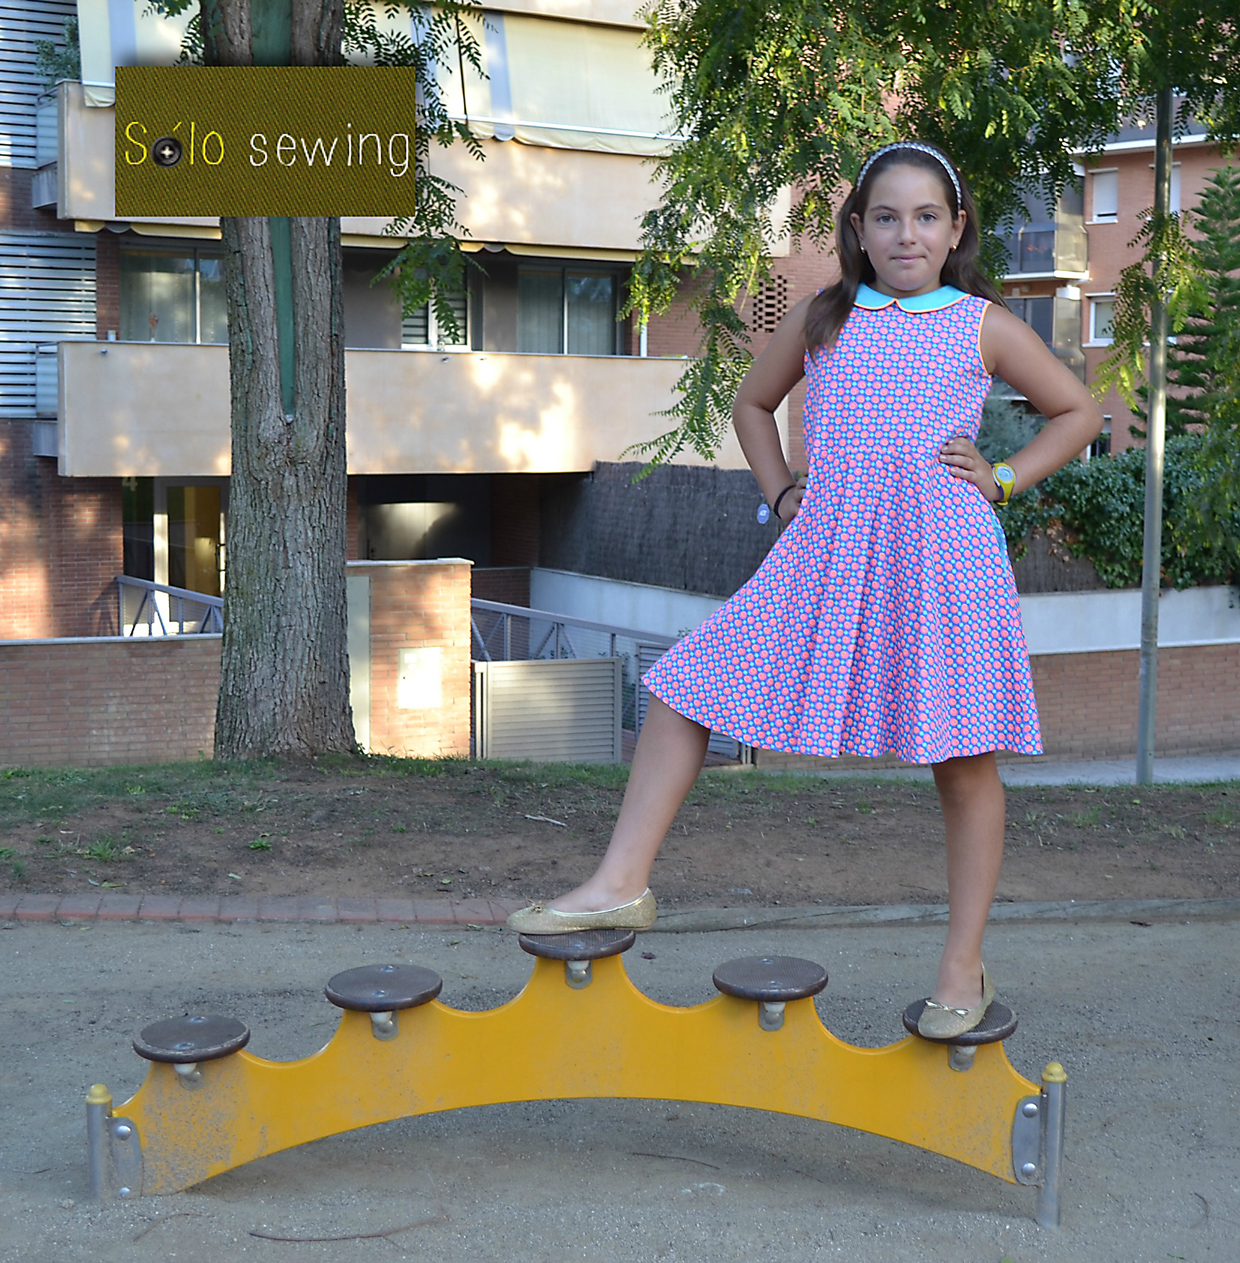
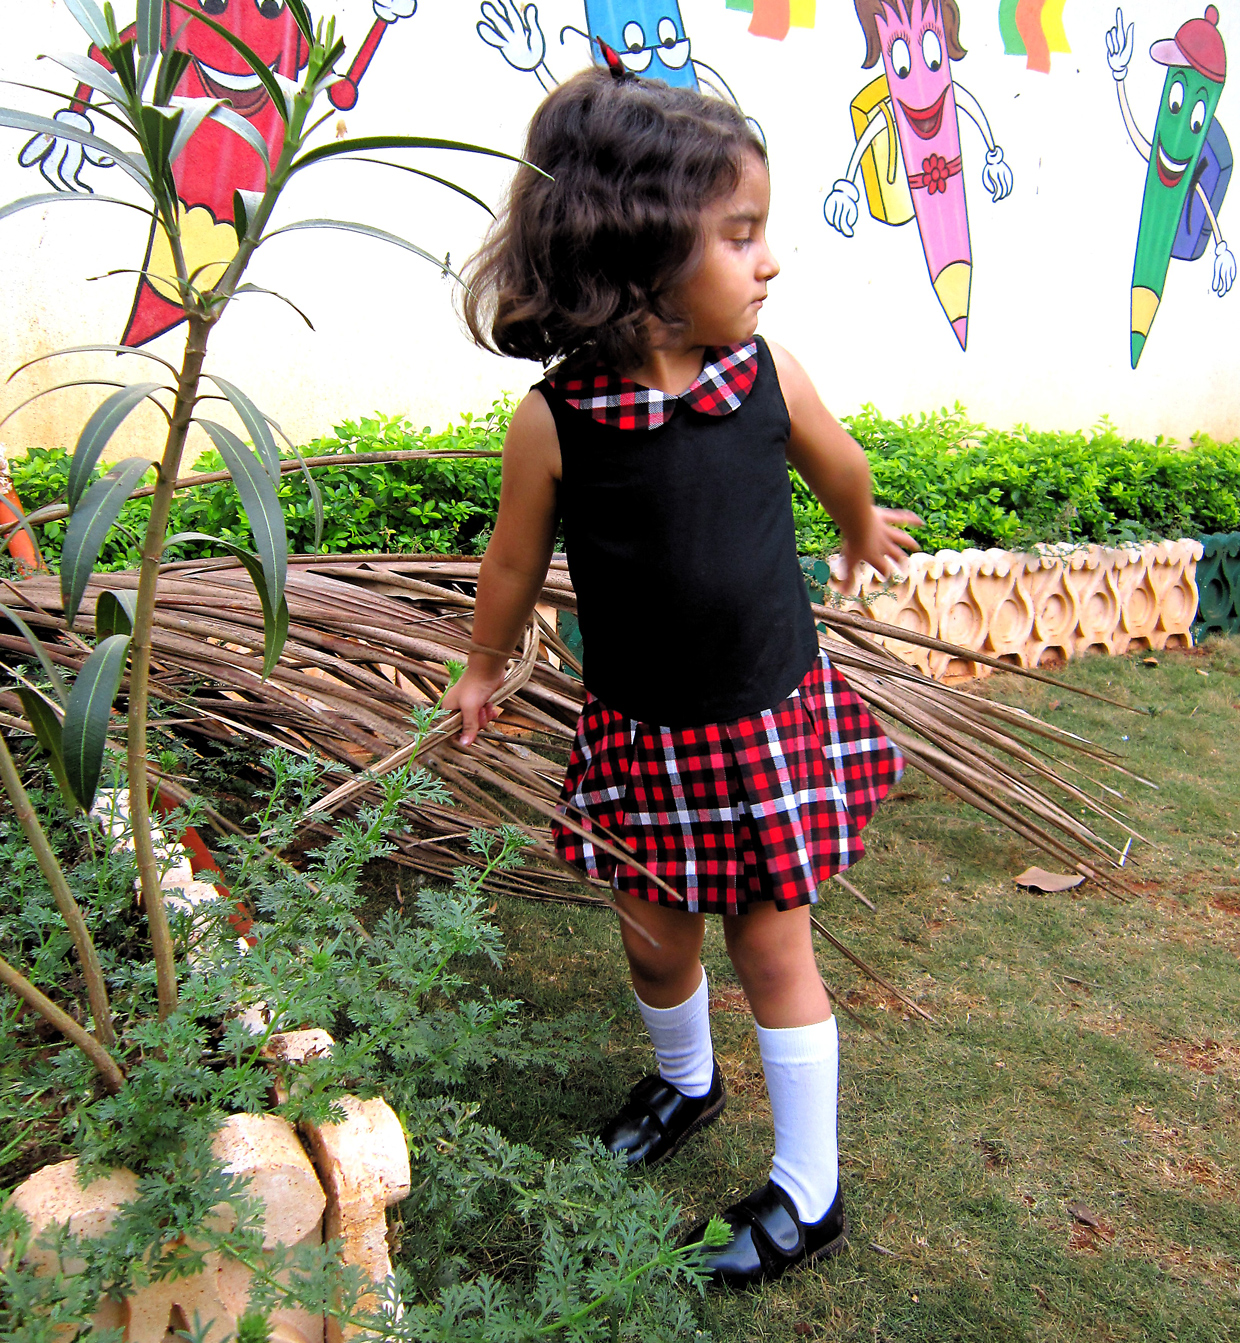
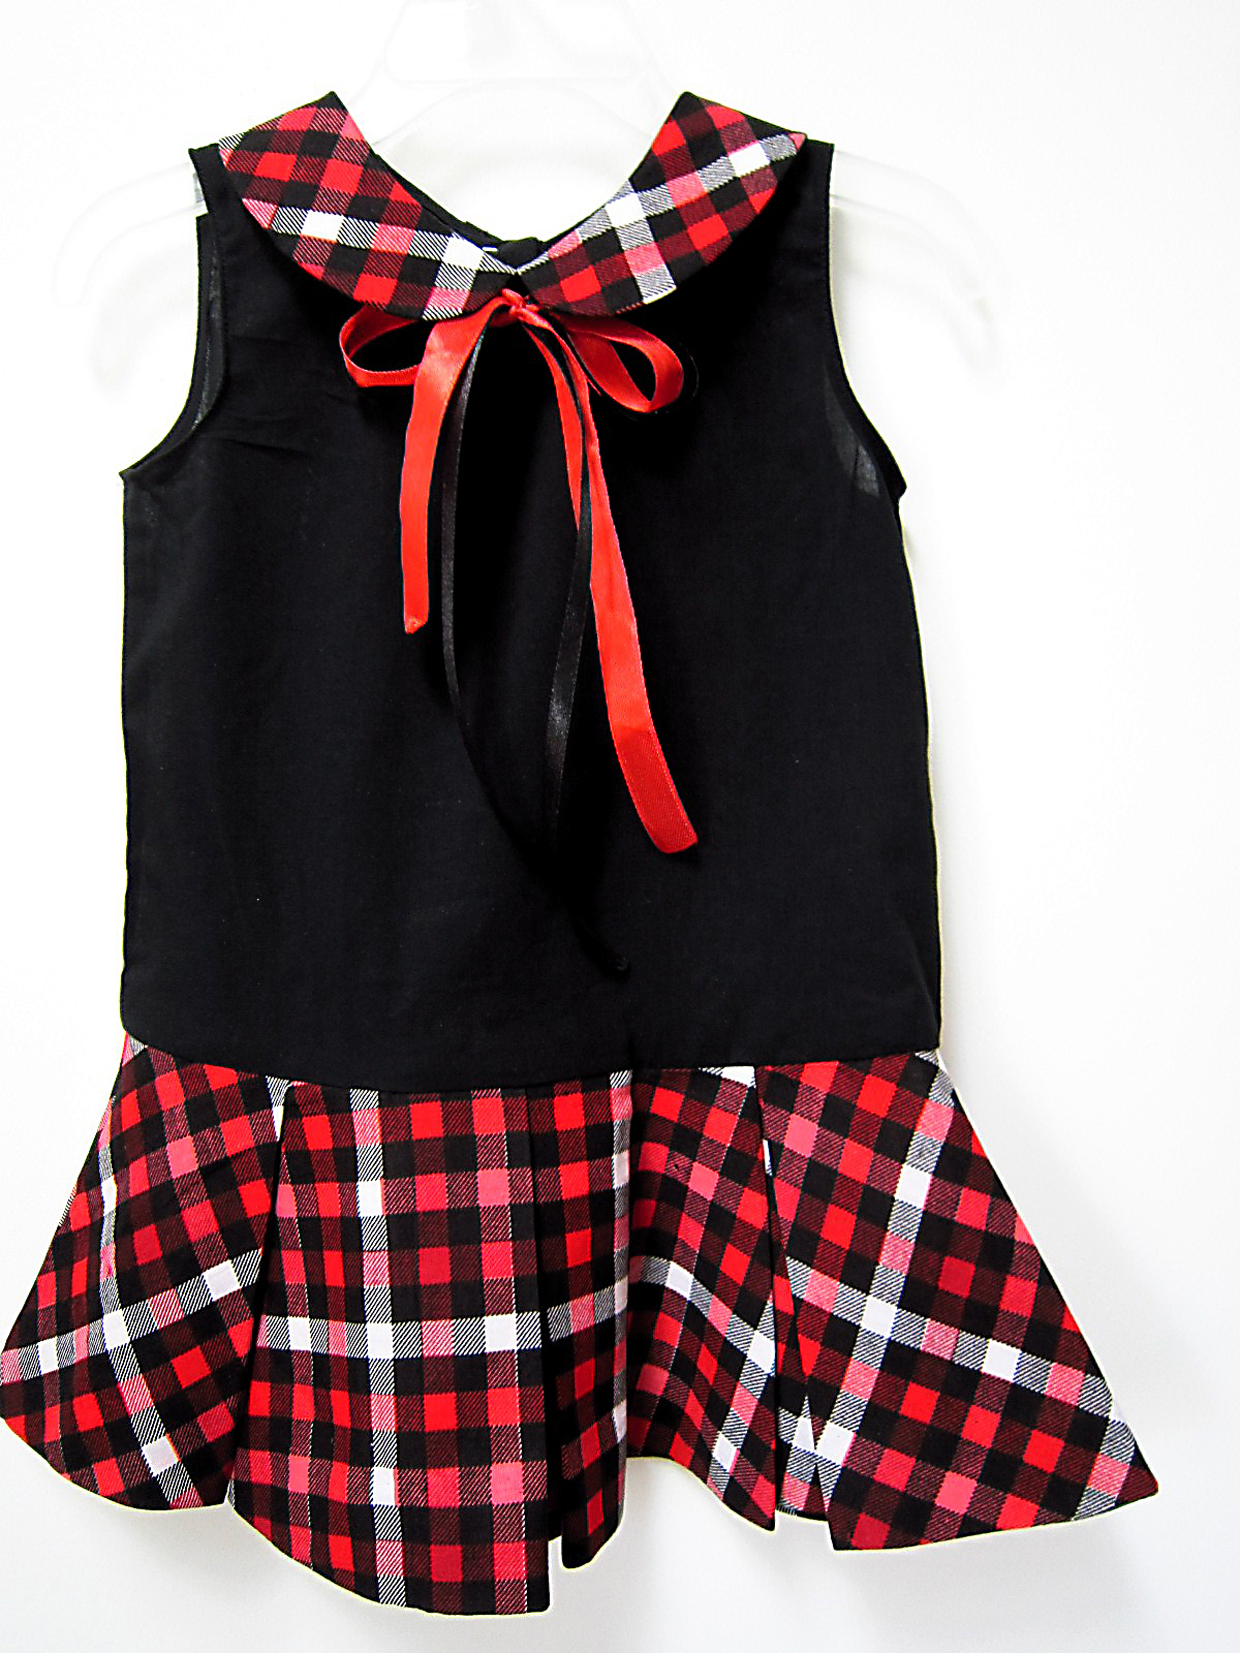
Rhythm also tried the dropped waist option with box pleats. This dress is so classic, I just love it for its schoolgirl element.
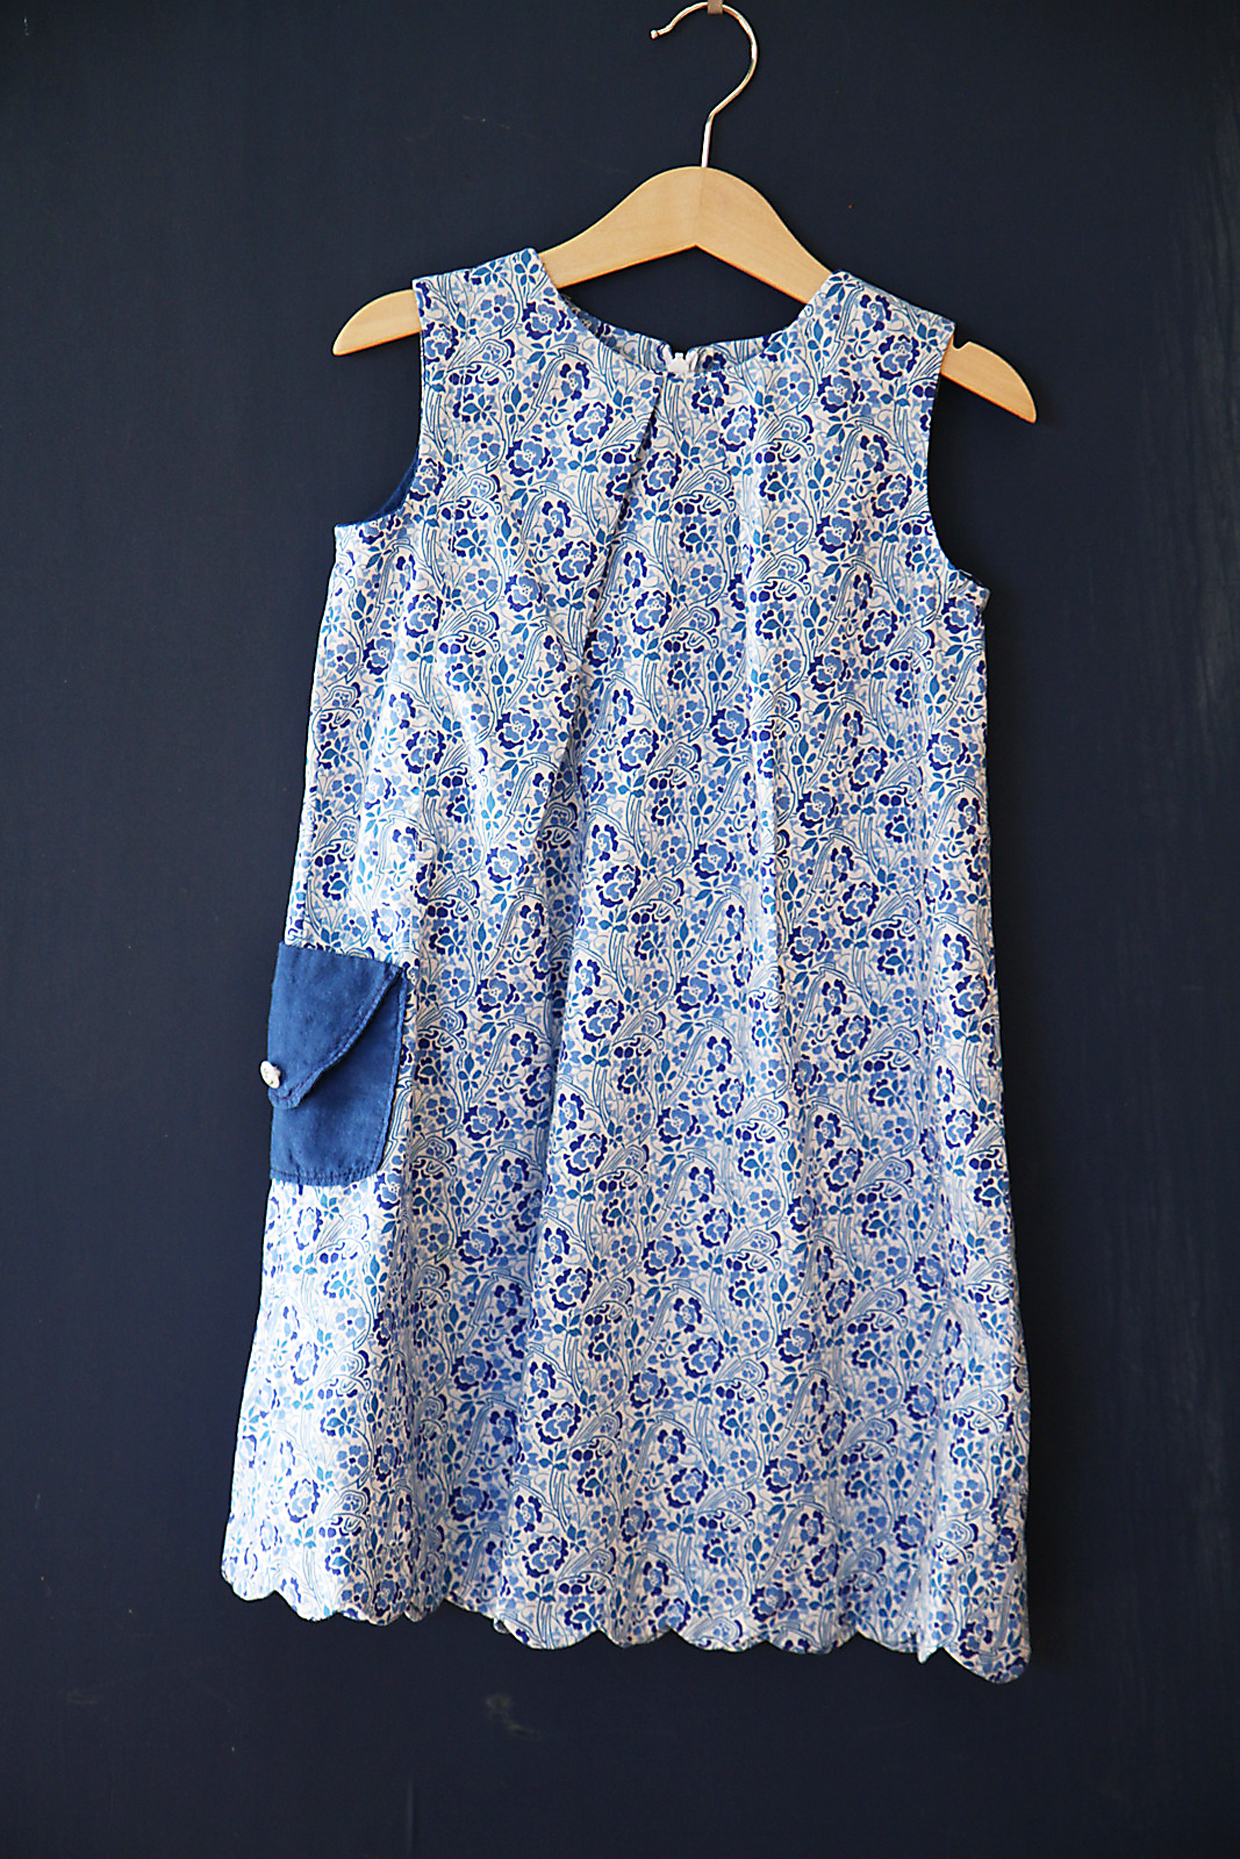
Sarvi took off with the book, too! I love this A-line dress with the pleated neckline. And of course she played with the lined patch pocket for fun little detail. I love that she included a fold-over element in the pocket as well. That’s the fun thing about the elements in the book–you can use them as a starting point and change them up as much as you like! But check out the tiny scalloped hem Sarvi added, too!

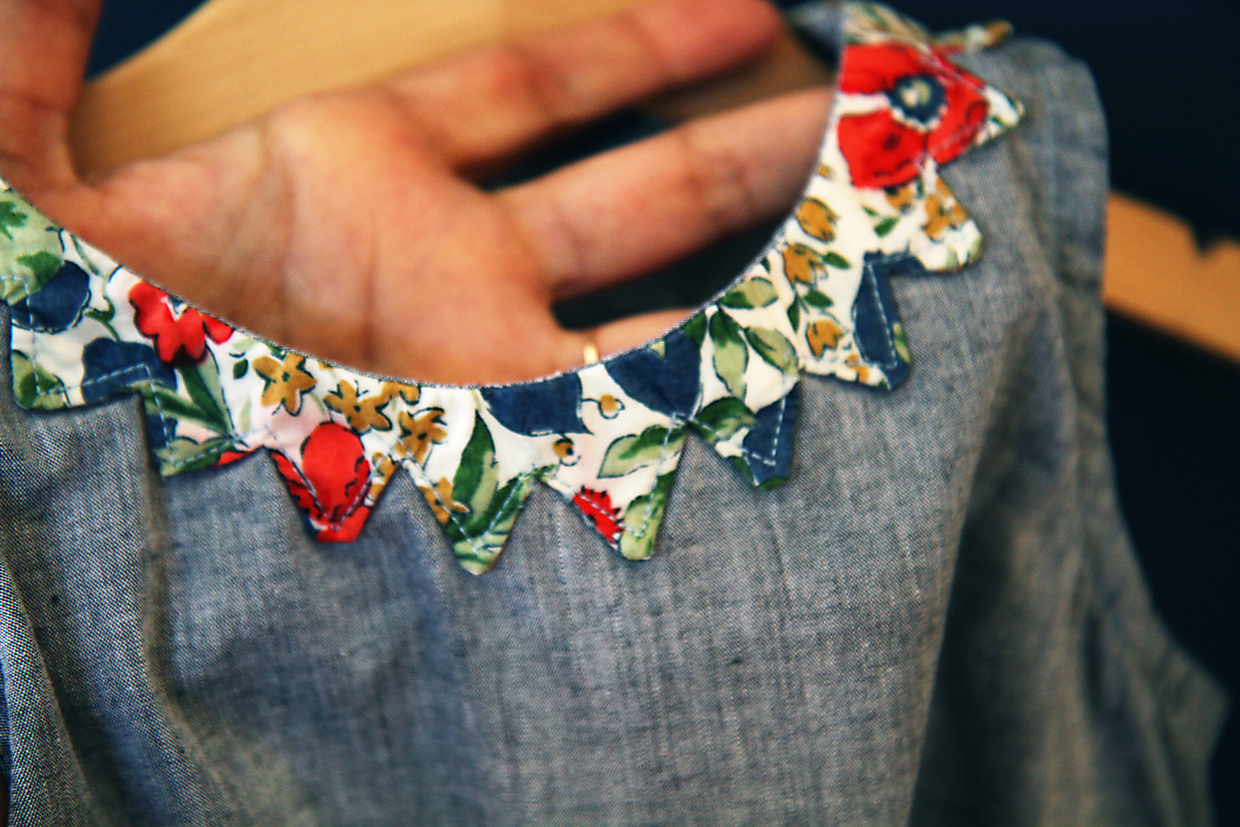
And Sarvi kept going, sewing the A-line dress option with an external neck facing (I love her daring zigzag edge–what a daredevil!) as well as patch pockets.

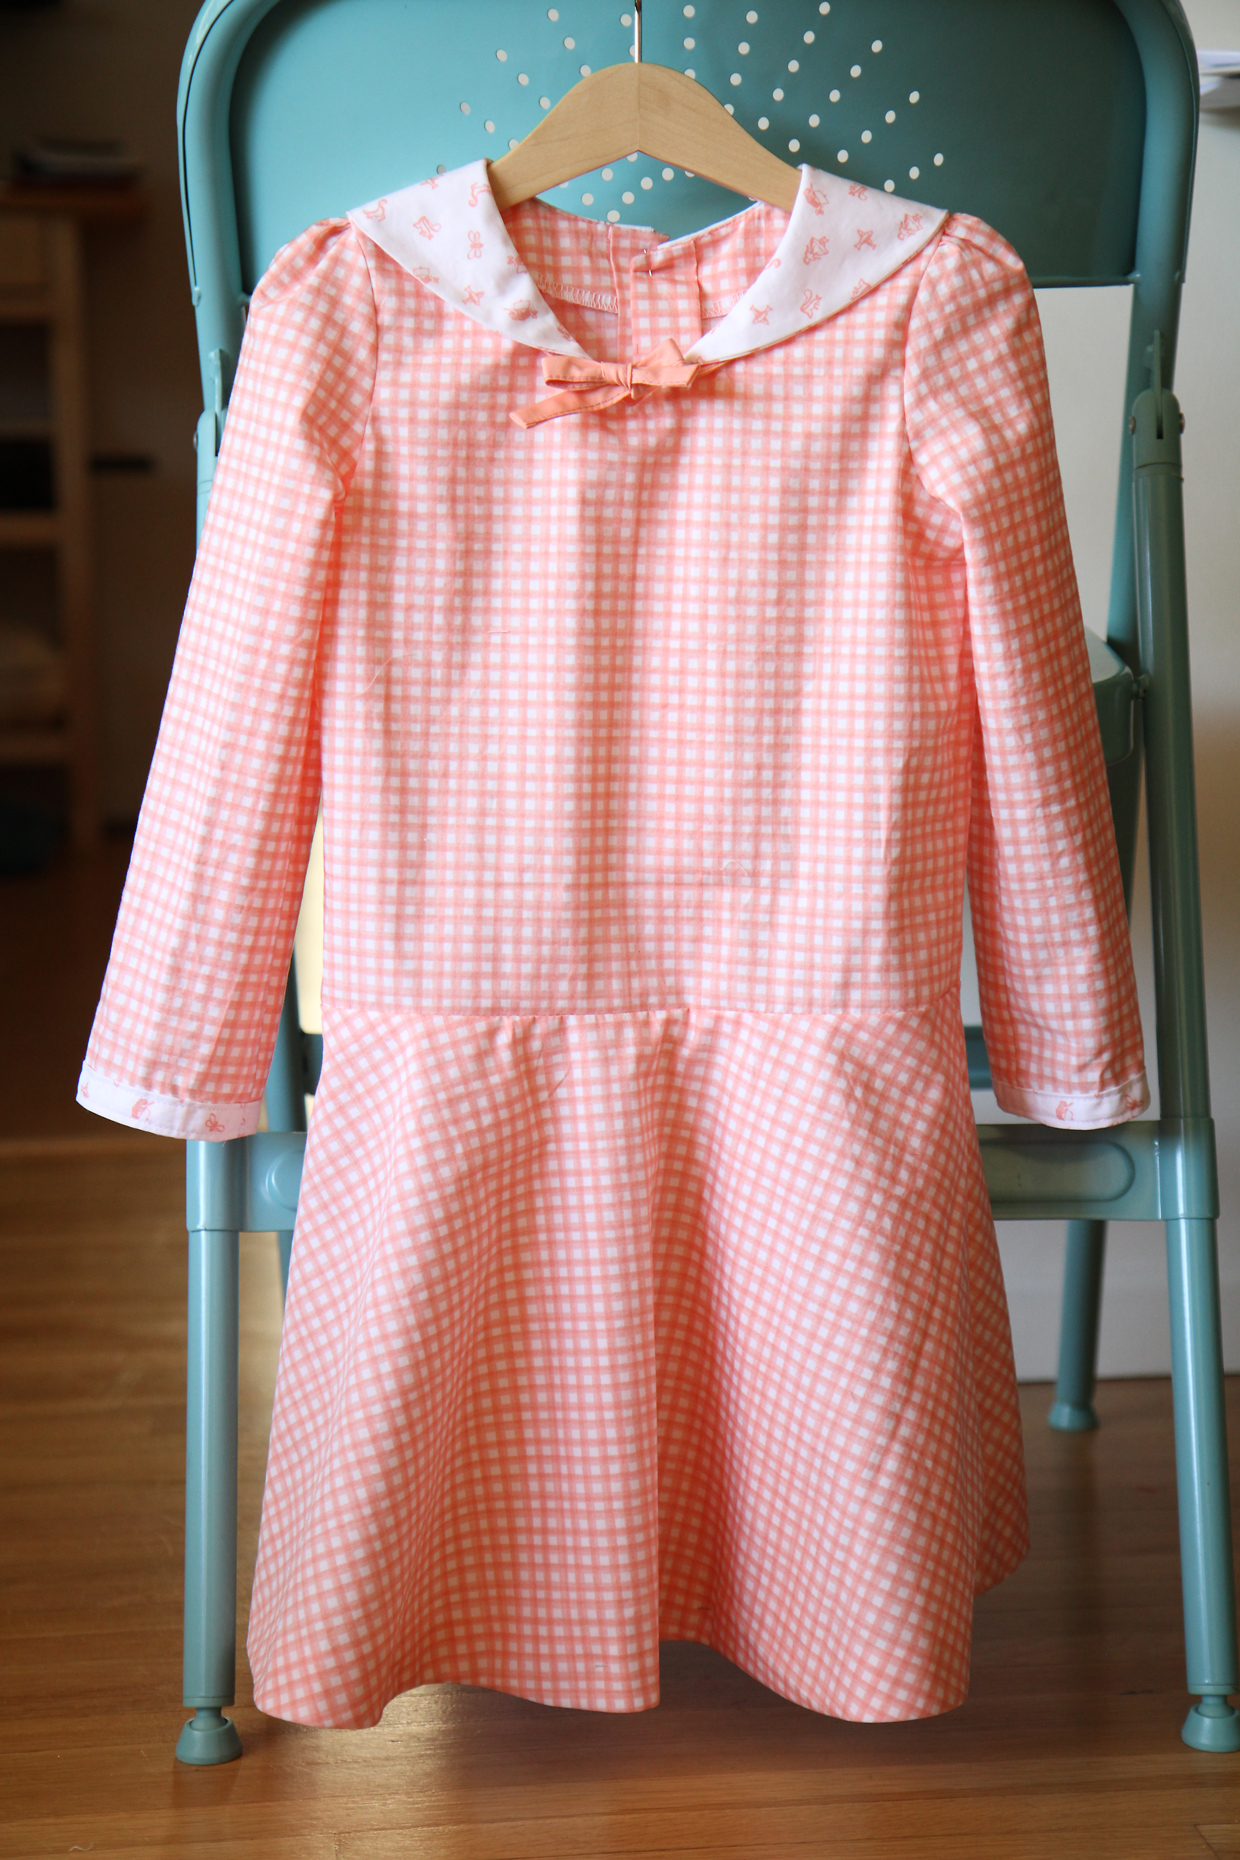
And Sarvi just kept going, this time making a dropped-waist dress with a sailor collar and adding a gathered long sleeve. These fabrics are so sweet together, aren’t they?
And Sarvi just kept on going, making another dress and adding the in-seam pockets option.

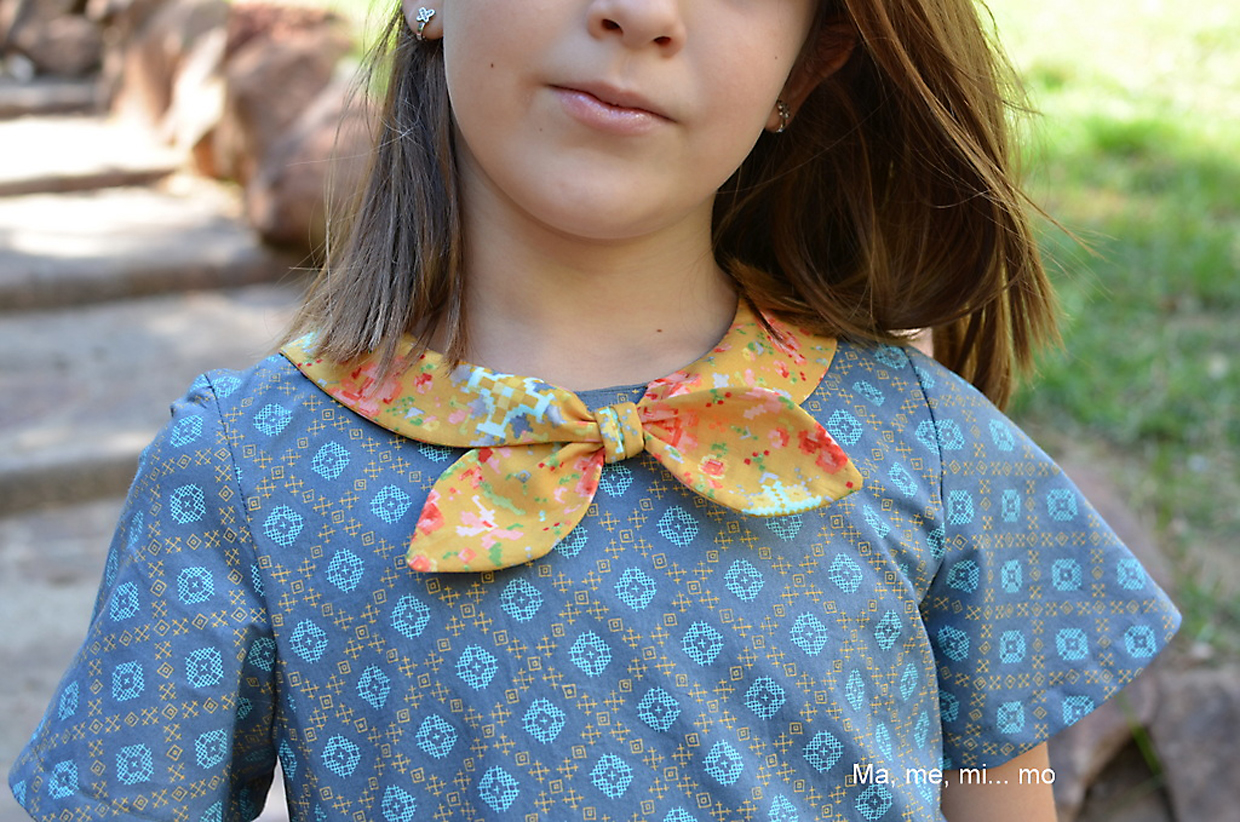
Mònica had fun with the tie collar, the front pocket with waist seam, and a center front box pleat. (Check out that Woodland Clearing fabric, too. I think she was going for extra credit!)

A close-up of the tie collar because I think it turned out awfully cute.
We had quite a few additional testers, too, so at some point I might show you more of their photos. But I love how each of these testers sewed such different dresses from one pattern. It’s going to be so much fun to see what you sew with the Building Block Dress book, too! I can’t wait to see.
So much wonderful inspiration in this post ;o)
Excellent dresses 🙂 .. Beautiful
Beautiful pictures! They all did a great job! It’s cool how the book lets each sewist bring their own style into what they are sewing. Sarvi’s zigzag neckline is awesome!!
These are all so beautiful. I can’t wait to have the book in my hands! I am going through a funny transition in my sewing because my girls both grew so much this year that 1) most of my makes don’t fit anymore, and 2) I am not sure what their style is now that they are getting older. I must confess that I am a little intimidated about seeing for this new “age group” and I cannot wait to try all the book’s choices and styles. Thank you so much, Liesl!
Ledys, this might be fun for all of you, then! I think S and I are at a similar stage for her. She has a very distinct sense of what she wants to wear, so we’re working together to design her dresses. That way she can have some say in what they look like and I’m not disappointed that she won’t wear something I’ve made for her. I’ll talk about this more very soon.
Thank you Darcy! In case anybody wants to try a similar row of small shapes, I recommend using a single layer of interfaced fabric, and folding back the edge past a stitched guideline. I was doing that at first and it worked pretty well, but then I thought I was being lazy and should really do two layers of fabric turned inside out. The first way worked much better for small detailed shapes.
Thank you for that tip, Sarvi! I might have to copy that amazing toothy/zig-zag neckline. Gorgeous work!
such lovely and inspiring dresses well done everyone 🙂