Hey there! How has your summer been treating you? Good, I hope. My summer has been going by faster than a New York minute!
It’s hard to believe it is almost September. Are you looking for a fun back-to-school sewing project? Well, we’ve got one for you today.
Please welcome Anne. Her fantastic work has been featured on the blog in the past here and here. Also be sure to take a look at her blog I’d Rather be Sewing and her Flickr account to see her fabulous sewing. She’s going to share how she made this fun pom pom skirt. Thanks Anne for stopping by to share your tutorial!
I’ve loved this skirt ever since I first saw it on Pinterest years ago. You can imagine my disappointment when I clicked on the link and it took me to a blog in Dutch with a rather unspecific tutorial. Plus the skirt wasn’t even lined! A see-through pom pom skirt just wasn’t going to do it for me and at the time I didn’t have the skills to figure out how to make one on my own. A week or so I saw it floating around Pinterest again, but a quick search revealed that a decent tutorial still didn’t exist. So, I decided to create my own! My sewing skills have improved dramatically since I saw a similar skirt years ago, but I could not have done this without using the Onstage Tutu Skirt as a reference. It’s such a great pattern and it’s free! It doesn’t get much better than that!
To get started use the Onstage Tutu instructions to figure out the length and width for your solid fabric. To make my pom pom version you will need to cut your tulle slightly differently.
I used two layers of tulle folded in half so they could hold pom poms. So use the Onstage Tutu pattern measurements for the tulle but double the length. In addition, one layer of tulle will be longer than the other and we won’t need to hem these layers. For my daughter I cut one of my tulle layers 40” long x 24” inches tall and the other 40” long x 22” inches tall.
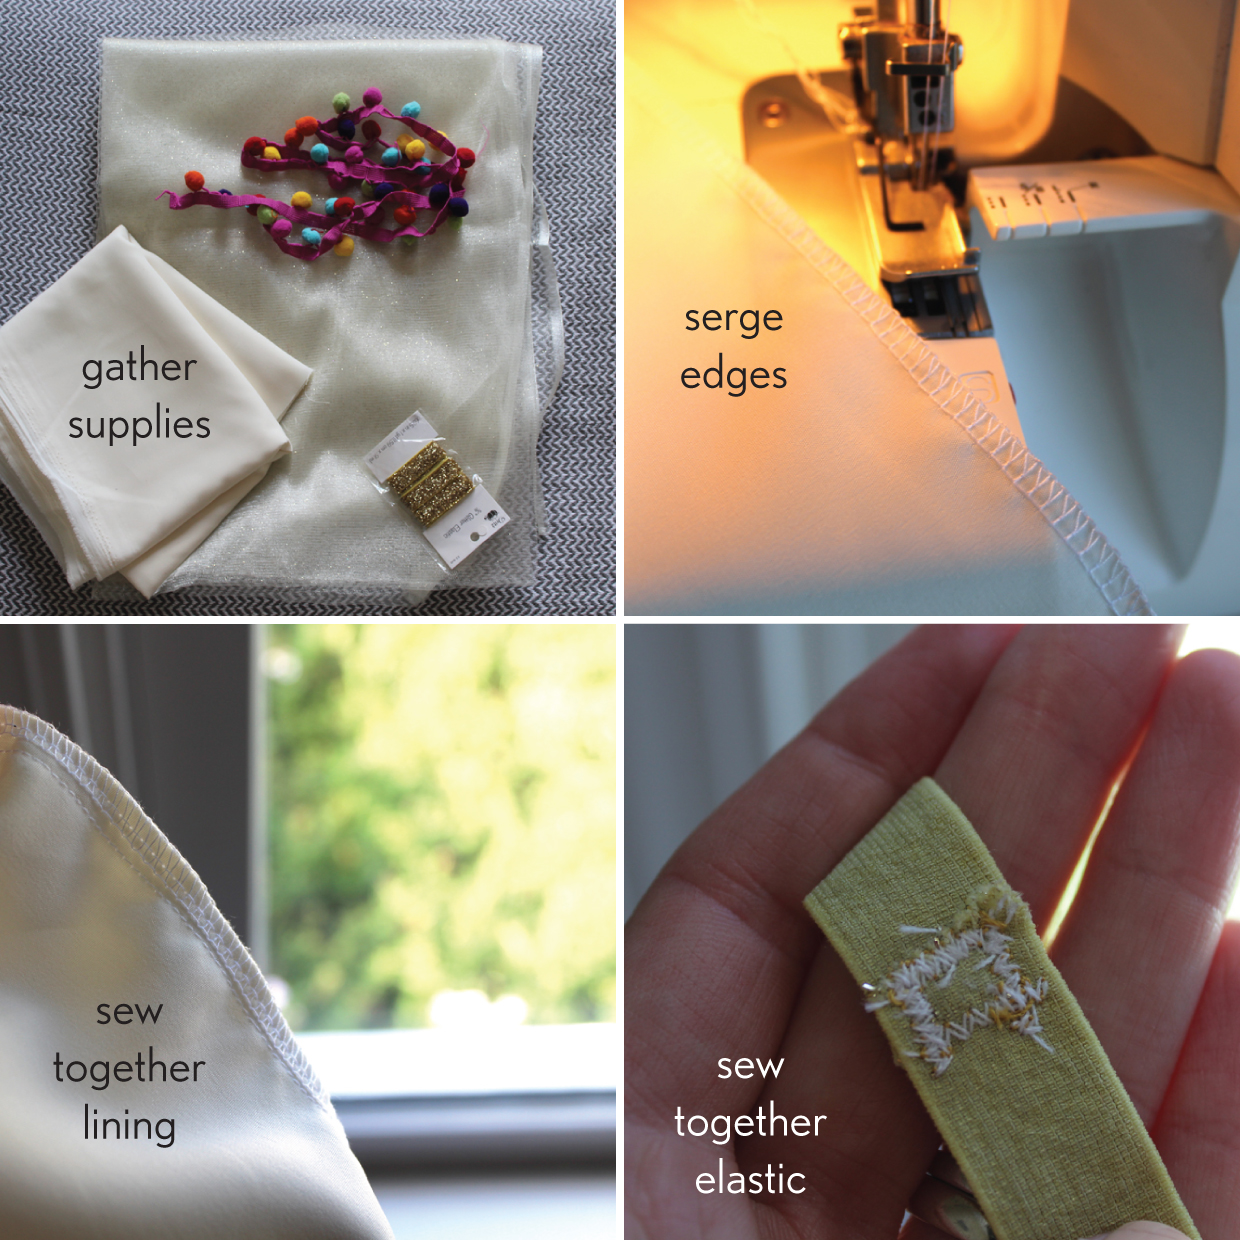
What you need:
- Gold glittery elastic
- Pom poms: 30-40, I bought large multi-colored pom pom trim. The pom poms are a little heavier and they do better in the wash than the cheap kind you find in the bag at craft stores.
- Off-white lining: See the Onstage Tutu for measurements (I did not add 1 ½ inches for waistband casing because I wanted the elastic exposed, but you absolutely can encase your elastic)
- Glittery tulle: 2 rectangles. Piece #1: Length = finished length of skirt x Width = child’s waist. Piece #2: Length = finished length of skirt – 2 inches x Width = child’s waist doubled.
- Pins
- Sewing scissors
- White and yellow gold thread
- Sewing machine and Serger (optional)
Step 1: If you would like to leave your elastic exposed sew the side edges of your solid skirt fabric together. Finish the seam allowances and serge or zigzag stitch the top edge of your solid skirt fabric. Continue to step 2.
If you will be encasing your elastic follow the Onstage Tutu Skirt instructions up until you add the tulle. When you are ready to add the tulle go to step 5 of this tutorial.
Step 2: Sew the short ends of your elastic together to make one continuous piece. This will become your waistband. You might want to use yellow gold thread here so your stitches will be somewhat hidden.
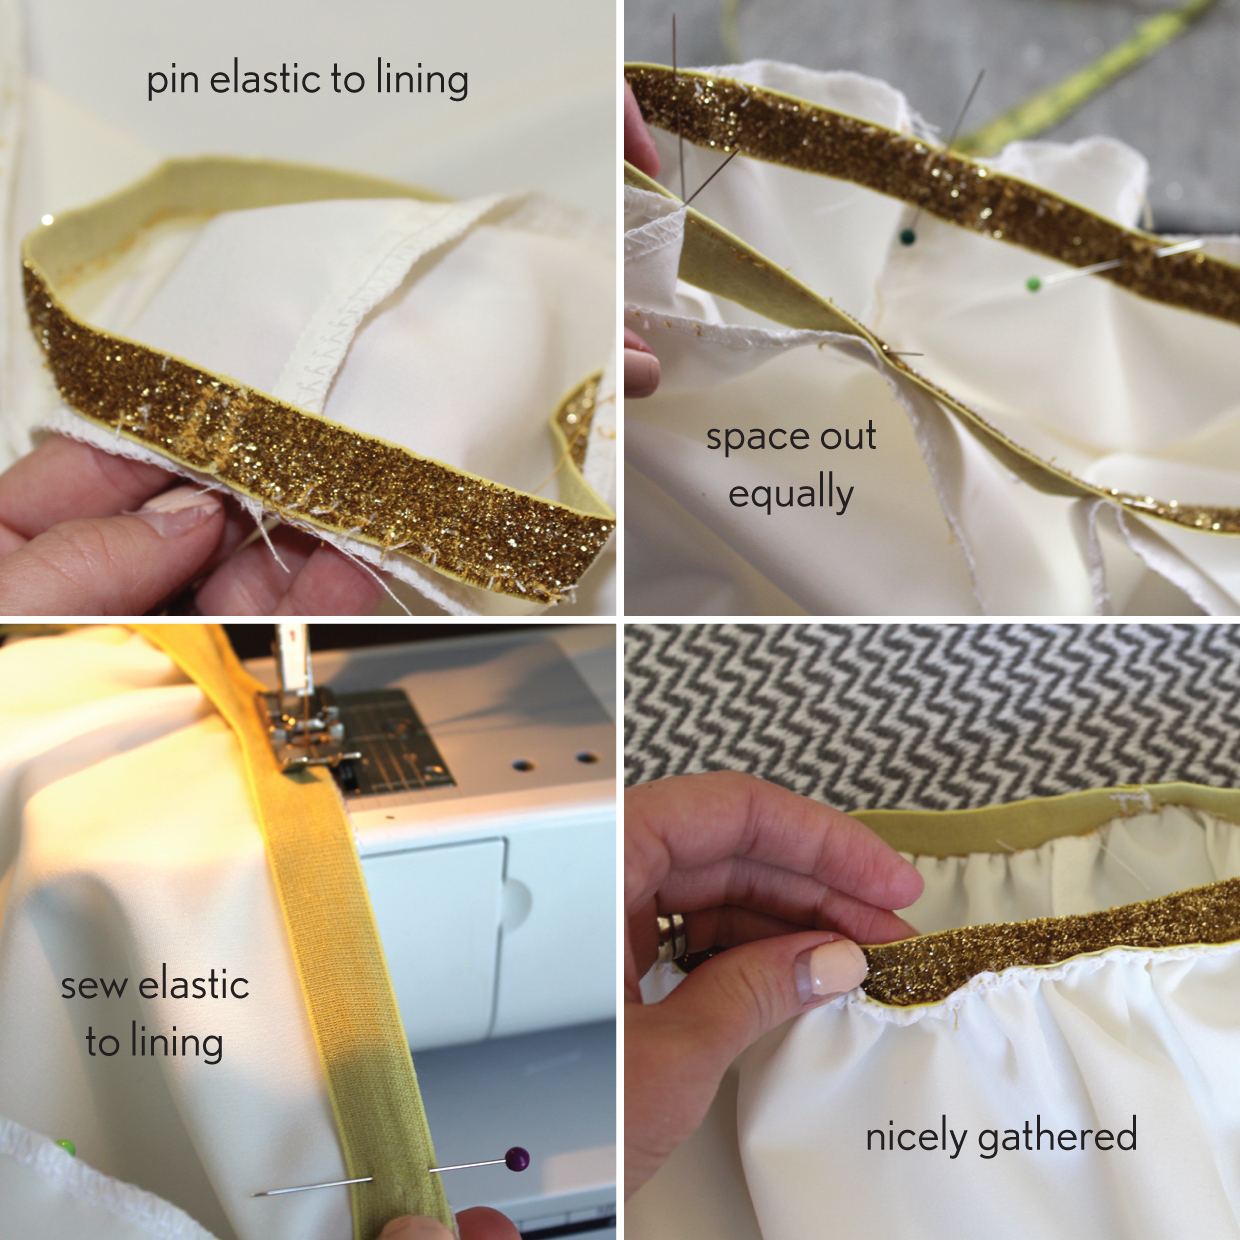
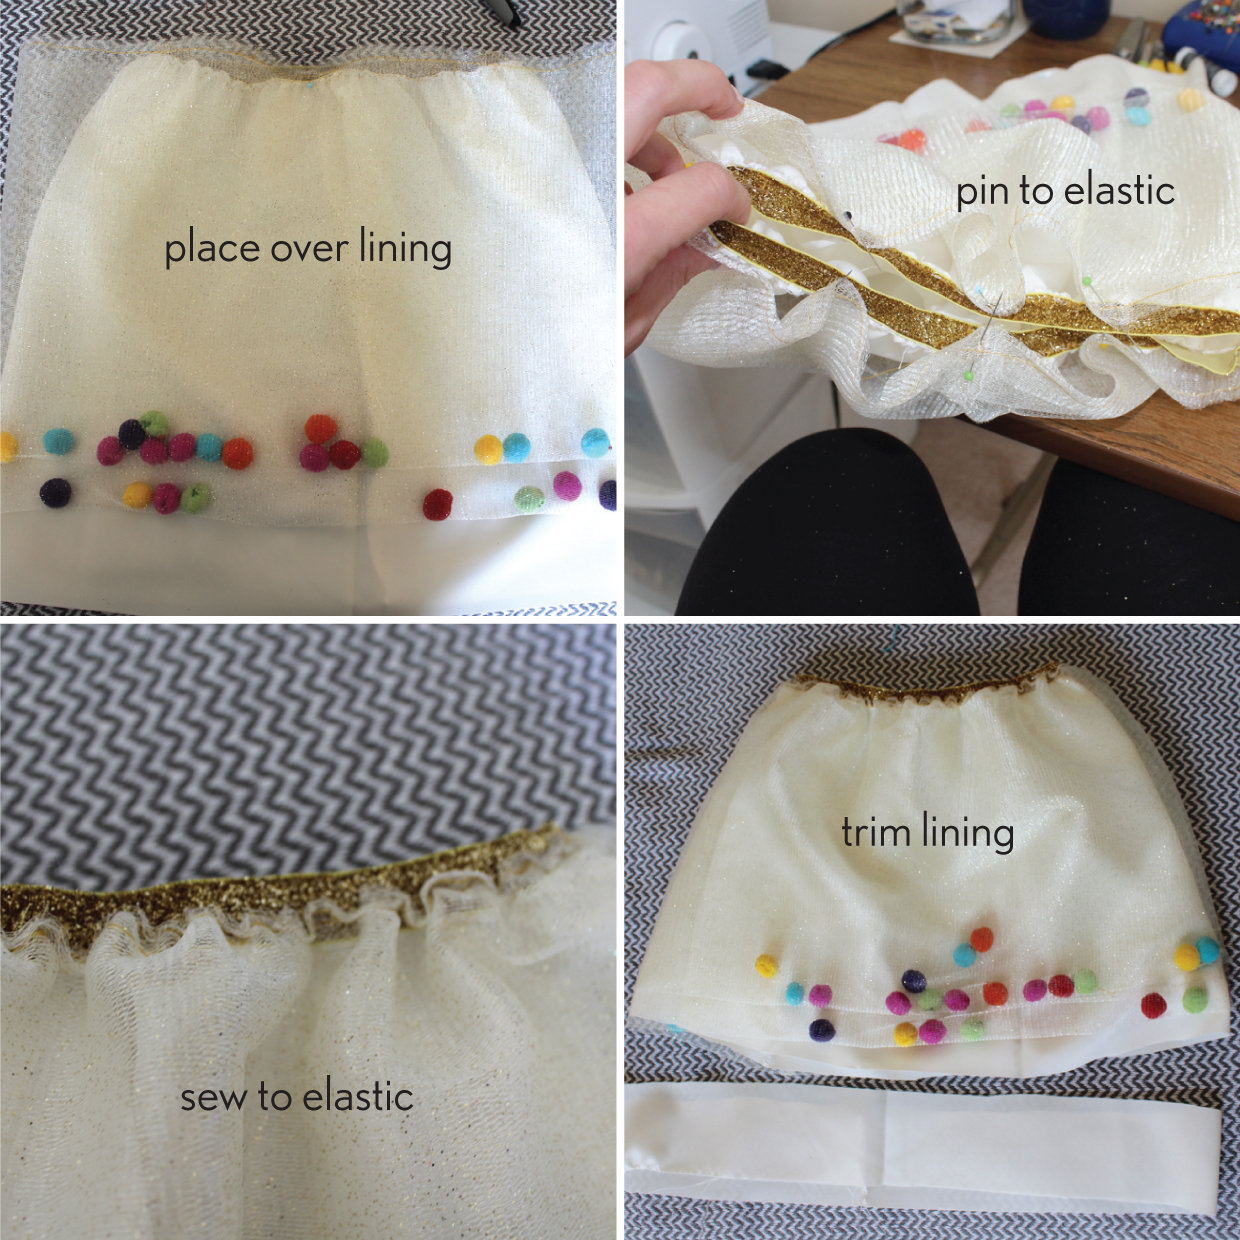
Step 3: Pin your lining to your elastic, wrong sides together. You will have gaps or slack in your lining as it is significantly larger than your elastic band.
Step 4: Sew your elastic to the lining with as small of a seam allowance as you can, 1/8” is ideal. Use a straight stitch and stretch the elastic as you sew. I just hold the pins as I sew around which ensures that I’m stretching the elastic evenly. I mistakenly showed sewing right sides together (in the photo). Make sure that you are sewing wrong sides together. The glittery side of your elastic should be on top!
When you are done, it will be nicely gathered with your sewn edge on what will be the outside of your skirt. Sewing the elastic this way ensures that the raw edge is on the outside where it won’t itch little tummies.
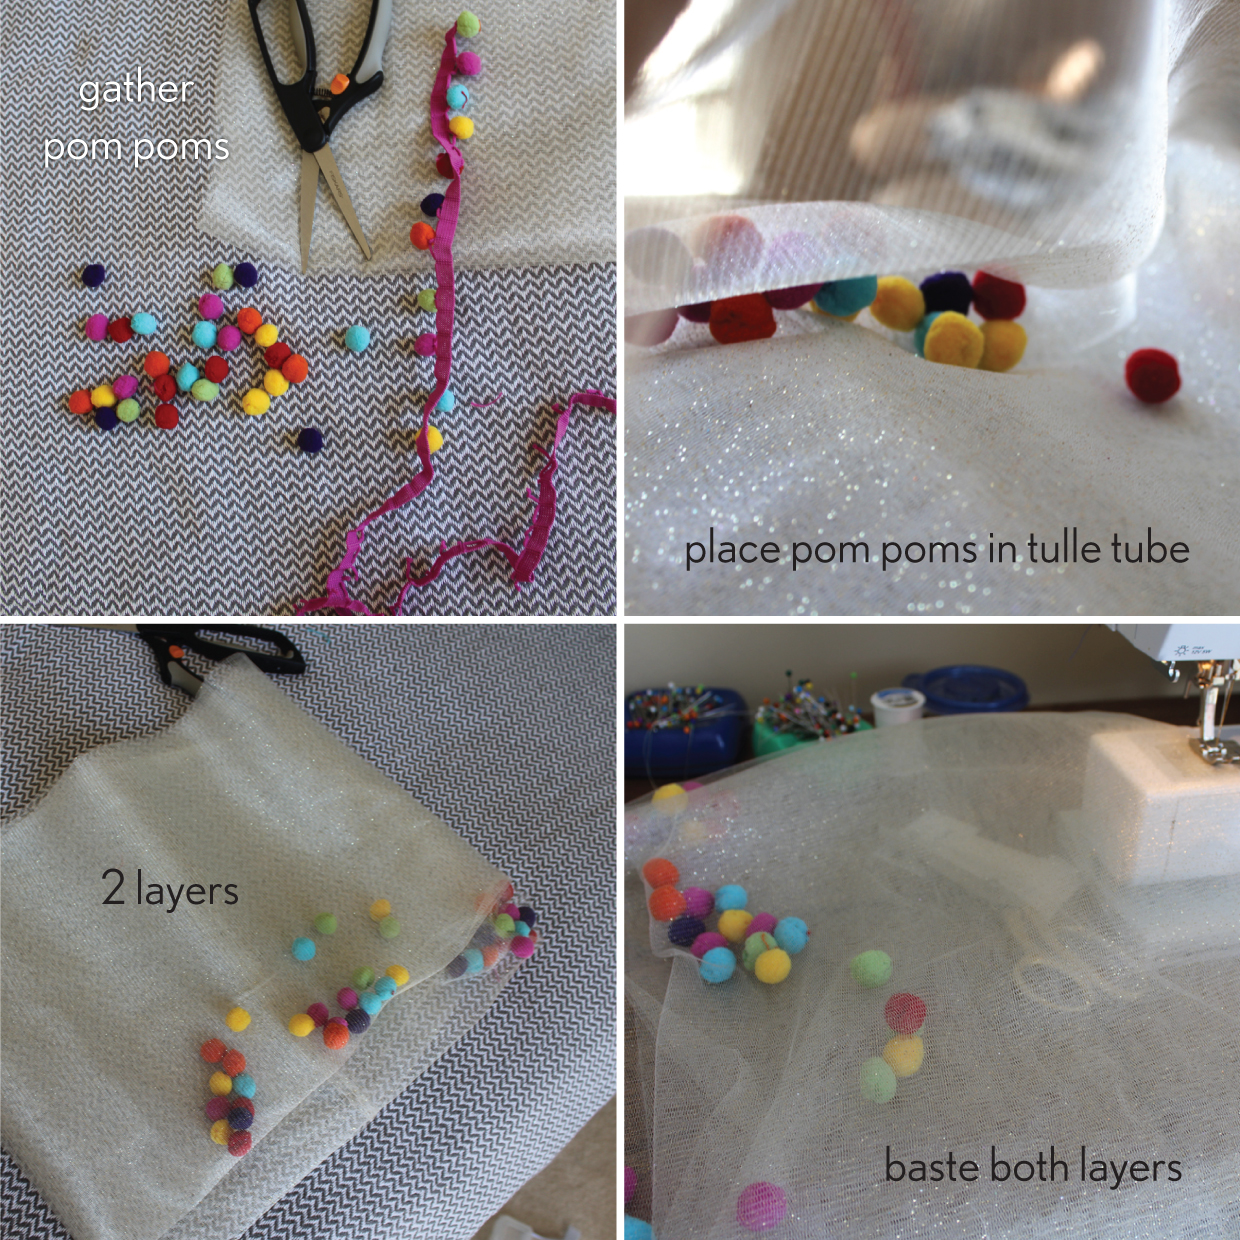
Step 5: Time to work on your tulle layers! First get your pom poms ready. For me that meant snipping them off the trim.
Step 6: Sew the shorter ends of one rectangle of tulle together. Then fold in half so that the raw ends of the tulle are together with a folded edge on the bottom. You should have what is a tube of tulle that can hold pom poms inside. Repeat for the other rectangle of tulle.
Step 7: Place your pom poms in your tulle layers. The folded raw edges are together at the top and the folded edges at the bottom. The pom poms are placed inside and the tulle is layered. One should be slightly longer than the other.
Step 8: Sew a basting stitch all around both layers of tulle. This will stop the pom poms from escaping and help the layers of tulle stay in place for later.
Step 9: If you are encasing your elastic, hop back over to the Onstage Tutu Skirt pattern and sew your tulle on as directed. If not, place your layers of tulle over your elasticized lining. Make sure your seams are in the back. The shorter tulle piece should be on the outside of the skirt. Pin the tulle to the elastic just as you did for the lining.
Make sure you’re pining the raw (not folded) edges of your tulle to the right side (glittery side) of your elastic.
Step 10: Sew the tulle to the elastic, stretching as you go along.
Step 11: Trim the raw edge of you tulle about 1/4 inch from the seam.
Step 12: Trim the lining if needed so that when it is hemmed it will sit just above your longest tulle layer. Fold over a ½ inch and then 1 inch again to hem.
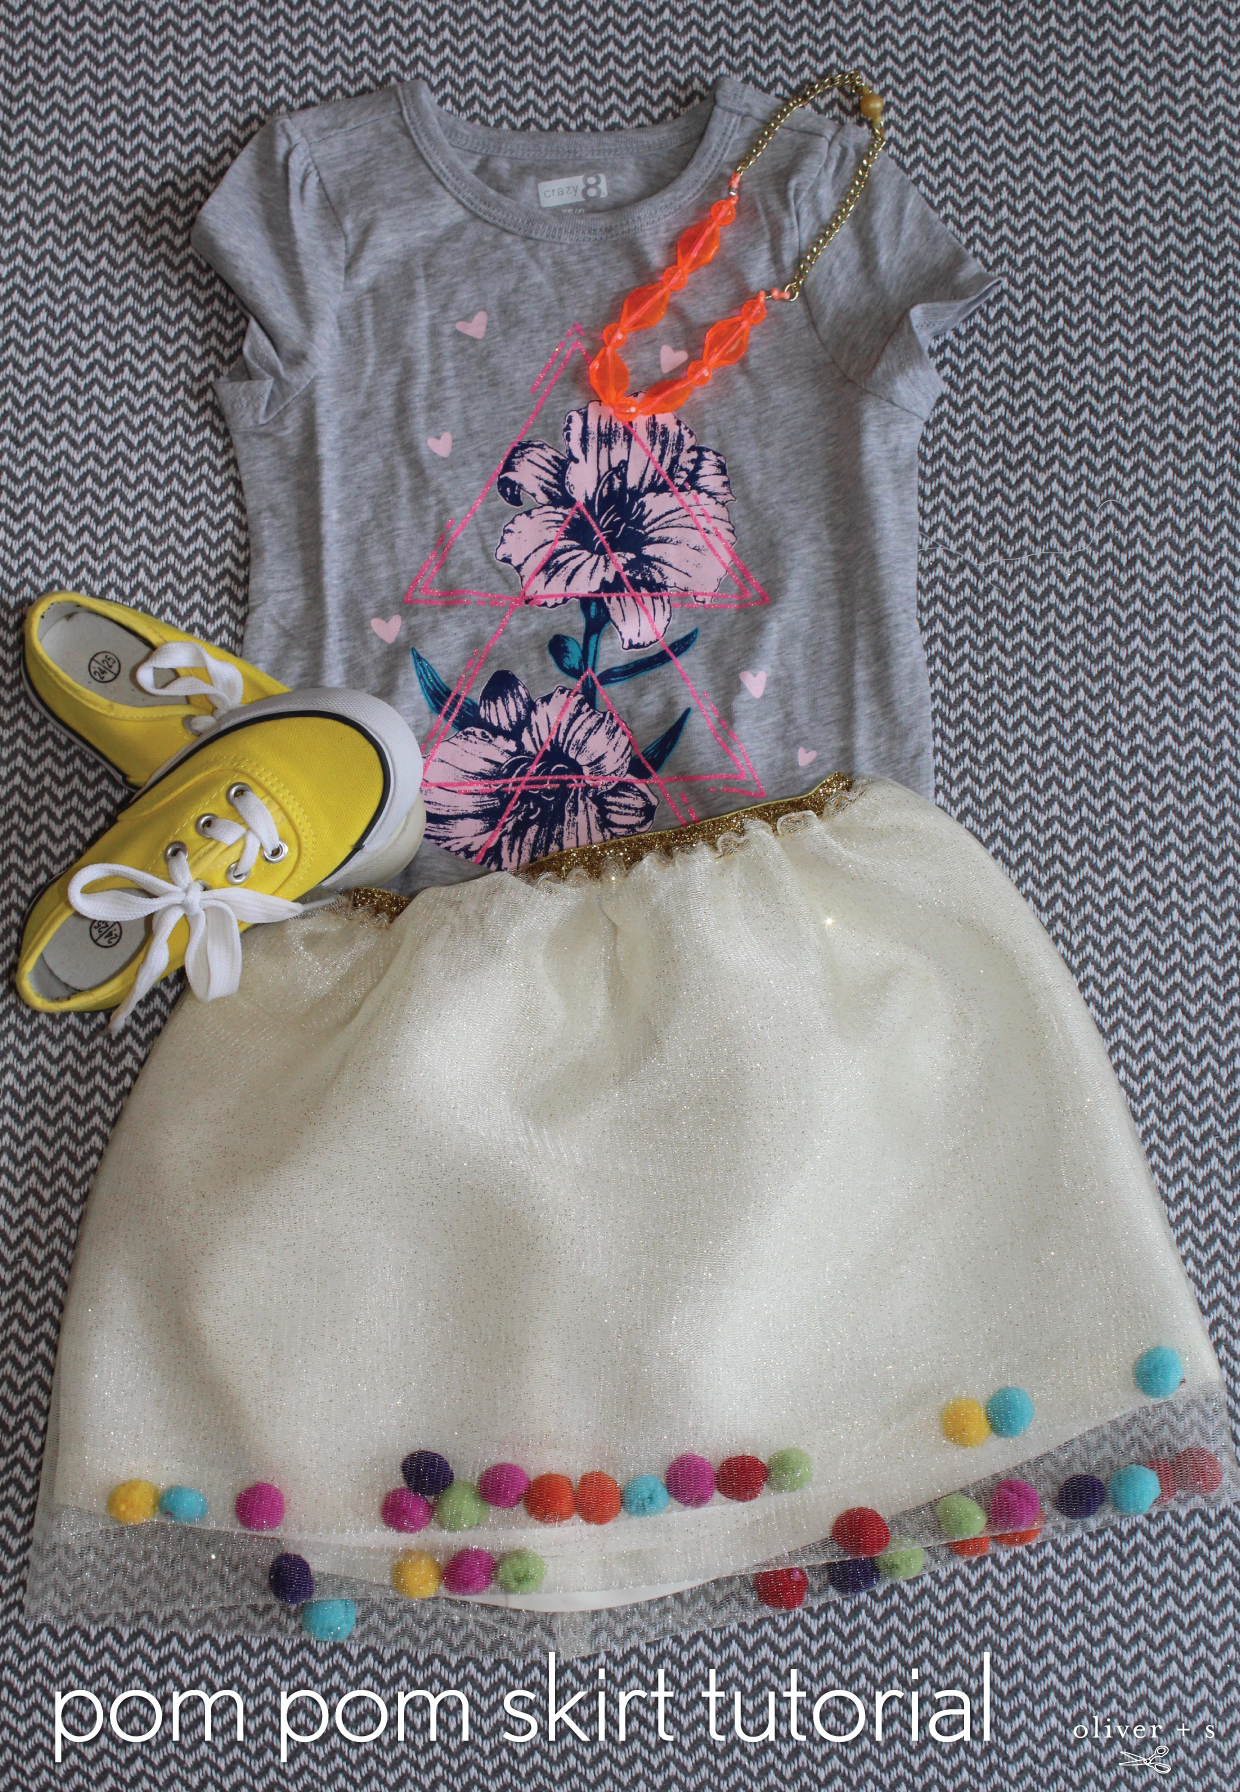
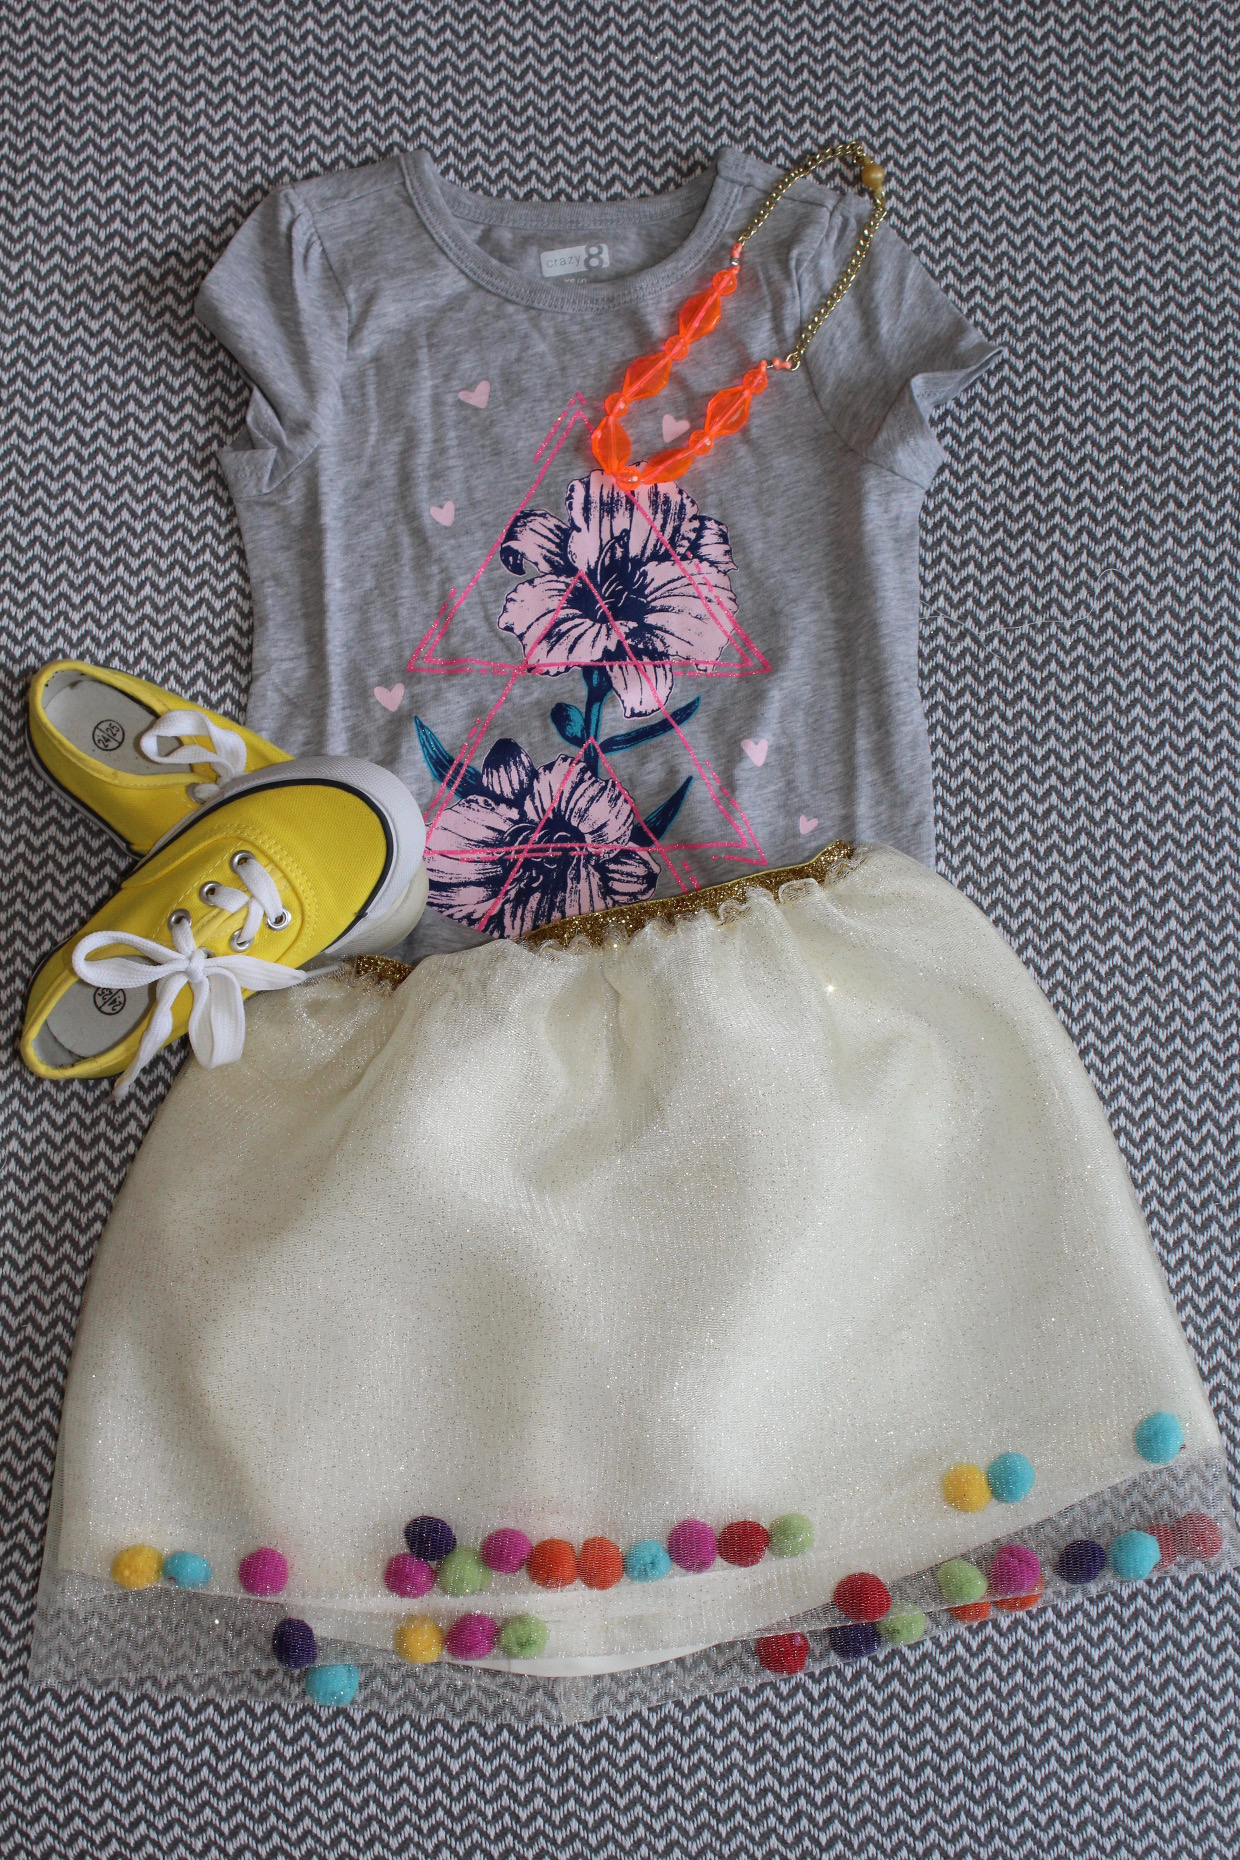
You’ve just made cute pom pom skirt that your daughter will absolutely love! Pair with some bright accessories and a graphic tee and your toddler will be ready to go!
Happy sewing!
Thanks Anne!
If you enjoyed this post, you might also like:
- Onstage Tutu skirt sew-along
- Customizing the Onstage Tutu skirt: curtain call
- Adding pom poms and tassels to Oliver + S patterns
I love this idea! Saw a similar thing at Target recently and think it’s so clever!
I love this skirt. I think it would also be fun with other (soft) items in there, like artificial lower petals. Tulle is so fun. See my baby tulle skirt here: http://www.thelostapron.com/2016/09/easy-baby-shower-gift.html
Thank you so much for the adorable tutorial! I am making one now for my daughter. Just wanted to post a quick note that in the materials needed section, the tulle dimensions are a bit confusing. It mentioned it further up in the directions, that the tulle would be doubled, but didn’t state that in the materials as well as the width being the waist measurement doubled. Hope that I made sense! 🙂