Today we are happy to welcome back Cindy. On her previous visits she has shown us a way to customize the 2+2 Blouse and about a year ago her family hosted Flat S. Now she’s going to share a newly created project she made using the Class Picnic Blouse. Take it away Cindy.
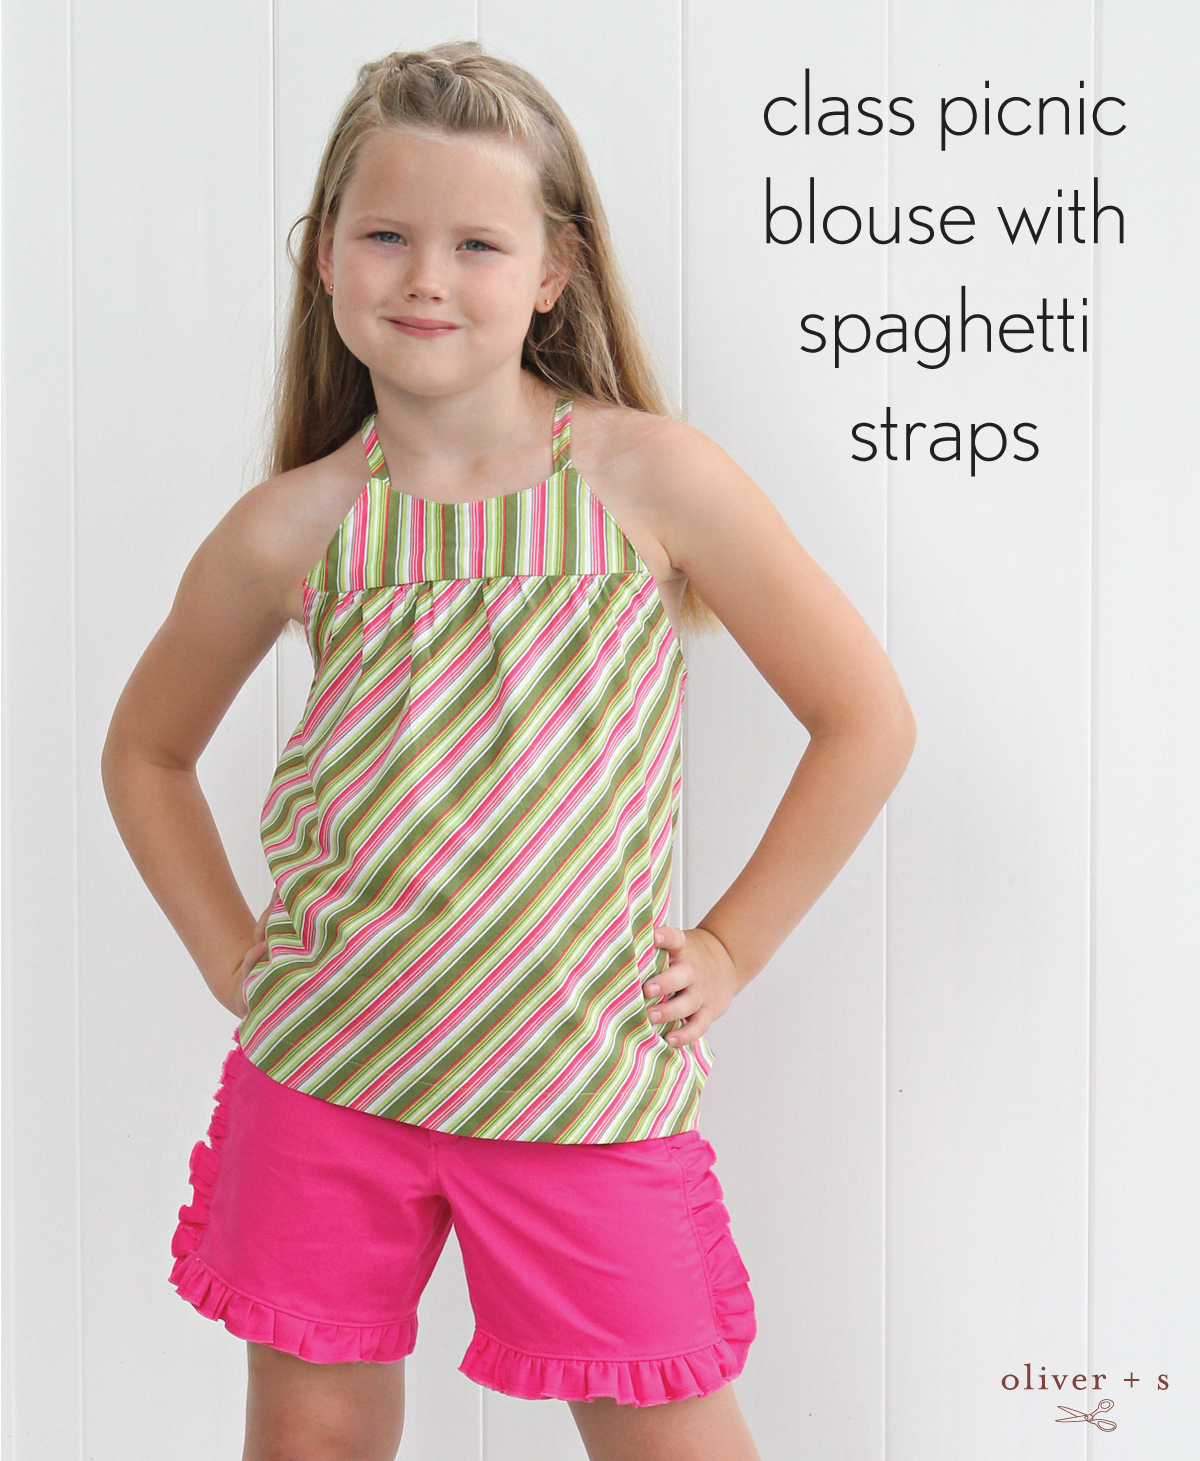
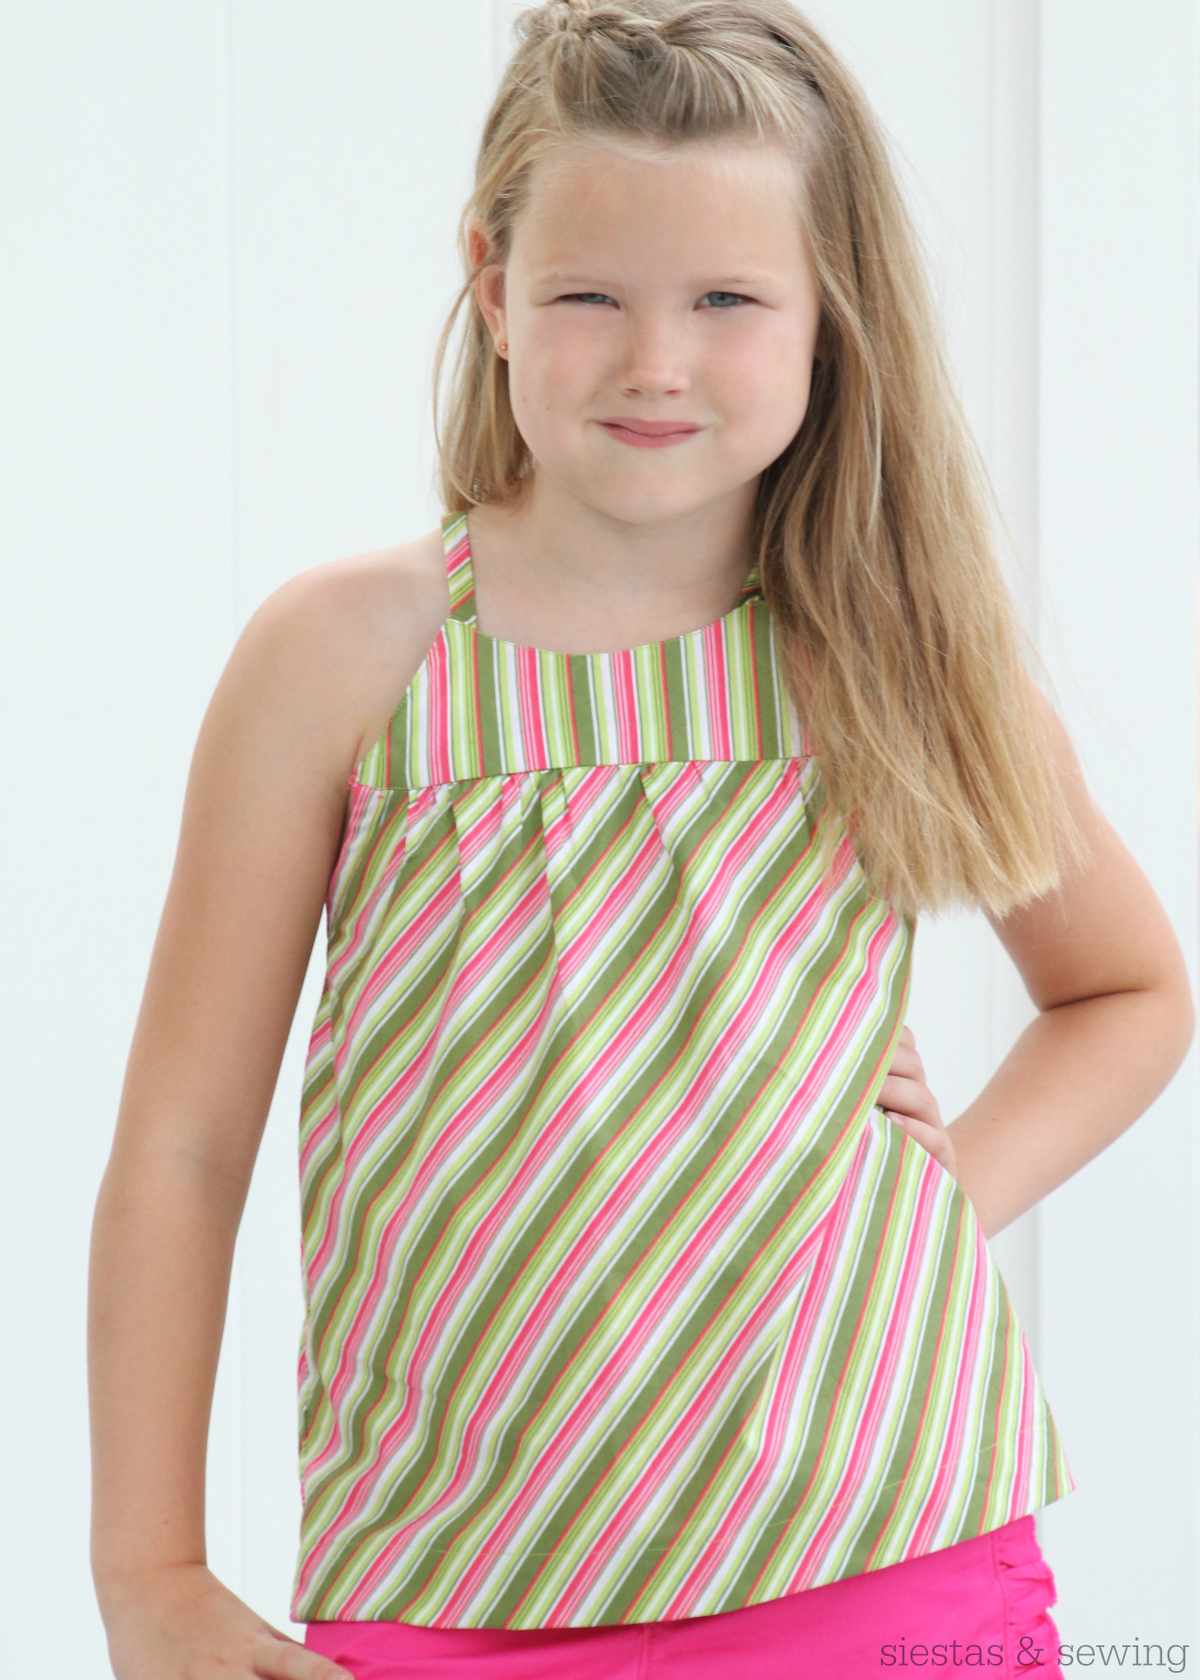
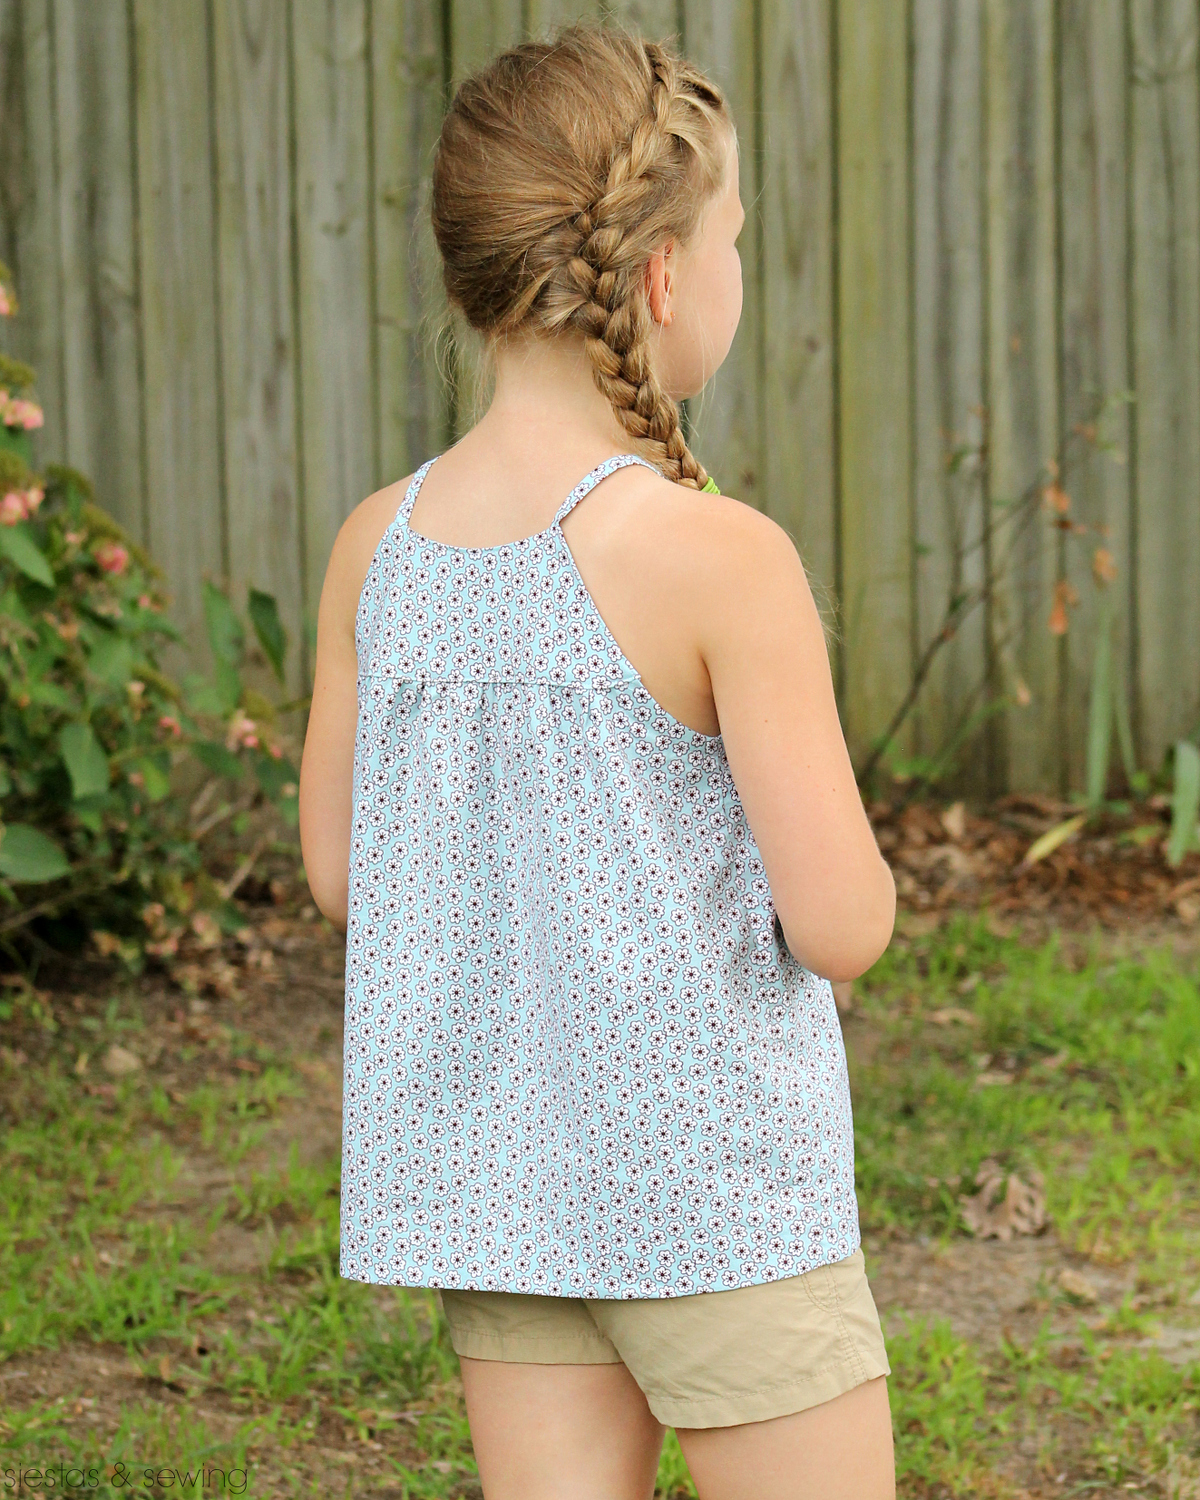
Recently, I sewed a pair of hot pink ruffle shorts using the Class Picnic pattern. BK didn’t have any sleeveless tops to wear with the shorts so I decided to customize the Class Picnic Blouse and make a top with spaghetti straps like the Swingset Tunic.
The first step you’ll need to do before cutting into your fabric is redraw the armhole so it isn’t too wide and low.
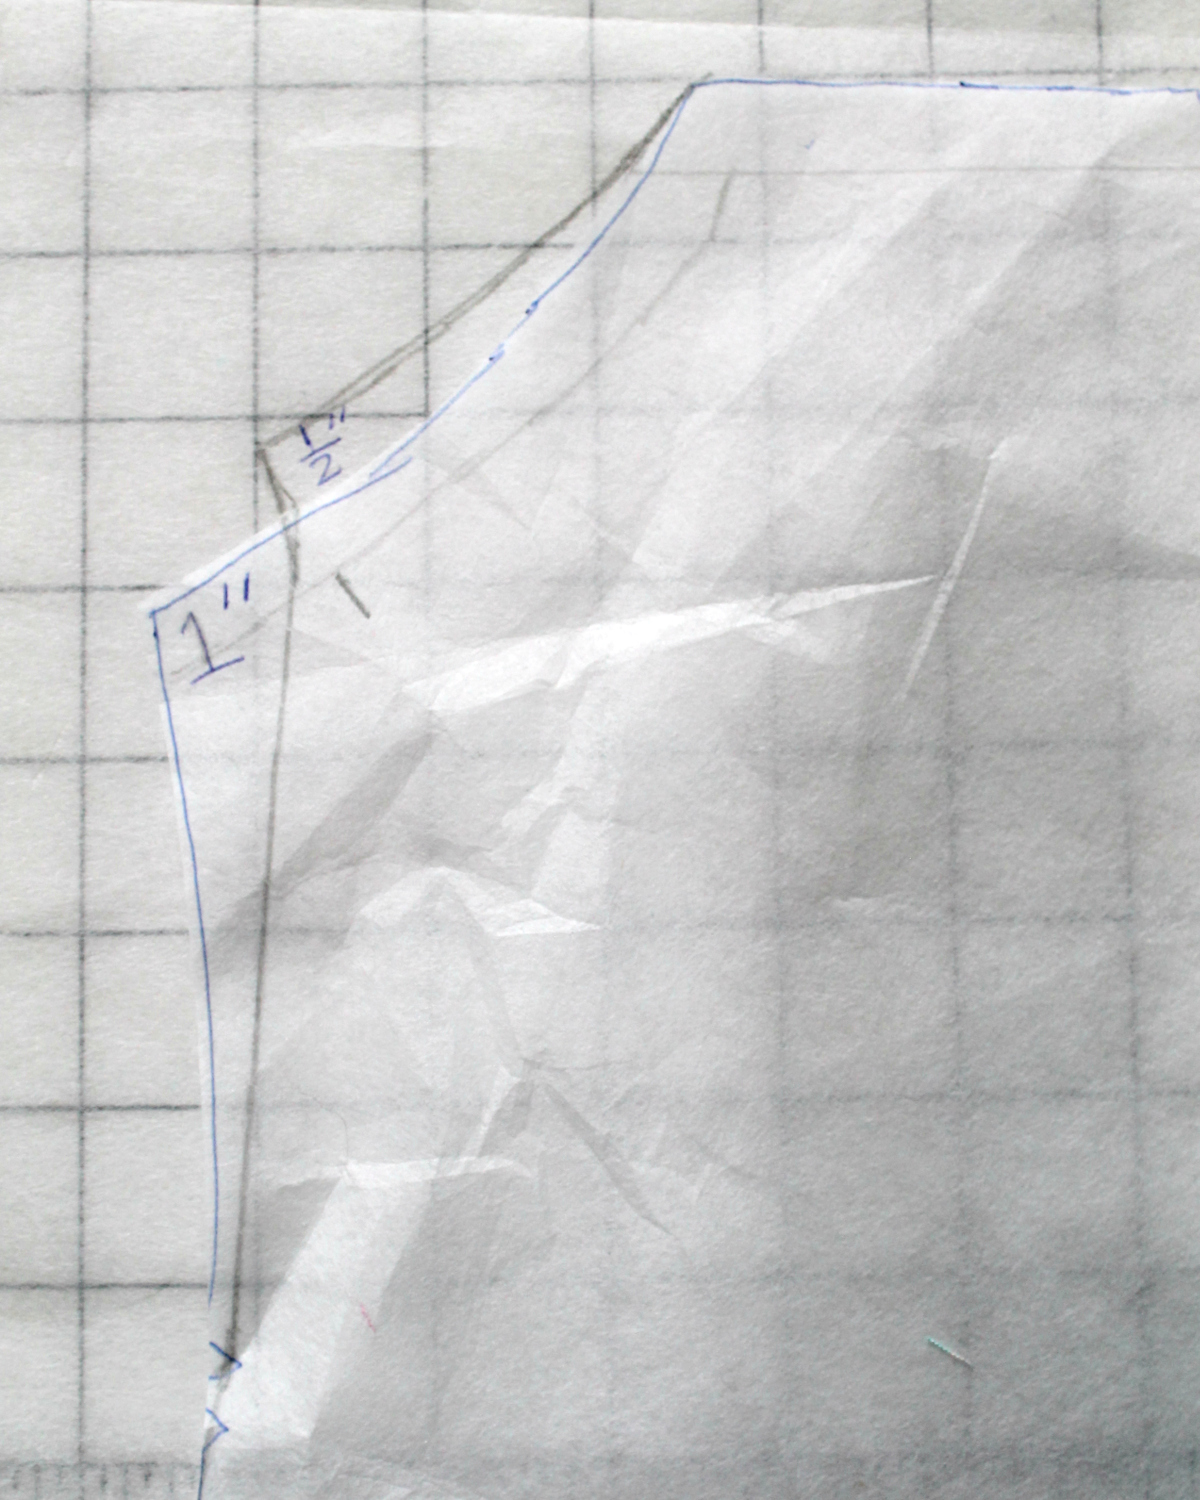
BK wears a size 8 in Oliver + S. I took in the pattern sides 1”, tapering back to the original line at the double notches. I also raised the armhole by 1/2”, once again easing the new line to the original (the blue ink lines are the original pattern and the pencil lines are the redrawn armhole).
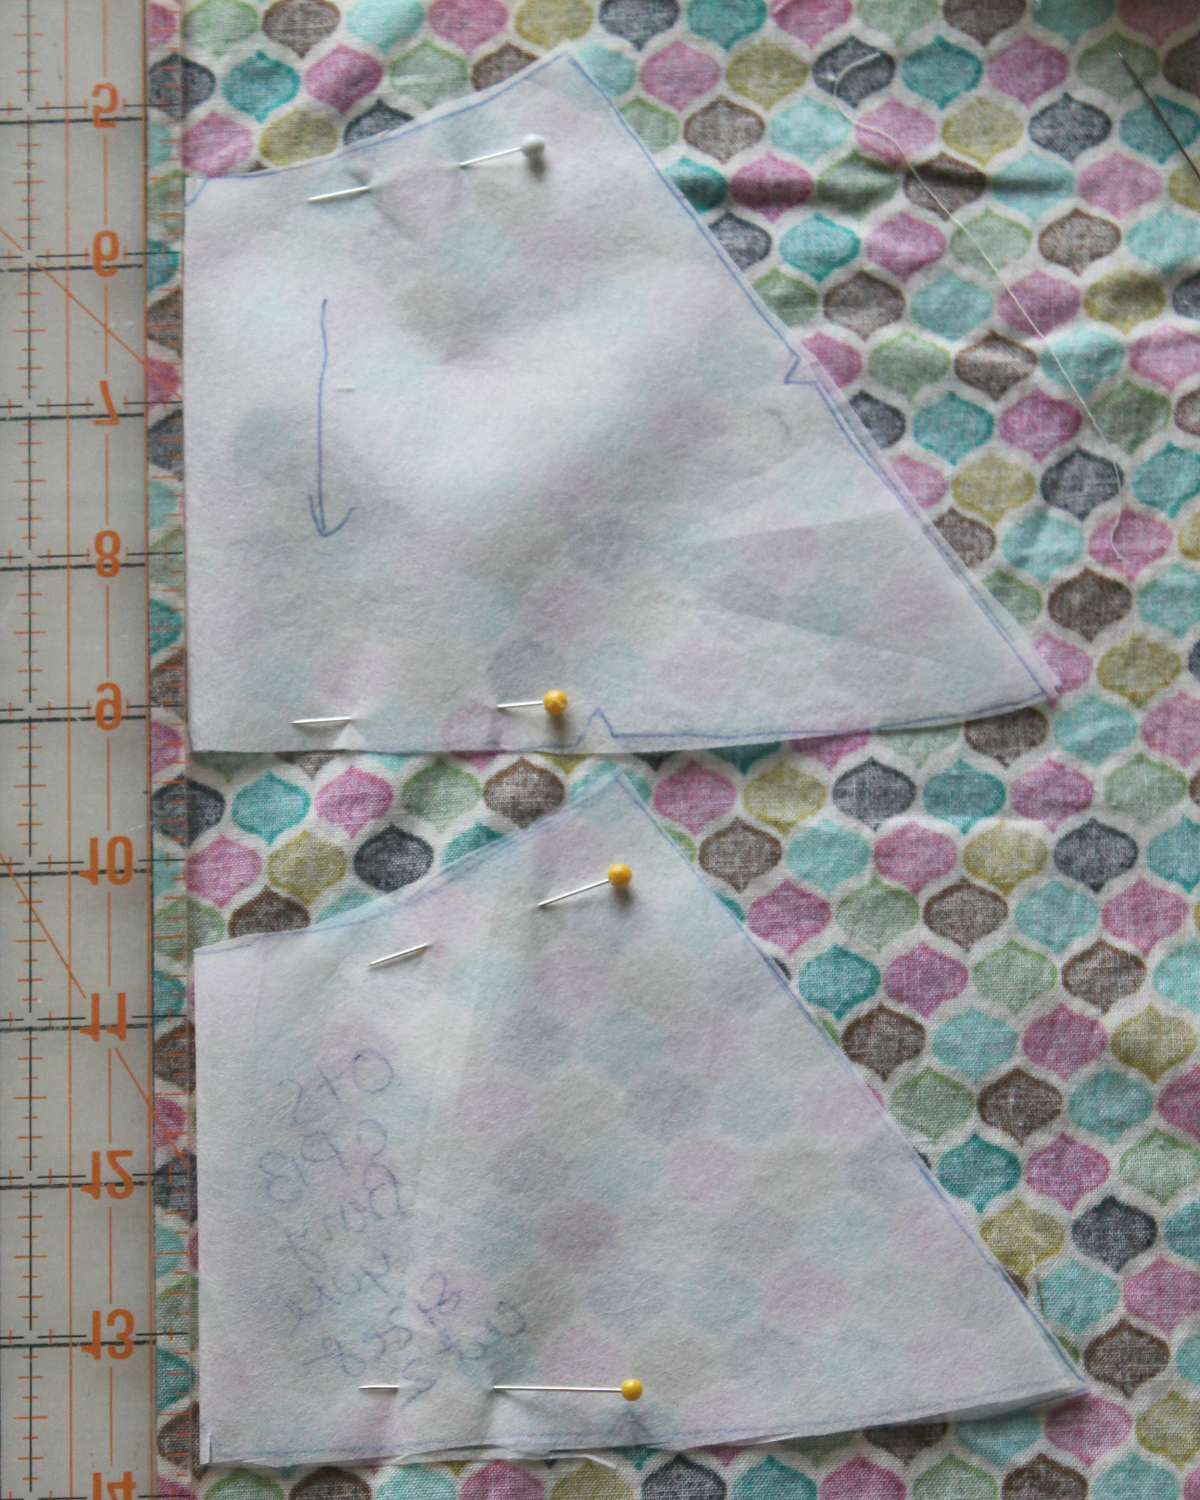
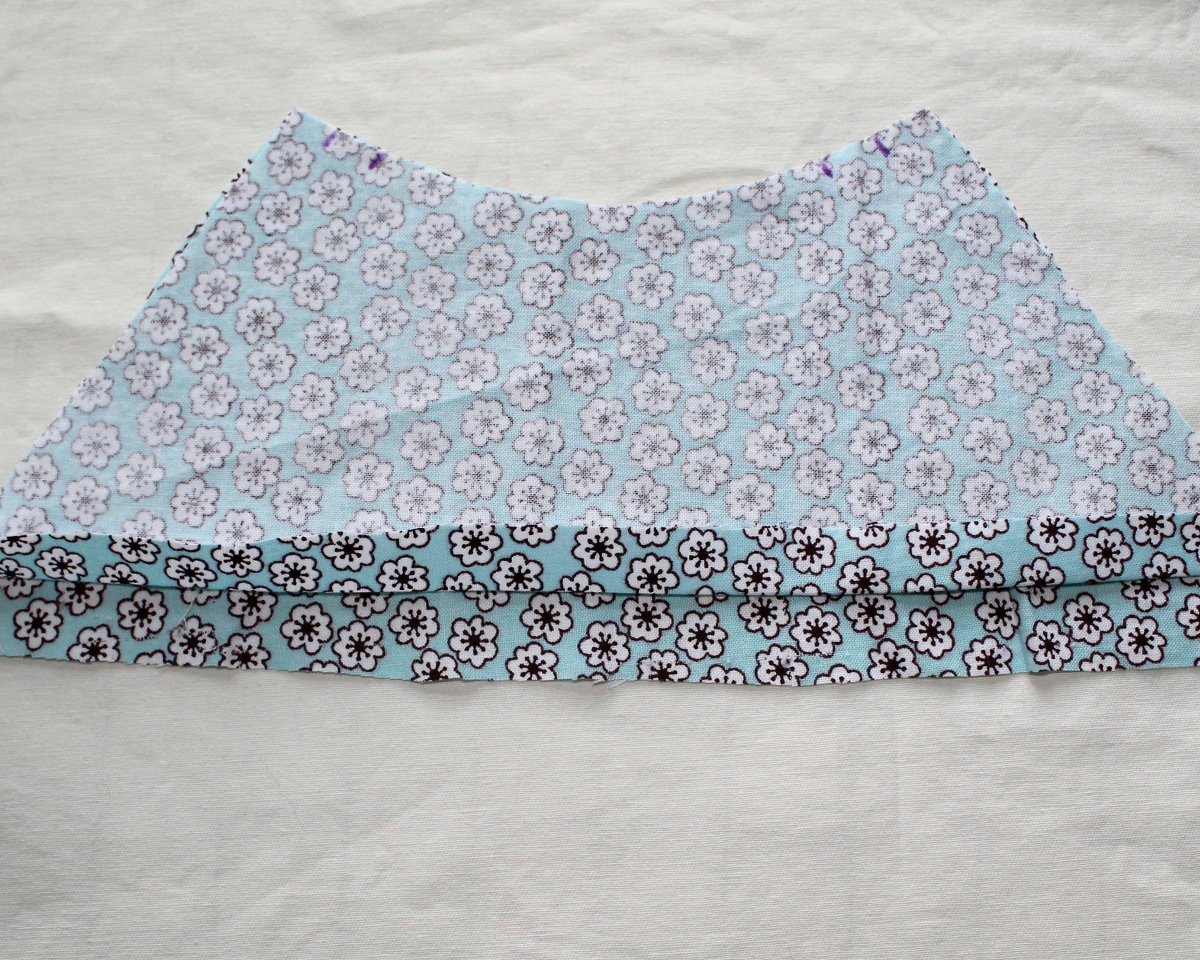
When you cut out your front/back panels and yokes, fold your pattern pieces in half and place them 1/4” from the fold in your fabric. This will add ½” in width to each piece and gives a little more room for the top to pull on over the head. In addition to those pattern pieces, you will need to cut a 1 ½” wide bias strip that’s long enough to finish both armholes and a 1 1/2” wide piece of fabric for the straps that is 14” long (not on the bias).
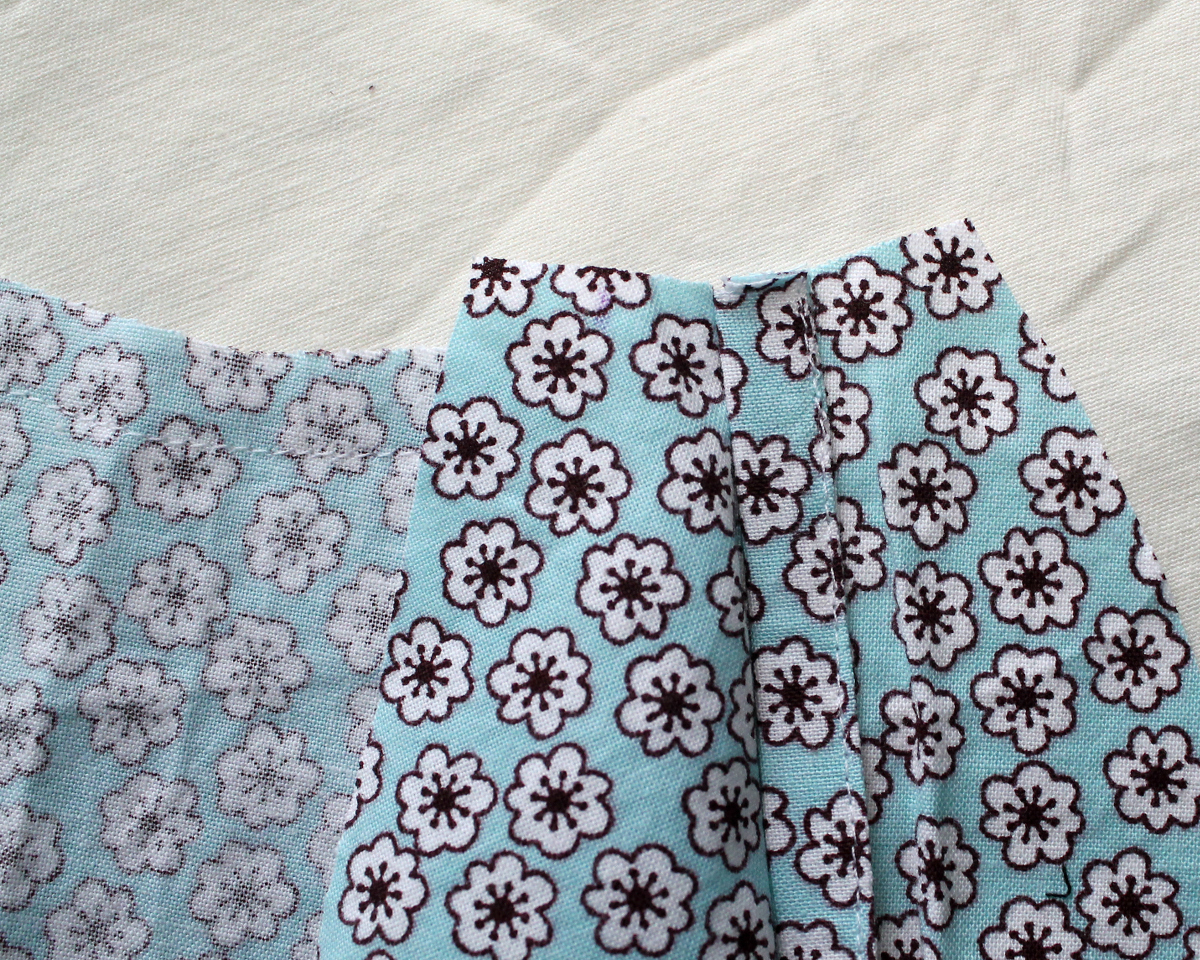
Sew the side seams, right sides together and either press the seam open or to the back. I serged my seams so I pressed them to the back. Take your bias strip and fold one long edge ½” to the wrong side, press. Pin the right side of the unfolded edge to the right side of the armhole and stitch with a 1/2” seam allowance. Understitch this seam and press to the wrong side of the armhole. Stitch along the edge.

Prepare the yokes (step 1) as directed in the sewing instructions. Make a mark 1/2” from the side at the top. Make another mark 1/2” to the inside of the original mark.
Fold your 14” long piece of fabric in half lengthwise, wrong sides together, and press to create a center fold line. Open the strap and lay it flat, wrong side up. Fold each long raw edge in toward the center, and press. Fold the strap in half again and press, enclosing the raw edges in the fold. Edgestitch the strap near the open edge to finish it. Then cut the strap in half to make two straps.
Take your back yoke and stitch the top right sides together from inside mark to inside mark. Open up the right side and place a strap right against where you stopped stitching.
Stitch across the strap and down the side, stopping at fold. Repeat for the left side. Clip the corners at the top and trim the seam allowances to 1/4”. Turn right side out, rolling the seam allowances slightly towards the facing and press.
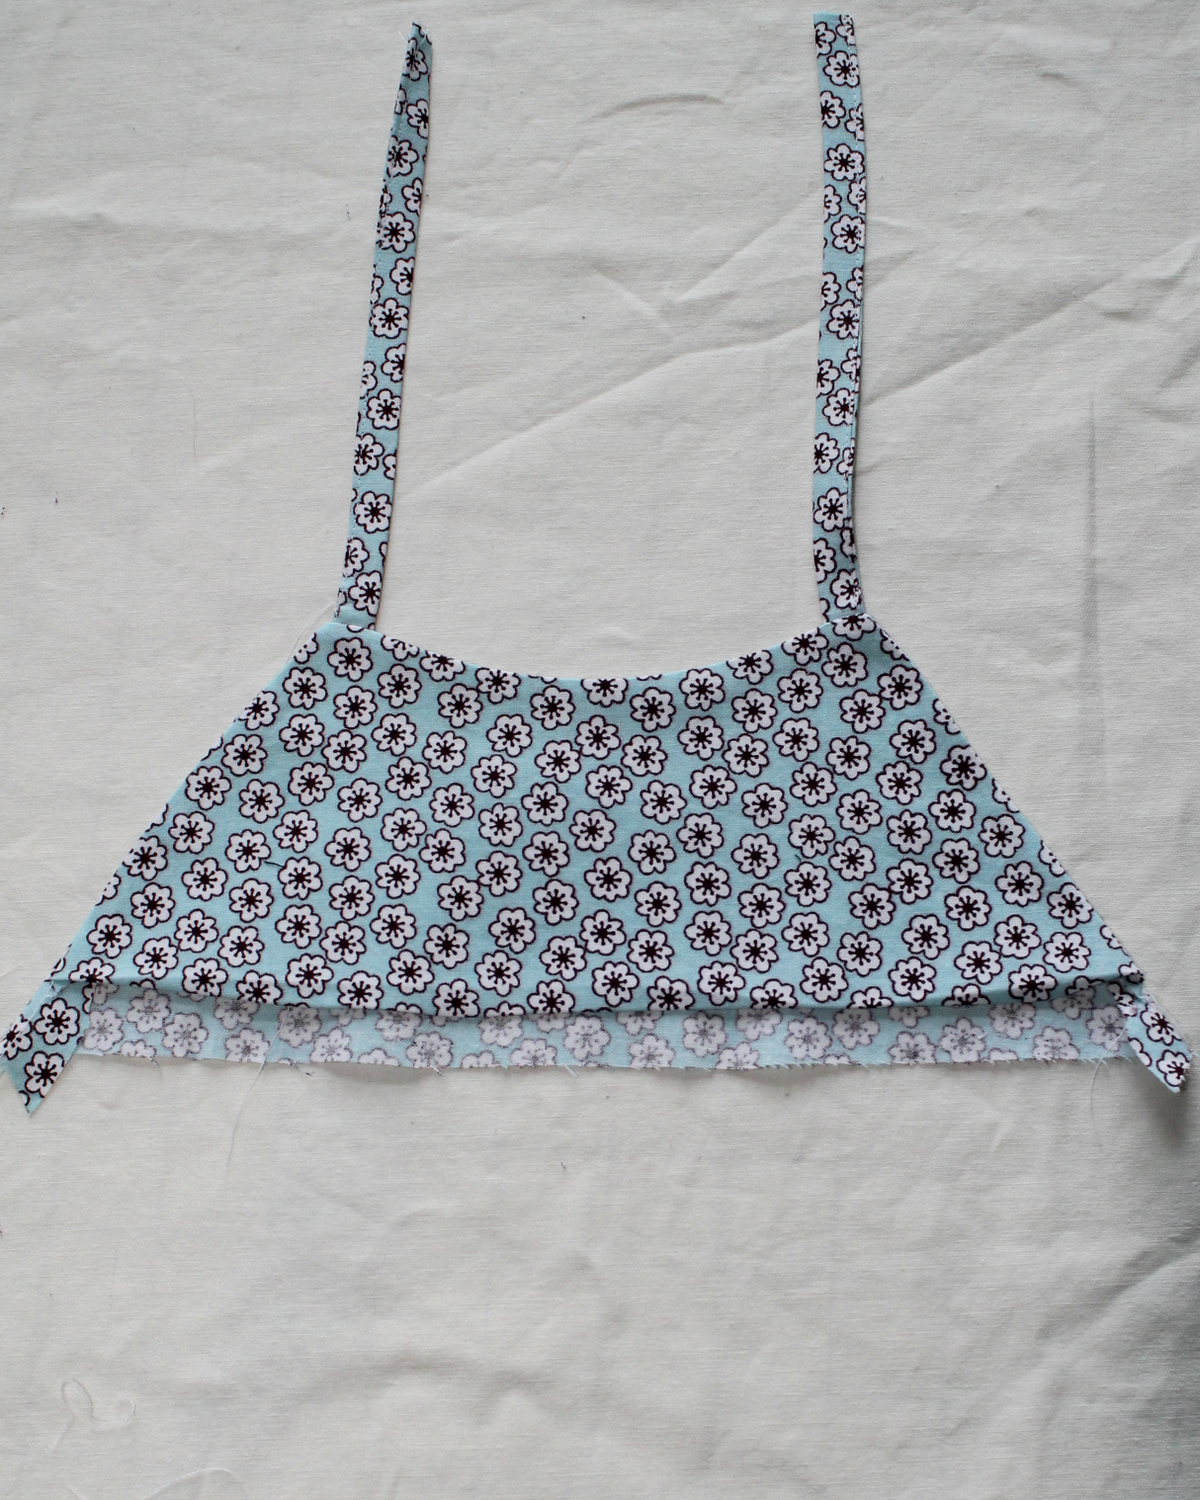
For the front yoke, you will sew the side seams first. Then slide the straps in, pin, and stitch the top seam. Clip the corners and trim the seam allowances to 1/4”. Turn right side out, rolling the seam allowances slightly towards the facing and press.
Refer to the pattern instructions (assemble the front and back blouse) to sew the yokes to the panels. Note, you will trim the little seam allowance corners before stitching the yokes. When you have pinned the yoke’s folded edge to cover the stitches at the yoke/panel seam, you will edgestitch the entire yoke. This applies to both the front and back.
Hem the blouse per pattern instructions.
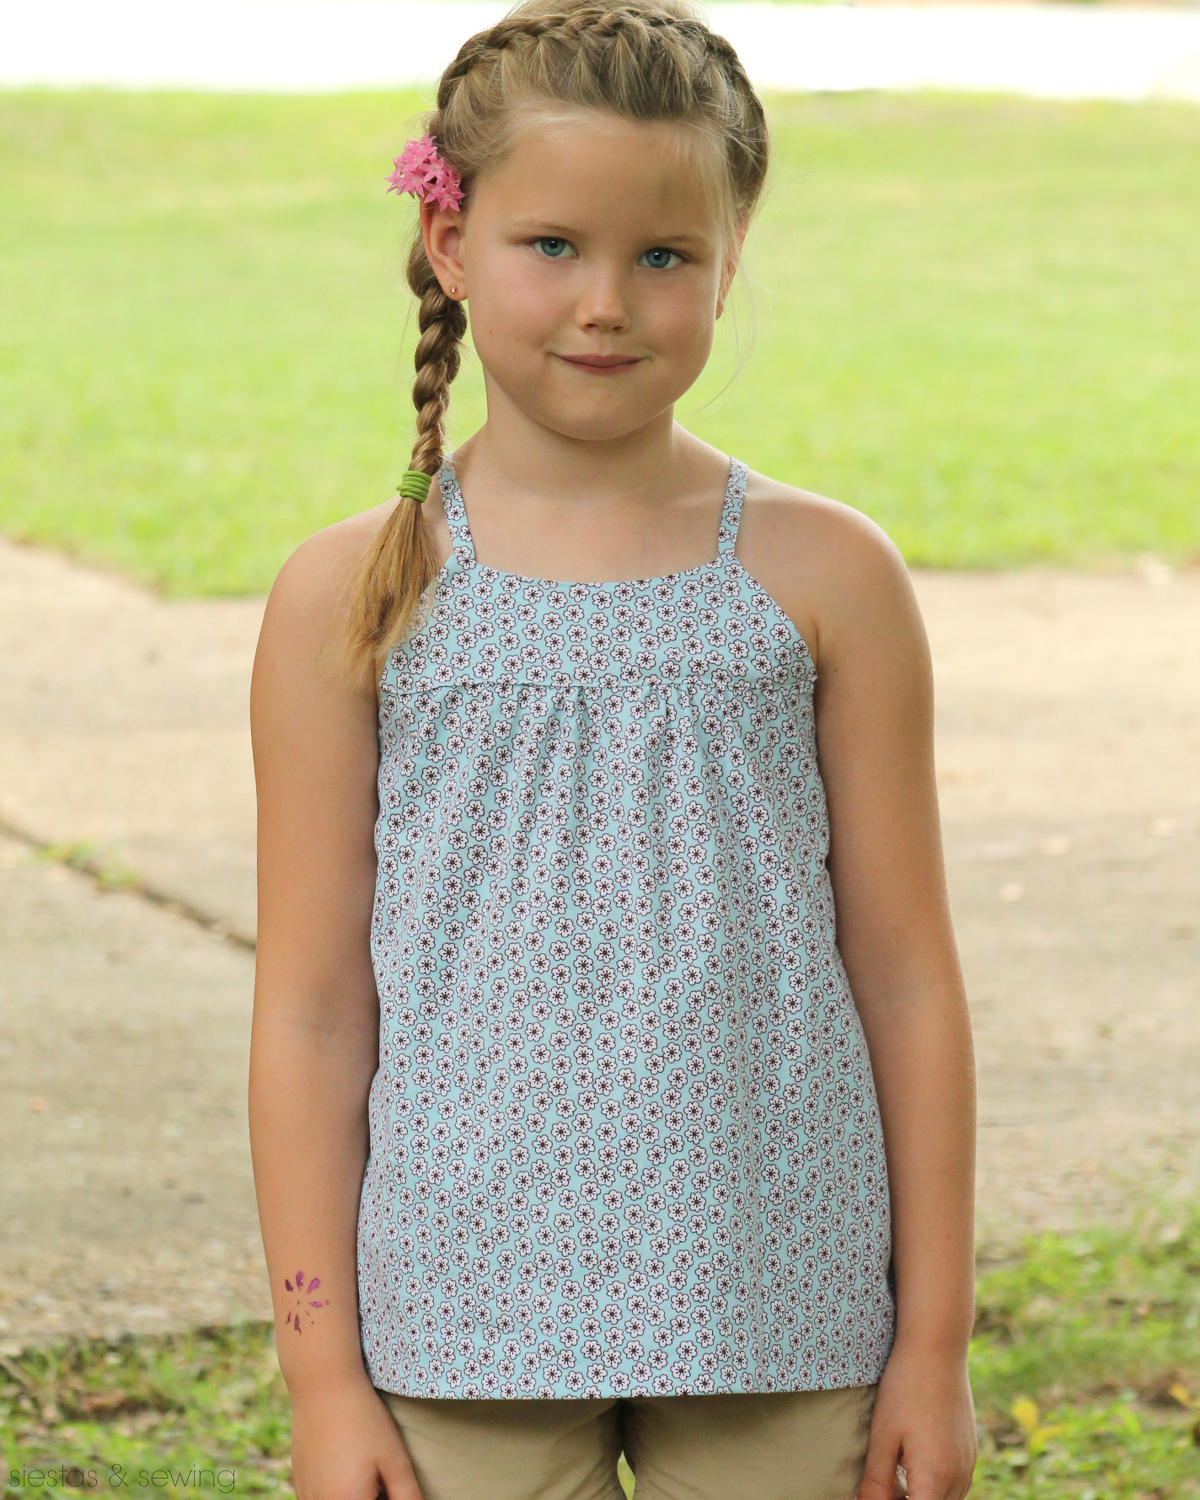
Some notes: I added 1/2” to the width as my original version was almost too small to fit over BK’s head. The strap length and armhole resizing are specific to my daughter. I’d highly recommend sewing a muslin in case you need to make more/less adjustments.
This is fab Cindy! Definitely something to keep in mind for next summer. Thank you!
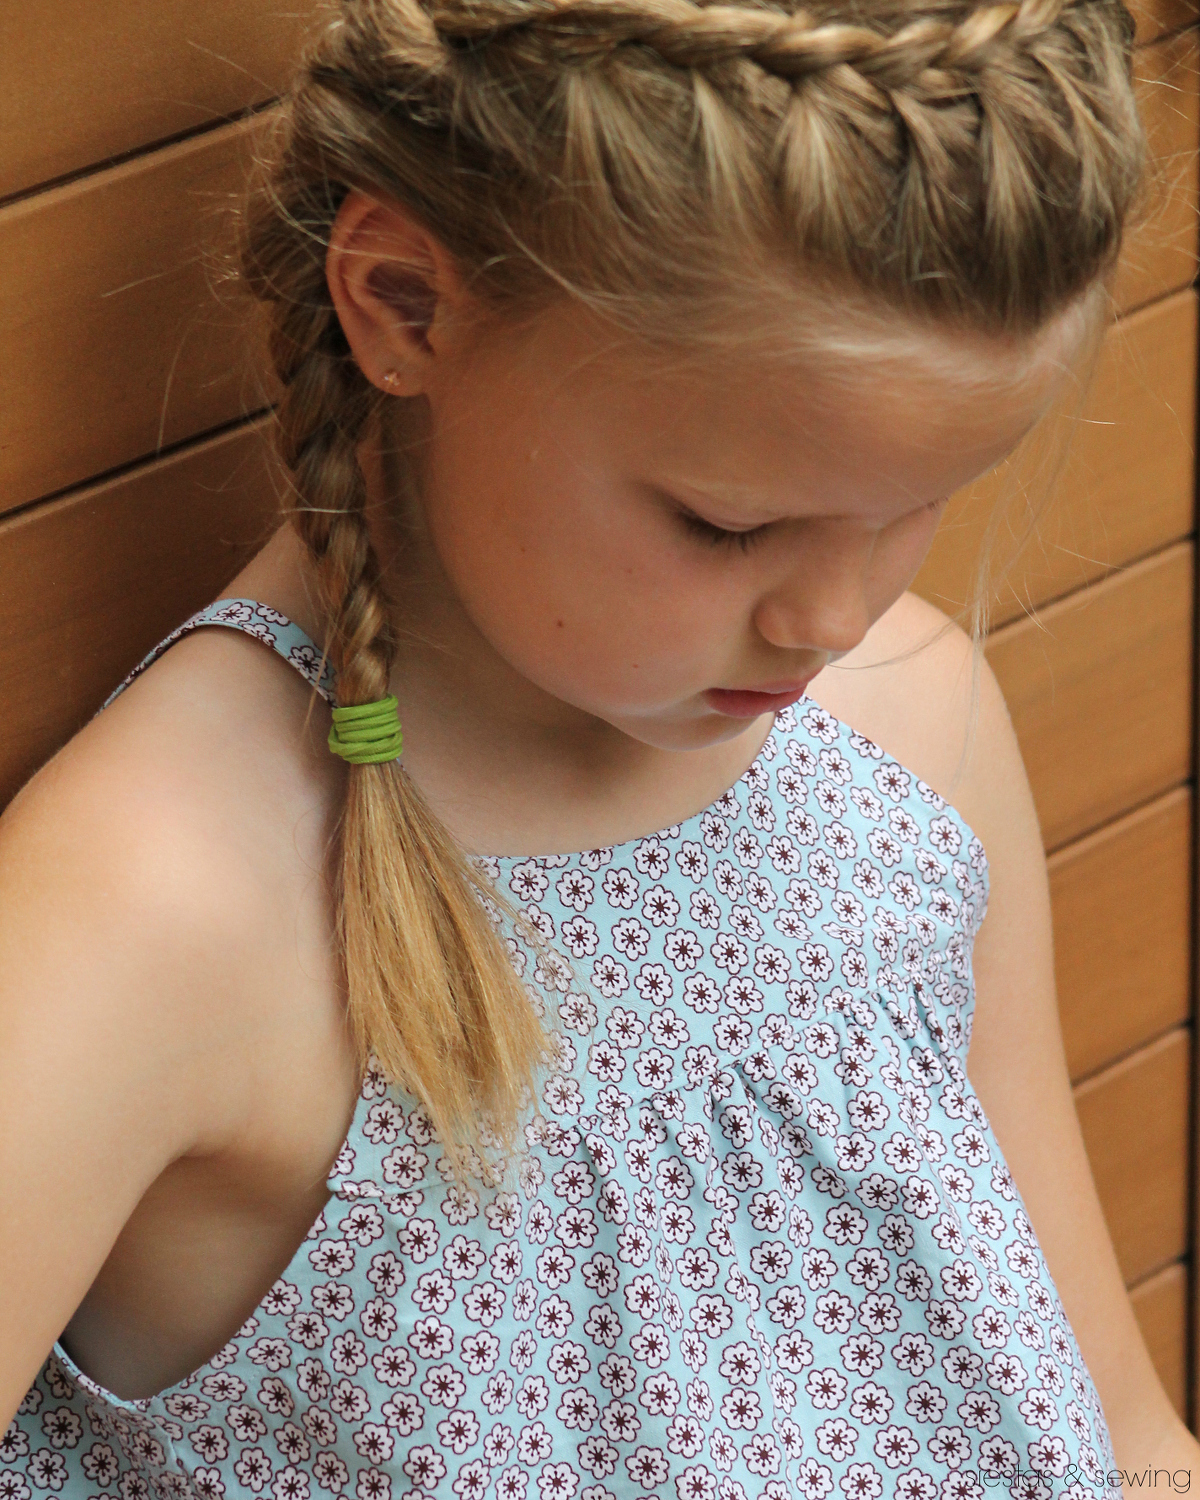
CUTE-AS-CAN-BE summer top customized from the Class Picnic Blouse pattern! I love the stylish look of diagonal stripes for the bodice/panels with vertical stripes for the yoke! Hot pink, green, and white narrow striped fabric is ideal to coordinate with the hot pink ruffled shorts for your daughter’s new outfit. THANKS for the details of how you “customized” the pattern. In your notes, you mentioned that the resizing of the armhole & strap length were according to your girl. Did you consider using straps that tie at the shoulders, so exact fitting would not be necessary? As she grows, the ties can be longer so she can certainly wear this top for a couple summers. BRAVO for mom’s “customizing.” LOVE your girl’s braided hairstyle in the last 3 photos! Sarah Helene in Minneapolis
Thanks, Lotta!
Sarah Helene, Thank you!:) Yes, you could absolutely do that. Jessica (a little gray) did a sleeveless class picnic top with binding straps that tied (like the popover sundress): http://alittlegray.blogspot.com/2013/08/a-sleeveless-class-picnic-with-mistakes.html
I was going for something more like the Swingset Tunic plus BK doesn’t like straps that tie. I was worried about the blog post being too long so I left out how I originally determined the strap length. In a nutshell, on the first top I had altered the armhole by eyeballing it and already finished it. When I sewed the yokes, I sewed the side seams and the top seam leaving an opening between the marks on the yokes for the straps. I then sewed the front/back yoke facings to the body of the top and pinned the other side of the yokes down. Next I took straps that I had cut (around 9 inches) in length and slid them in the openings and pinned them in place. BK tried on the top and I adjusted the straps until I was happy with the fit. When I topstitched the yokes the straps were sewn in to place. When the entire top was finished and BK tried it on the armholes were still too loose. So on the striped top I ended up going back and just serging the side seams narrower and then tacking the seam allowance back.
The striped top was just me playing around at the sewing machine and trying something new. BK tried the top on several times and I tweaked the fit as I went. With the flowered top, I was being more deliberate about my modifications and writing down my steps so someone else (hopefully!) would be able to follow them. Hats off to Liesl and all the other pattern designers out there. I’m in awe of how easy and straight forward they make pattern instructions.:)
Thanks again!
Cindy
Thanks for doing all the thinking, tweaking and measuring to make Class Picnic like the Swingset top. Your re-draft of the pattern fits BK perfectly.
Thank you so much for taking time to show us how to make this top! I know I will be using this much next summer time!
The Swing Set was a favourite in our house and I know this tute will be so handy!
Thank you Cindy, its gorgeous and your photography is lovely.
This is great! I would have never thought to do something like this…..but what a nice summer staple… THANKS for such a detailed customizing post!
I love this Cindy ;o)
Thank you, Deb, Sharon, Nicole, Ashley, Emily, and Colette!
MG has requested one too but it’s going to have to wait until next summer since they are not allowed to wear spaghetti strap tops to school.;)
Such a clever mod! I love the whole outfit, Cindy.
wonderful! You are so clever Cindy.
Perfect! Thank you Cindy. I love the Swingset top and was so sad when Missy grew out of the sizing.
Thank you Brittney, Christine, and Peta!
I’m so glad that Liesl extended the sizing on the newer patterns. It was heartbreaking when my girls outgrew the ones that only go to size 5. BK is in size 8 so I need to make those patterns that top out of 8 a lot this year. Hopefully, MG won’t have any crazy growth spurts!