First garment
-
7 years ago LINK
Nancy @nancys
I haven’t done much sewing for many years. I’d like to start with the easiest garment in this collection. Can you advise me?
Thanks!7 years ago LINK Lightning McStitch
@LightningMcStitch
Lightning McStitch
@LightningMcStitch
Hi Nancy. My feeling is that the pants are the simplest of the three garments in the Lullaby Layette.
However, there’s nothing overly tricky about the jacket or blouse/bodysuit and the instructions will walk you through it nicely. In fact, if you ever quilted and you’re a dab hand at applying binding then you might find the jacket the easiest.
Have fun with it, it’s a lovely pattern (and quite addictive!)7 years ago LINKThank you. I appreciate your feedback! I was thinking that about the pants, too. Last night I was looking through the pattern and realized that I need to get snaps. People on the forum advised Snap Source. Do you usually get them online?
I only need six (and maybe a few to practice on!) and might check my fabric store first.
I’m excited to be sewing for my little granddaughter due in July!7 years ago LINKLightning McStitch
@LightningMcStitch
I confess I bought myself a big, benchtops snap press a few years ago – what’s a hobby if it doesn’t allow for tool purchases, right?!
I’ve heard good things about the Snap pliers (KAM or Snapsource), but in my experience the hammer in snaps you can buy from fabric shops are a nightmare. (Bear in mind I’m in Australia and the plier snap sets don’t seem to exist here)
Another option is snap tape, where the snaps are already applied to a strip of cotton tape and you just sew that in. That would work for the shirt placket and the onesie but not so well for the jacket.7 years ago LINKThanks for your thoughts!
One more question!
What seam finish do you use on the baby clothes?
Thanks, again!
Nancy7 years ago LINKLightning McStitch
@LightningMcStitch
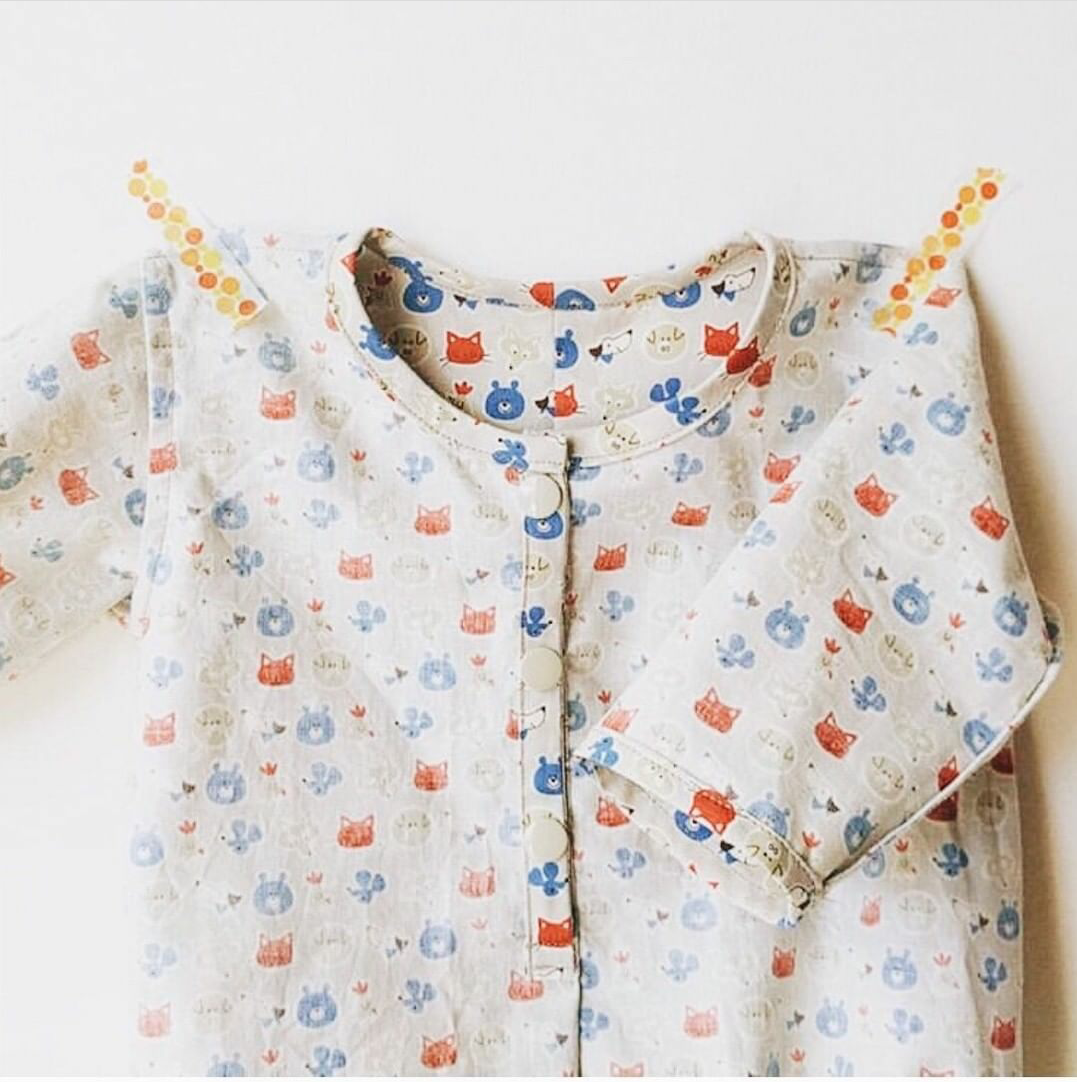
Whatever you like!
But here’s a picture where i prove that you can French seam every seam on the Lullaby Layette blouse/bodysuit. It’s a lovely, tidy finish if you can be bothered. If you look in the tutorials section of the website you’ll find quite a number of seam finish tutorials.Attachments:
7 years ago LINKThat is so, so beautiful!!!
You sure do prove it. Your workmanship is wonderful!I’m in San Francisco, CA, by the way. Thanks for inspiring me from Australia!
7 years ago LINK Shanti
@Shanti
Shanti
@Shanti
I’m inclined to go with the pants, too…though I have to admit I only made them once and didn’t love them the way I do the other parts. The jacket I adore! It takes a second to figure out the instructions, you just have to trust and follow exactly and you’re rewarded with a clever garment.
After trying a different snap style, plastic snaps with pliers, probably more meant for cloth diapers, I went with Snap Source and they are great. They come in a great range of colors, styles, and sizes. Getting to hit things with the hammer is nice, too.
7 years ago LINKOk! Thanks for your thoughts. I think I will go for Snap Source.
I agree the pants might be the least thrilling of the pieces but perhaps a good way for me to get started. Then I was thinking of the shirt next. Building up to the jacket!
Next I have to figure out my fabric!7 years ago LINKI am happy to say I finished my lullaby layette pants and today I did a practice placket for the shirt. It was challenging but I got it.
Tomorrow I will add the placket to my shirt.
Then the snaps situation is looming over me. I have read or heard some negatives about Snap Source saying sometimes they dont go in well and taking them out to redo is not easy.
I am using double gauze and dread that possibility.
Any thoughts?
Thanks!7 years ago LINKShanti
@Shanti
Congratulations! I really like the Snap Source set, but I would recommend you do several practice runs before you set them on the garment. I do it every time because I don’t set them so often that it’s second nature.
Set up the fabric exactly like your placket – fabric layers, interfacing, everything. My most common mistake is putting one of the ends on backwards and that can be near impossible to fix. Do it in good light and mark your spot on both sides of the fabric before you whack it with the hammer. I’ve found that all my mistakes are because I wasn’t bothering to double check my work before I set the snaps. There’s nothing like trying and failing to prise apart a snap to remind you that “measure twice, cut once” applies to everything!
7 years ago LINKThank you! Since I made a practice placket, I will be able to practice on it which is good. (I was surprised that it didn’t call for interfacing on the shirt but does call for it on the bodysuit.) Do you use the 3 piece plastic applicator or the pliers?
7 years ago LINKEnbee @Enbee
Congratulations! I also like the Snap Source set – I’ve used the Dritz hammer-in snaps and had OK success, but I do occasionally ruin one of them. I haven’t had a Snap Source failure yet. I’ve also used KAM snaps (with the pliers), and I don’t love them on anything thin, delicate, stretchy, or too thick. Prong length can be either too short or too long, depending on fabric thickness, and the snaps can be very stiff, making them hard to open/ripping the garment if you’re not careful. I use KAM snaps on things like button-up shirt plackets (several layers of woven + interfacing), the sailboat top snaps (woven or knit, as long as it’s not too thick, thanks to the interfacing), or non-garment closures.
I’ve made two LL bodysuits and two shirts, and used metal snaps on all, but on one of the bodysuits, I used actual buttons for the front placket, with snaps just for the crotch closure. That was nice, and can be an option if you’re more comfortable sewing buttonholes, but real buttons on babies is a PITA (IMO, as a parent of a baby). And yes, French seams everywhere! So clean!
I’ve made one jacket, and I actually did use KAM snaps for it – that worked out fine (I can’t remember, but I *think* there’s interfacing there).
7 years ago LINKThank you!
Your input is so appreciated.7 years ago LINKShanti
@Shanti
I use the three piece applicator and hammer. I have a plier snap set and I hated it. Just couldn’t get the snaps to set, and the snaps themselves were hard to open and close. BUT, those were Baby Source or something like that, not KAM. I bought the set when I didn’t know anything about snaps. I have the Snap Source tools for the size 16 and 24 (for jackets and overalls) and setters for the regular and pearl snap heads.
As long as I check everything carefully, I feel like I have a little more control over the process with the plastic applicator. And it’s fun 🙂
You must be logged in to reply to this topic.
copyright
Unless otherwise credited, all work on this blog is © Liesl + Co., Inc, 2008-2026. You are welcome to link to this blog, but please ask permission before using any text or images.