Sewing is a great way to express your creativity and to wear something that no one else has. It’s also a great way to get a great fit! We’ve written lots of posts about fit in the past, and you can find many of them here on the blog. But today I want to focus on one of the easiest ways to improve the fit and to sew something to your personal preferences using a simple tool: the lengthen/shorten line.
Whenever possible (and whenever I remember), I try to include a lengthen/shorten line on our sewing patterns.
Sometimes people ask what height our patterns are drafted for. To be perfectly honest, I don’t like that question because even if you’re the same height as our mannequin, three women who are the same height might have torsos that are very different lengths. (Ok, I know some of you will still ask, so here’s the answer: our mannequin is probably about 5’5”. She doesn’t have a head or feet, so that’s an estimate…) I’m 5’8” and very long waisted, and I nearly always add 1” to sewing patterns to accommodate my long torso. But someone much taller than me could easily be short waisted and need to remove torso length from the same styles to suit their body. So don’t put too much weight on the drafted height of a pattern, ok?
That’s why I think it’s important to measure, to hold the pattern pieces to your body, and (I’m sorry!) to make a muslin or fit sample to check the proportions of each pattern. After all, you try on clothing in a store before you buy it, don’t you? Why would you sew a pattern without checking the fit? Proportions are important, and you really can’t tell if a proportion will work well for you until you try it.
You try on clothing in a store before you buy it, don’t you? Why would you sew a pattern without checking the fit?
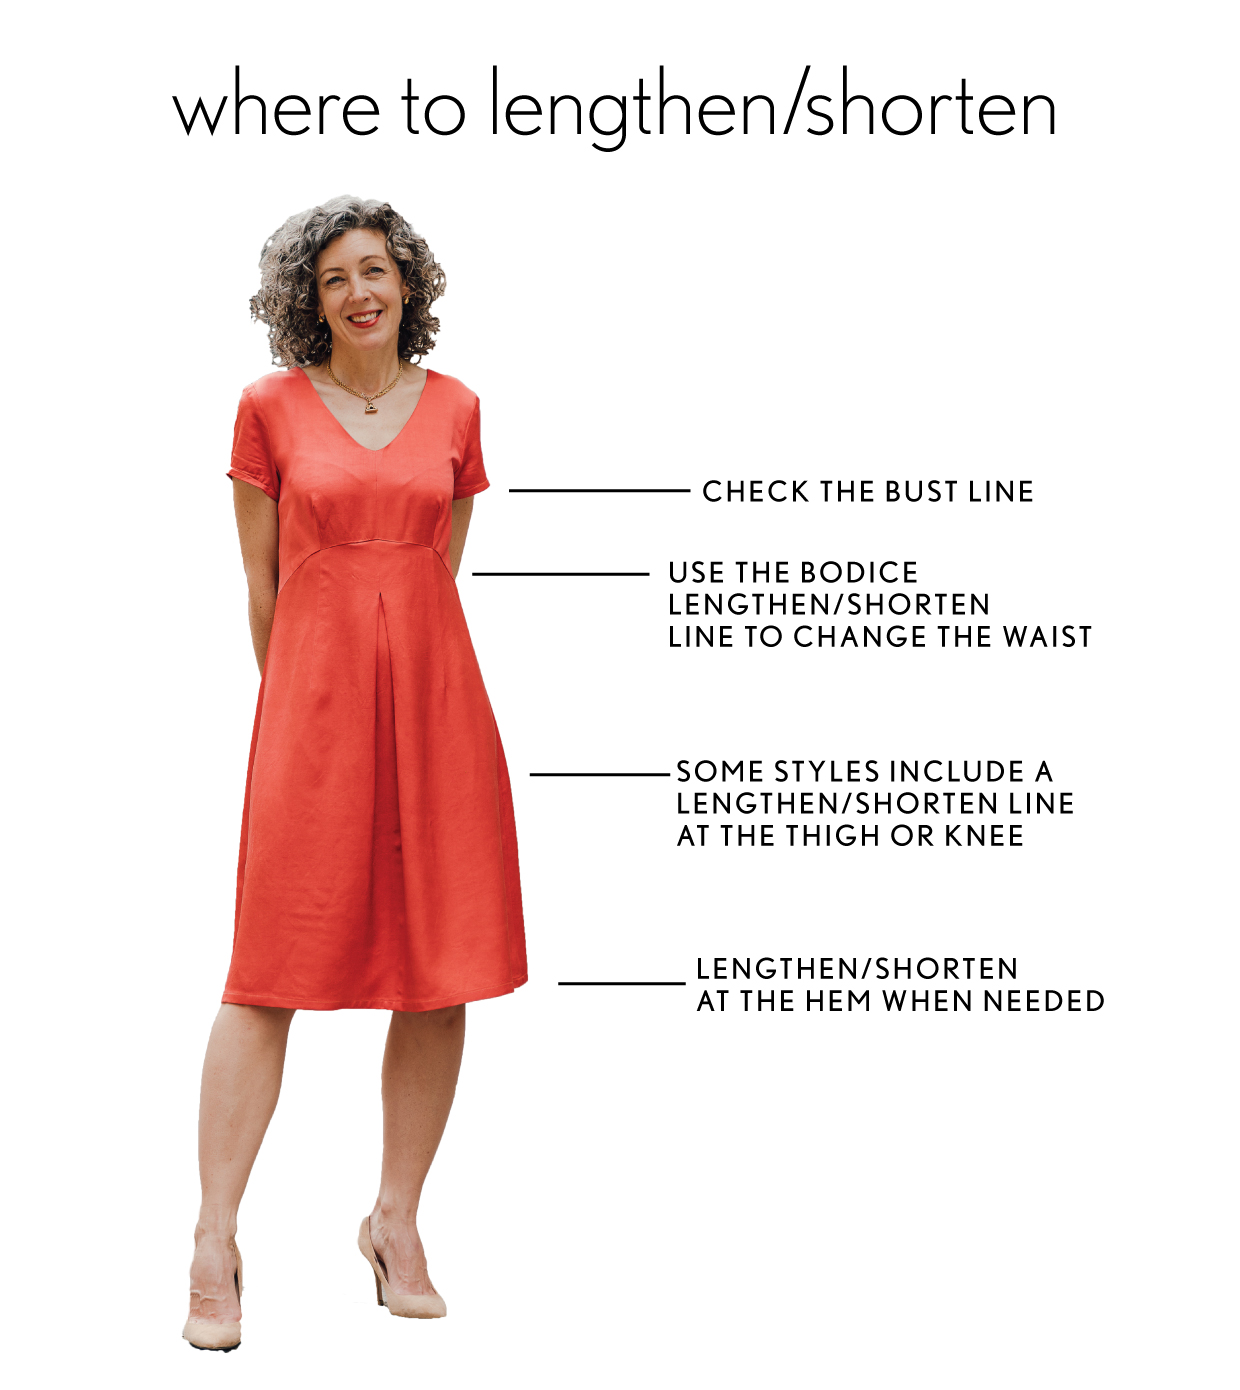
The most important thing to remember when checking the length of a pattern is where the various parts of the garment hit you. Do the bust darts match your bust? If not, here is a post that will help you. Is the waist in the right place? If you’re sewing trousers, is the crotch depth (the rise) to your preference? What about the shirt, skirt, or trouser length?
Personal preferences can come into play here too, and you might prefer a garment to be longer or shorter than it was drafted. Nothing wrong with that. Again, that’s why it’s helpful to try it before you sew it. Adding length is easy—but only if you do it BEFORE you cut your fabric!
In any case, that’s why we include the lengthen/shorten line on our patterns. Size grading adjusts for width, cup sizes adjust for bust, and the lengthen/shorten line adjusts for length. Use these tools to your advantage and for best results.
Size grading adjusts for width, cup sizes adjust for bust, and the lengthen/shorten line adjusts for length. Use these tools to your advantage and for best results.
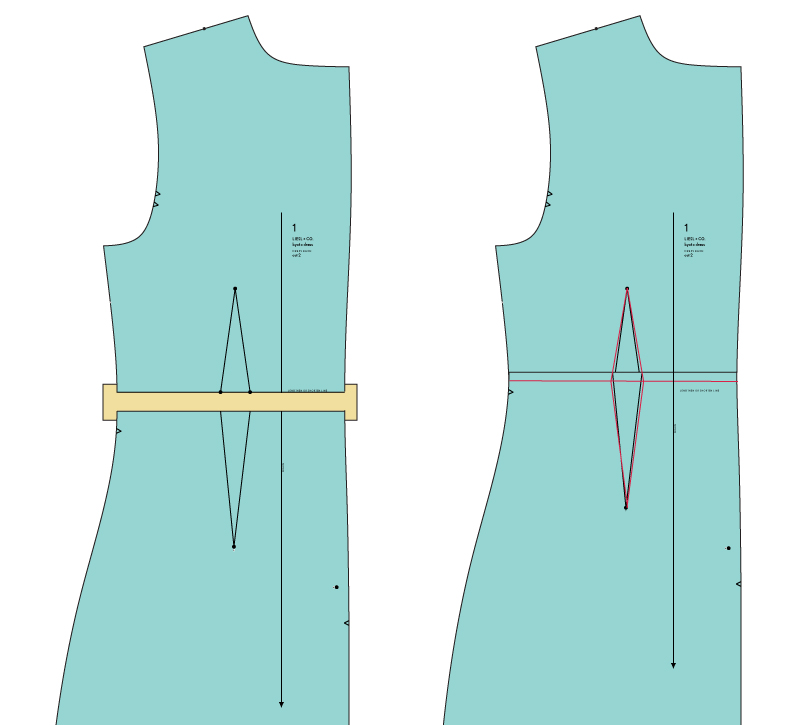
How to use the lengthen/shorten line? Once you decide whether a pattern needs to be longer or shorter, whether to lengthen at the hem or at the bodice (to raise or lower the waistline) and by how much to lengthen or shorten, you simply cut the pattern along the lengthen/shorten line, spread the two pieces too add length, or overlap them to shorten, and tape them back together. If you’re spreading to add length and lower the waistline, tape a piece of paper between the pieces to fill the gap. Be consistent with this adjustment, and check to be sure you’ve made the same adjustment to all the necessary pieces, including facings and linings. Then, to finish, blend any lines that need to be blended, and be sure to keep the grainline consistent so the piece doesn’t get reassembled incorrectly. And that’s all there is to it!
Here are a few examples to help you visualize the process:

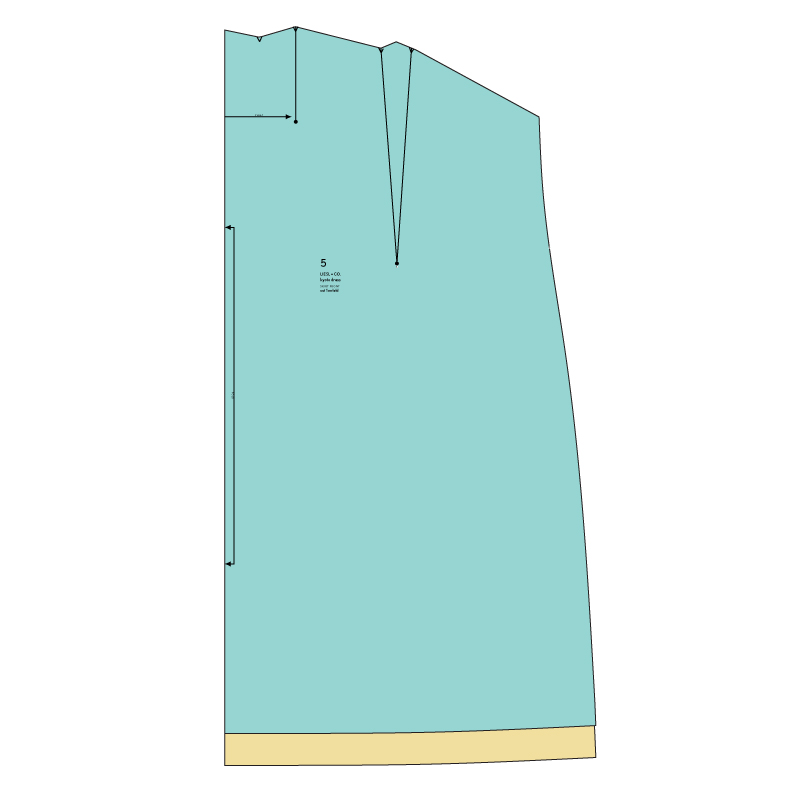
Remember, too, that if the waistline or torso for the style seems ok and you only want to lengthen the hem, on some pieces and in some instances the hem edge of the garment is the best place to lengthen it. This is usually the case if a pattern piece or silhouette is mostly straight, like a gathered skirt that is rectangular, or if a piece is flared and needs to keep getting wider as it gets longer. Most skirts and trousers can be lengthened at the hem. Experience and common sense will generally help you with this, but don’t be afraid to reach out to us or to the sewing community if you’re unsure. Sewing is a lifelong learning process, so don’t be afraid to lean on the experience of others because they’ve probably learned it from someone, too!
Sewing is a lifelong learning process, so don’t be afraid to lean on the experience of others because they’ve probably learned it from someone, too!
Use the size grading, the cup sizes, and the lengthen/shorten lines to your advantage and you’ll be well on your way to getting a great fit. And don’t forget to visit our other posts for detailed instructions on more specific pattern alterations. I hope that helps!
Where do you usually lengthen or shorten sewing patterns? Do you have a trick to share? We’d love to hear it!
THANK YOU. Always such Great information!
I also need to lengthen tops or dress bodice to fit a longer torso. When I add length to a dress torso how do I adjust an attached skirt so that the skirt/ pockets are in the right position?
Thanks in advance!
Generally if you add length you’ll raise the pockets by the same amount, and vice versa. But this is usually a small adjustment, so I often don’t need to change the pocket location when I add length. The other approach would be to measure your preferred pocket placement from the shoulder at your neckline and consistently position the pockets at this level.
Some pattern companies have a chart that shows all the pattern measurements by size, including the back waist length.
Does Liesel &Co have a chart that shows the back waist length? I see the circumference measurements but would love to know some vertical measurements as well.
Reason is I’m now learning to use my sloper to adjust patterns I buy to get them to fit better and it would be nice to know where the initial design block had the waist level so I can have an idea of where to align my sloper. Many loose designs don’t show that line as it’s not crucial to the design, understandably, but it would be nice to have an idea of much difference there is between my sloper and the pattern. I’ve made the Geneva blouse twice – I love that blouse! – and I’d love to see how much better I can make it by using my sloper to make a few tweaks.
Thanks!
I purchased the Fira Dress + Top pattern recently. I did not realize that my size is ‘off the chart’. I think I would wear a 22 or 24 according to the size breakdown. Do you sell a plus-size pattern for the Fira Dress or should I add the inches to the printed pattern?
Hi Amy,
That pattern isn’t available in larger sizes, I’m sorry. Yes, you can indeed add sizes by following the grading as it’s been done for the other sizes, or by adding a little width where needed. We tried developing larger sizes for some of our patterns, but they didn’t sell well enough for us to continue to develop them as a result. Best wishes!