We have such a special treat for you today! Asmita is sharing her Cannes Trousers, styled as palazzo pants. Her beautiful red fabric is paired with a hand-embroidered border. Simply stunning, Asmita!
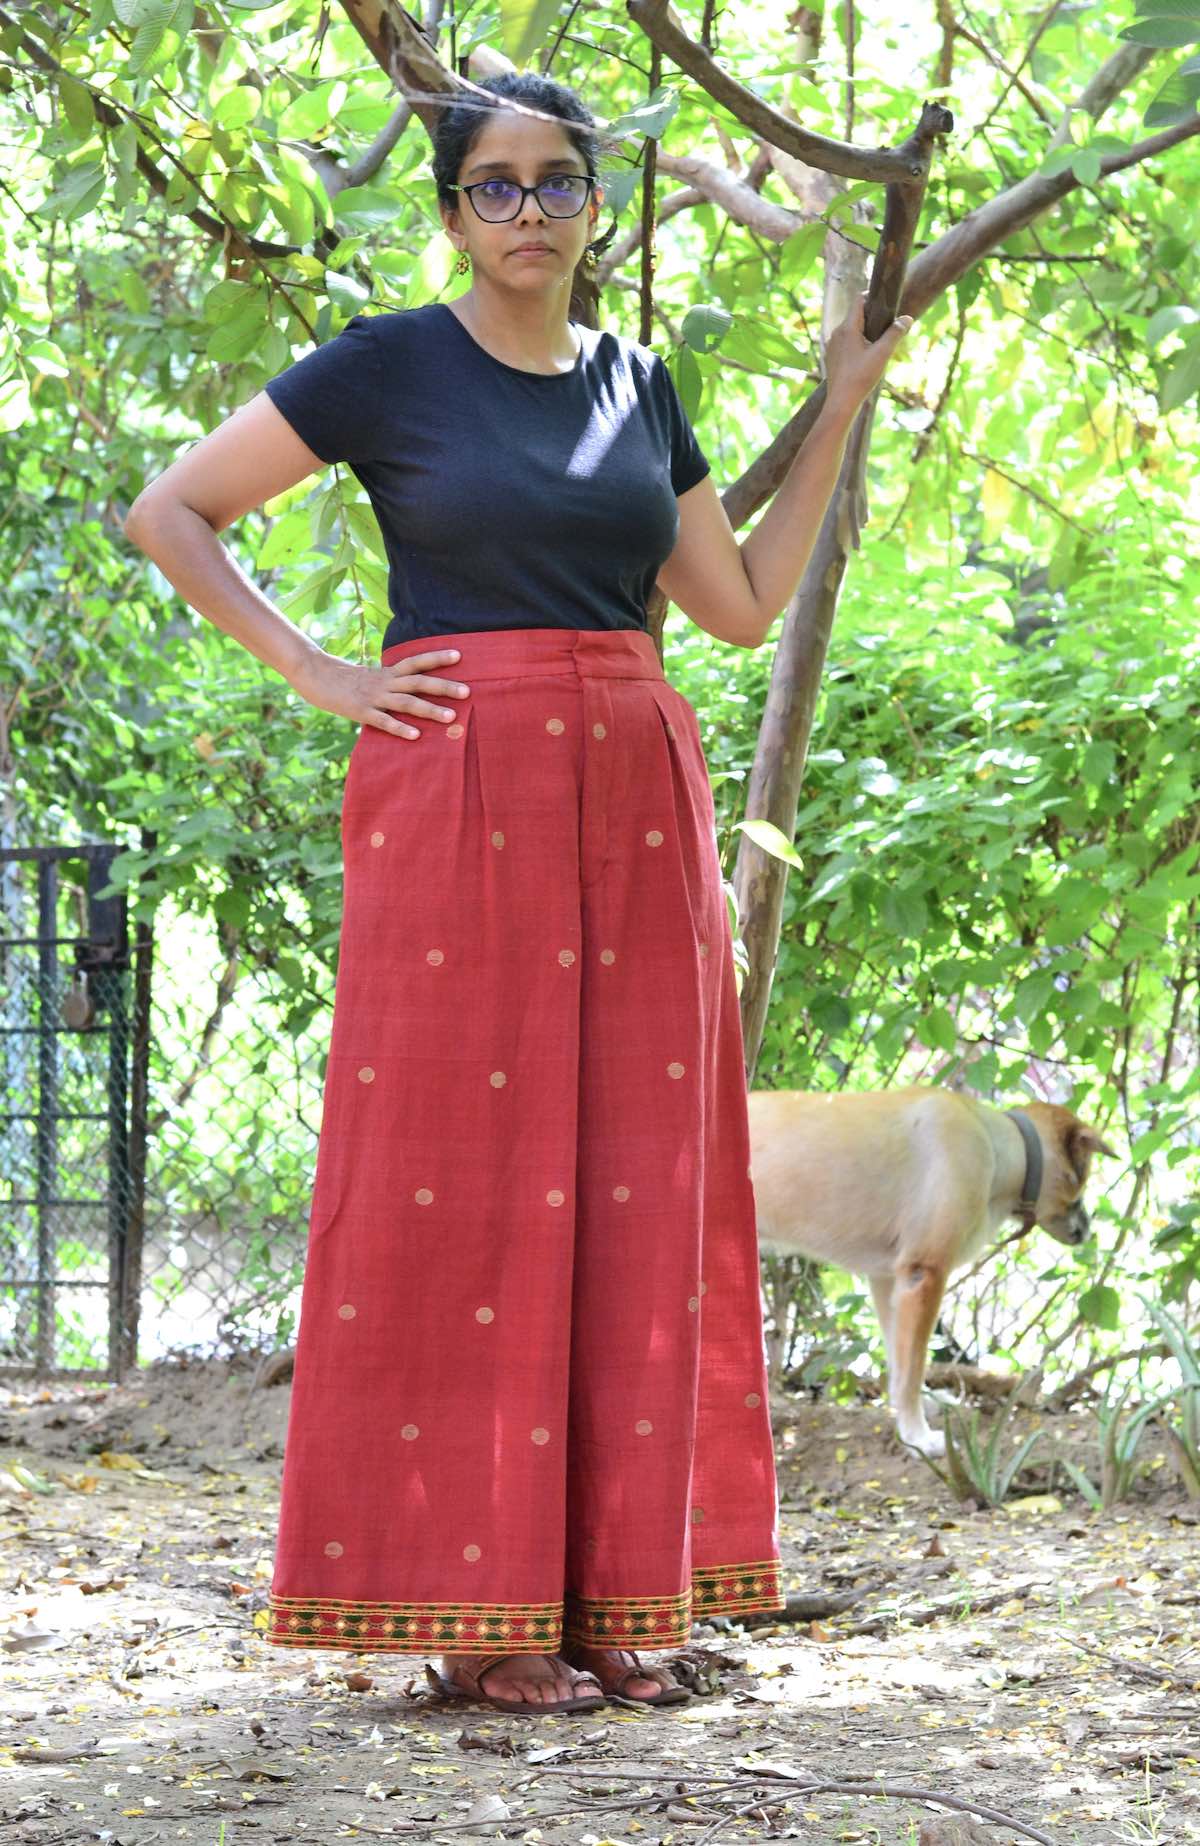
When the pattern for the Cannes trousers first came out, I remember thinking that these would make the perfect palazzo pants. Palazzo pants, at least in the Indian context, are those worn under kurtas, usually made of lightweight fabric, and often have an elastic waist. Liesl and several other members of the Advisors’ Circle styled them quite differently, but I could not get the “Indian” version of them out of my mind. Of late, I prefer non-elastic waisted pants, and what attracted me to these were both their high waist and the billowing bottom and last but not least, good deep pockets.
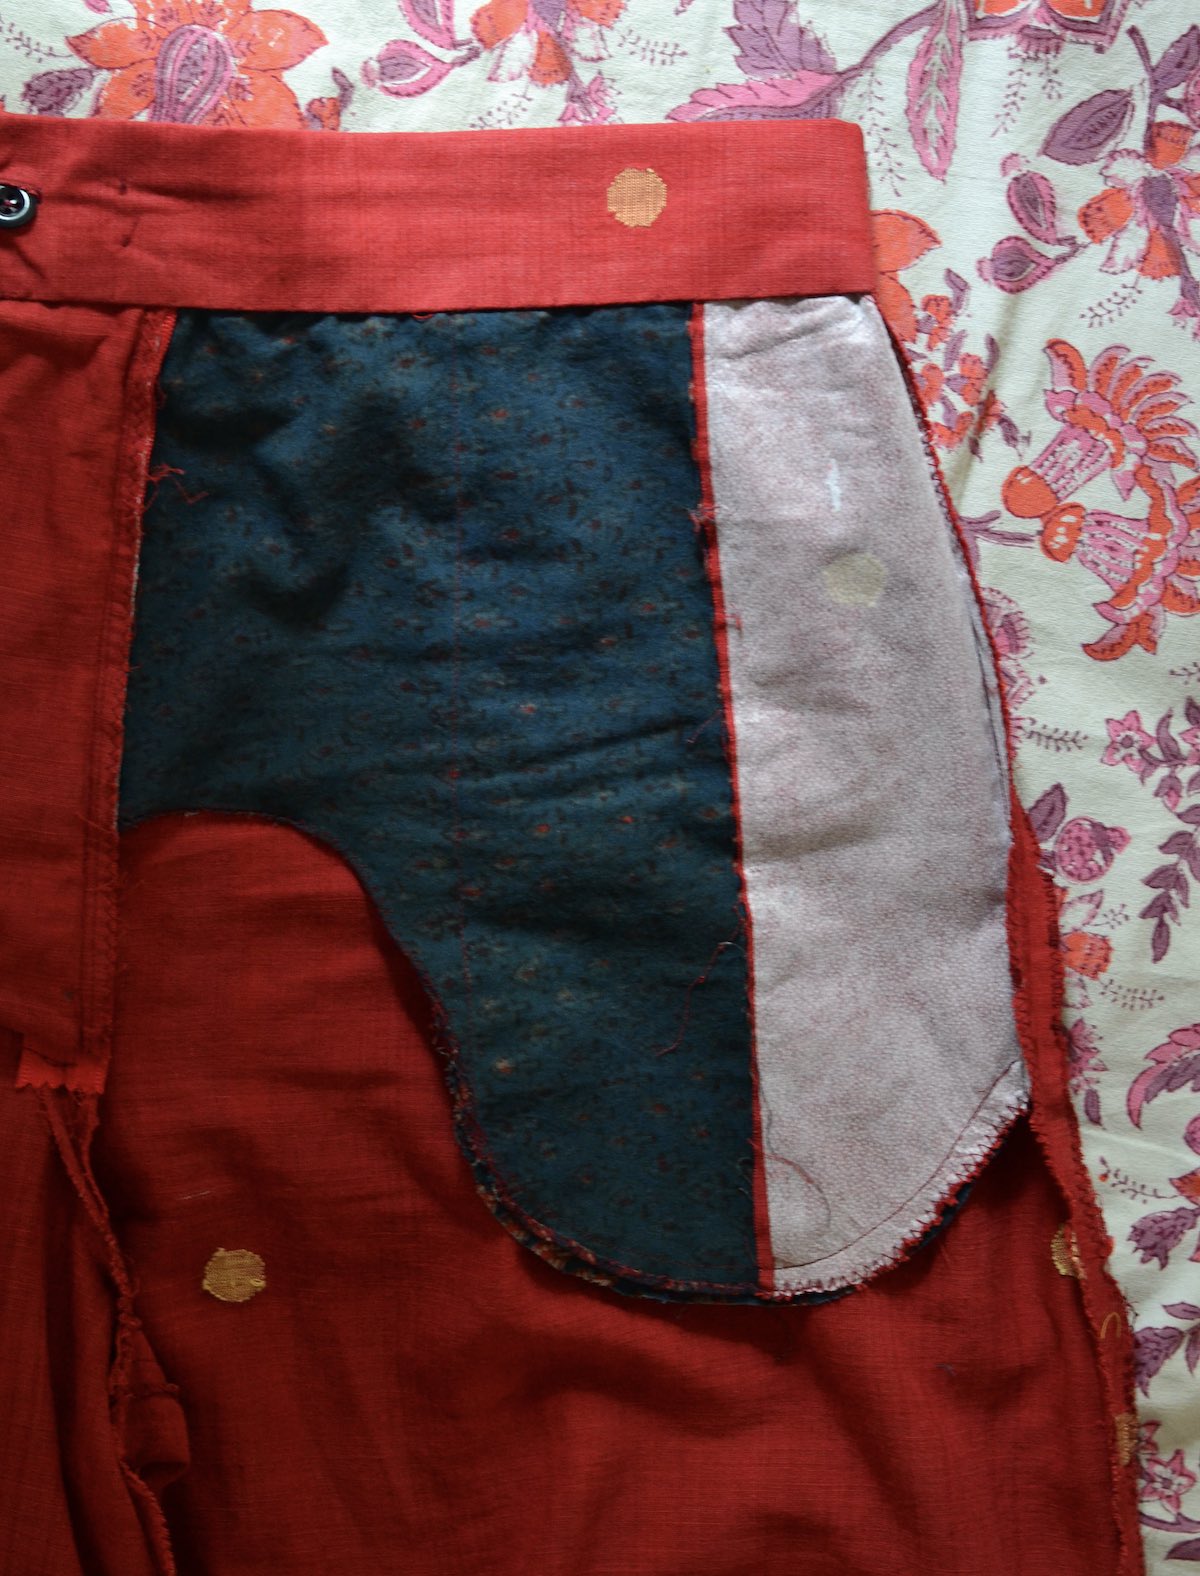
Sizing and modifications: I fall between sizes 10 and 12 (my measurements are: h 41″, w 32″). At the hip, the Cannes have an ease of 5″ (for these sizes). I, however, wanted something that would skim my thighs and therefore needed less ease in that area. The reason is that since I primarily planned to wear it under a kurta, one cannot have too much fabric in the thigh area. Most kurtas worn with a palazzo are at least knee length; having too much material in the thing area (as the ease would have given me) would not have given me the look I was going for.
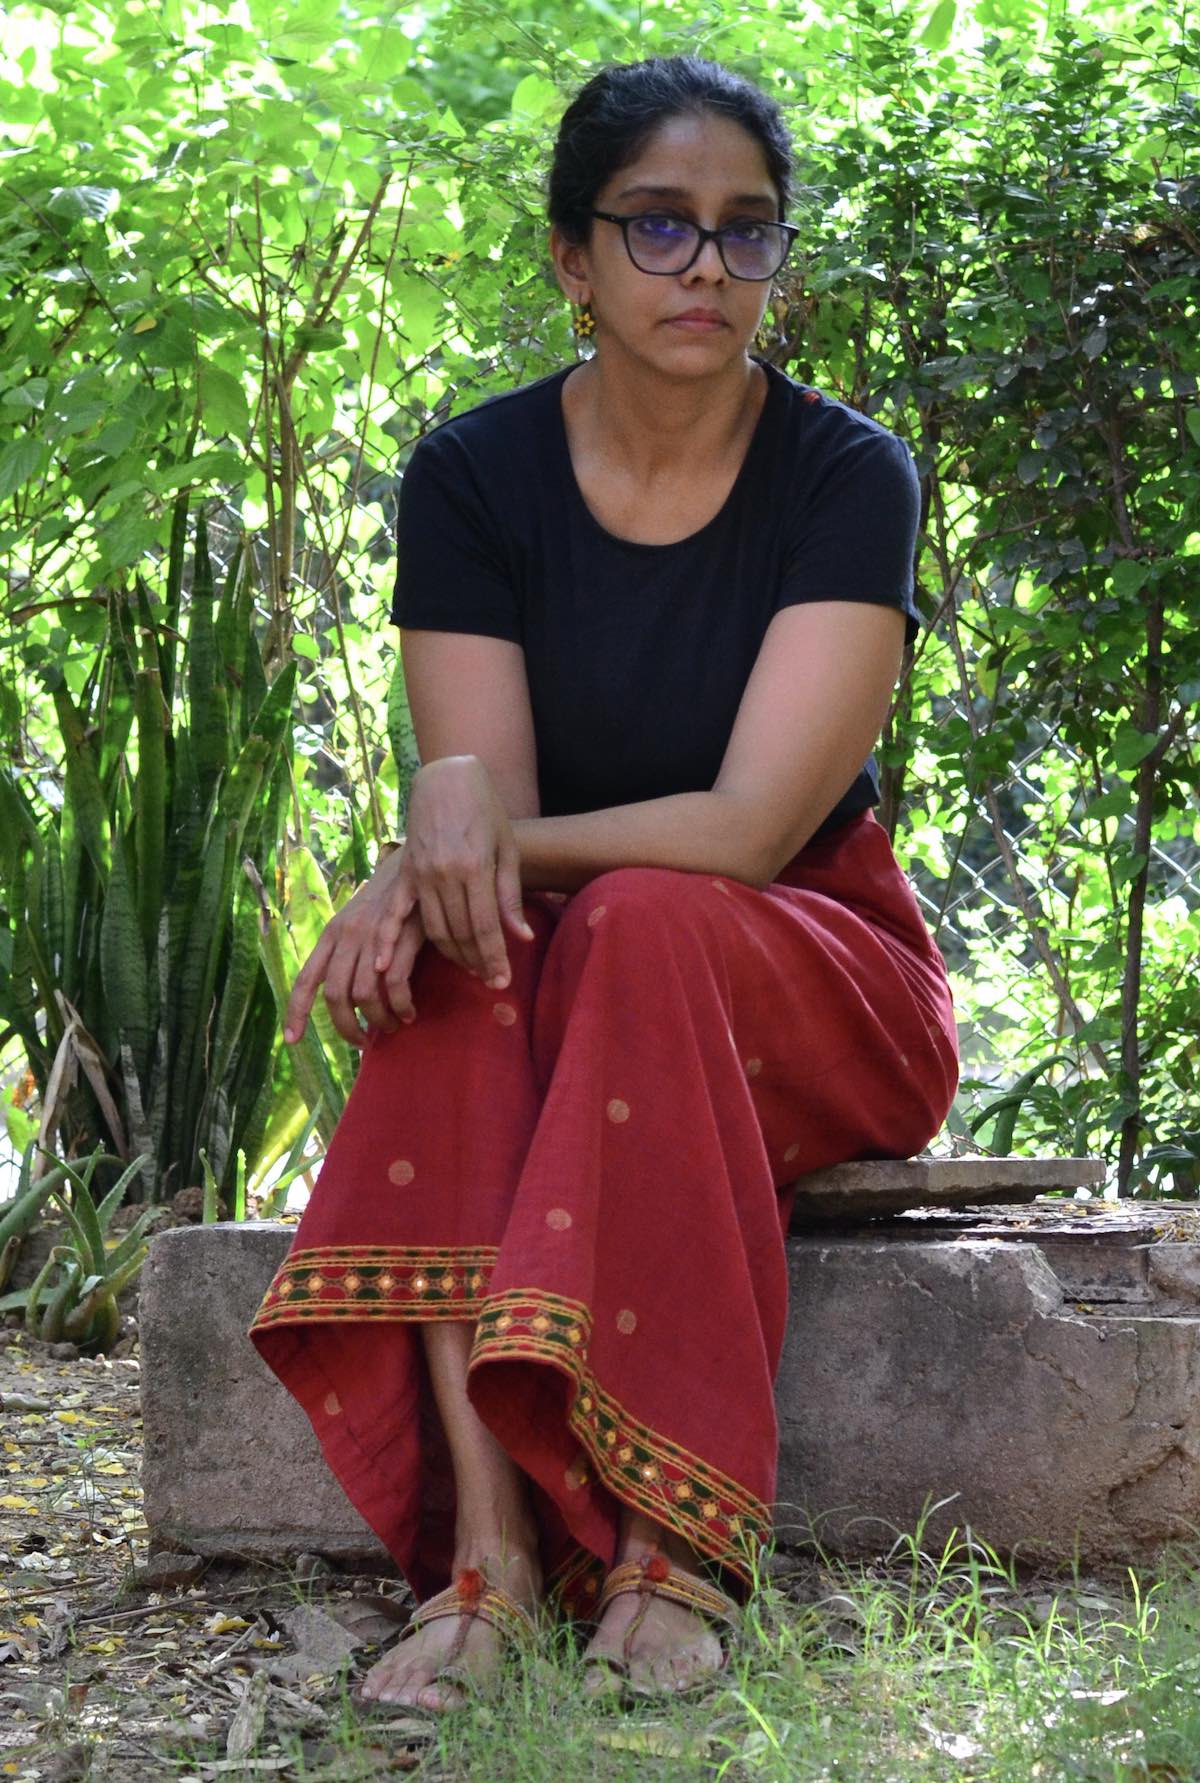
The second part that I needed to change was the length. I am 5’5″ and usually need to shorten all Liesl+Co patterns by at least 2-3″ to achieve an inseam that reaches just below my ankles. However, in this case, I did want my trousers to be a little shorter—specifically just above the knee. I looked to see what Erica (another AC member had done) with her Cannes. Based on that, I took 2″ off at the Lengthen and Shorten line and then another 3″ at the bottom hem. I did this by re-drawing a new (curved) line 3″ away from the bottom line. For reference, my hem is turned up by 1.5″ (but more about this when I speak about how I attached the border.)
Finally, besides interfacing my entire waistband, I also added interfacing to the part of the pocket stay that is attached to the side seam. I am glad I did this because of the kind of fabric I used (handloom cotton, very lightweight). It added some much-needed “weight” to hold up the pockets.
I skipped the belt loops and the sash entirely, partly because I did not have enough fabric and could not use them under a kurta.
Attaching the border: My fabric is not a border print, but I was quite attached to the idea of a border for my Cannes trousers. A few years ago, I purchased this beautiful hand-embroidered “border” in Jaipur—it had been sitting in my stash too pretty and precious to use until I knew I had found the right project for it.
A word about the “border”: Borders like these are regularly sold in fabric shops. They are used to embellish necklines, sleeves, and sometimes hems. Usually, these are sold as strips of fabric with an embroidered panel. Like this one, it is not hard to find hand-embroidered ones sold by the meter.
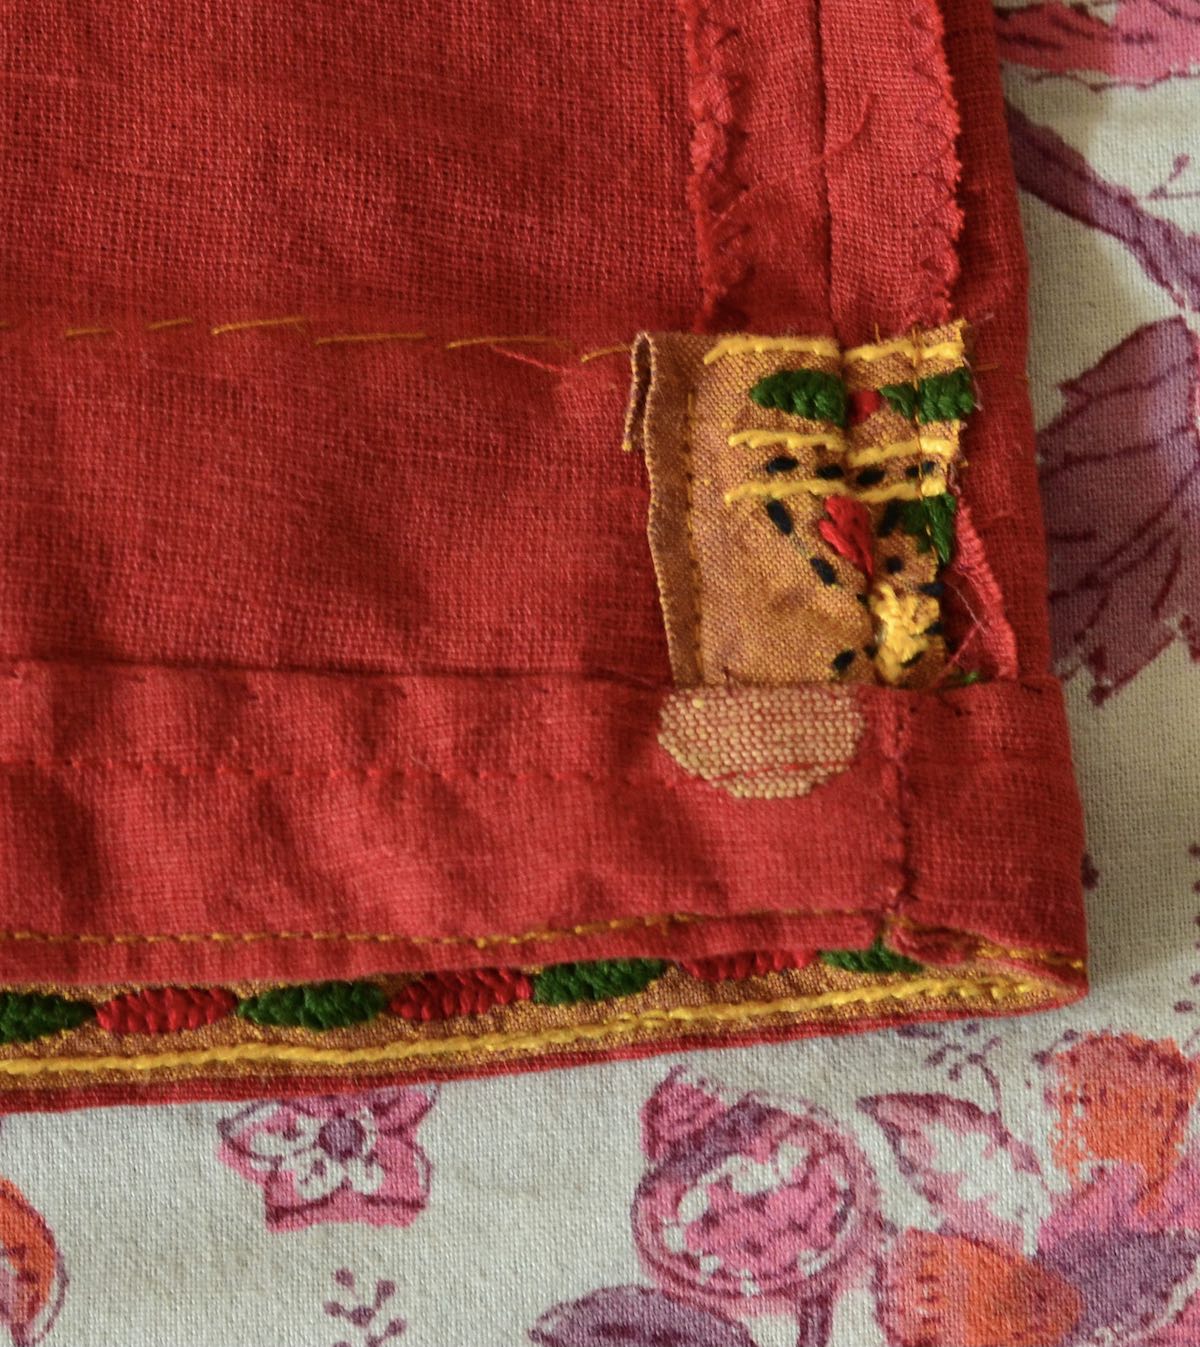
To attach the border, I did the following.
1. Folded and sewed ½” from the pants’ hem.
2. Folded this by another 1″ and basted it with a thread in a different color (white) to hold up the hem.
3. Opened the side seam of the inseam from the bottom so that I could insert my border (measuring roughly 2″ in width).
4. Sewed the bottom of the border to this folded (and basted) leg hem.
5. Hand-sewed the top border (I did not want to do this by machine because I did not want any puckering.)
6. Inserted the (short) border ends back into the opened inseam and close up the side seam as if the border and fabric are one.
7. Finally, hand-sewed the folded basted leg hem (halfway between the border’s bottom and top edge).
The suggested hem for the pants would have covered almost the entire width of the border. I did not do this because the border fabric tends to be quite heavy with its embroidery and mirror work. I was afraid that the pants’ hem would stand out too much with another layer of fabric and lose their “swirling” effect.
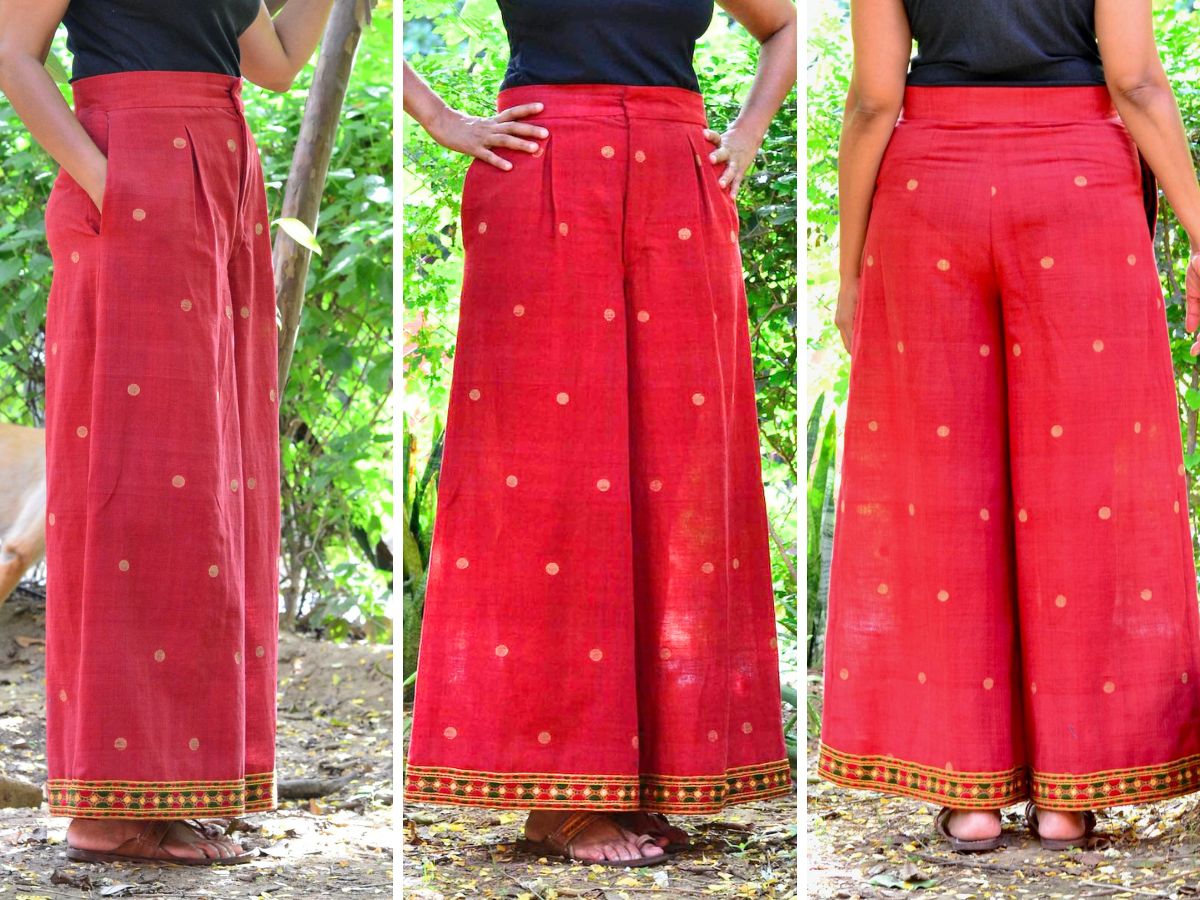
Fabric choice: Summer is when lovely border prints come into the market, and my initial idea was to make them with a border print or embroidered Shiffli fabric. As things worked out, though, I fell in love with some south cotton woven polka dots and knew I wanted to make Cannes trousers with this. To get the border print effect, I attached a border at the hem. Another point about the fabric: You may notice some creasing on the back hip area. This fabric is a loose weave and tends to relax substantially with use, and I did not want it to sag over time. While it may look like I could do with some ease, it is very comfortable, and now I need to wait until it softens and “grows” a bit.
Sewing experience: Since the last year or so, I have been ardently following the “top-down center out” (#tdco) method that @ithacamaven has proposed. For this pattern, too, I followed the same method. I cut out a size 10 for my muslin, and based on the changes made, I can say that I fall somewhere between the size 10 and 12, just as I had anticipated. The sewing itself was as lovely an experience as it tends to be with all Liesl+Co patterns. Two things especially felt so much easier this time: attaching the zipper and doing the pockets stays. This is my third or fourth pair of pants in the last two years, and it is true that practice does improve one’s technique and overall sewing experience!
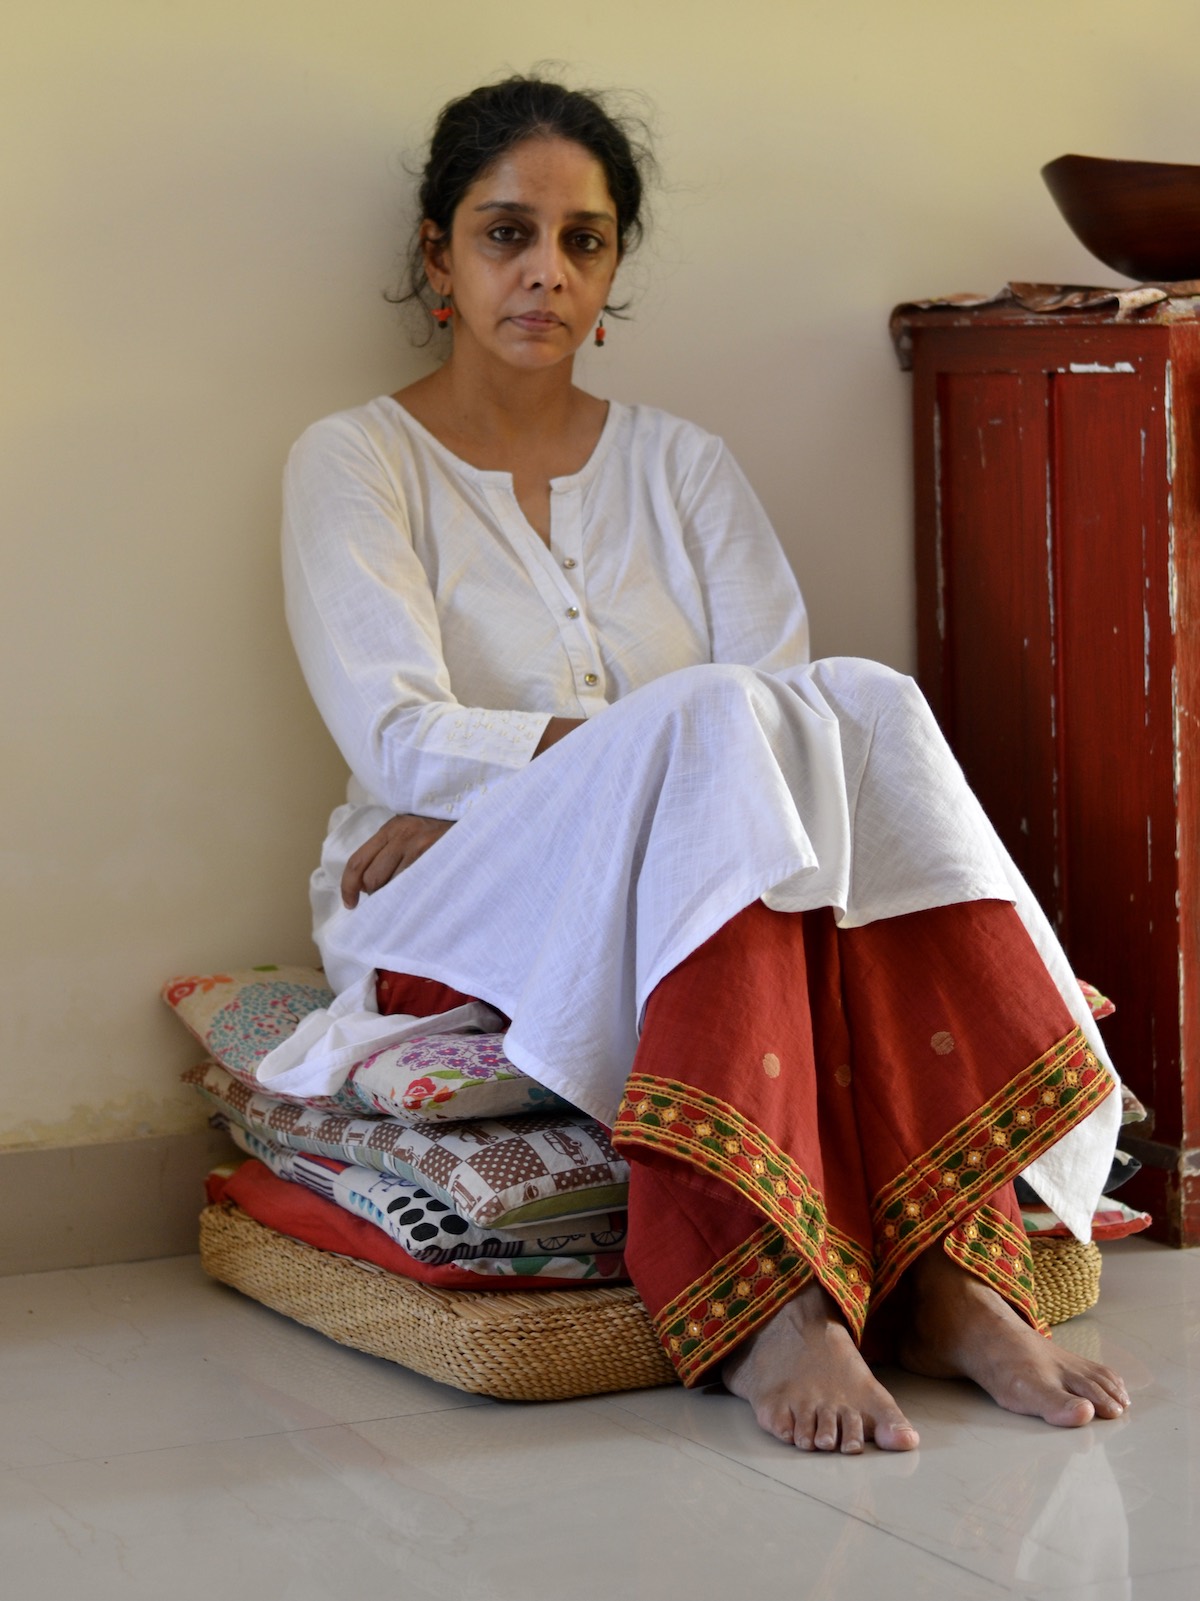
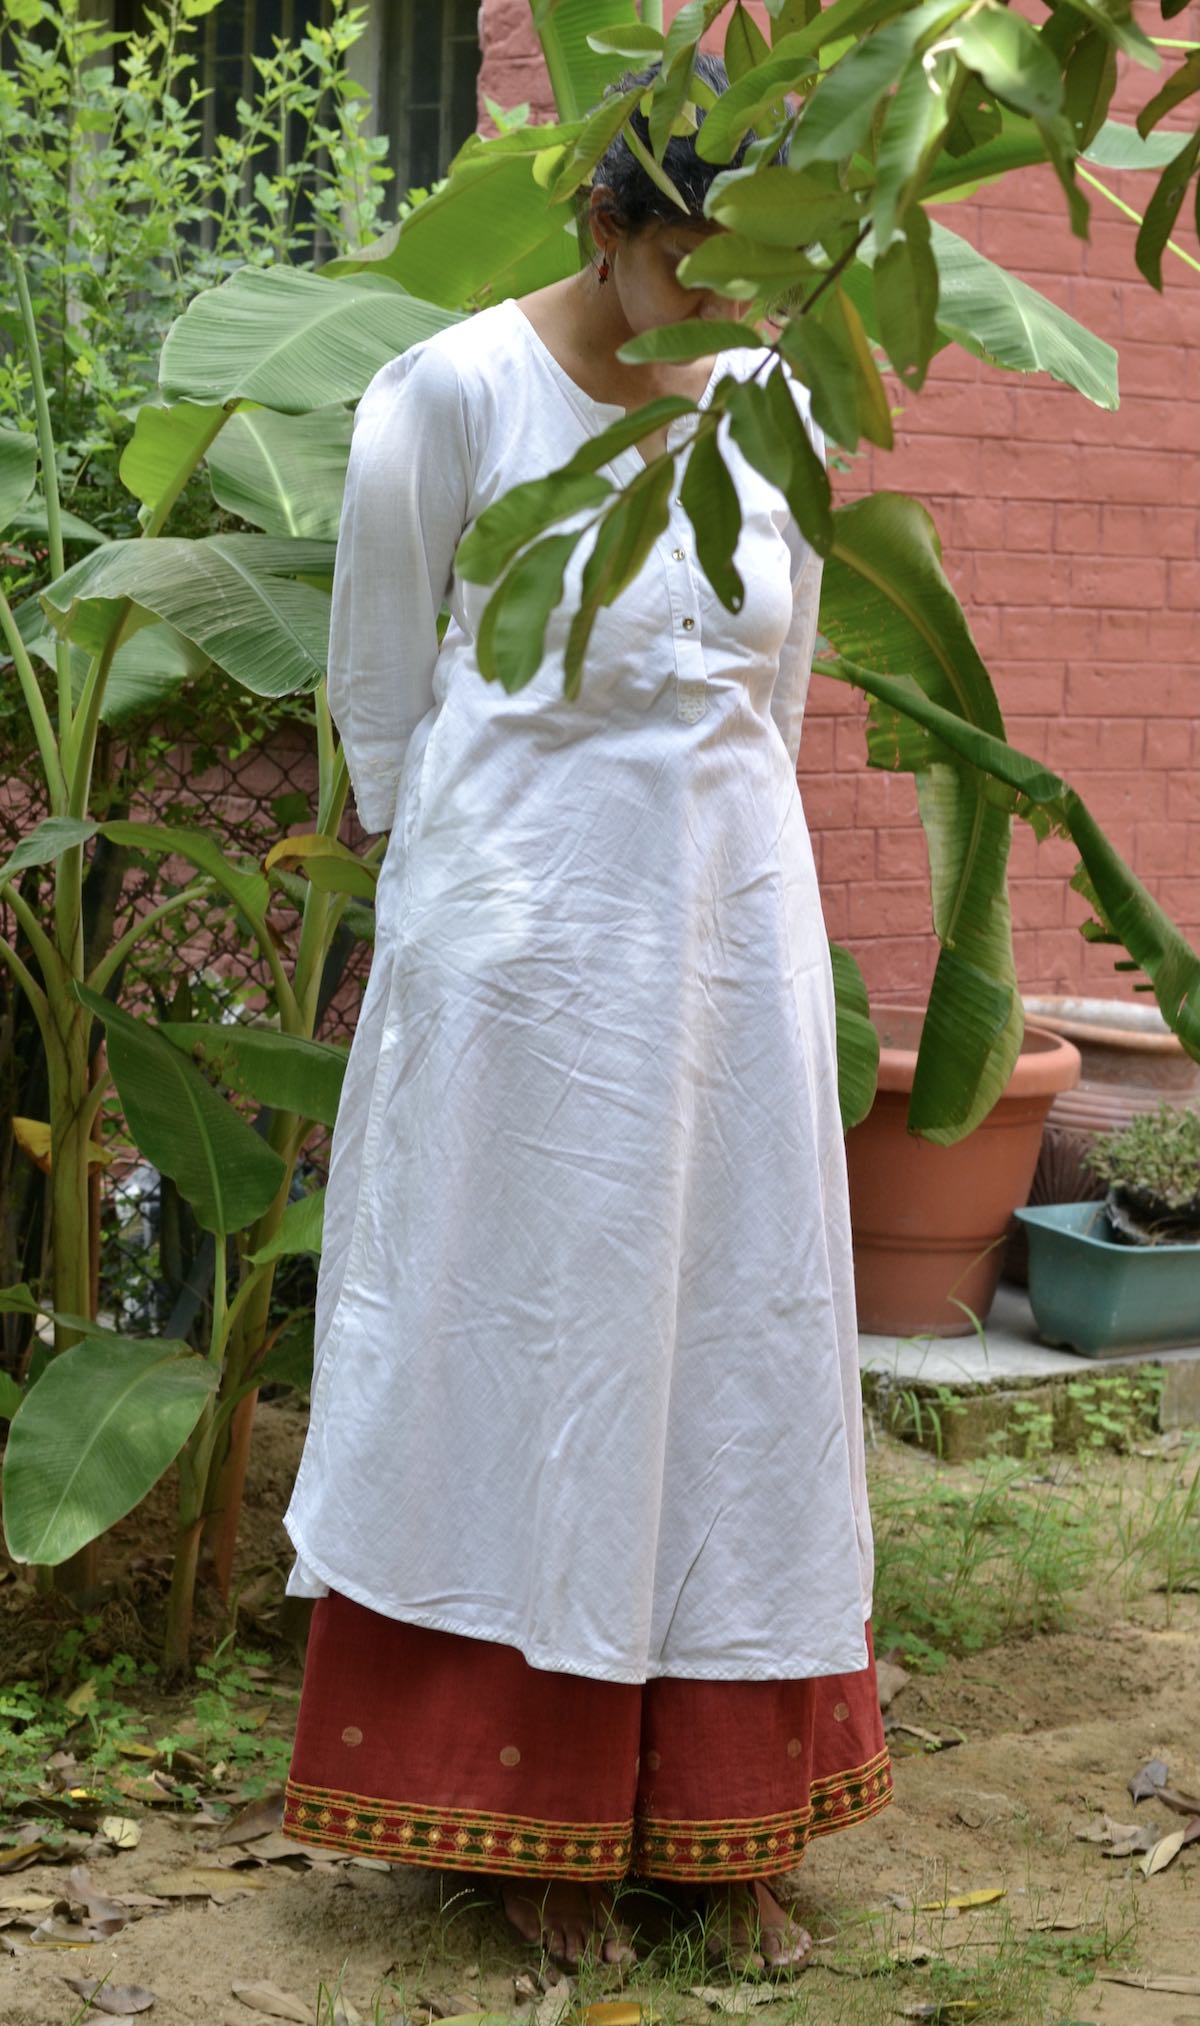
How I style it: I am happy that by sewing the Cannes trouser pattern, I was able to make a pant that I had envisioned. My big decision, sewing-wise, was whether to attach a separate border piece. Would the pants fall differently without the border? –Most definitely, I would say. The border gives it a more festive feel and, dare I say, an “ethnic” touch, and with it, the chances of me wearing them as simple trousers are almost none. Also, was it worth spending all the time and energy in making pants where the fit of the pants is not visible from underneath a kurta? I have worn plenty of ill-fitting pants under a kurta and will finally be glad to have one that fits so well. I love the fitted waist and the pockets, and call them what you will–palazzos or trousers; I see no need for buying ready-to-wear ones ever again!
Very Pretty Fabric. You did a Great job!
Thank you Dara.
These are gorgeous! You did a wonderful job to incorporate the border hem.
Thank you Erica. Your post of how you reduced a substantial amount of length helped. I think taking of 5″ at the L/S line may not have worked in the same way?
I believe that taking out all the length at the l/s line will ensure that the hem flare is the same width as originally designed, but to be honest, the flare is so wide that I don’t think there is a big difference either way it is done. It is just nice to save some fabric if you aren’t going to need it in leg length, and it is nice to have some flexibility to pick the final length once you have sewn it in the fashion fabric of choice. I took my chambray Cannes trousers on a recent trip, and I found it to be extremely versatile—I wore it with sneakers and heels!
They are beautiful!!
Thank you. The best part of sewing them was that I enjoyed the process thoroughly.
These are absolutely gorgeous and look beautiful on you. I always enjoy seeing the things you sew.
Thank you MC.
I love that you emphasize the Indian aesthetic of the fabric. I am of Indian dissent myself and love Indian fabrics, but worried that they may be too folk to wear for every day. Thank you for helping change my ideas the pants are just beautiful and seem very wearable.
I am glad you liked these Keerthi. At one point (I don’t know if people still wear them) I remember seeing these jeans with a saree border. I wasn’t much taken by them then, but perhaps something of that stayed with me. I would still like to make a pair with no trim though. These are pretty limited in terms of use, but I wanted formal, yet comfortable looking palazzos for slightly dressier occasions and I am so glad to have them now.