Our Fitting Room blog series focuses on altering patterns to fit your shape. One of the best things about sewing is the ability to make a garment fit the way you want. It’s all about your personal preference. Today, Lyndsey from the Advisor’s Circle talks about her adjustments to fit the Strasbourg Henley to her shape.

Sewing Muslins for Knits
I love sewing patterns for knit fabrics! I know beginner stitchers are often intimidated by sewing knits, but I find knits forgiving in construction and forgiving in fit. Once you get past the learning curve, I think knits are easier to sew with than wovens. And since my weight fluctuates, knits keep me wearing my handmade wardrobe longer.
I was taught that fitting knits uses the same process as fitting wovens. The muslin stage is the most significant difference in the fit process. You can use any woven fabric to sew a muslin for a woven pattern. The drape may differ from the final fashion fabric, but the fit will be accurate. I’ve used old bed sheets, muslin fabric, and pieces from my fabric stash that no longer fit my style.
Sewing muslins for knit fabrics requires attention because most knit fabrics have a different amount of stretch. For example, some knit fabrics will only have horizontal stretch, and some will have horizontal and vertical stretch. If you use a knit fabric with a lot of stretch for your muslin, but your final fashion fabric has less stretch, your garment may not fit. Not to worry! Just ensure the fabric you use for your muslin has a similar amount of stretch.
- Cut your fashion fabric into a square (for example, 4 inches by 4 inches).
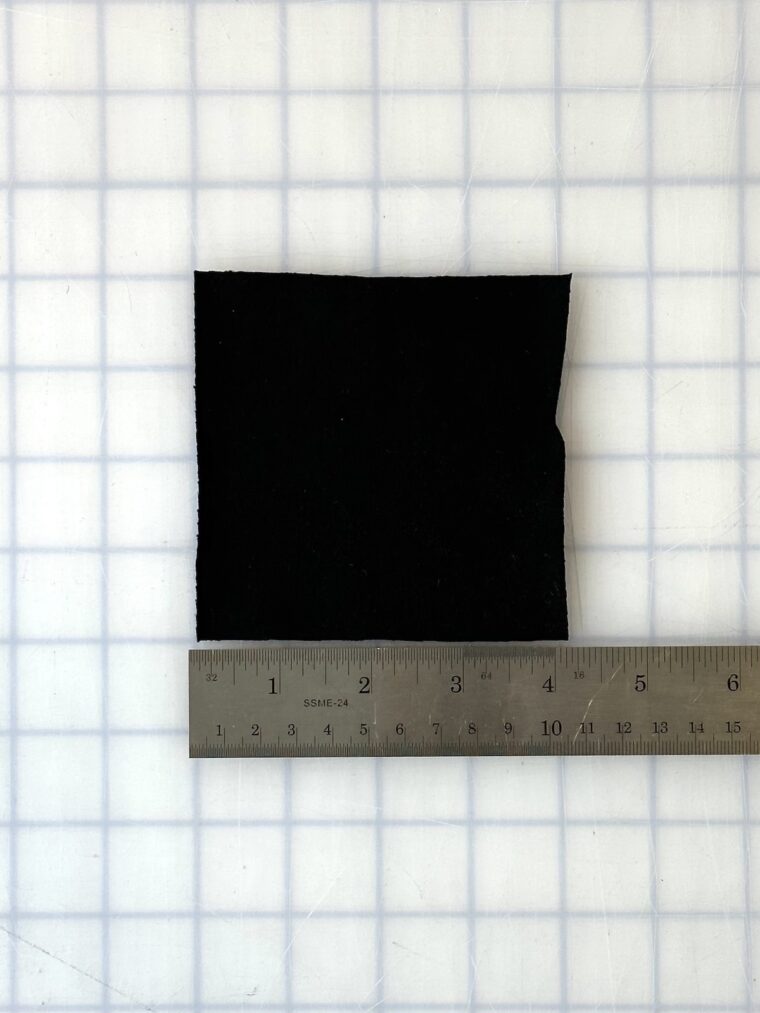
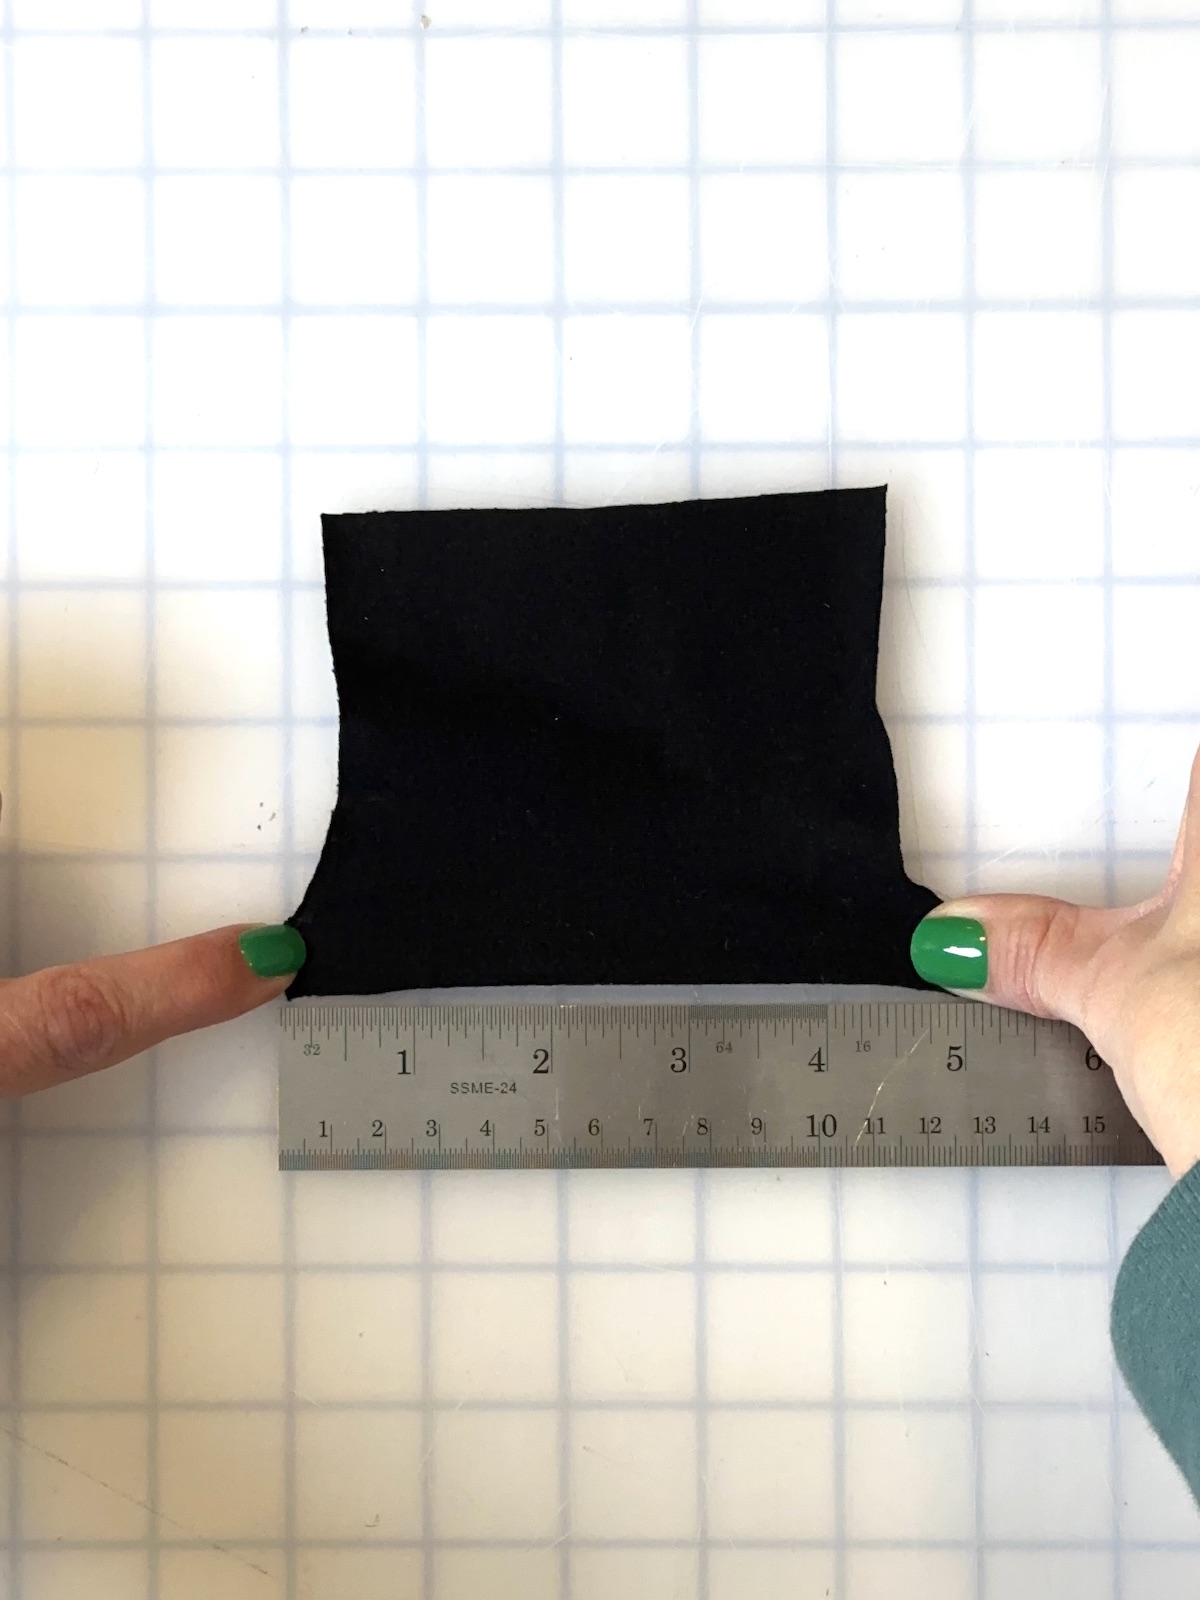
- Then stretch the sample square and measure the length of the fabric when stretched.

- Calculate the amount of stretch using this formula: (the stretched length-the original length) divided by the original length times 100. For example, if I cut a 4-inch by 4-inch square and the fabric stretches to 5 inches, the fabric has 20% stretch: (5-4)/4 X 100=20%
- Repeat the process with your muslin fabric. If the muslin fabric has much more/less stretch, then it will not be the best choice for the muslin process. However, if it has about the same amount of stretch, you are good to go!

Fitting Adjustments
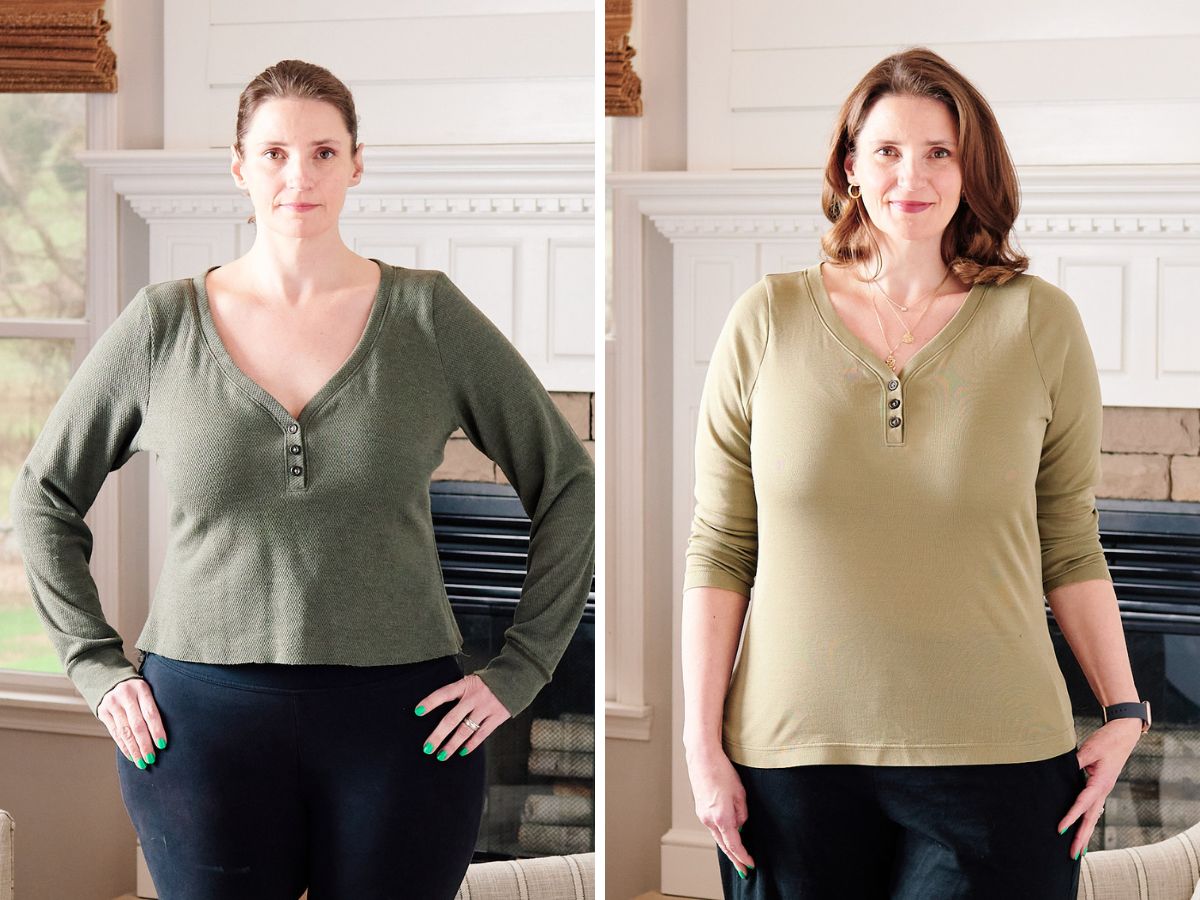
I used a waffle tee from the thrift store for the first version. I cut version B without any fit adjustments and quickly decided I needed to make alterations to fit my proportions and preferences.
As usual, I needed high-round and forward-shoulder adjustments. I usually make these adjustments to patterns due to my poor posture from working on a computer. The high round back and forward shoulder adjustments are completed first, and I used 1/2 inch for both adjustments.
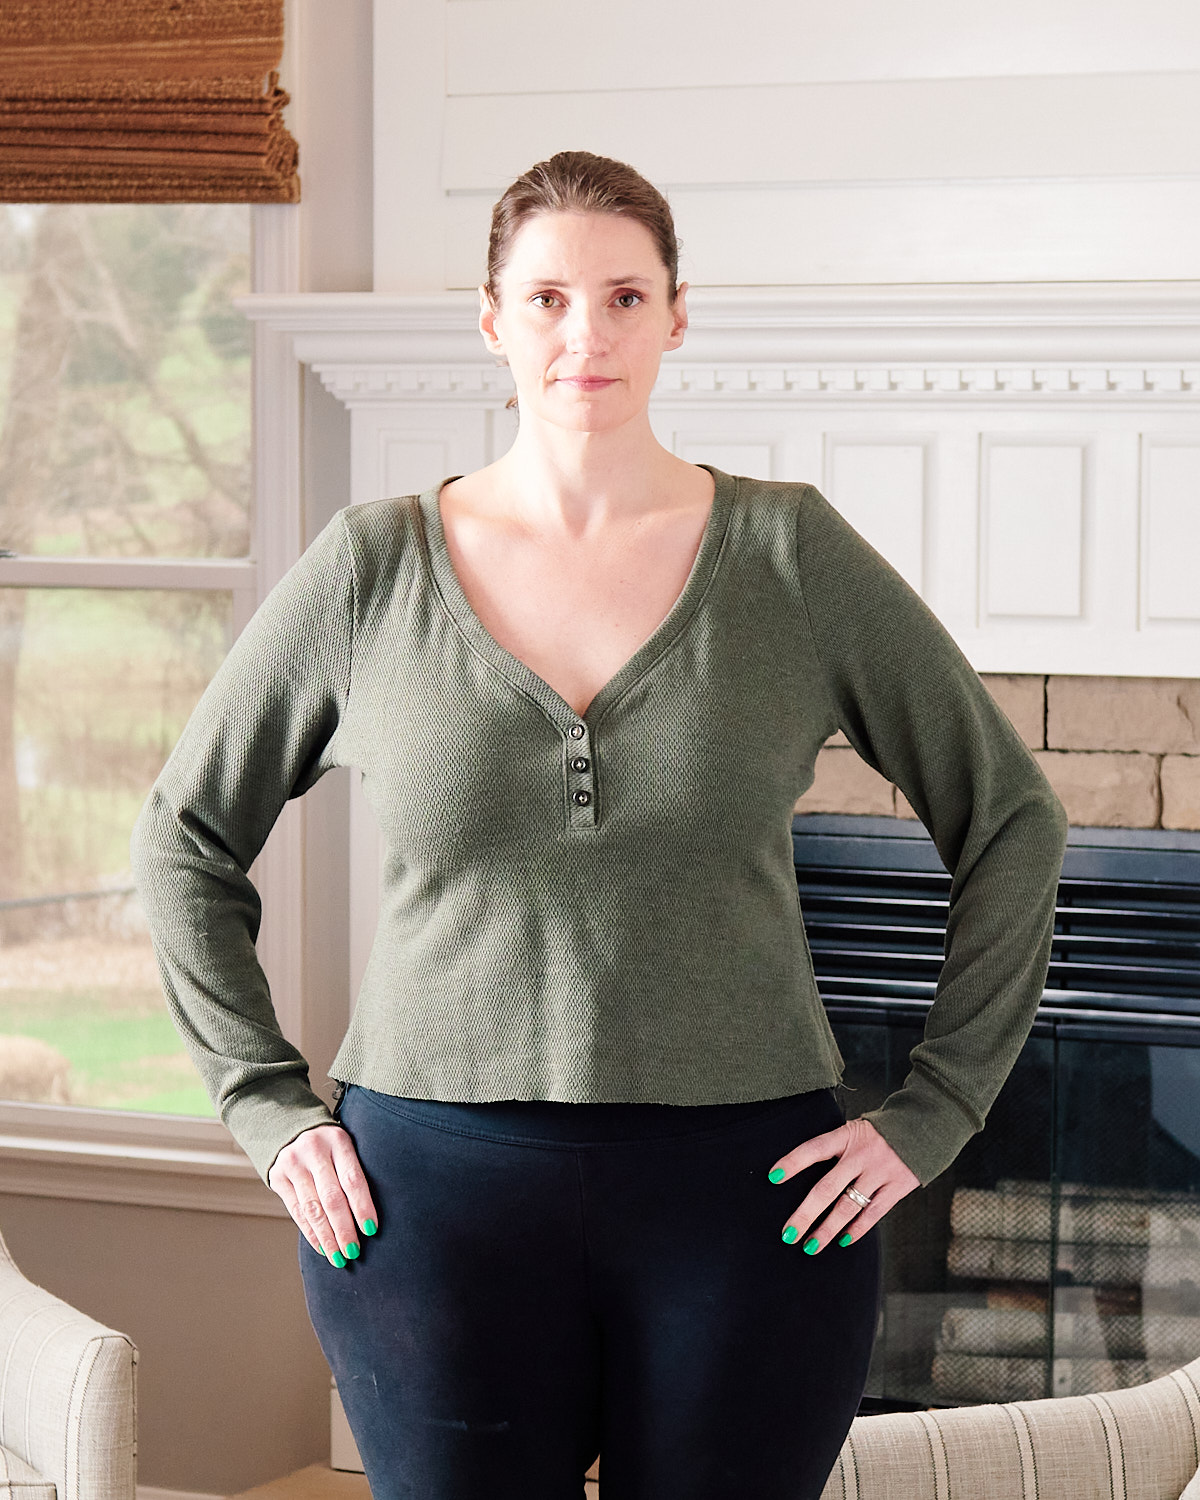
Next, the bodice length is addressed. The bodice length was shorter than what I like to wear. I hadn’t yet sewn a hem on the muslin, and the shirt was already cropped. When I’m unsure how a pattern is supposed to fit, I check the sample photos to see what the designer intended. In the product photos, you can see that the hem falls at the top of Liesl’s jeans, so this is indeed how the top is supposed to fit. However, I prefer a longer length, so I added 6 inches to the bodice length.
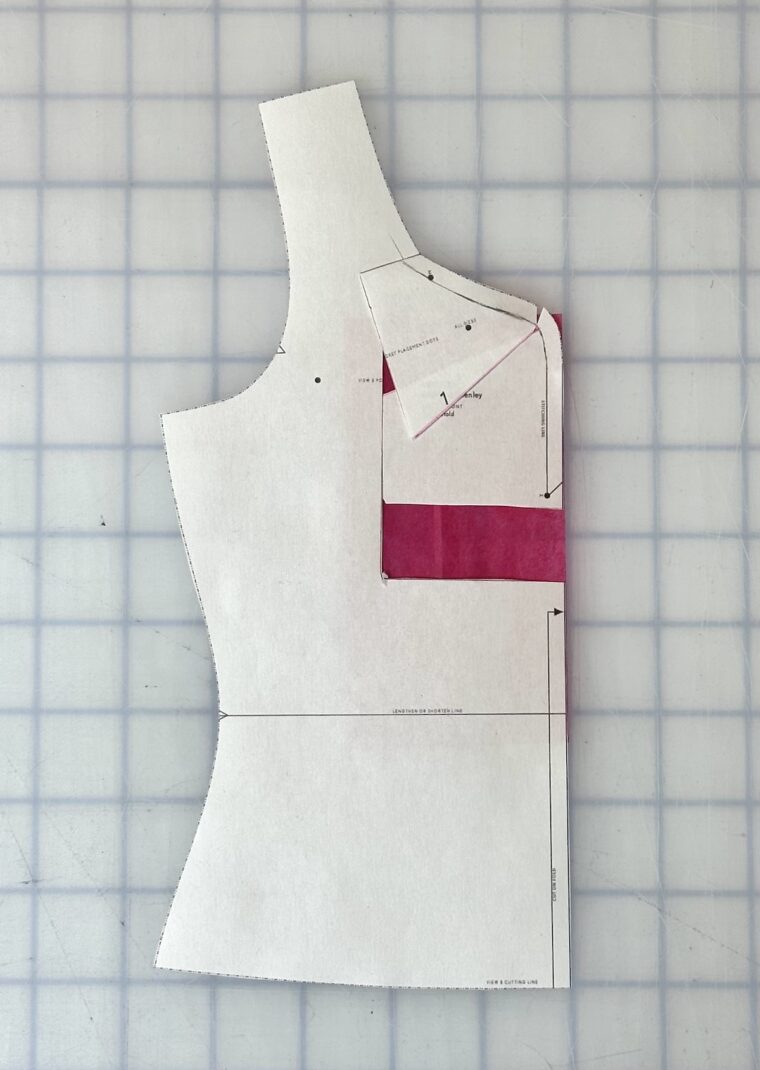
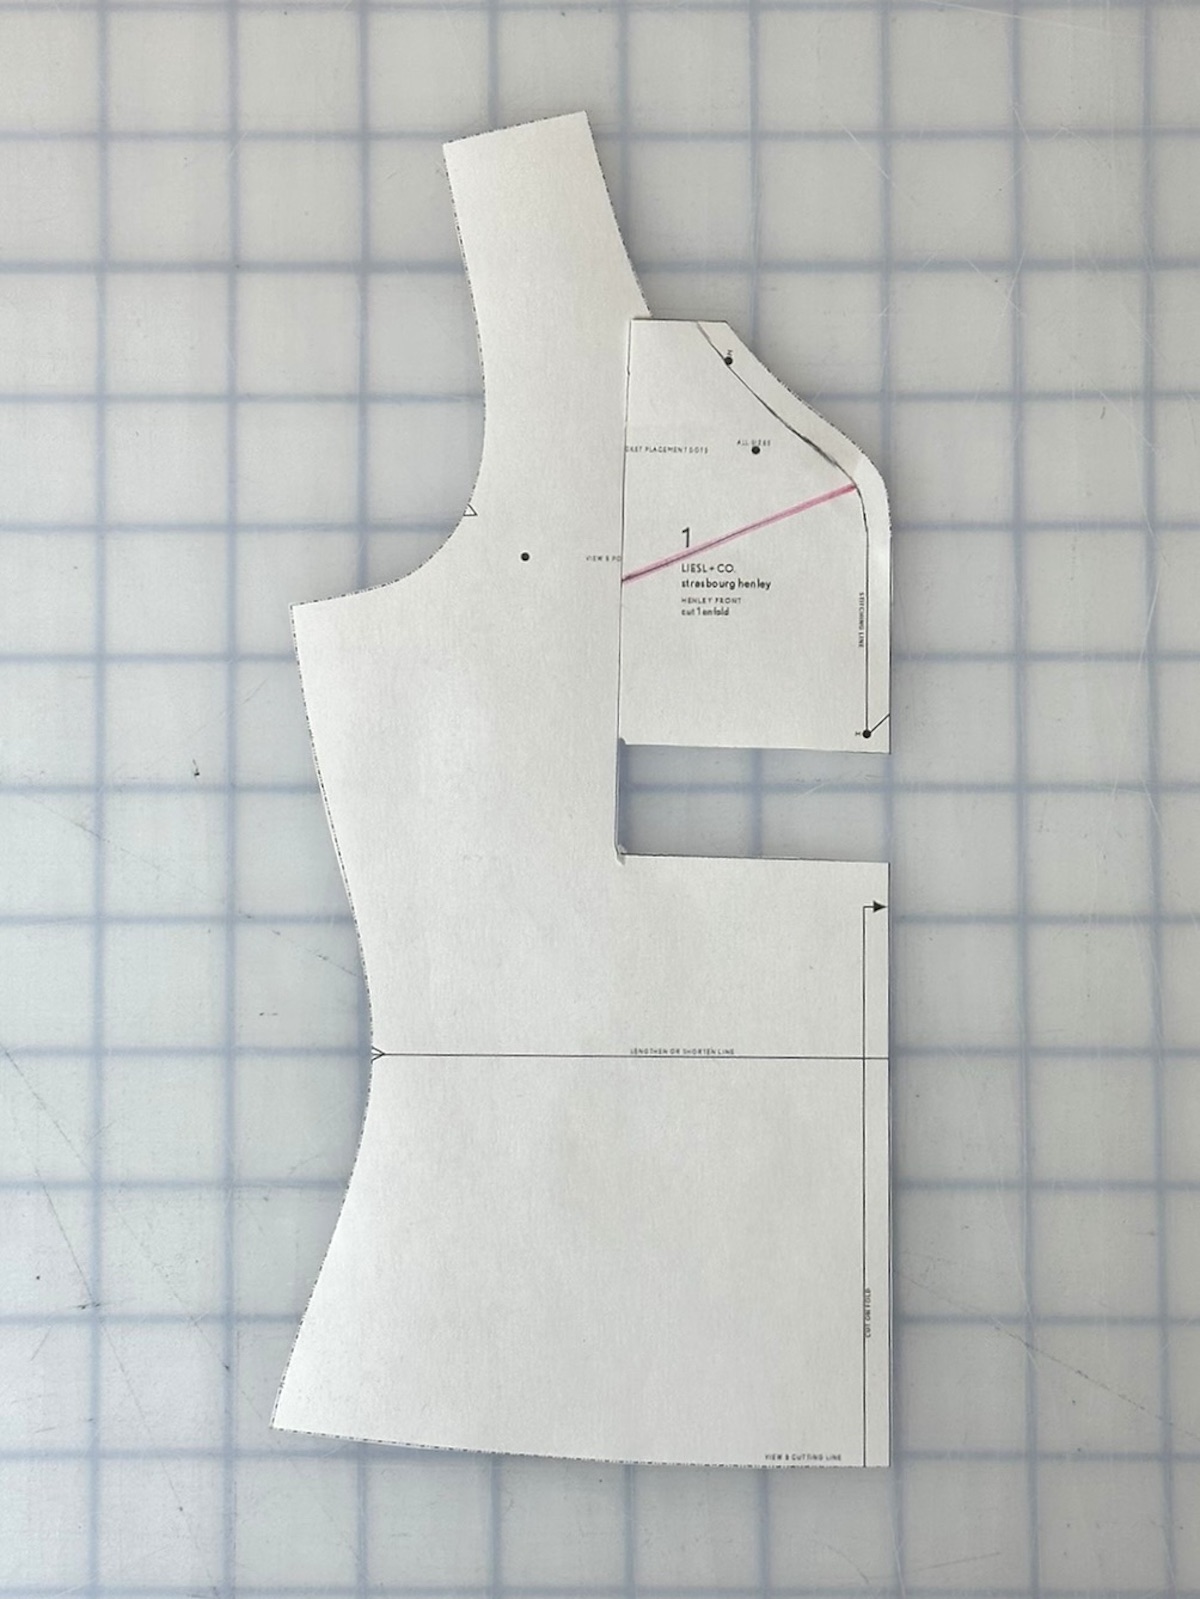
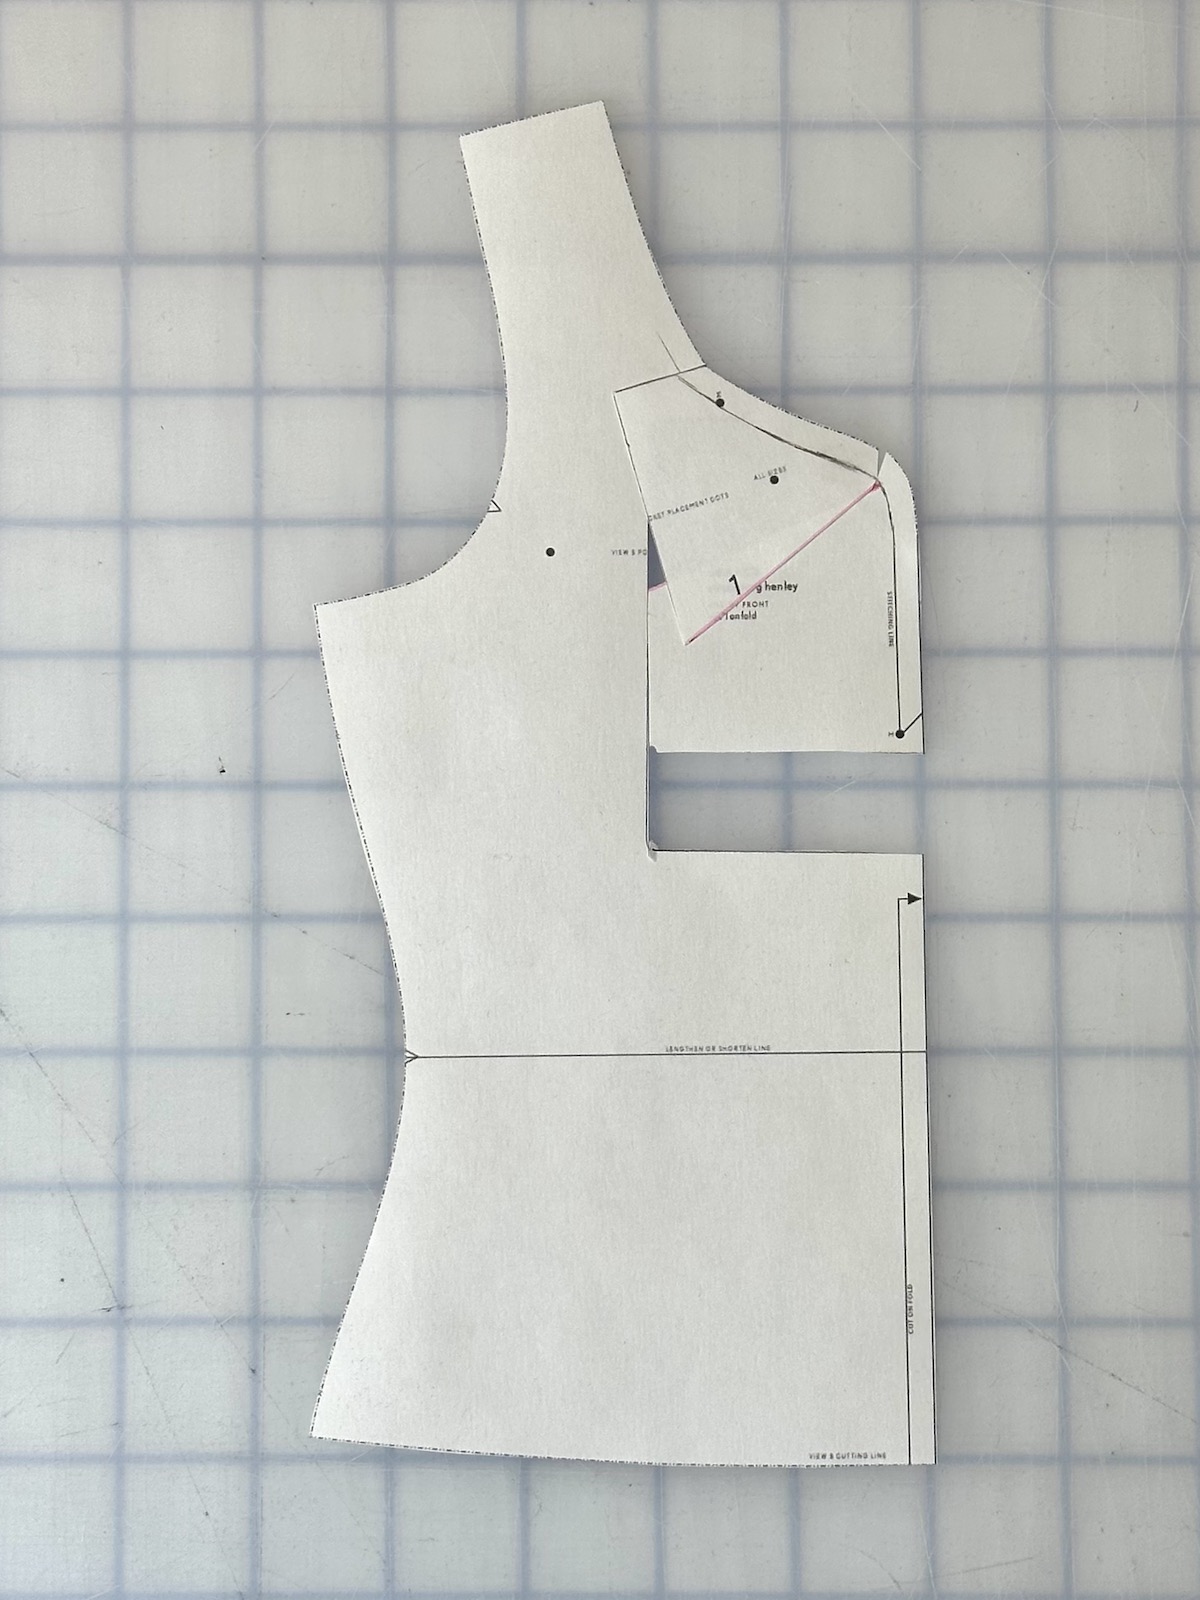
Third, I wanted to raise the neckline. I planned to sew functioning buttonholes on the Henley to have the option of wearing the shirt buttoned or unbuttoned. If I had left the original neckline, I wouldn’t be able to wear the shirt unbuttoned. I raised the neckline 2 inches. I wasn’t exactly sure how to make this pattern adjustment, but I wanted to make sure to keep that pretty curve on the center front. I used a technique similar to how a horizontal bust dart is raised or lowered.
- Draw a box around the shaped neckline at the center front and cut out the box.

- Raise the box the desire amount.

- True up the neckline by slashing a line (pink) from the one side of the box to (but not through) the stitching line. Rotate the edge of the neckline until it blends seamlessly with the original neckline.
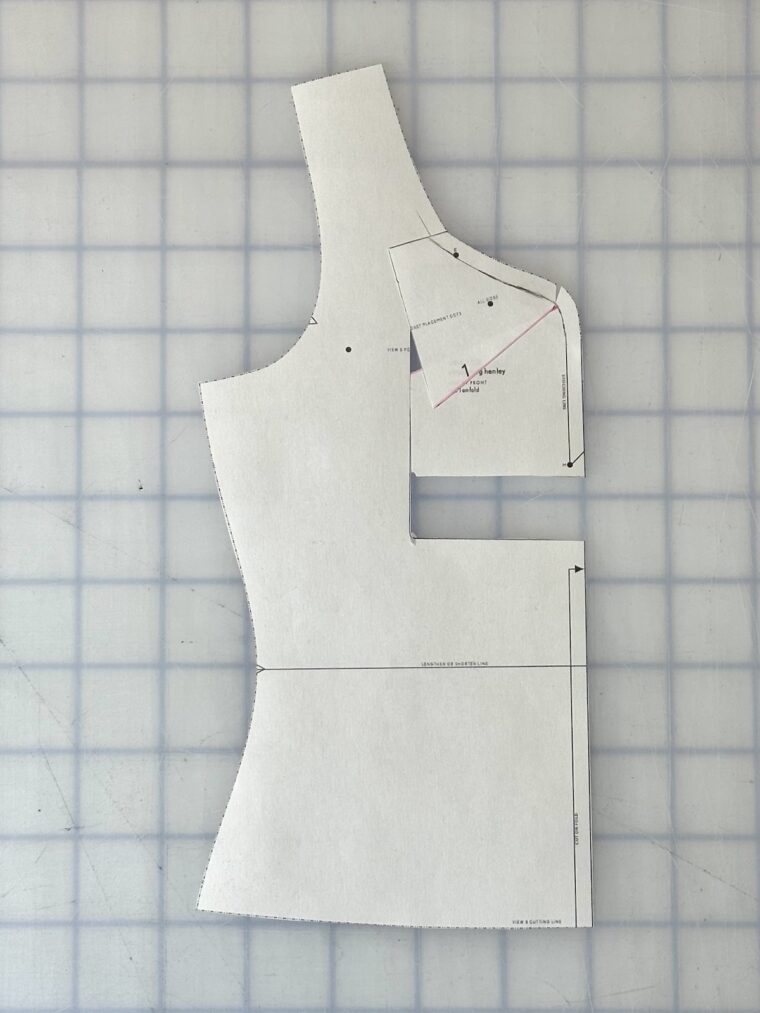
- Add paper under the open space and tape all pieces to secure the pattern changes.


Finally, the sleeves were longer than I usually like in long sleeve shirts. I removed 1.5 inches from the sleeve length.
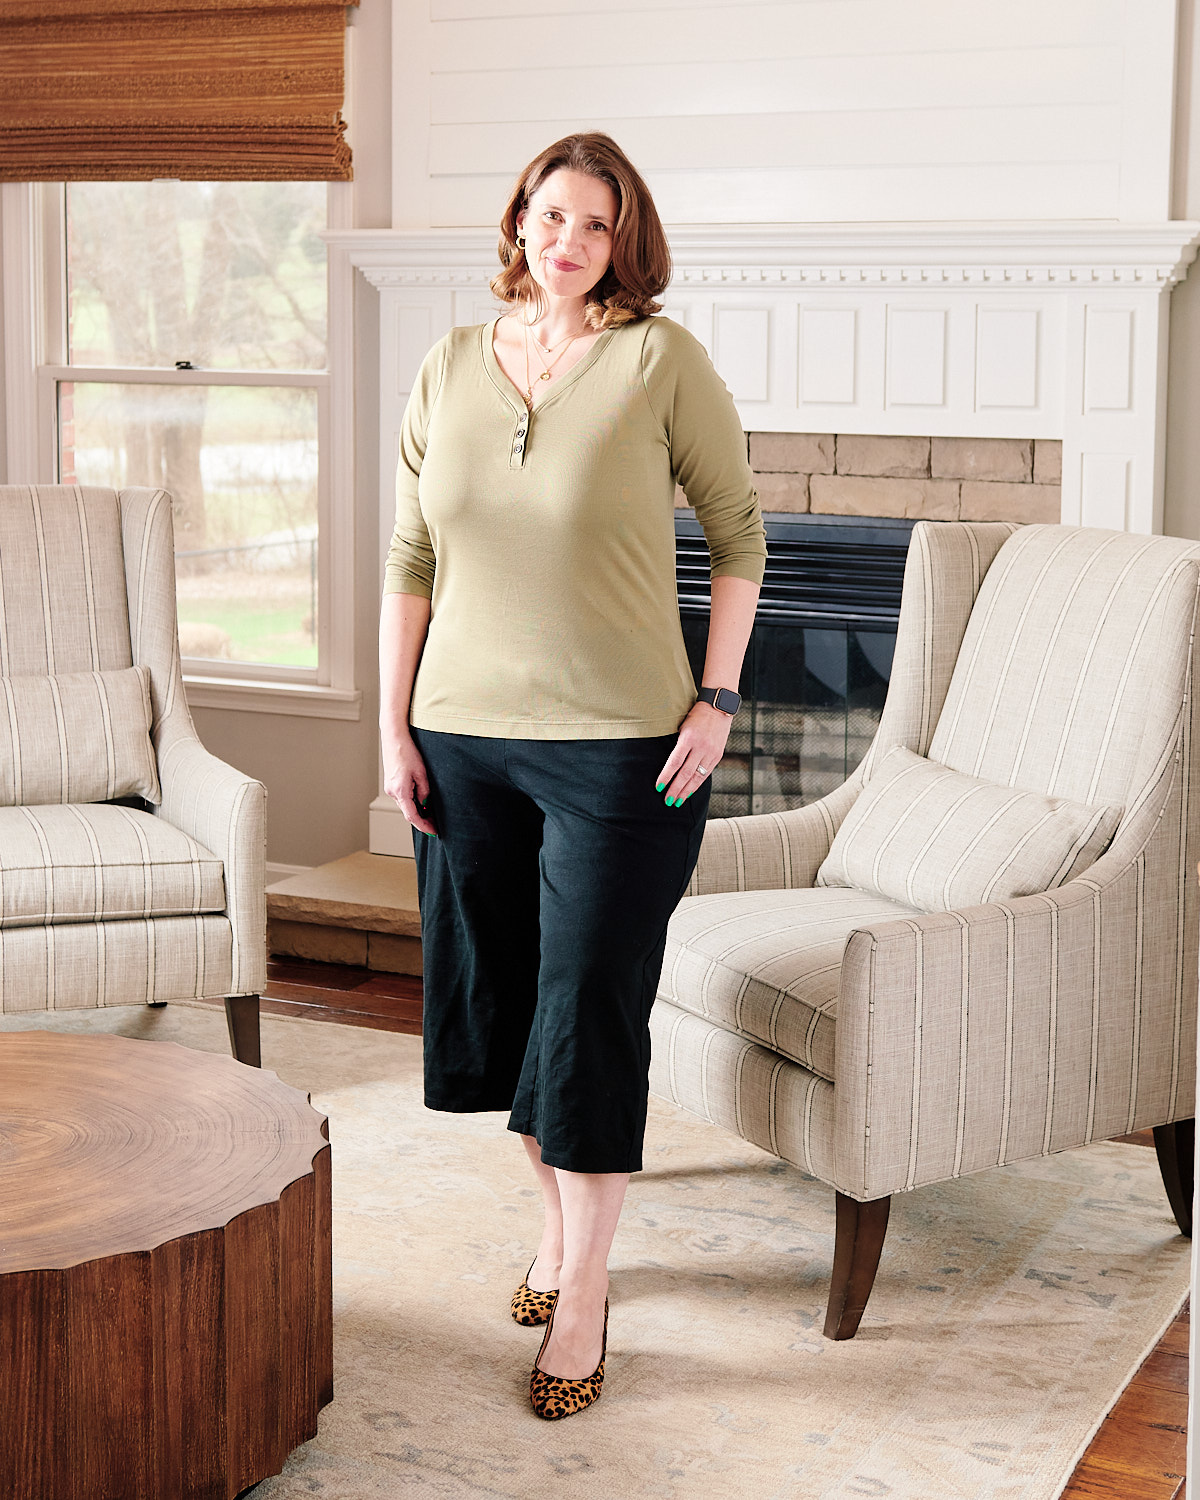
Final Version
I love how the final version turned out!
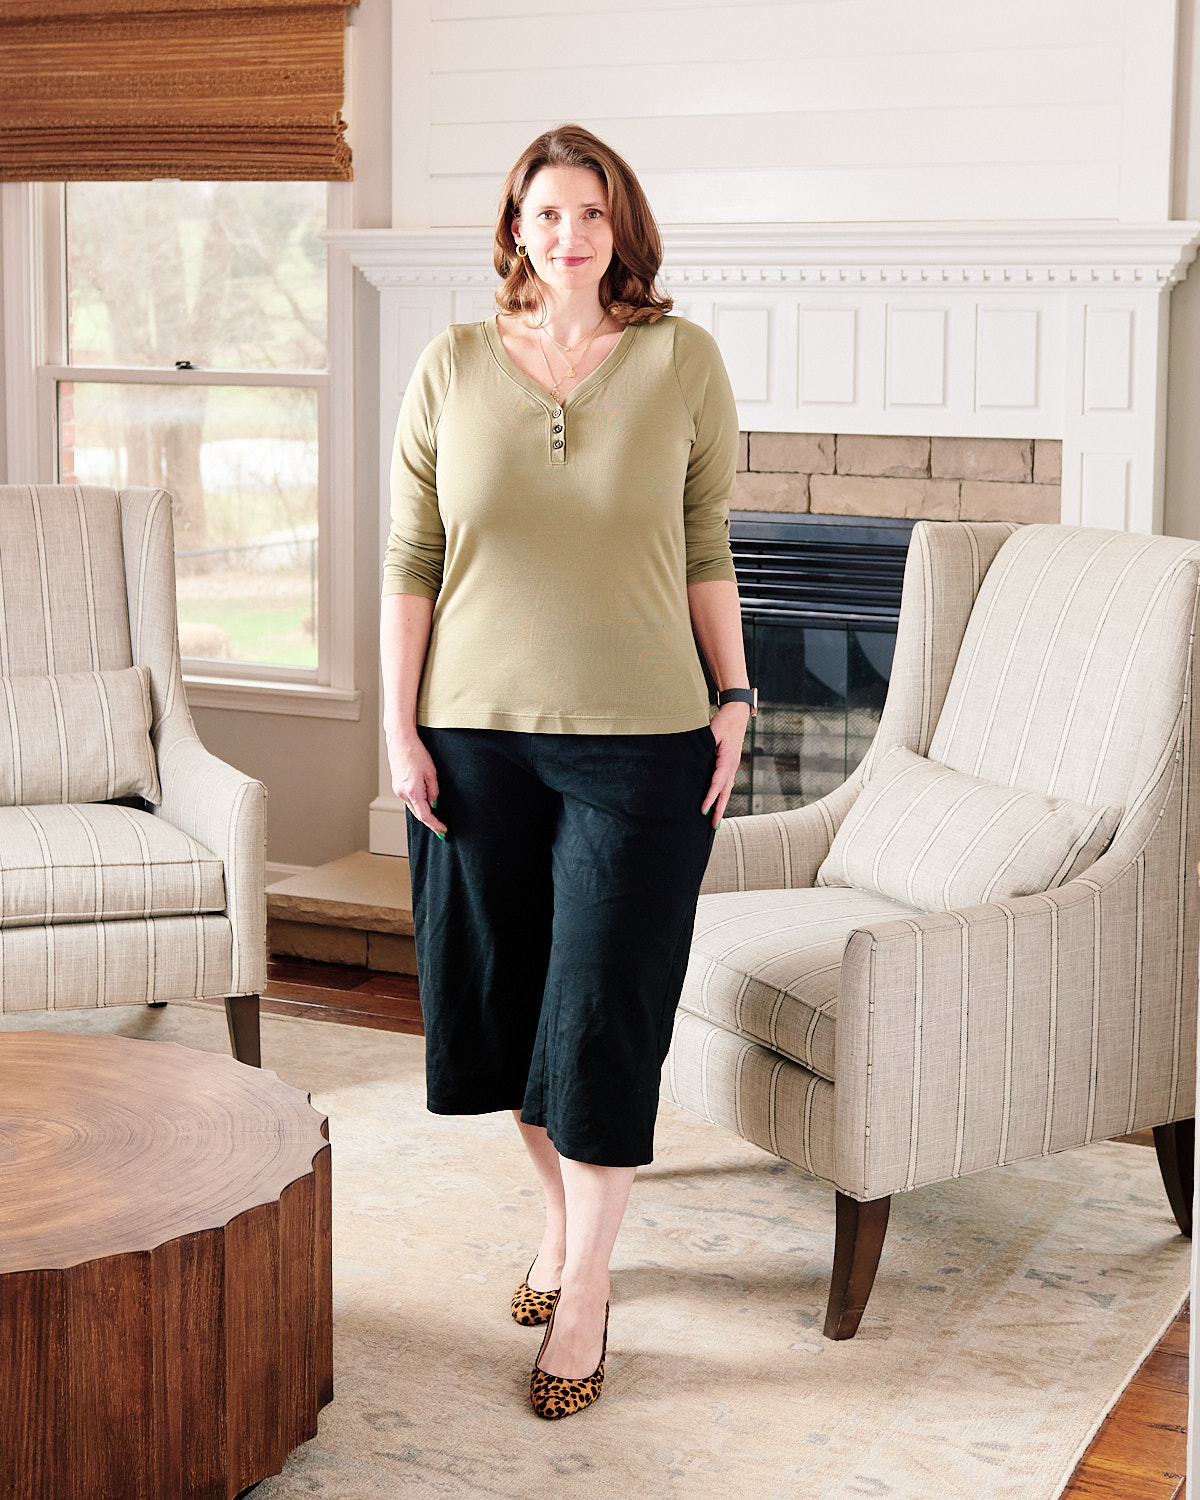
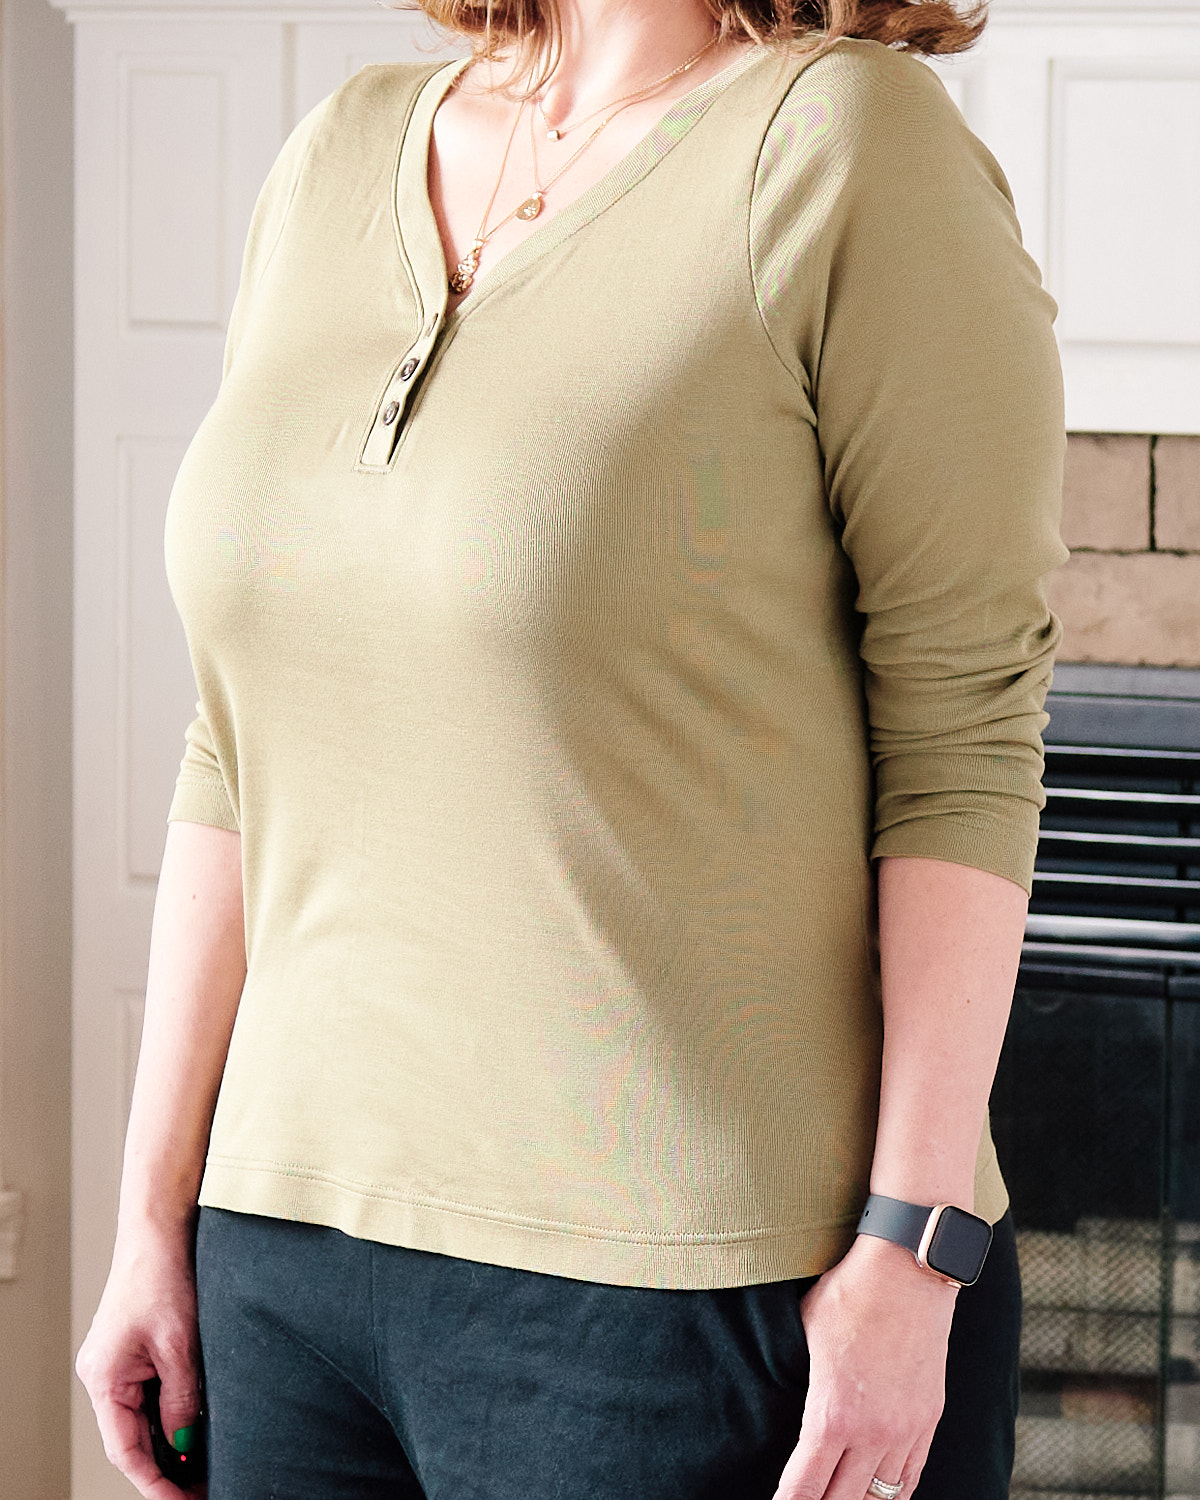
I will most often wear this henley buttoned-up, but I like having the option to wear it unbuttoned for a more daring look.
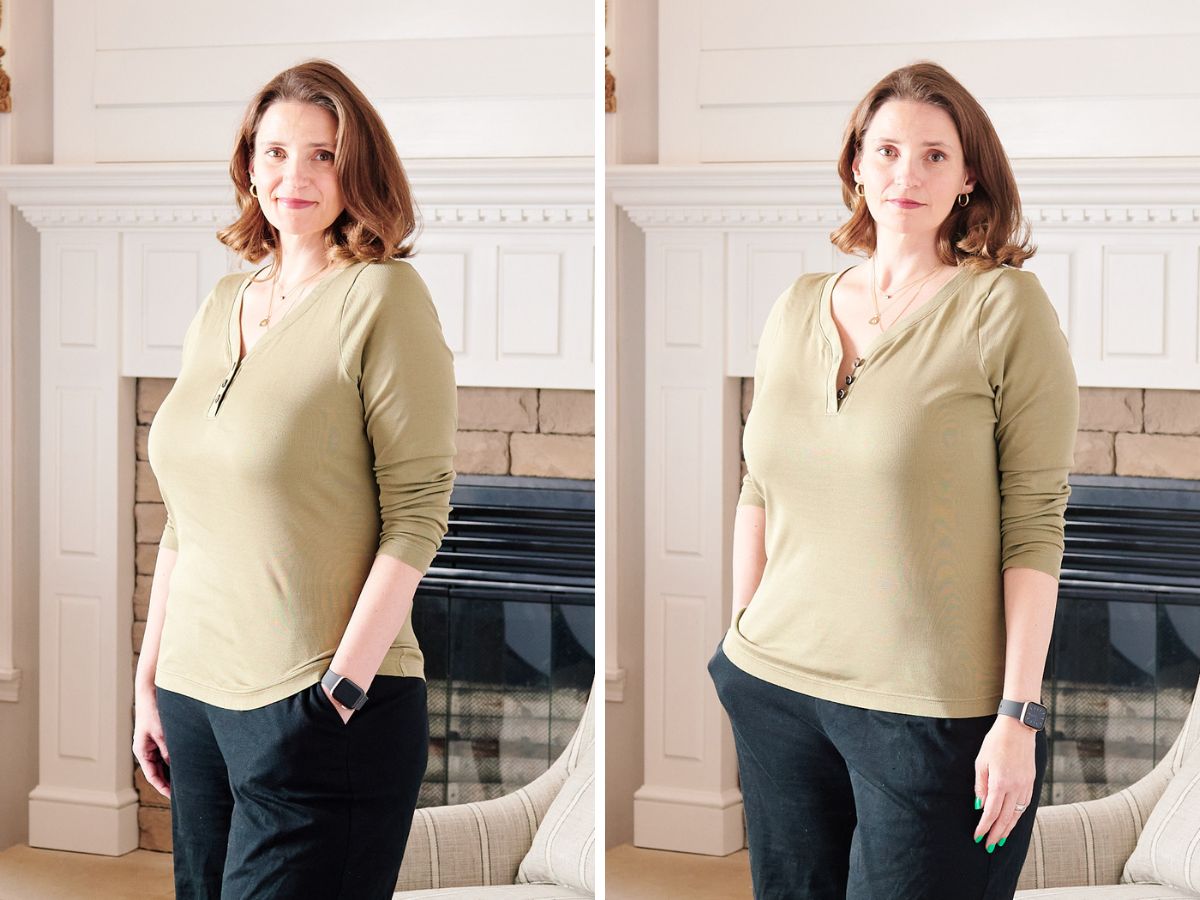
The additional bodice length and raising the neckline produced a more pleasing garment for my proportions.
Future Adjustments
I will definitely be sewing this pattern again, and I will continue to enhance the fit in future versions. Even though I know better, my fashion fabric for this top had much less stretch than the fabric I used for the muslin. I fit the pattern while I was waiting on my fabric to arrive in the mail, and I wish that I had waited to do the fitting until I had the fabric in hand.
Where this caused the biggest problem was in the sleeve fit. There are two different issues going on here: fabric stretch and the need for another adjustment.
You can see the muslin fabric had so much stretch that I initially thought the sleeve was too wide. In the final version, the sleeve is snug. I actually would like fabric that is in the middle.
As for the sleeve fit, I think what is going on here is that I need a broad-shoulder adjustment. You can see the diagonal drag lines sloping up towards the shoulder.
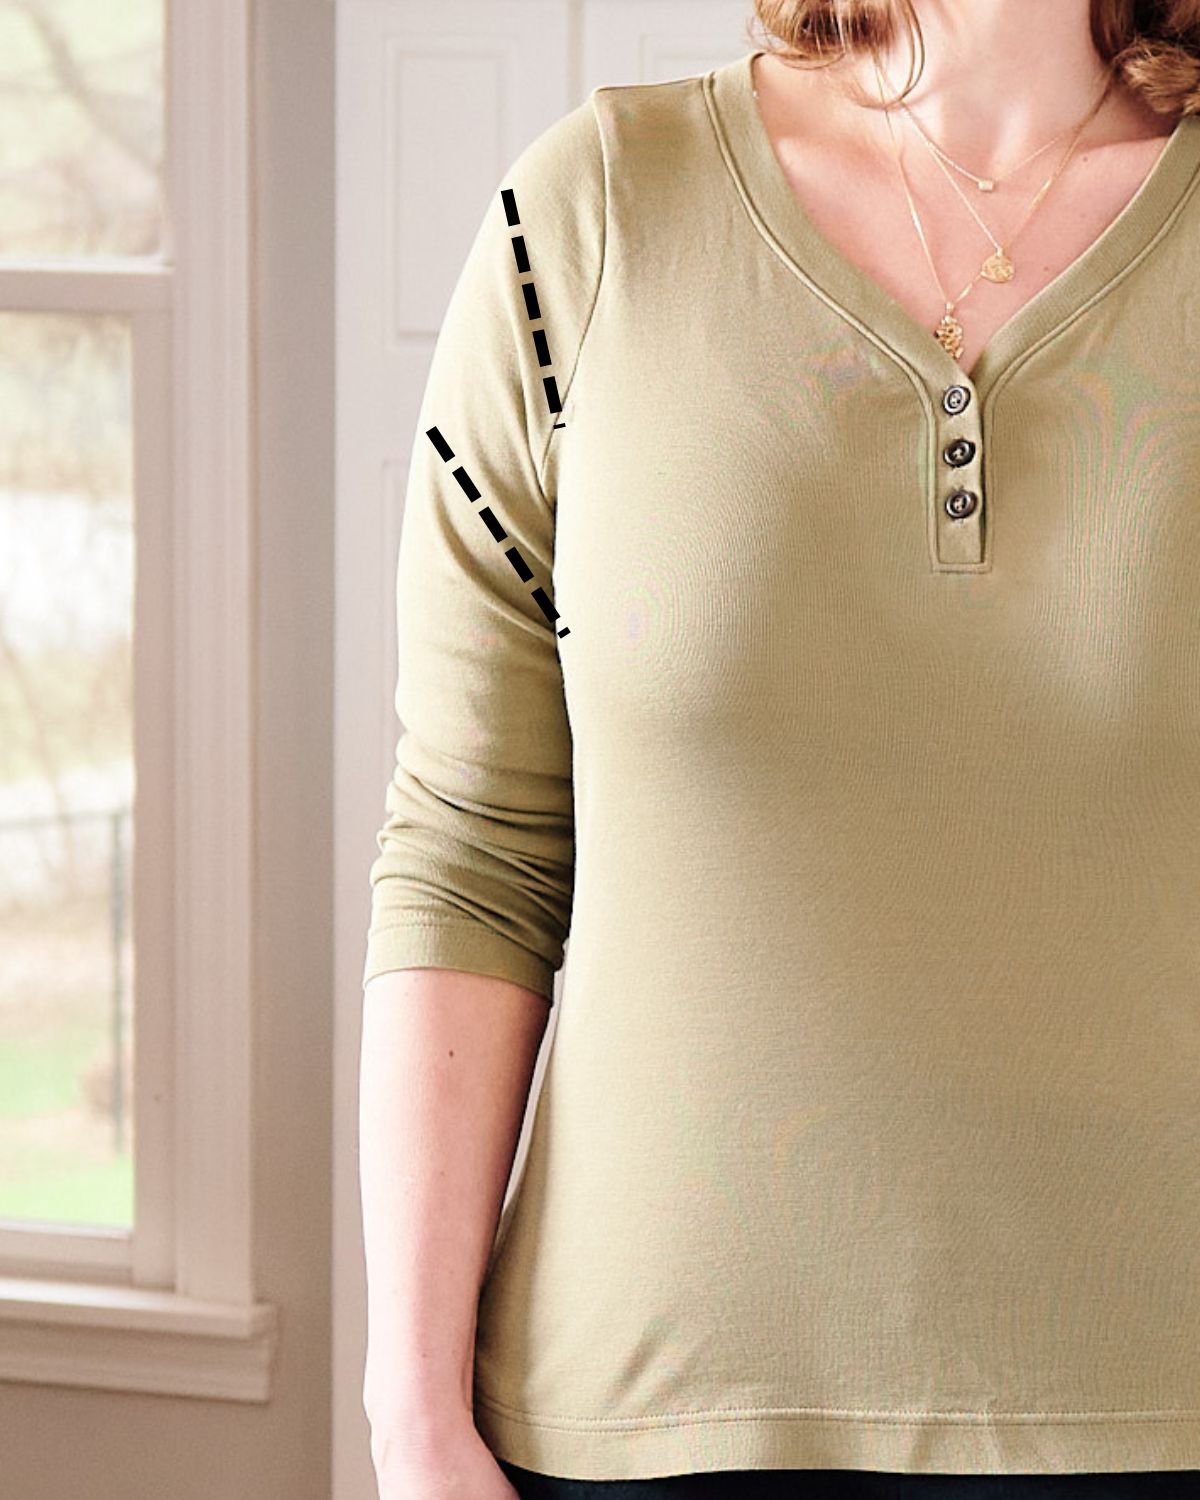
When I see drag lines like this on a garment, I usually need to raise the sleeve cap or I need a broad shoulder adjustment. I don’t think the sleeve cap is the problem here. I think that if I add 1/2 inch to the sleeve width, then the sleeve will release those drag lines.
It’s difficult for me to translate into writing why that would be, but I’m hoping this picture will help.
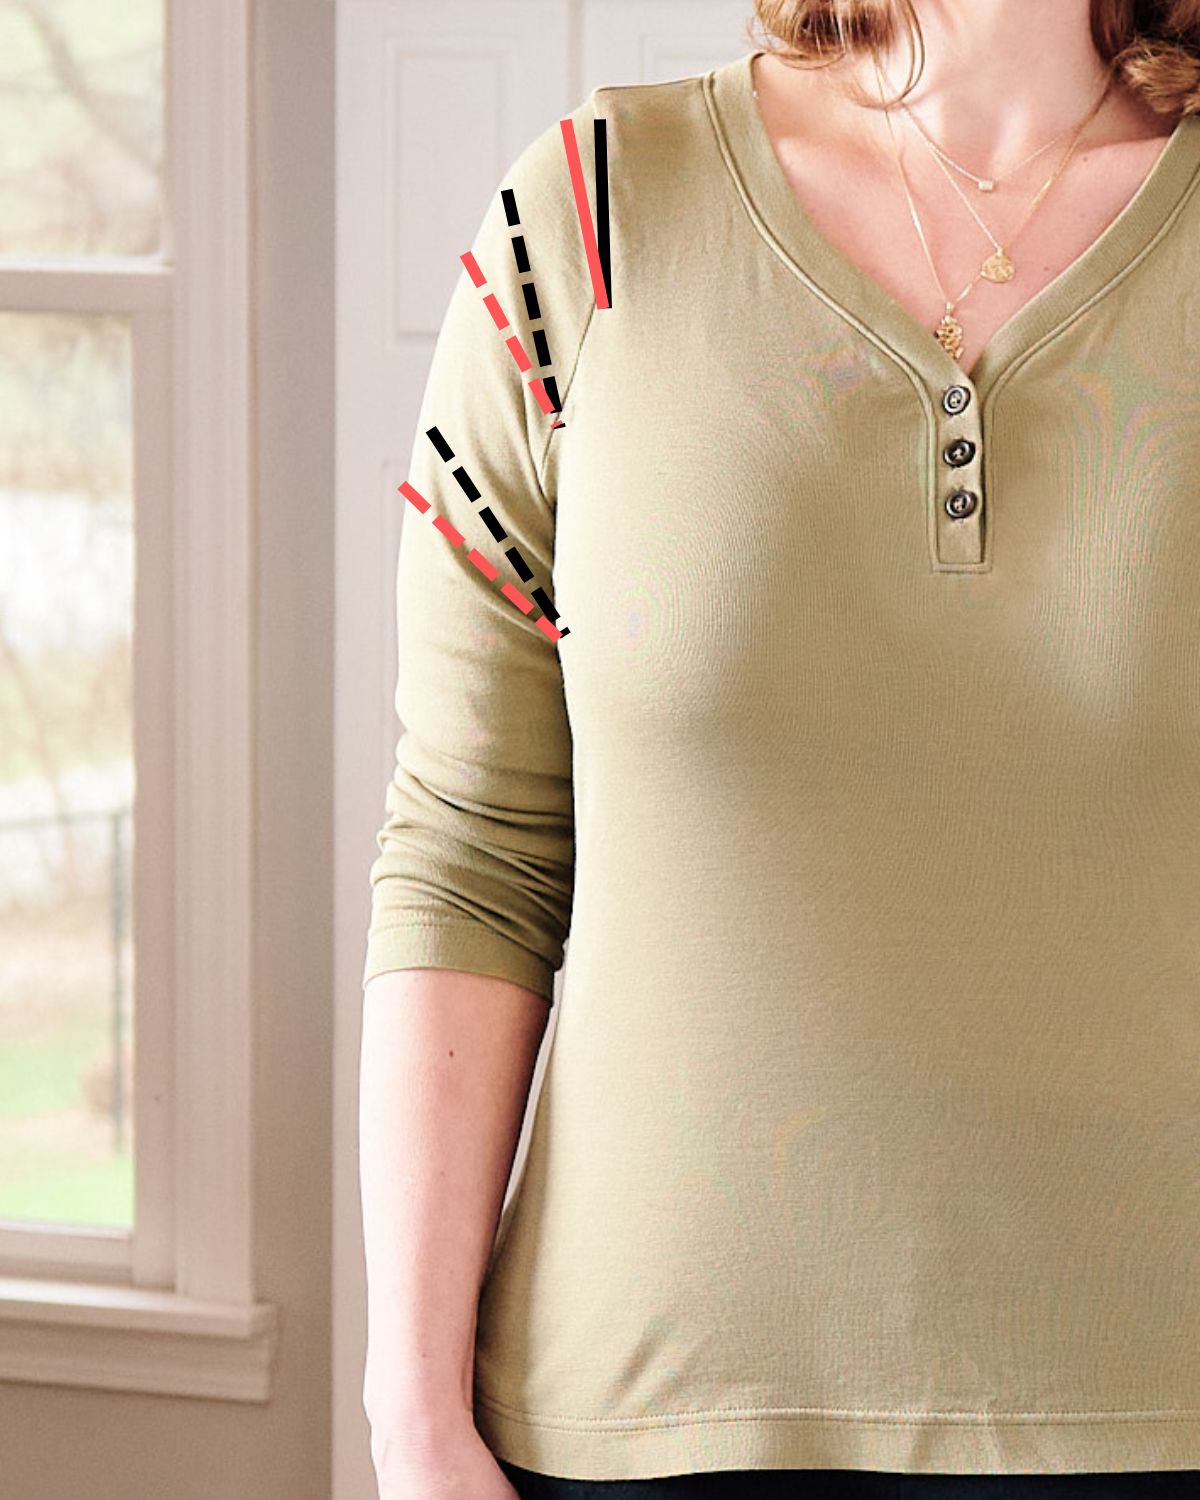
When you broaden the shoulder, the fabric on the outside of the sleeve all moves “down” but the inside of the sleeve (where the sleeve seam lies) remains the same. The black solid line is the original seamline between the sleeve and the armscye. The red solid line represents the new seamline after the broad should adjustment. Therefore the drag lines (black dashed lines) will start to level out (red dashed lines).
Another way to think about this: if I ripped out the stitching on the sleeve above the notches and let the sleeve hang loose on its own, it would naturally fall so that the bicep line is horizontal. Then, the distance between the sleeve stitching line and the armscye stitching line is how much adjustment I need for a broad shoulder. Let me know in the comments if you still have questions!
Even though I still have a few adjustments left for this pattern, I love this version! I have already worn it several times. It is great on its own and it is great layered under a light jacket for spring.
Excellent information about high neck and forward shoulder issues. How do you do your forward shoulder changes? Also how do you decide whether it is a broad shoulder or a sleeve cap issue with those drag lines, which I often get!! Thanks for this post.
When I was writing this post, I realized we don’t have a forward shoulder adjustment blog post! I’ll write and post one ASAP.
As for broad should vs sleeve cap, it is a bit of art. I really prefer to not change the sleeve cap shape if I can. I think it is easier to do the broad shoulder adjustment first and see if that addresses the drag lines.
Thank you Lyndsey for your prompt response. I have been wrestling with these issues with T shirts for years (and wovens) due to my rounded posture. I am just finishing yet another long sleeved T but I still haven’t perfected it as each fabric just slightly different! I just have to remind myself that bought clothes don’t fit perfectly either, I love to sew, and aren’t we home sewers clever! I look forward to your blog on rounded shoulders, and thanks again for an excellent discussion of fit.
So much great information and opportunity for learning, Lyndsey! Thank you for sharing your fitting process with us!
Thanks, Erica!
I do want to thank you for your so-helpful blogs about the various adjustments that more and more women require due to working all day with computers. I really relate to the choking, too tight, front of tee shirts etc. I really like the adjustment of the height of the neckline as well. Lots of the Big 4 patterns have really unwearable v-necklines – thanks for all the help