Hello friends! I promised you a tutorial for pleated trousers, and here it is.
I used our Hollywood Trousers pattern for mine, but you could also use our Peckham Trousers pattern if you prefer a narrower leg. And like I mentioned the other day, feel free to mix and match elements from our patterns. I like to borrow different waistband techniques and closures, add belt loops, etc. You’ll see that our soon-to-be-released new spring trouser pattern will offer you even more options!
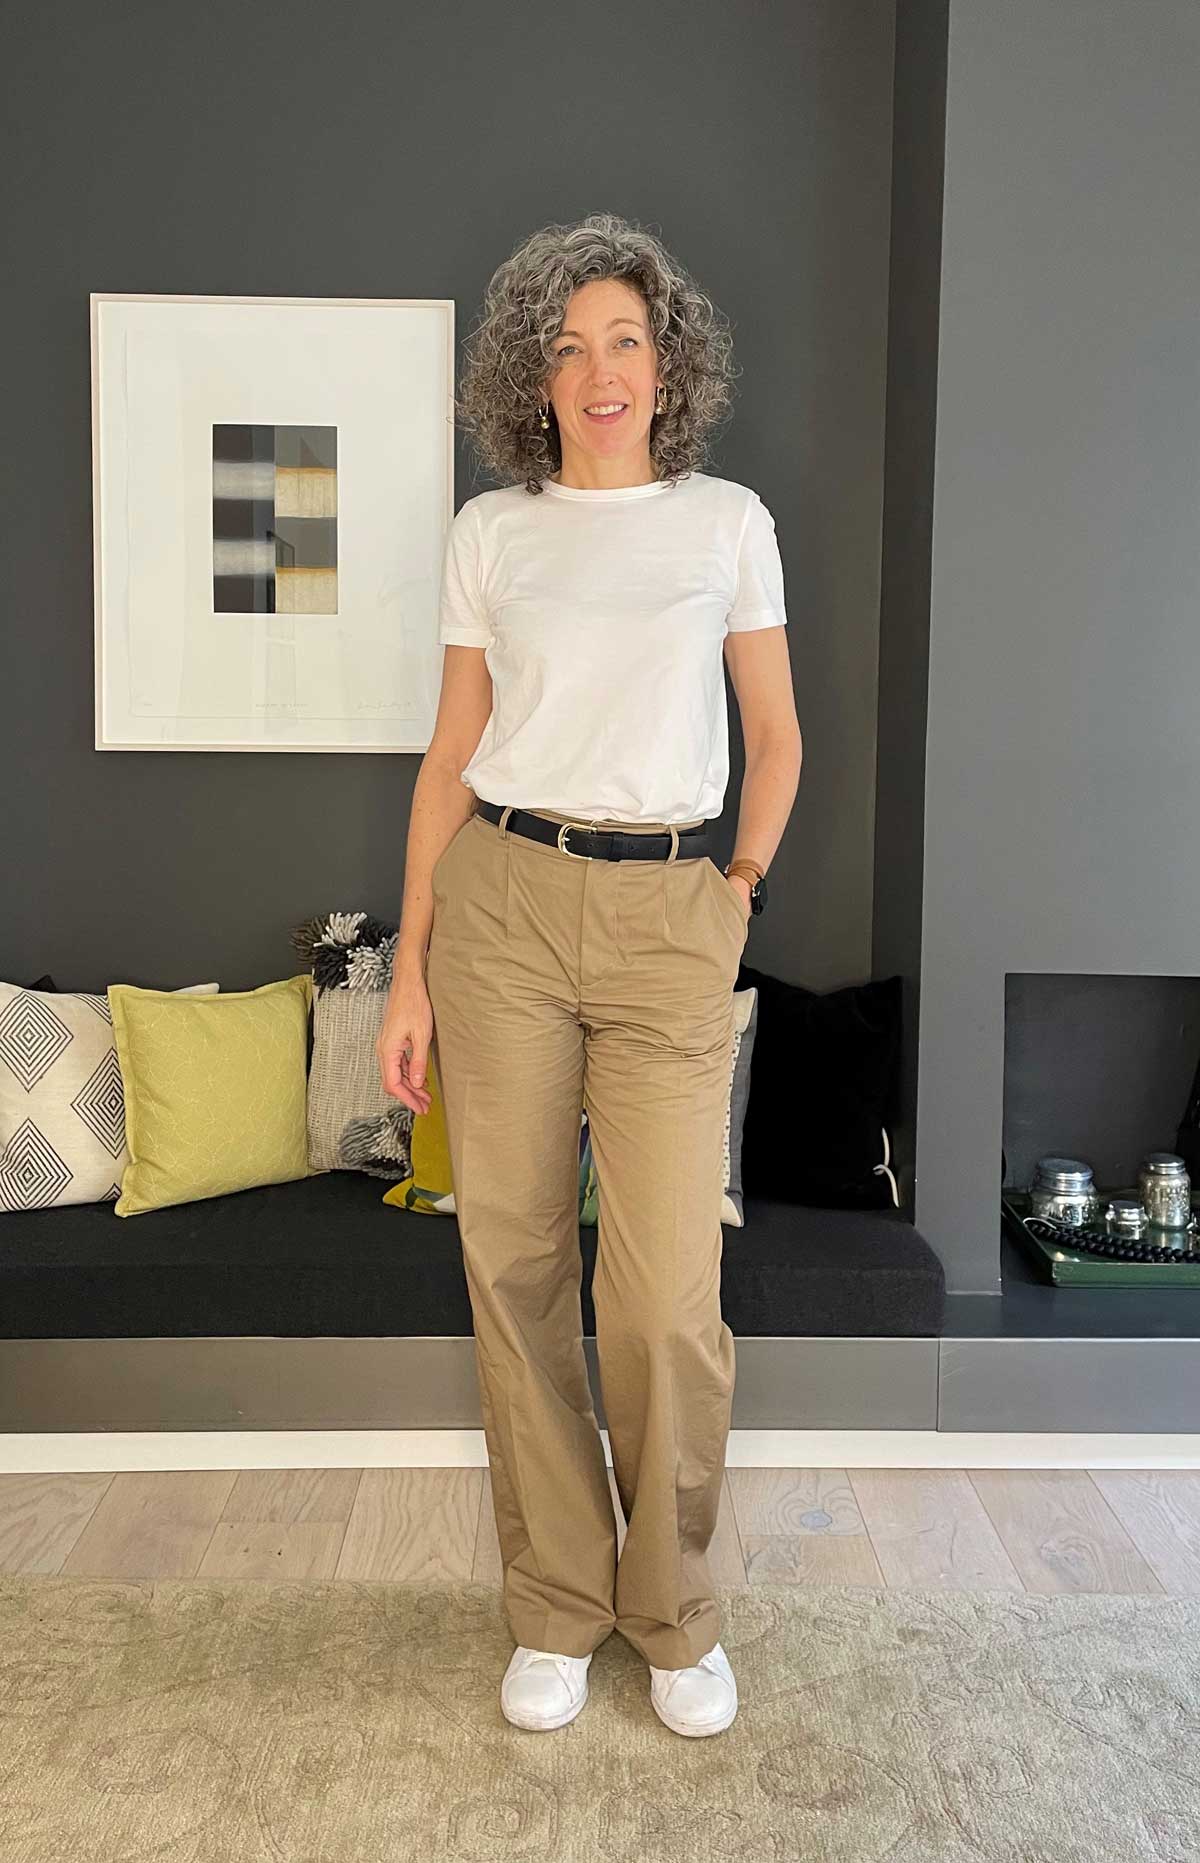
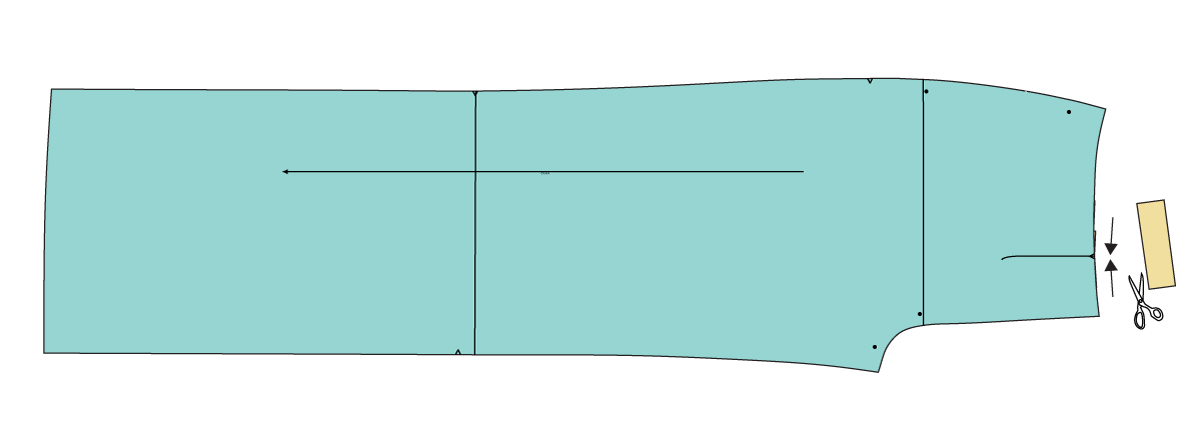
1. Start with your Trousers Front piece. I like to position the pleat approximately one third of the distance from the center-front waist to the side seam, since that will visually position the darts approximately halfway across your center front when you wear them (since the outside third will wrap around your side). Make a mark on the waist at this spot, like this: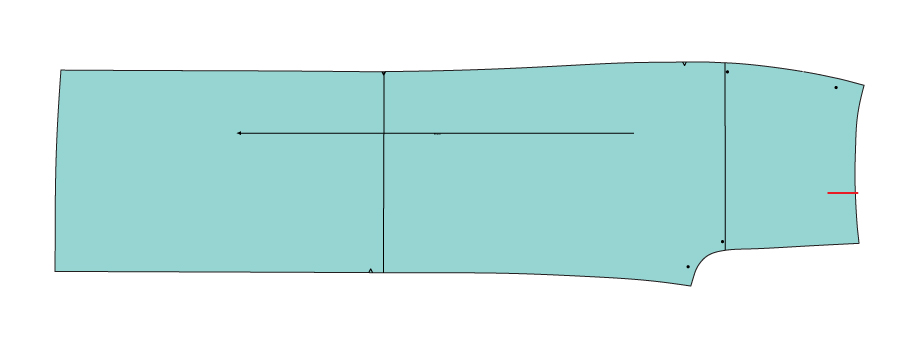 2. Draw a straight line from the mark you made directly to the bottom edge of the trousers, making sure to keep the line parallel to the grain line on your pattern piece. Cut the trousers from the waist to the bottom edge along this line. If you like, you can leave the pattern piece attached at the hem edge to act as a sort of paper “hinge” in the next step.
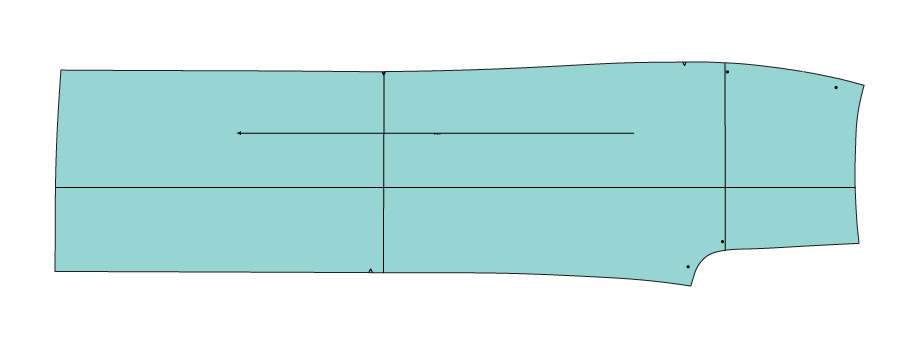
 3. Decide how big you want your pleat, then double that amount since the pleat will be folded back on itself. For a 1″ pleat, you’ll spread the top edge of the trouser by 2″. Don’t go too crazy with the size of your pleat: I made my pleat only 1/2″ (1″) wide, more to give the look of a pleat without adding a lot of fullness to the front. I would suggest making your pleat a minimum of 1/2″ (1″) and a maximum of 1.5″ (3″). (Three inches of extra fabric across the front of one leg of the trousers is a lot of extra ease in the fit of the trousers, so keep that in mind.) Gently spread the waist edge according to this measurement, keeping the two parts of the pattern flat and leaving them touching (or attached, if you left a paper hinge) at the hem edge. In other words, the pleat will be widest at the waist and will taper gradually to nothing at the hem. Slip a strip of paper underneath the two pieces, then tape the pieces to the paper strip to keep everything in place.
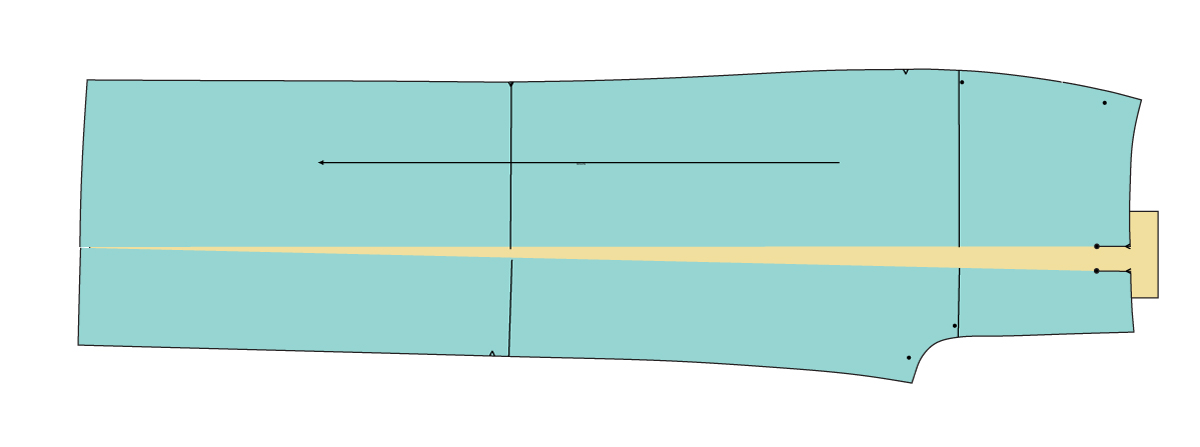
 4. Draw the pleat lines the same at the edges of your wedge-shaped space between the two parts of the pattern piece. Then you can fold the pattern piece along those pleat lines (make a “pretend” pleat with your pattern piece) and trim the excess paper strip along the top seamline edge while the pleat is closed. By the way, if you’re not sure, pleats usually point to the center front (the fullness inside the trouser points to the side seam), but this isn’t a hard and fast rule. Do as you like here. Then you can unfold the pleat and your pattern is ready.
 5. When you sew the trousers, make the pleat first. Then you can proceed with the regular front pocket construction, etc.
And that’s all there is to it!
You can pick up your own copy of the Hollywood Trousers here. You might also want to consider our Peckham Trousers for the slimmer leg and the front and back pocket options. Both patterns are based on the same base pattern, with a forward inseam to give better shaping through the rise. I hope you’ll tag us so we can see what you’ve made! And have fun!
Liesl, I was just thinking about using this technique to slightly widen my TNT pattern for DH’s shorts.
Thanks Liesl! I was thinking of making an inverted box pleat. Is the method the same, aside from folding the box pleat?
That would be very cute, and yes, it’s exactly the same, just folded differently. You might also want to make a box pleat a little wider since the fullness is split into two halves, if that makes any sense…
Yes, makes sense! Thank you. I have some black wool so I’m going to try the inverted box pleats and belt loops.
I’ve a follow-up question. I want to add the back welt pockets from the Peckham trousers but am having difficulty placing them horizontal on the back of the Hollywood Trousers. They don’t seem to be placed perpendicular to the grain line or to the back crotch seam on Peckham. Should they be perpendicular to the dart leg? I’m scared of making crooked pockets! Thank you
Thanks for your patience while I’ve been recovering from illness. To keep the pockets level, position them parallel to the lengthen/shorten line and they’ll be ok. If you don’t have a lengthen/shorten line (other sewing patterns may not have one), the center-back rise can offer a reference point for positioning perpendicular. Remember to close the darts first, before you mark and/or sew the pocket placement! You can fold the darts closed on the paper pattern, then mark the pocket, and open the darts again.