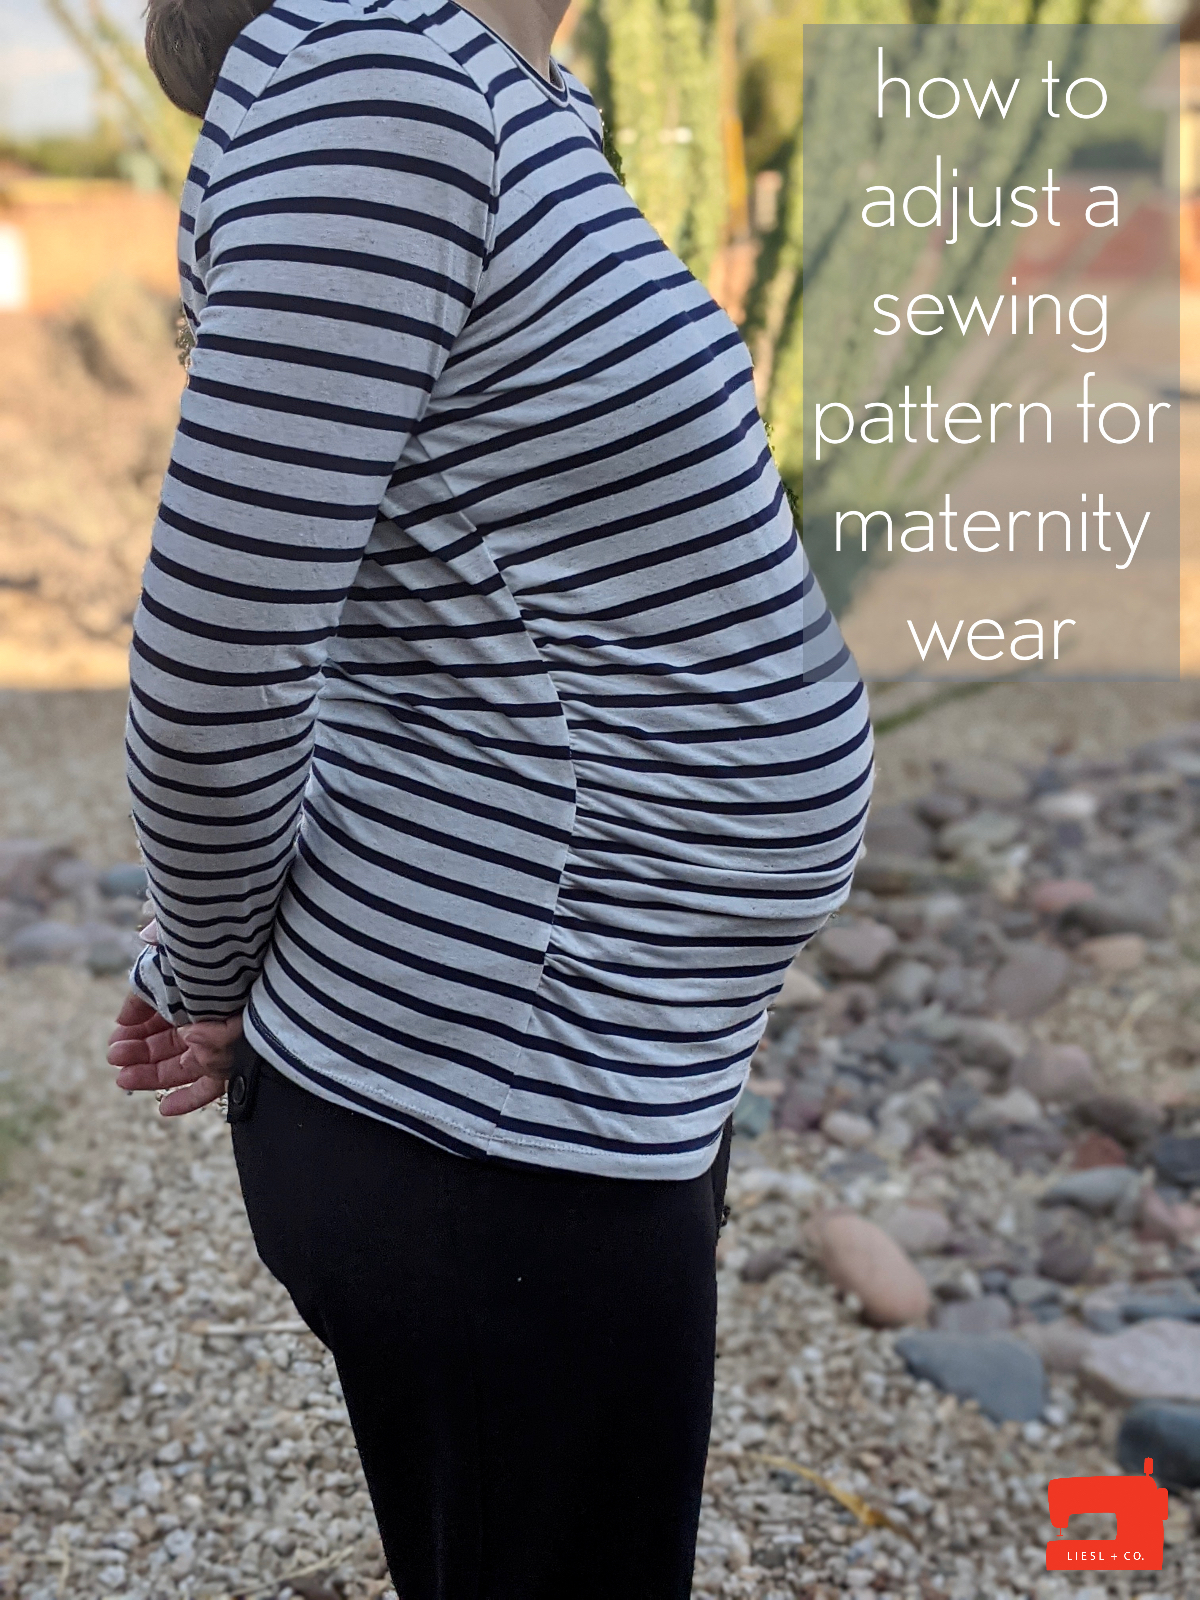
We saw Nicole’s beautiful maternity Marais Knit Top in the Liesl + Co. Friends Facebook group and contacted her straightaway. We are thrilled that she agreed to write this tutorial on how to alter a knit top pattern for maternity wear.
I gave away most of my maternity clothes after my daughter was born in 2018, so now that I’m expecting my third child, I thought I’d try my hand at altering some patterns to become maternity items. As it turns out, when starting from a knit top, modifications are straightforward.
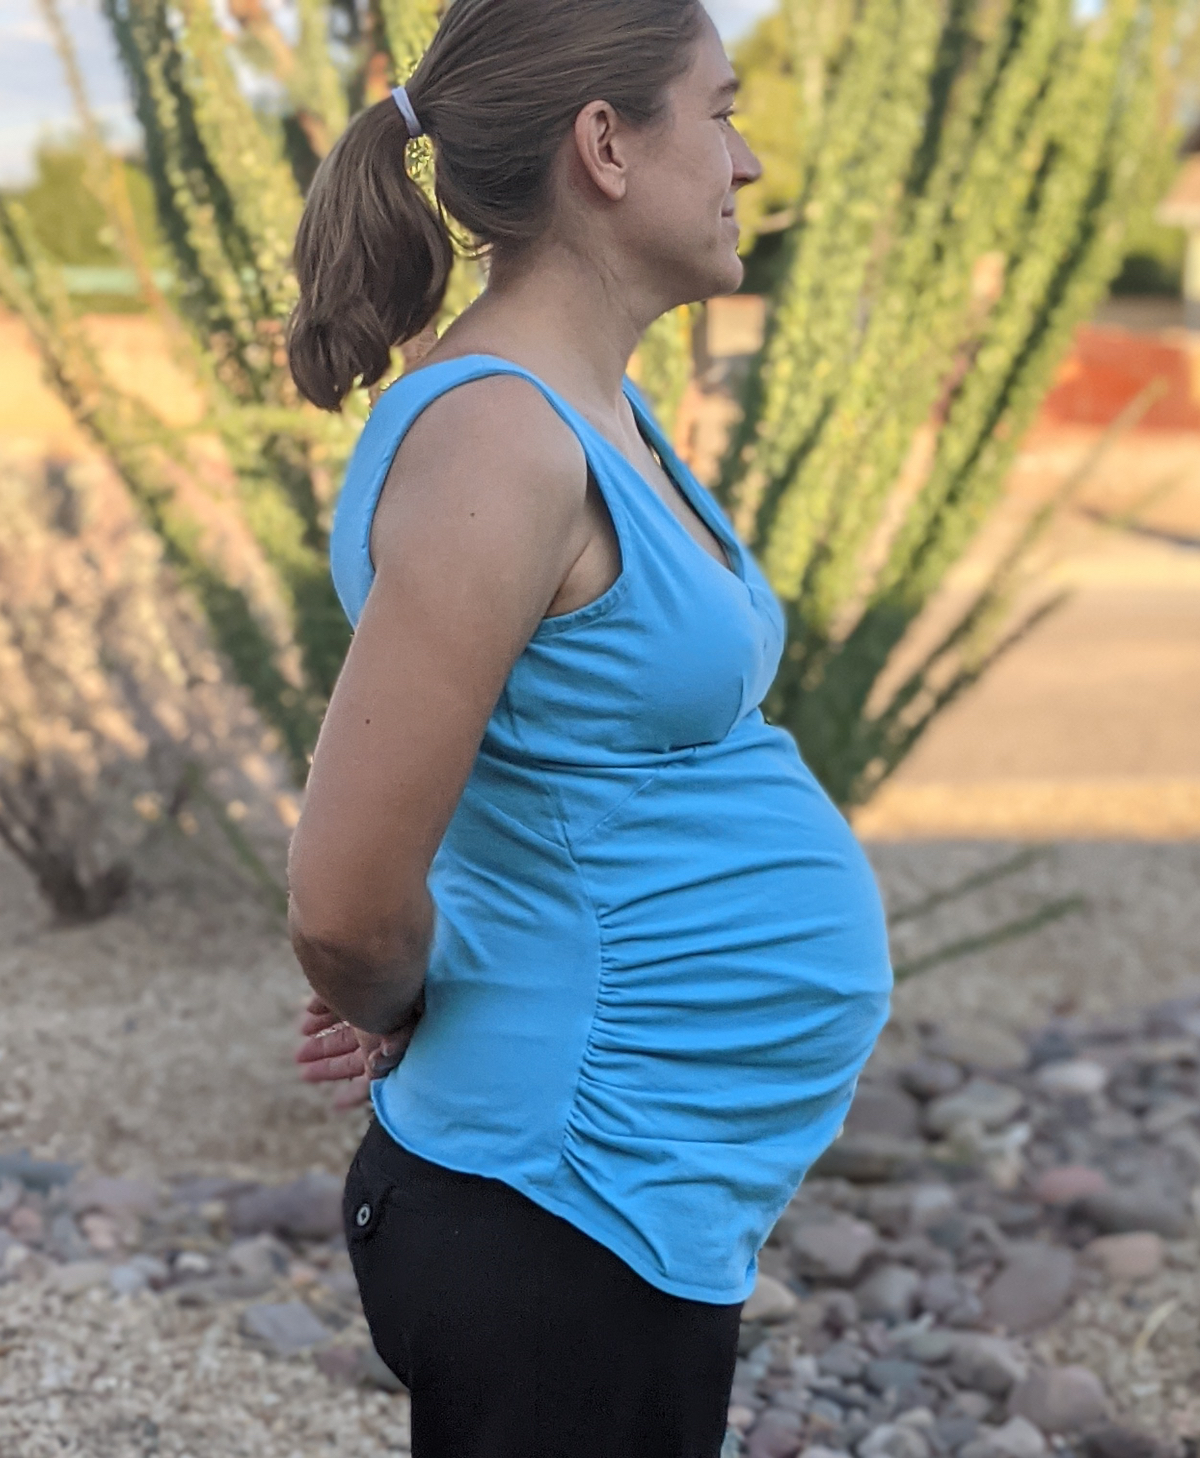
The basic idea is simple (and common in RTW maternity clothing): Add length to the pattern front and use elastic to gather that extra length into ruched side seams. There are several great candidates in the Liesl + Co. pattern collection. I’ve modified the Metro T-Shirt and the Marais Knit Top, but the same idea should work equally well for the Chai Tee or Maritime Knit Top, too.
Note: I started with the Marais and learned a little along the way, so the notes and measurements below are from my Metro T-Shirt.
Step 1: Choose your pattern
This modification is intended for a knit top with relatively straightforward side seams and fabric with some stretch. That doesn’t have to mean just a t-shirt. The Marais, with its bodice pieces and bust darts, provides a bit more shaping but still works just fine as a maternity top.
Step 2: Determine your size
Don’t go with your waist measurement for size! If you’ve made the pattern before your pregnancy and were pleased with its fit, that size is likely fine to start with. But do re-measure your bust. You may find that you need to size up there, if nowhere else. If you (like me) measure between two sizes, consider whether you’d be more comfortable with a looser or snugger fit, and consider the degree of stretch in your fabric.
Step 3: Alter your pattern pieces
There is only one alteration needed to turn your knit top into a maternity top: Add extra length for belly room. About 5″ of added length to the pattern front will give generous room for growth in a stretchy knit. Be sure to maintain the 5” difference between the front and the back if you make other length alterations. For example, if you ordinarily shorten your tops by 1″, go ahead and shorten the back pattern piece, but add 4″ to the front piece. Whether you decide to add 5″ of length or a different amount, this measurement will be measurement a.
Split your pattern at the lengthen/shorten line to adjust the length for the front (and back, if applicable) pattern piece and redraw the side seams, as explained here. Note that the gathered front and your belly will make the redrawn side seams nicely forgiving, so there’s no need to sweat getting it just right.
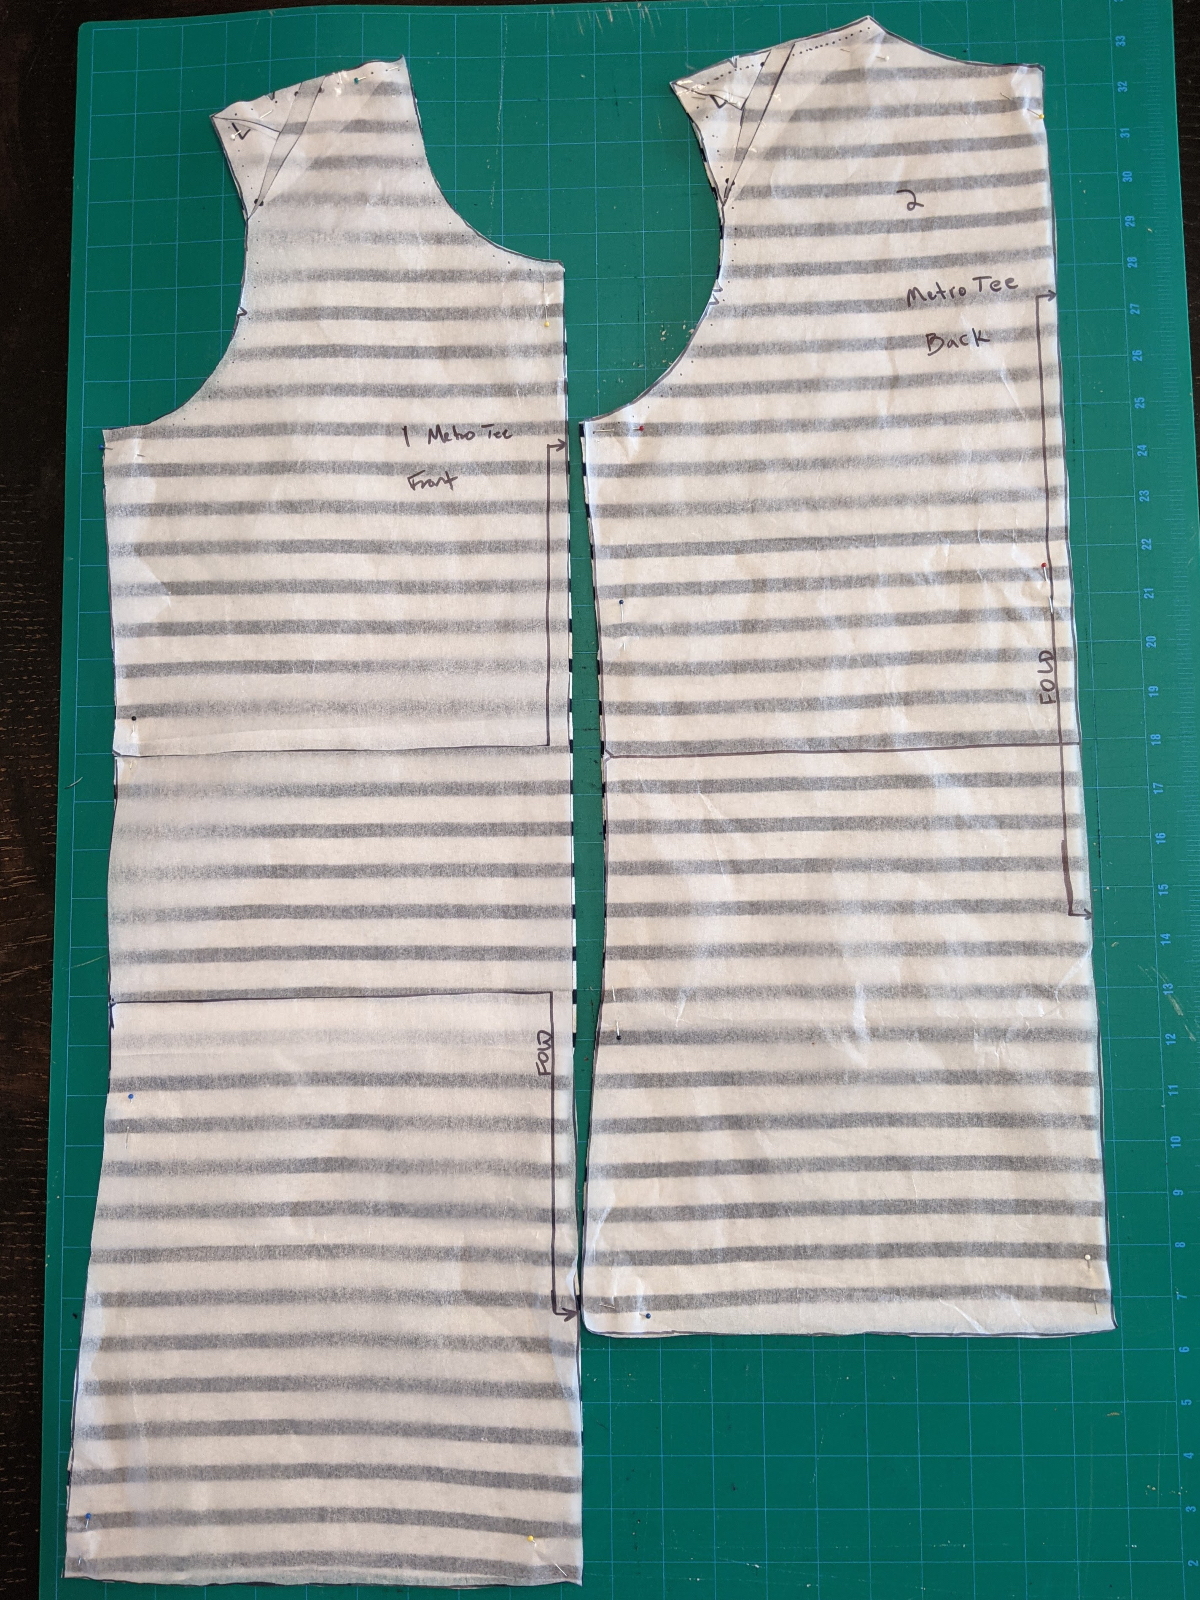
From here you can also add any other alterations you’d ordinarily need. You can see from my Metro T-Shirt pattern pieces that I’ve included a broad shoulder adjustment.
Once you have your altered front pattern piece, determine where you’d like to start and finish the gather to take up the excess pattern length. I eyeballed this from some purchased maternity tops, which seem to start the gather 3-5″ from the underarm seam and end it anywhere from the hem to 3″ above the hem.
Mark your desired start and finish spots on your pattern and fabric and measure the distance between them. This distance is measurement b.
Now, to determine the length of your elastic, subtract measurement a (the total difference between the length of your front and back pieces) from measurement b (the length between the starting and stopping points of your gather). Then add 1/2″ or so to that number. This will give you enough elastic on either end of the seam to make it possible to hold it in place while you stretch.
Depending on the seam allowance of your pattern, either 1/4” or 1/8 ” elastic might be appropriate. You’ll find that 1/4” elastic is easier to hold and sew, but harder to keep inside a narrow seam allowance.
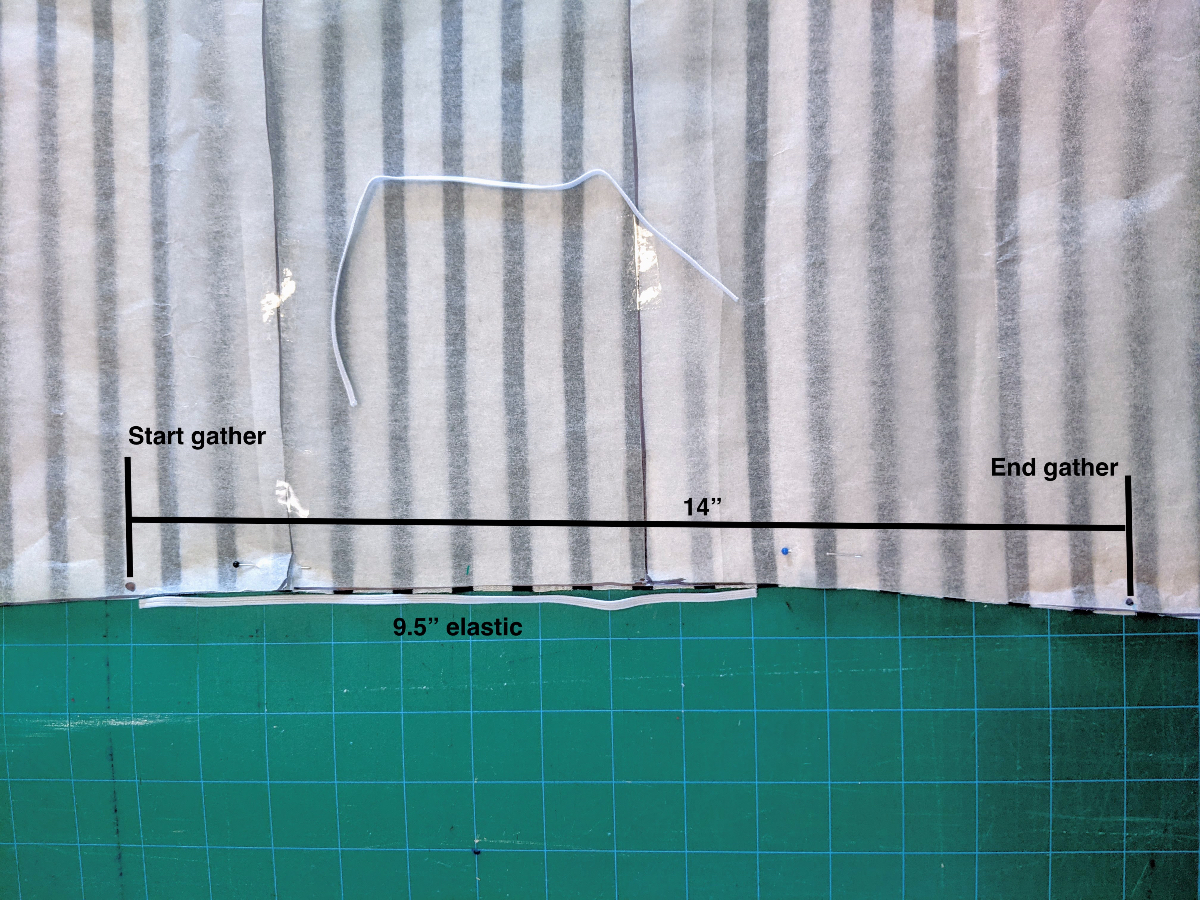
The gather marks on my metro tee were 14″ apart. I therefore cut my pieces of 1/8 ” elastic to be 9 1/2” long (14 – 5 + 1/2 = 9 1/2). Taking into account about 1/4” of unstretched elastic on either end of the seam, that 14″ of fabric would shrink to 9″ on the side seam, and the lengths of the front and back pattern pieces would match.
Step 4: Sew the elastic into the seam allowance of the shirt front
Because it will be within the seam allowance, you can do this on either the right or the wrong side of the fabric. With the elastic on top of your fabric and the needle down through the elastic, stretch the elastic (but not the fabric) so that it and the fabric are the same length. Keep an even stretch on the elastic both in front of and behind your needle, keeping the elastic on the very edge of your fabric. You can use either a serger or a sewing machine with a zigzag stitch to attach the elastic.
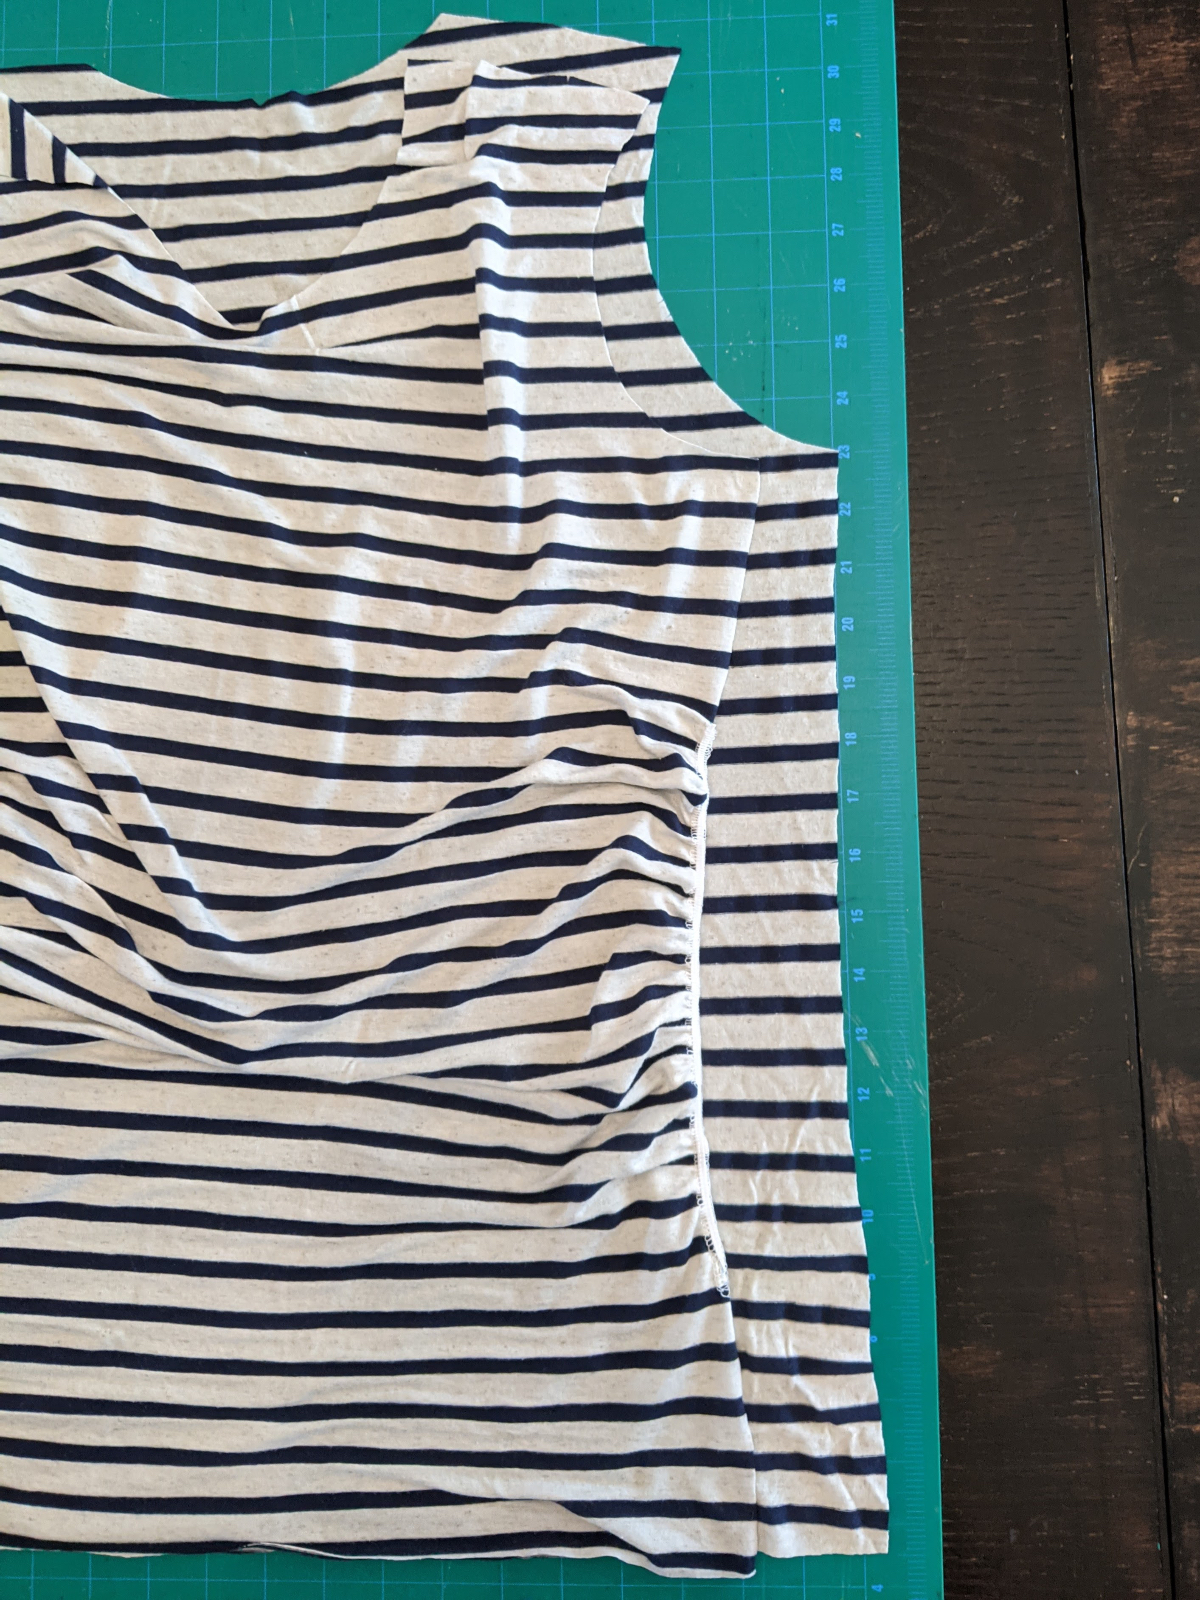
Once you’ve sewn elastic into both sides, it’s worth a quick check to make sure that the front and back pattern pieces are now very close to the same length from underarm seam to hem before proceeding.
Step 5: Make your shirt
That’s it! From here, you’ll assemble the shirt following the pattern instructions.

The only additional trick is to ensure that the stitches from attaching your elastic are inside the side seam. If you’ve used your serger to attach the elastic and the pattern assumes 1/4″ seams, you may need to cheat a little and make your side seams just a bit wider to make sure no thread is visible on the outside of the shirt.
Thanks a lot for the detailed explanation. I followed it and it worked!