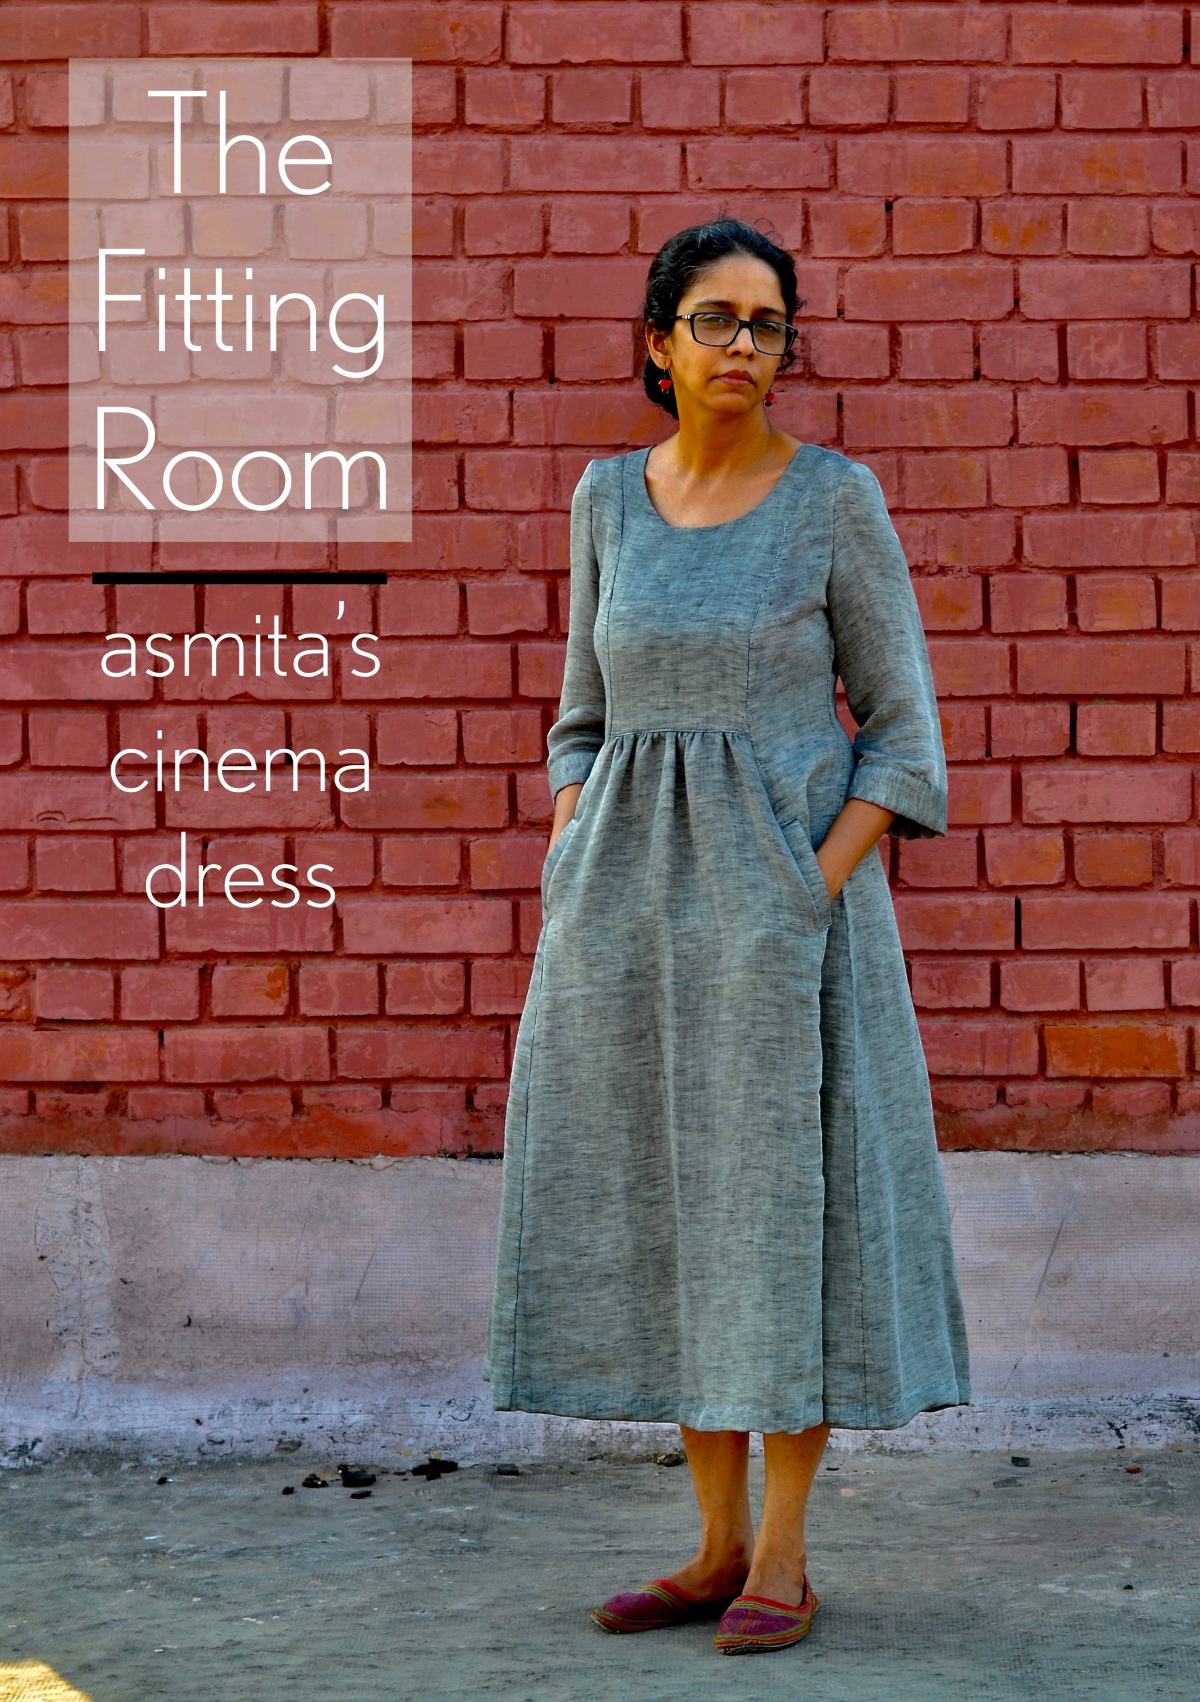
We all know how disappointing it can be when a garment doesn’t fit the way we had envisioned. Asmita didn’t let it get her down, and persevered to get the perfect fit on her Cinema Dress. It’s the latest installment of The Fitting Room blog series.
When I began my sewing journey to sew clothes specifically for me, I was looking forward to trying out dress patterns from Liesl + Co. I knew that the impeccable instructions would help me achieve my dream of sewing the perfect dress. Having enjoyed making the children’s Hide-and-Seek Dress several times, I was excited when the Cinema Dress pattern was released and knew pretty much right away that I wanted to make it. But when I finally gathered up the courage to try last year, my first version ended up being a huge disappointment.
The first try
To begin with, my measurements are: high bust 33″, bust 34 1/2-35″, waist 30″, height 40″. Looking at the finished measurements, I decided to attempt a size 4 for the bodice and grade it to a 10 at the hips. I did this grading for the front and back side panels and cut a size 10 for the front and back skirt.
Results (and causes for the disappointment):
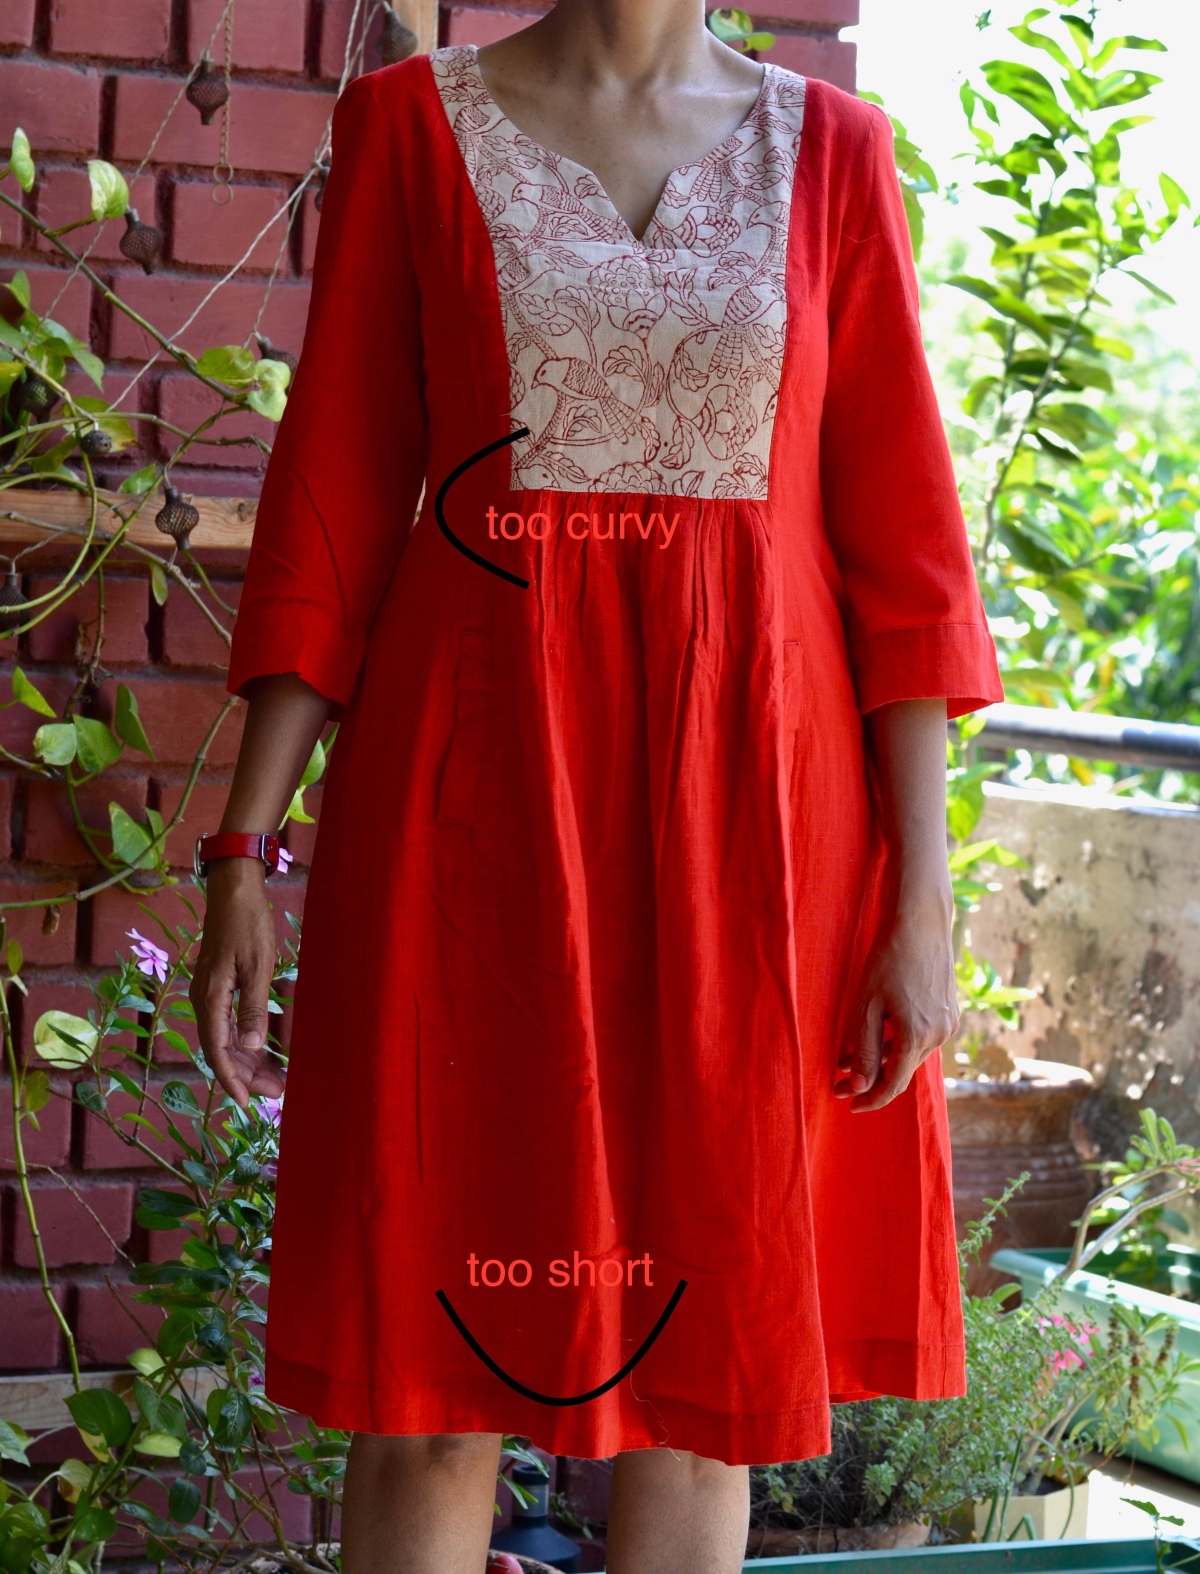
1. My dress did not look anything like the model on the cover was wearing. It was too curvy on the waist which for some reason made me feel like I was wearing a child’s dress, or at best, someone who was pretending to be Goldilocks.
2. It was too short for me. I made view A, with no attention to the finished measurements.
3. On the positive side, I did like the fit on the top, although I felt the yoke to be too short.
4. I did not even attempt to make a muslin, and so I cut out some well-loved fabric (especially for the yoke) and just hoped that miraculously my body shape and hence the dress would match the look that I was envisioning.
This first version definitely put me off sewing any dress for a while, until recently I came across another version of this dress on social media and I knew it was time to try making it again.
This time I knew I was going to start out with a muslin.
Muslin #1
The main part that needed work was the grading from size 4 to a larger size. I also needed to do a length check. So, the changes made in muslin 1 were as follows:
1. Made a version B and shortened it by 1 1/4” at the bottom lengthen/shorten line (L/S line henceforth). This was to adjust for my height which is 5’4”.
2. Instead of grading from a 4 to 10, I decided to grade from 4 to 8.
3. Whereas in the previous version I had done a sharp outward turn following the first L/S line (near yoke), in this case, I used a hip curve ruler and did more gradual grading from 4 to 8. I started this grading out at a much lower point than what I had done previously.
4. Finally, and the easiest change, was to skip the V of the neckline. I wasn’t too keen on it in my first version and so I simply increased the depth of the neckline curve by about 1/8”.
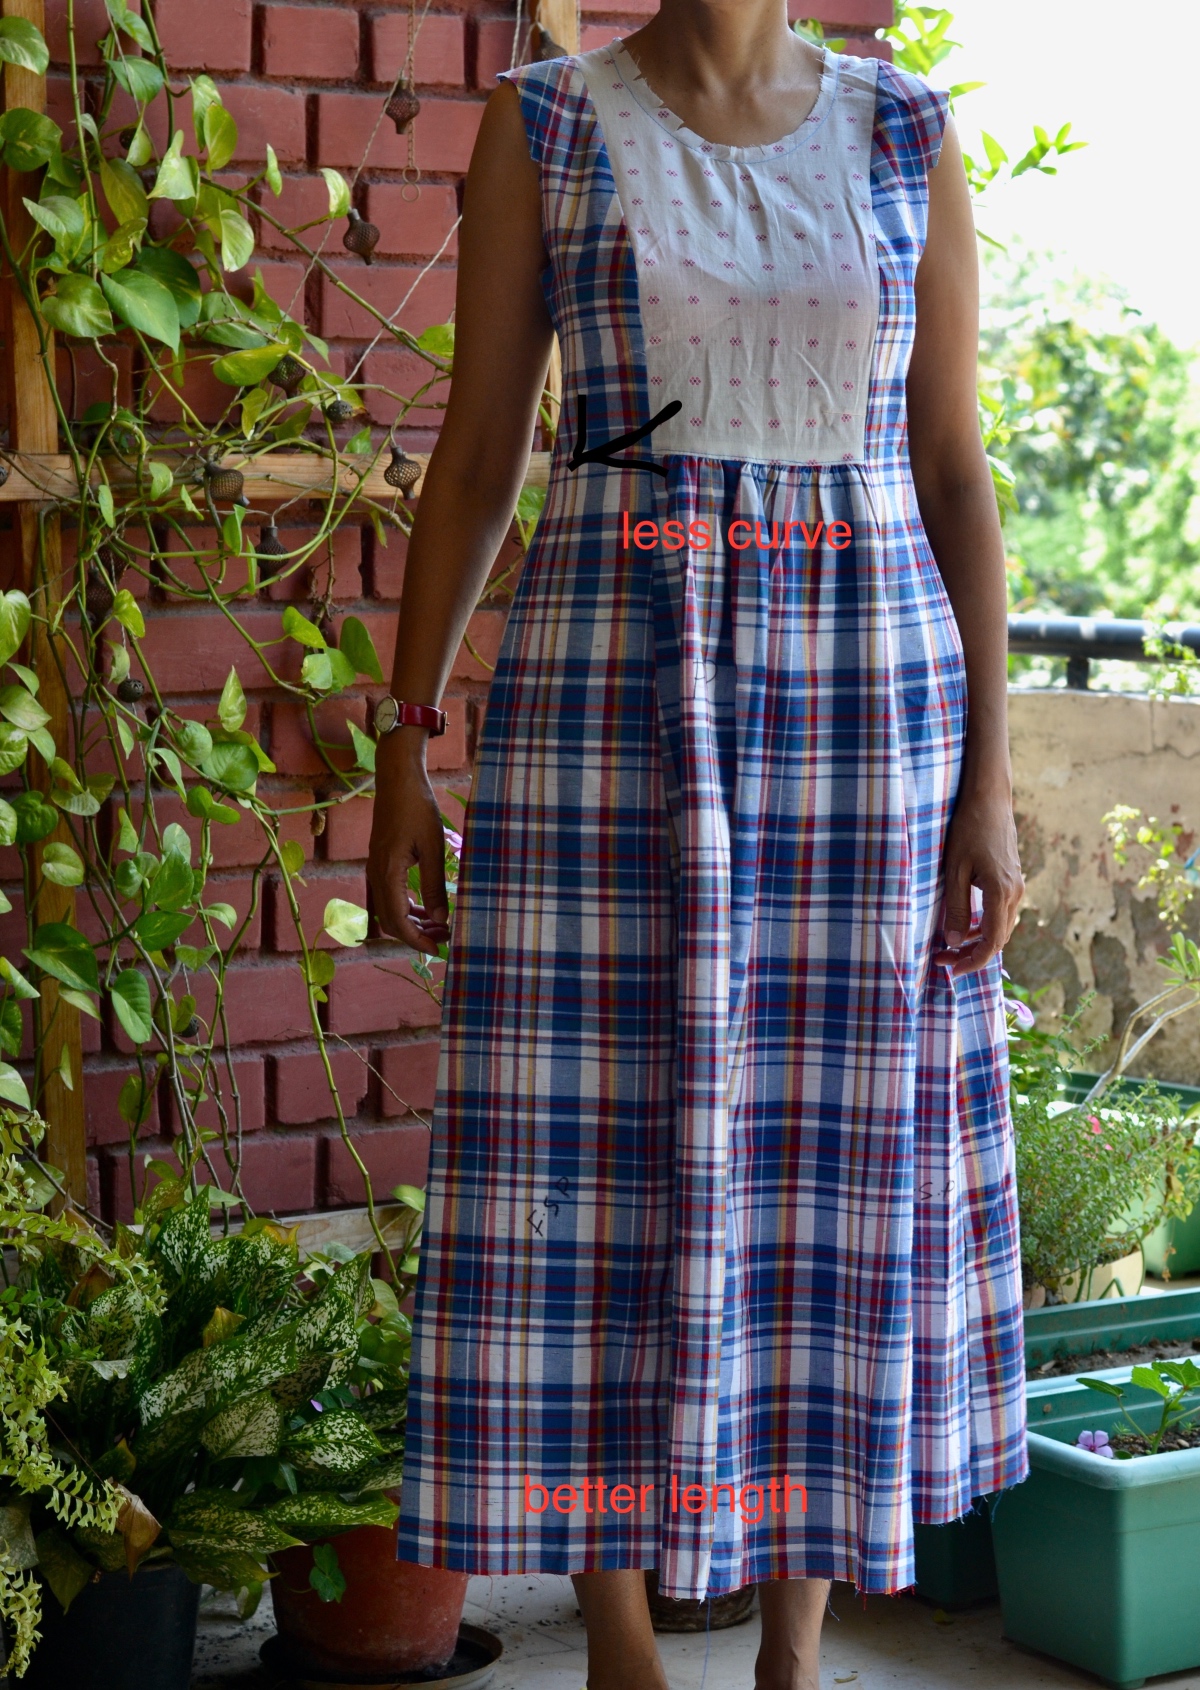
I was happy with the length and the side curve between my high waist and high hip looked promising. But I wasn’t yet 100% sure that I liked it. It was then I realized that what I really wanted was more ease at the waist. My waist is 30”; going by size 4 I only got 1” ease at the waist where as I needed a little bit more. That was my a-ha moment!
Muslin #2
Changes in version 2 muslin:
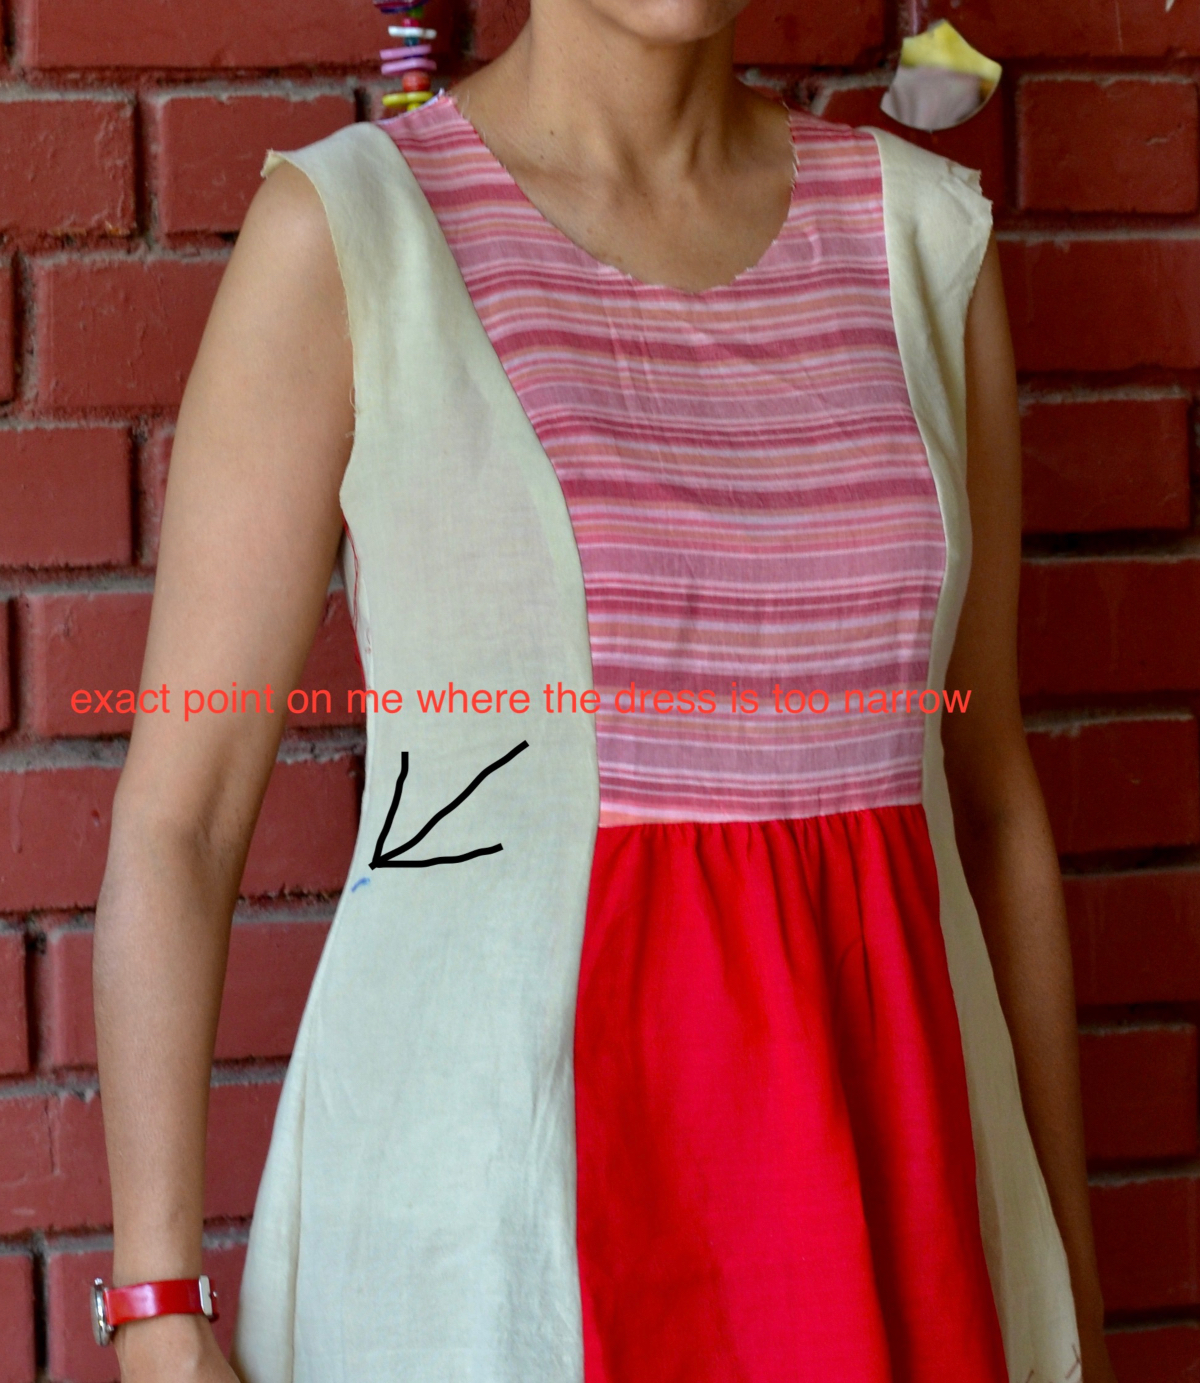
1. I re-drew the outer line of the flat paper pattern to accommodate for my waist. Here is how: I gave myself another 1/4“ by extending outwards (horizontally) the top L/S line of side panel (both front and back). I wanted less curvature from about 4 1/4” below my armpit to 12” below my armpit so I re-drew the pattern line to give the pattern less of a curve.

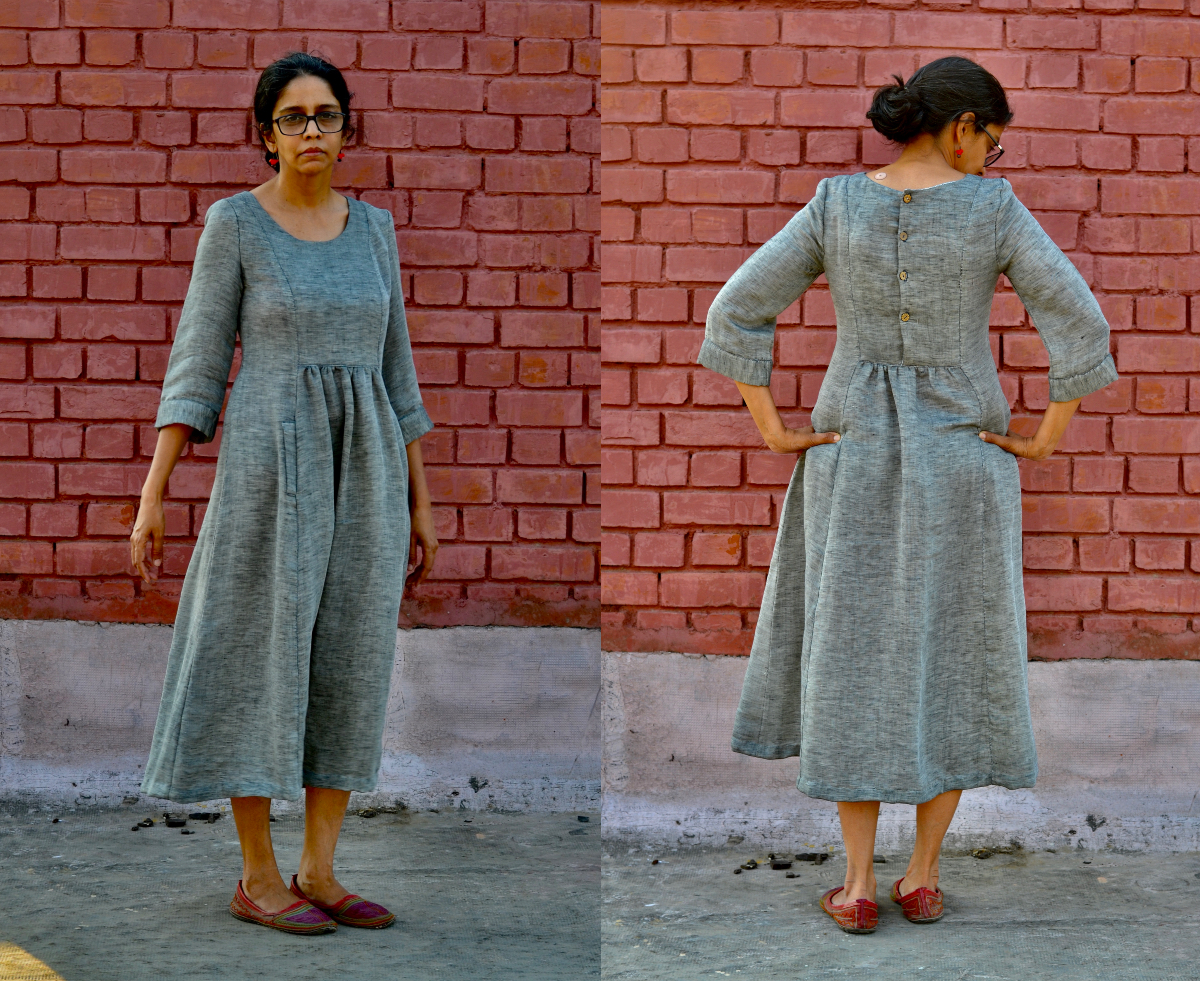
This final muslin gave me exactly the silhouette I was looking for: the additional ease at the waist stopped the dress from “spreading” at the hips. It finally had more of that “adult” shape that I was hoping to achieve.
Lessons learned
1. Muslin: one or more until I get it right! I still regret the fact that I cut up the beautiful hand block printed fabric of the bird print for my very first red dress. It would have been worth it to save for the dress I really wanted to make!
2. I have never before extended a pattern and re-drawn entirely new lines outside of the pattern markings as I did for muslin 2, to bring some ease to the waist. I am glad I was able to stick to my mental image of the dress and persist to make a reality of that dress using Liesl’s beautiful pattern.
3. As still a new sewist, I struggle with lengths. It might seem like the easiest part, but going forward, I am going to always make the first muslin in the length that I imagine I want the dress to be, and not skimp on fabric.
A note on the fabric: This is a triple-layer gauze cotton fabric that I bought at Mood in New York 12 years ago! It was a special fabric then as it is now, and I am glad that I made this dress out of it. But it was crazy to work with because it frays tremendously. Still the weight that it gives the dress is lovely, and despite many hesitations (and swearing!) the dress does leave me feeling like I am wrapped in a cool gauzy blanket, which is not a bad thing in summer!
Finally, I want to say a special thank you to Rachel of @oakbluedesigns. It was her Cinema Dress that prompted me to give this another shot and she did a lot of hand-holding through the first stage of muslin making and grading to a larger hip size.
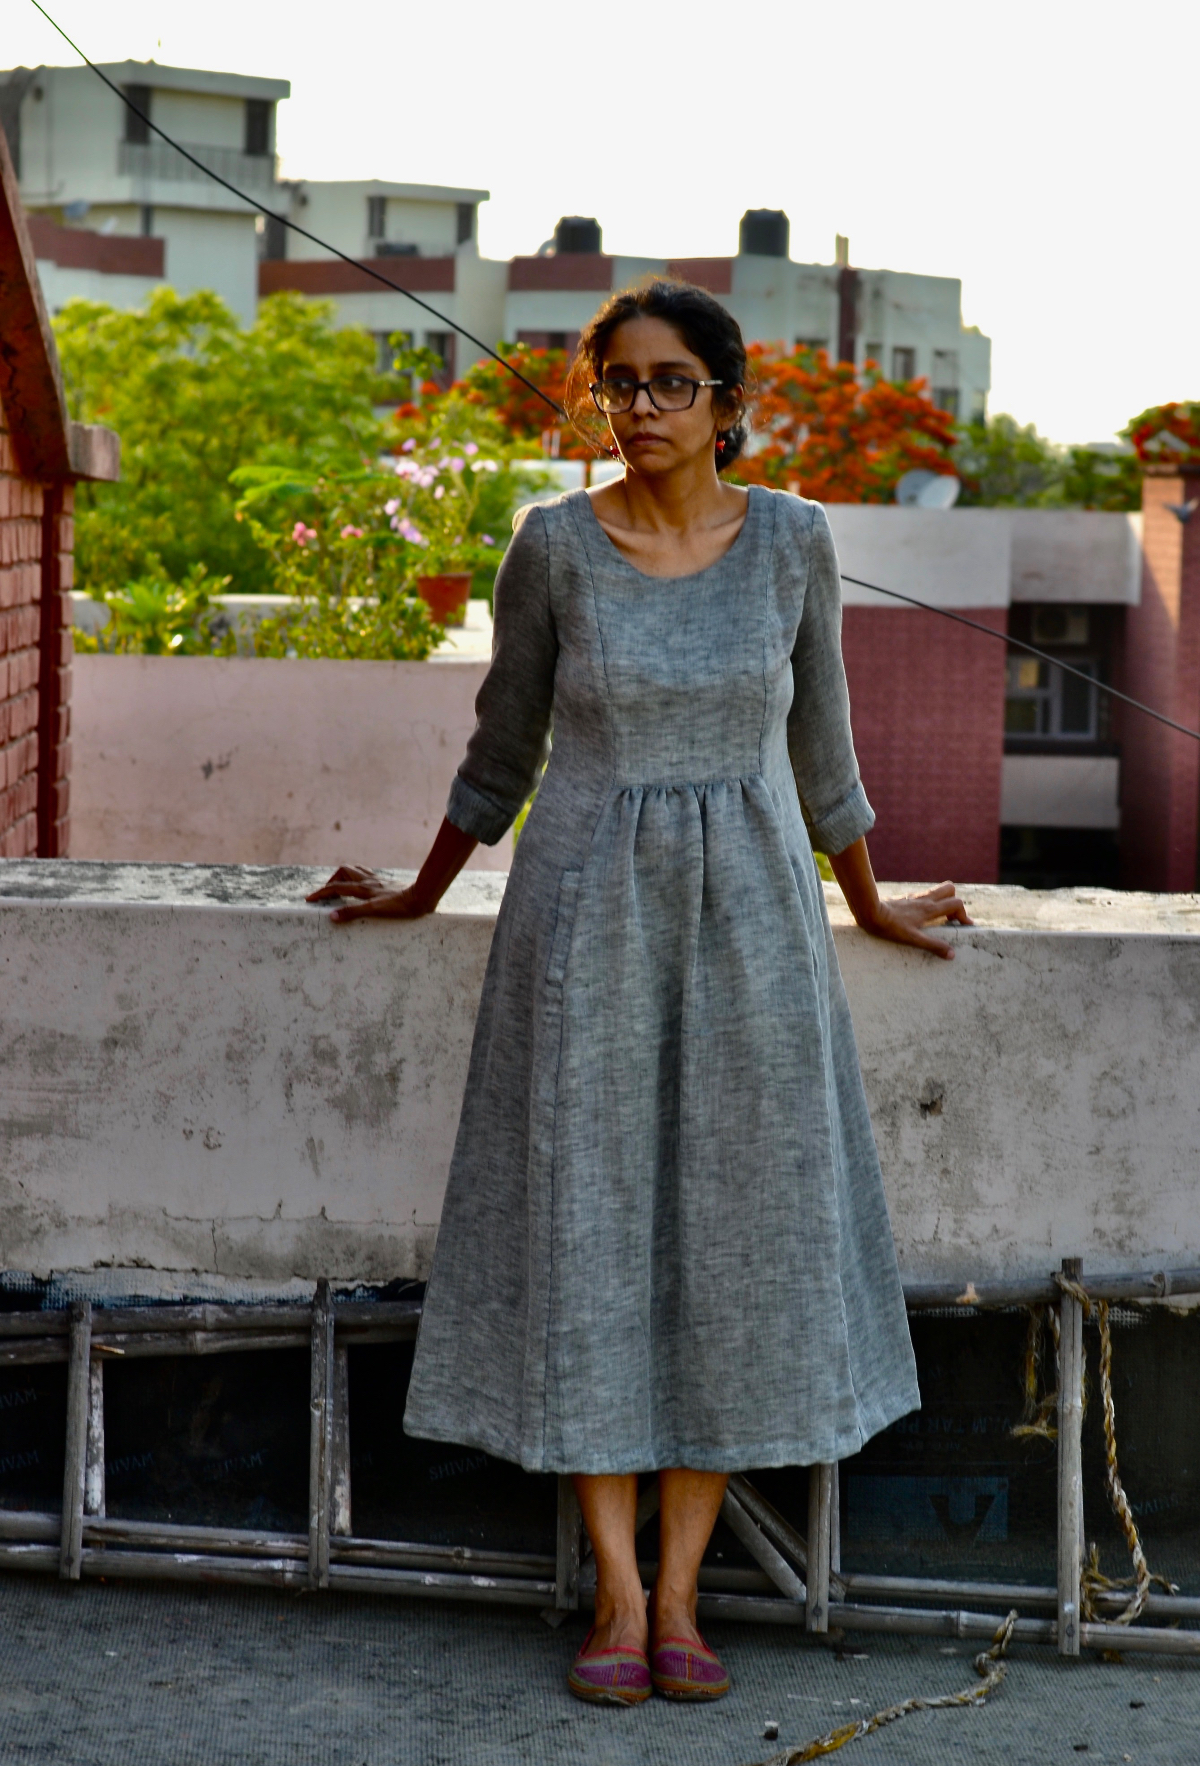
Challenging as it was, I enjoyed the journey that this dress making took me through. I can already see some problems with it, but for the moment it is definitely a huge step forward from the very first version I made of it last year, and I know that I will enjoy wearing it tremendously in the coming months.
The Fitting Room blog series seeks to demystify garment fitting. It is our hope that these fitting stories from real people will inform and inspire you to create clothing that fits you the way you prefer.
It can be so frustrating to tweak the fit on something to fit your personal vision, and not be able to just sit down and stitch it up. I’m having a week like that myself! LOL! Your dress is lovely! I will admit, I rather like the red one! 🙂 But, it isn’t me wearing it and if you’re uncomfortable in a garment because of one or two issues you will always be uncomfortable in it. I hope you get another opportunity to make a red dress exactly as you want it.
Yes, I know about those weeks Colleen! Good luck with yours. I hope you can finish sewing one soon, exactly as it matches up with the image in your mind. I tried wearing the red one, a few times actually, and tried to like it, but i think in my mind I knew it was not what I wanted. It took me a year to get to a muslin after overcoming that frustration. I hope you get to yours sooner than mine.
Your final dress looks so beautiful on you! It was so interesting to read about your journey in getting there. Now that you have found the combination that fits and pleases you, it will help you with future dresses.
Yes definitely! Thank you for your comment Cindy.
Dear Asmita,
I have enjoyed your posts so much and this is my favorite so far. The Cinema Dress you completed is just beautiful! The changes you made are subtle, but as you say, it becomes a grown up dress. Just beautiful nd worth the effort. It just so happens I am tackling the Cinema Dress for my daughter and a Hide and Seek for may granddaughter in the same fabric. I made a muslin and am trying hard to get it right. You have given me lots to think about! The big change I made so far is to move the widest curve of the bodice down – sort of like moving the bust dart down. Scary, but it has helped. Thank you for your inspiring post and beautiful dress!
Dear Nirmala, Thank you for your kind words. It sounds exciting that you are trying to make both the child and the adult’s version at the same time. yes, I agree changing a pattern seems scary but if it works there is nothing like it. Good luck with your endeavours. I am glad my post helped!
I always enjoy reading and seeing your projects. Thanks for posting them.
Thank you Mary, for those kind words and reading my posts regularly.
The final dress looks beautiful on you and I love the fabric and color! Well done.
Thank you.
Wonderful project Asmita!
Thank you Lyndsey. 🙂
The final dress is gorgeous! I do also like the red one, but echo the previous comment that says what matters is how YOU feel in it. Hopefully you can find a home for it, as it is a lovely garment, but your final version definitely looks like it was tailor made for you.
Thank you! I have found a home for the red one already, so I am happy about that. I hope I can make a red one again for myself sometime in the future, now that I have the fit i wanted.
I love your dress and have purchased the pattern in the hopes of making one like it for myself. I haven’t sewn for myself in a long time and just made my first muslin yesterday (different pattern.) I am used to much quicker gratification in sewing for my kids. I felt discouraged that the changes I think are needed are more than just letting out a little here or there and will require making another muslin. This post shows me that sewing for myself will be slower- in addition to the learning curve, it’s just part of the process. Thanks for sharing your experience with it.
I too expected quick gratification when I first started sewing for myself and when that didn’t come almost gave up entirely. I think like in most cases, patience pays here too. Thank you for this very sweet comment. I think it is good for all us to remember that a good fit takes time and that the being patient with our own selves helps in the longer run