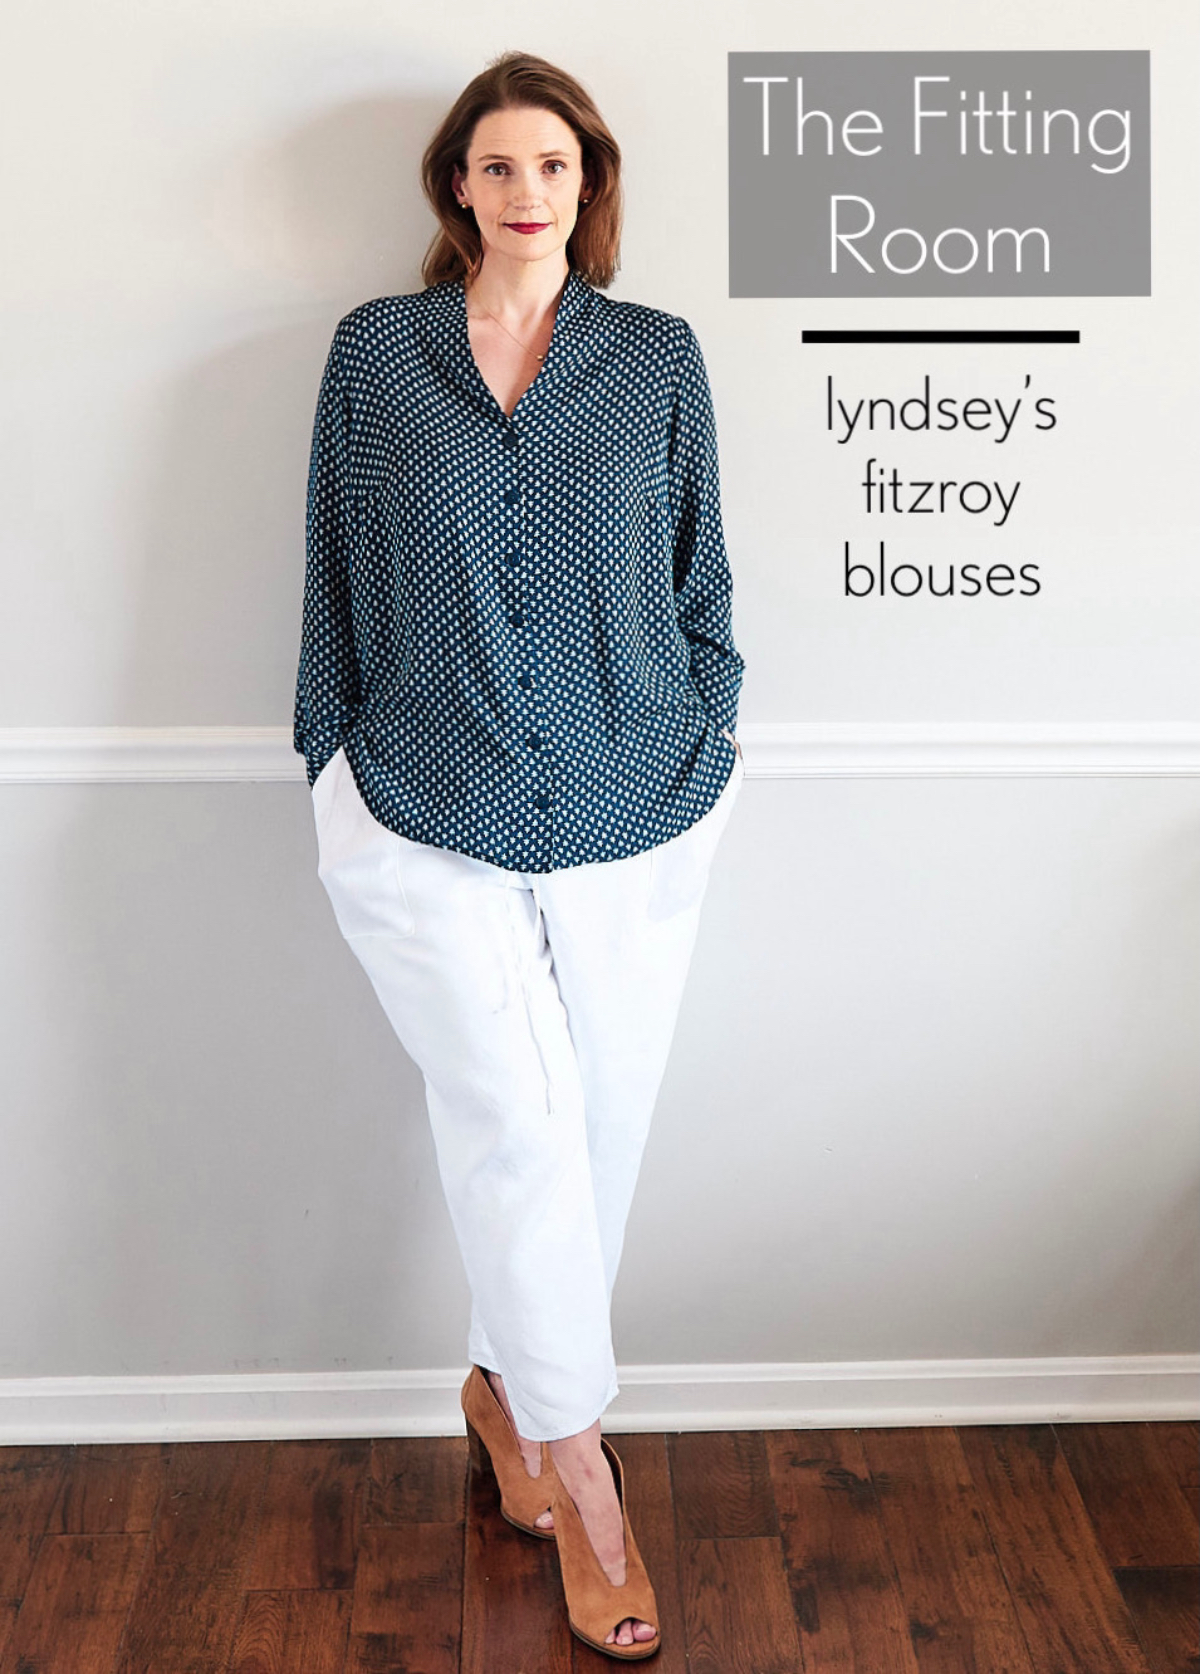
I immediately knew that I wanted to sew the Fitzroy Blouse when it came out. I find that a V-neck top is very flattering for my shape, and the shawl collar on the Fitzroy Blouse makes a beautiful V-neck!
Typically, I have a hard time buying ready-to-wear blouses because I have a large bust and I am pear shaped. When I buy the size to fit my shoulders, the bust and the hips gape open. When I buy the size to fit my bust and hips, the shoulders are way too large. I knew sewing a custom blouse with a few fit adjustments would get me the blouse I had in mind.
Choosing a size
My measurements are high bust 36”, full bust 40”, waist 33” and hips 43”. A 4″ difference between my high bust and full bust put me at the D-cup sizing. With a 36” high bust, I probably should have selected an 8D, but since my hip measurement put me at a size 14, I started with the 10D. If I were teaching a fit class, I would have told myself to start with the 8D, but fitting is more art than science!
The muslin phase
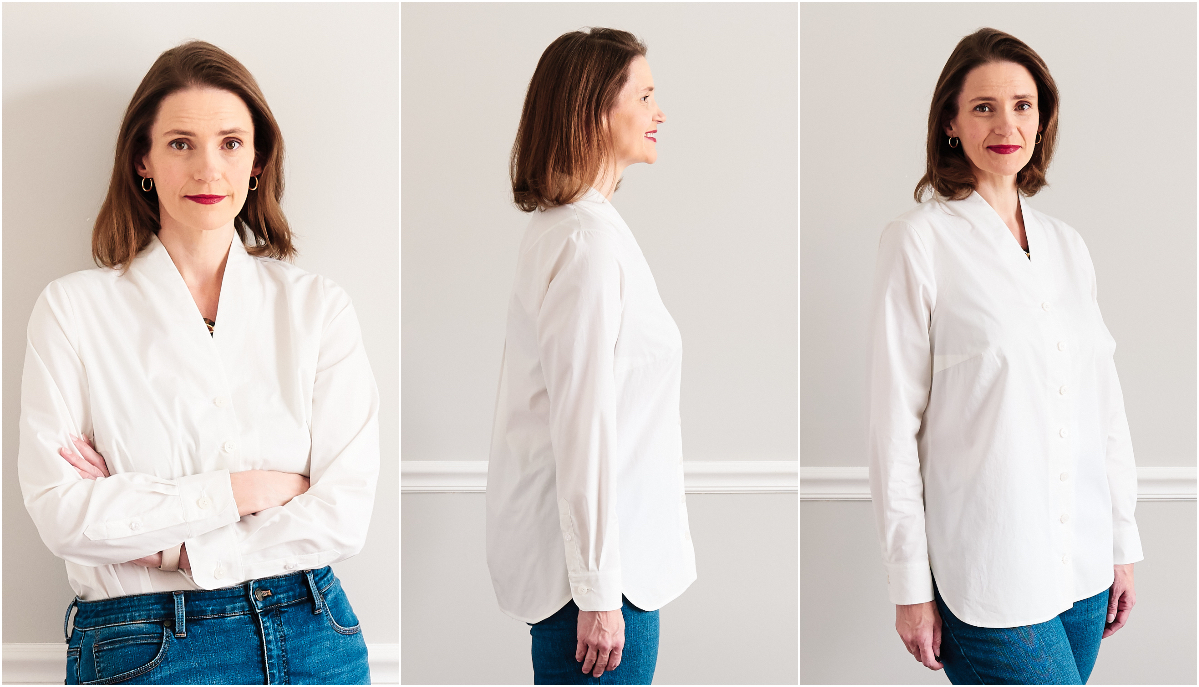
I sewed a muslin using the 10D without any fit alterations to get a sense of what might be needed. As expected, I needed some adjustments. From the front, the blouse looked ok. It looked like the bust dart might be a bit high and there was a little pulling across the hips, but it didn’t look bad.

From the side view, I could tell that I needed a forward shoulder adjustment. The wrinkles just behind the shoulder indicate that you need to rotate the entire sleeve forward. I work on a computer all day and sew at night which has affected my posture over time, so I usually need to make the forward shoulder adjustment.
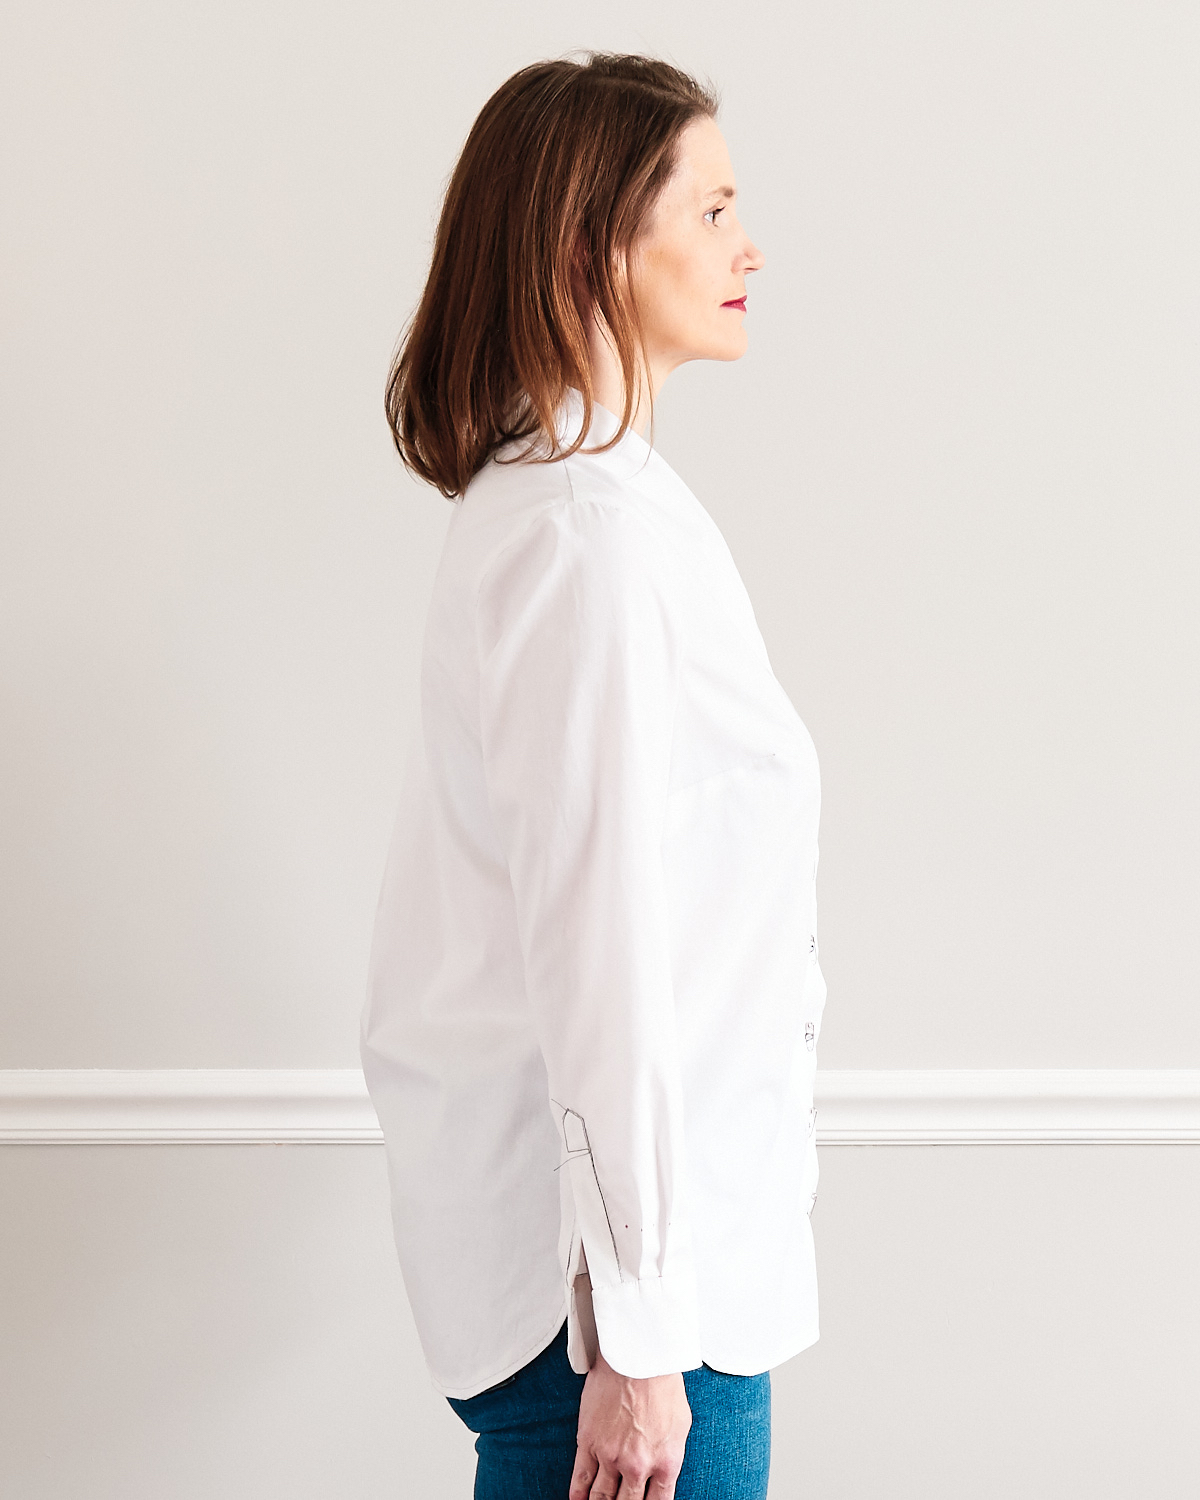
I was happy with the sleeve length.
The back view was a different story. I almost always need to do a high round adjustment, again because of my posture. If you typically have collars that stand out from the back of your neck or if it feels like your front neckline is pulling towards the back, you need a high round back adjustment. The way to check the fit is to wear a necklace. The neck seamline should hit right where the necklace falls on the back of your neck.
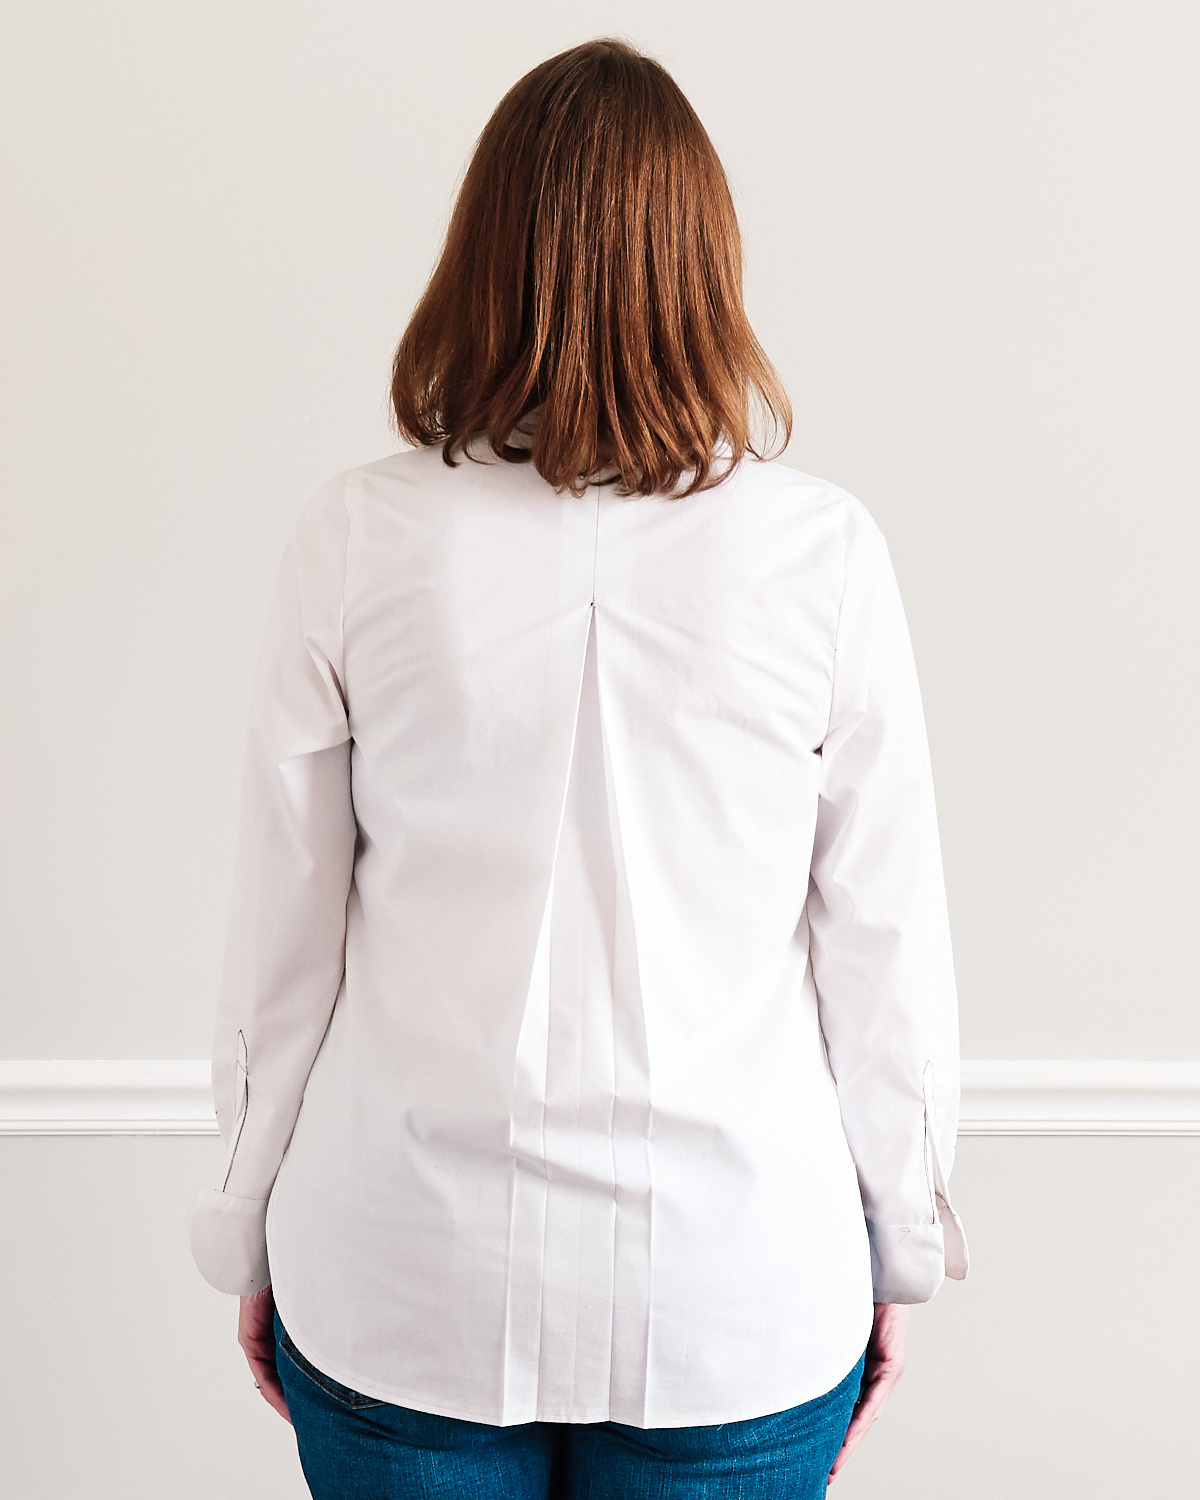
You can also see from the photos that the back is too narrow; the horizontal wrinkles between my arms indicate that more width is needed.
The hips are also too narrow which you can tell from the pleat pulling open, but I’ll come back to the hips later.
Flat pattern adjustments
Armed with this information from the first muslin, I started pattern adjustments and tissue fitting. Since the pattern has a reverse box pleat at the center back, I cut the pleat off during tissue fitting adjustments so that I could tell where the true center back hit on my body.
It is important to do fit adjustments in the proper order because the adjustments can affect each other. The high round back and back width adjustments are performed first. I did a 1/2” high round back adjustment and added 1” to the back width (which adds 2” to the circumference because 1” will be added to both sides).
Since I added an inch to the shoulder width, I would need to either ease in that inch during sewing to make the front and back shoulders the same length, or I could take care of the added width with a shoulder dart. Since I have rounded shoulders, I need a dart anyway, so I killed two birds with one stone. Another tissue fit and I could see that I needed a 1/2” swayback adjustment because I had too much tissue at my back waist.

With the back adjusted, I checked the front again and decided that I should lower the bust dart 1”. For the final tissue fitting, I decided that my hips needed 1/2” added to each side seam (which creates 2” total in the final garment).

A note about the forward shoulder adjustment: You can make this adjustment on the flat pattern or you can just rotate the entire sleeve forward. The outcome will be the same. I usually make the change on the flat pattern, but since I had never made a forward shoulder adjustment on a shawl collar I was hesitant to try. Now that I’ve sewn the shirt I realize it would have been fine. But it is easy to just rotate the sleeve forward so I’ll just keep doing that for this pattern. I did make a note on the pattern so that I wouldn’t forget the next time. I also made sure to add the center back pleat back on!
Version 1
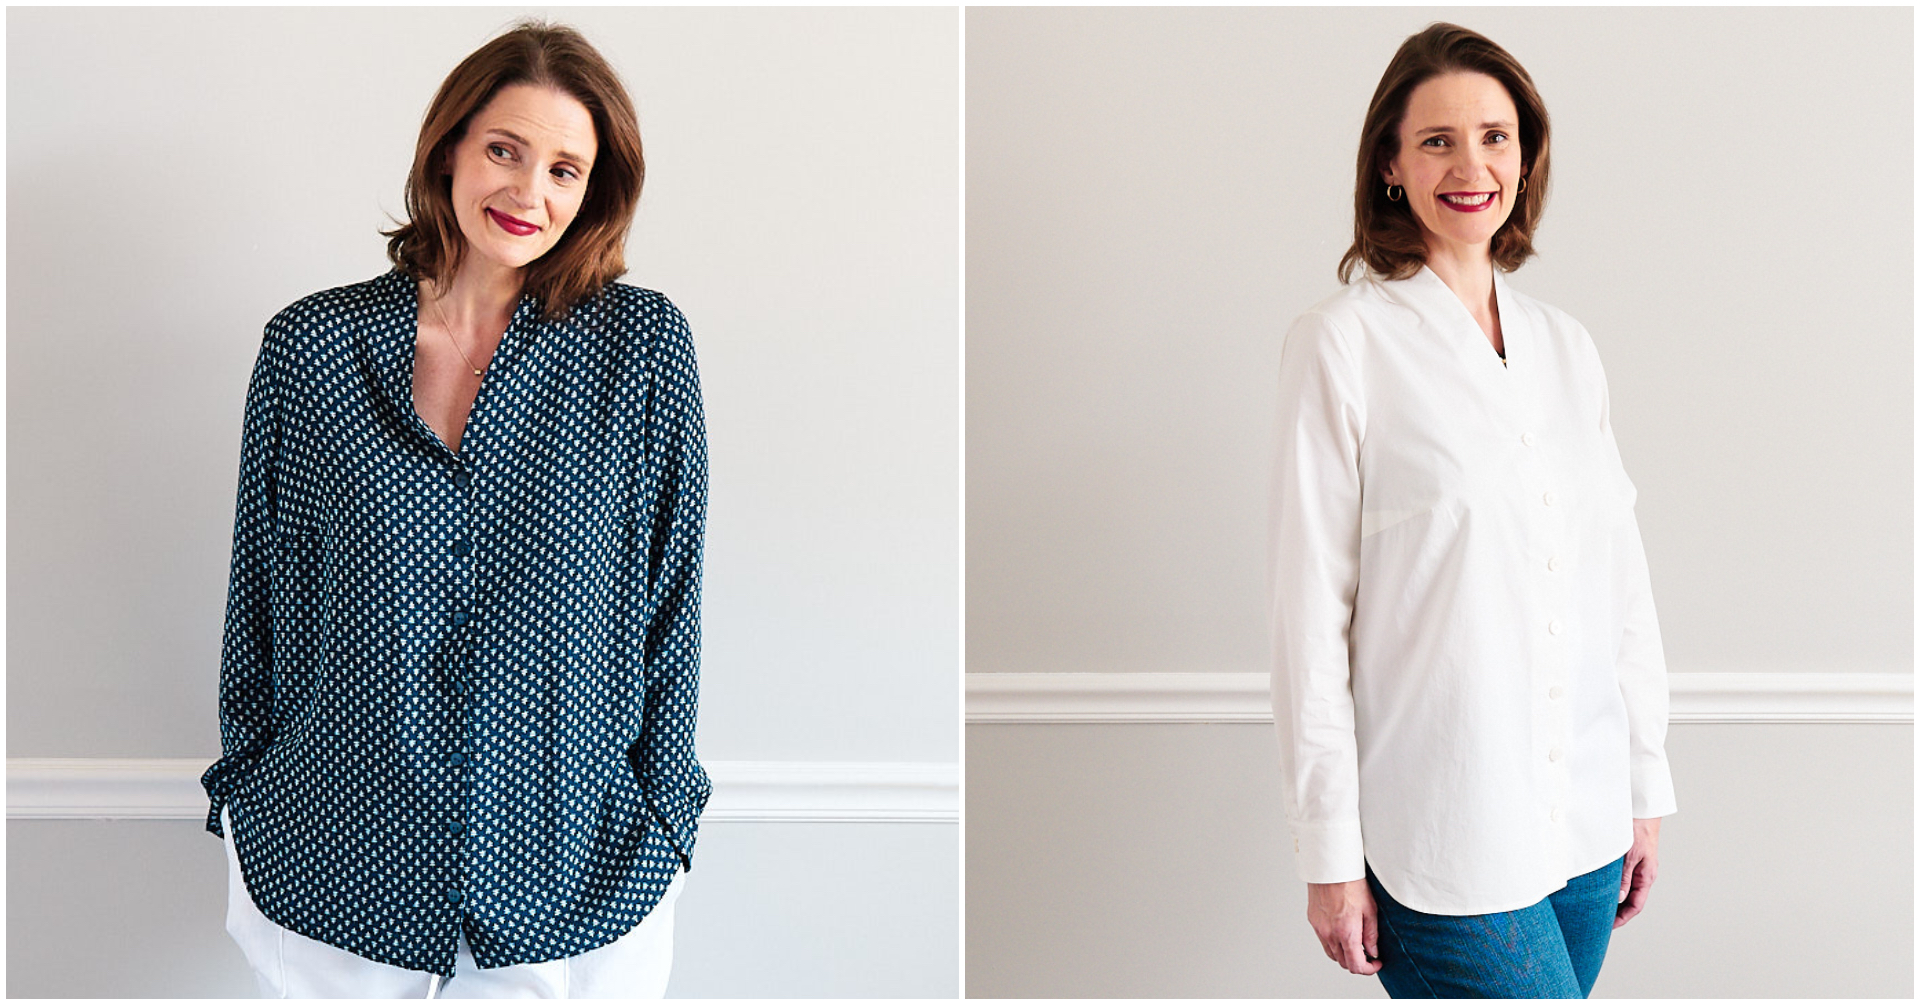
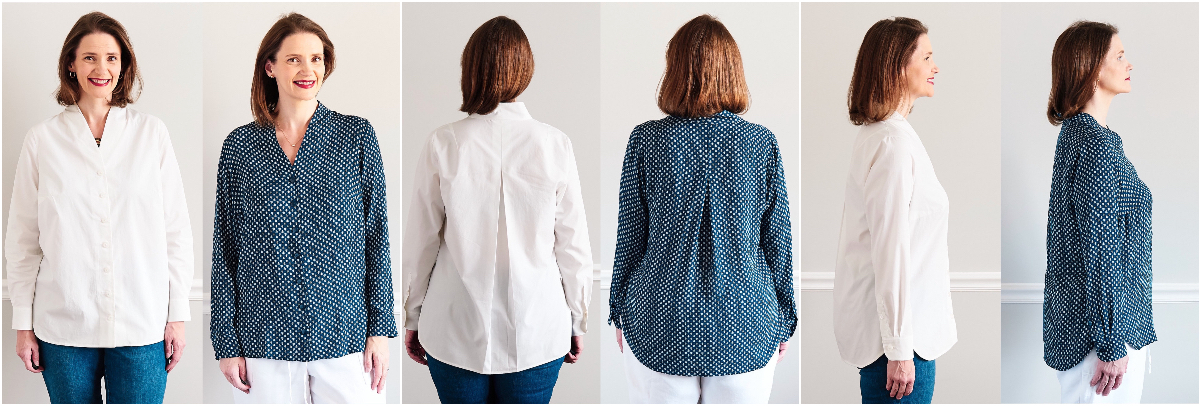
In my next sewn version, I used a really crisp shirting fabric. The fit on the shoulders and back is perfect. My side seam falls exactly at my side and hangs perpendicular to the floor. The position of the bust dart is good. The sleeve hangs perpendicular to the floor as it should.
I had to make some decisions about the hip width when I was sewing. Remember that I had added 2” to the width at the hips. With the box pleat added back in, however, I felt that I had way too much ease at the hips and it made the fit look sloppy (especially from the front). I decided to remove the extra 1/2” on the hips.

From the back it looks like the center pleat is being pulled open by my hip width, and maybe it is a bit, but I also think that is partly due to the crispness of the fabric. At the end of the day, however, I am the editor, and I thought the blouse looked better overall without the added hip width!
Version 2
In my second complete version, I used a lightweight and drapey fabric. I didn’t make any adjustments on the fit—the pattern was exactly the same as what I used for the crisp fabric.
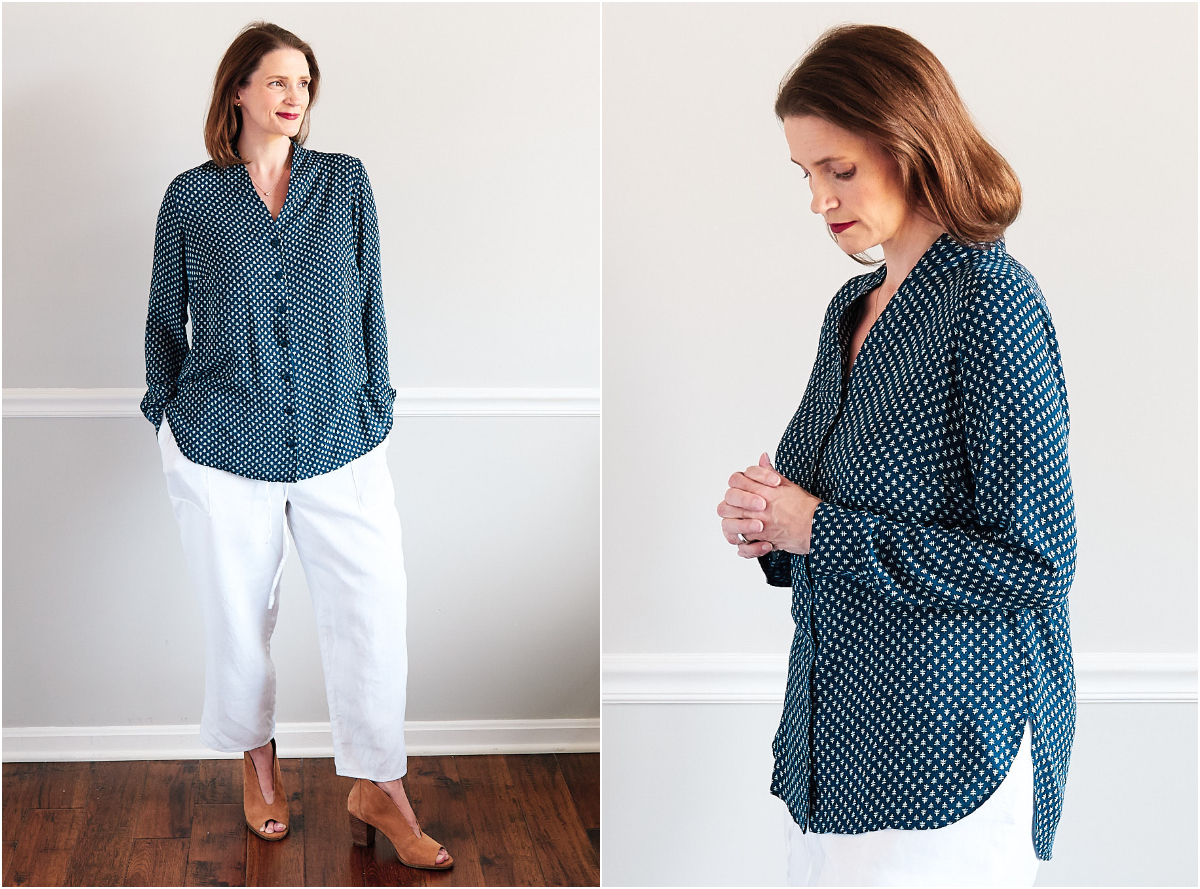
You can see that the type of fabric really affects the look. The drapey fabric glides over my curves whereas the crisp fabric maintains structure. Both looks are “correct!” The biggest difference between the crisp version and the drapey version is how that center back pleat lies.
If you are new to fit adjustments, it can seem overwhelming at first. But every single adjustment I made for this blouse—high round, back width, should darts, sway back, bust dart position, and forward shoulder—are my typical adjustments! Even when my weight was significantly higher than it is now, I still made these same adjustments. I just started with a larger size.
It is helpful to have a sewing friend who can help with fitting, but you can totally do it by yourself, too. I use a mirror and my smart phone to take lots of pictures. I have also started taking videos when I fit, moving around in the video, so that I can see how looks like when I move around. I’ve found that to be a really useful tool.
Really useful. Thanks!
Great! Glad it was helpful!
Great job describing how to read a muslin and how to do alterations!
Thanks, Kate!
That was so thorough and helpful. Thank you!!
Glad you like it!
What a wonderful review. I have many of the same issues and liked the way you methodically got the job done and finished with a lovely blouse with both types of fabric.
Thanks, Marge!
It’s so helpful to see this process in action – thank you. I realised half-way through that I have exactly the same measurements, so I’m bookmarking this for future reference – and to apply to the classic shirt that I have on my table right now.
Yay! Glad it was helpful!
Thank you. This was really helpful. Just one bit I don’t understand. Could you clarify ‘forward shoulder adjustment’? Do you mean that you rotate the sleeve clockwise so that the side seams are no longer aligned?
Bronwyn, That is it exactly! You rotate the sleeve forward (1/2″ for me). So you just make sure that each notch on the sleeve is 1/2″ forward from the notch on the armscye. It’s kind of confusing until you do it for the first time! But on the plus side you don’t have to worry about matching those underarm seams!
This is incredibly useful Lyndsey, and I am making a mental note to consult this when I sew this pattern perhaps coming winter. Thank you for taking us through the steps and of course seeing you in both the tops (the black/blue one is my favourite) is a treat. You look lovely and the fit is great.
Thank you, Asmita! I can’t wait to see your version!
Ah hah. Thank you.