Mire is here from the Advisors Circle today to explain how to do a square shoulder adjustment on a shirt with a yoke and a forward shoulder seam. She has helpfully illustrated what this fit issue looks like on an unadjusted shirt. Take it away, Mire!
I usually have diagonal drag lines from the corner of the shoulder towards the second button of my shirt. These drag lines tell me that I need a square shoulder adjustment. You can see them in the photo below.

I had to do this adjustment slightly differently than a normal square shoulder adjustment, because the pattern has a yoke with a slightly forward shoulder seam. I did my adjustment on the Classic Shirt pattern. Here is how to do a square shoulder adjustment on that pattern, or any pattern with such a yoke.
Square shoulder adjustment tutorial
Step 1
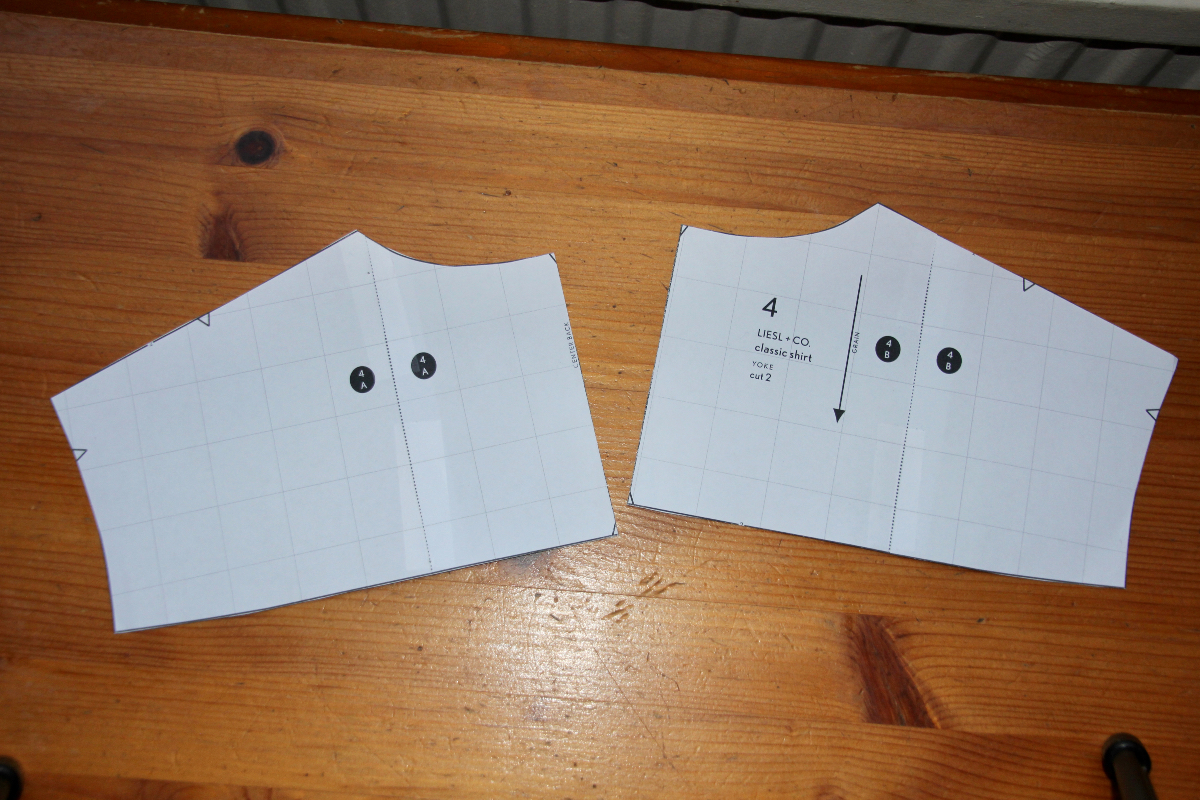
Draw a line down the center of the yoke and cut the yoke pattern in half (if your yoke pattern is cut on the fold, you can skip this step).
Step 2
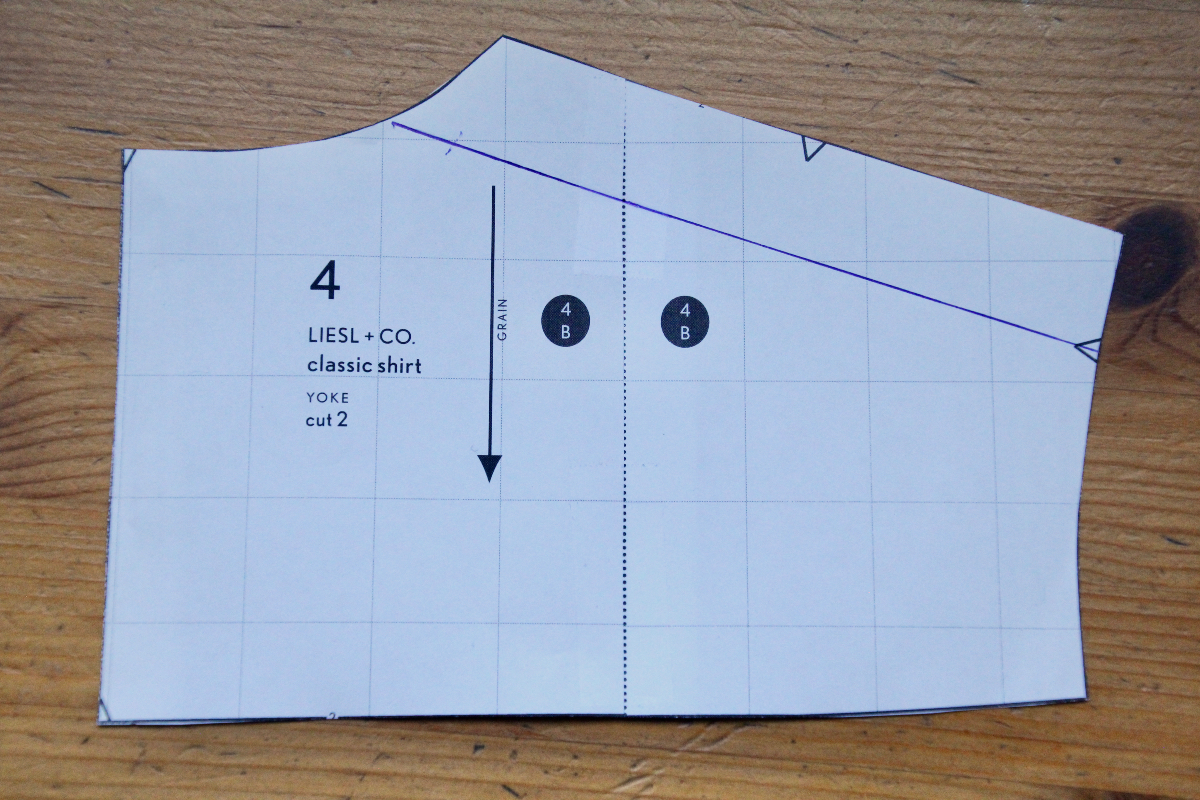
Draw a line from the shoulder notch to the neckline.
Step 3
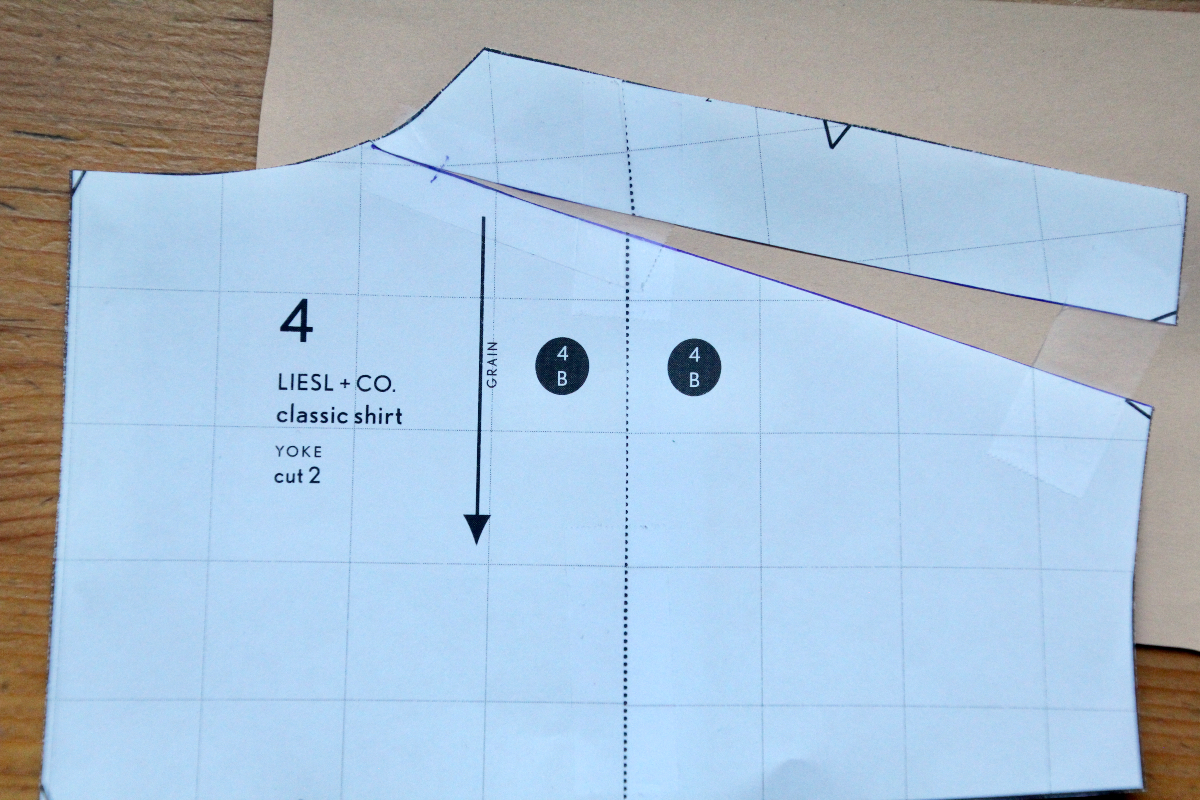
Cut along the line you just drew, starting from the shoulder seam and cutting to, but not through, the neckline. Leave a small paper hinge so that you can pivot the pattern.
Step 4
Insert paper underneath the pattern. Spread the pieces the amount of your adjustment. I added 1/2″. Tape the pattern in place.
If I were doing this adjustment on a centered shoulder seam, I would have added 1/4″ to the front and 1/4″ to the back. But this seam sits forward on my shoulder, so I had to add all 1/2″ to the one seam.
Step 5
Place the pattern on paper and trace it. Now you have two halves of the yoke. Cut out the half that you traced and tape it to the adjusted piece. Now the yoke pattern is ready.

Step 6
Next we have to raise the armscye so that its length doesn’t change. Raise the underarm of the front and the back pieces by half the amount of the total shoulder adjustment. In my case I raised each 1/4″.
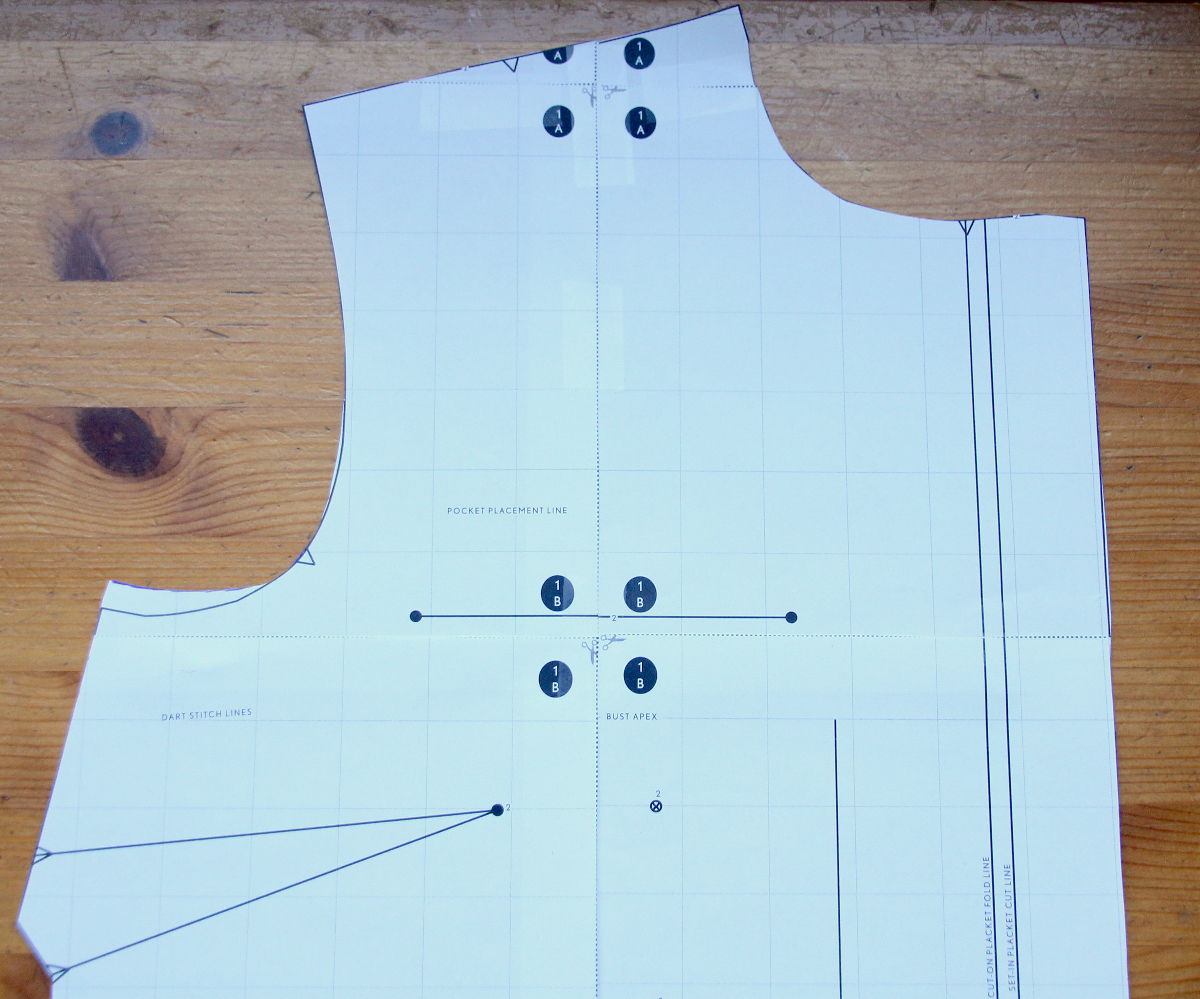
Normally, if the pattern doesn’t have a yoke, I would just raise the outer edge of the shoulder on both front and back, and then raise the bottom of the armscye on front and back the same amount. (See picture below.)
And that’s all there is to it!
Thank you for this! Although it feels obvious in retrospect, I’d never considered this as a source of my frequent shoulder fitting issues, when a look at the neckline of a recent make shows that this is clearly an adjustment I should be making.
I came to the comments to say the same thing! I’ve always done a broad shoulder adjustment instead, but I’m going to re-think that, now!
Could you show how to make the square shoulder adjustment on a raglan sleeve?
The other issue is doing a high round adjustment with the square shoulder adjustment with the forward yoke. And to add to that I like to make front yoke about 1” longer and lengthen the back so yoke is about 6”-8” long (great for embroidery or diamond pintucking on yoke,)
I would appreciate you addressing this double issue.