Invisible zipper. Two words that can strike fear into the heart of even the most seasoned sewists.
But inserting an invisible zipper doesn’t have to be scary. Although you don’t sew an invisible zipper the same way you do regular zippers, it’s not that difficult. And we’re making it as easy as possible with this thorough, step-by-step photo tutorial to insert an invisible zipper.
You’ll be sewing beautiful, professional invisible zippers in no time.
This popular post was originally published here on the blog in November 2018. We’re updating it to make it more useful for our readers.
Tutorial: How To Insert An Invisible Zipper

In this tutorial, we’re sewing an invisible zipper on a Liesl + Co. Extra-Sharp Pencil Skirt.
Prepare the invisible zipper
1) Close the invisible zipper and use a pencil or fabric-marking pen to mark the wrong side of the zipper tape at the top of the zipper slider (the metal part that moves up and down).

2) Unlike a regular zipper, the zipper tape on an invisible zipper “folds over” next to the coils, or teeth, so that the coils wrap to the back of the zipper. To insert the zipper, you’ll first need to iron the zipper tape flat so that your sewing machine can stitch very close to the edge of the coils. To do this, begin by setting your iron to a low setting (to keep from melting the plastic coils). Then unzip the zipper and, working from the zipper’s wrong side press the zipper tape flat, uncurling it as you press. Leave the zipper unzipped until you’ve finished inserting it so that it stays pressed flat while you work.
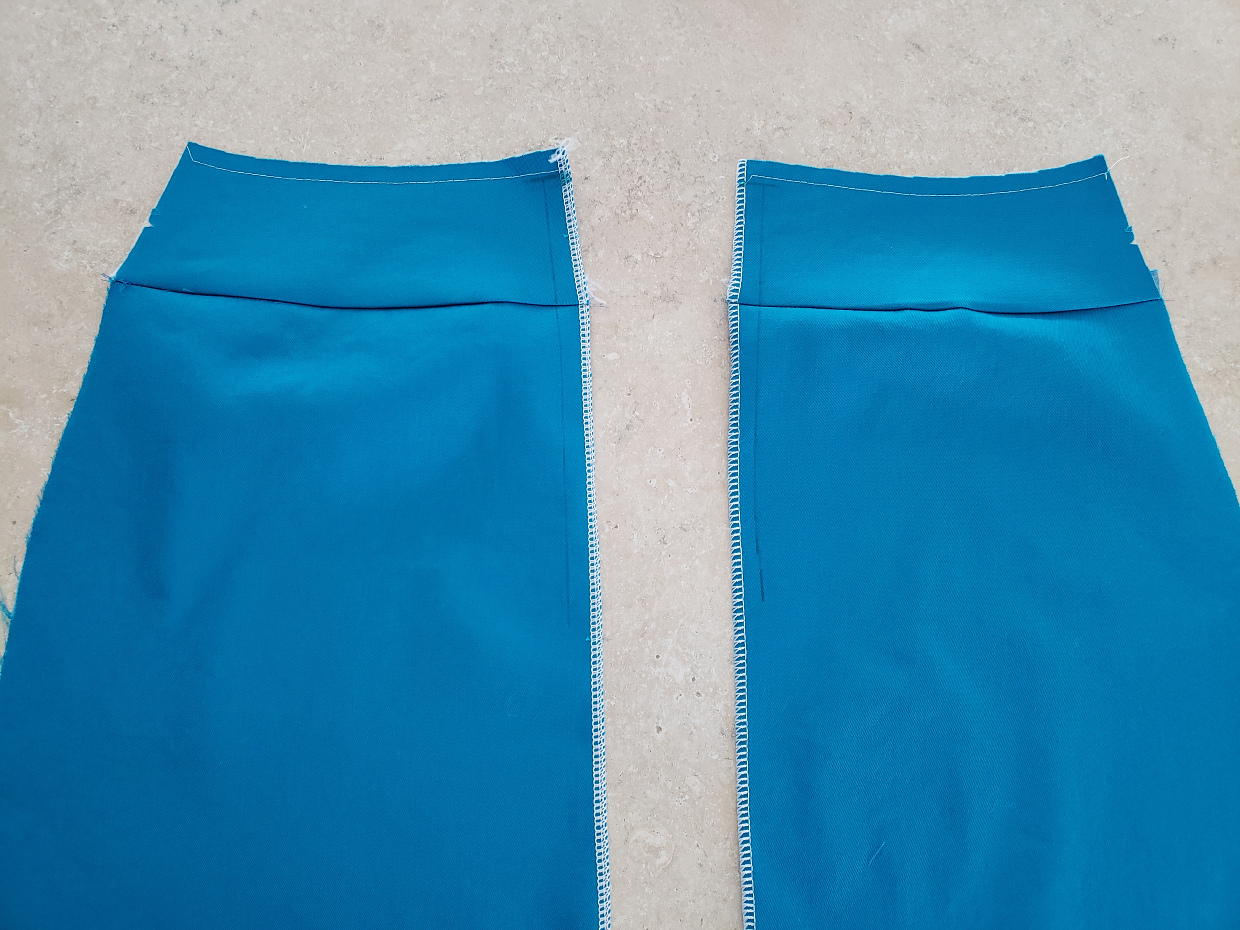
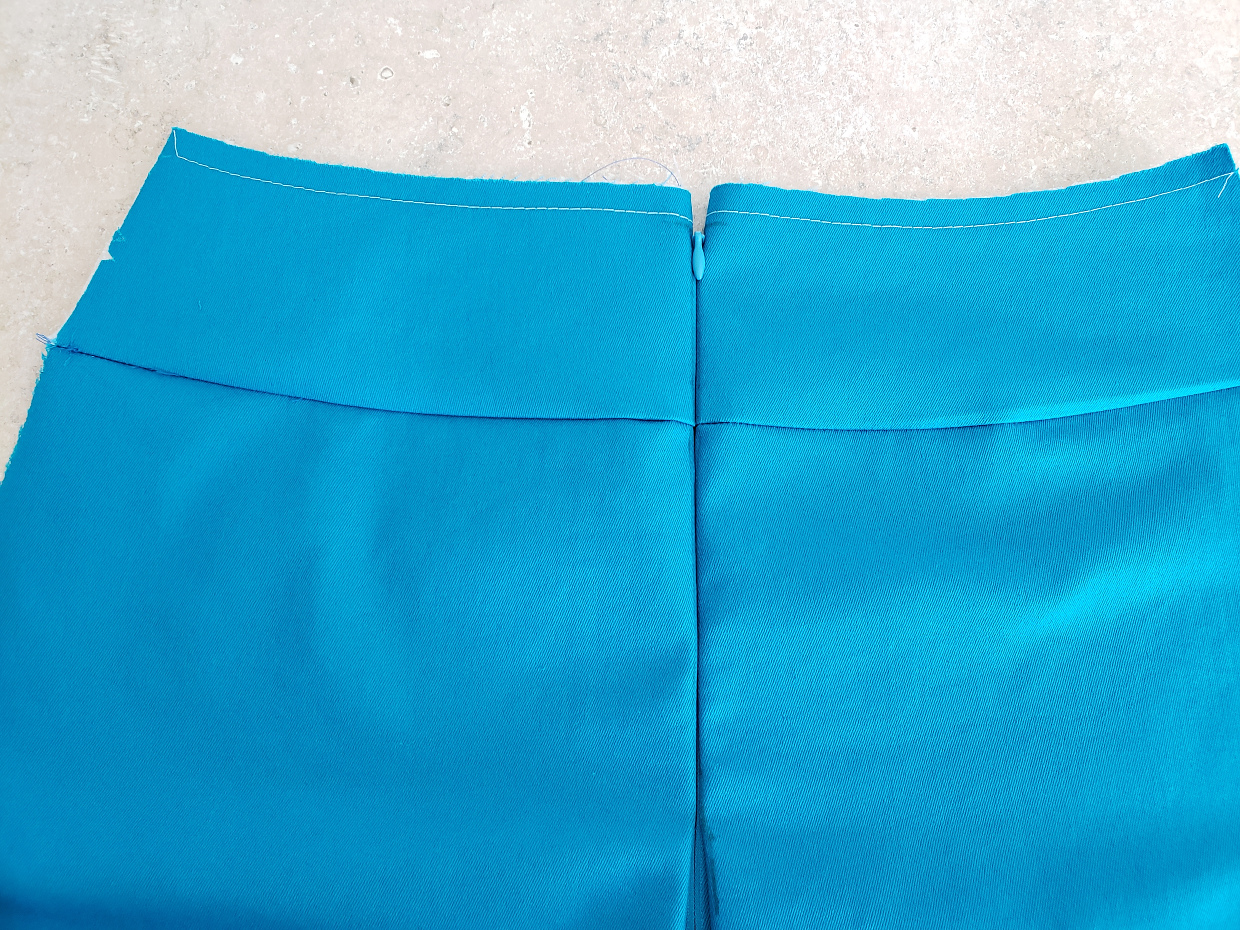
Prepare the fabric
3) Using a water-soluble fabric-marking pen or tailor’s chalk, draw the 1/2” center-back and waist seamlines on the right side of the fabric. This will help with aligning the zipper in the next steps.
Sew the invisible zipper
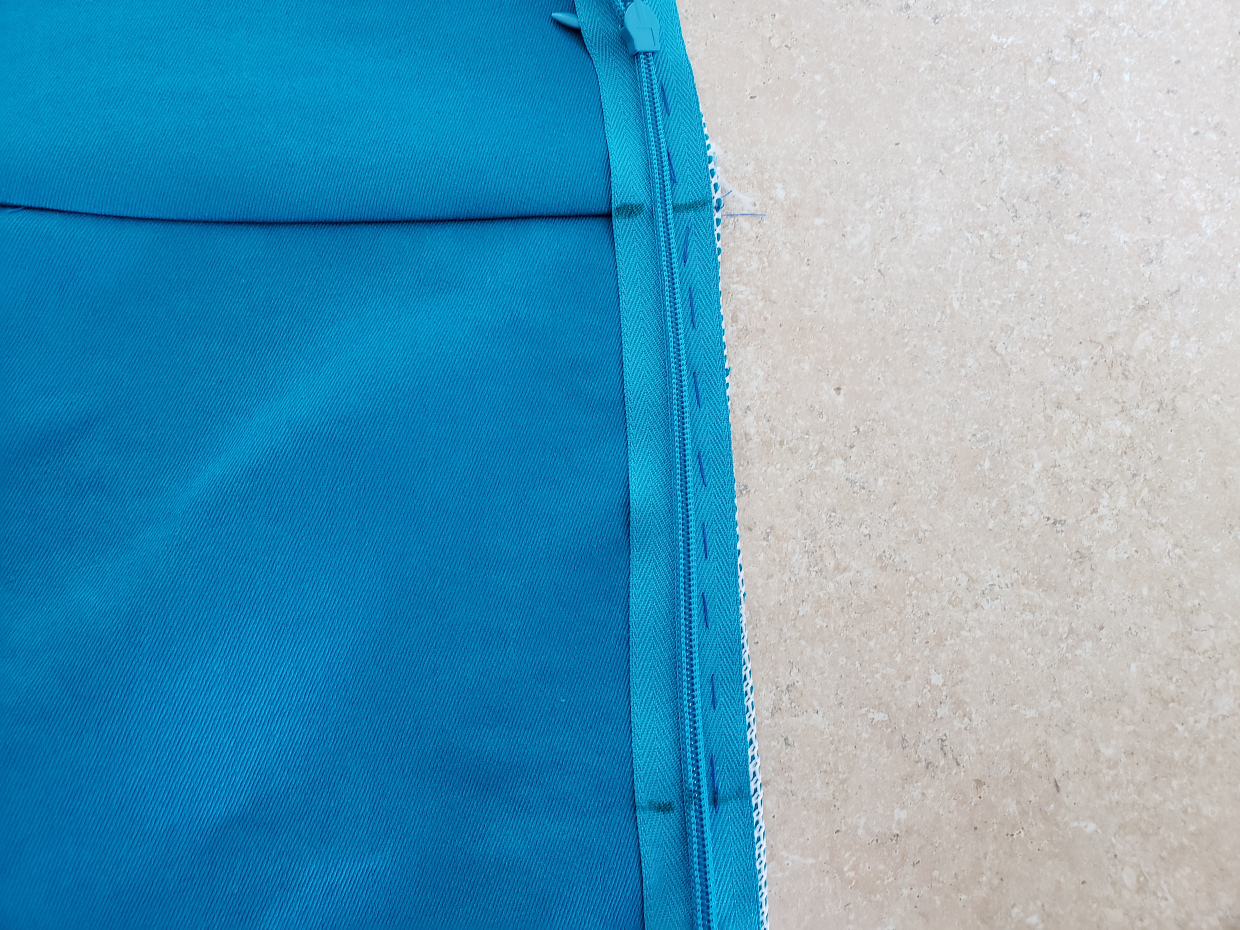
4) Starting with the wearer’s left side of the skirt-back piece, place the zipper tape face down on the right side of the fabric. Pin the left side of the zipper tape to the fabric so the edge of the coils aligns with the 1/2” seam line, the zipper tape sits in the seam allowance, and the mark at the top of the zipper sits just below the folded top edge of the waistband (1/8” is a good distance). Hand-baste or glue (using a water-soluble glue stick) the zipper to the fabric along the center of the zipper tape to the dot you transferred from the pattern piece. If the zipper is longer than the dot, just leave the zipper’s extra length hanging for now.
If you have an invisible-zipper foot, attach the foot and line up the needle with the center mark. If you’re using a regular zipper foot, attach the zipper foot to your machine and adjust the needle to be on the left side of the foot. Stitch the zipper to the fabric close to the coils (without stitching into the coils themselves), sewing from the mark at the top of the zipper to the dot and backstitching or lockstitching at both ends of the seam. Note that the zipper will be longer than the dot, and you won’t be sewing all the way to the end of the zipper.

5) Close the zipper (for just a moment, so you don’t need to press it flat again) and mark on both sides of the zipper tape where the yoke seam hits the zipper and where the zipper hits the dot you transferred from the pattern. This will help you to line up the zipper on the back of the skirt so the waistband seam and the side seam line up when the zipper is closed. Reopen the zipper and pin the zipper to the right side of the skirt back, matching the markings on the zipper tape to the top of the yoke and the dot you transferred from the pattern.
6) Move the zipper foot (or the needle, depending on the type of zipper foot you’re using) to the opposite side so the needle sits to the right of the zipper foot. (If you’re using an invisible-zipper foot, you may not need to make any changes.) Pin the opposite side of the zipper facedown to the skirt-back panel so, again, the edge of the coils aligns with the 1/2” seam line, the zipper tape sits in the seam allowance, and the mark at the top of the zipper sits just below the folded top edge of the yoke, the same distance as you placed it in Step 4 above. The zipper tape will seem to be twisted at the bottom if you have everything pinned and stitched properly. As before, baste or glue and then machine-stitch the zipper to the fabric close to the coils, sewing from just below the mark at the top of the zipper (don’t stitch the upper zipper tape so you can move it out of the way later) and continuing down to the dot you transferred from the pattern piece, backstitching or lockstitching at both ends of the seam.
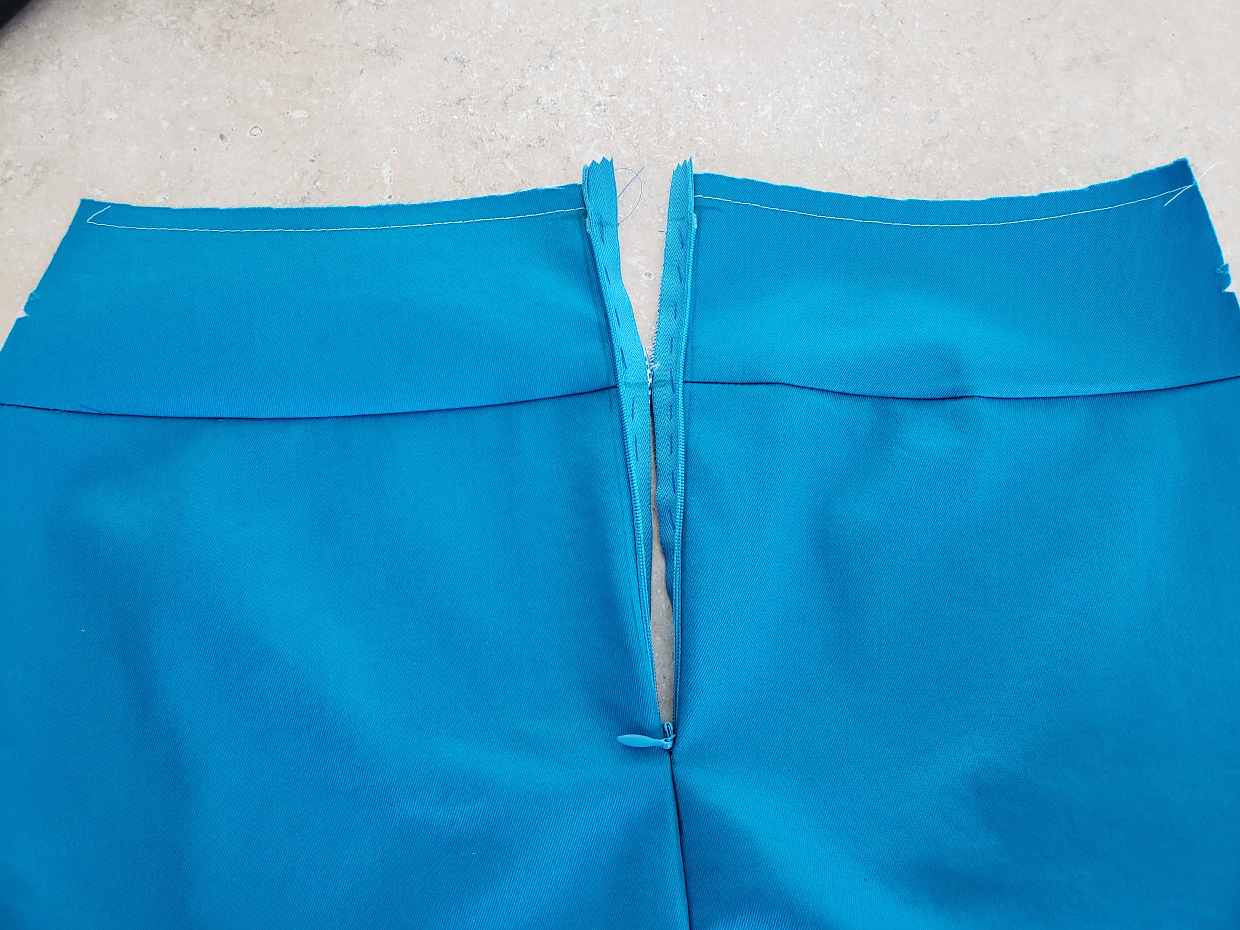
7) Close the zipper and check to be sure that it is invisible from the right side of the fabric. (If the zipper shows, you may need to stitch again closer to the coils.) Pin the skirt-back pieces together below the zipper opening, with right sides together. Fold the end of the zipper out of the way and lower the machine needle by hand about 1/8” above and just slightly to the left of the last stitches on the zipper. Note that the two seam lines will not meet but will instead be slightly offset. Stitch the seam for about 2” using the zipper foot, backstitching or lockstitching at the start of the seam. (The zipper foot will allow you to get closer to the seam line without the bulk of the zipper interfering.) Leave the rest of the center-back seam open for the moment so you can finish the walking vent.
8) Check to be sure that the center-back seam is smooth, especially at the base of the zipper. If the seam puckers or gaps, adjust it as necessary. It may take a little fiddling to get everything aligned properly.
Finishing touches when you sew an invisible zipper
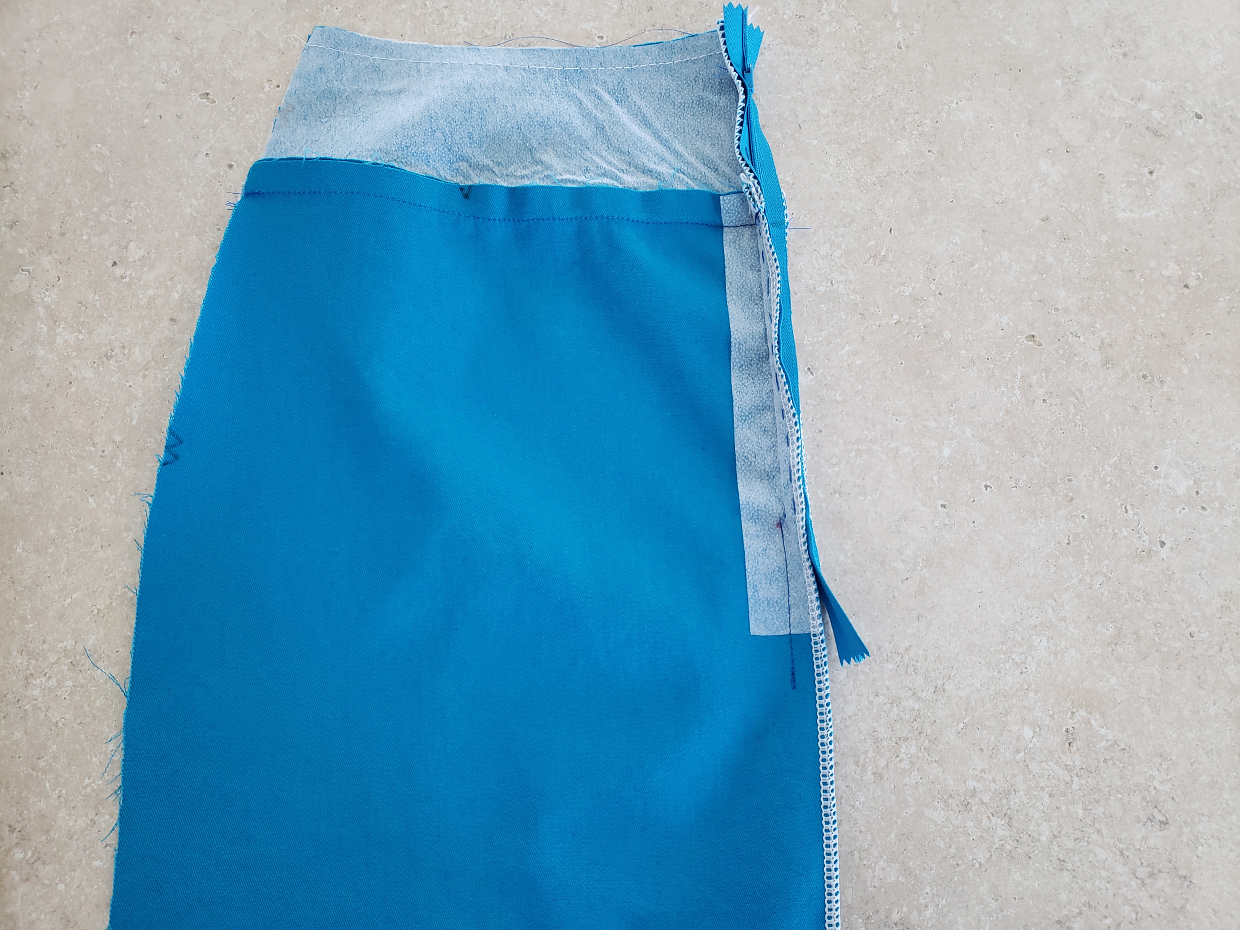
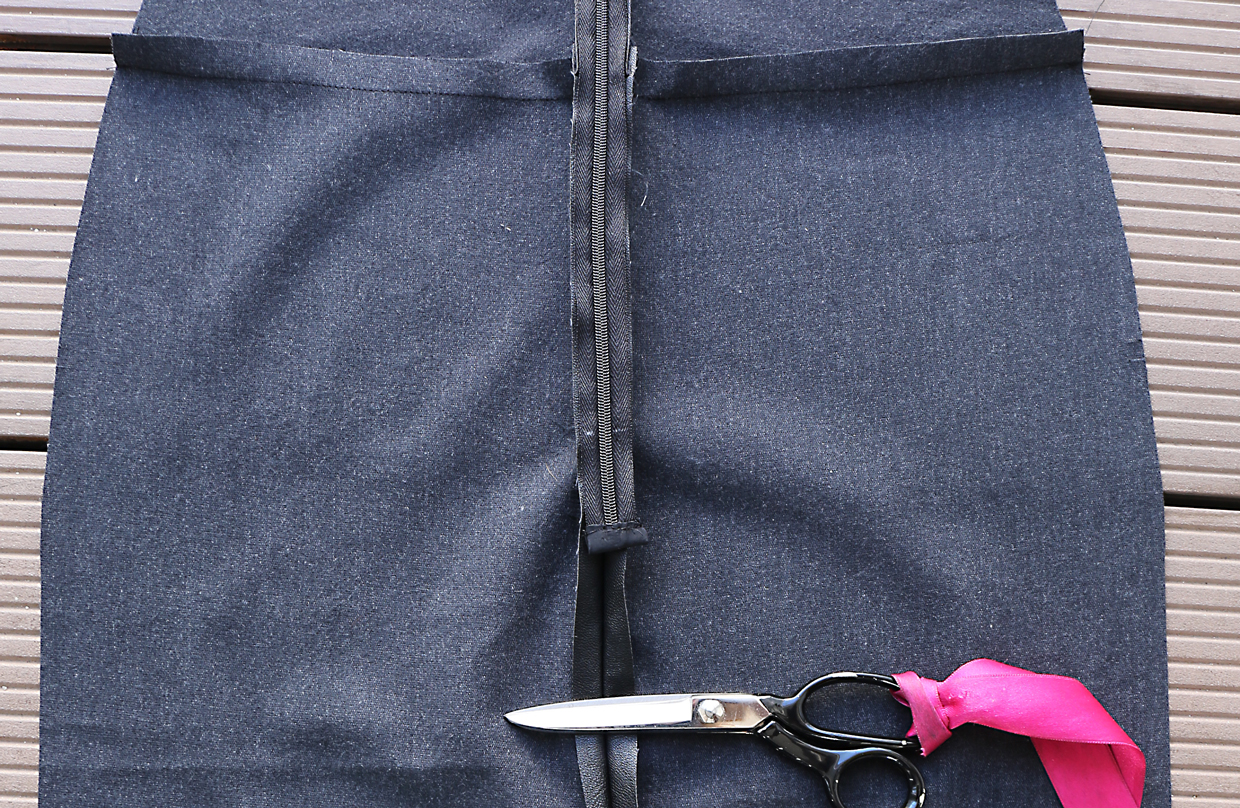
9) At the bottom end of the zipper, stitch about 1” of the zipper tape to the seam allowance to secure it. This will make it easier to close the zipper and will keep the bottom of the zipper from shifting. (Use the zipper foot for this step; it’s easier.)

If you used a longer zipper you can also cut it shorter now, using a paper scissors. When I shorten a zipper I like to finish the cut end with a little scrap of fabric to make it look nice and to keep it from being scratchy.
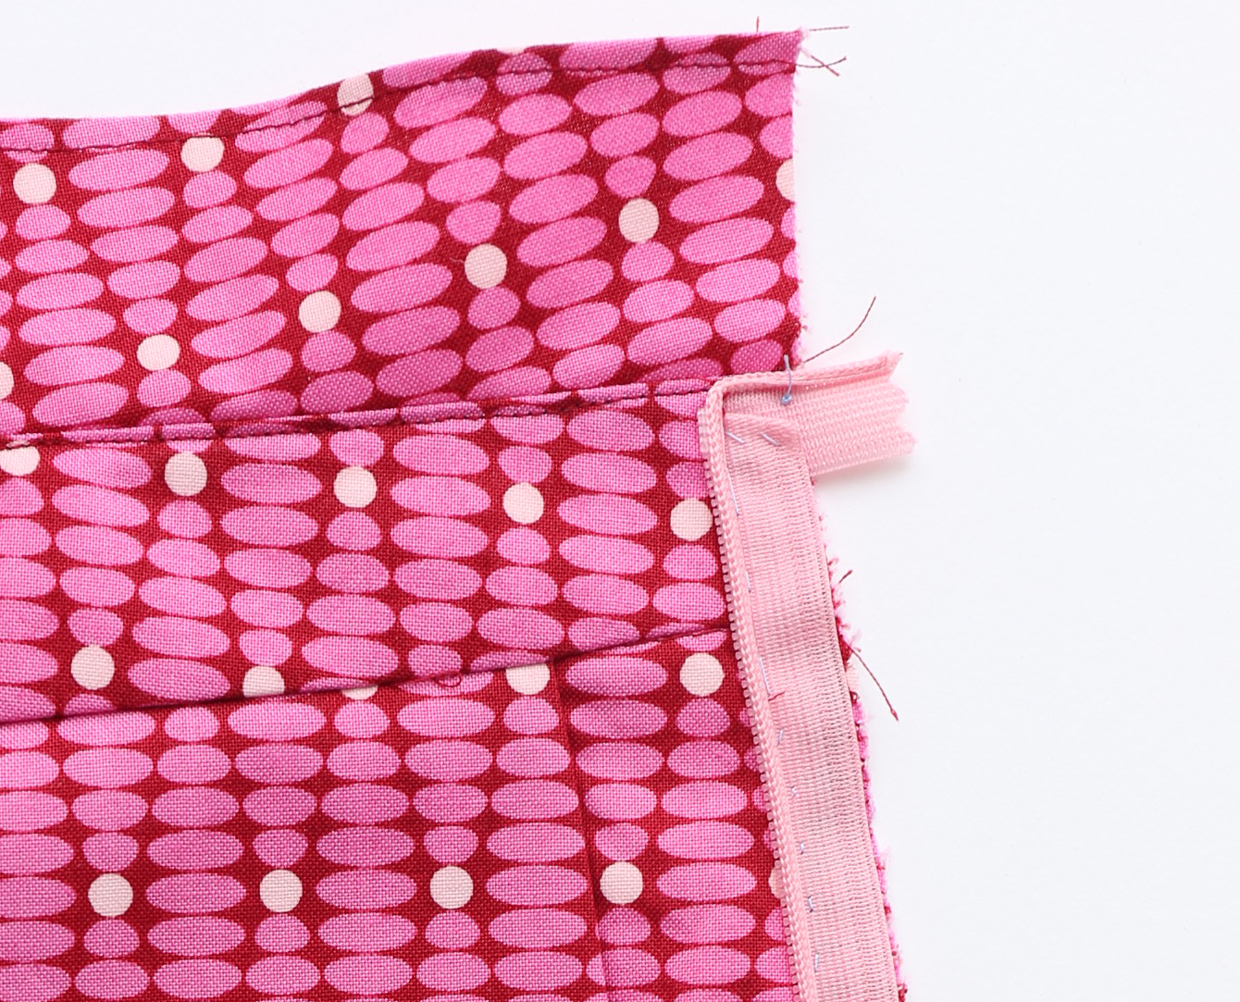
10) Bend and fold the top of the remaining zipper tape toward the seam allowances of the garment. Stitch the loose top ends of the tape to the seam allowances to keep the tape out of the way.
And that’s all there is to inserting an invisible zipper. If you try it out, let us know how it goes in the comments.
If you enjoyed this post you might also like our tutorial on Changing a Button-back Opening to an Invisible Zipper.
Thanks for the tutorial! In your description it doesn’t really sound like there’s any advantage to a specific foot for an invisible zipper – is that the case?
In general I would suggest using an invisible zipper foot if you have one available. I use Janome machines and they have only a basic zipper foot, which works fine, but I do prefer the invisible zipper foot if you can get one. I hope that helps!
Thanks for this great tutorial! I find my invisible zipper foot is great because I can get a lot closer to the teeth of the zip than I can with my regular zipper foot. The invisible zipper foot has a small groove for the teeth of the zip, so everything stays nicely aligned. I switch to a regular zipper foot to sew the seam 1-2″ below the zip, and then switch to the regular foot for the rest of the seam.
Yes, you’ve got it! Sounds like you’ve mastered this technique!
Can you show how you sew the little piece of fabric to the end of the tape? And the pink picture is unclear re is the tape folded at the top of the skirt?
What foot do we use to install the invisible zipper?
Either an invisible zipper foot or a regular zipper foot. Step 4 of the tutorial gives instructions for each foot.