If you’re like me, you always need a full bust adjustment. But sometimes, particularly when I’m working with knits, I don’t want to add a dart to a top. I have graded out to a larger size at the bottom of the armscye, and it works, but I never liked the fact that this changes the size of the armscye. I find that this can lead to excess fabric in the armpit area, creating more drag lines than are necessary.
Enter the dartless pivot-and-slide FBA. (If you are looking for instructions on how to make an FBA and add a dart to a dartless bodice, we have a tutorial for that here.)
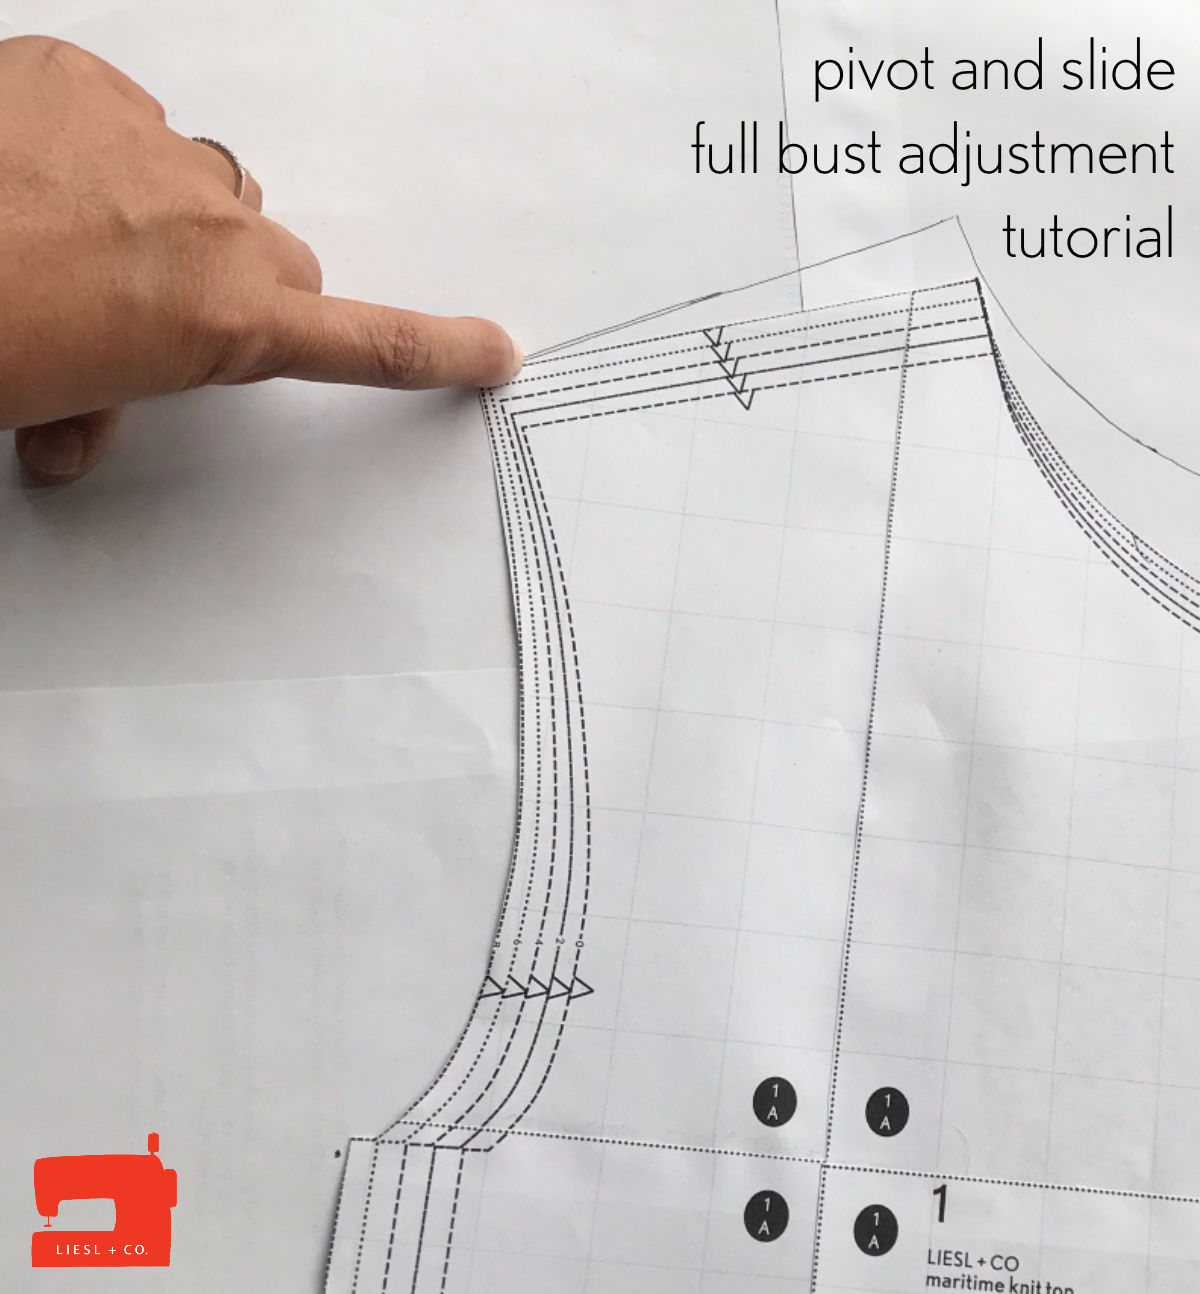
I used the pivot-and-slide method most recently on a Maritime Top I sewed for myself, and I’m going to walk you through it now.
Step 1
We’ll begin by determining how much room you need to add. Measure your high bust and your full bust. My high bust is 36″ and my full bust is 40″. I always use my high bust to find my pattern size, which in Liesl + Co. patterns, is a size 8. (Note: My full bust is a size 14, however, if I use my full bust measurement to choose my pattern size, I will end up with a top that is far too large in the shoulders and neckline. So I always do an FBA of some kind.)
Next, decide how much ease you want. Ease is the difference between your measurement and the pattern’s finished measurement. If you are not sure how much ease you want, you can always consult the finished measurements of the pattern. (This information is available on the pattern page for Liesl + Co. patterns.)
In my case, the size 14 finished bust measurement is 40 1/2″, while the size 8 finished bust measures 38″. That’s a difference of 2 1/2″. Since my bodice pattern piece is only half the bodice (because it is cut on the fold), I only need to adjust it 1 1/4″. Figure out how much your adjustment will be and remember it, as we will need it in Step 3.
Step 2
Prepare a large sheet of paper (you can glue smaller pieces of scrap paper together the way I did below. We are only going to add to the side of the pattern piece in this tutorial, so I used an oddly-shaped piece of paper. You do need to make sure that paper extends past the entire shoulder, neckline, and about an inch or two below the neckline at center front.

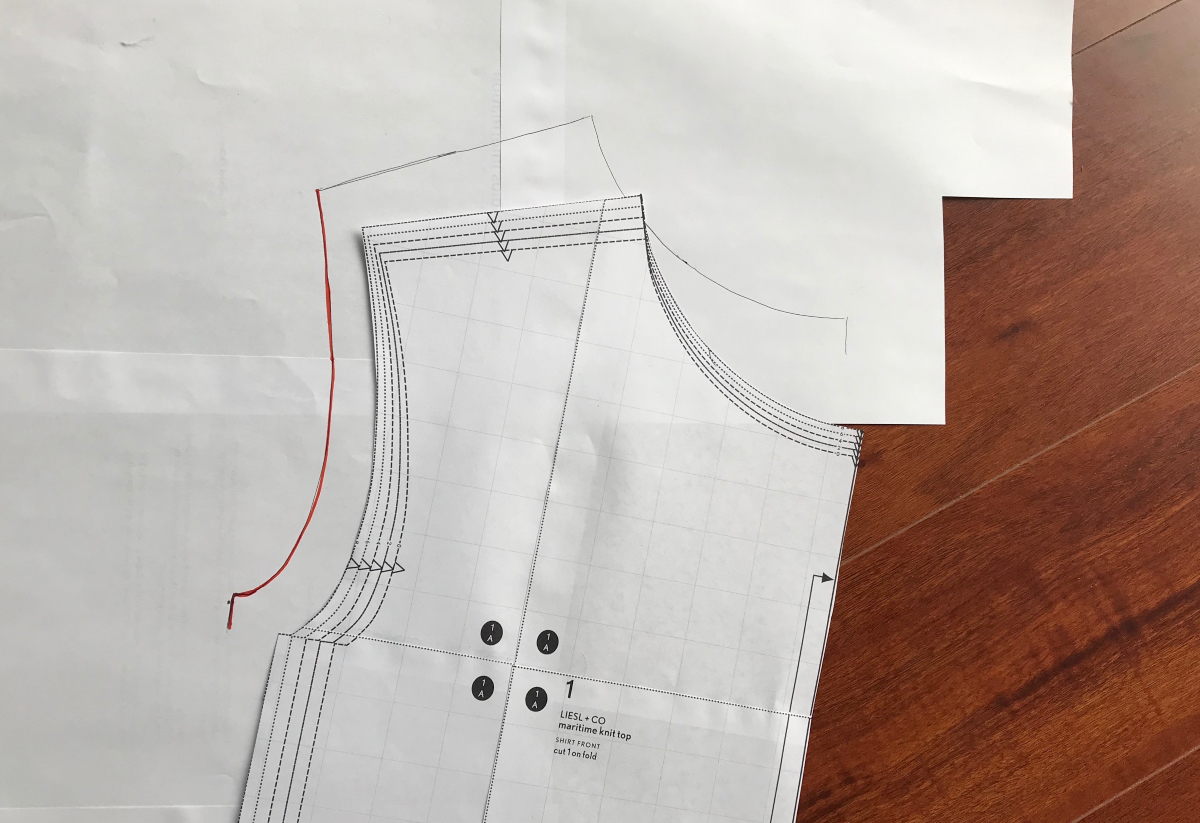
Place your front bodice piece on the paper and trace the shoulder, neckline, and an inch or two down the center front..
I have removed my pattern piece from the paper to show you what I traced, but you do not need to do that. If you do, line the pattern back up against your tracing markings before proceeding.
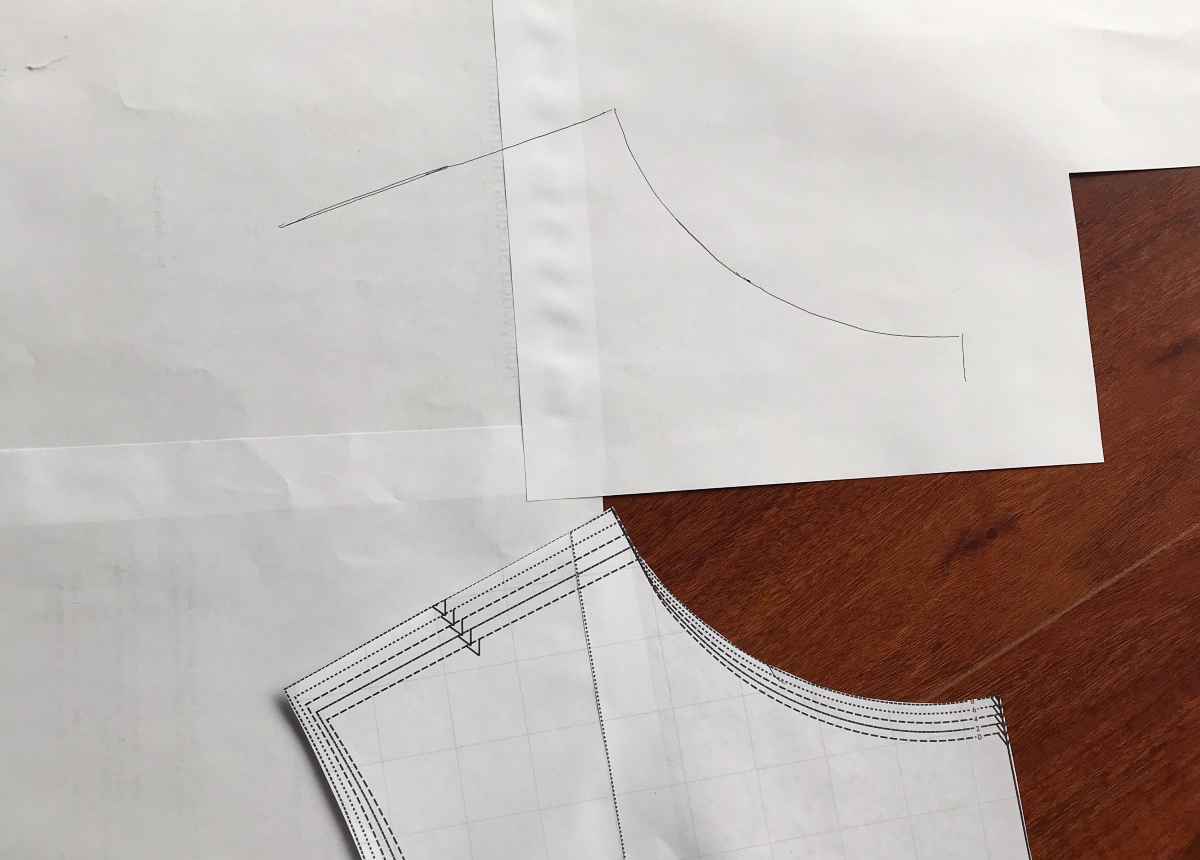
Next, trace the bottom side seam corner of the pattern. Below, I’ve moved my pattern out of the way so you can see what I traced. I will return it to the original position before proceeding to the next step.
Step 3
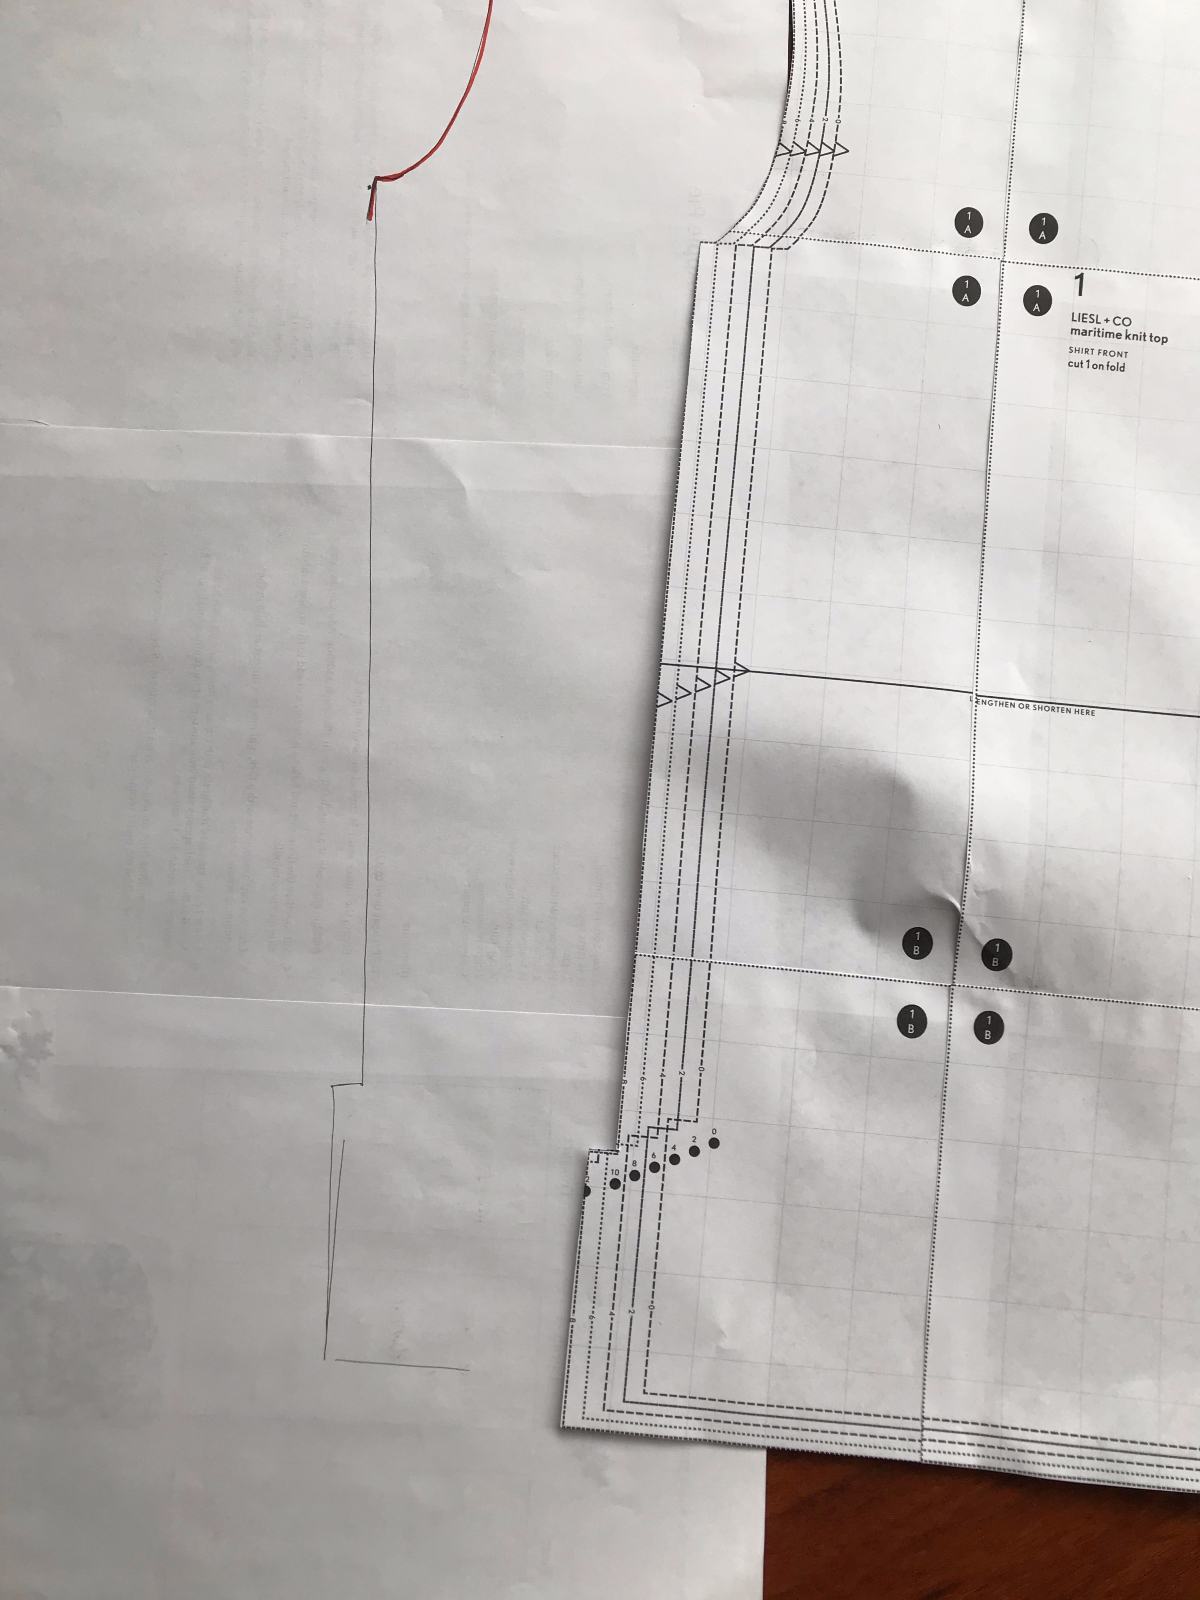
Next, mark a dot at the same level as the bottom of your armscye. The dot should be the same distance away from the armscye point, as the adjustment measurement that we calculated in step 1. My adjustment measurement is 1 1/4″, so I drew my dot 1 1/4″ away from the armscye point.

Step 4
Next, we’re going to swing the pattern piece out to meet that dot. To do this, you need to press firmly down on the outer corner of the shoulder with your finger to keep it in place, while swinging the side seam outwards. You could anchor the shoulder point down with something if you want, but I don’t find that to be necessary.
Step 5
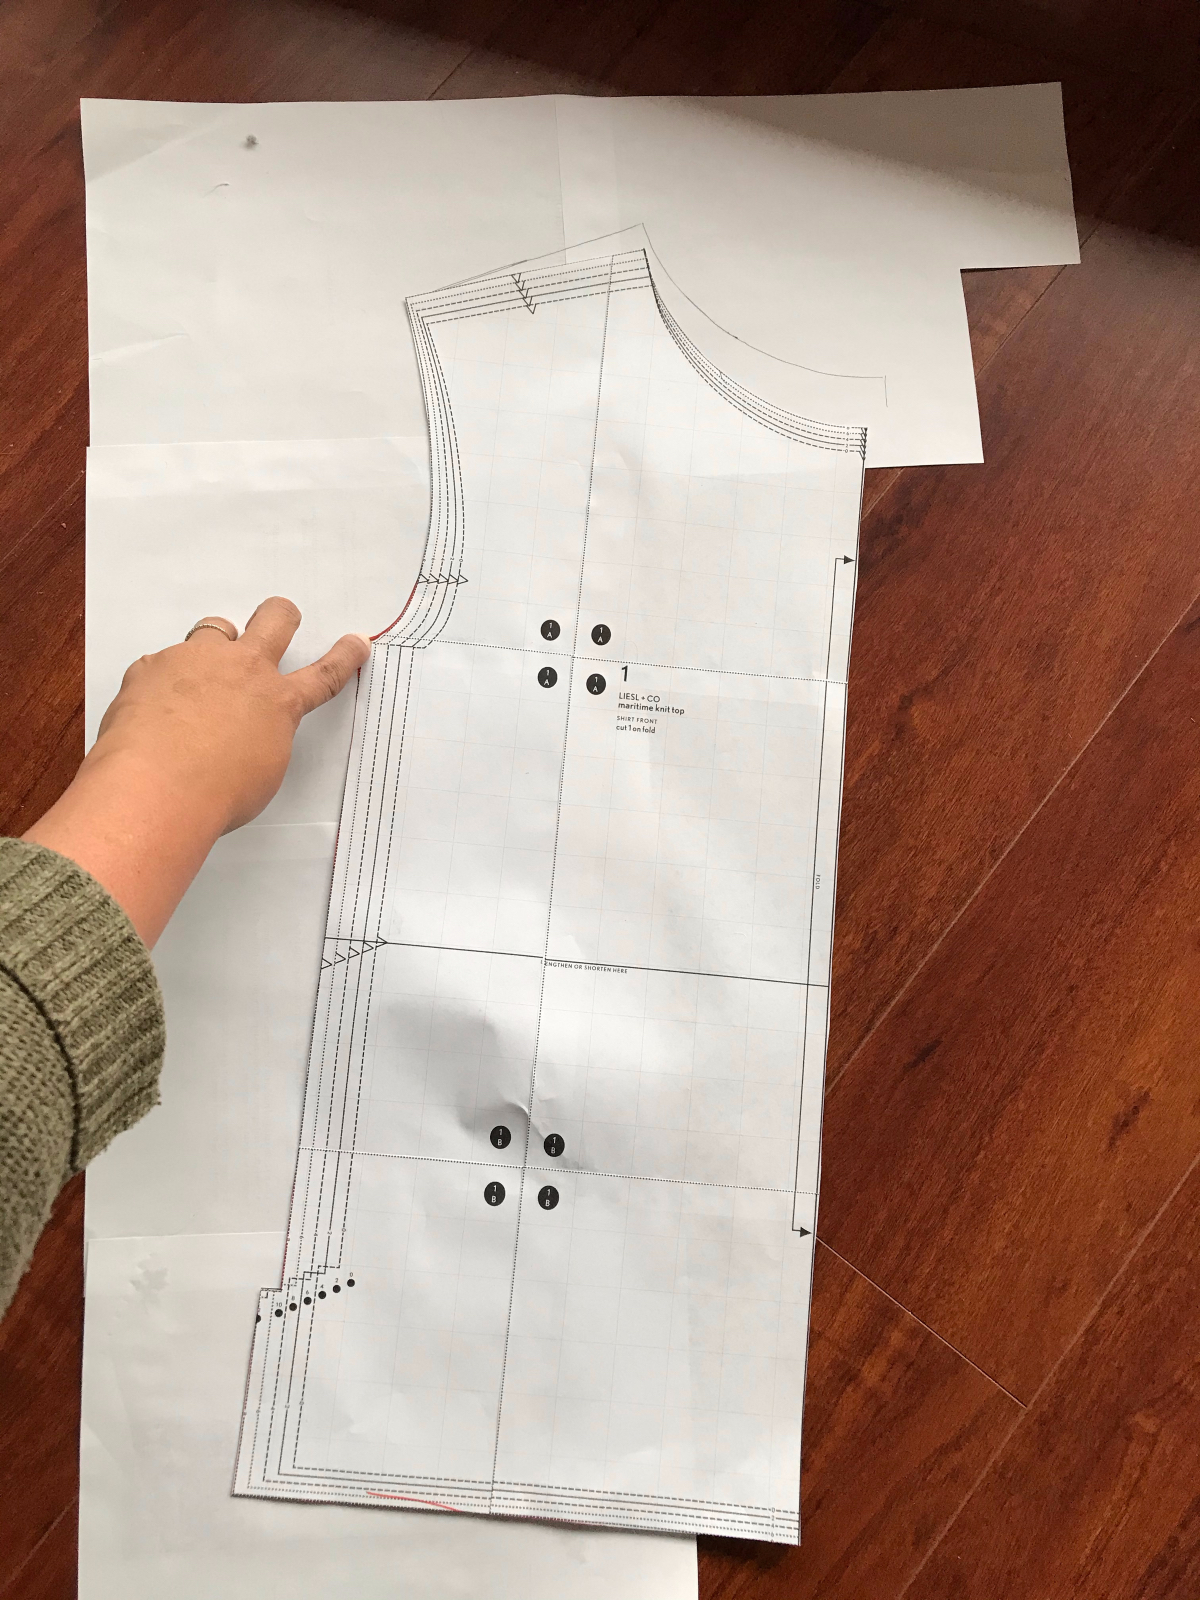
Time for more tracing. Trace the armscye from the outer shoulder point, down to where the armscye meets the side seam, and extend the line of the side seam down an inch or so. I’ve made this tracing in orange below.
Step 6
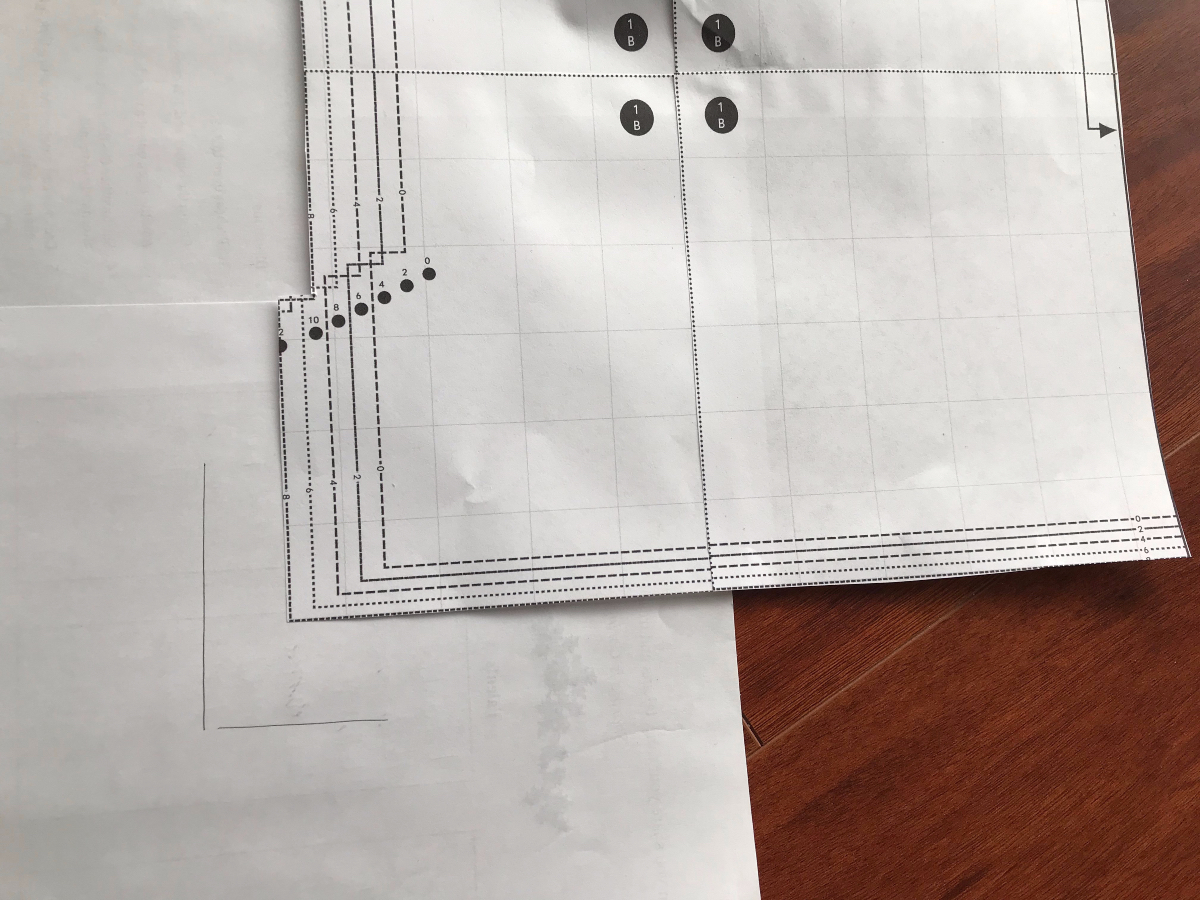
Now it’s time to draw our side seams. The classic pivot-and-slide method calls for drawing a side seam line that curves in to the original hip measurement. If you do not need the extra waist and hip room, you can do this. To do so, simply draw a line connecting the armscye/side seam junction at the top, with the tracings you made at the bottom corner of the side seam and hem. Below you can see what mine would look like, if I did this.
But if, like me, you need extra space, you can just pivot back to make the side seam fall parallel with the original side seam. This will add the same amount of space to the waist and hip, as you added to the bust. My waist and hips measure a size 12 in Liesl + Co. patterns, and I wanted to maintain the top’s boxy shape, so that is what I did. Below I’m showing how I pivoted the piece at the armsyce/side seam juncture to make it parallel with the original side seam.
The pencil line below shows where the side seam was while the pattern was still swung out, before I moved it back. The orange line is my new side seam, which I drew to fall parallel with the original side seam of the pattern.

Step 7
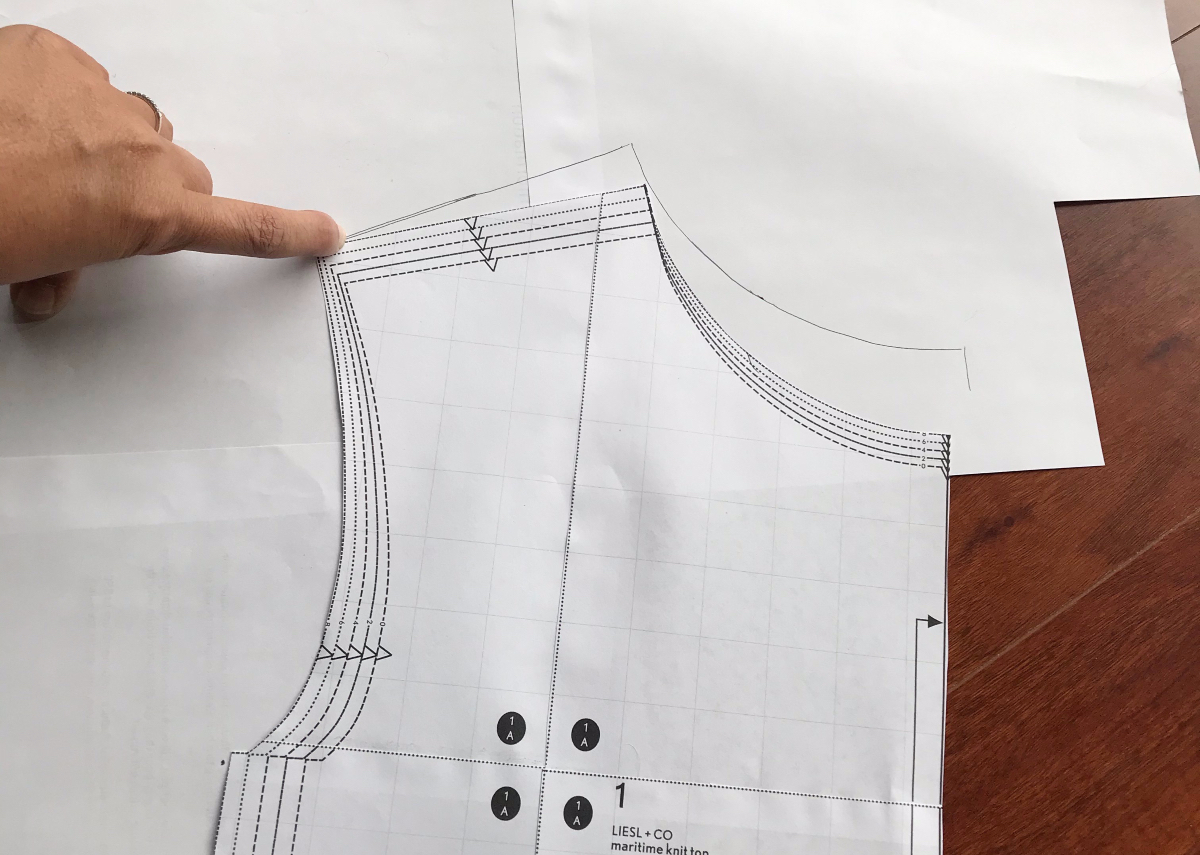
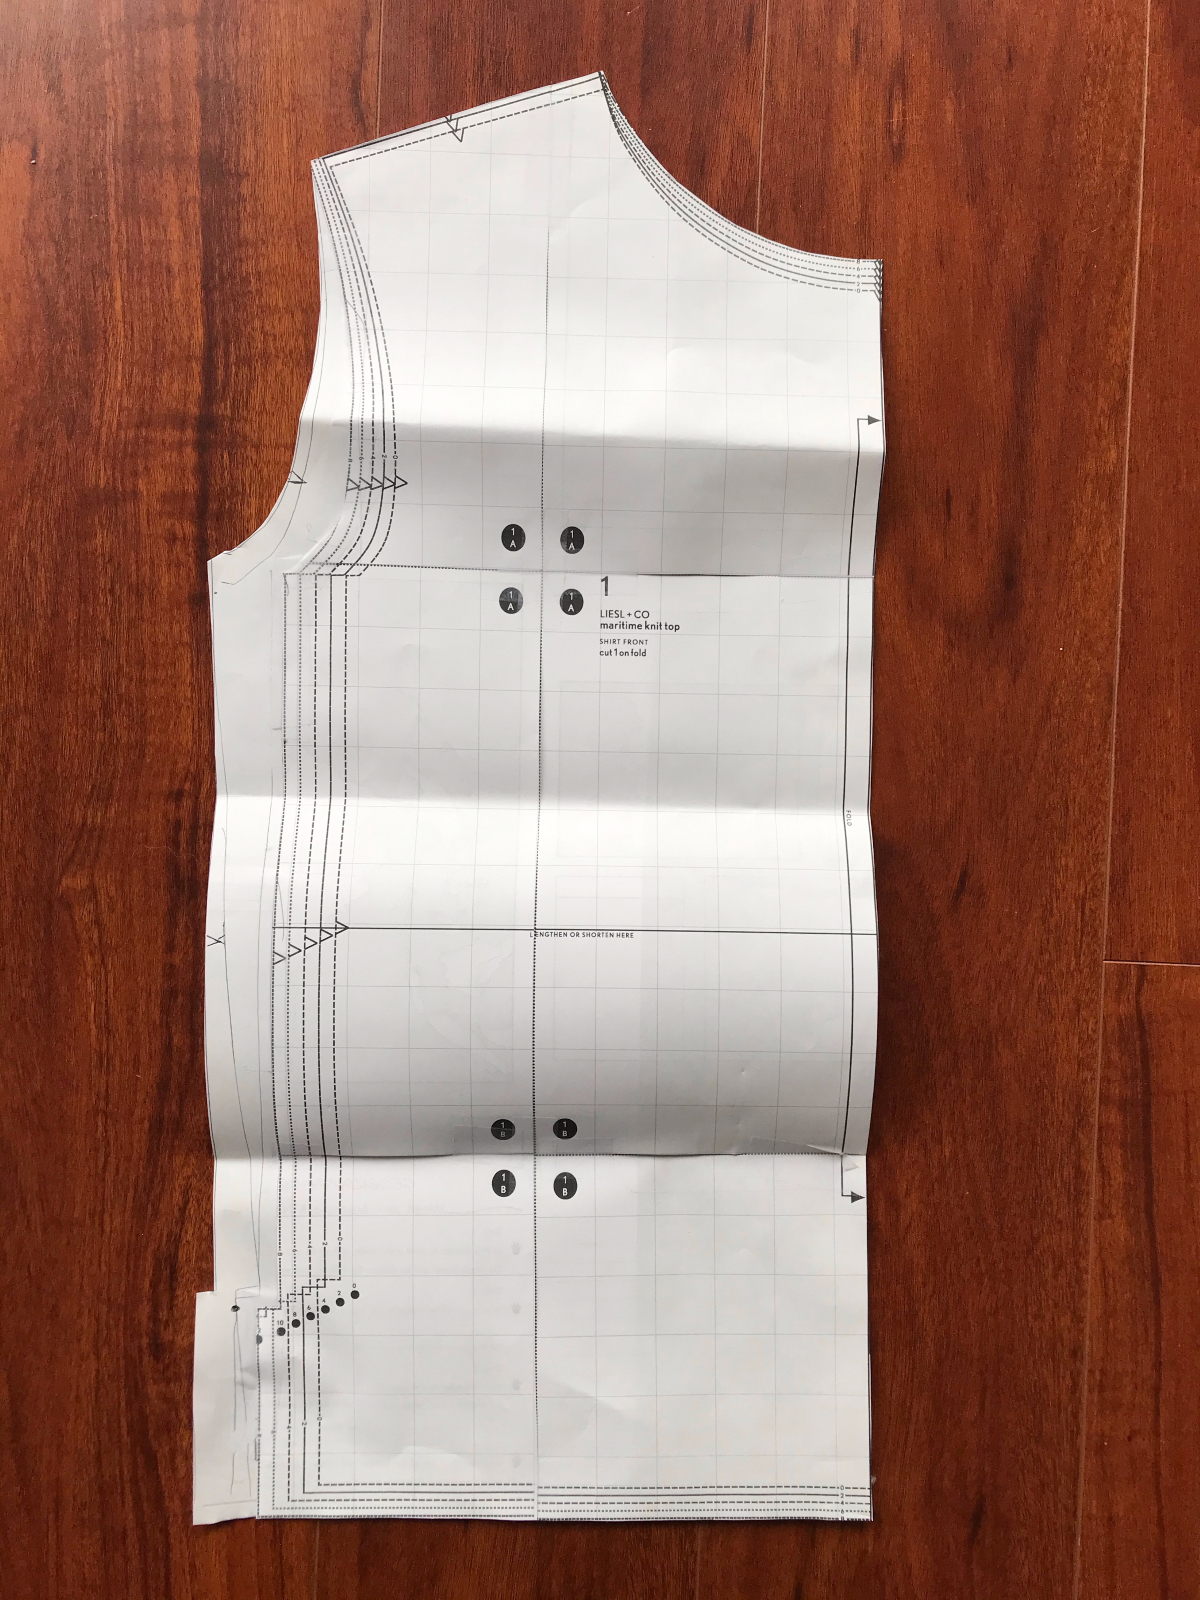
Last, I align my pattern piece with the shoulder, neckline and center front markings I made. Now it’s time to tape the pattern down and cut it out along the new armscye and side seam lines. Transfer your notches to the new armscye and side seam, and you are ready to sew your adjusted pattern.
This adjustment isn’t too hard, but is a good one to have in your arsenal if you occasionally want to perform a dartless FBA. If you are looking for more fit tutorials, we’ve got them all here under our fit tag. We’re adding more tutorials to the library all the time. Is there a particular fit adjustment you’d like to see demonstrated? Let us know in the comments.
Great tutorial, thank you. I always end up needing to make this adjustment to knit tops and this is one of the clearest explanations I’ve seen.
I use this adjustment for nearly everything I sew for myself. It works for woven fabric as well as it does for knits. I’ve been sewing for seventy years and it’s the easiest full bust adjustment I found.
Wow – I have never seen this before. Thank you !!!
You’re welcome! Give it a try, it’s a useful one to have in your back pocket!
Thank you, Masha. Beautifully explained, and illustrated. Very timely as I need to some PJs for myself. I have narrow shoulders with a 36″ bust so will give this method a trial.
Thanks Fiona! I hope it is helpful.
I would love to see an adjustment for dior darts please.
Is there a maximum amount you can add using the pivot and slide method?
Some people say not to use it for adjustments over 2″ (a total of 4″ across the body since the FBA is done on half the bodice). One issue is that this method does not add length like other methods, but you could always add length yourself. I think a lot will also depend on the garment you are sewing and the fabric you are using.
Thank you for the quick reply! I do want length, but need to keep the side seam length. Should I add length at the center front, curving the bottom up to meet the side seam?
Yes, that’s the way I’d do it!
Pretty good, except for one major problem: fbas need to add LENGTH as well as width. Breasts are usually spherical :-). So you need to add as much length to the center front as you add in width. That length needs to taper gently to zero at the side seam, so you can. you know, sew your side seams without drama, and not end up with extra length under your arms which isn’t the point at all.
This is such a great tutorial, thank you. Do you need to make any changes to the back at all?