Today we’re happy to welcome back Elisabeth, who is stopping by from the Advisor’s Circle with a post about her new Chaval Coat.
Name: Elisabeth Larsen
Where can we find you on the internet? Instagram, Flickr
Project Details
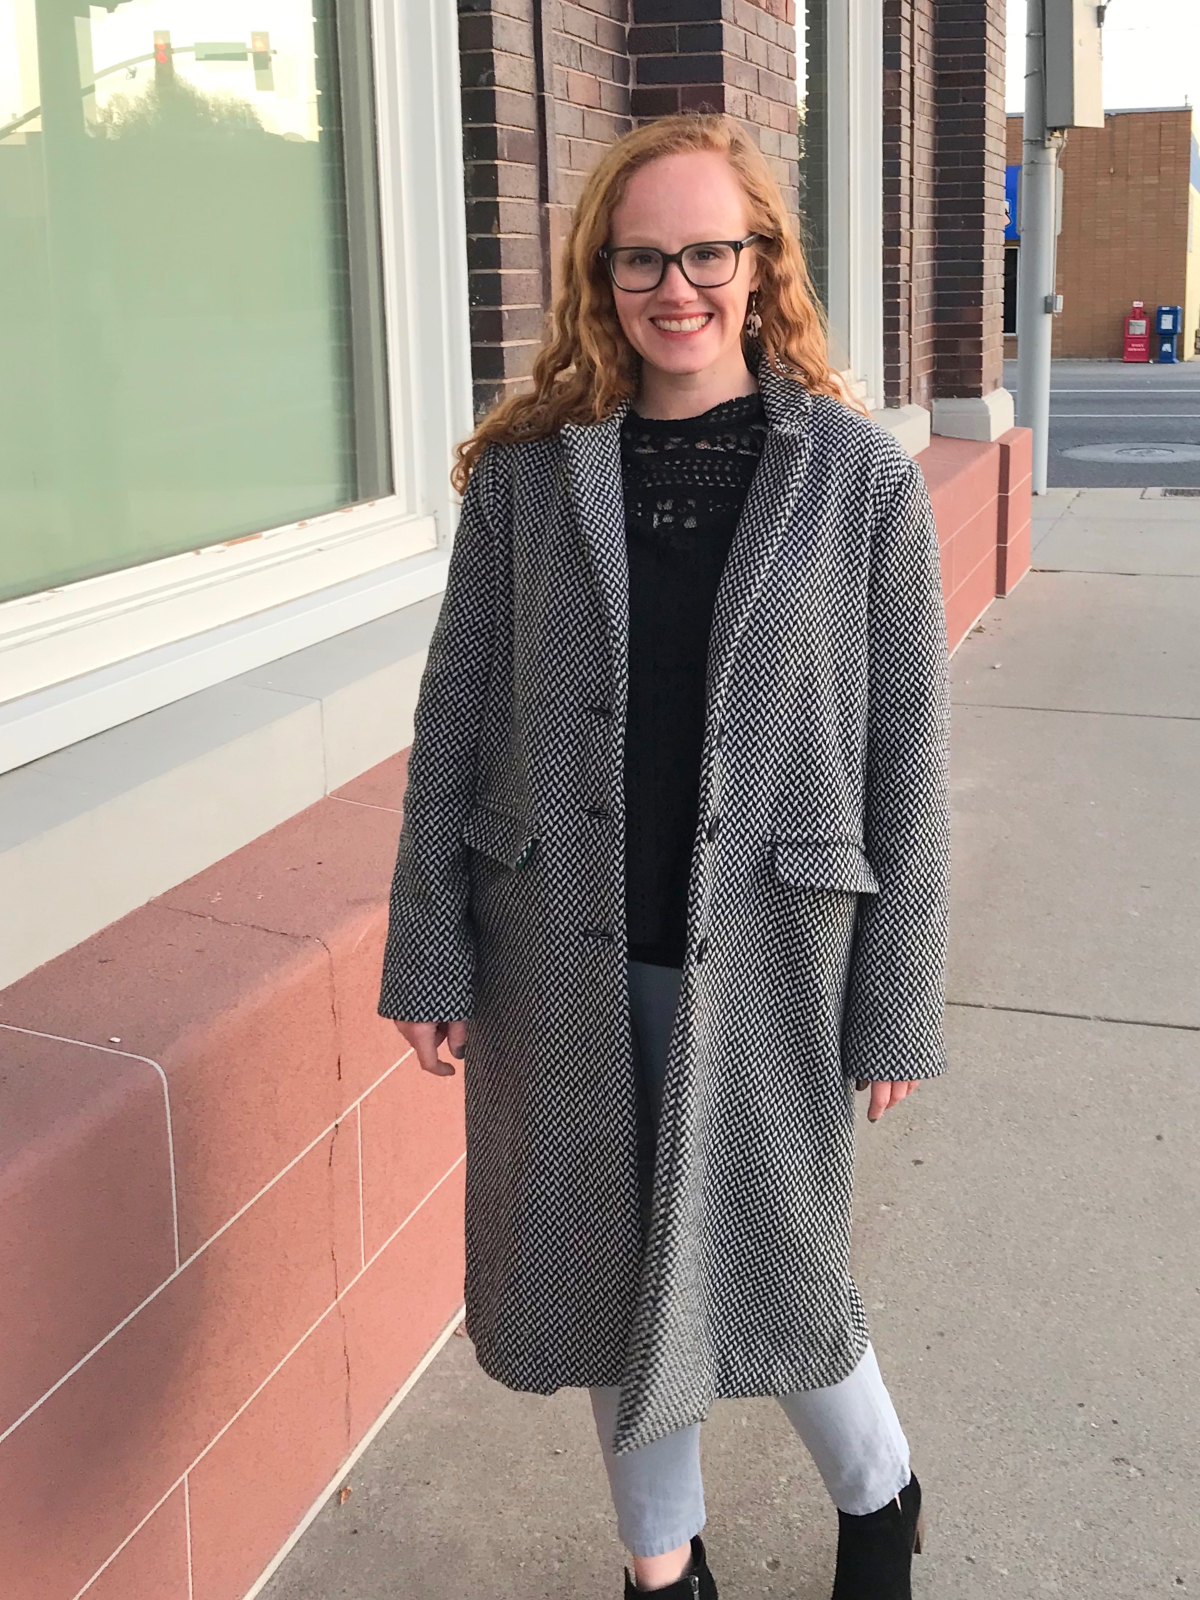
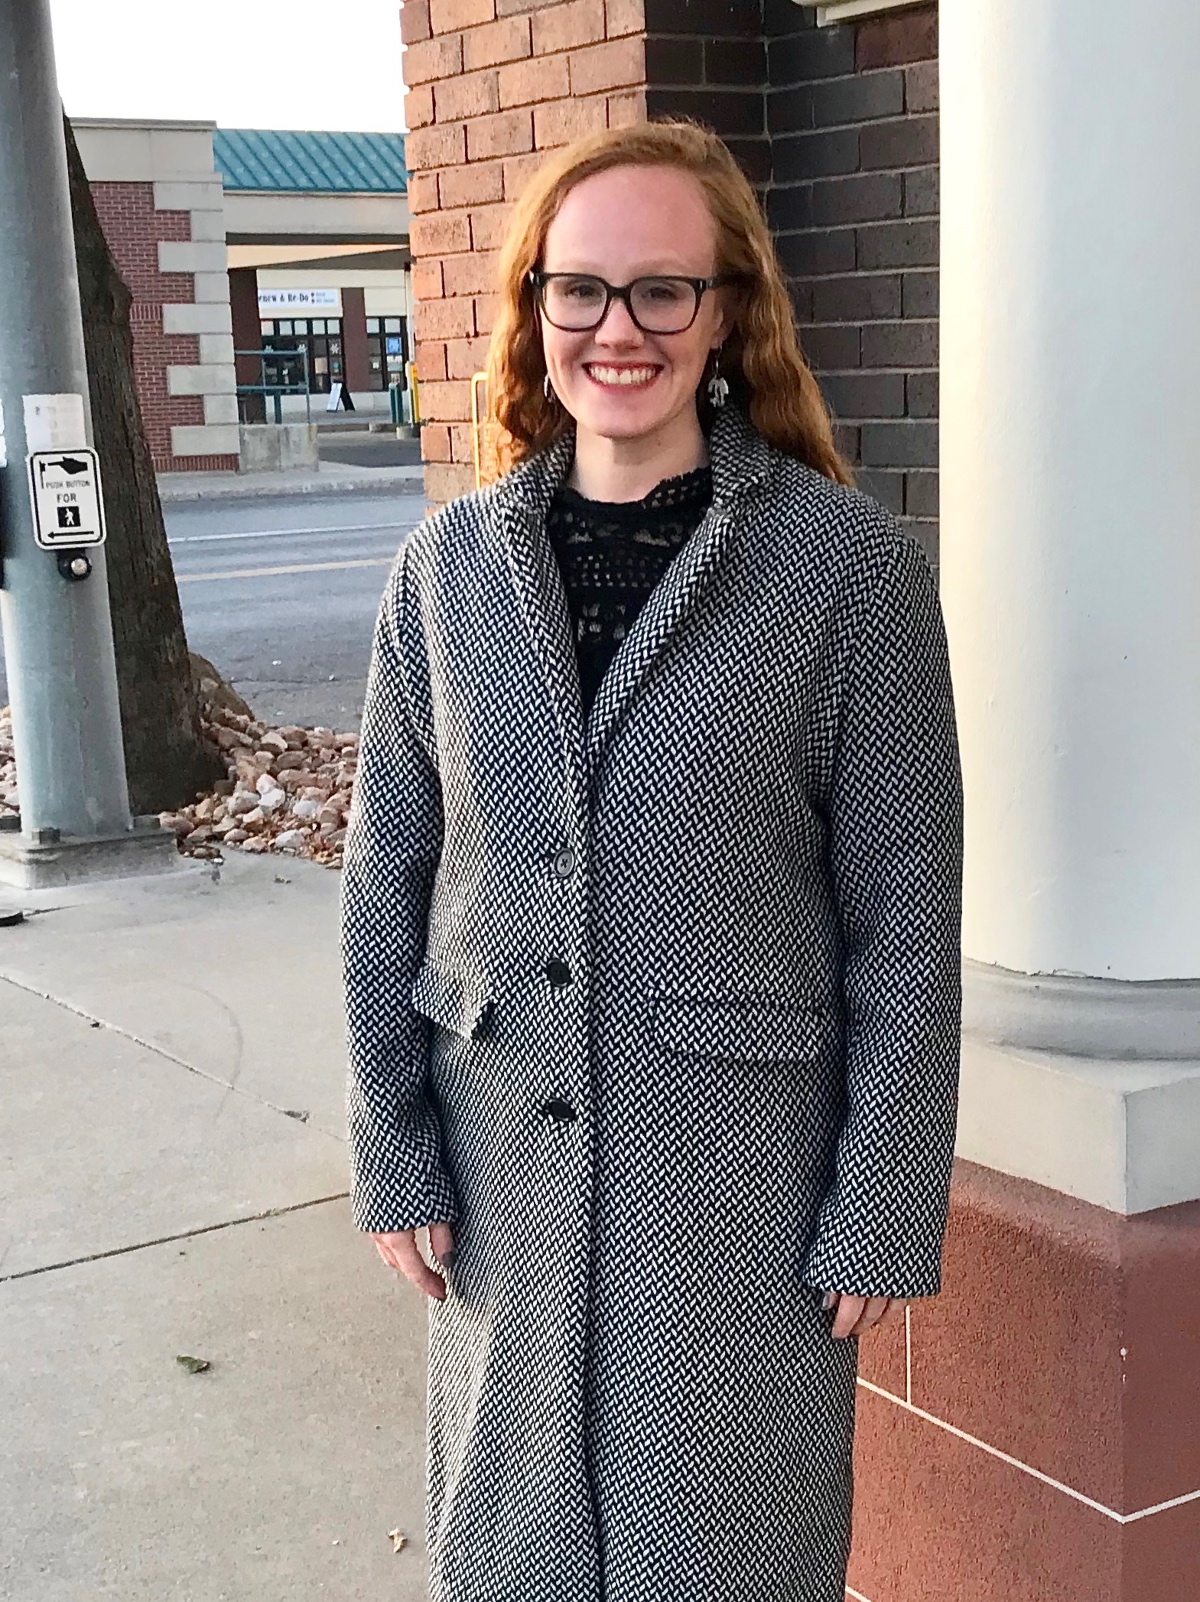
Pattern used: Liesl + Co. Chaval Coat
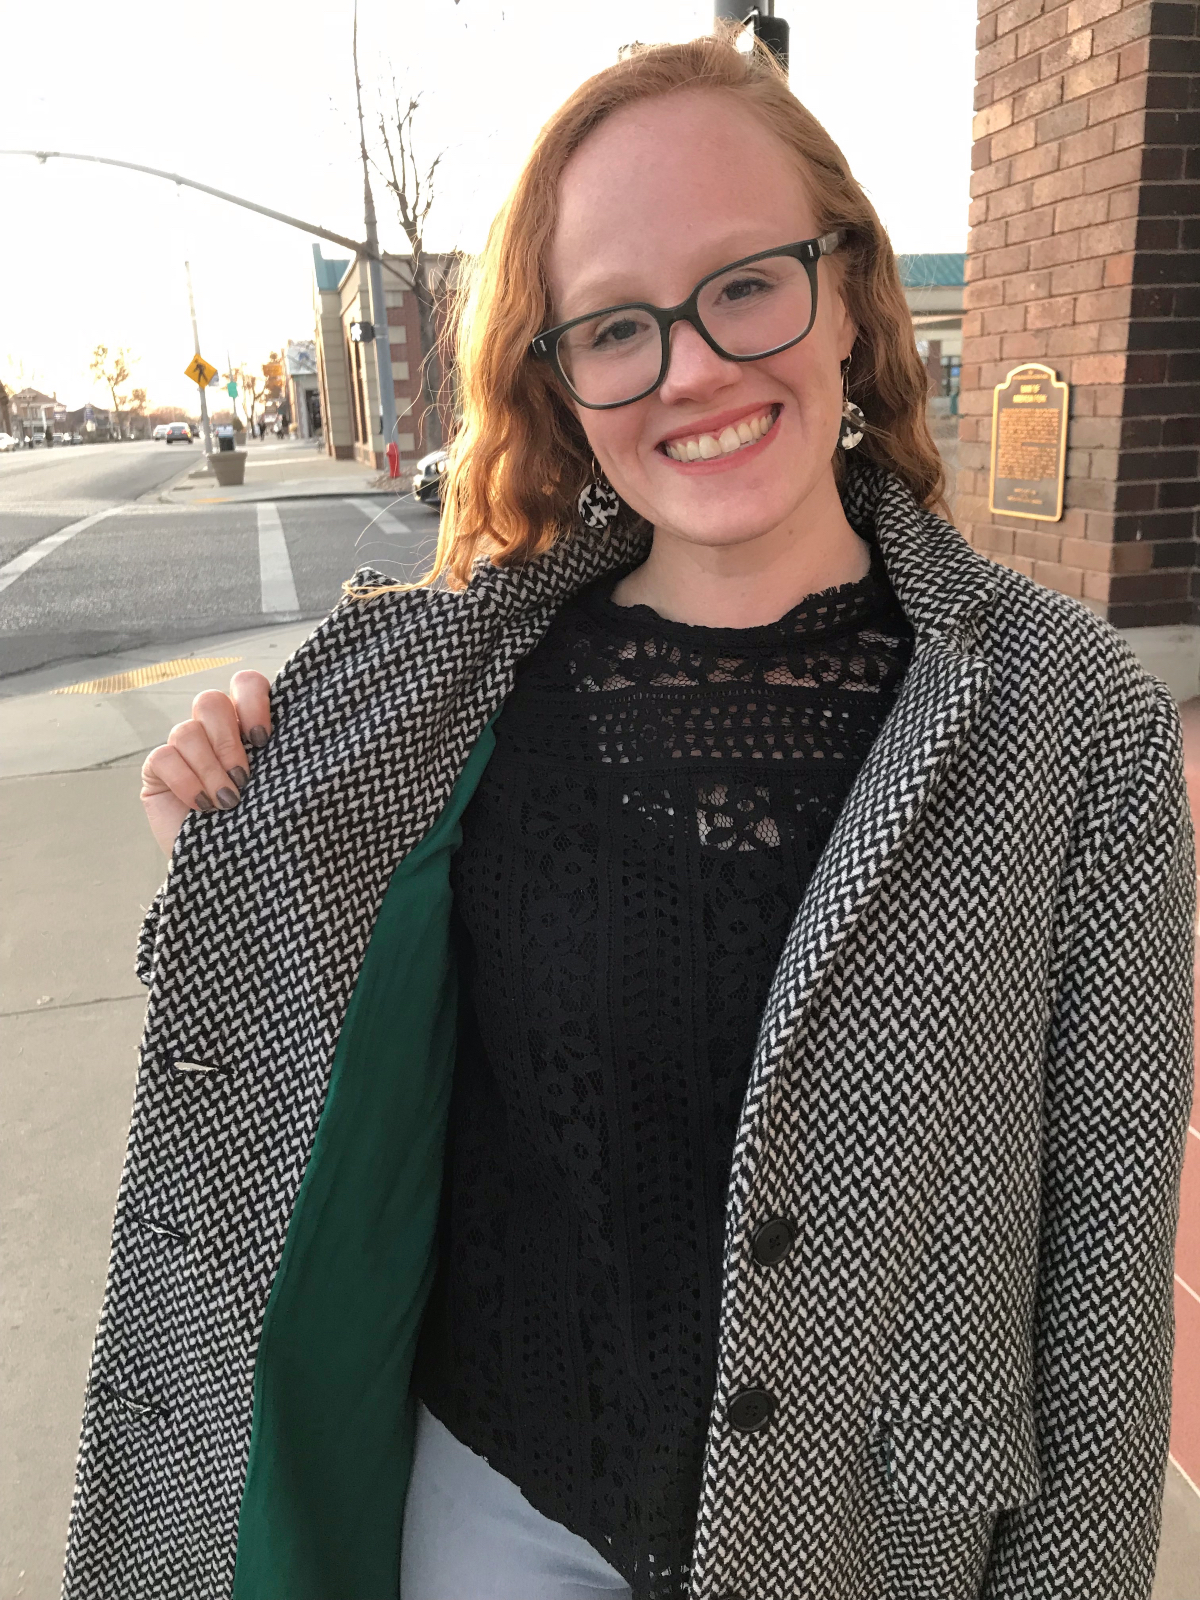
Fabric used: Wool blend herringbone coating for the exterior, rayon batiste for the lining.
Did the fabric work well?
Definitely! I would highly recommend a wool or wool blend coating as a great weight to work with for this pattern. It is thick enough to be a warm layer for the winter, but not so thick that it was difficult to sew with, even in the more detailed parts like the the collar and the pocket. The pattern recommends Bemberg for the lining. I used a rayon batiste (softer and drapier than Bemberg) because I was absolutely set on the emerald color! It did make hemming the lining slightly more difficult but otherwise worked perfectly for the pattern and has been lovely to wear.
How did the sewing go?
Making a coat takes some time, but the results are well worth it! I sewed the size 8, according to my measurements, with no adjustments and am very happy with the fit. I’m 5’5″ and the hem is exactly where I would like it to be for a winter coat.
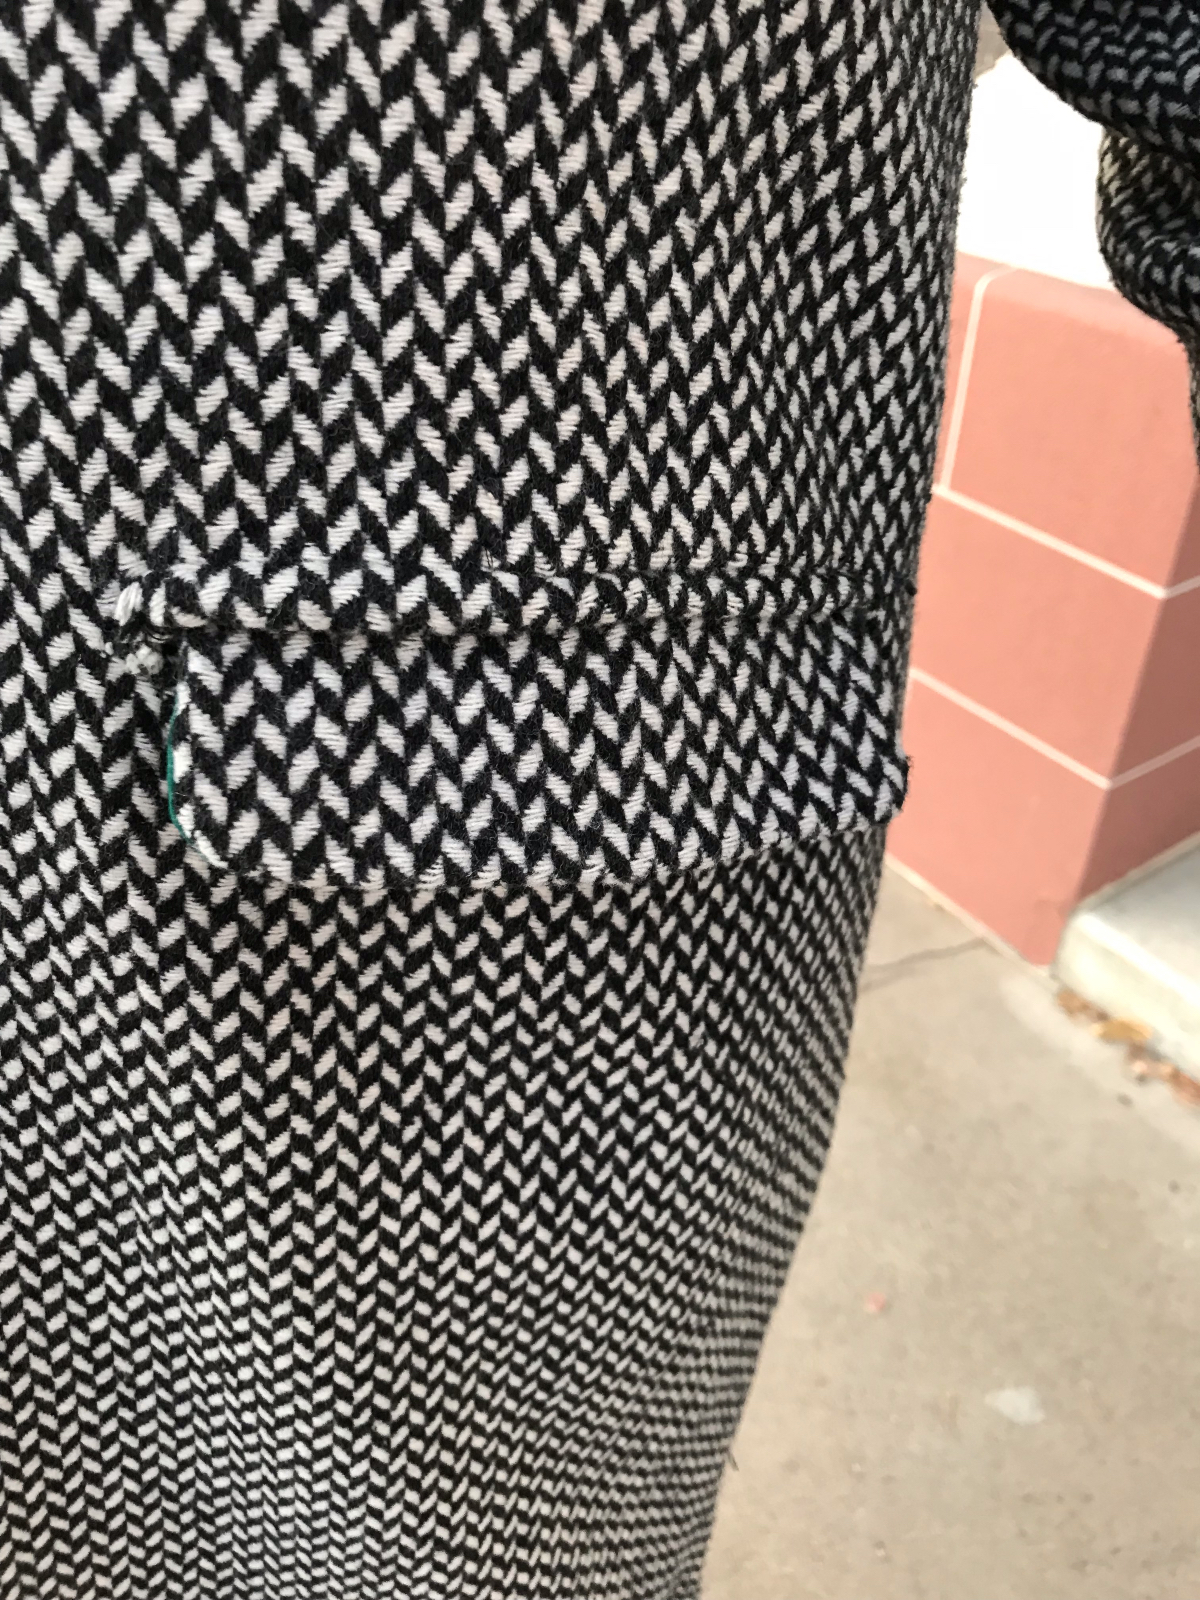
I had never made this style of pocket or collar before and I was a little nervous about making them. My best recommendation is to go slow and follow the special tips in the pattern! There are a lot of steps associated with the pockets. This looked a little intimidating to start with, but they all made perfect sense once I got going. I gave myself plenty of time to carefully follow each step of the pockets and I’m thrilled with how professional they look.
I also particularly appreciated the direction to pin the collar at the neck seam first! It meant that the collar fit together and lies well on the finished coat. The collar and pockets have ended up being my favorite two features of the coat.

The coat ends with a fair bit of hand-hemming. I like doing my hand-sewing on long road trips, so I packed up my coat in a duffel bag to take on a trip to my parents’ house. This is where I’m going to send out a public service announcement to please, please pack your unfinished makes very carefully! My lining stretched out somewhat in transit. I then had to repin the hem that I had carefully pressed before I left because it wasn’t quite right anymore. The hand sewing went well once I did that, but I definitely felt kind of crabby with myself!
What was the best part?
I have such a major feeling of accomplishment when I make something big like a coat. It’s exciting to try out new techniques and have something that looks really professional at the end! I know I will get a lot of wear out of this length and style of coat during our long cold winters.
Thanks, Elisabeth! Making a coat is time-consuming, but it doesn’t have to be frustrating, and we are glad our instructions and tips were helpful!
I love your fabric choices and can see why you were smitten with that lining. I think the bits we work hardest at are often the bits we like the most in thre end. Your coat looks fab.