

I promised you this tutorial a while ago, so let’s get to it!
When you’re sewing and the dart isn’t quite right for your body, how do you move it to the right spot?
First of all, let’s talk briefly about darts and why they’re useful. Darts exist to give shaping where there aren’t any seams. Sometimes we add style lines to a pattern instead of darts; for example, princess seams are a great way to add shaping for a bust. But when seams aren’t present and we need to account for a three-dimensional shape like busts (or hips, or shoulders, or waists), then we often add darts. Lots of garments today are designed to be quite loose-fitting, and sometimes darts can be eliminated entirely. It’s fine to eliminate a dart if the fabric skims the body and still gives the intended fit, but for closer-fitting garments (or for larger busts, sometimes, even when a dart wasn’t originally intended) a dart can be extremely useful.

What is a dart? It’s really just a little wedge of fabric that’s sewn closed to allow the fabric to contour to the shape of the body underneath. Imagine cutting a narrow pizza-shaped slice out of a paper plate and then taping the cut edges together. This is basically what a dart does. Bust darts can be set at any angle as a design feature, but most of them will come from the fullest part of the bust (called the apex) and be sewn into the side seam. This placement makes the dart less of a design feature and more of a fit element, as opposed to darts that are meant to be visible and are moved into the neckline or someplace else where they can become an important part of the appearance of a garment. Darts can also be changed into pleats and gathers, but we’ll talk about that more another day.

Since everyone’s bust is different–yours might be fuller, flatter, higher, lower than a sewing pattern–you might find that the bust dart in a pattern doesn’t fit the way you like. In particular, the dart might be too high or low, too short or too long for you. (We’ve talked about finding your size and making a dart larger or smaller in this post, and most of our Liesl + Co. patterns include detailed instructions for enlarging or reducing a dart, and many of them include separate pattern pieces for different cup sizes so you don’t need to do the work of changing the dart size yourself!)
How do you know if a dart is positioned correctly? Most darts should end 1″-1 1/2″ from your apex–the fullest part of your breast. The precise end of the dart will depend on the amount of ease of the garment as well as the fabric you’ve chosen, so don’t be afraid to adjust the dart as needed. But the goal is to get as smooth a fit as possible, and if the dart isn’t pointing to your apex it will need to be adjusted.
So how do you move a dart if the tip of the dart is too high or too low for your bust? First I’ll show you two easy ways to raise or lower a dart. Then I’ll show you how to lengthen or shorten a dart if it’s too long or too short.
To Raise or Lower a Dart
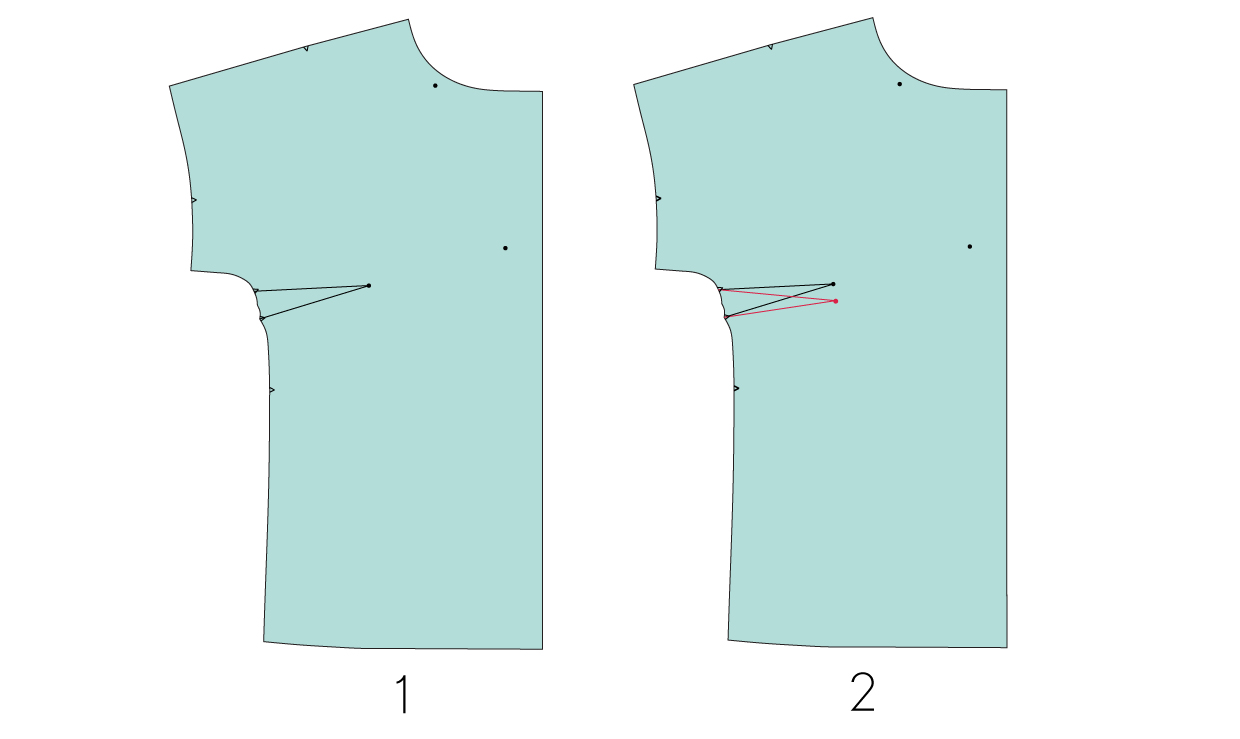
Re-Draw the Dart: The first and, in my opinion, easiest way to raise or lower a dart is to simply determine where you want the tip of the dart to end and re-draw the dart to end at that spot, using the same original dart opening lines at the side seam but re-drawing them to the new tip of the dart. To show you, I’ve used the Weekend Getaway pattern in figure 1 below. You can see in figure 2 that I’ve moved the tip of the dart and re-drawn the legs of the dart to meet at the tip. Easy-peasy, right?
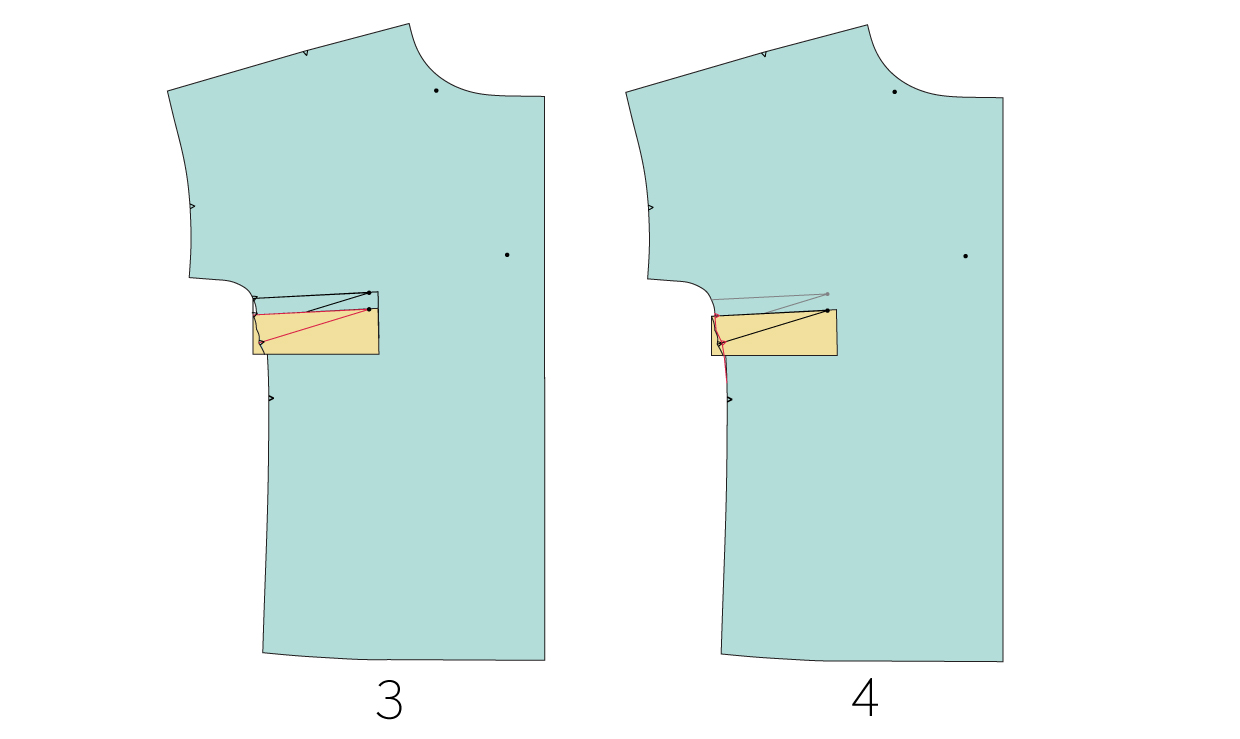
Shift the Entire Dart: This second method is preferable if you don’t want to change the angle of the dart itself. You’ll simply trace the dart and side seam onto another sheet of paper (tracing paper or tissue paper is ideal for this) and shift the dart up or down by the amount needed. Tape it into place when the tip of the dart points to your apex and this will become your new dart. I’ve illustrated this is figures 3 and 4 below, where in figure 3 I copied the original dart onto tissue paper and shifted it down to the location of the new apex. Then you’ll need to re-draw the side seam a bit, as illustrated in figure 4. The easiest way to do this is to fold the dart as you would sew it, to close it, and then blend the side seam to correct it. Open the folded dart again when you’re finished and you’ll be ready to go.
To Lengthen or Shorten a Dart
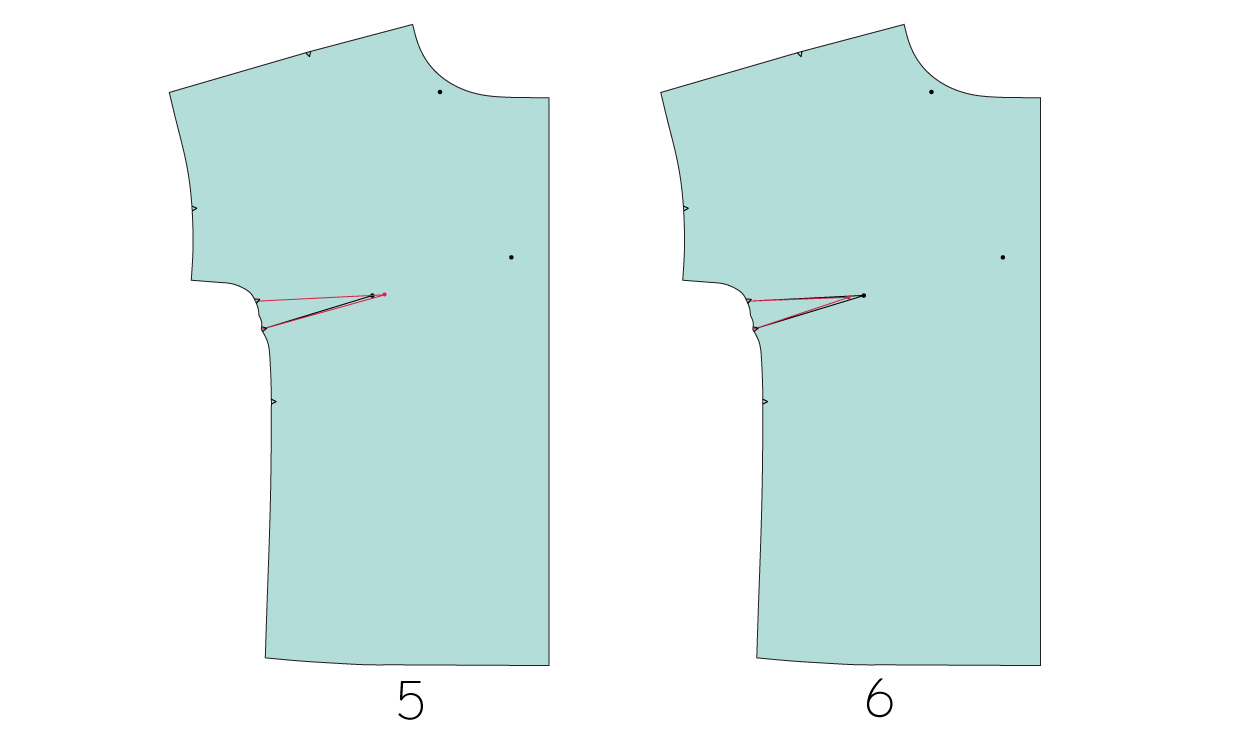
What if a dart is too long or too short? Here again, simply decide on the best position of the dart tip and redraw the dart legs to meet that point. In figure 5 below I’ve drawn the dart to be longer. In figure 6 I drew it to be shorter.
I hope that helps, and I hope it eliminates any fear of altering darts! Obviously the best time and place to alter your darts is when you’re making a muslin, which is when you can check and adjust the fit to your body.
By the way, I talk more about darts in my Creativebug classes on Bust Adjustment and Dart Manipulation if you’re interested in pursuing this topic further.