Who’s sewing the Cartwheel Wrap Dress with us today and tomorrow? You can learn more about the pattern by visiting Liesl’s introduction post. We cannot wait to see what you make!
We’ll be working through the pattern over the next two days. Here’s our schedule:
Day 1: Prepare the Bodice, Assemble and Attach the Skirts
Day 2: Assemble the Dress, Sew the Armholes and Ties, Hem and Finish the Dress
Let’s begin, shall we?
Prepare the Bodice
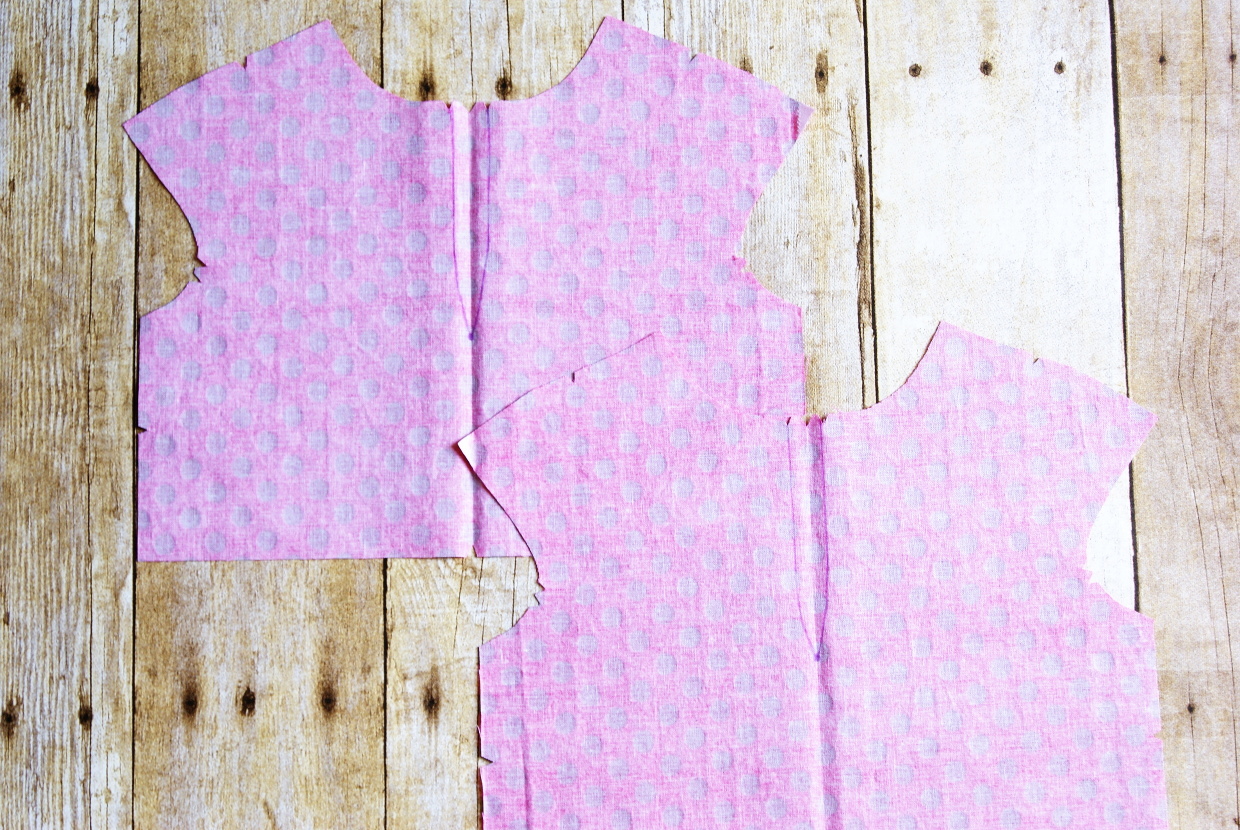
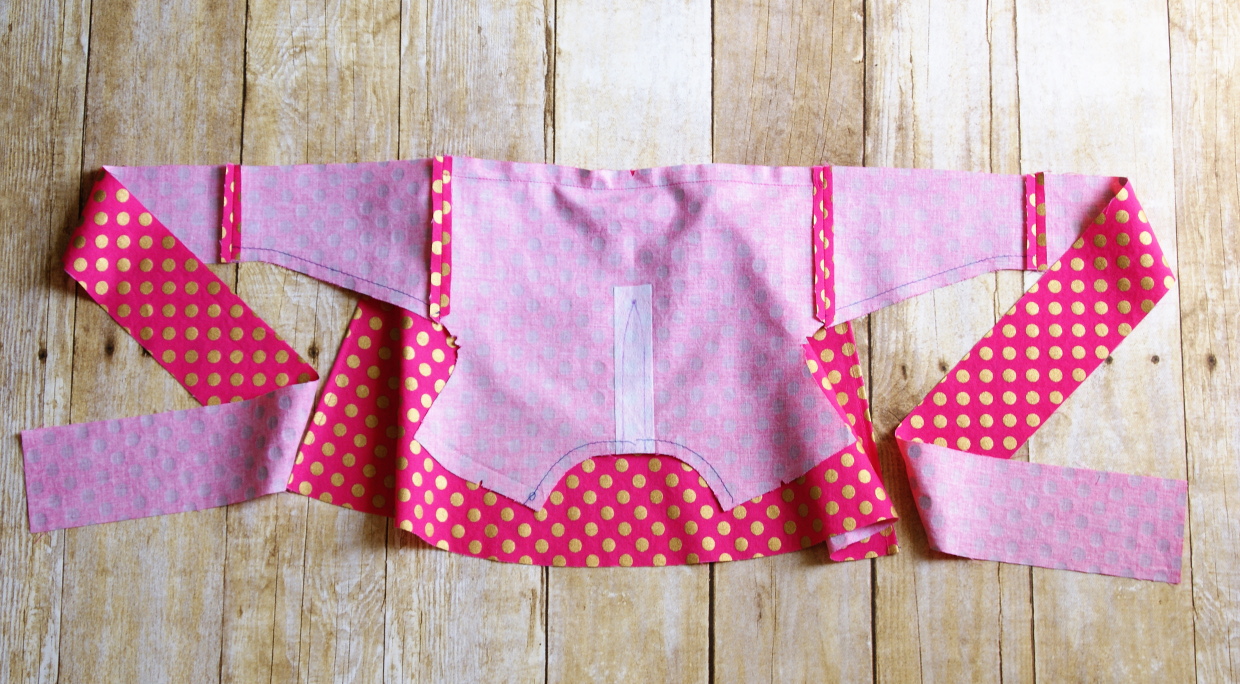
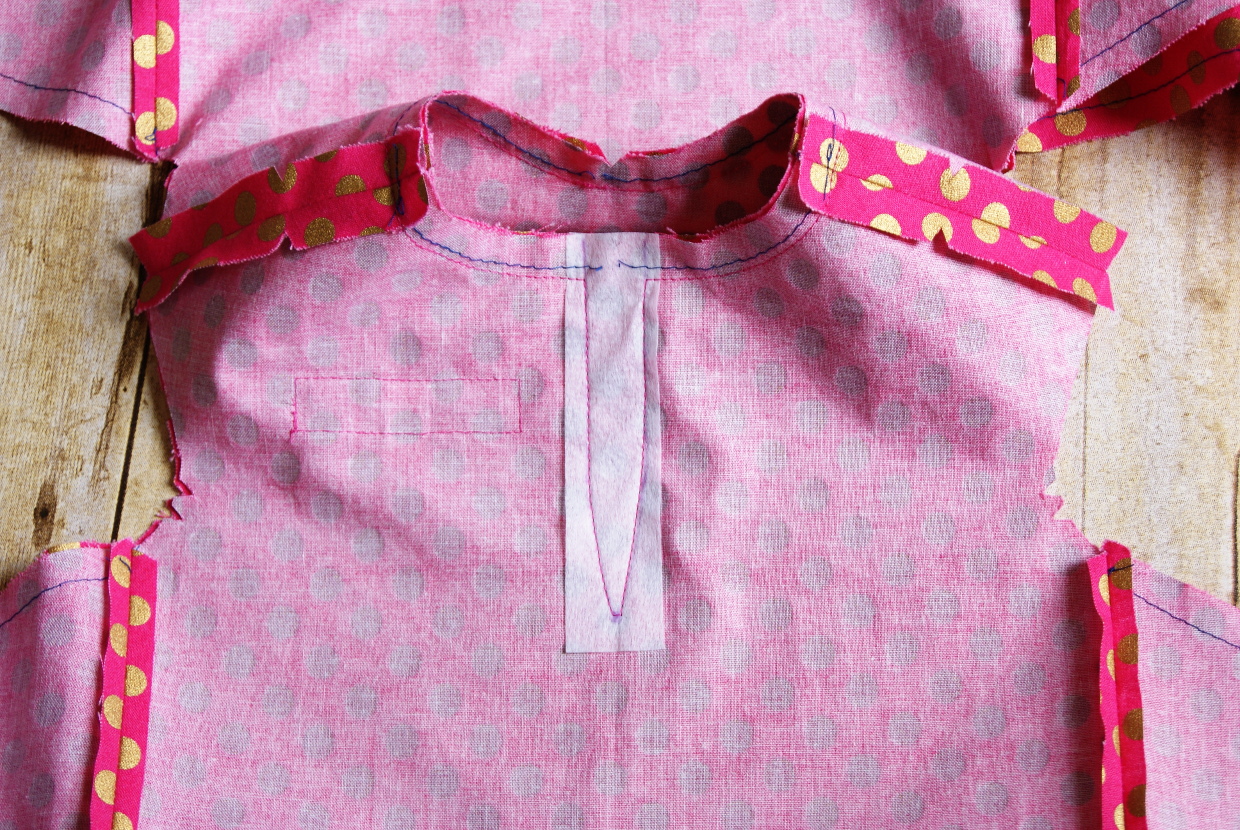
1) Using tailor’s chalk or a water-soluble fabric-marking pen, transfer the keyhole dot and markings from the bodice-back pattern piece to the cut fabric’s wrong side.
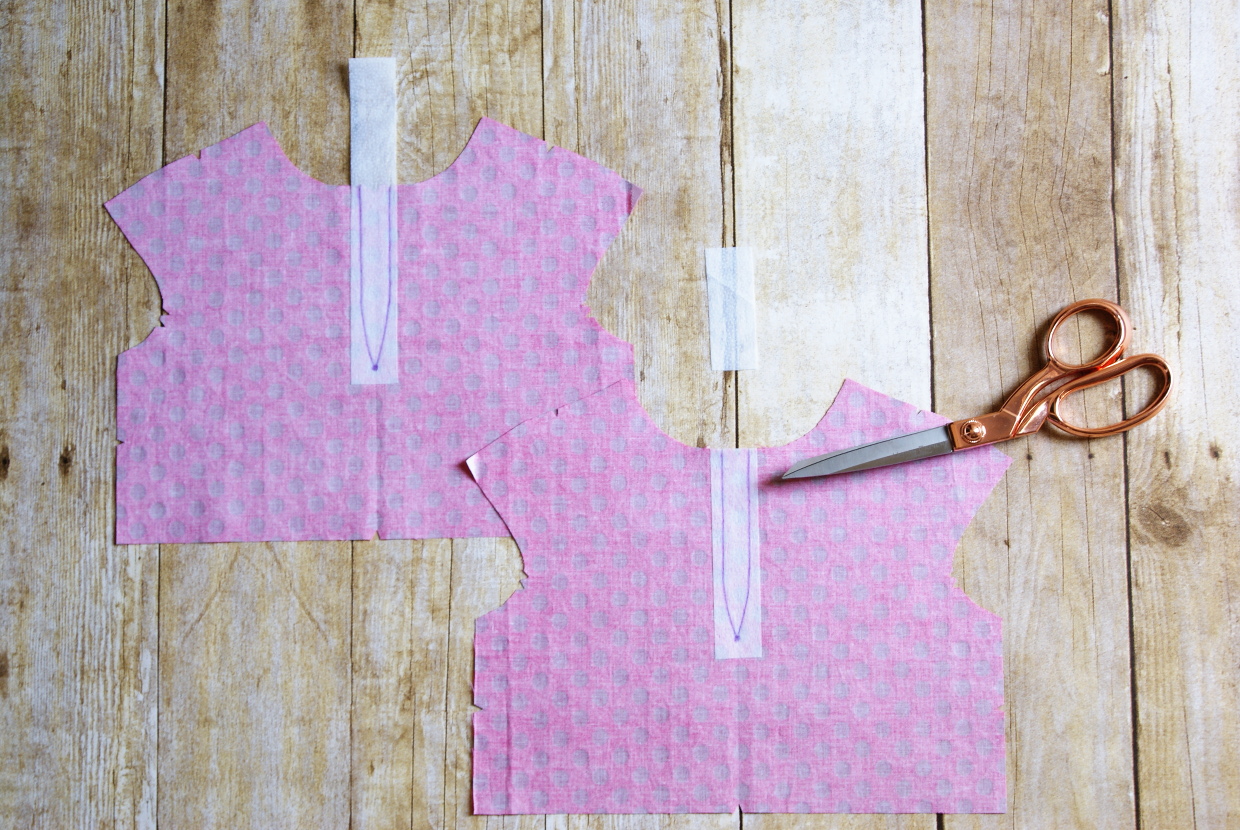
Cut two 1” by 7” strips of featherweight fusible interfacing and follow the manufacturer’s instructions to fuse one strip of interfacing to the wrong side of each bodice-back piece at the center-back neckline so it covers the dot and the keyhole markings. Trim off the extra length of the interfacing, making it even with the neck edge, and redraw the markings so they are visible.
2) Staystitch the neckline on the two bodice-front and the two bodice-back pieces and staystitch the top edge of all eight wrap front/back pieces, stitching 3/8” from the cut edges and sewing in the direction of the arrows shown in the pattern instructions. The stay stitching is permanent and helps prevent these areas from stretching during assembly.
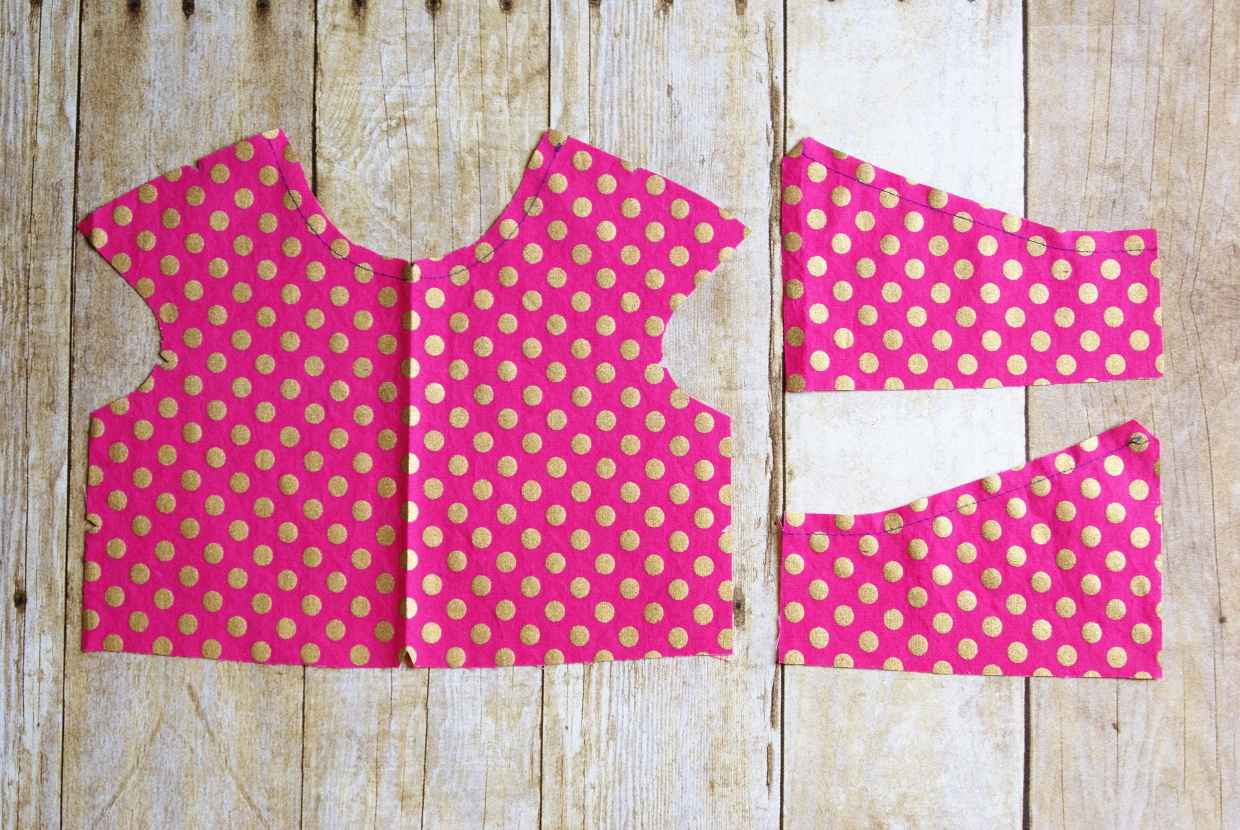
3) Pin one wrap-front/back piece to each side of the two bodice-front and two bodice-back pieces, with right sides together, matching the side edges and notches. Stitch the wrap pieces to each bodice with a 1/2” seam, backstitching or lockstitching at both ends. Press the seam allowances open and trim them to 1/4”. (There is no need to finish the seam allowances since they will be hidden.)
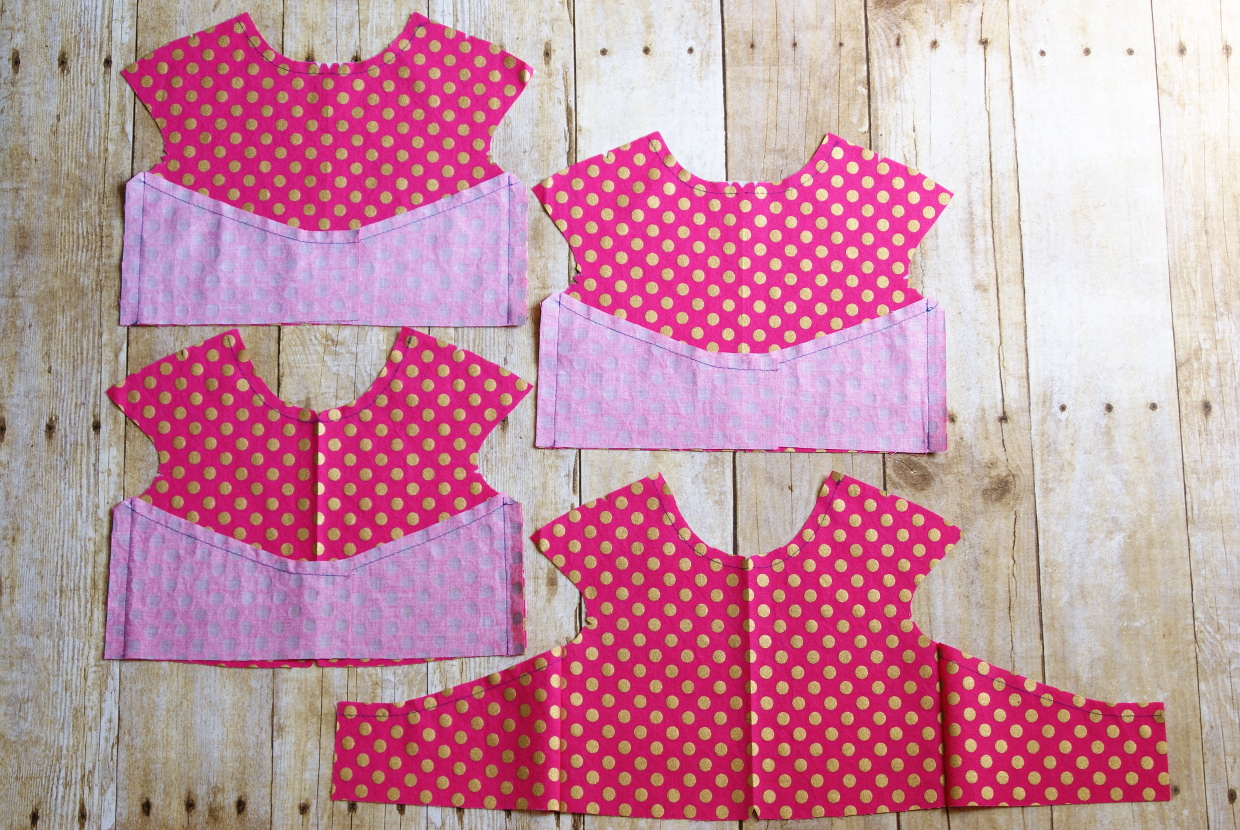
4) For View A, you’ll temporarily place the two bodice-front pieces aside while you attach the ties to the bodice-back pieces. With right sides facing and with notches and raw edges aligned, pin one set of ties to the short end of the wrap piece. Stitch the ties to the wrap with a 1/2” seam, backstitching or lockstitching at both ends. Press each seam open and trim the seam allowances to 1/4”. (No need to finish the seam allowances since they will be hidden.) Repeat to attach the second set of ties to the other bodice-back piece.
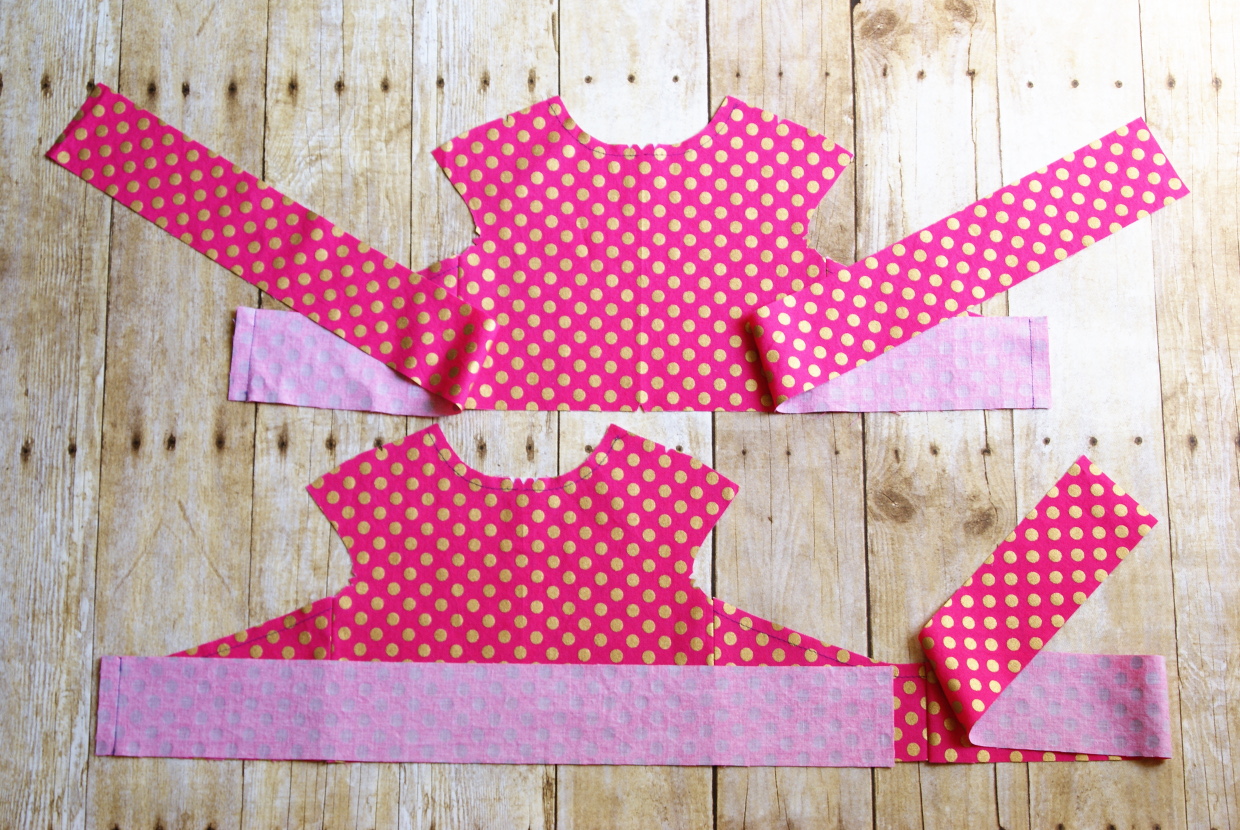
5) For View B, you’ll temporarily place the two bodice-back pieces aside while you attach the ties to the bodice-front pieces. With right sides facing and with notches and raw edges aligned, pin one set of ties to the short end of each wrap piece. Stitch the ties to the wrap with a 1/2” seam, backstitching or lockstitching at both ends. Press each seam open and trim the seam allowances to 1/4”. (No need to finish the seam allowances since they will be hidden.) Repeat to attach the second set of ties to the other bodice-from piece.
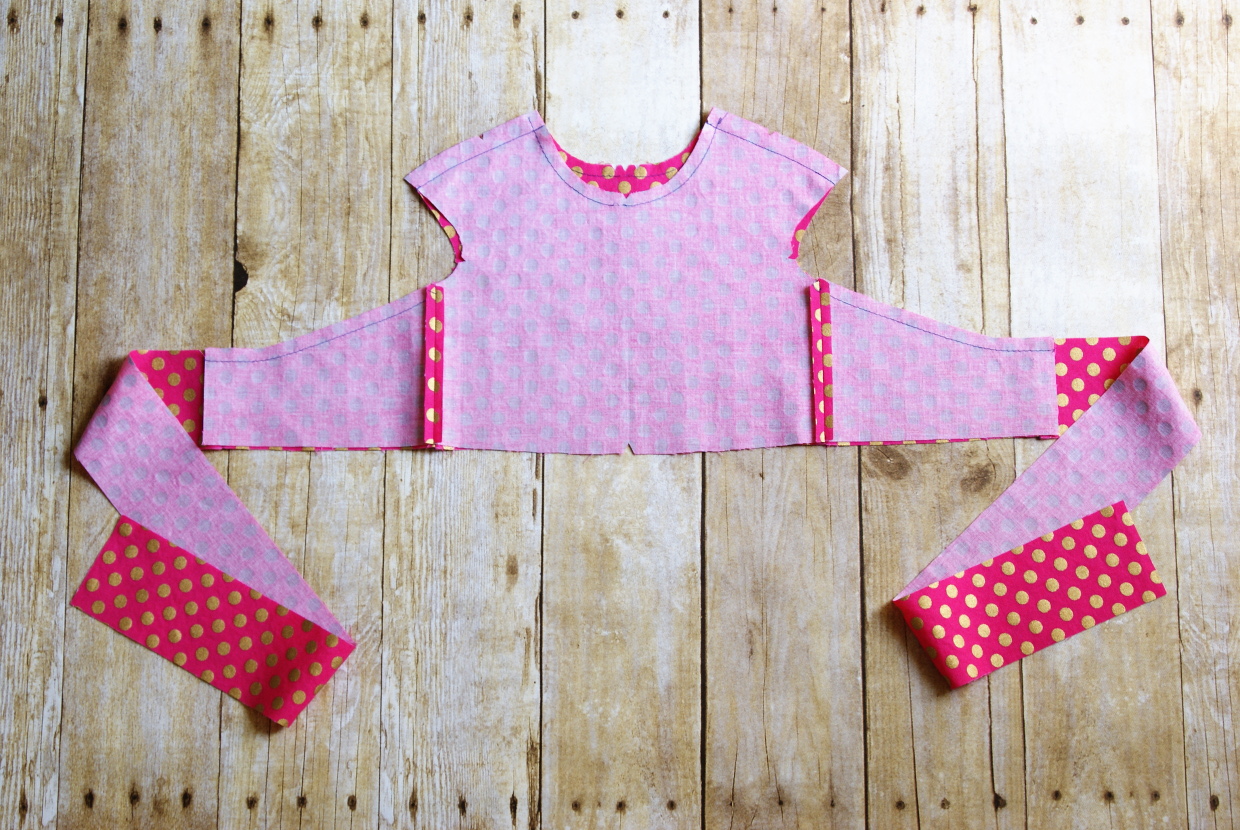
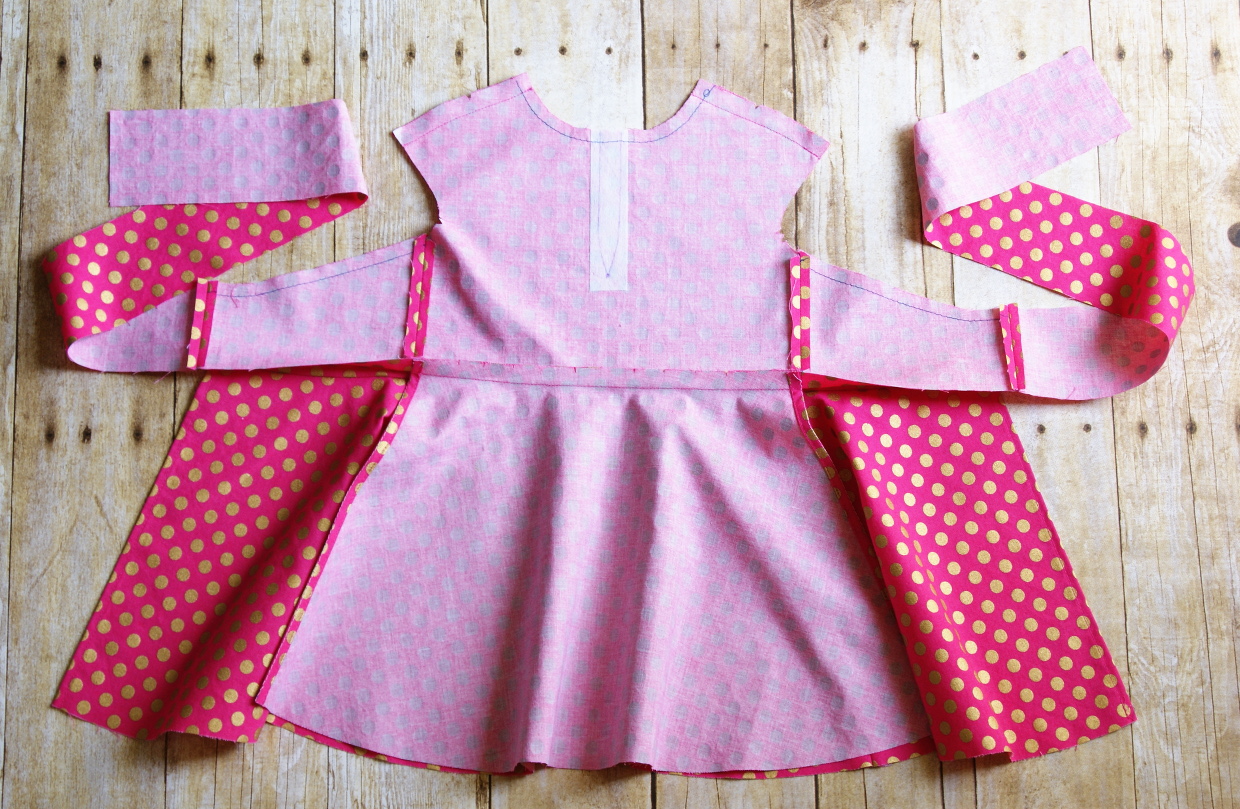
6) For both views, select one bodice-front and one bodice-back piece to become the bodice lining. Pin those pieces at the shoulders with right sides together, matching notches and raw edges. Stitch the shoulders with a 1/2” seam, backstitching or lockstitching at both ends. Press the seam allowances open. Add a row of basting stitches 1/2” from the bottom edge of both the front and the back lining pieces. Extend the basting all the way across the bottom edge of the pieces without ties and only to the side/wrap seam for the pieces with ties. This basting will help with finishing the lining later.
Assemble the Skirts
1) Select one skirt front/back. Pin a skirt-extension piece to the skirt piece with right sides together and matching the side edges and notches. Stitch the extension to the skirt with a 1/2” seam, backstitching or lockstitching at both ends. Press the seam allowances open and finish them using your preferred method. Repeat to attach the second skirt-extension piece to the other side of the skirt. We’ll refer to this skirt piece, going forward, as the wide skirt. The remaining skirt front/back will be called the narrow skirt.

2) To finish the remaining back edges of the wide skirt, sew a line of basting stitches 1/2” from the skirt’s straight unfinished edges. These stitches will become the fold line from the finished edges.
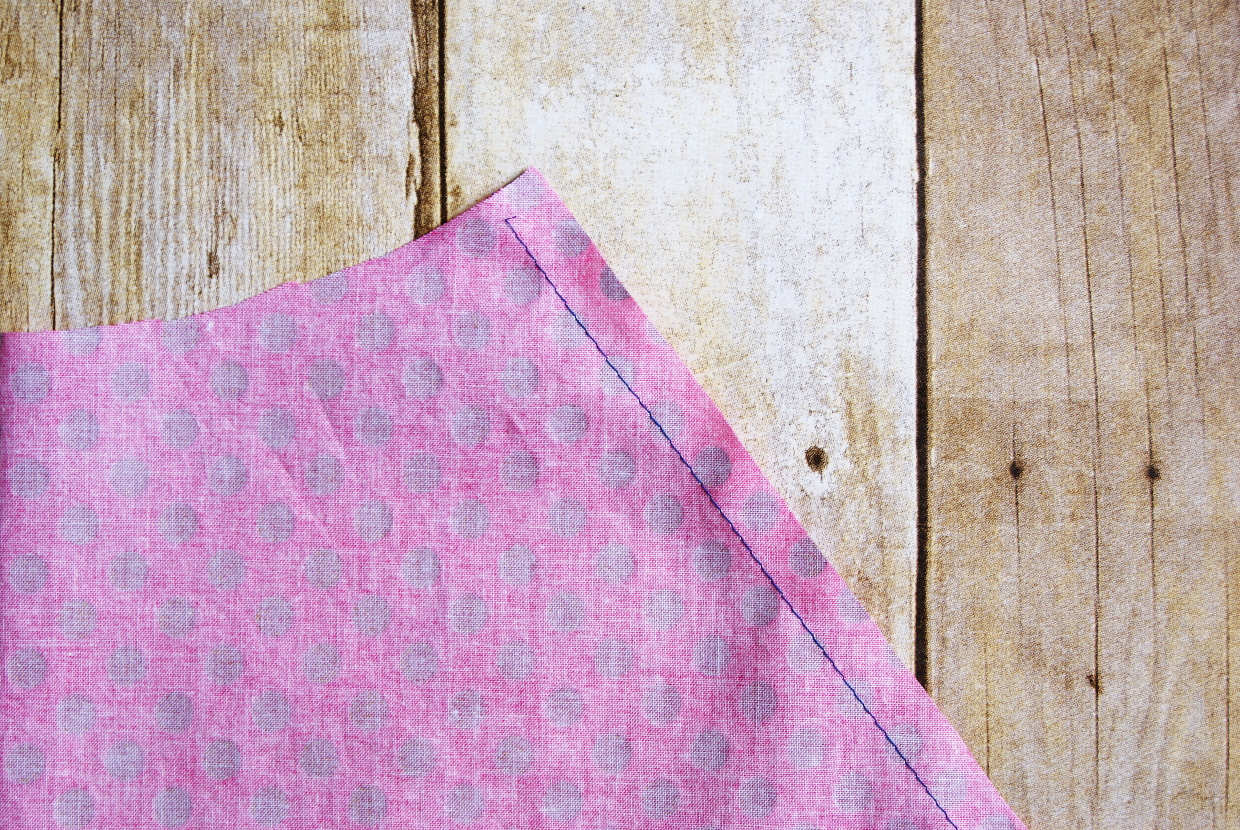
Fold and press the skirt’s straight edge to the wrong side to meet the basting stitches.
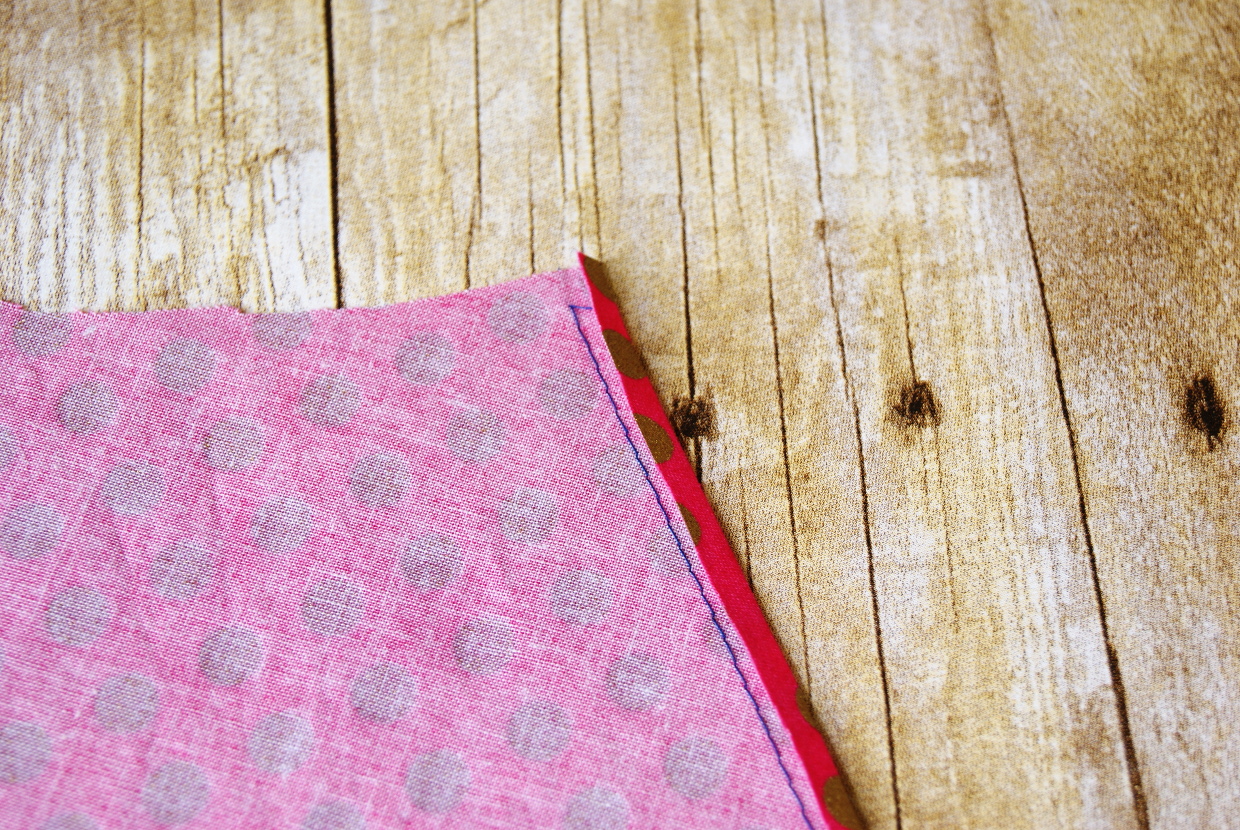
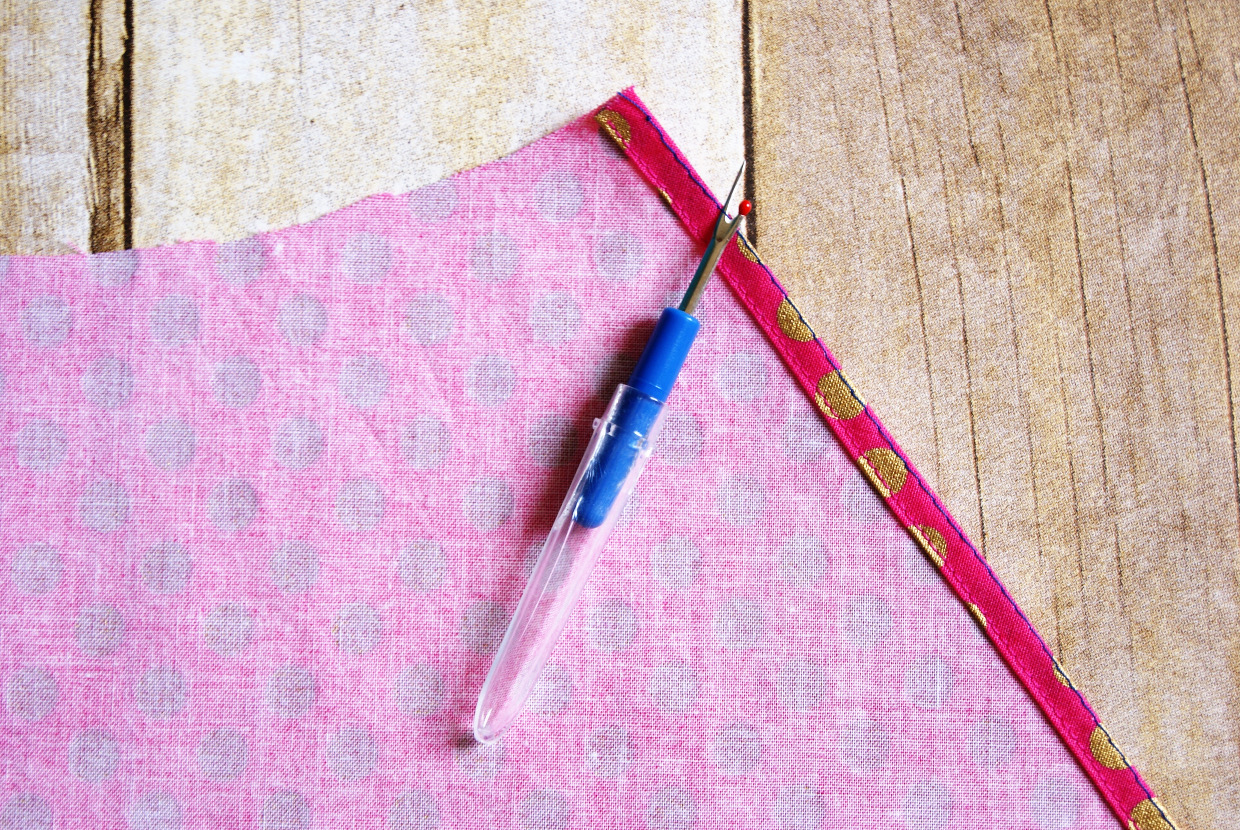
Then fold and press the fabric again along the basting stitches to enclose the raw edge and create a narrow hem. Edgestitch the innermost fold to finish the edge, then remove any visible basting stitches from the fold line. Repeat to finish the straight edges of the narrow skirt front/back in the same manner.
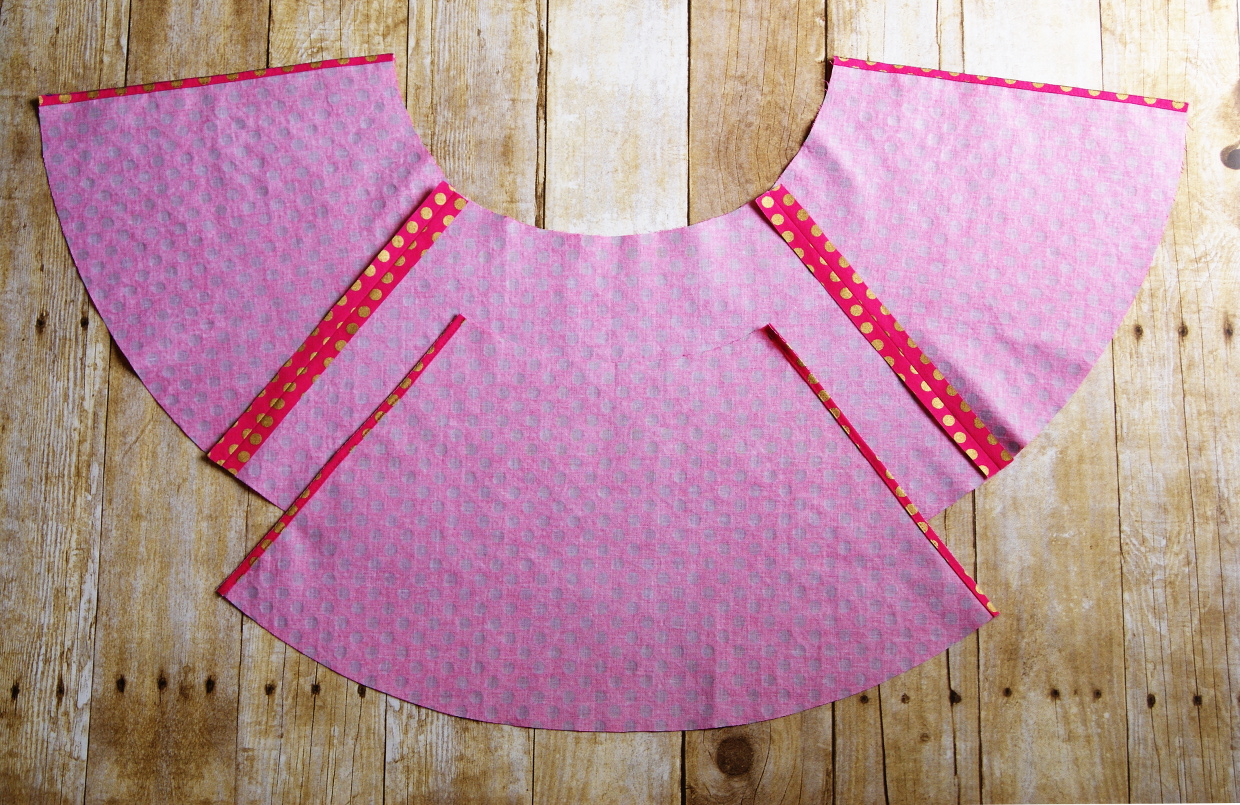
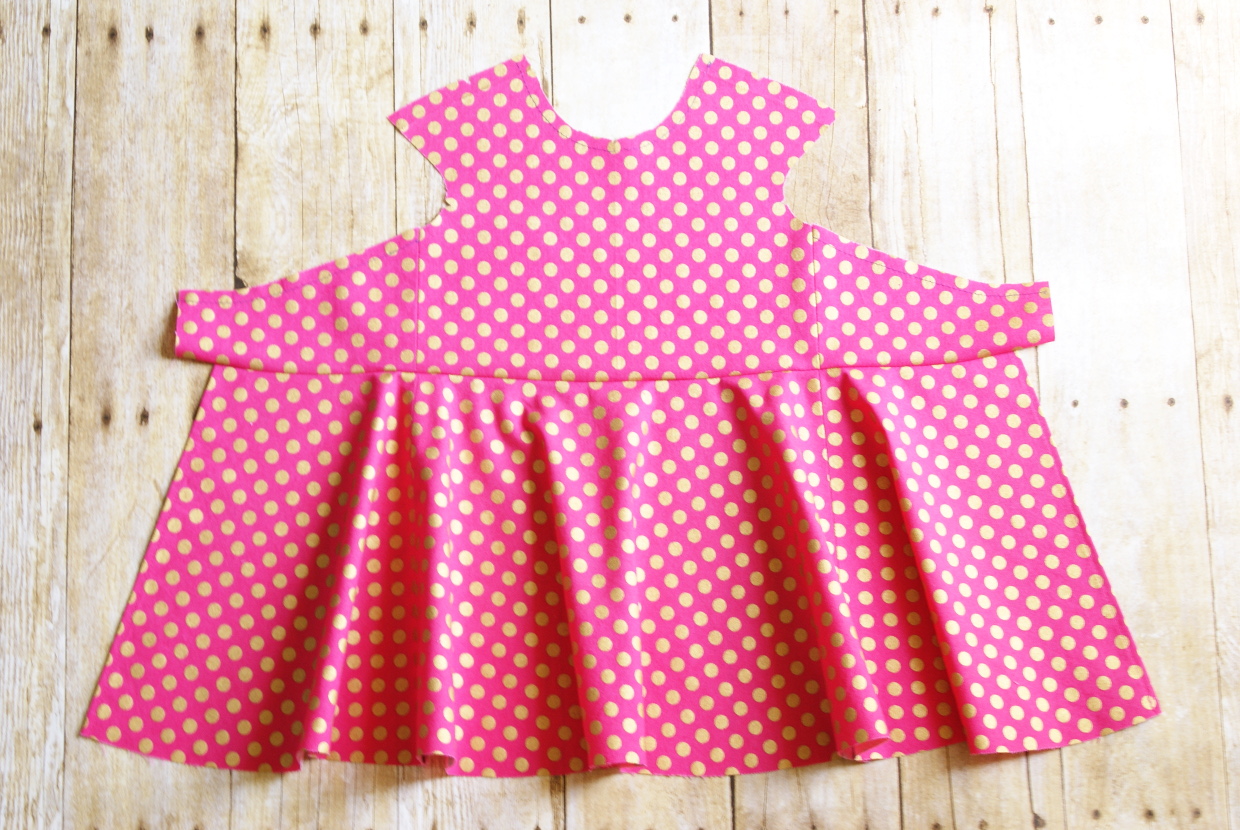
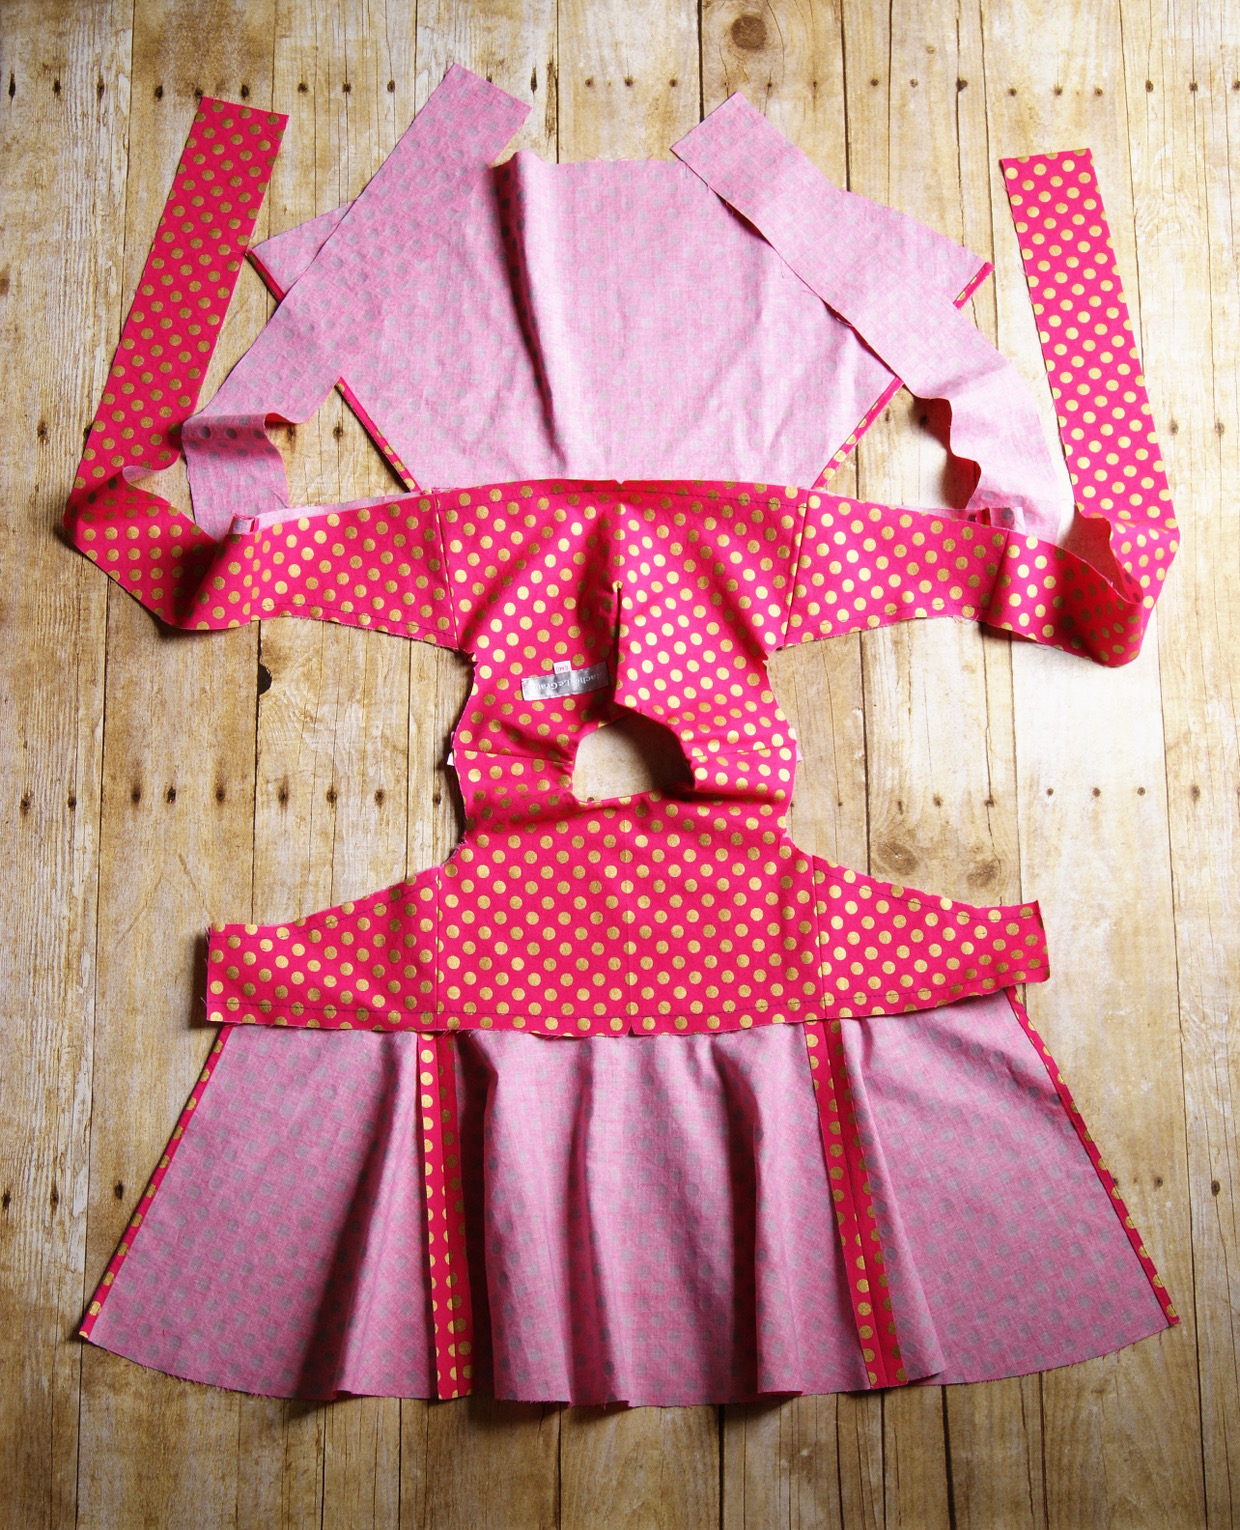
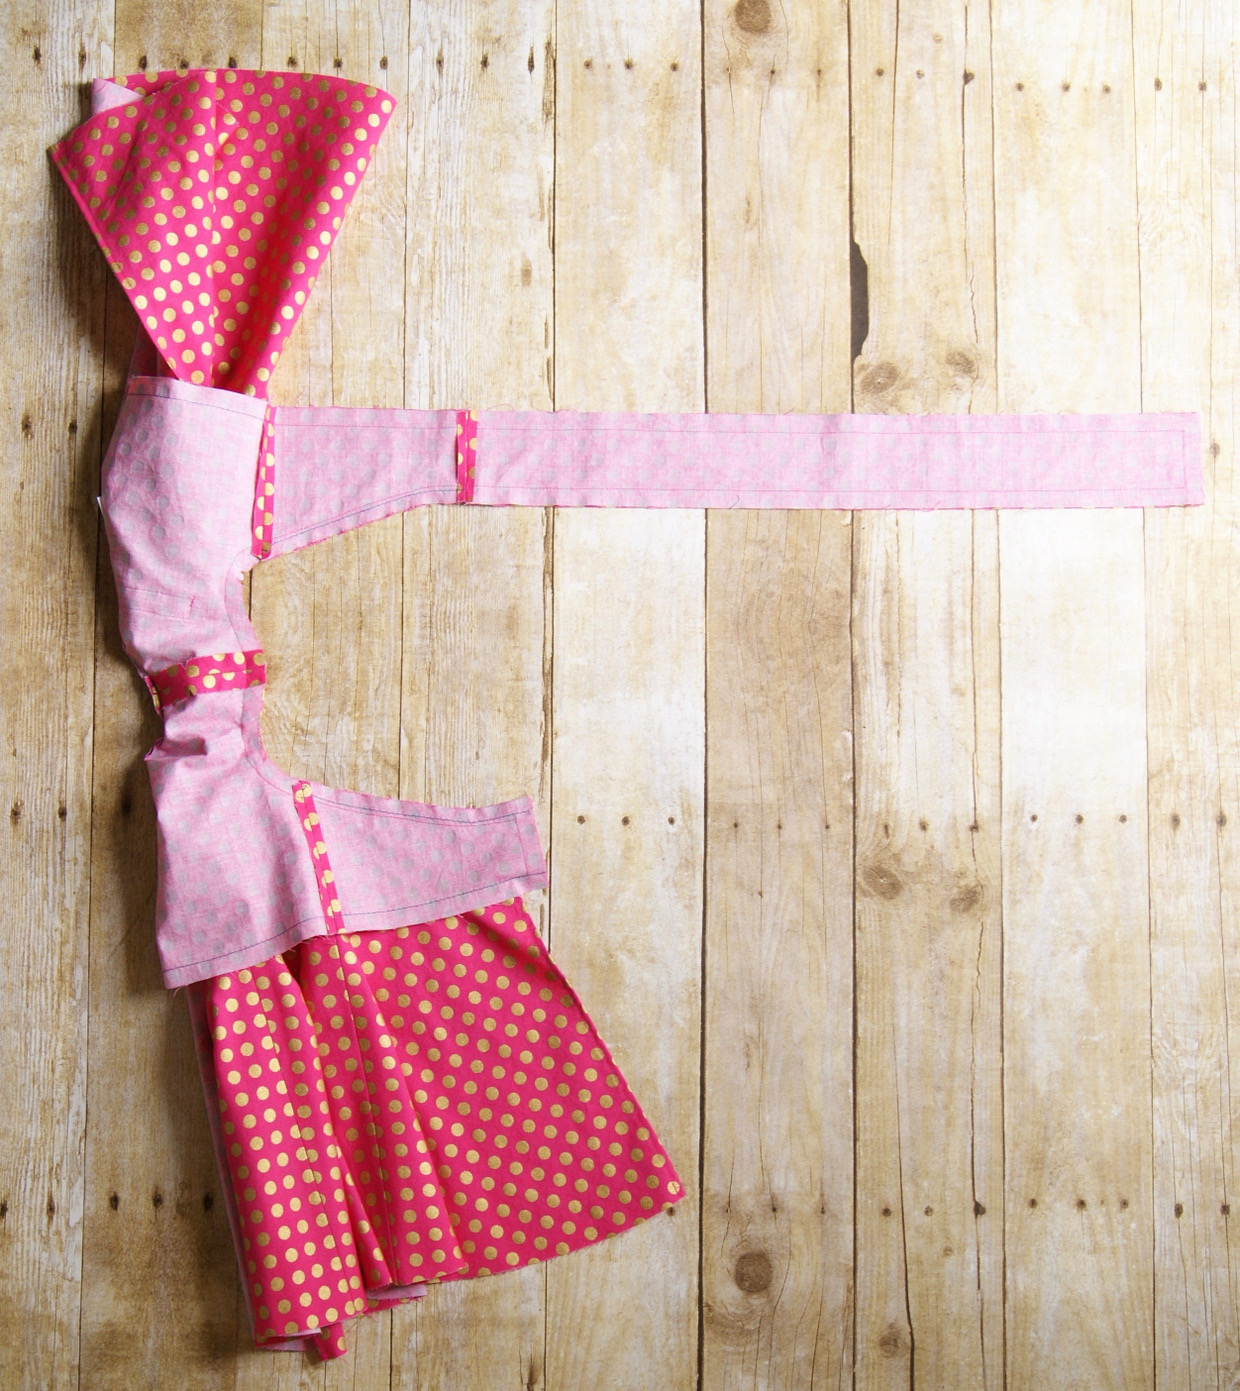
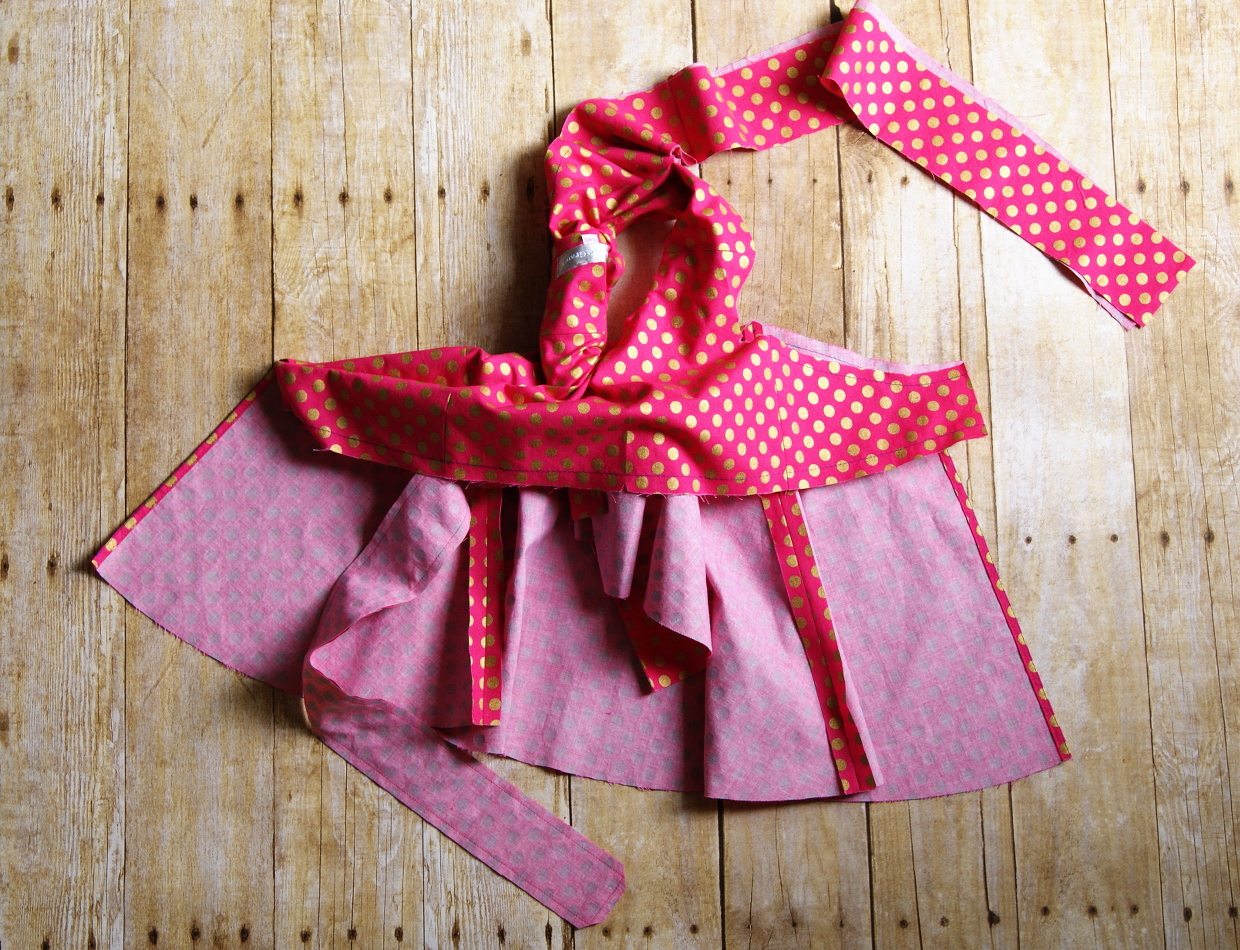
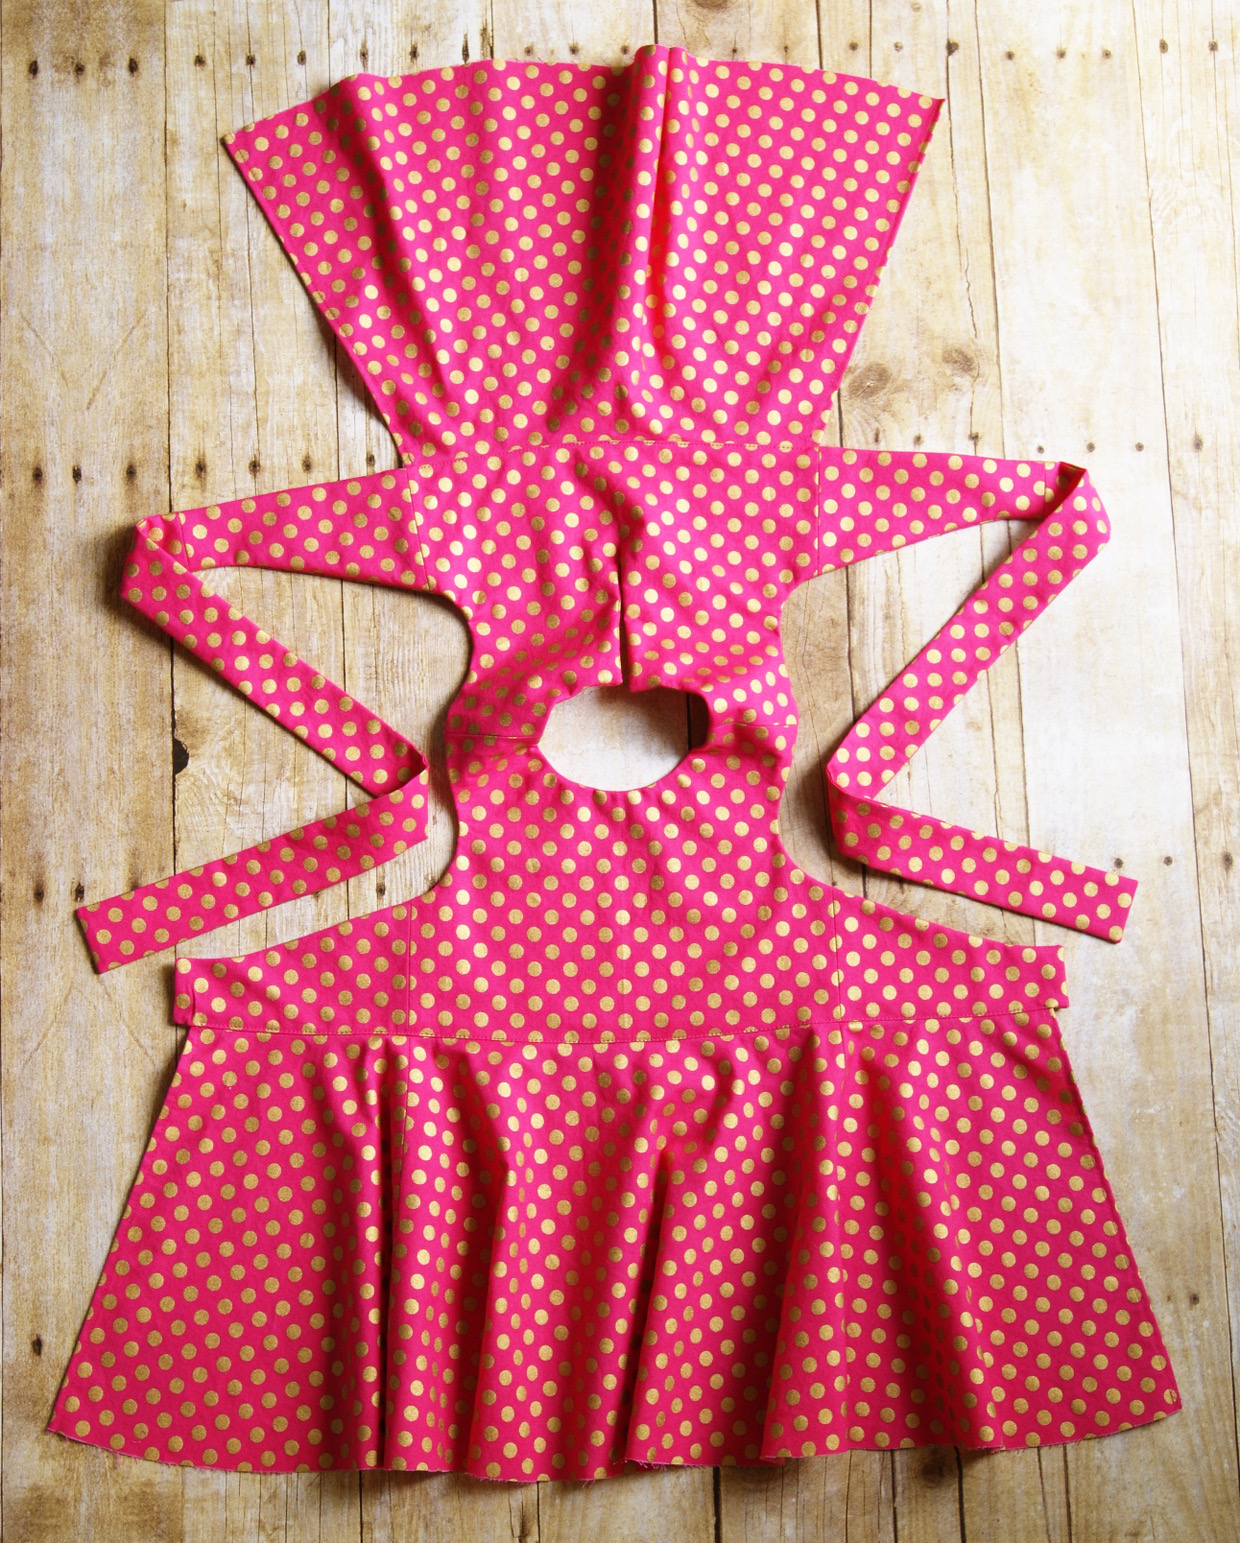
This is what your skirt pieces will look like so far:
Attach the Skirts (View A)
1) For View A, pin the wide skirt (skirt plus extensions) to the front bodice with right sides together, matching the center notches and side seams, and aligning each finished skirt edge to the notch at the center back/front line of each wrap piece. Clip into the skirt seam allowances as needed to help the skirt fit the bodice, then stitch the skirt to the bodice with a 1/2” seam. Press the stitches seam allowances toward the bodice. (No need to finish the seam allowances since they will be hidden.)
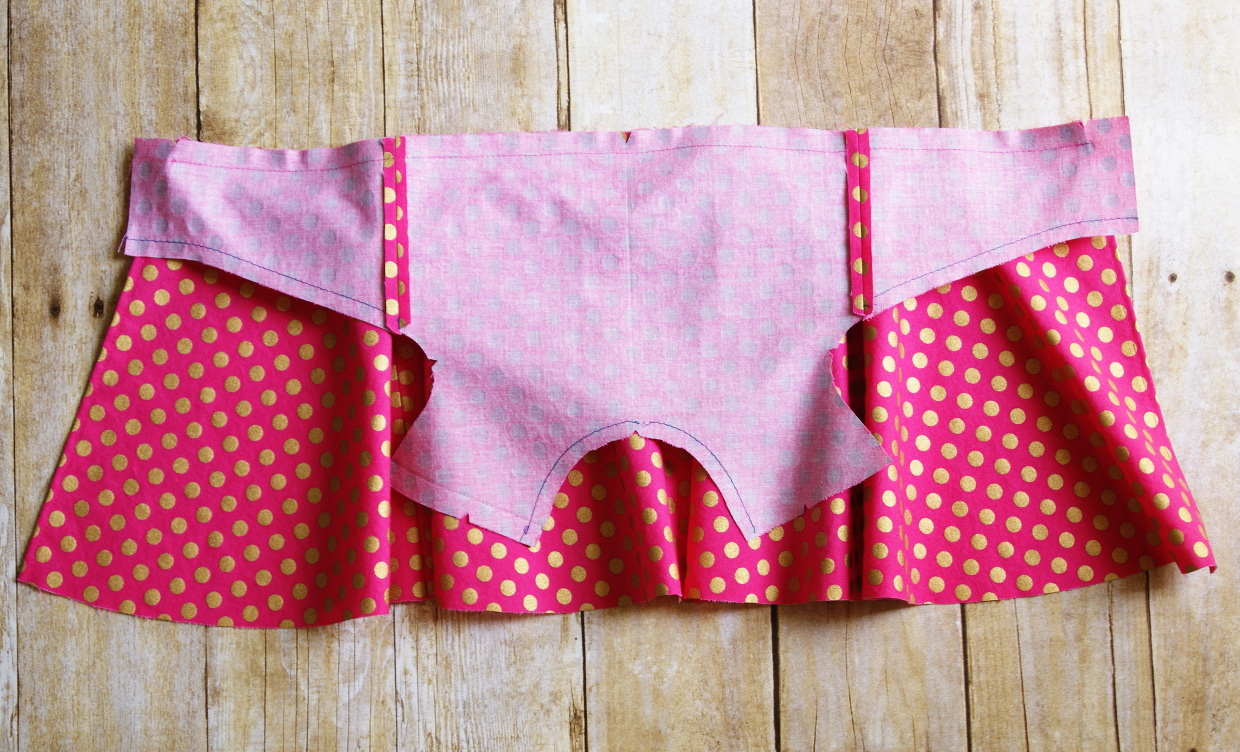
2) Pin the narrow skirt (the remaining skirt front/back) to the back bodice with right sides together, matching the center notches and side edges. Clip into the skirt seam allowances as needed to help the skirt fit, then stitch the skirt to the bodice with a 1/2” seam, backstitching or lockstitching at both ends. Press the stitched seam allowances toward the bodice. (No need to finish the seam allowances; they will be hidden.)

Attach the Skirts (View B)
1) For View B, pin the wide skirt (skirt plus extensions) to the back bodice with right sides together, matching the center notches, side seams, and aligning each finished skirt edge to the notch at the center back/front line of each wrap piece. Clip into the skirt seam allowances as needed to help the skirt fit the bodice, then stitch the skirt to the bodice. (No need to finish the seam allowances since they will be hidden.)
2) Pin the narrow skirt (the remaining skirt front/back) to the front bodice with right sides together, matching the center notches and side edges. Clip into the skirt seam allowances as needed to help the skirt fit the bodice, then stitch the skirt to the bodice with a 1/2” seam, backstitching or lockstitching at both ends. Press the stitched seam allowances toward the bodice. (No need to finish the seam allowances; they will be hidden.)
Here we are at Day 2 of the Cartwheel Dress sew-along already! Are you set to continue? This is a quick dress to sew, and we’re already well on our way to finishing it.
Assemble the Dress
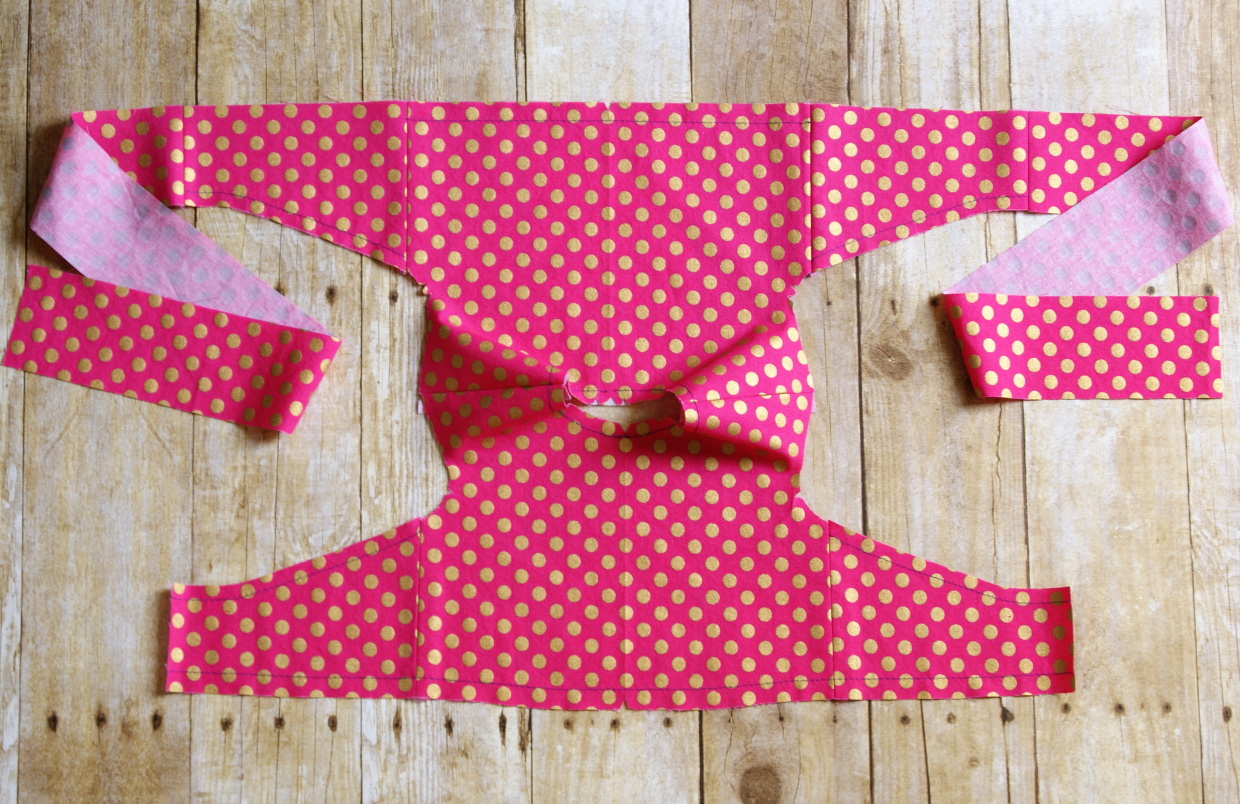
1) Select the bodice-front and bodice-back pieces with the skirts attached. Pin the front and back bodices at the shoulders, with right sides together and notches aligned, and stitch the shoulders with a 1/2” seam. Press the seam allowances open. (You don’t need to finish the seam allowances because they will be hidden in the finished dress.)
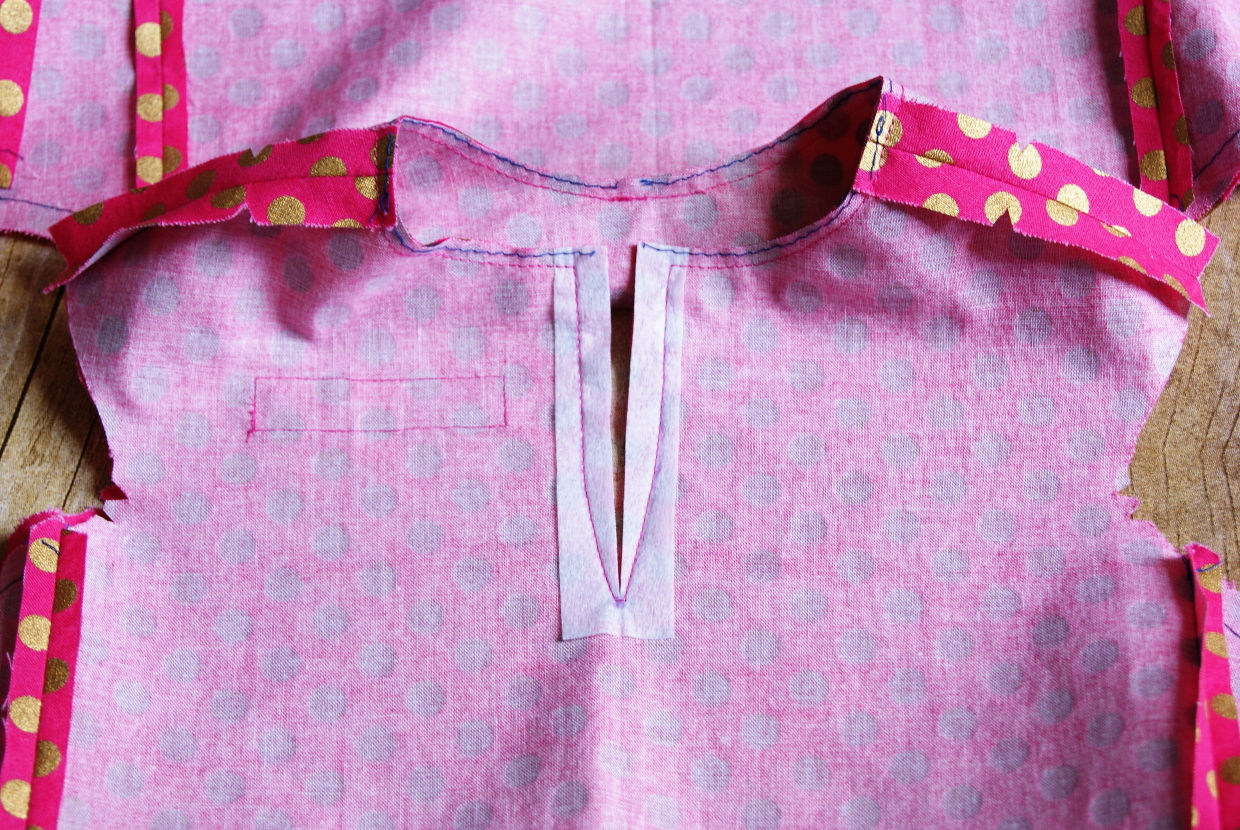
2) Pin the bodice lining to the dress bodice with right sides together, matching the neckline, shoulder seams, and keyhole markings. Stitch the neckline with a 1/2” seam, starting at one shoulder and stitching around the neck. Pivot when you reach the keyhole opening, then stitch carefully along the keyhole opening, then stitch carefully along the keyhole opening’s stitching line, pivoting again at the bottom dot and taking one horizontal stitch across at the dot before pivoting again to stitch up the other side. Pivot one more time to finish stitching the neckline, backstitching or lockstitching when you reach the start of your stitching.
3) Trim the neckline seam allowances to 1/8” and cut straight down the center back between the keyhole stitching lines, carefully clipping to the stitching at the dot, taking care not to clip into the stitching itself.
4) Press the lining away from the neckline and, if desired, understitch the neckline as far as you can reach. (Because of the keyhole opening you won’t be able to stitch all the way around.) Then turn the lining to the inside of the dress and press the neckline again, rolling the seam slightly toward the lining side so it won’t show when the dress in worn.

Sew the Armholes and Ties
1) Lay the dress flat, lining-side up. The lining is still separate from the rest of the dress everywhere except for the neckline, so arrange the lining to match the outside of the dress as well as you can. Roll one side of the dress halfway to get it out of the way.
From Liesl: This is where things start to get exciting! This is a burrito-style method of construction, and if you haven’t done something like this before it may feel confusing at first. But stick with us!

2) On the opposite (unrolled) half of the dress, separate the lining from the outside of the dress and wrap the lining and outside of the dress around the rolled portion of the dress so you can pin the shoulders, armhole, wrap, and tie with right sides together. Stitch the two edges together beginning at the edge of the skirt and continuing all the way around the wrap, armhole, and tie until you reach the edge of the opposite skirt. Pivot at the corners of the tie, and stitch the entire edge, from one skirt’s edge to the other skirt’s edge, with a 1/2” seam.
From Liesl: So just to re-iterate, one half of the dress and lining have been rolled up to keep them out of the way, and the other half of the dress and lining are being wrapped around the rolled portion and stitched with right sides together. Are you with us so far?
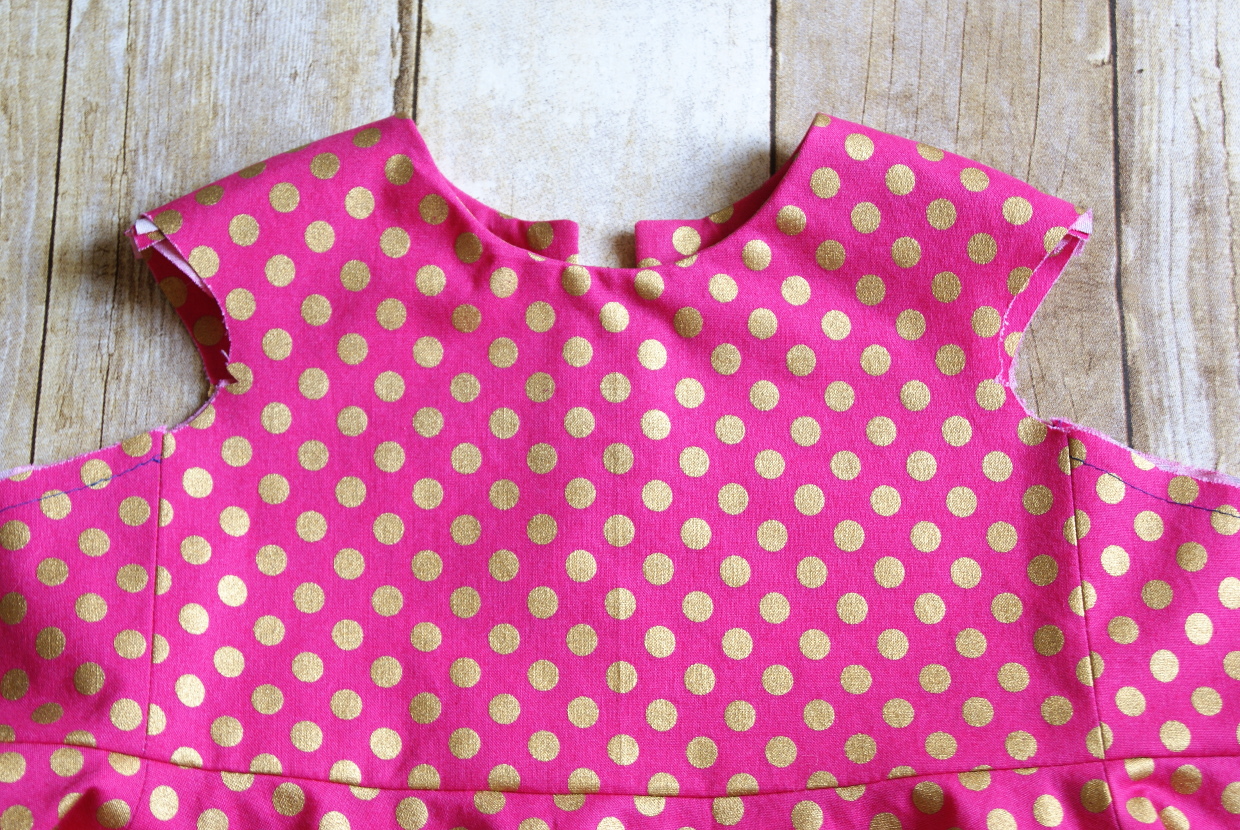
3) Trim the stitched edge to 1/4” and clip the curves and corners to prepare the bodice for being turned right-side out. Then reach in through the stitched shoulder and turn the dress right-side out by pulling the rolled portion of the dress through the shoulder. When you’re doing this it won’t seem like it will work, but if you keep gently pulling through the shoulder the dress will eventually right itself and you’ll find that one side of the dress has been sewn and finished. Turn the stitched tie right-side out.
From Liesl: This is the point where you might feel like you’ve done something wrong because for a moment it might seem like you can’t turn the dress right-side out. But concentrate on pulling the dress through the stitched shoulder and with a few minutes of puzzling it will seem like magic! The dress turns right side out through that narrow shoulder.

4) Repeat steps 1-3 to finish the other side of the dress, this time rolling the stitched half of the dress so you can wrap the opposite un-stitched side of the dress around it.
From Liesl: You did it once, and now you get to do it again with the opposite side of the dress!
Trim the edges and corners before turning the dress right-side out again. Press the edges all the way around the dress, finger-pressing first to coax the seams slightly toward the facing so they won’t show from the right side. Press the lower edges of the lining to the wrong side, using the basting stitches sewn in Step 6 of the “Prepare the bodice” section as a folding guide, and pin the bottom edge of the lining so it covers the waist seam. Hand-stitch or edge stitch the waist seam (stitching from the outside of the dress) to finish the lining.
Hem and Finish the Dress
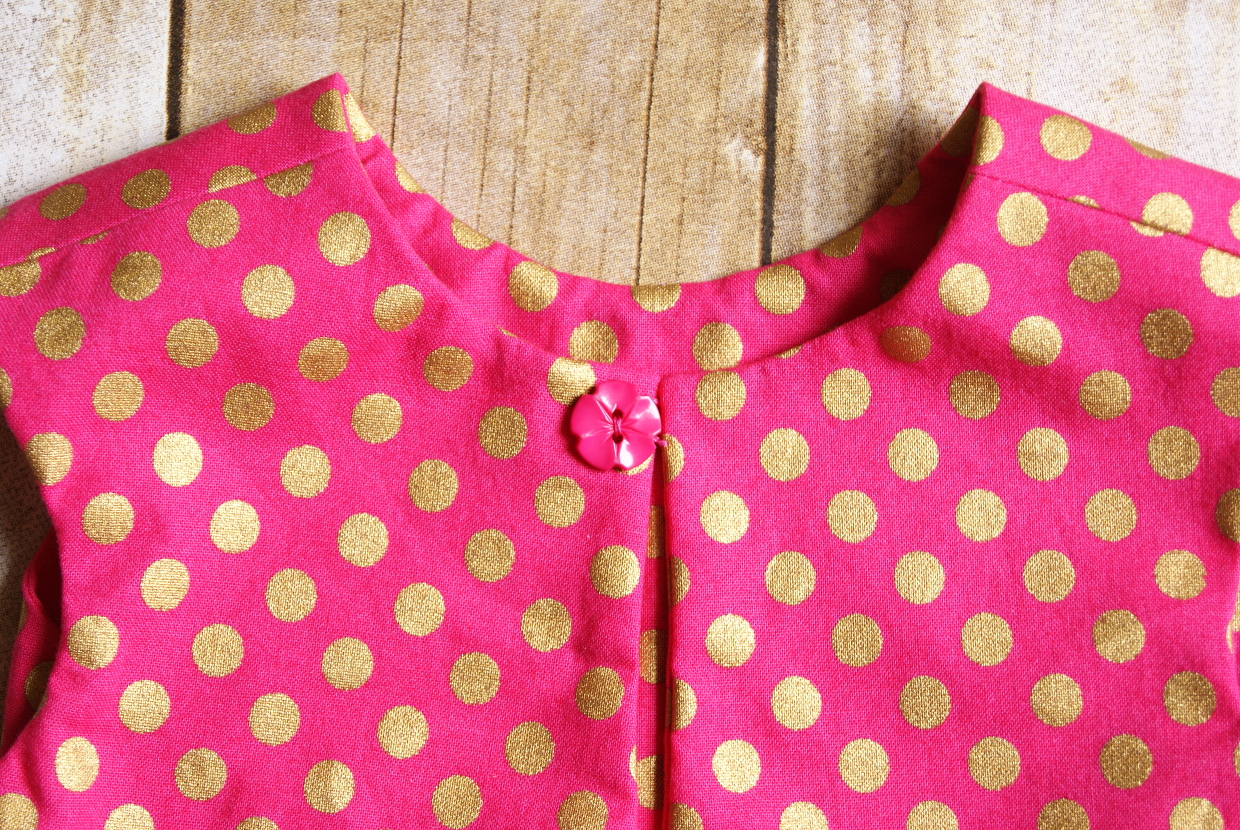
1) Stitch a button and a thread chain loop at the back edge of the neck so the two back edges will “kiss” when buttoned. If you’d like more information visit our making a thread chain tutorial.
2) To hem the skirt, sew a line of basting stitches 5/8” from the bottom edge of both skirts. These stitches will become the fold line for the hem. Fold and press the outer skirt’s raw edge to the basting line on the wrong side. Then fold and press the fabric again along the basting line to enclose the raw edge and create a narrow hem. Edgestitch the innermost fold to finish the hem. Remove any visible basting stitches from the fold line.
Note: These are the same photos from the ‘Assemble the Skirts’ section. It is the same method, but keep in mind that hemming the bottom edge of both skirts will be on a curved edge.
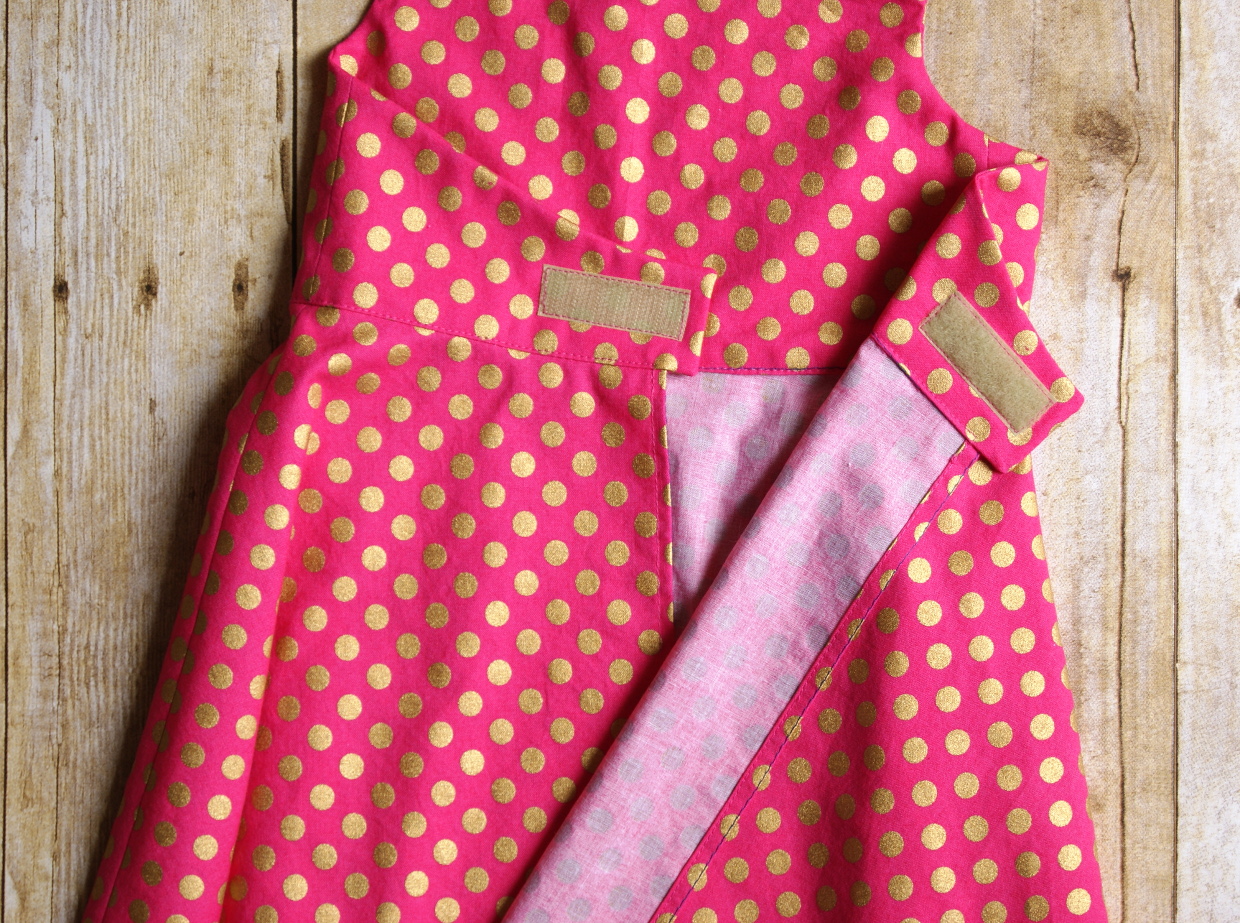
3) Use the wrap fastener template to position one or two snaps or a 2” length of Velcro to the back (View A) or front (View B) wrap. If you’re using Velcro, be sure to sew the softer side of the Velcro to the lining and the rougher side to the outside fabrics so it doesn’t scratch the wearer.
From Liesl: Before stitching the Velcro I like to try the dress on the wearer to check the placement of the Velcro. this dress is a bit forgiving, so if you need to position the Velcro to make the dress a little wider or narrower you absolutely can.
4) To wear the dress, slip it on over the head, fasten the button at the keyhole opening, fasten the snap or Velcro around the waist, and then tie the ties. It’s a wrap!

We hope you and your little Cartwheeler will love this new dress!
Finished this last night. The pulling through the shoulder reminded me of a dress I made years ago. Very cute dress. Waiting for the arrival of the granddaughter to do the snap/velcro placement. I used a hook and eye for the back closure instead of a zipper.
I need help!! I don’t know what I’m doing wrong I’m on my second dress the first one worked out beautifully. The 2nd one I can’t turn it out. I keep pulling through the sewn shoulder and it just keeps going and going and I end up where I started all inside out. I’m so confused!
i Think I figured out what I did wrong, I don’t think I wrapped the sides around the rolled part before sewing… I burritoed wrong.