We are happy to welcome Lisa back to the blog today. Last year she stopped by to contribute her Weekend Links post. Now she is here to share how she added hemstitching to the Weekend Getaway Blouse. Thanks Lisa for this wonderful tutorial!
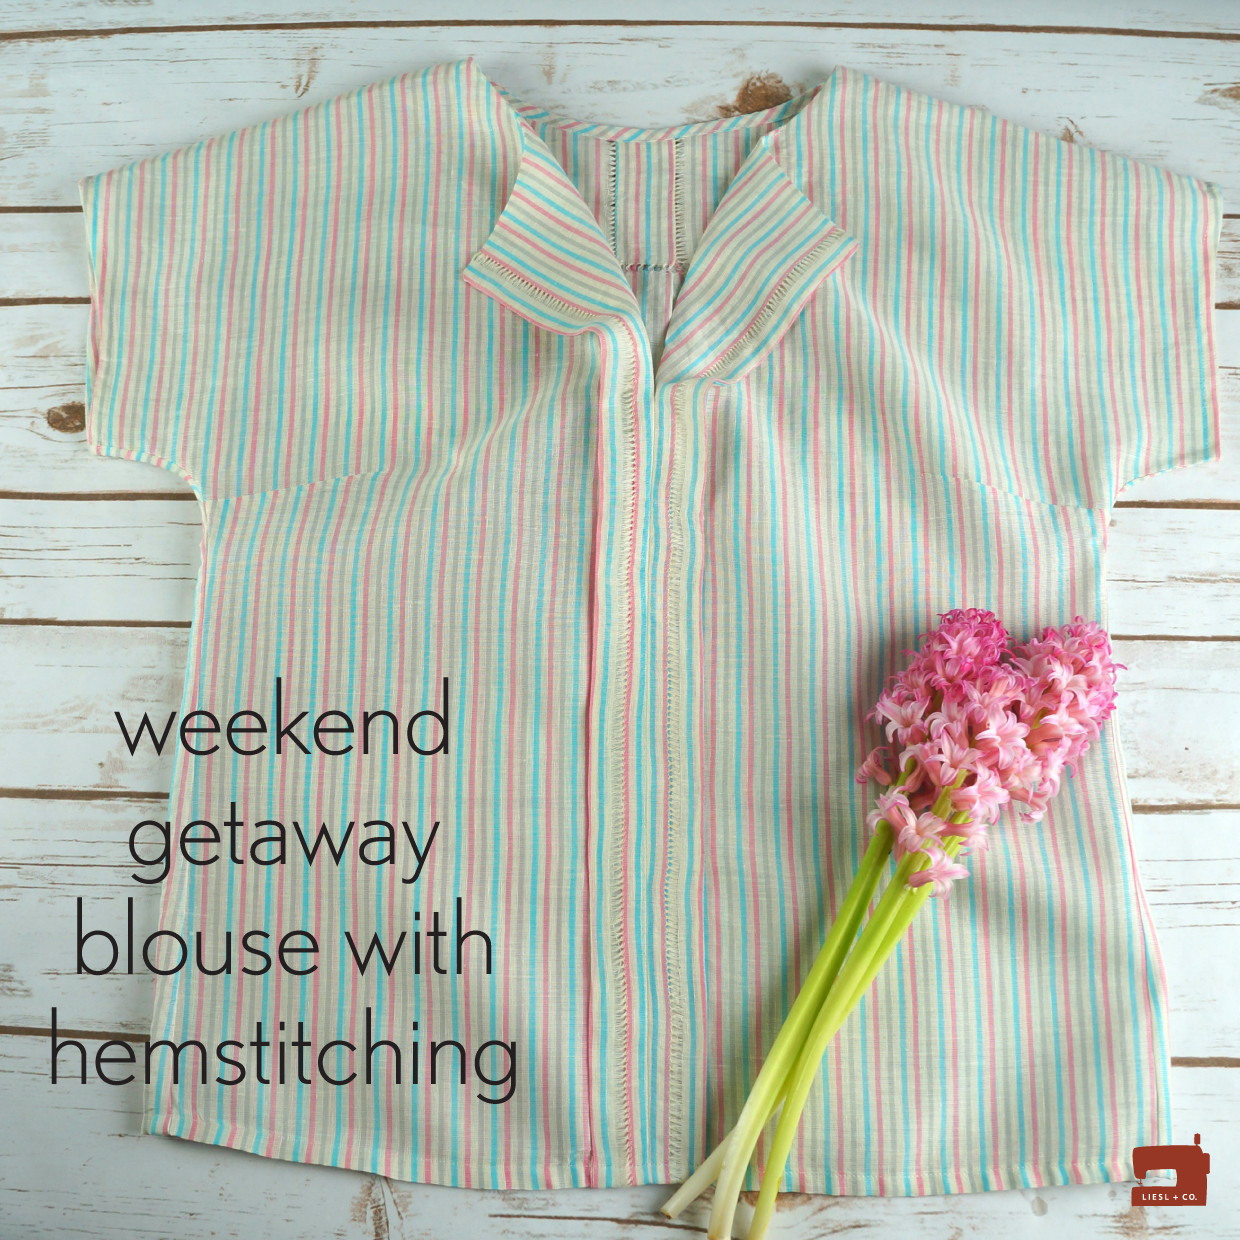
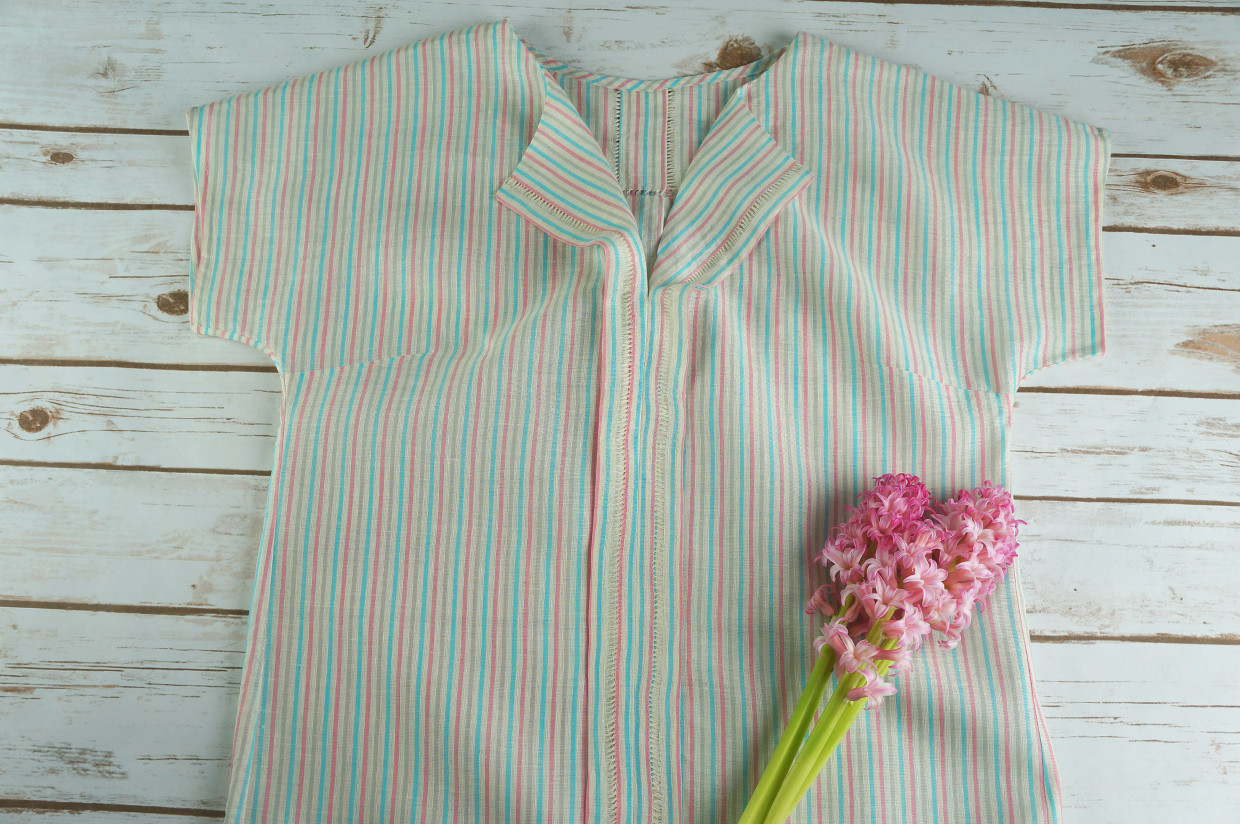
I have long had the Weekend Getaway Blouse on my “to sew” list, so when Liesl told the Advisors Circle that it was being released in a paper format, and this was one of the patterns she would love us to play around with, I knew this was the pattern I wanted to make. Make sure to check out Lori’s lovely version with pleats added, and Claire’s fun version with a bright pop of color for more sewing inspiration with this pattern. Liesl’s ideas focused on playing with that center front detail. At the same time she mentioned she had been sewing a lot with linen and somehow the wheels started turning and my mind went to hemstitching on linen. If you have never tried hemstitching, it is a type of drawn thread work that also has the practical application of hemming the garment. It is often found on vintage heirloom garments. You can read a little more about the history of hemstitching in this post. Below is a general tutorial on hemstitching using a piece of linen with a larger gauge and perle cotton so you can clearly see what I am doing, and then I explain how to apply the technique to the Weekend Getaway Blouse.
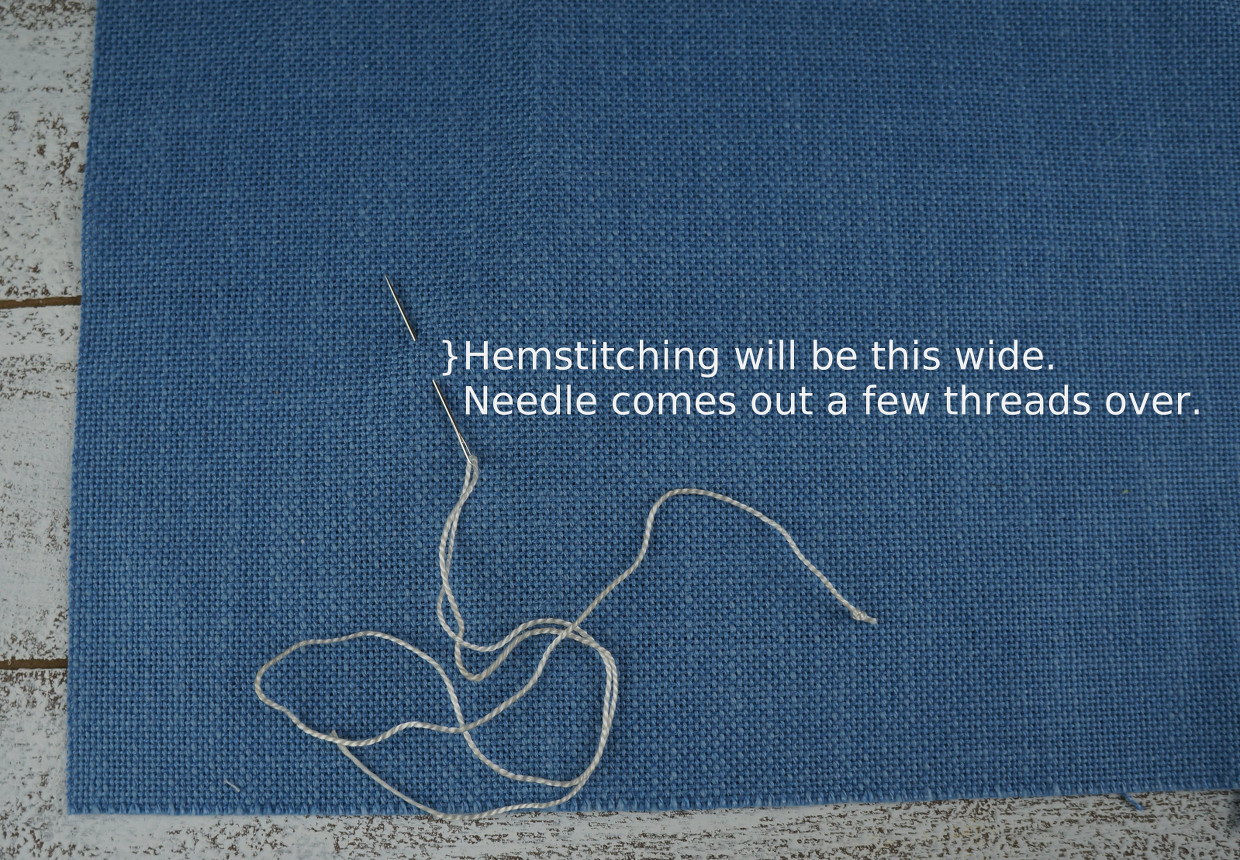
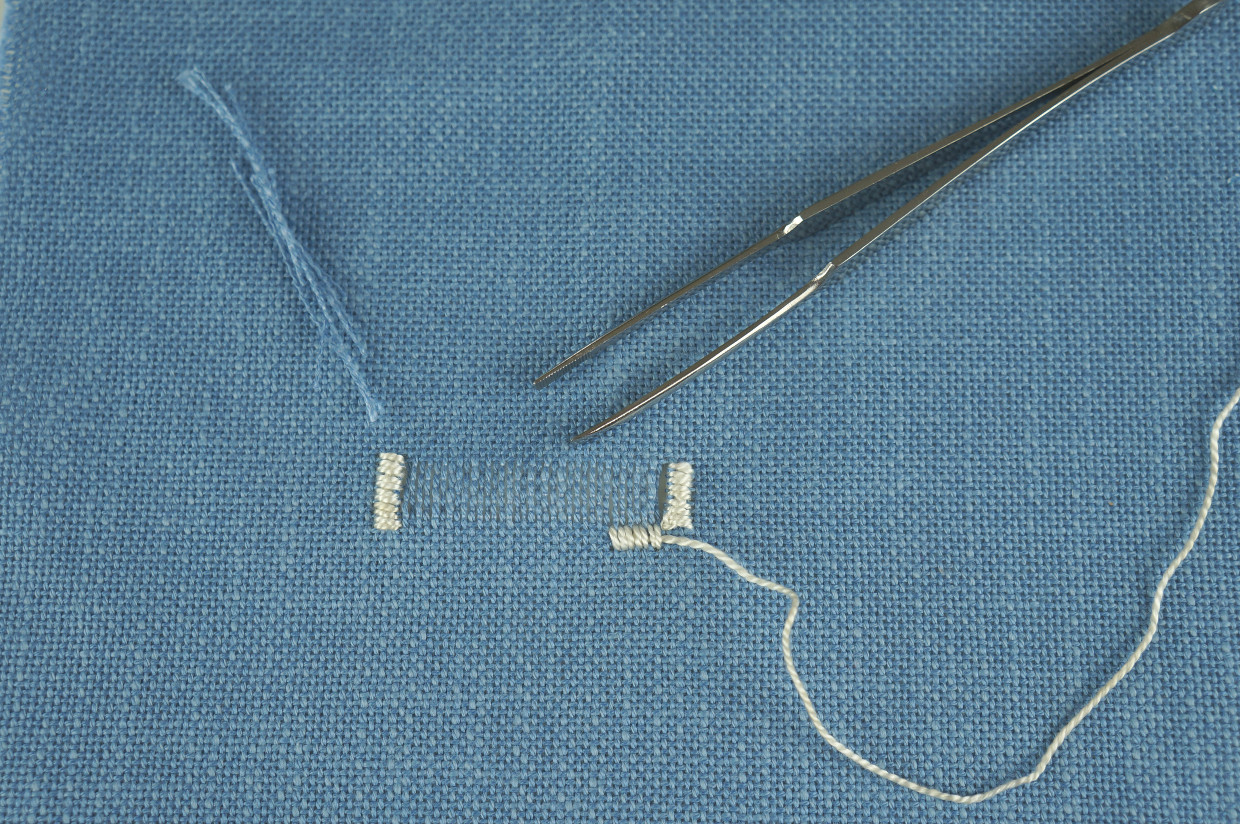
Preparing the Fabric: Satin stitch bars reinforce the area that is to be hemstitched. Knot the thread. From the right side of the fabric, insert the needle where the width of the hemstitching is going to begin and come up a few threads to the left where the width of the hemstitching is going to end.
Satin stitch back down to the knot by going in and out of every hole and stitching over the thread on the back as you work your way back down to where you started.
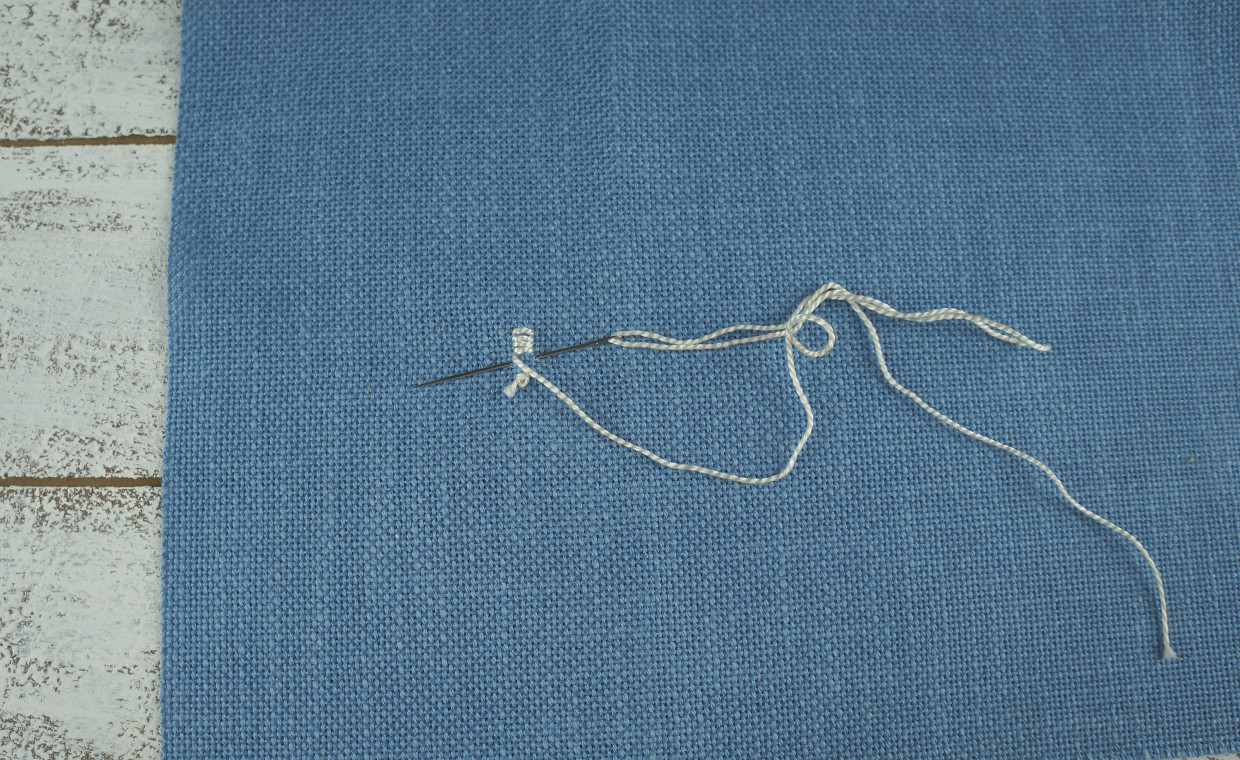
Clip the knot. Take the needle to the back of the fabric and run the thread under the satin stitch bar to end. Take a deep breath (you can do this) and carefully clip the horizontal threads right up against the satin stitch bar.
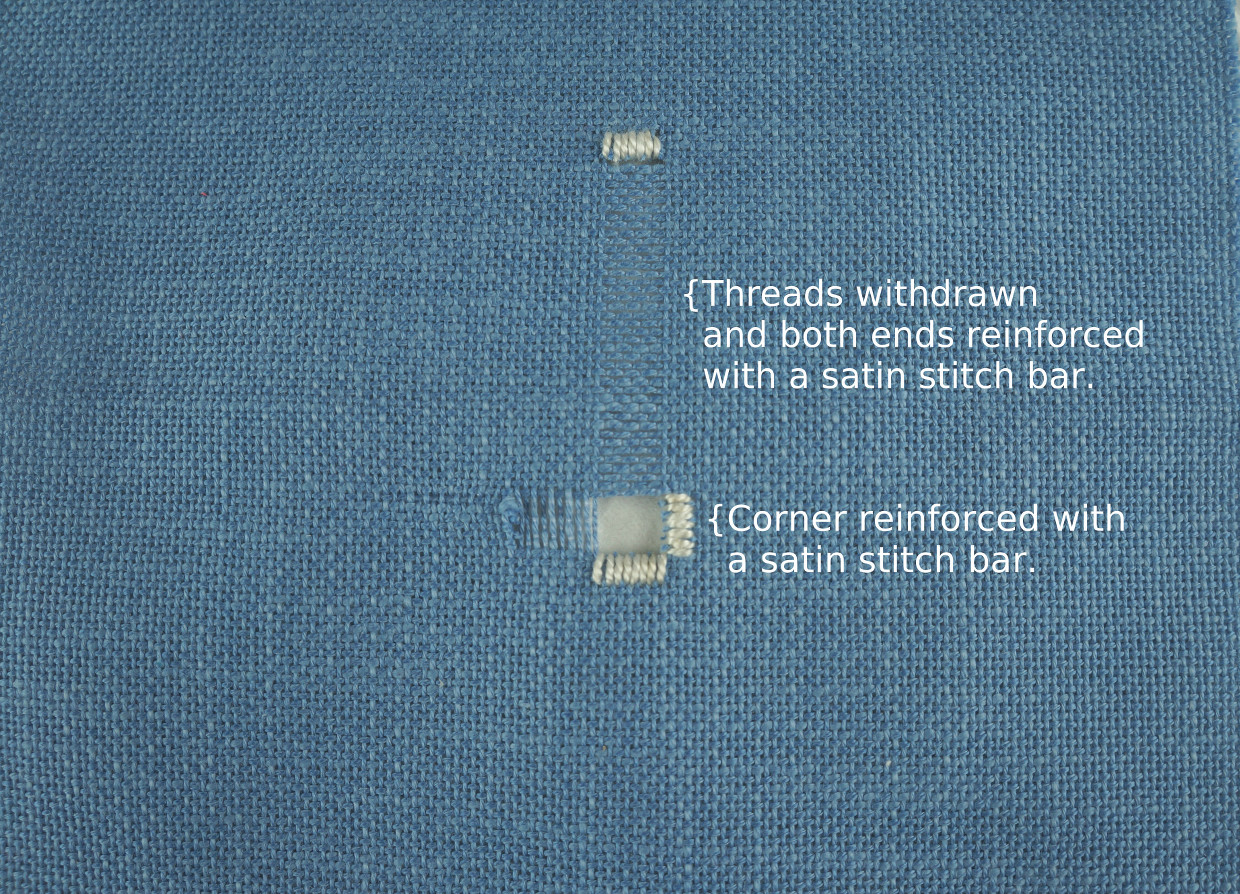
Stitch a second satin stitch bar where the hemstitching is going to end. If you can’t tell where this is, with the eye of the needle, begin withdrawing the threads by unweaving them and working your way down to where you wish to end.

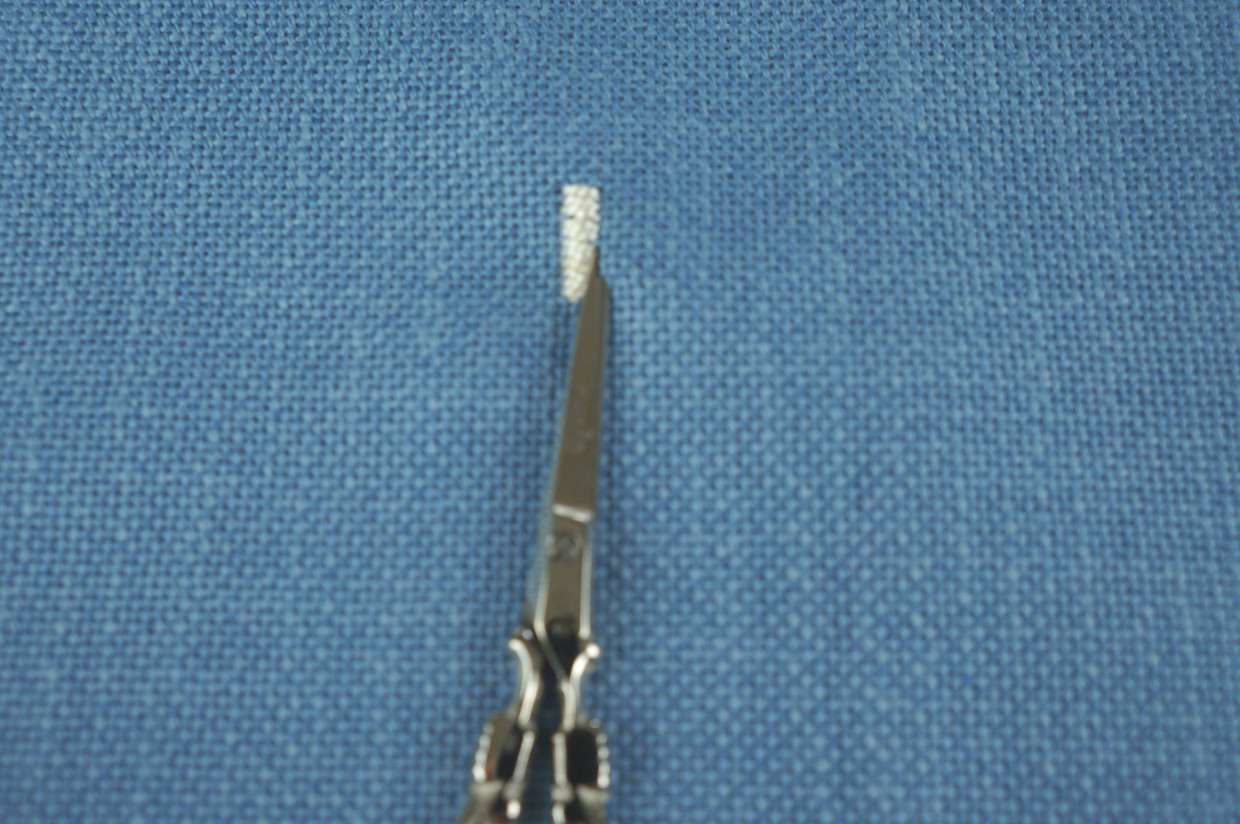
After stitching the second bar, clip the threads at the other end and pull them out with a tweezers.
If you are unsure of how many threads to clip (they can be difficult to see on a finer piece of linen), clip one or two threads in the middle and just withdraw those. This will make room so you can see which additional threads need to be clipped. If you would like to turn the corner as I did on the back of the blouse, both sides of the corner need to be reinforced with a satin stitch bar.
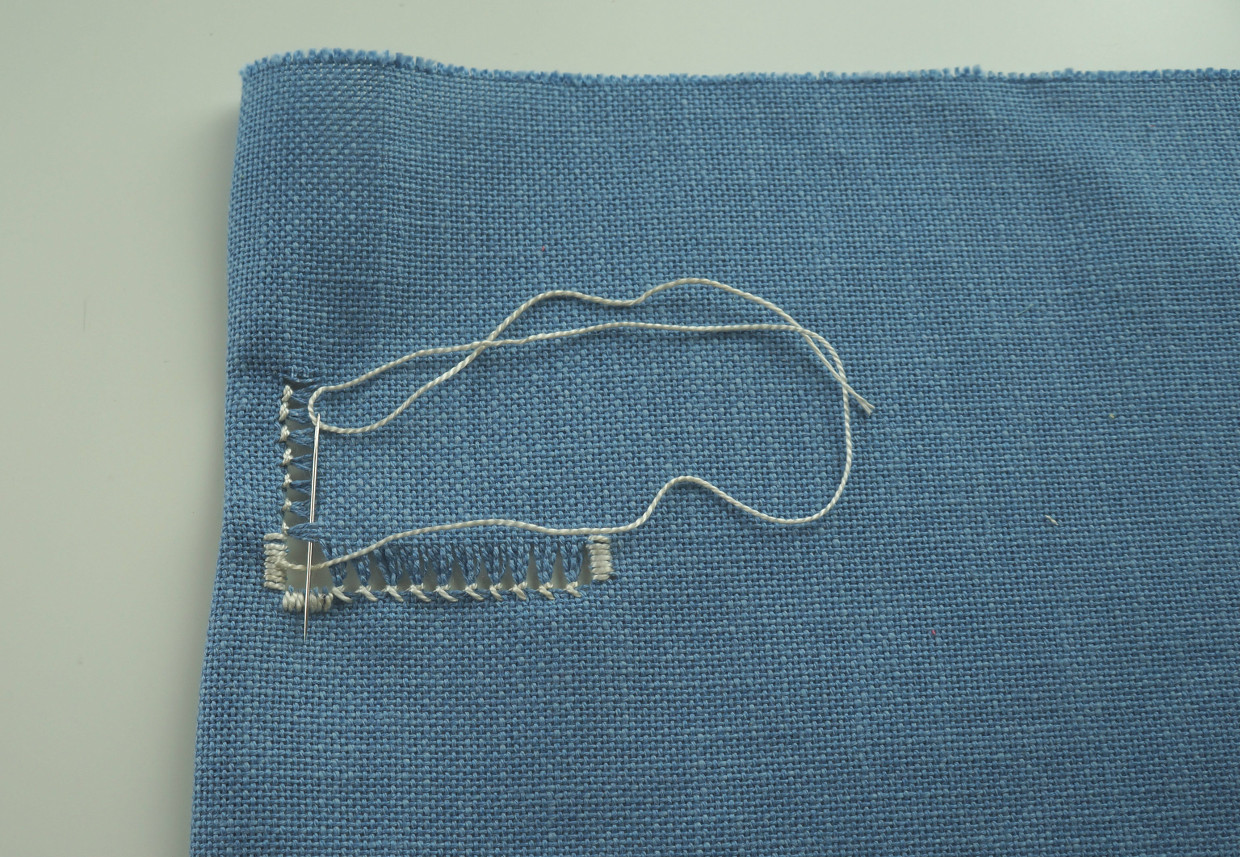
Hemstitching: Traditional hemstitching is worked from the wrong side of the fabric so you can catch the hem. I think this gives a neater appearance as well. Turn the work to the wrong side and attach the thread to the fabric by running it under the right satin stitch bar. Working from right to left, slip the needle from A to B Under several threads (I am grouping by 4s), and come back out the needle doesn’t pierce anything.

Insert the needle again from A to B so the working thread goes Around the fabric threads but this time as the needle comes out at B, pierce and go Through the fabric a few threads below where the threads have been withdrawn.
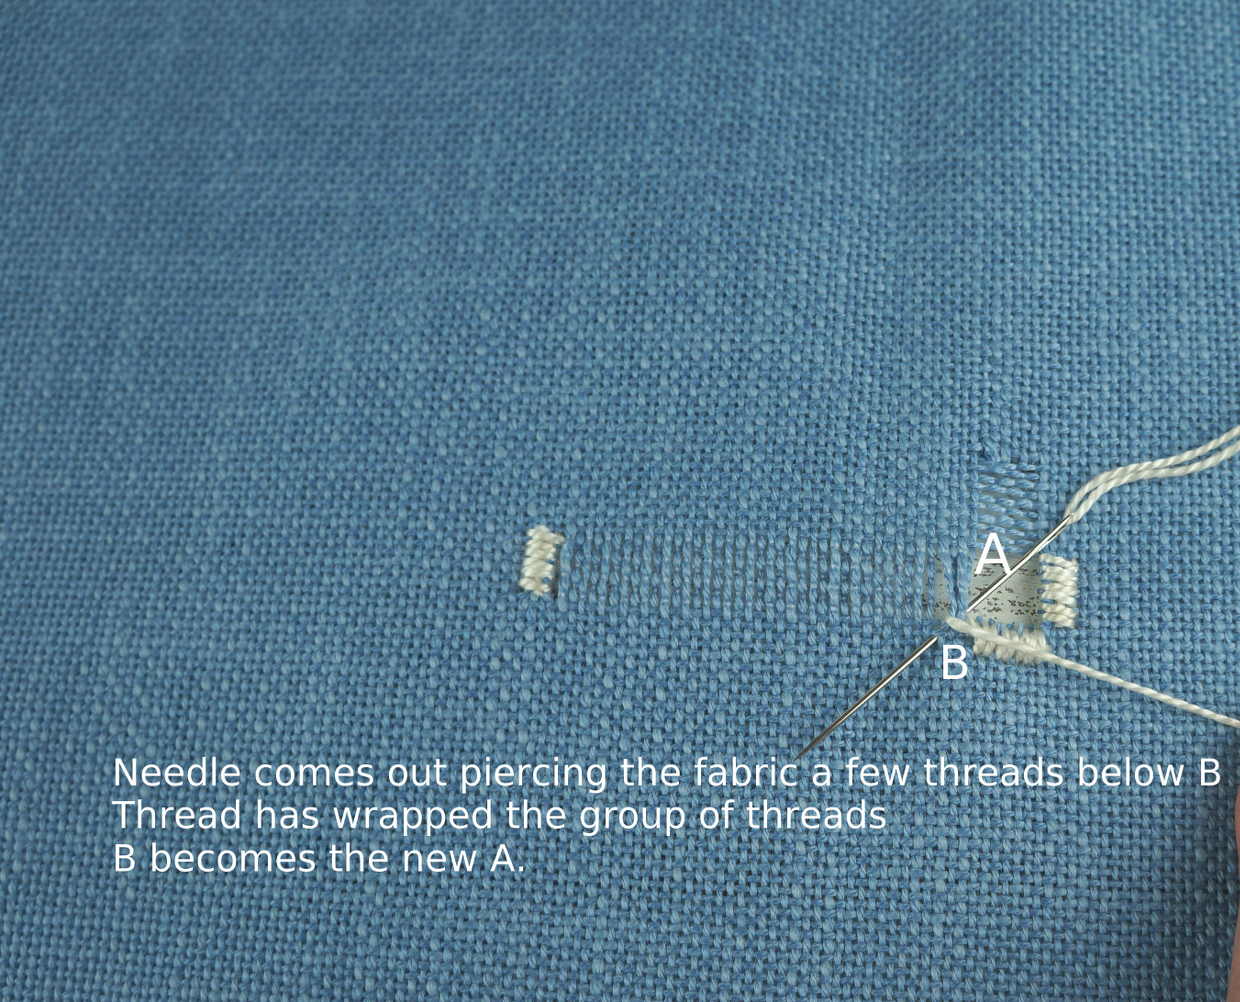
Pull securely. B now becomes the next A. That is all there is to it: Under, Around and Through! It is very rhythmic and relaxing once you get going. Repeat with the next group of threads working your way to the end. To end an old thread and start a new thread in a run of hemstitching, run the old thread under the previous line of hemstitching and take a few tiny back stitches. To start, take a few tiny back stitches and continue on. In order to hem the fabric as you stitch, the hem is folded up to the withdrawn threads and when the needle comes through it pierces the turned up hem allowance.
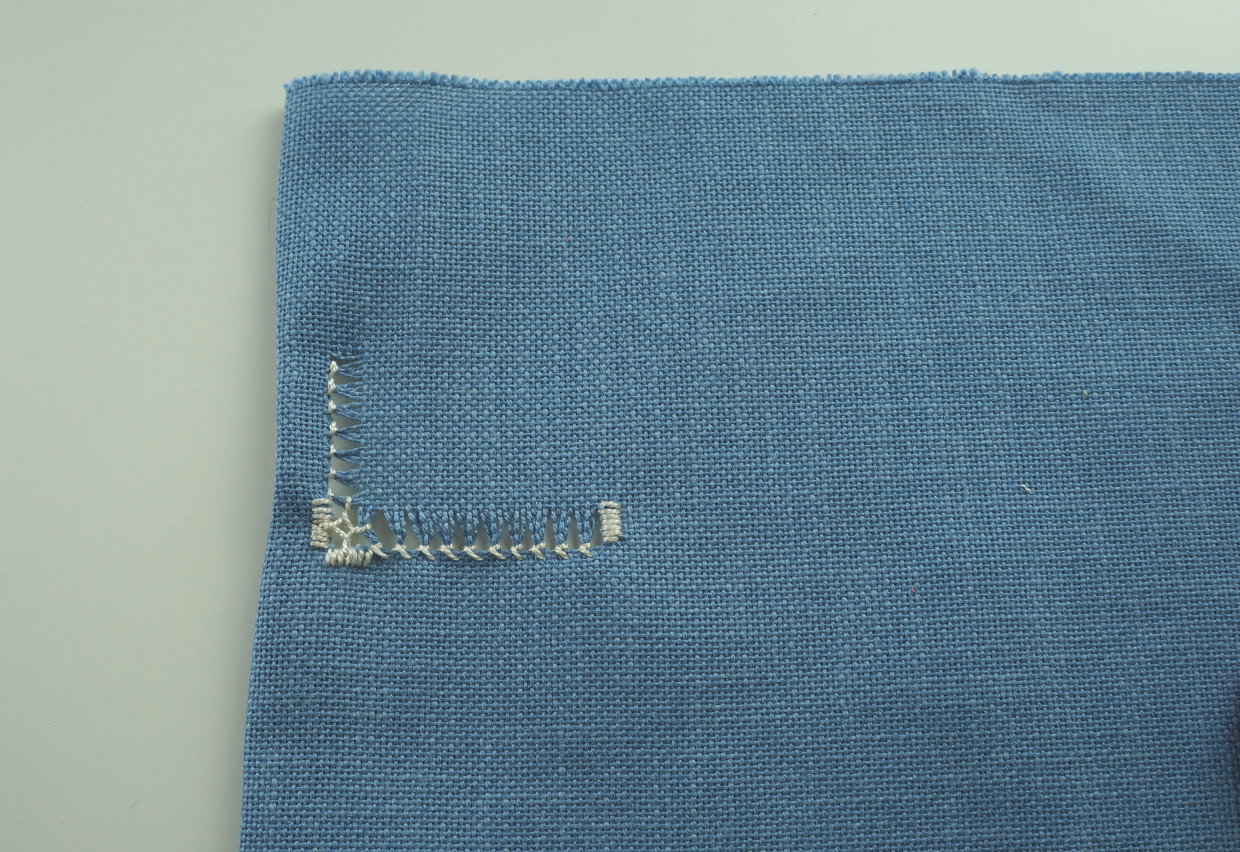
Handling the Corner: Since all the threads are withdrawn from a corner, some reinforcement is necessary. There are all kinds of elaborate stitches that can be used to decorate a corner, but I used the simplest one for my blouse. Again anchor the thread under a satin stitch bar on the wrong side of the fabric, and bring it up in the middle of one of the satin stitch bars on the right side of the fabric. Take a stitch in the middle on the next side of the square that makes up the corner, pointing your needle from the edge to the middle of the square and going over the working thread.
Work clockwise around the corner stitching from the middle of a bar or group of threads, and pointing the needle to the center of the corner and going over the thread. Adjust the tension of the thread so that it doesn’t pull too much on the group of threads. When you get back to where you started, take the needle to the back and end by running the thread under one of the bars.
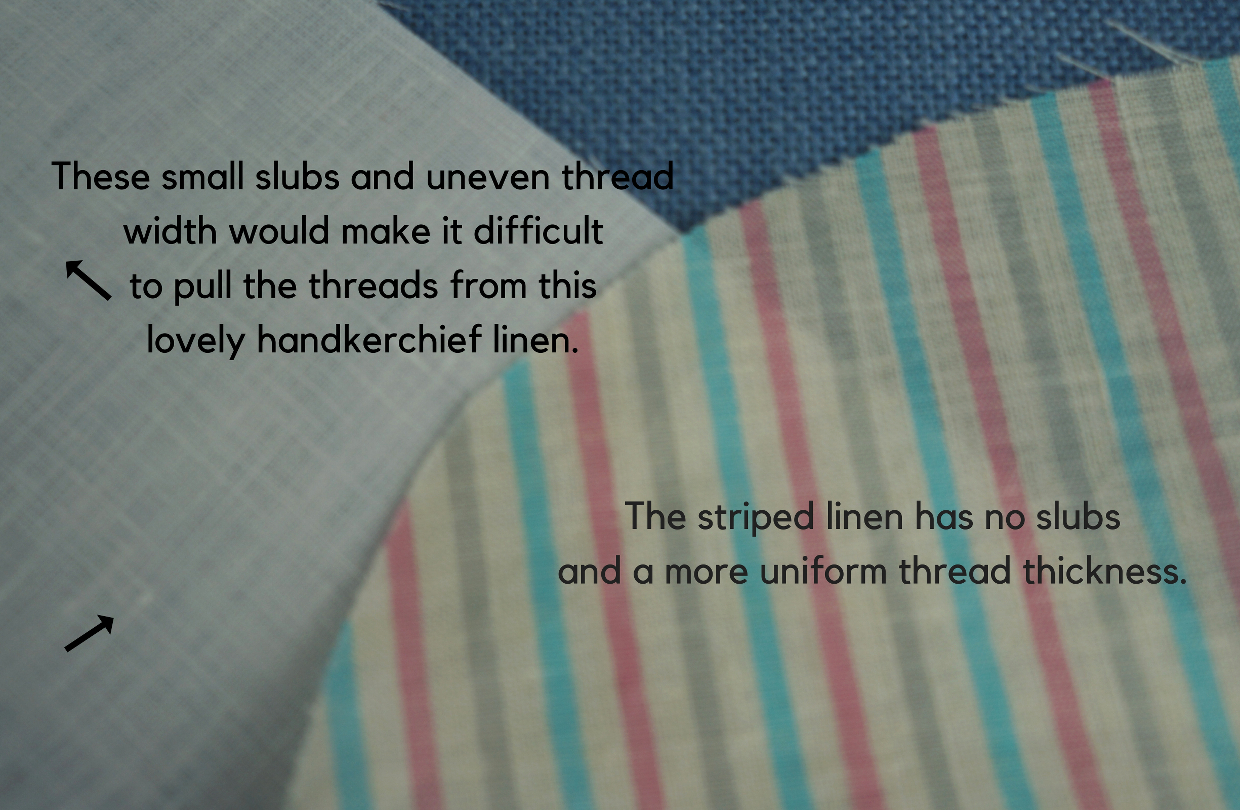
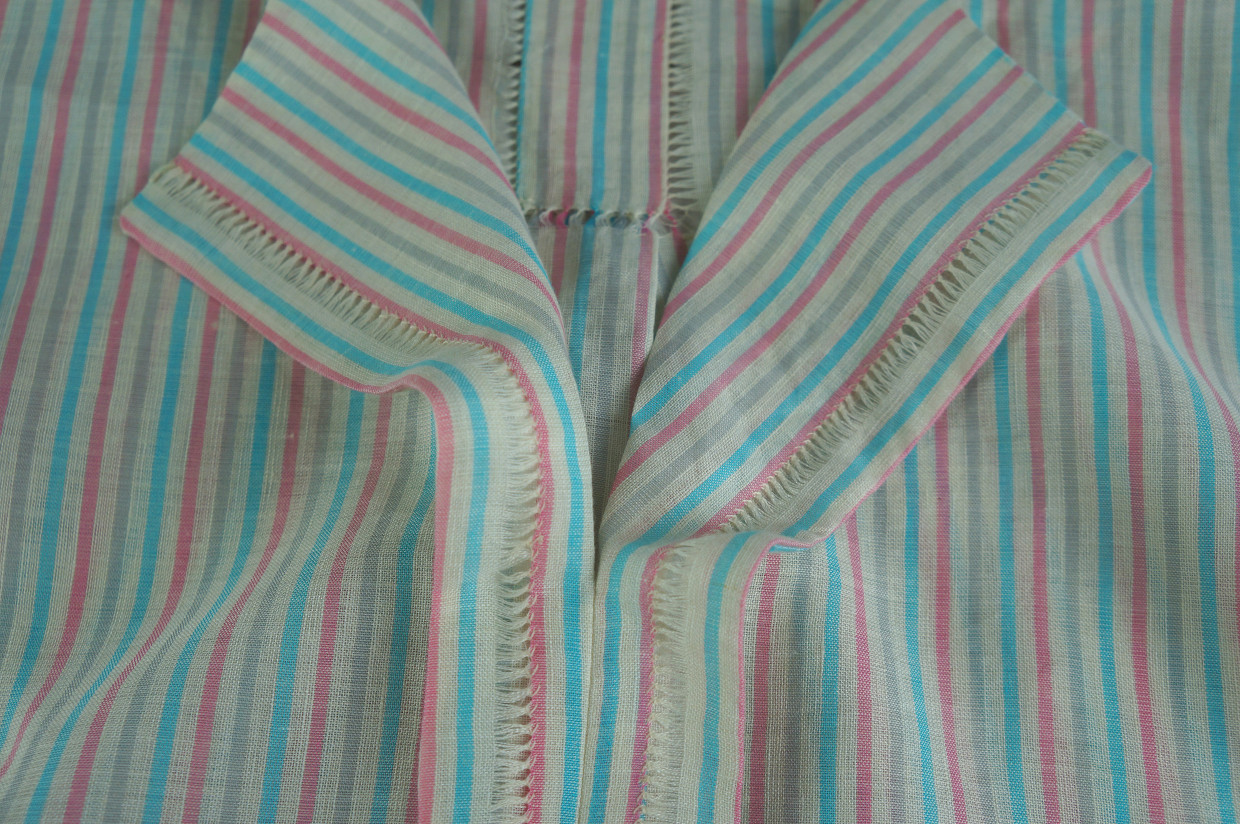
Applying Hemstitching to the Weekend Getaway Blouse: To apply hemstitching to the blouse, choose a light weight drapy loosely woven linen or cotton/linen blend with flew slubs and a uniform thread width. It should be easy to remove the threads. The striped pattern helps with knowing which threads to pull.
No changes are necessary to the pattern. The hemstitching is applied to the facing pieces of the blouse because the front detail is formed from the facings. Mark the seam allowance on both the top and bottom of the facings.
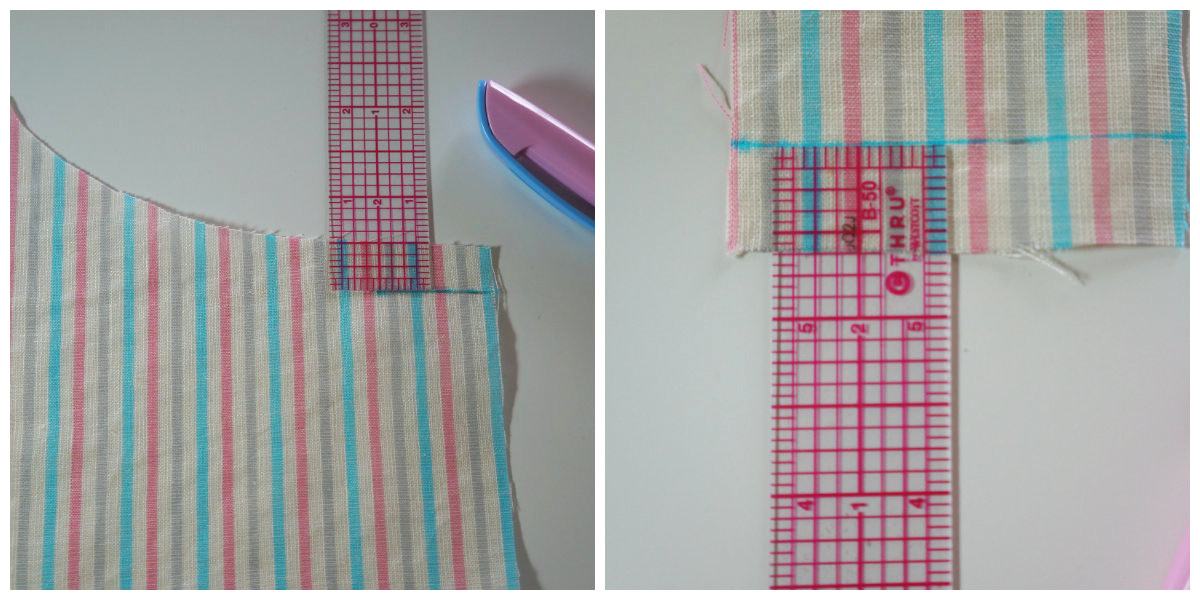
Determine how far from the edges to place the hemstitching remembering that there is a ½ seam allowance down the center front and a total of a 1 inch turn back. My hemstitching is ¼ wide (2 stripes width) and begins 7/8 of an inch from the center front. You can make it 1 inch from the center front if that works better with your fabric – I used 7/8 because that lined up with the stripes. Stitch the satin stitch reinforcement bar on the marked seam allowance at the neck edge and hem edge. Cut the threads and remove them. Here is where the stripes helped! From the back, using regular thread and an embroidery or tapestry needle, hemstitch the facing.

Hemstitching the Back of the Blouse: On the back of the blouse, I used hemstitching to hem the pleat in place.
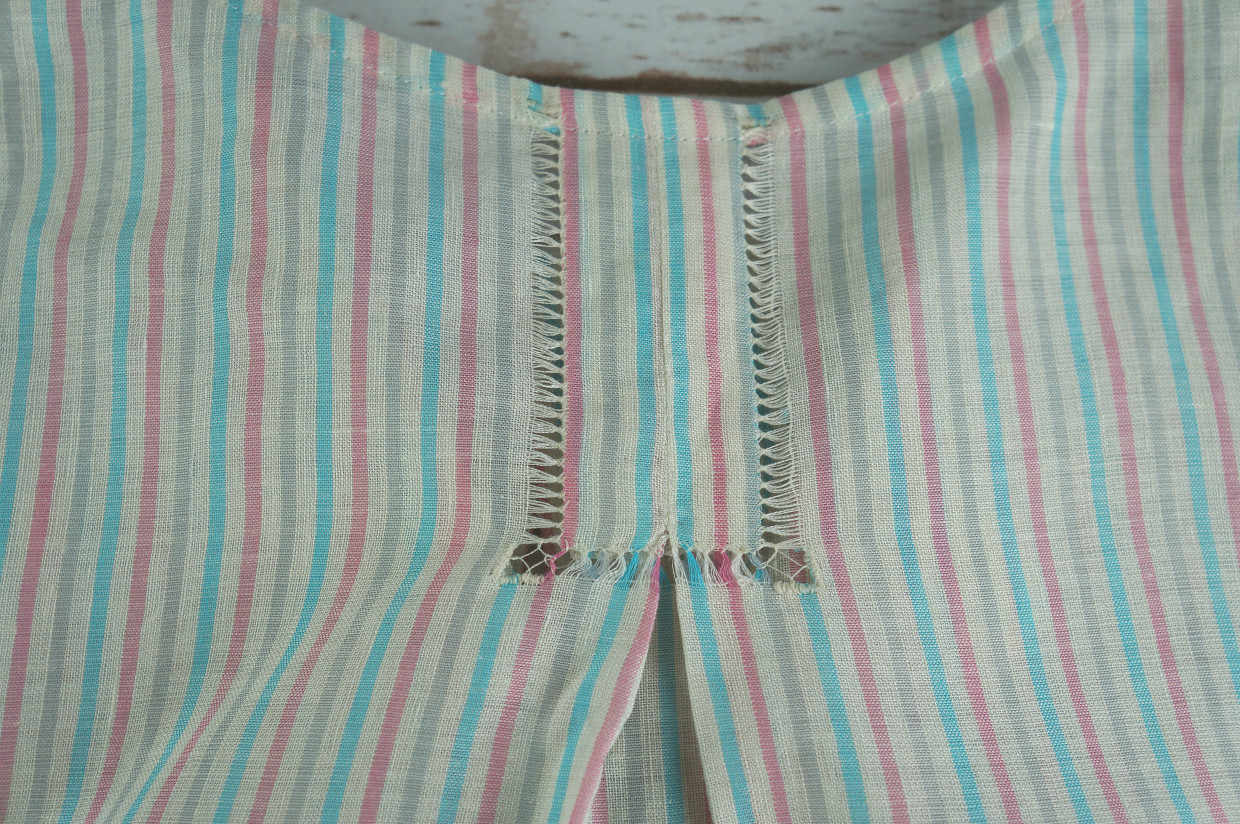
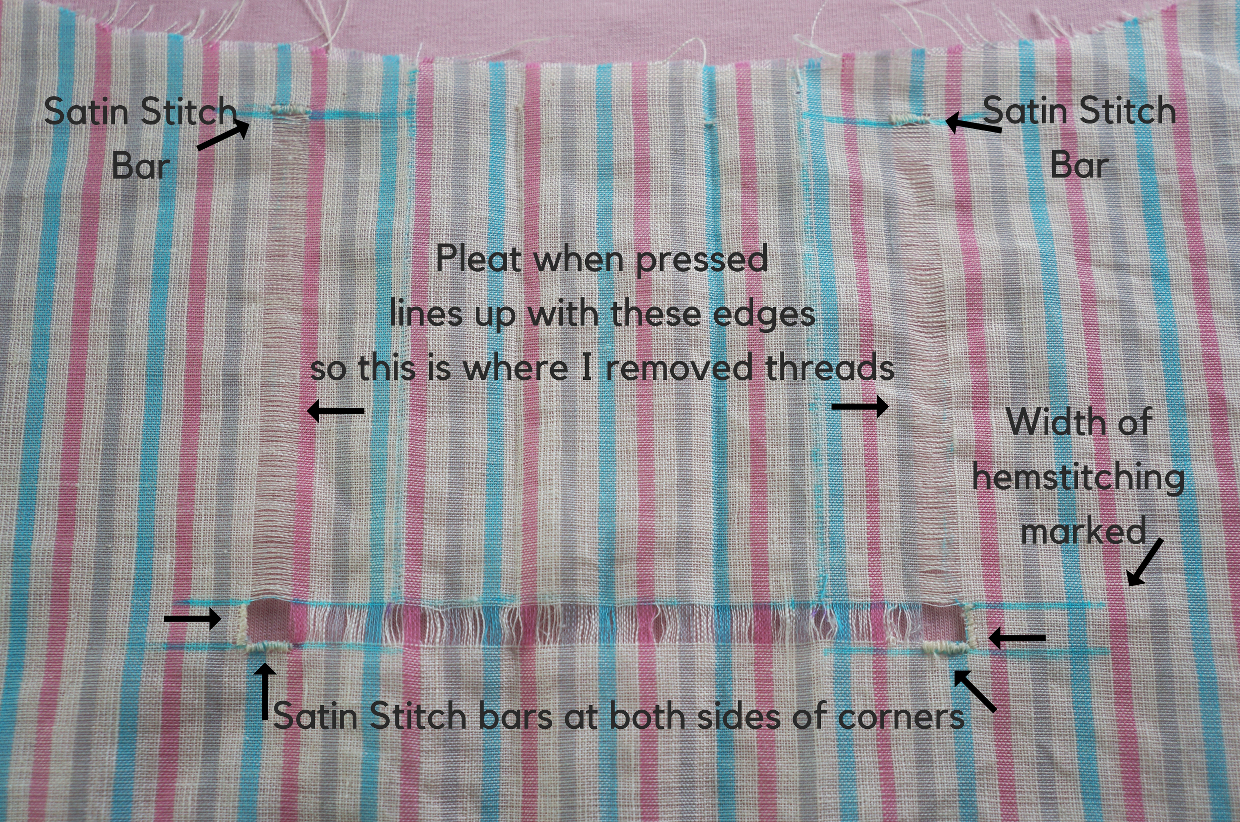
To determine where to place the hemstitching, baste the pleat on the center back of the blouse and press flat, as instructed in the pattern, but use a long stitch length. With a marking pen, on the back of the blouse, mark where the pressed edges hit the body of the blouse (this is where the vertical lines of hemstitching go.) Also mark the neck edge seam allowance and the width of the hemstitching that will go across the bottom of the pleat. Remove the basting thread and press flat. Stitch a satin reinforcement bar at the top of both neck edges and on both sides of the corner at the bottom.
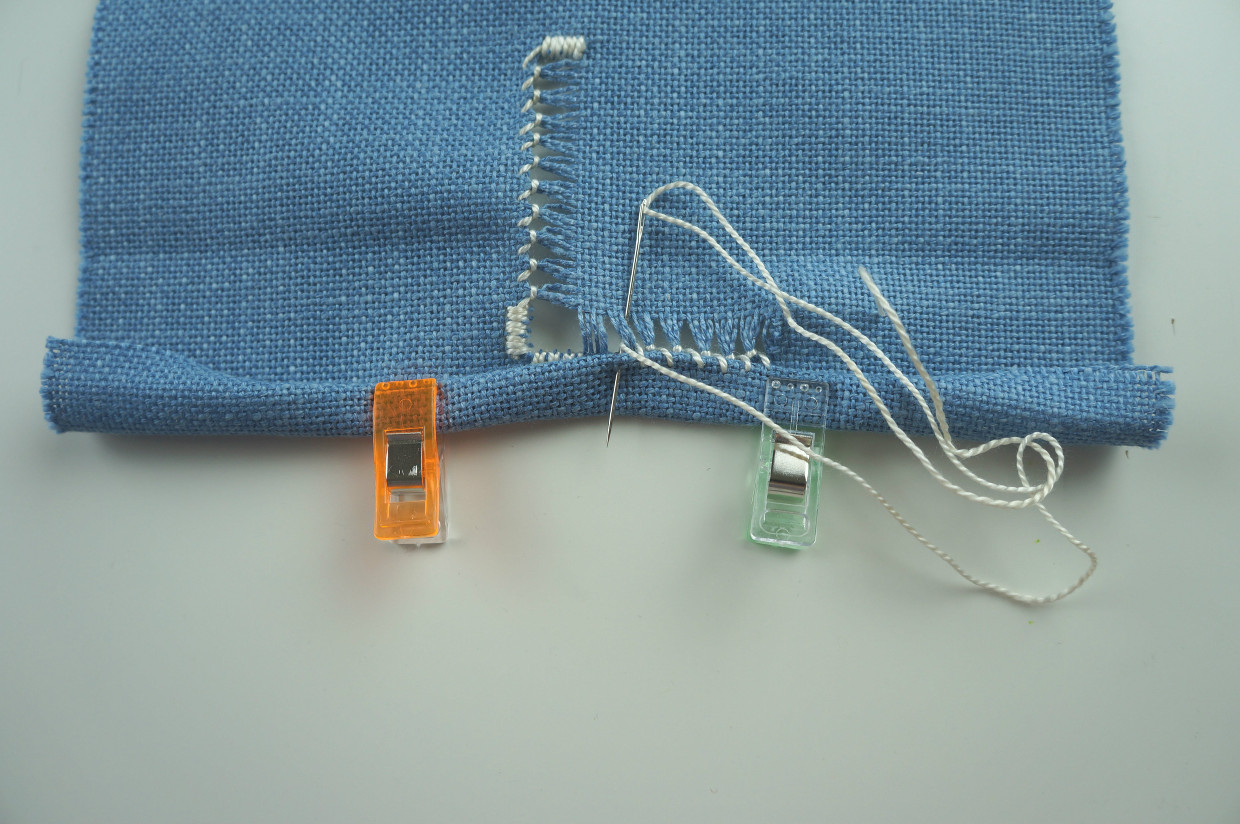
Cut the threads and remove them. Hemstitch across the bottom but not the sides. Stitch the pleat as instructed in the pattern, press it flat and hand baste in place (so pins are not in the way as you hemstitch).
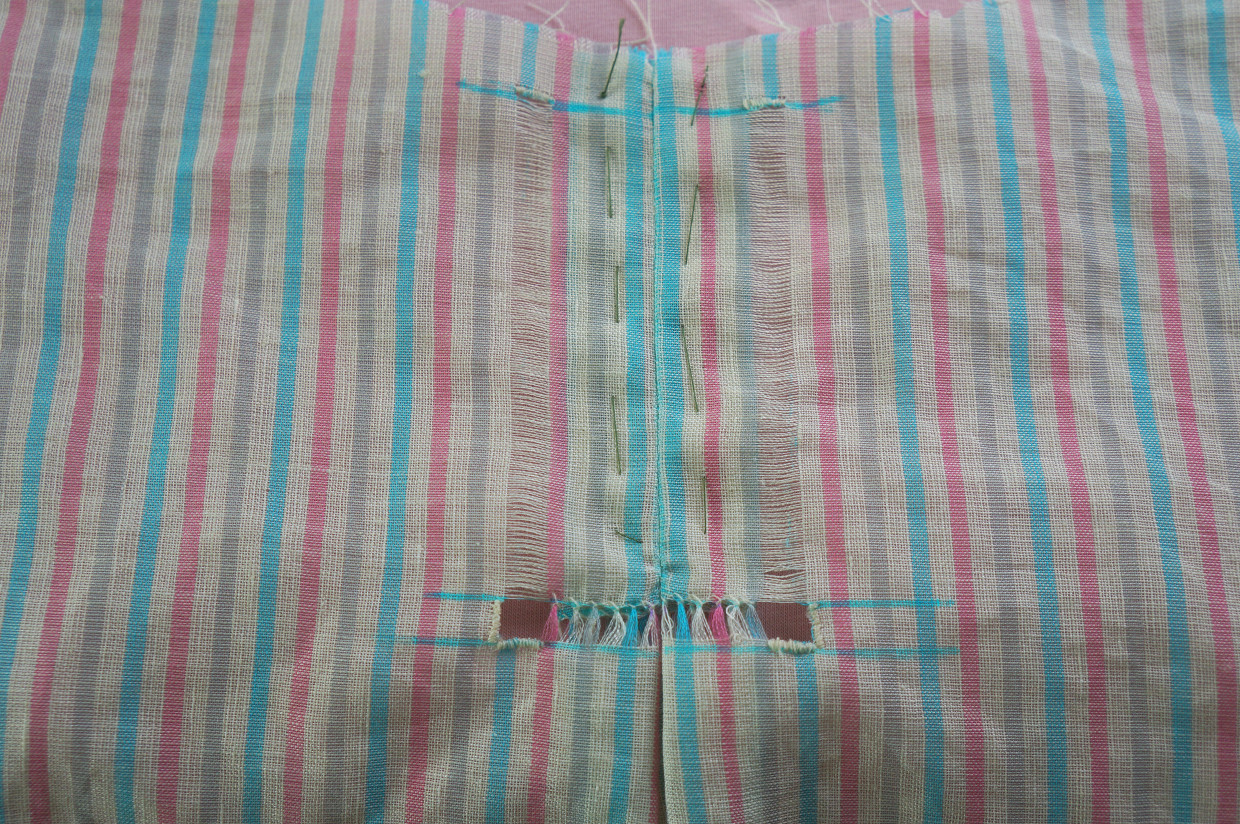
Hemstitch the sides catching the pleat as you stitch.
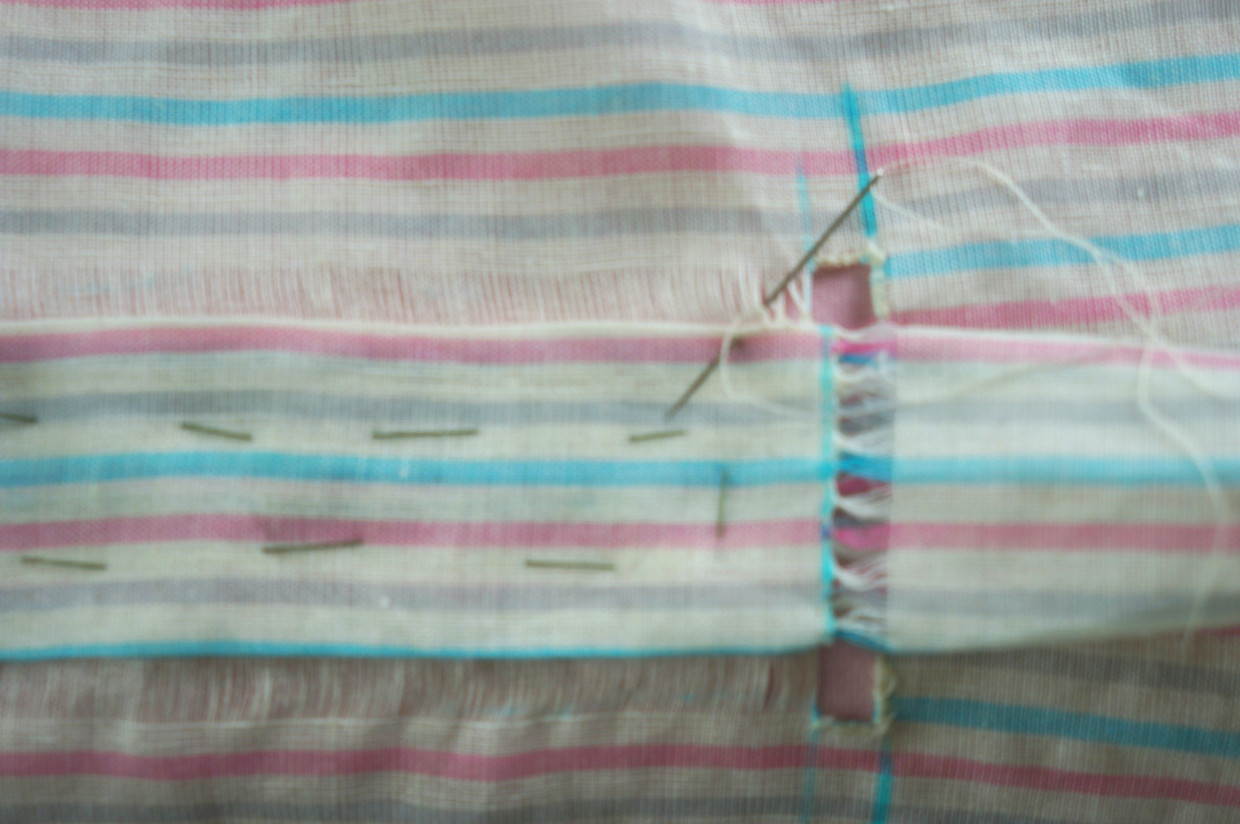
Remove the hand basting thread. Reinforce the empty corners as per the hemstitch tutorial. Construct the rest of the blouse as instructed in the pattern and enjoy your lovely hemstitched blouse!
I have a hem stitch foot for my vintage Singer sewing machines, that makes a similar look
Lovely, thank you. Your link to pinkhollybush on hem stitching didn’t work, tho.
I had to be patient, but the link is working for me, do you want to try it again?
Wow. That’s amazing!
Wow! This is really beautiful work. I imagine it requires a quality fabric with impeccably straight grains. Thanks for this tutorial!
Holy cow I don’t have your patience, but this is beautiful!!
Thank you everyone for your kind comments. I really enjoyed making the blouse, you get into a rhythm and it really doesn’t take that long!