We are excited to start showing you creations made by our Advisors Circle members. Today we have two members sharing their experiences with their daughters sewing the Girl on the Go Dress.
Here’s what they had to say. First up is Erica.
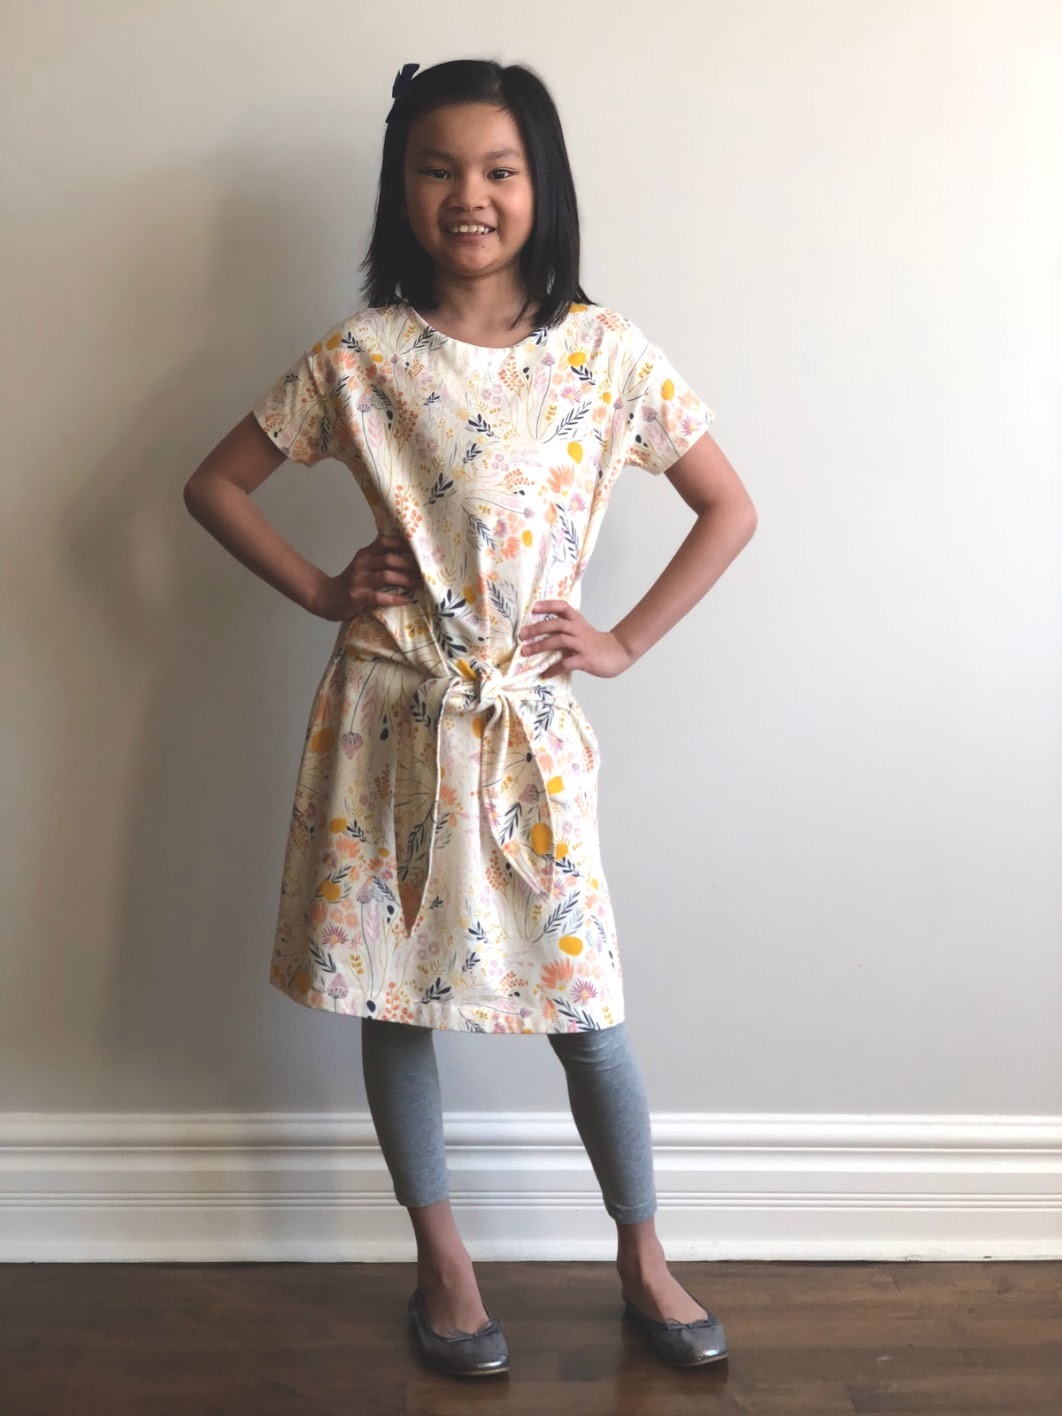
I still have the first dress I ever made. I was eight-years old for my first trip to a fabric store, where I flipped through pattern books with my mother, let my “fingers do the walking” in the store’s file cabinets to find my pattern of choice, and then we picked a suitable cotton. From then on and through high school, I found a passion that kept my hands and my head occupied for hours and days on end. With hindsight, I credit my adult math confidence to my motivation back then to quickly calculate in multiples of one-eighth to adjust a fit and to be able to visualize how flat planes of fabric and curved lines transform into three-dimensional forms.
Fast forward nearly two decades: I had not sewn a complete garment in ages, and I had my first-born child—a daughter! Ah, to sew clothes for a little girl. Does it get any better? Over the years, I’ve been conscious to not assume my daughter would have the same interest in clothes and sewing, but I couldn’t help but wonder if she would pick it up. And then a few weeks ago, she finally declares, “Mom, I’d like to try to sew something myself.” Liesl announces her newest tween pattern, Girl on the Go, and the stars are aligned!
How did it go? Let’s ask my ten-year old.
What did you think of the process? What was the best part? …and the hardest part?
There were many steps, but they all made sense. My mom showed me different fabric options online, but I ended up choosing a fabric we already had at home. I’m glad we taped together the pattern one day and cut the fabric another day. It was hard to keep the seam allowances straight, and I wanted help along the curves. It was fun to use the serger.
How do you like your new dress? I love it. I wore it to school the next day, and my teacher noticed it. I was proud to say that I made it. It is very comfortable.
Do you want to sew more clothes now? I think I can make pajama pants next without any help.
Great! We already have a tracing of the Bedtime Story Pajamas in your size.
To anticipate which steps my daughter might have needed help, I made my own version of Girl on the Go in the upper end of the teen sizes. Now we have matching dresses! And, maybe my daughter will keep her first dress she made to show to her daughter.

Now we’ll hear from Emily.
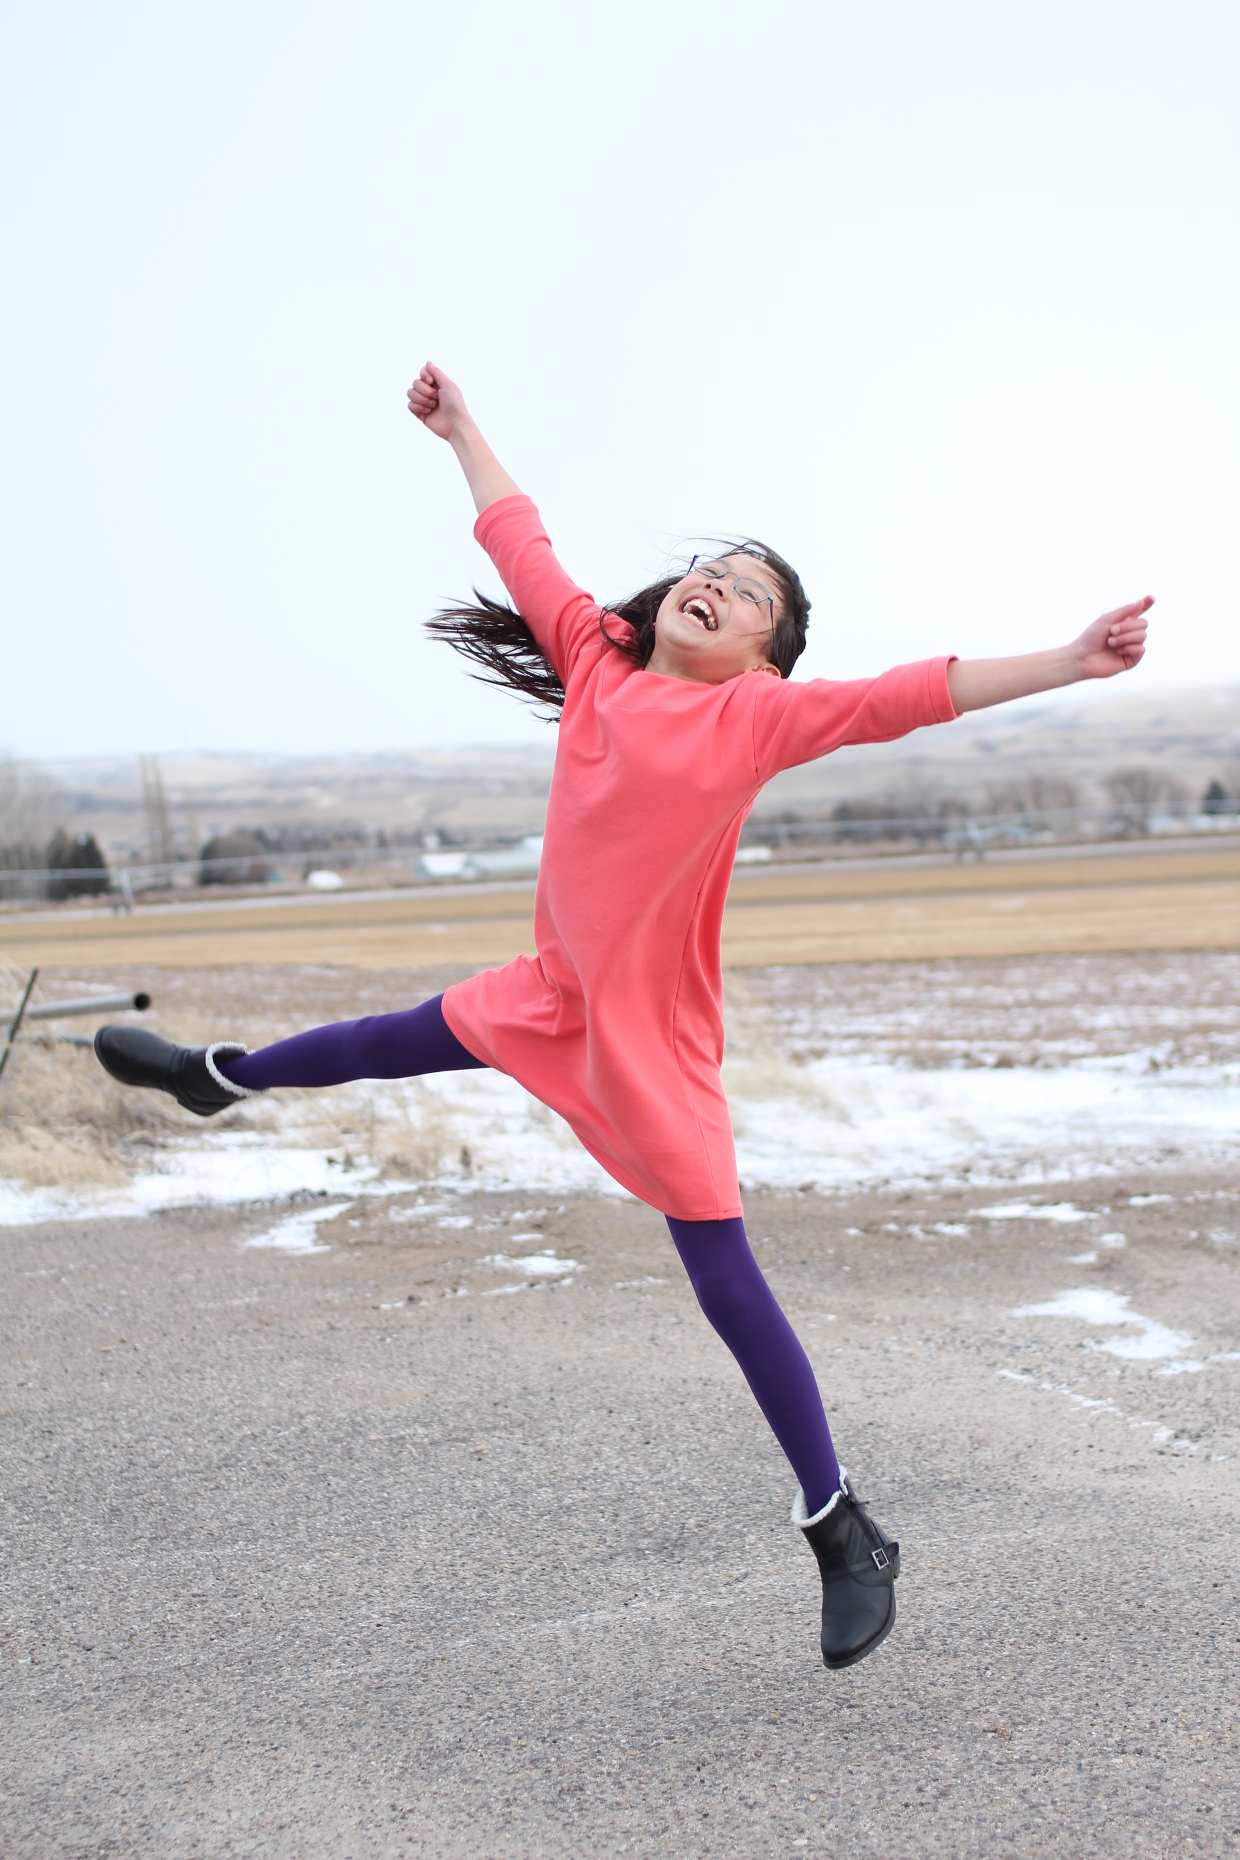
Hi! We are excited to be here today and to share our experience sewing one of the new Oliver + S patterns, Girl on the Go.
At the end of last year, Ansley assembled an 1100 piece LEGO set on her own by following the 280+ steps in the instruction booklet. It was a wake up call to me that I should and could probably teach her to sew and cook. We did some small, non clothing projects together (her water bottle pocket invention and a sleeping bag for her stuffed chick) right before this opportunity arose.
This is her first sewn item of clothing. I knew we’d be in good hands with Oliver + S patterns and I am excited about the tween/teen size range! Ansley will be nine in April and we picked to sew the size eight based on her measurements.
We looked in The Stash together and found some solid knits to pick from. (Solids are great for beginners because you don’t have to worry about matching stripes or patterns). She picked this solid coral cotton French terry that I picked up from a destash. It was just about a yard in length and nice and stable. I also liked that it was a color light enough for her to trace the pattern and pattern markings with a washable marker.
The Girl on the Go has layer printing options so I printed the size 8. She really wanted elbow length sleeves so we were excited when we had just enough fabric for elbow sleeves. She also wanted to sew the dress version and didn’t mind that we didn’t have enough fabric for the ties.
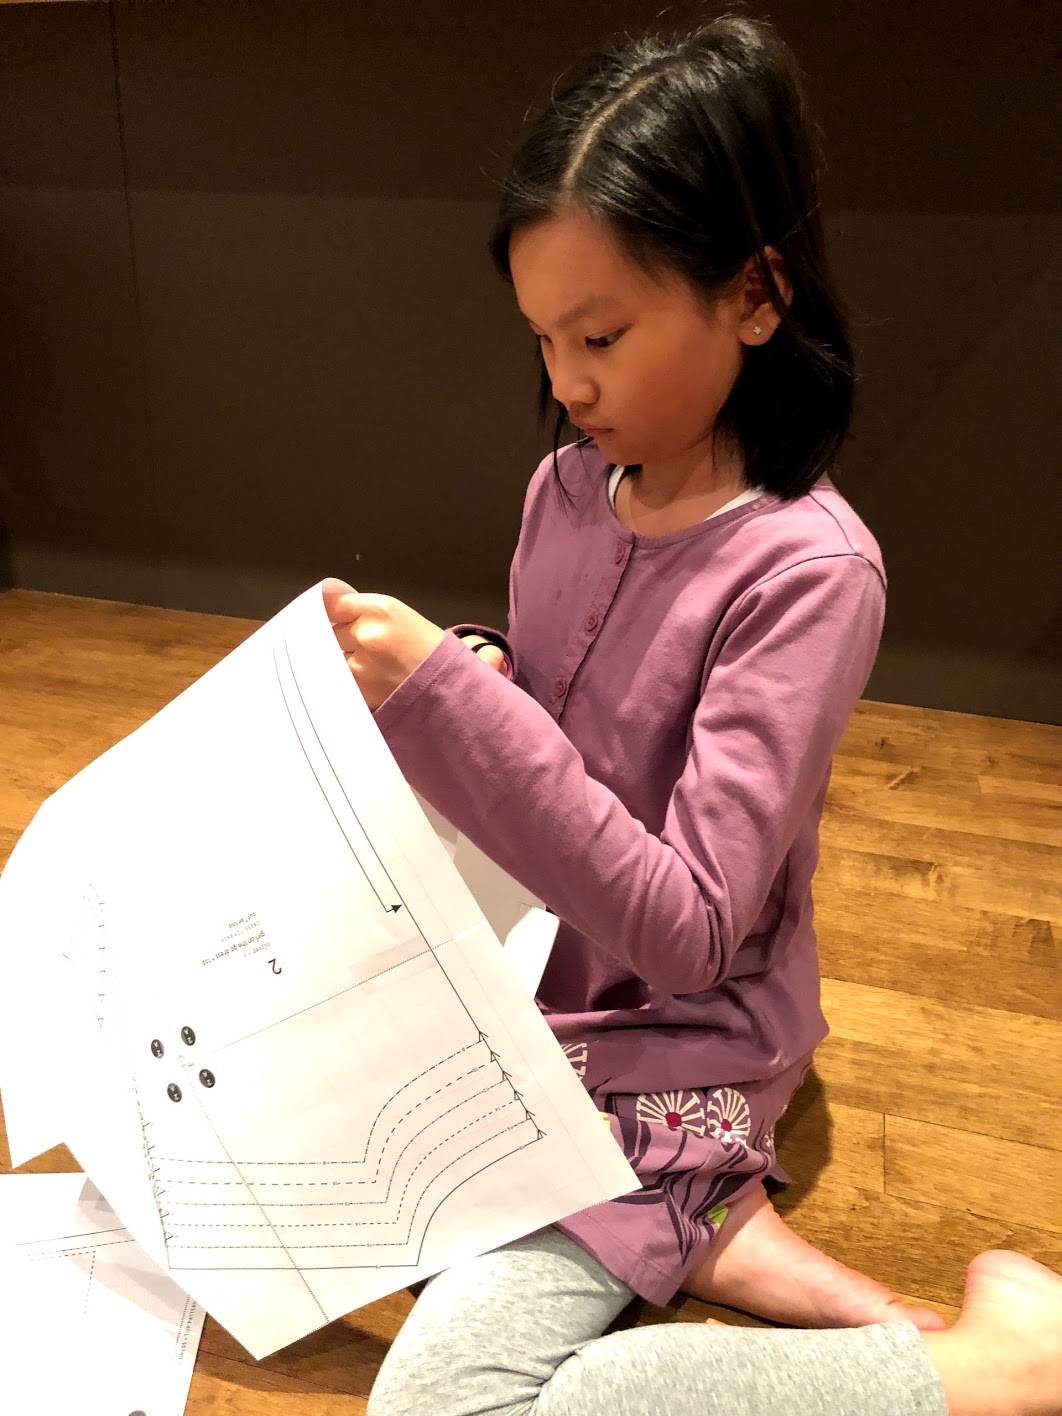
She read the instructions and assembled the pattern and cut the pattern. We didn’t have enough fabric to follow the cutting guide but we discussed the importance of making sure the fold was were it should be and the grainline in the direction it should be. We also talked about how accuracy in cutting would make it easier for the pattern pieces to line up. She traced the pattern pieces with a washable marker and also transferred the pattern markings.

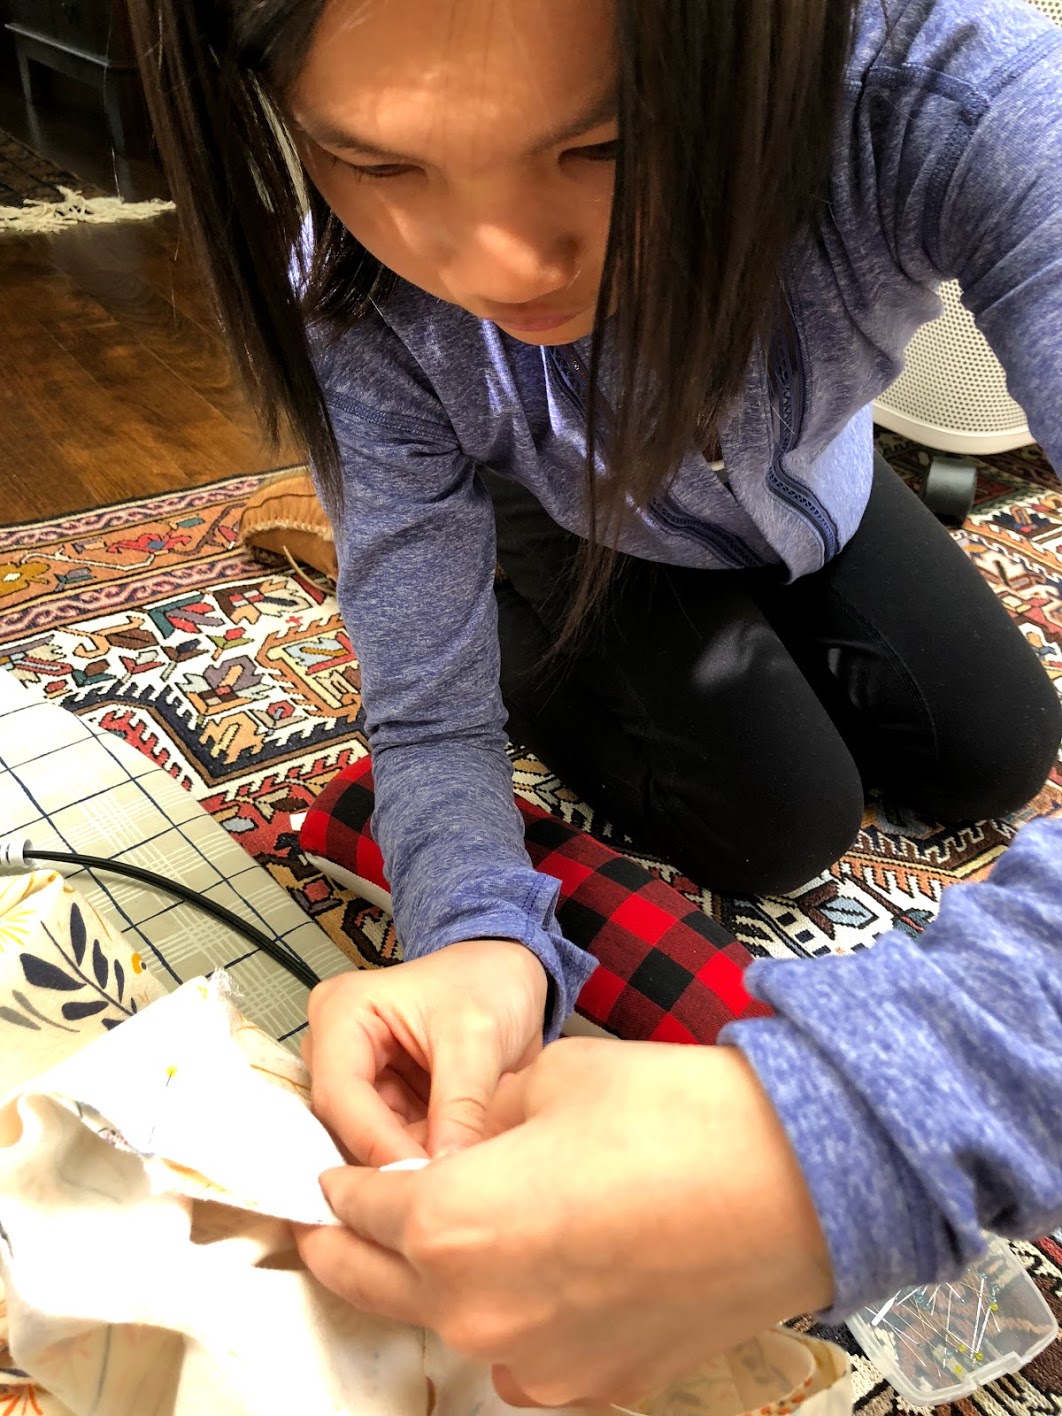
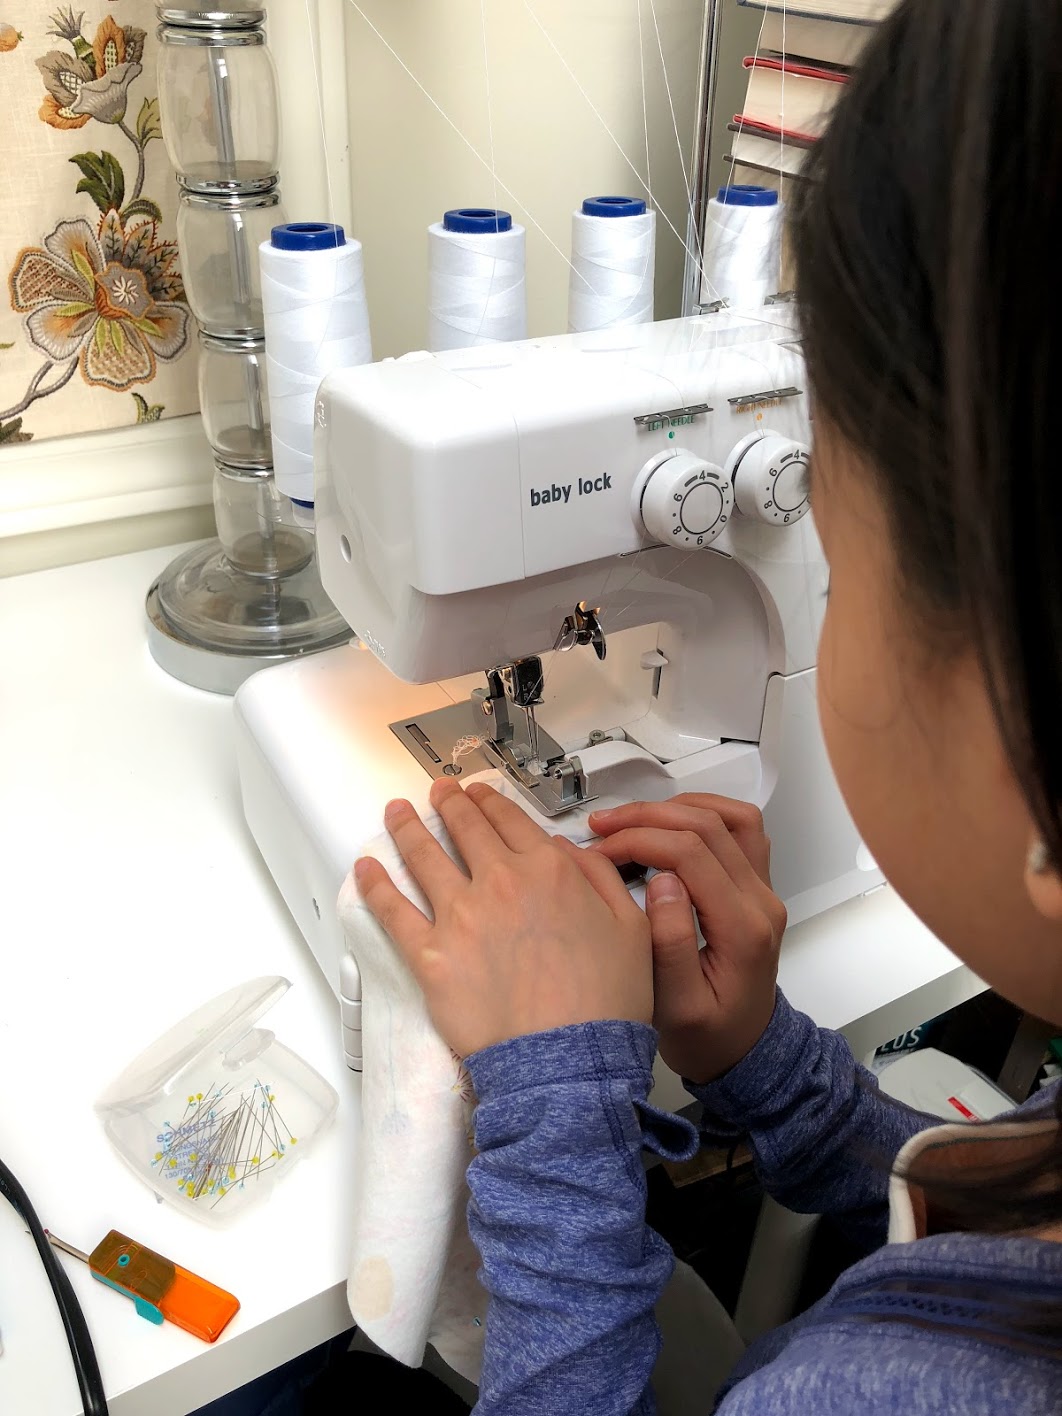
We sewed most of the dress on my regular sewing machine with a narrow zigzag stitch. We talked about how important proper seam allowance is so that the facings will fit the neckline and the sleeves will fit as they are supposed to. This pattern calls for a 1/4 inch seam allowance and it was a little tricky for her to stay at 1/4 inch instead of 3/8 or 1/2 inch. We did a little bit of unpicking together. She was able to stay at 1/4 inch when she went slowly and paused often to adjust the fabric if she needed. I did help guide her on the curve of the sleeve caps. I also did the topstitching down of the facing in the front, since it was so visible and she picked red thread. Upon my insistence she topstitched the back of the facing after I assured her it was good practice and her hair would cover it a lot of the time. She did quite a good job too!
I serged the end of the sleeves and the bottom hem and hemmed it for her because the sleeves were tricky to get around the arm of my sewing machine and the hem wanted to stretch out.
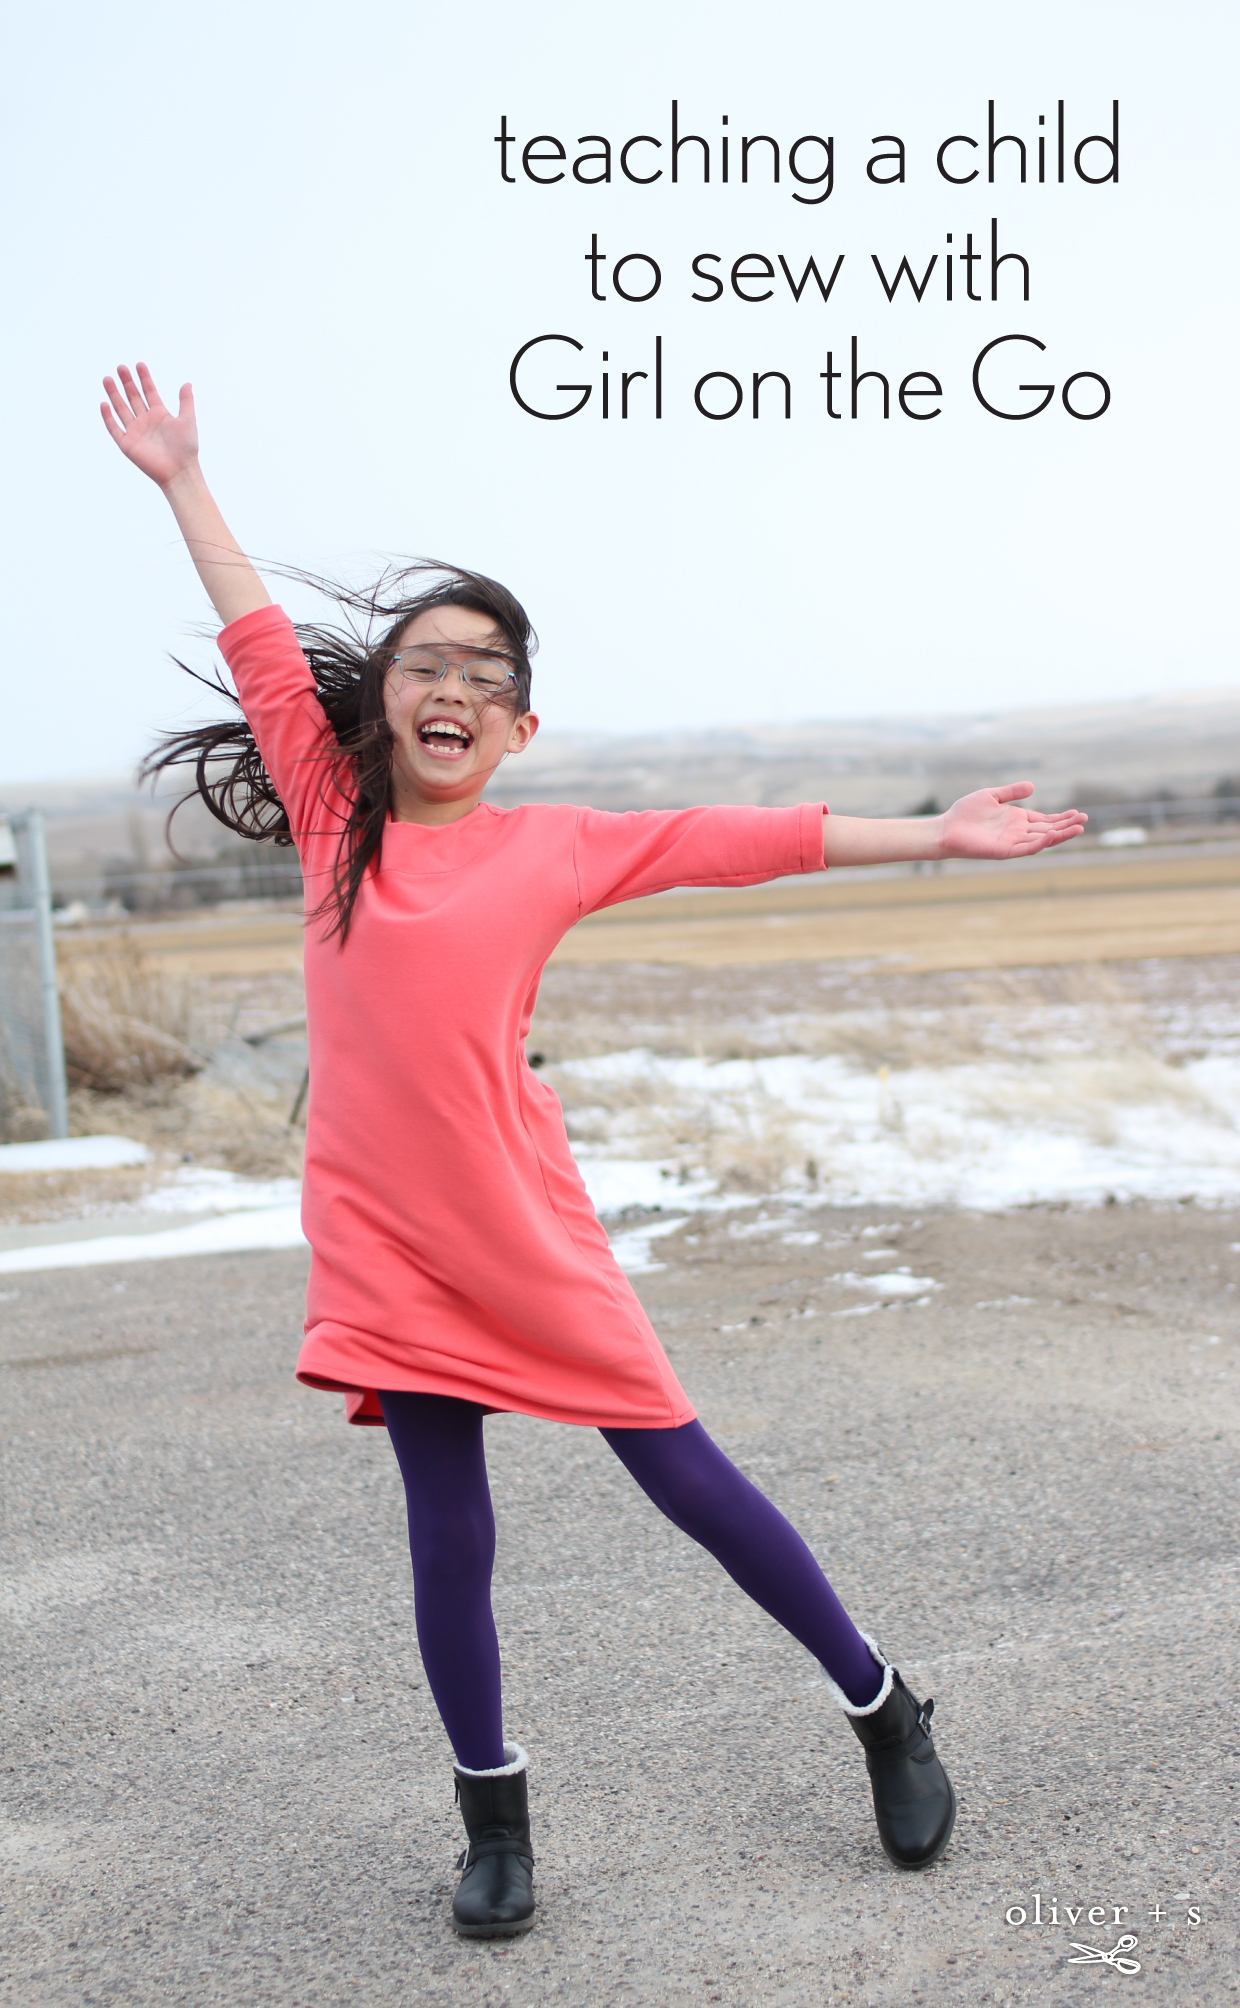
I asked her what she wanted to tell you about her dress and she said, “It was really fun to sew even though some of the parts were tricky. The trickiest part was sewing the facing. The easiest part was sewing the side seams.” I hope I always remember how she giggled when she sewed the side seams and realized she had also sewed the sleeves at the same time. She loves how comfy the dress is and has worn it nearly every Sunday to church. She also picked to wear it for picture day and wore it to school the Monday after we finished even though it’s still pants weather here, as you can probably tell from the extremely windy pictures!
We loved sewing Girl on the Go! The clean neck and sewn facing are so comfortable. We love the flattering fit. I might add a little in length if we sew another dress since I used a smaller than called for hem. Or maybe we will need to sew a shirt first.
Thanks ladies! And in case that wasn’t enough of a fix for you be sure to check out our Oliver + S Skirts Sewn by Kids post.
Well done moms and girls! The dresses look wonderful and the girls should be really proud of their accomplishments. Love the big smiles!
Hooray! Good work girls – you’re an inspiration to all of us!
Mom thank you for sharing this lovely experience teaching your daughter to sew. Thoroughly enjoyed the dialogue and pictures of the finished dresses.
My home economics ( aka learning to sew) teacher will forever hold a special place in my heart. I adored Mrs. Frankenstein. She was a human fashion plate of a 1960’s pattern package down to her red polished finger nails. We were taught to bond with our seam rippers and refine our hand basting.
Happy sewing in the years ahead.
Thanks for sharing this, it was lovely to read! I hope there will be more stories about kids and sewing on the blog soon.
Love it! Glad you let her sew this project!