Last week I showed you two jackets I sewed from my Lisette for Butterick pattern B6464, so today I thought I’d show you the sleeveless tops I’ve made from the same pattern. These are so much fun to make and wear, and they’ve quickly become a favorite summer item in my wardrobe!

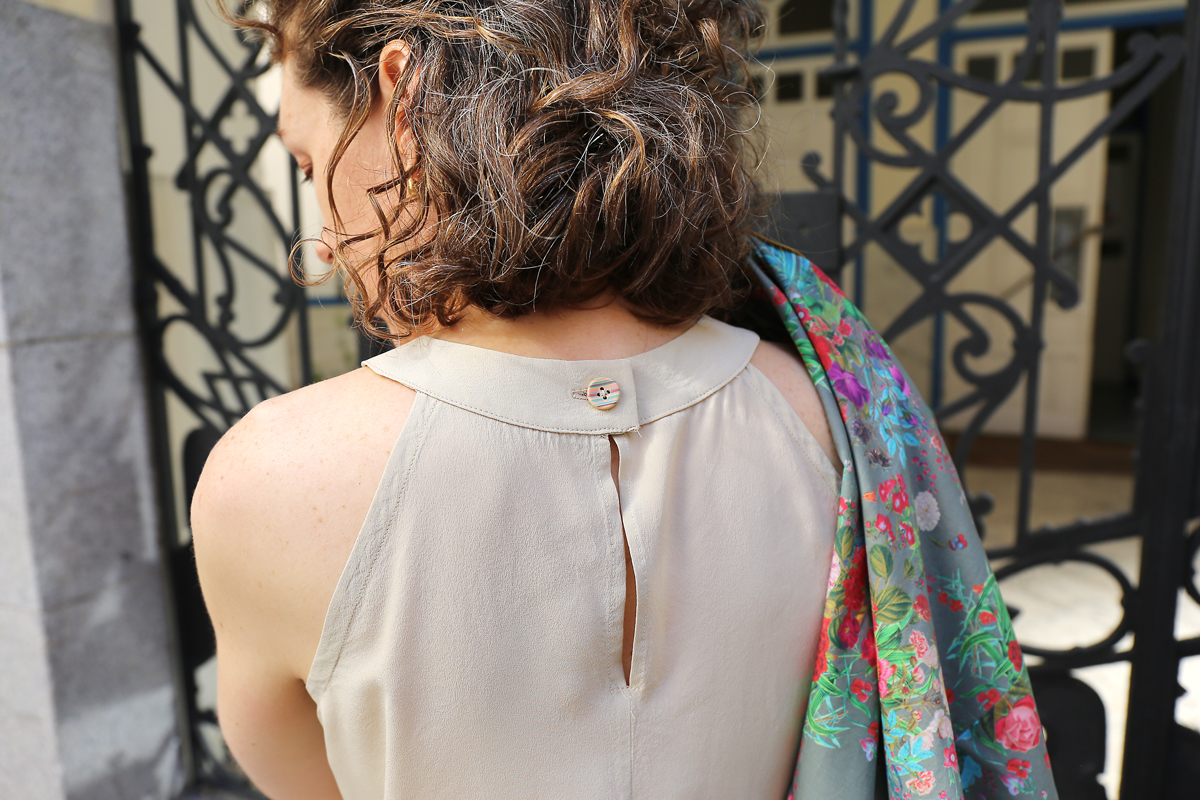
I’ve made this top three times now, each time in different fabrics. The first one was from this leftover silk crepe in a color that isn’t especially flattering to me but which has a very nice drape and was surprisingly easy to work with. I lengthened the pattern by about 4-5″ and closed up the center-front gap, just to see what would happen. (I prefer it open, the way it’s written in the instructions. You’ll see that the other two tops I made include the gap.)

This is a really easy pattern, with only one buttonhole closure at the back. With the silk crepe, I spent a little time hand-stitching the neck facing to be sure it finished nicely. But with a stiffer fabric you really don’t need to fuss with it like I did for the silk. And aside from that, it goes together really quickly, which also makes it a fun summer sew.
I also tried making this pattern from some leftover Essex yarn-dye metallic from Robert Kaufman. (You’ll see the rest of the fabric in another post very soon. ) I can’t tell you how much I love this fabric. The metallic threads are so much fun! Because this fabric has a lot more body and a stiffer hand, this one is definitely more blouse-y, but not in a bad way. I get lots of compliments on this top, possibly because of the gold threads woven into the fabric, which gives it a subtle summer glow. And although I like the cropped un-tucked look of the original pattern, I lengthened it by about 4-5″ as well. I’m tall and long-waisted, so I can always use the extra length.


Since the first silk top has such nice drape, I decided to make another in navy silk satin, which is probably more flattering to my very light skin-tone than the pale beige-y green color of my first top. For this one I reversed the fabric so the slippery satin face is on the inside because I didn’t really want any shine (I knew the satin would feel so nice against my skin, too!), but now I sort of wished I left the satin as the outside because it just looks so rich and luxurious.
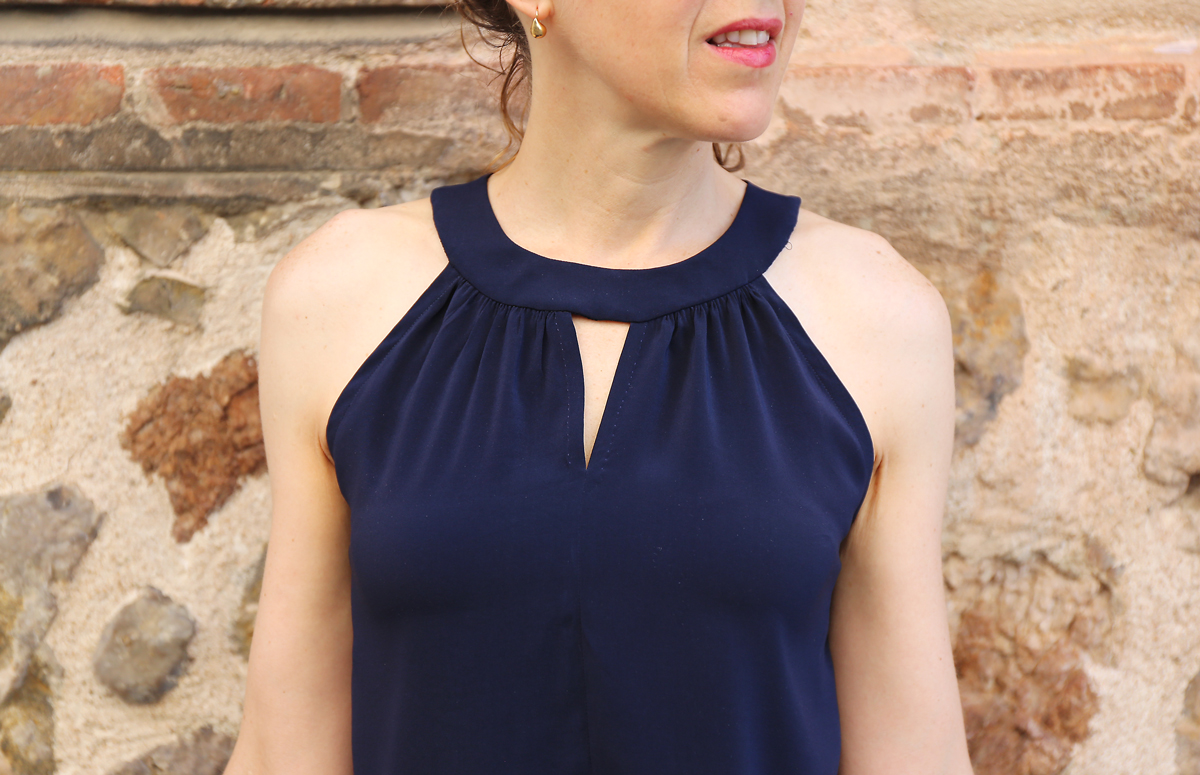
Like I said, this pattern has very quickly become part of my core summer essentials. Who would have thought? It’s loose-fitting enough through the torso and waist that it’s really comfortable, and I think the bare shoulders are summery without making me feel like I’m revealing a lot. I’ll be making more of these over time, no question.
A few tips about fit: if you’re between sizes, definitely size down for this pattern. If this pattern is too wide around the chest it gaps under the arms, which is never a good look. Also, if you’re any larger than a B-cup you’ll definitely want to do a full bust adjustment. No worries, it’s so easy! If you’re at all unsure about this process and want a full explanation, I have a detailed class on bust adjustments at Creativebug which will walk you through all the steps and explain the hows and whys behind this technique. Don’t be scared; it’s incredibly easy!
Once you’re familiar with the basics of the process, here are the specific steps for this pattern, which doesn’t have a dart. Instead, the dart has been transferred into gathers at the neckline, so the FBA (full bust adjustment) widens the front and adds more space for the bust. The extra room, which would ordinarily become a larger dart, gets moved into more gathers at the neckline, so it’s an easy change and no one know the difference. Here are the steps:
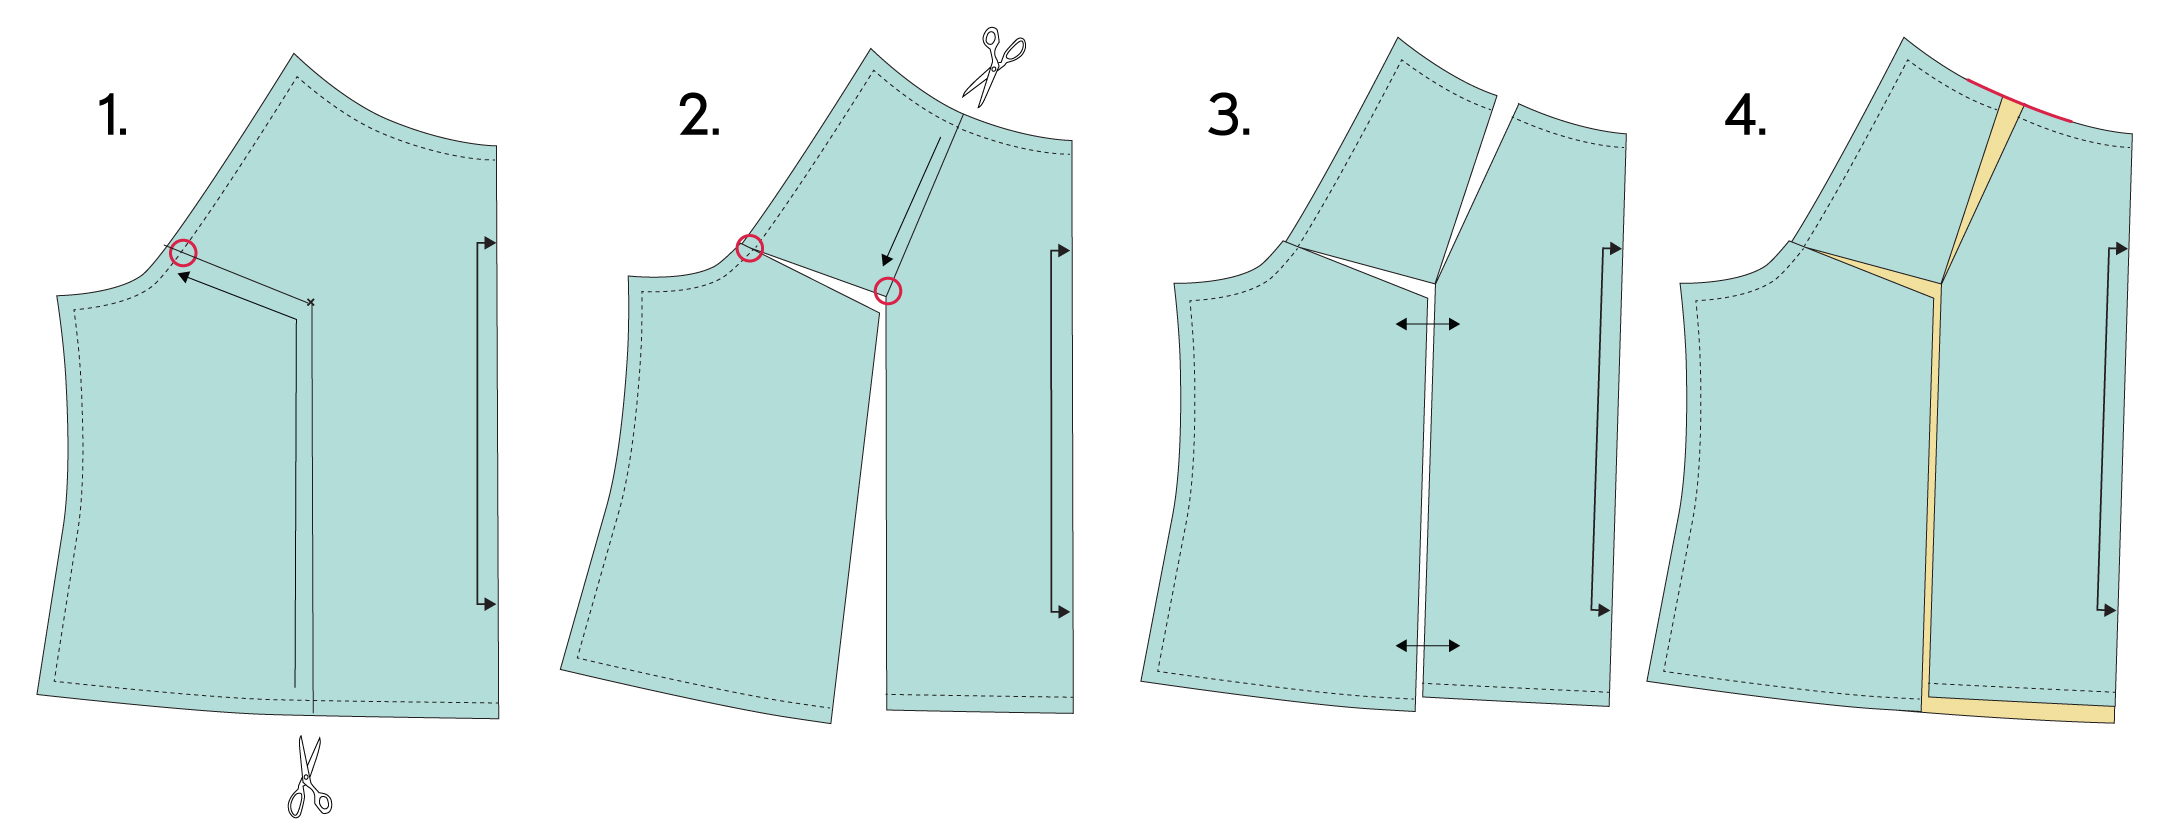 1. Once you’ve traced the front blouse pattern piece and drawn in the seam lines, find your bust apex and mark it on the pattern piece. Draw a line that runs parallel to the center front and starts at the apex marking, continuing down parallel to the center-front fold line so that it intersects the hem. Draw a second straight line from the bust apex to about 1/3 of the way up the armhole. Then cut the pattern along the line, leaving an un-cut paper “hinge” at the armhole seam line. If any of this in confusing, it’s all explained in great detail in my Creativebug class.
2. Draw a second line that starts about half-way across the neck line and intersects the bust apex. Cut on that line, leaving a paper “hinge” at the apex.
3. Spread the pattern piece at the vertical cut, keeping the various sections of the pattern flat while spreading the two “halves” of the blouse to add more space. Be sure, as you spread, that you keep the space even from the apex to the hem. If you’re a C-cup, spread the cut line by approximately 1/2″ while keeping the two edges parallel. For a D cup, spread the cut line by 3/4″-1″. The amount of extra space you add will taper to nothing at the paper hinges, so the length of the seam line at the underarm won’t change. Notice that as you spread the vertical line the gap at the neckline will grow. The combination of adding extra width at the chest and creating a greater amount of gathering at the neckline will allow extra room at the bust without significantly altering the rest of the pattern. It’s the equivalent of making a bigger dart, but the dart isn’t visible. Cool, right?
4. Tape tissue or plain paper behind the cuts to fill the gaps produced by the spreading. Then redraw the neck edge, blending a new cut line. Add length to the center-front hem, following the original shape of the blouse/dress hem. To do this, simply trace the original hem, starting at the side seams and keeping the grain lines parallel to each other.
The pattern is now ready! These little changes will help you to get a better fit from the pattern right away, and you can further tweak the fit later, according to your particular needs.
If you missed it, you can see the coordinating jackets I made from the pattern, and you can pick up a copy of the pattern itself. I hope you’ll post photos of your finished B6464 tops! Be sure to tag them #B6464 and #sewlisette on Instagram, and add them to our SewLisette Flickr group.
This is really, really cute!
CHIC pattern indeed! Detailed instructions
& easy to follow. FAB choices of fabrics / colors
— I like the dark blue silk satin. Wish I was younger — to sew this top & wear! Sarah in
Minneapolis
Liesl, how do you suggest wearing a bra with this? Strapless? Racer-back? One of those weird circle-hook converter things? Freeboob it?
Emily, I prefer a strapless bra for this style. But whatever works is fine!
I LOVE this pattern. I have some silk crepe I bought in the sale rack of Elegant Fabrics in NY waiting in my stash for this project. I have a question, Liesl. If it is too sheer, would it work making it with two layers of fabric? I will also add some lenght, I would love to see where the hem comes with those 4-5” added. With the FBA the arm hole doesn’t change, does it? I’m also thinking to share the top with one of my daughters, and maybe she needs the FBA, but not me, certainly… I suppose it will be looser for me with the FBA, but I could still wear it, if the armhole is the same size.
Well… These are three questions, not one….!
1. Sheer fabric with two layers will be great!
2. I usually add more length than I need and then shorten once I try it on, so I can determine exactly where I want it to hit me. The general rule of thumb is that you don’t want the hem to hit you at your widest part, so a little above the hip is probably best. A tunic would be cute, too!
3. FBA doesn’t affect the armhole. That’s the beauty of the FBA!
Cheers
Thank you, Liesl!
Lovely, thanks! Will you be making the skirt too? I seem to be the only person who has posted about or reviewed the skirt which I think has a really clever construction and design.
Yours turned out great! Mine is cut out and just waiting until I have time to sew it–after I finish all the fall sample sewing!
I have a question about the FBA: when you do a full bust adjustment, you add width to the garment below the bust, correct? Is there any way to avoid that? I recently did an FBA and then the shirt itself was too wide. It was easy enough to take in, but is there a better way to avoid adding width to the top below the bust?
Liesl,
How much ease did you have in your tops? The fit is perfect, and I’d like to make sure the size I choose is not too loose nor too snug.
Thank you!