Let me introduce you to Rita who is the mother of three boys. She’s got an adorable little sewing project to share with us. She was kind enough to take the time to make a step-by-step photo tutorial for it. Thanks Rita for stopping by to share your tutorial.
I began sewing Oliver + S patterns five years ago after I had my oldest son and now I am a mother of three little boys who are in constant need of new clothes. I am always on the hunt for unique boy patterns. Every season I wait expectantly for the new patterns to arrive on the Oliver + S website hoping there will be something for a little boy. A few years ago, I was delighted to see the Lullaby Layette. I have made this pattern at least twenty times; it has become my go-to for every baby shower that comes my way. In my opinion, there is nothing more fun than sewing for a baby and this pattern has so much potential for creativity. Throughout the years I’ve added buttons, ribbons, pockets, belts, and bow ties, but today I’ll be sharing my favorite customization with you – a little tie.
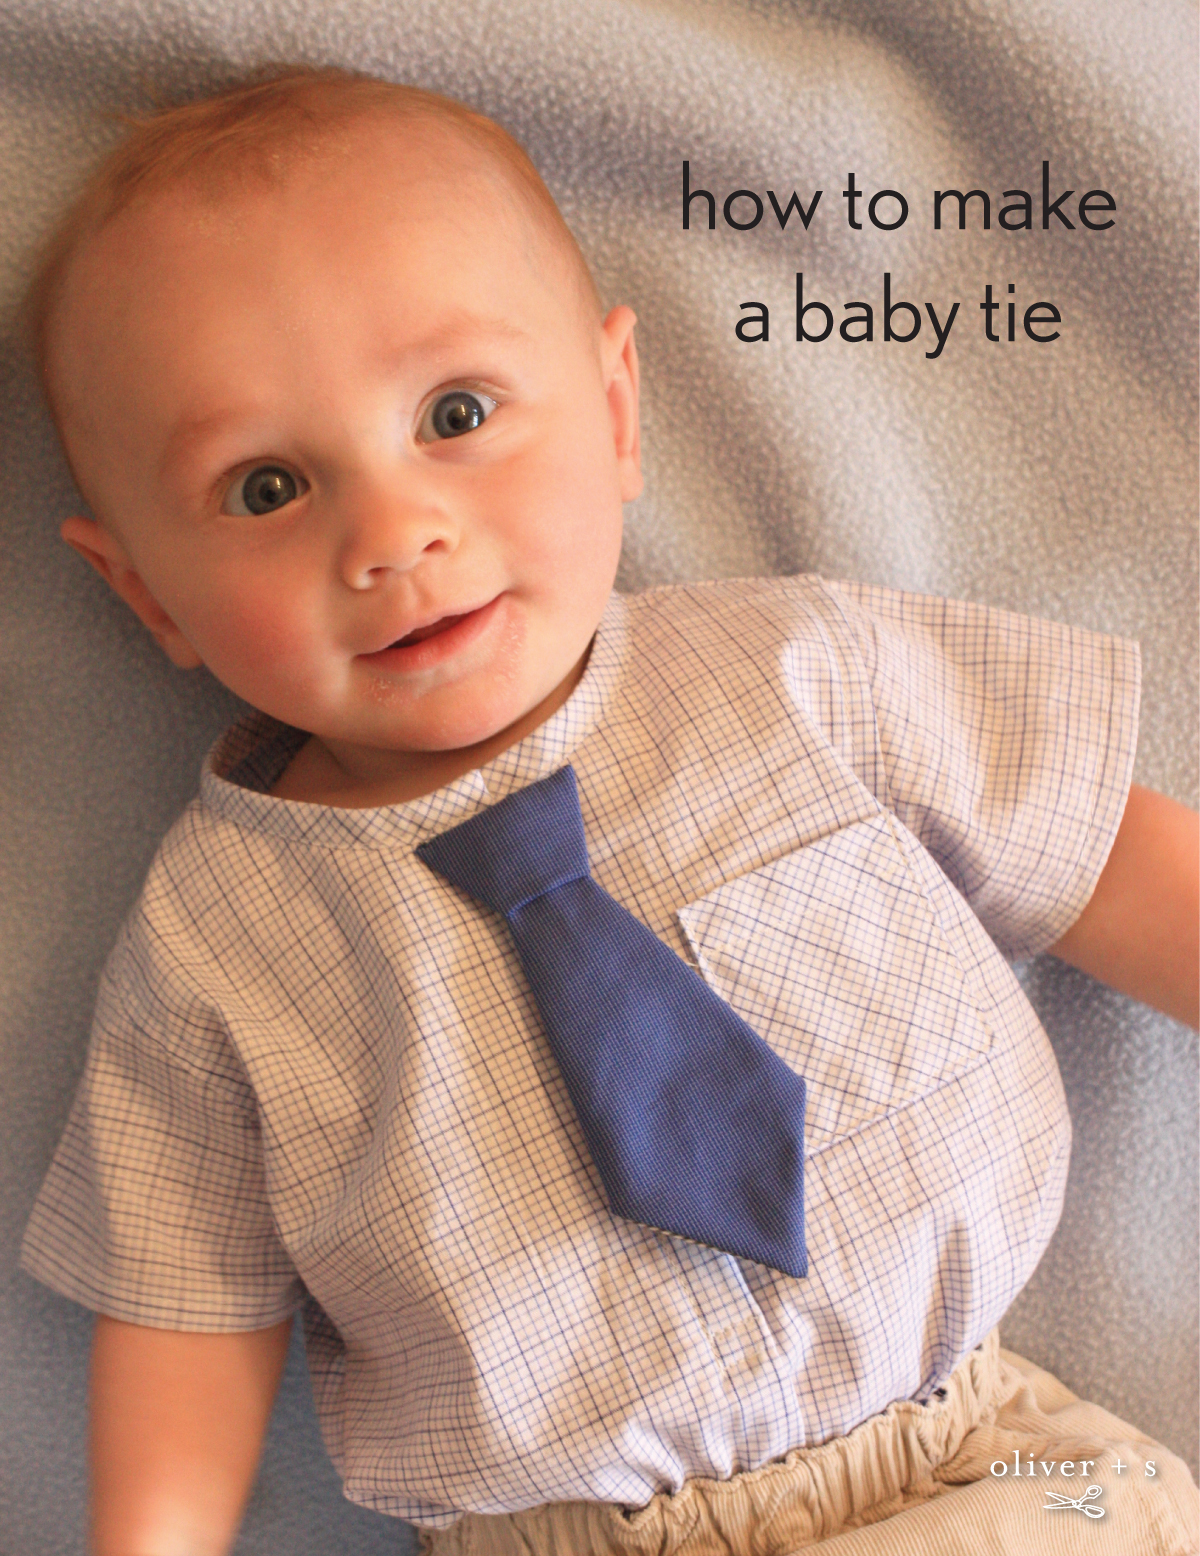
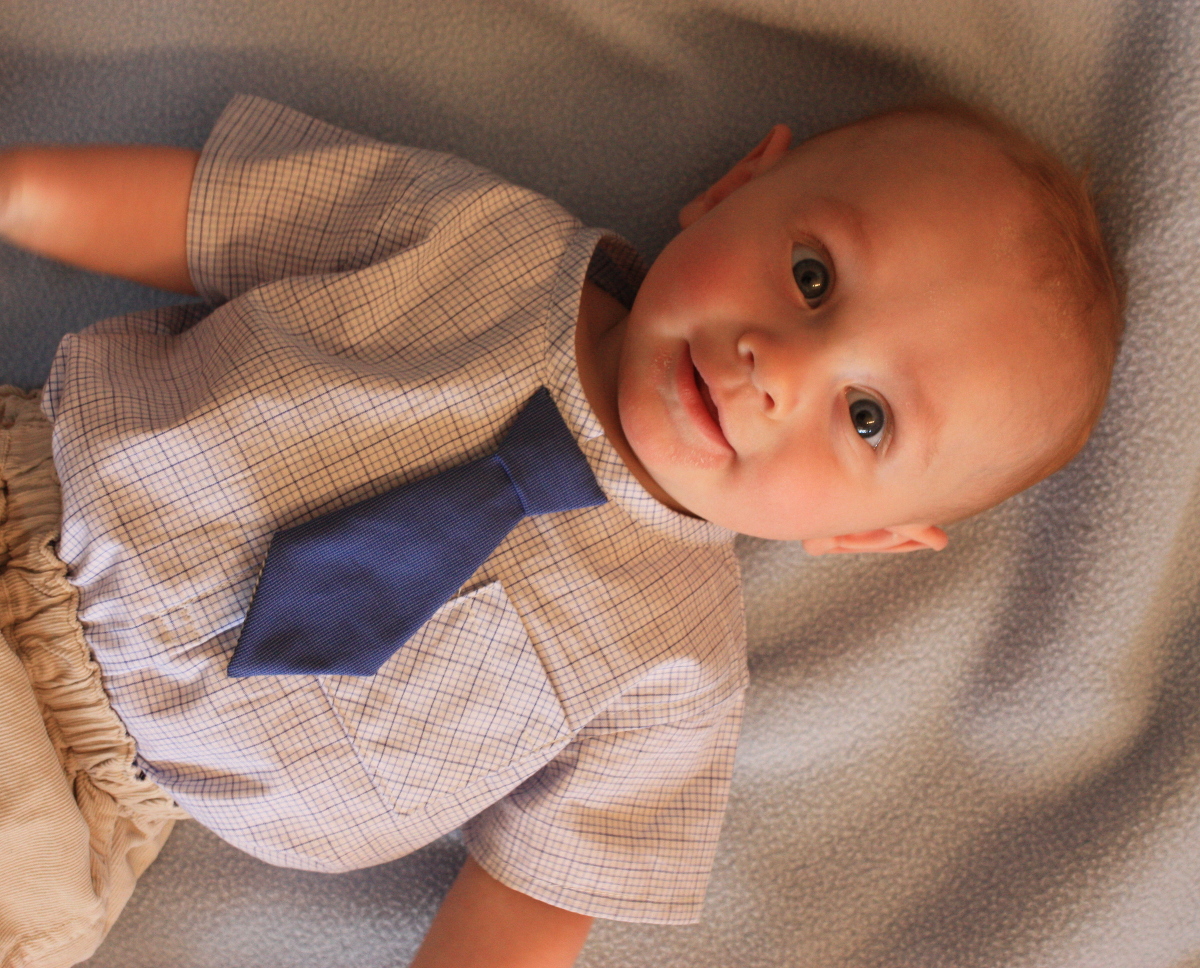
To get this look I used shirting material and followed the Lullaby Layette directions to complete the bodysuit before adding the tie. If you have any old men’s dress shirts laying around they work fabulously for this little bodysuit.
The little tie takes a few moments of preparation but once you have your template it is super easy. I am working with size 6-12 months, but this tie could be altered to fit any size simply by adding or subtracting a little length. The tie consists of two main pieces – the tail and the knot. First up, I’ll be tackling the tail.
Making the Tail
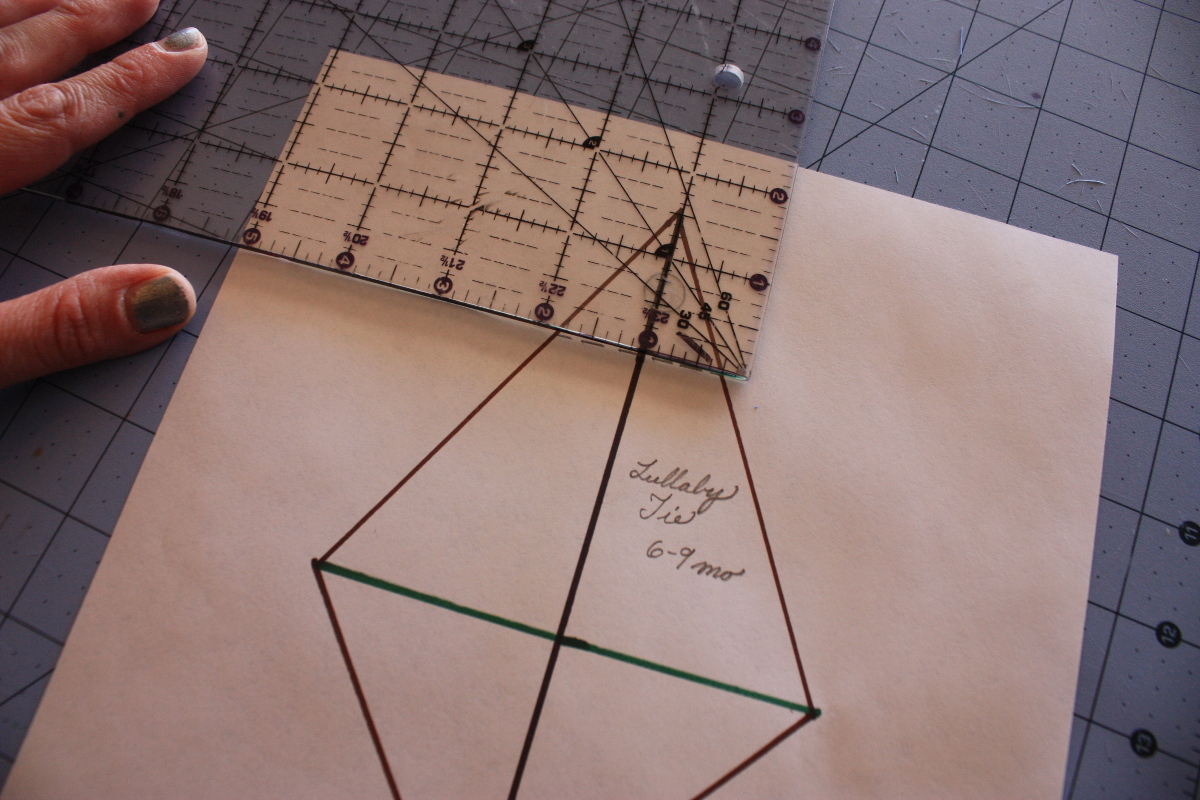
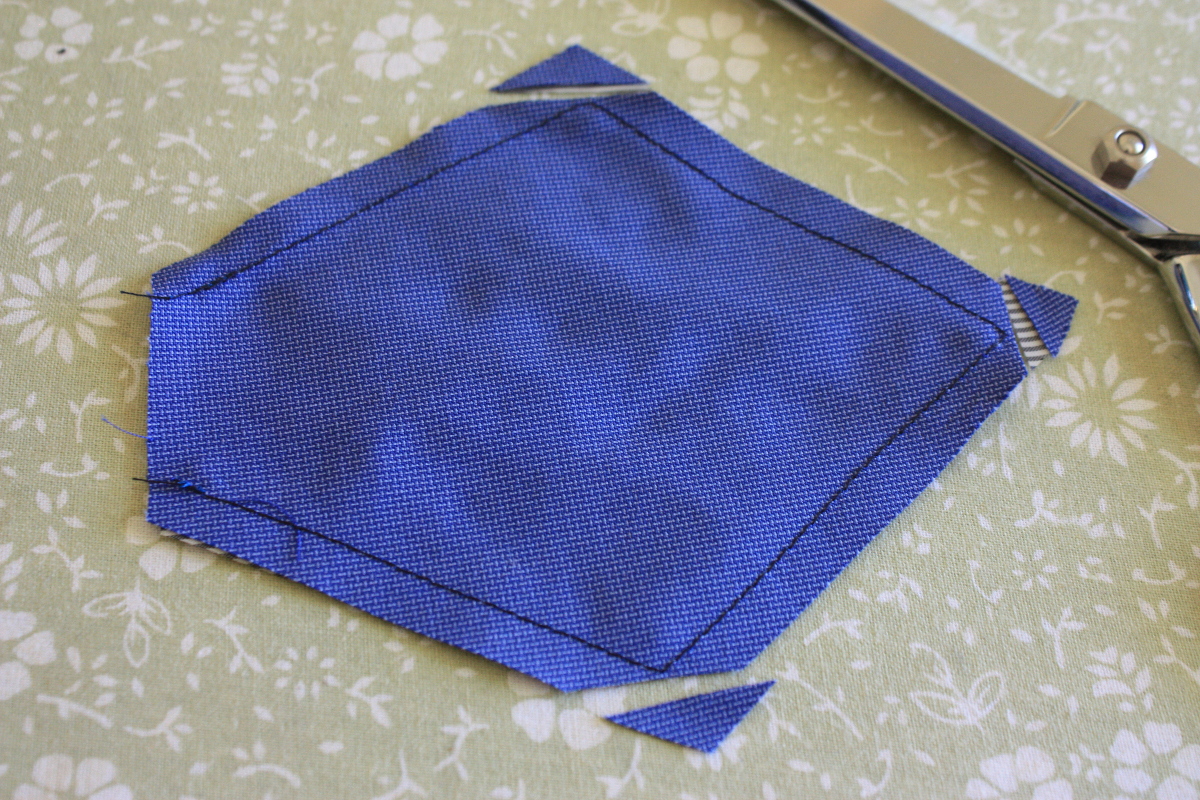
Draw a line 7 inches long on a piece of paper and mark the line 4 ¼ inches down from one end. Next, draw a 4 ½ inch line perpendicular to the 7 inch line at the mark you made in the last step; make sure it is centered on the 7 inch line (2 ¼ inches to each side of the mark).

Connect the four ends of the lines creating a kite shape.
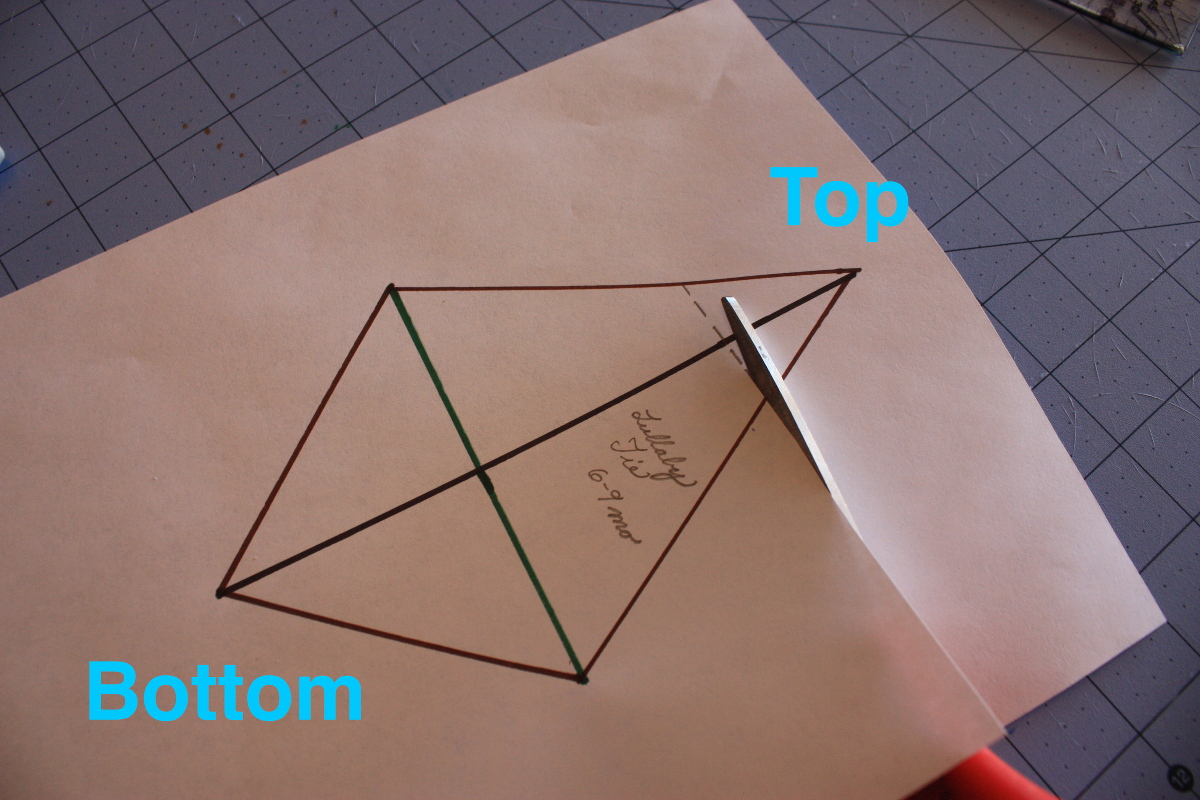
Finally, measure 1 ½ inches from the top of the tall side of the kite and draw a dotted line across its width. Cut off the top of the kite along this dotted line. This is your tail template.
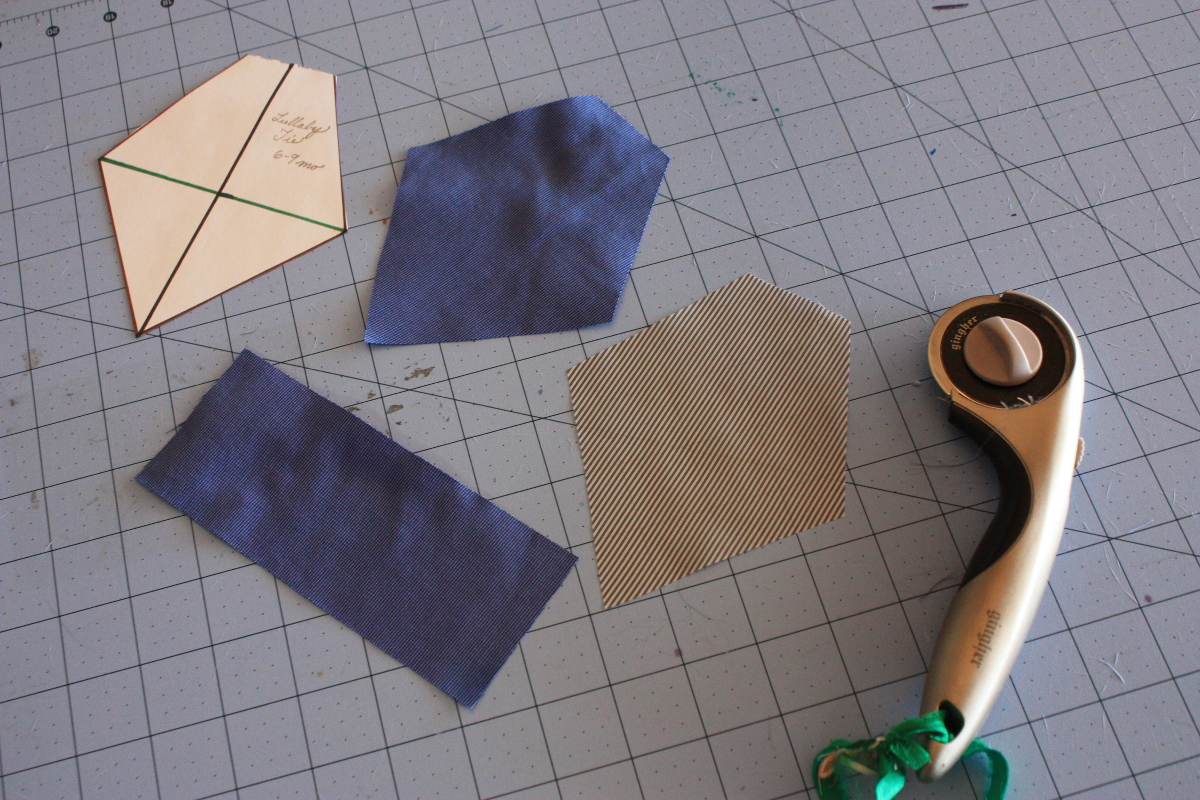
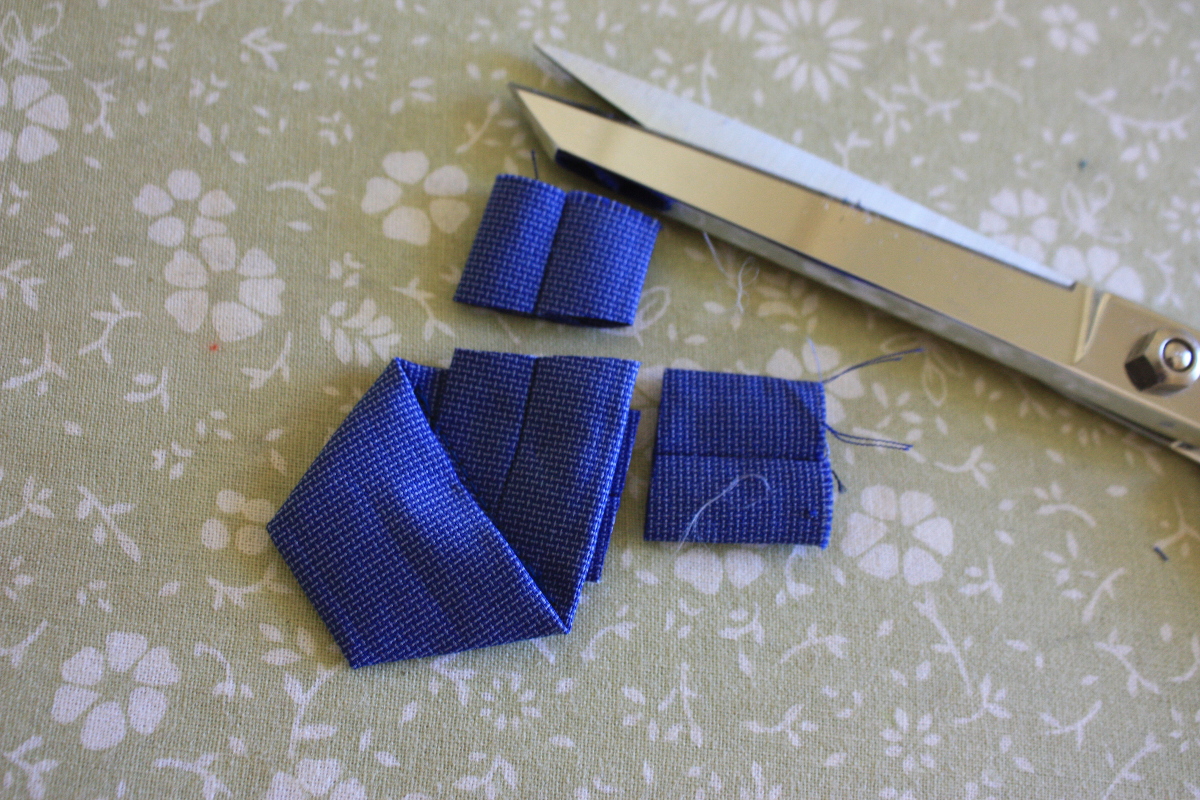
Use the template to cut out the tail from the fabric you have chosen for the tie, and cut out a second tail from a piece of lining. At this point it is also a good idea to cut a rectangle 2 ½ inches by 6 inches from the main tie fabric. This will be the tie knot, set it aside for the time being.
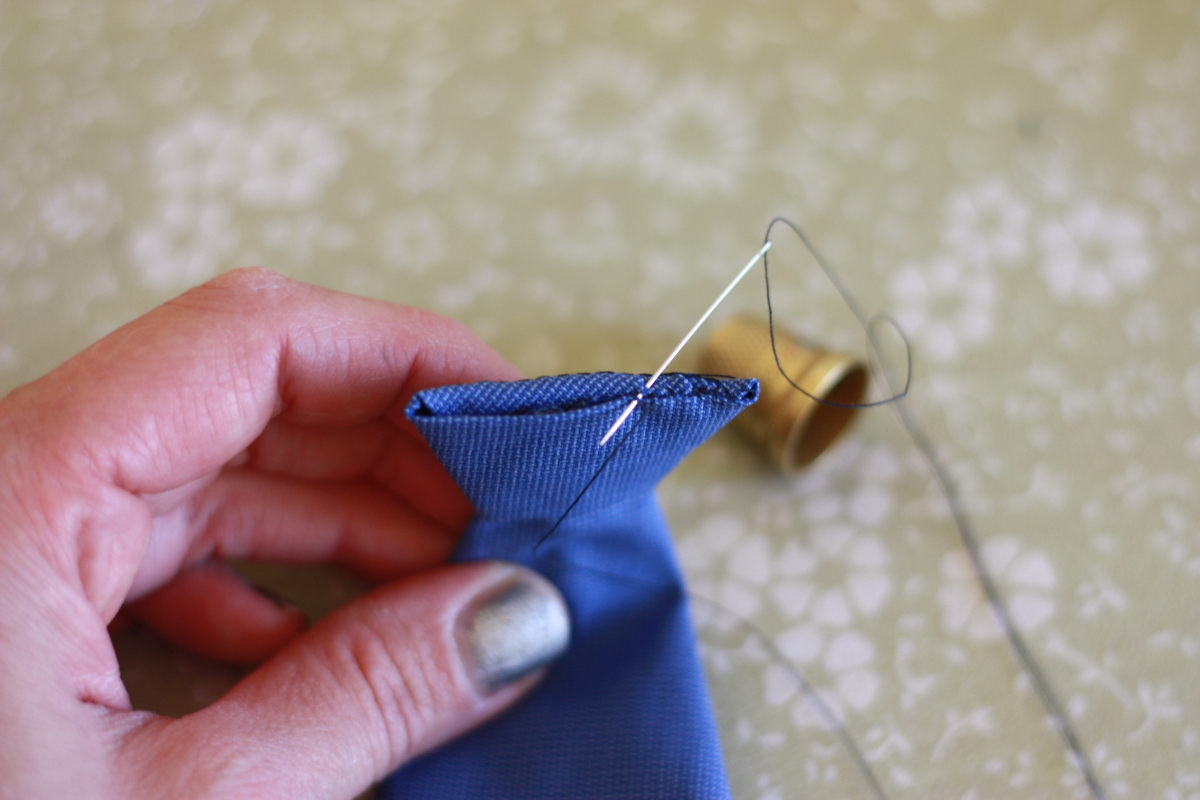
With right sides together sew the tail and tail lining together on all the sides but the top using a ¼ inch seam allowance. Clip the corners and turn the tail right side out by pushing it through the open top making sure to push out the corners with a chopstick or point pusher. Give it a press.
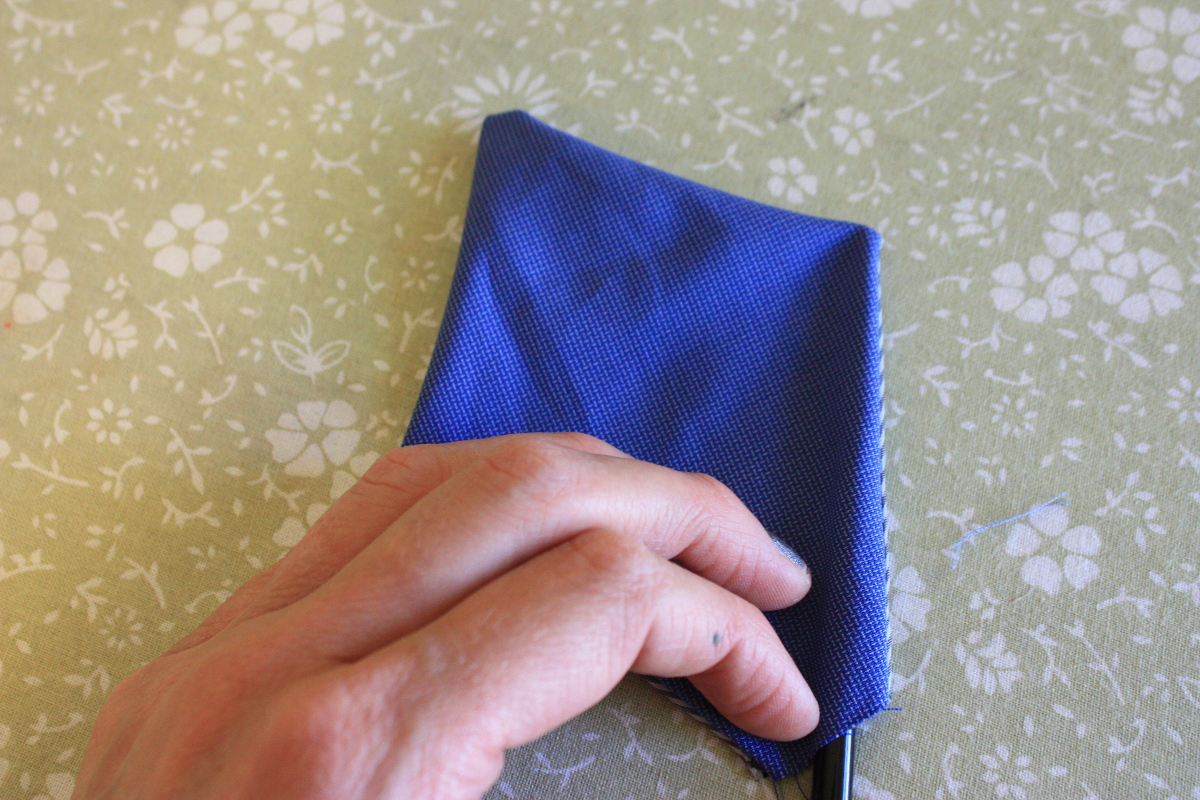
Lay the tail face down and fold the right and left corners of the kite together into the center. Hand stitch the two sides together along the entire length of the seam.
Making the Knot
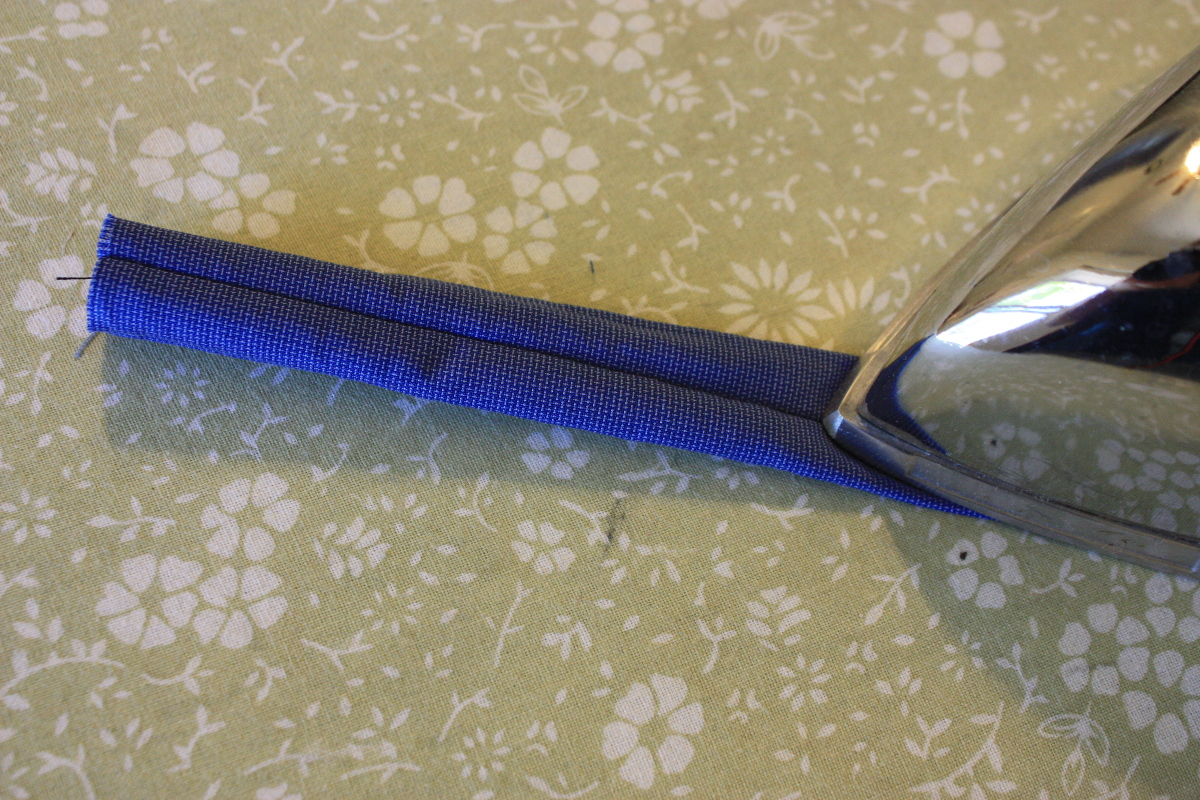
Set the tail aside and grab the 2 ½ by 6 inch rectangle that you cut out earlier (the knot). Fold the right sides together and sew along the 6 inch edge with a ¼ inch seam allowance creating a tube.

Turn the tube right side out using a safety pin or a loop turner and press with the seam centered on the top.
Completing the Tie
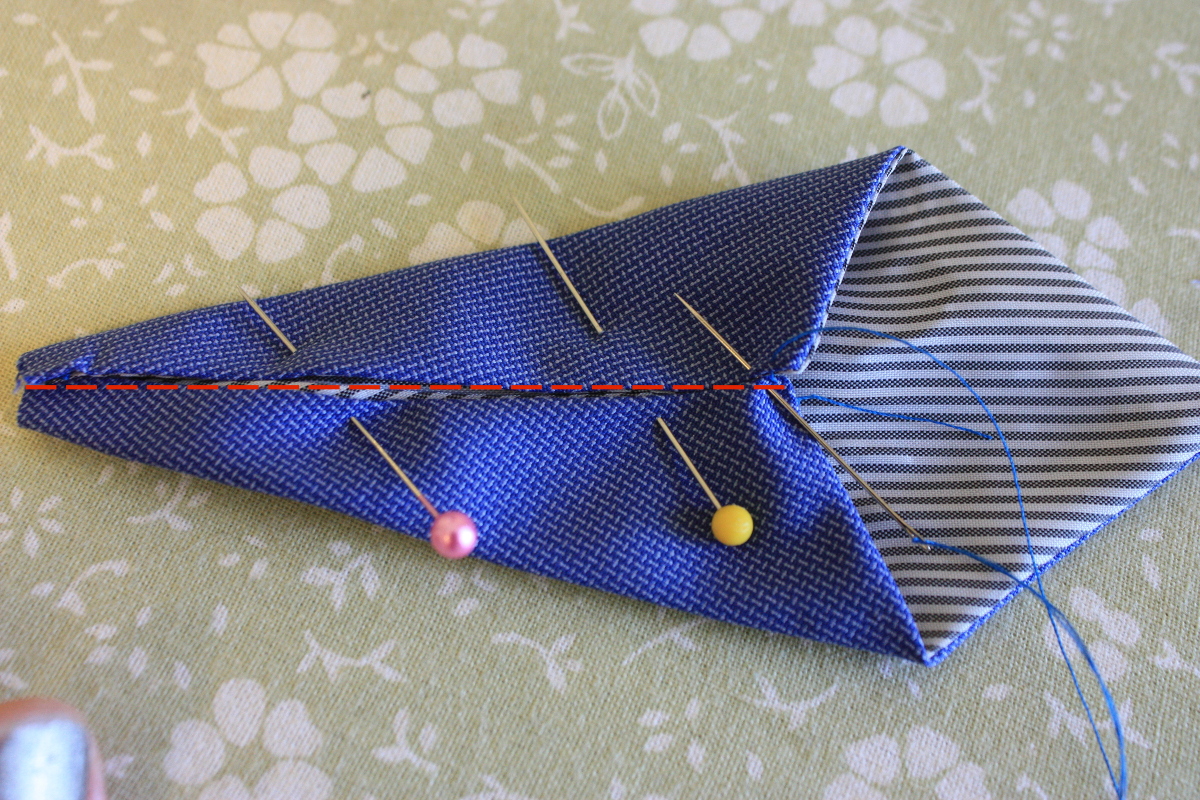
Lay the knot piece face down and the tail (also face down) centered on it and aligned to the top edge, as shown.
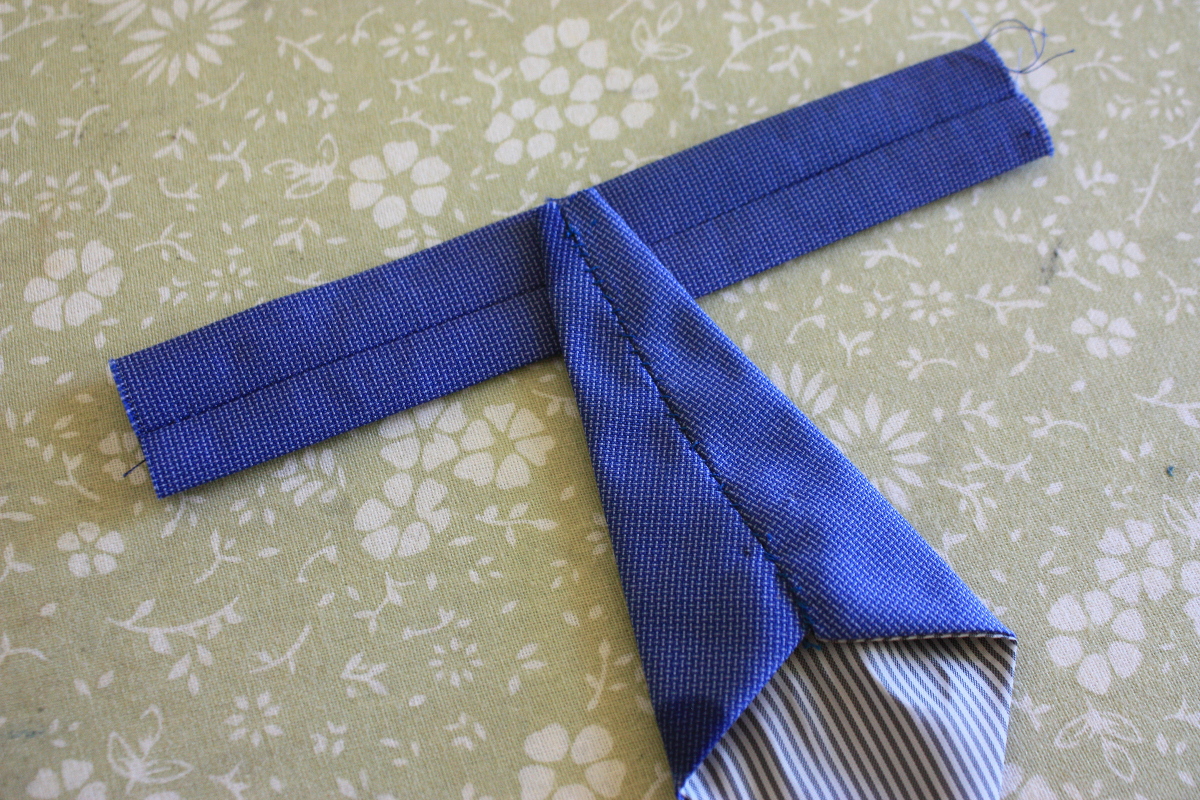
Push the arms of the knot up at an angle, the larger the angle the wider the knot will be.
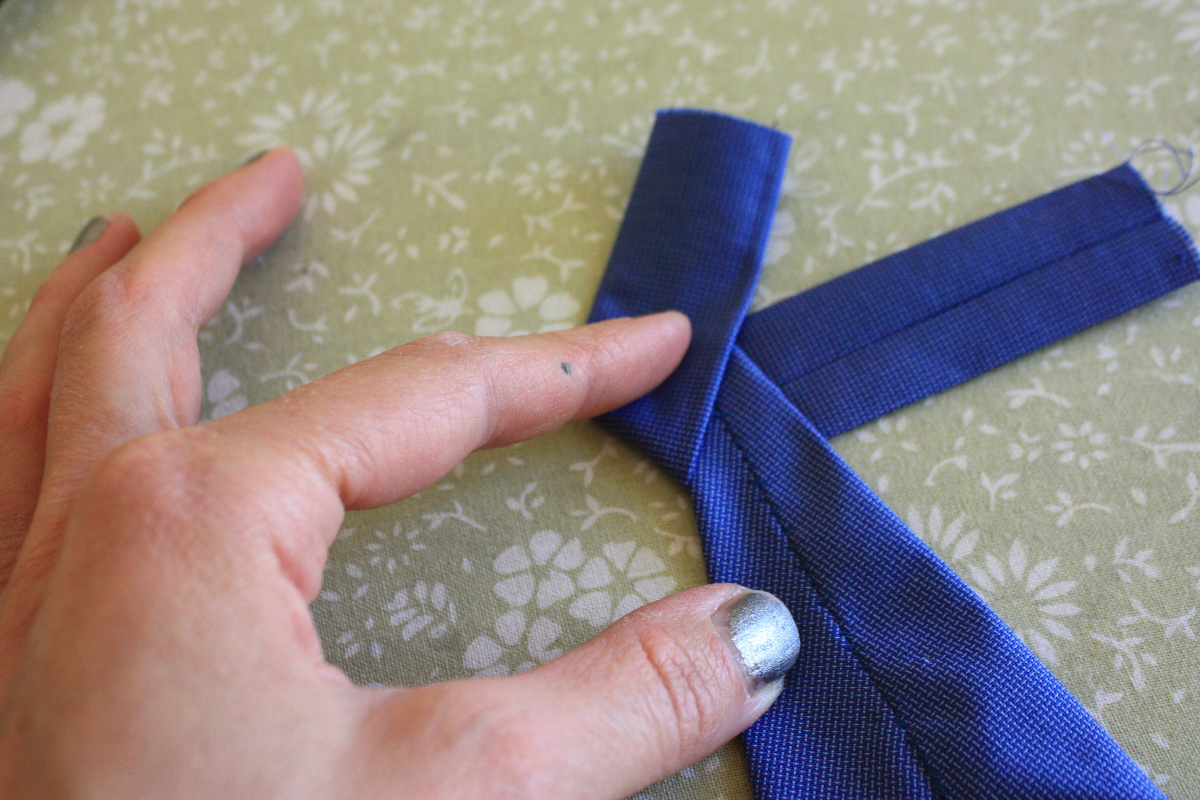
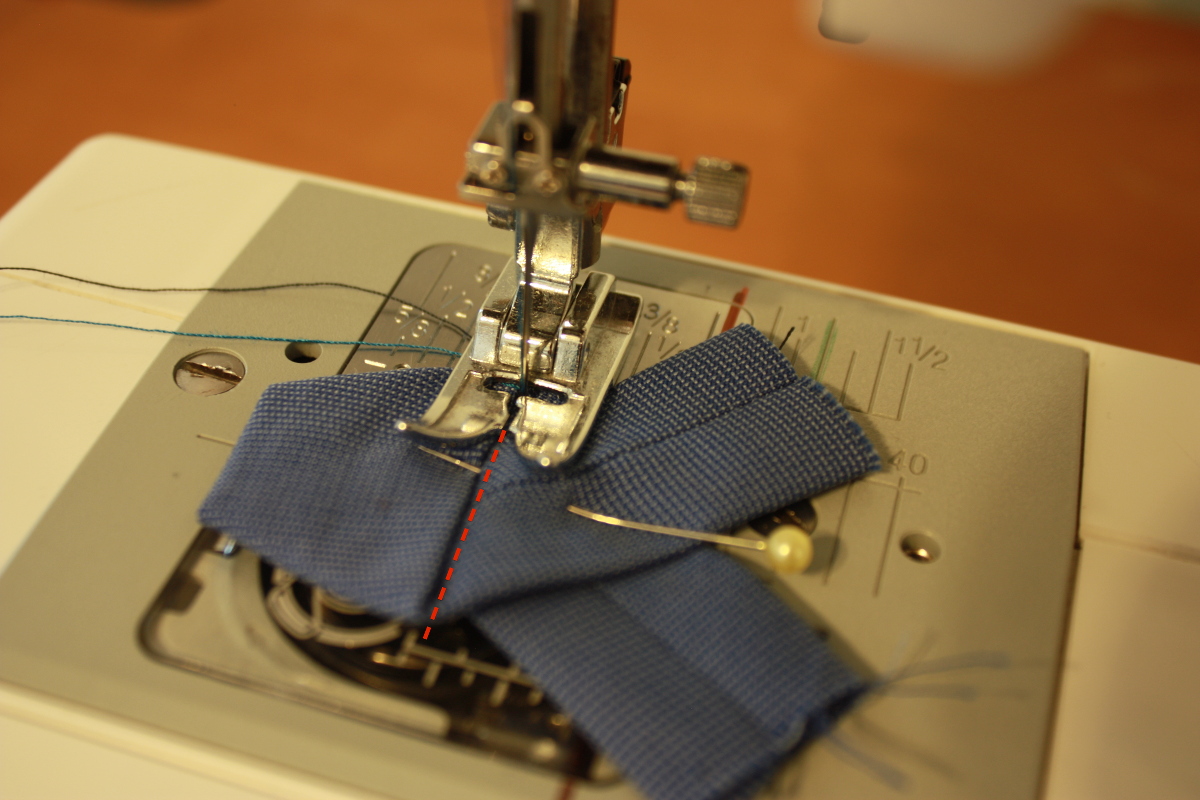
Pin the arms of the knot in place and flip the knot over removing the tail for the time being. Carefully sew the knot across the long arms being careful not to catch the front of the knot in the stitching. This will hold the knot in the correct position.
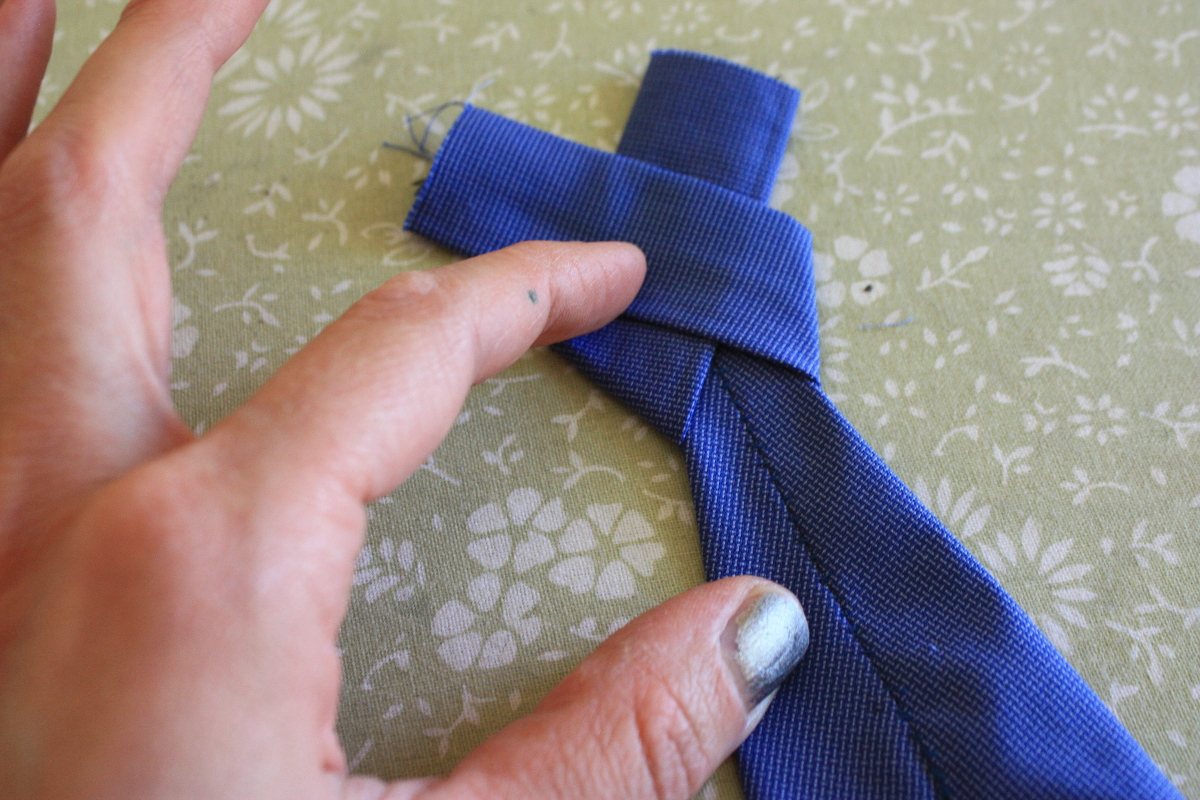
Clip the long arms on the knot creating a little triangle.
Grab the little triangle and tuck it into the top of the knot.
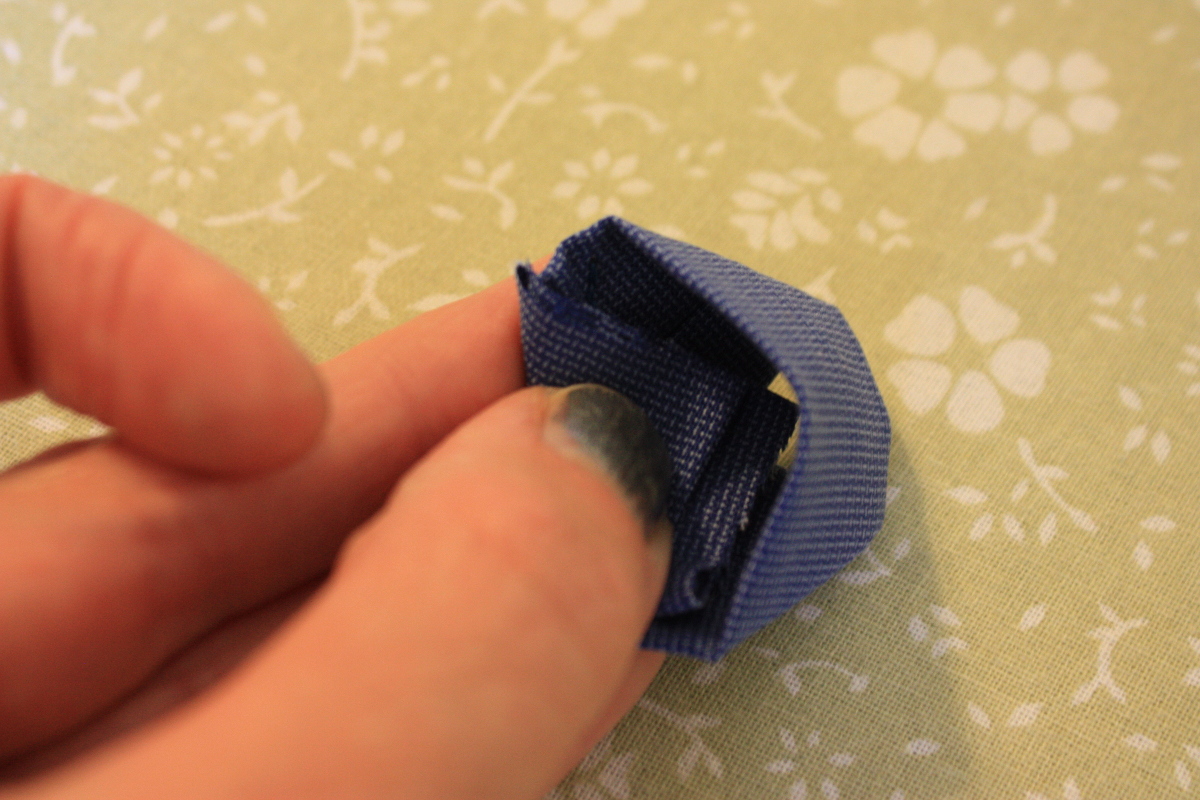
The knot should look like this.
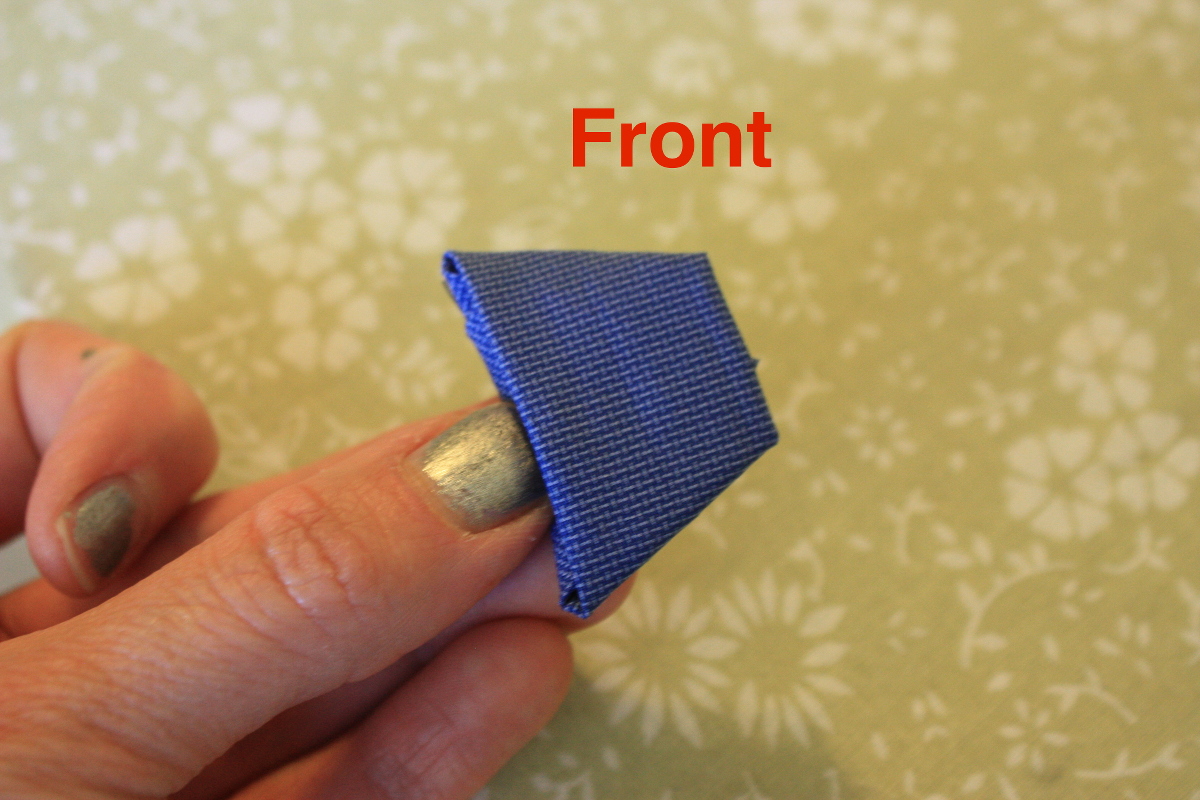

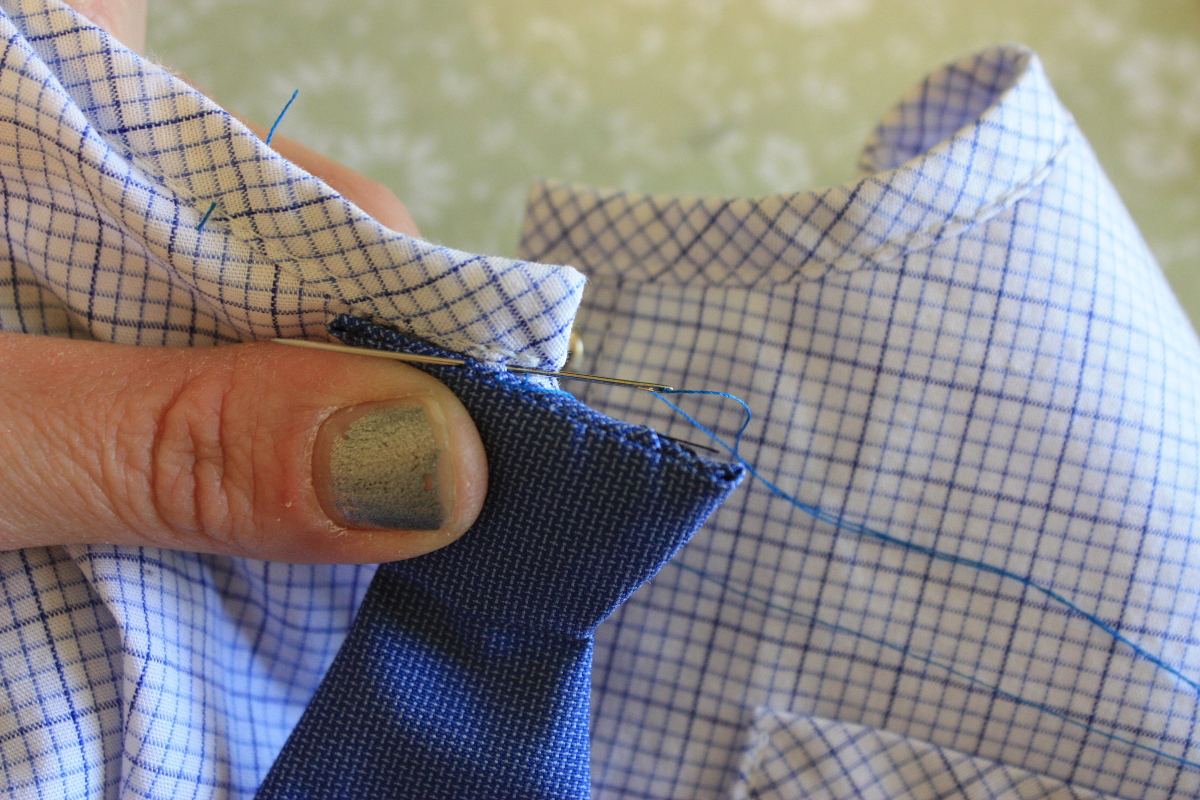
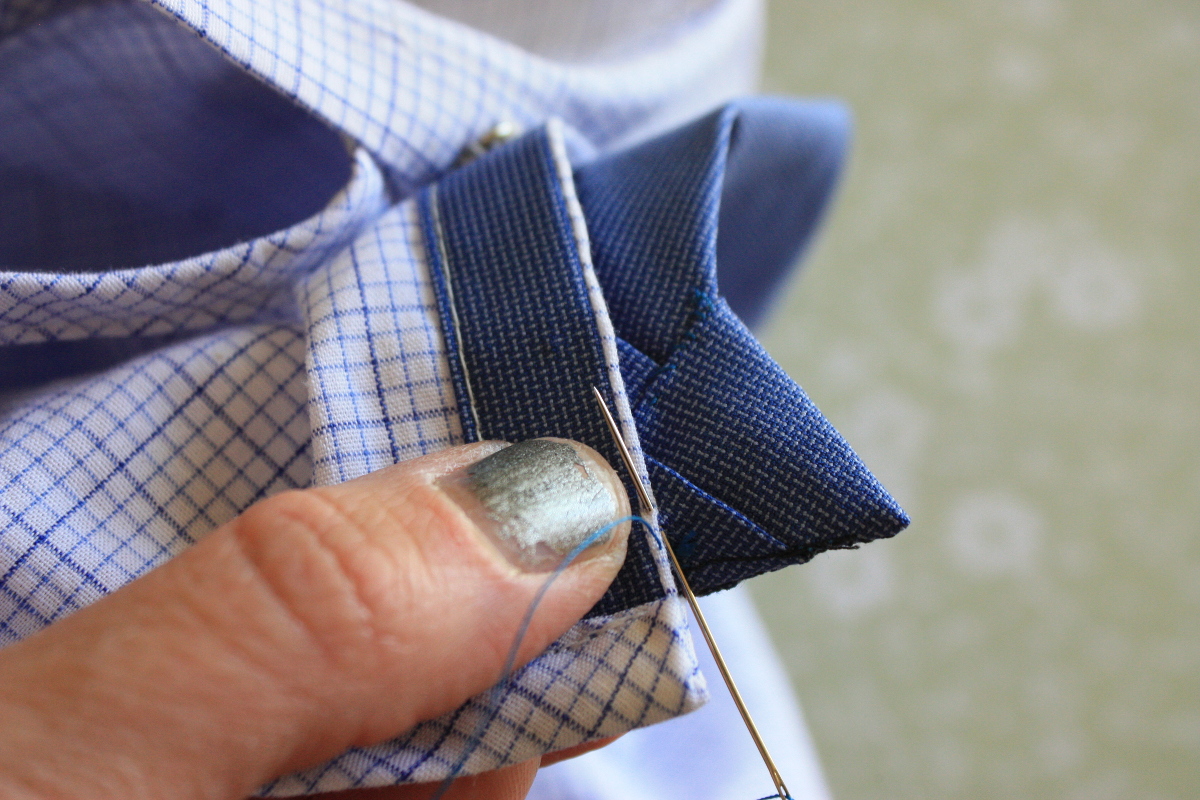
Tuck the tail back into the bottom of the knot and hand stitch the knot to the tail on the backside to hold it in place. While you are at it, stitch the top of the knot closed to give it a finished look.
Now the little tie is complete, time to add it to the Lullaby Layette Bodysuit.
Putting it all Together
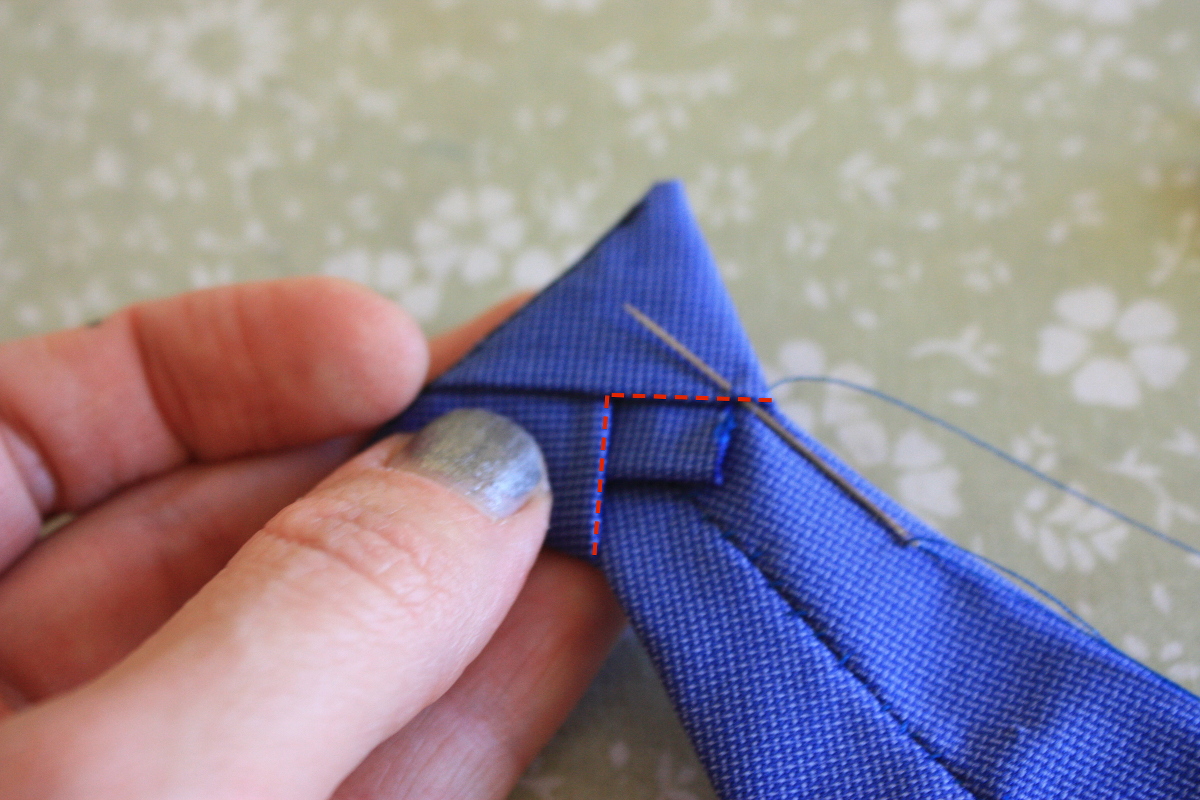
Center the knot over the front placket just under the collar. Stitch the knot across the top of the tie and about an inch down the side of the placket. The tie should only be stitched to the front placket.
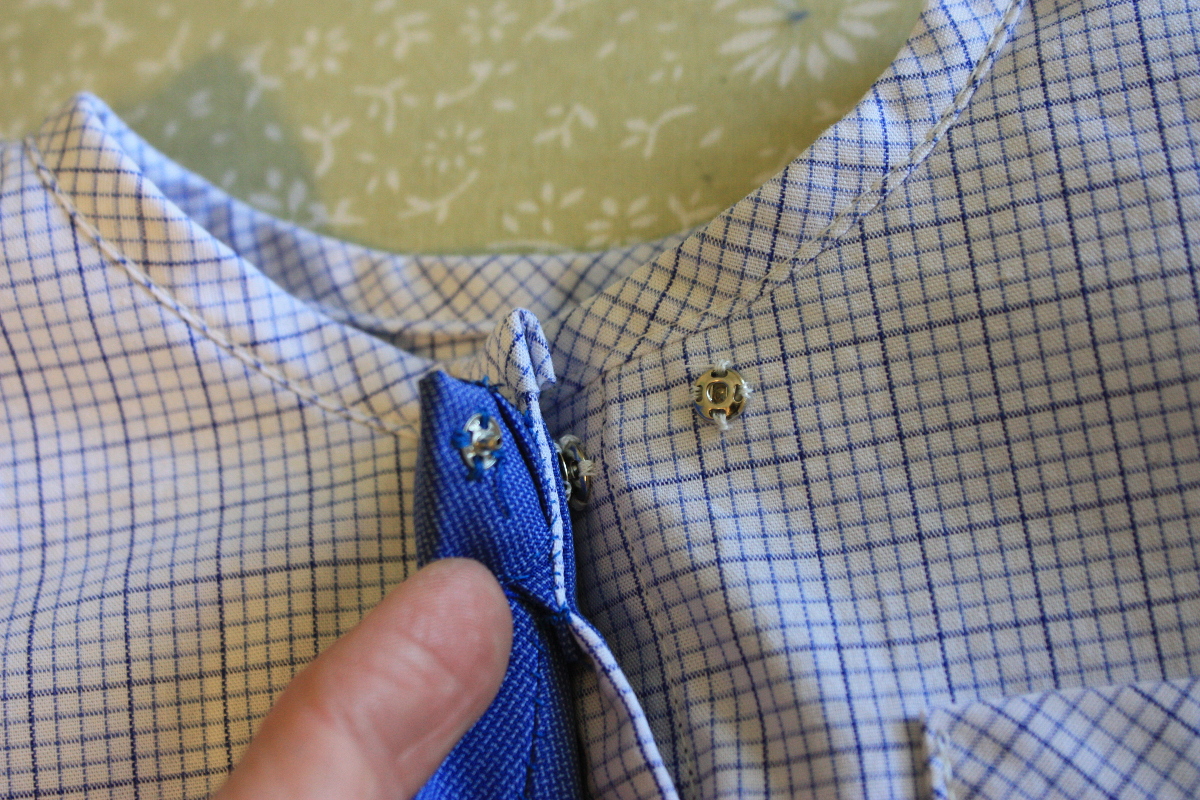
Finally, add a little snap to the underside of the knot and the receiving end of the snap to the shirt (you may consider adding a small circle of interfacing on the underside of the shirt where the receiving end of the snap is sewn). This snap will keep the tie neatly in place when worn by a squirmy little one.
The only thing left to do now is to hunt down a dapper little fellow to wear the thing!
I love this! So nicely done and the shirting just completes the look. Also, I am overwhelmed and just smiling at the cuteness of this beautiful boy. Thanks for sharing.
This is wonderful and so clever. I especially like the way the knot is folded and looks so real. I’ll have to remember this for baby presents since my boy is grown.
The tie is genius, and the baby is adorable! Thanks so much, Rita. A terrific tutorial.
This has to be the cutest accessory idea for a baby boy. Wonderful tutorial. And the baby is so beautiful !! I need a hug. Thanks.
Linda
That is pretty cute!
What a great tutorial. It’s beautifully well made and pretty darn cute!