Today we have a simple switch to add variety to your Fairy Tale Dress pattern. Meredith is going to explain how she added a pleated section to the bodice. She is no stranger to the blog, she has been here to share her favorite pattern and she was also a Swingset Skirt panelist. Thanks for stopping by to share your tutorial, Meredith!
The Fairytale Dress is one of my favorite and most used Oliver + S patterns, and I’m thrilled to share this bodice hack with you! It’s much easier than you may think, but the finished product is quite striking.

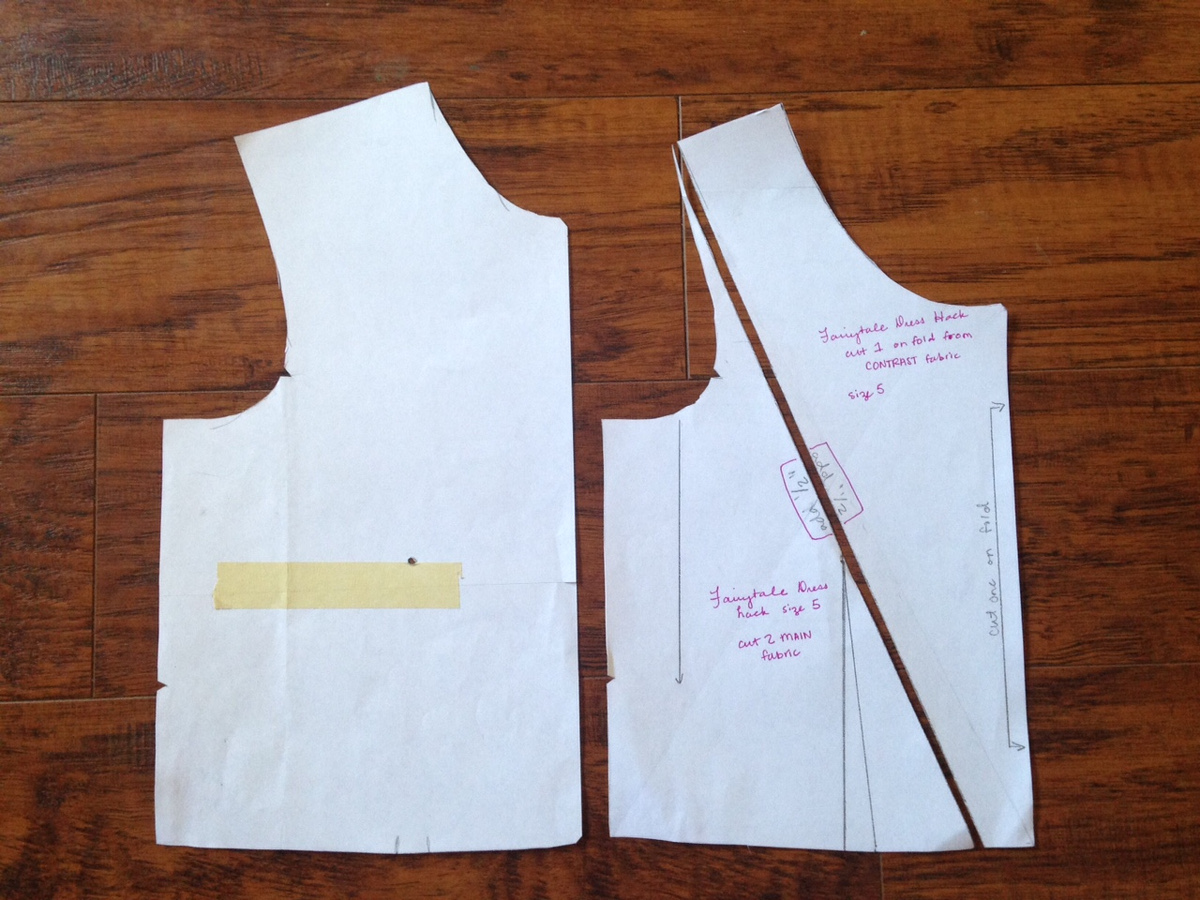
To begin, trace out the bodice pieces in the size you’ll need. I’m working with a size 5. We’ll start by taking 1.5″ off the neckline. Since we’re omitting the collar, the neckline can be brought down just a bit. To do this, simply mark 1.5″ in along the curve of the neckline with some dots and connect them. Do this on the front and back pieces and cut along the line. Your back piece is now ready.
To finish prepping the front, we’ll actually need to split it into two pattern pieces to account for the contrasting center of the bodice. Note that I’m working with a size 5, so if you are making a smaller or larger size, you may want to move your markings a little bit. On the bottom front bodice, make a mark 3/4″ from the center. Then go all the way up to the corner of the shoulder and make a mark. Draw a diagonal line connecting your marks. Before you cut, make sure that your line does not go through the dart! You want that dart to be on one side. Now you can cut your pattern piece along the diagonal line. Be sure to write on your two pattern pieces to add a 1/2″ along the diagonal line to account for seam allowance, or tape on an additional 1/2″. You’ll cut two of the outer bodice pieces from your main fabric, one center piece on the fold with your contrast fabric, and you can tape your pieces together temporarily to it out a single lining piece on the fold.
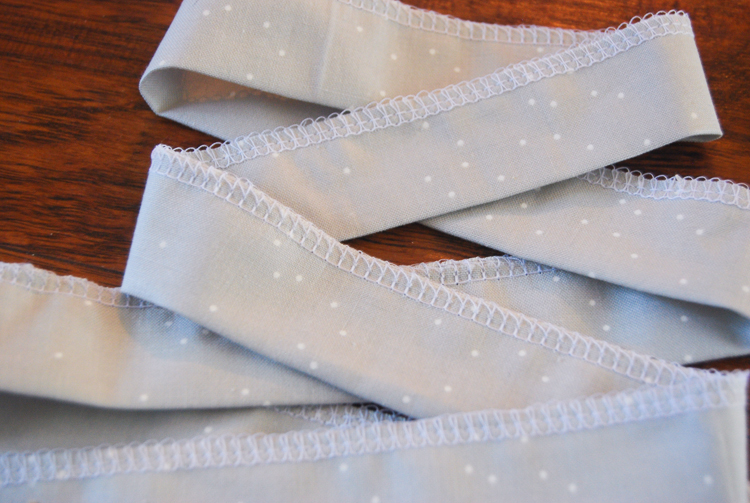
For the pleating we’re going to cheat. This method is quick and easy and doesn’t require making a crazy pattern piece. Cut out four 2.5” by the width of fabric strips from your contrast fabric. Fold it in half lengthwise, press, and finish the raw edges to prevent any fraying.
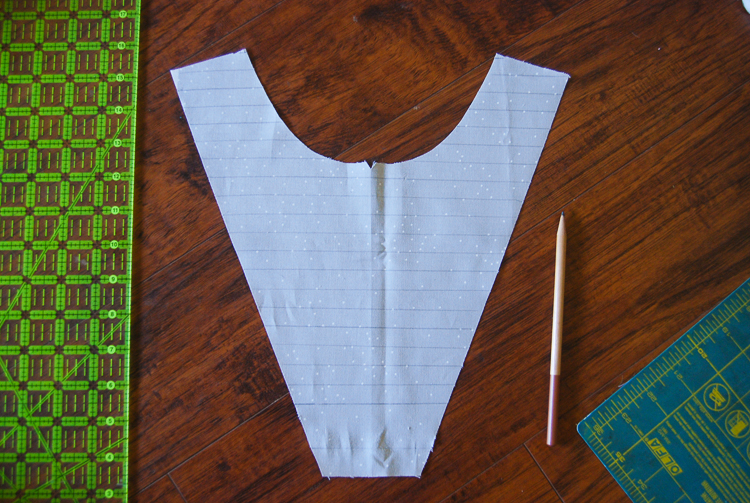
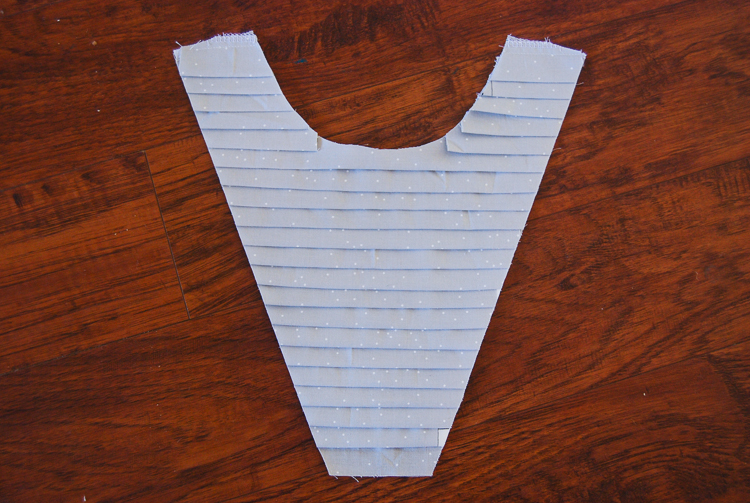
Starting at the bottom of your contrast bodice piece, mark a horizontal line 2″ from the bottom. Then make marks every 1/2″ until you reach the shoulders. You can use a pencil for this because all these marks will be hidden. Starting at the bottom, place a strip (cut down enough to the correct width) on that 2″ mark so that the finished edge of the strip is right along your marked 2″ line. Sew along finished edge with a 1/4″ seam. Now layer another strip on top. Sew that one down on the 1/2″ mark right above the first strip. Repeat until you have covered your contrast bodice piece.
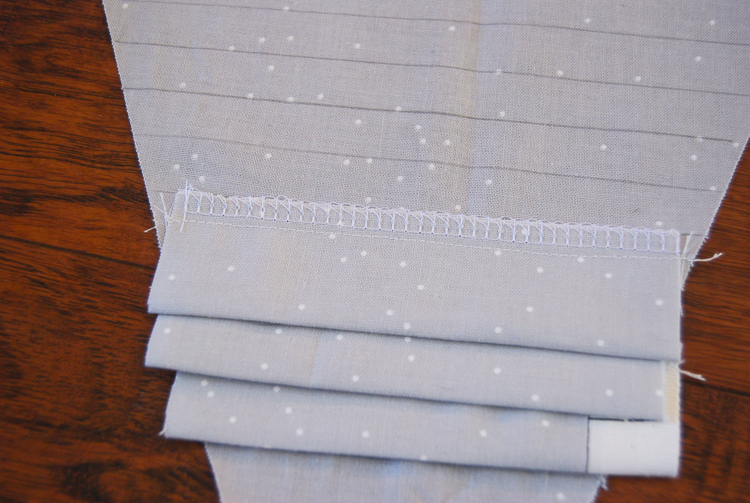
Flip the bodice over and trim the overhanging edges of the faux pleats down to the size of the center bodice.
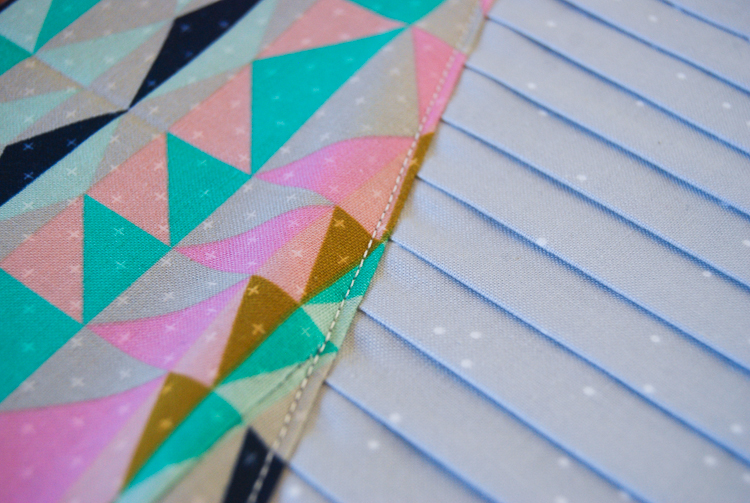
Sew all the darts on the front side bodice, back, and lining pieces. Sew the center and side bodice pieces together with a 1/2″ seam and press toward the side. Add some top stitching to the side, then assemble your Fairytale Dress as usual, simply omitting the collar and sleeves if you wish.

This is such an easy way to add interest to a bodice (or skirt or whatever)! It’s quick and simple, but you can let people think you slaved over it for hours! No one will be the wiser.

COOL & CHIC– pleated bodice on the Fairytale Dress pattern! Really detailed tutorial with words/steps & accompanying photos. This addition is certainly a touch of pizzazz for a young girl’s party or special occasion dress! I love, LOVE it! Bravo Meredith! Your daughter models the dress perfectly in the final photo! Thanks for sharing!
Thank you, Sarah!
This would be great on the hide and seek as well! Great tutorial!!
Wonderful technique. I am wondering how much fabric the pleated bodice required for size 5 and how many rows did you make. I think almost any dress that didn’t button down the front could be made to be “pleated”. Love this
Gorgeous